GA Cody-300 User manual

INTERNATIONAL
Thermal-Transfer/Direct Thermal Printer
Cody-300™User Manual

2
Contents
The printer 3
Introduction 3
Instructions for Proper Use and Precautions 3
Product features 4
Standard equipment 4
Accessories 4
Specifications 4
Print Specifications 5
Ribbon specifications 5
Media size 5
Product Introduction 6
What’s in the Box 6
Printer Components 7
External 7
Internal 8
The bottom 8
Installation 9
Installing the printer 9
Installing the ribbon 9
Ribbon and Media Installation Diagram 10
Installing the media 10
LED Indicator and Button Functions 11
LED Indicators 11
Button Functions 12
Start Functions 12
Troubleshooting 14
Common problems 14
Maintenance 16

3
The printer
Introduction
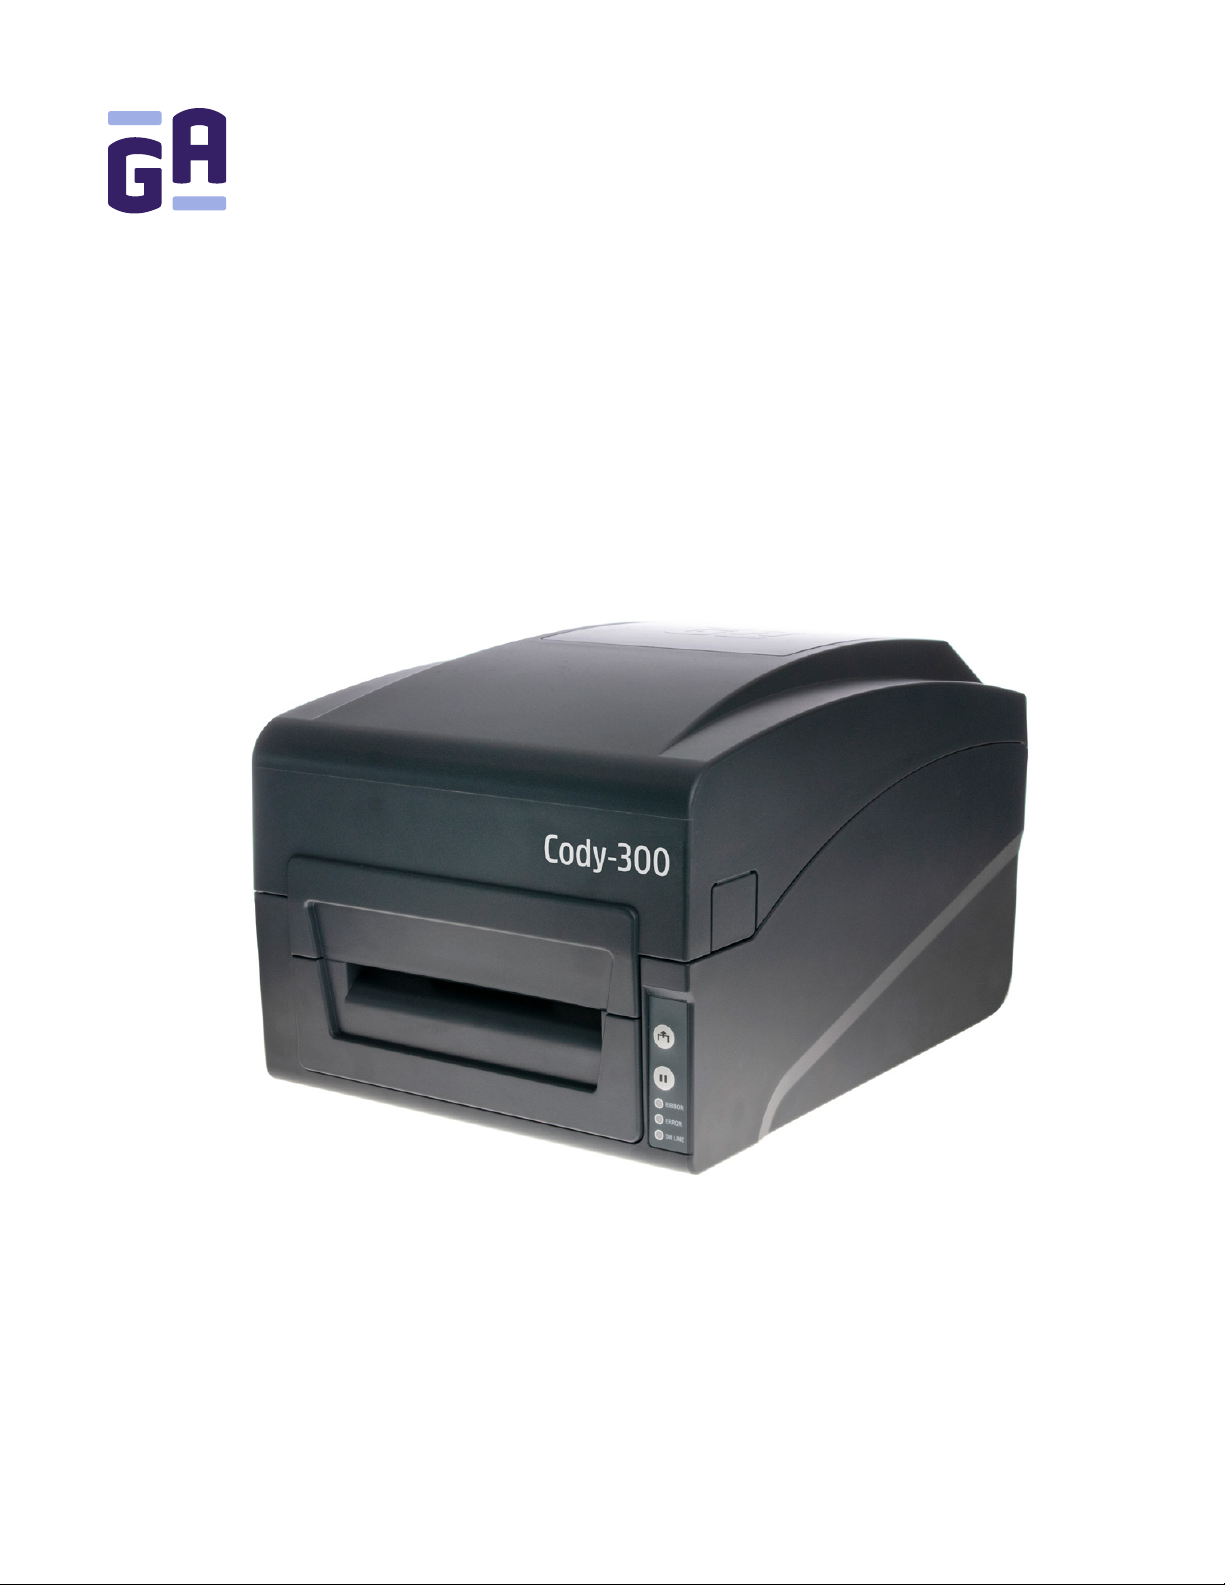
Thank you for choosing the Cody-300™ direct thermal and thermal-transfer printer.
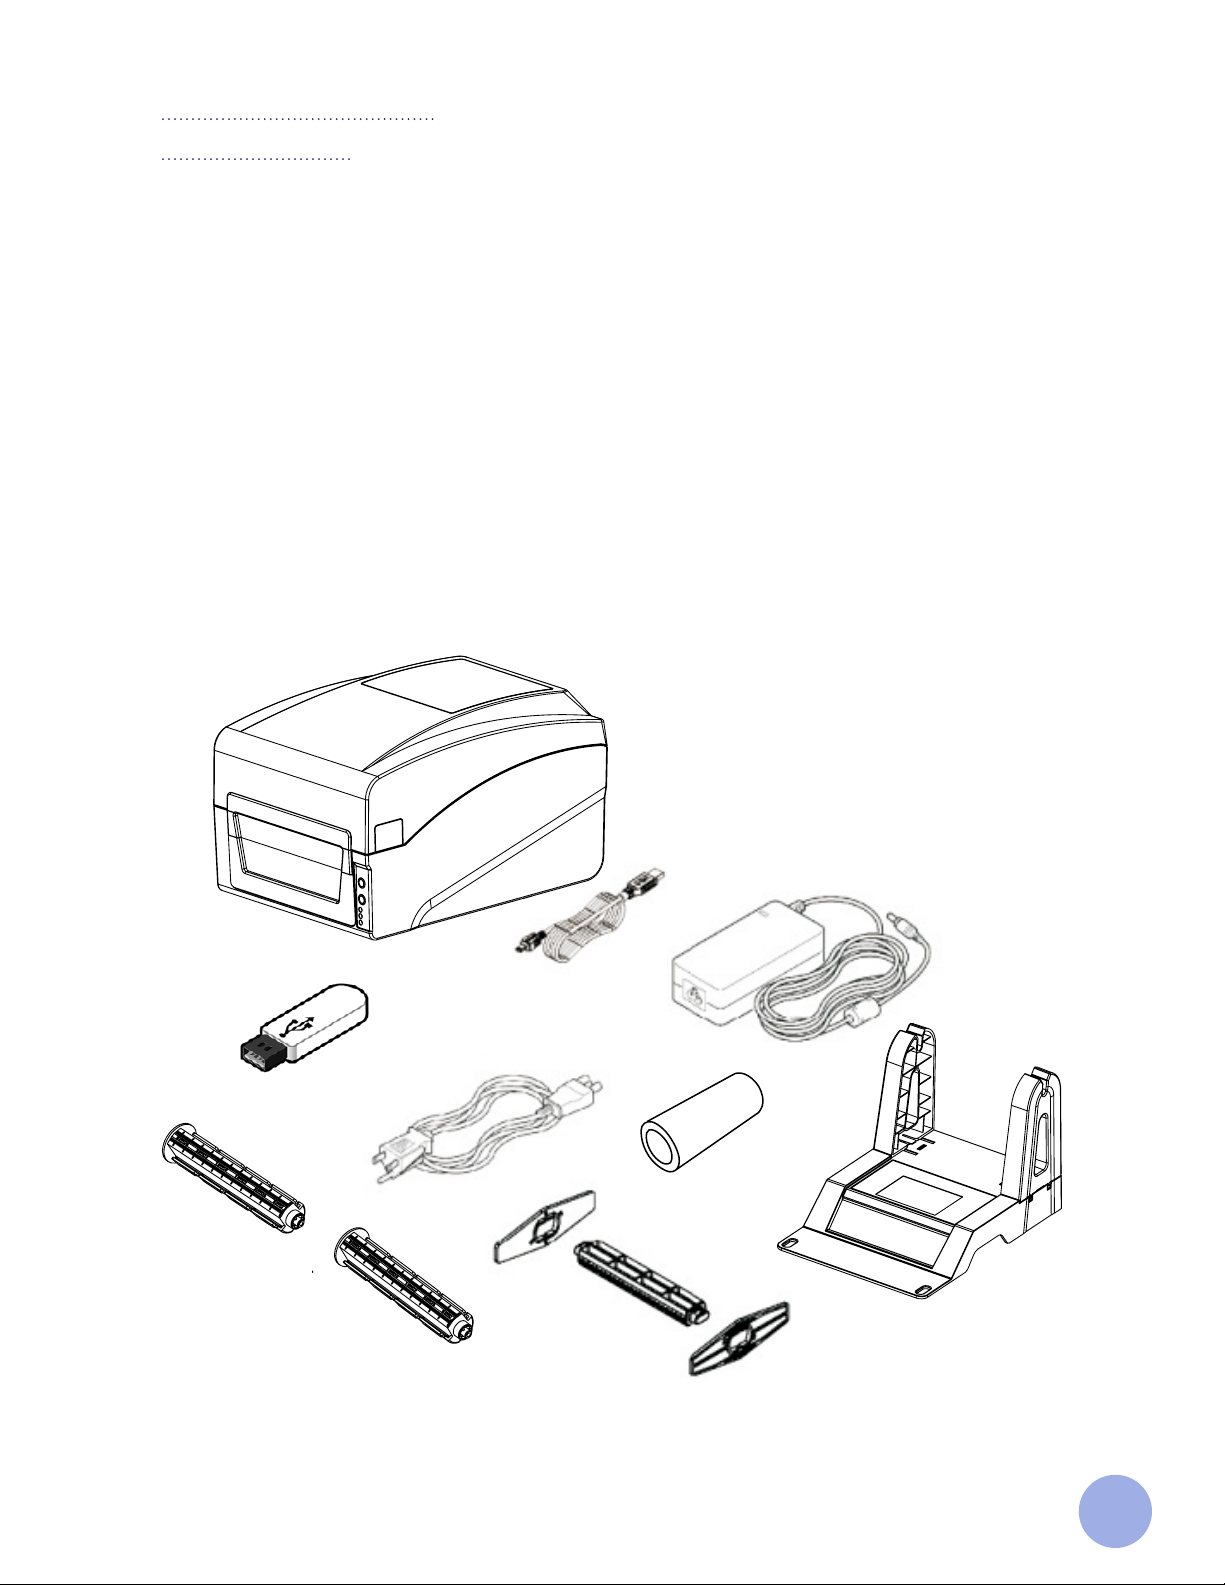
This printer is built with 2 sets of gears to drive the motor and is capable of handling 300 meters of ribbon and
large label rolls. The printer’s inner volume is fit for 5” OD (Outer Diameter) media rolls; if using an external
media holder, you can install a 8.4” OD industrial-grade label roll.
This printer is designed for real-time and batch label printing, with standard serial, parallel, USB, and Ethernet
connection ports. Direct thermal printing and thermal-transfer printing modes are all in one printer body, so
you can choose various kinds of printing materials.
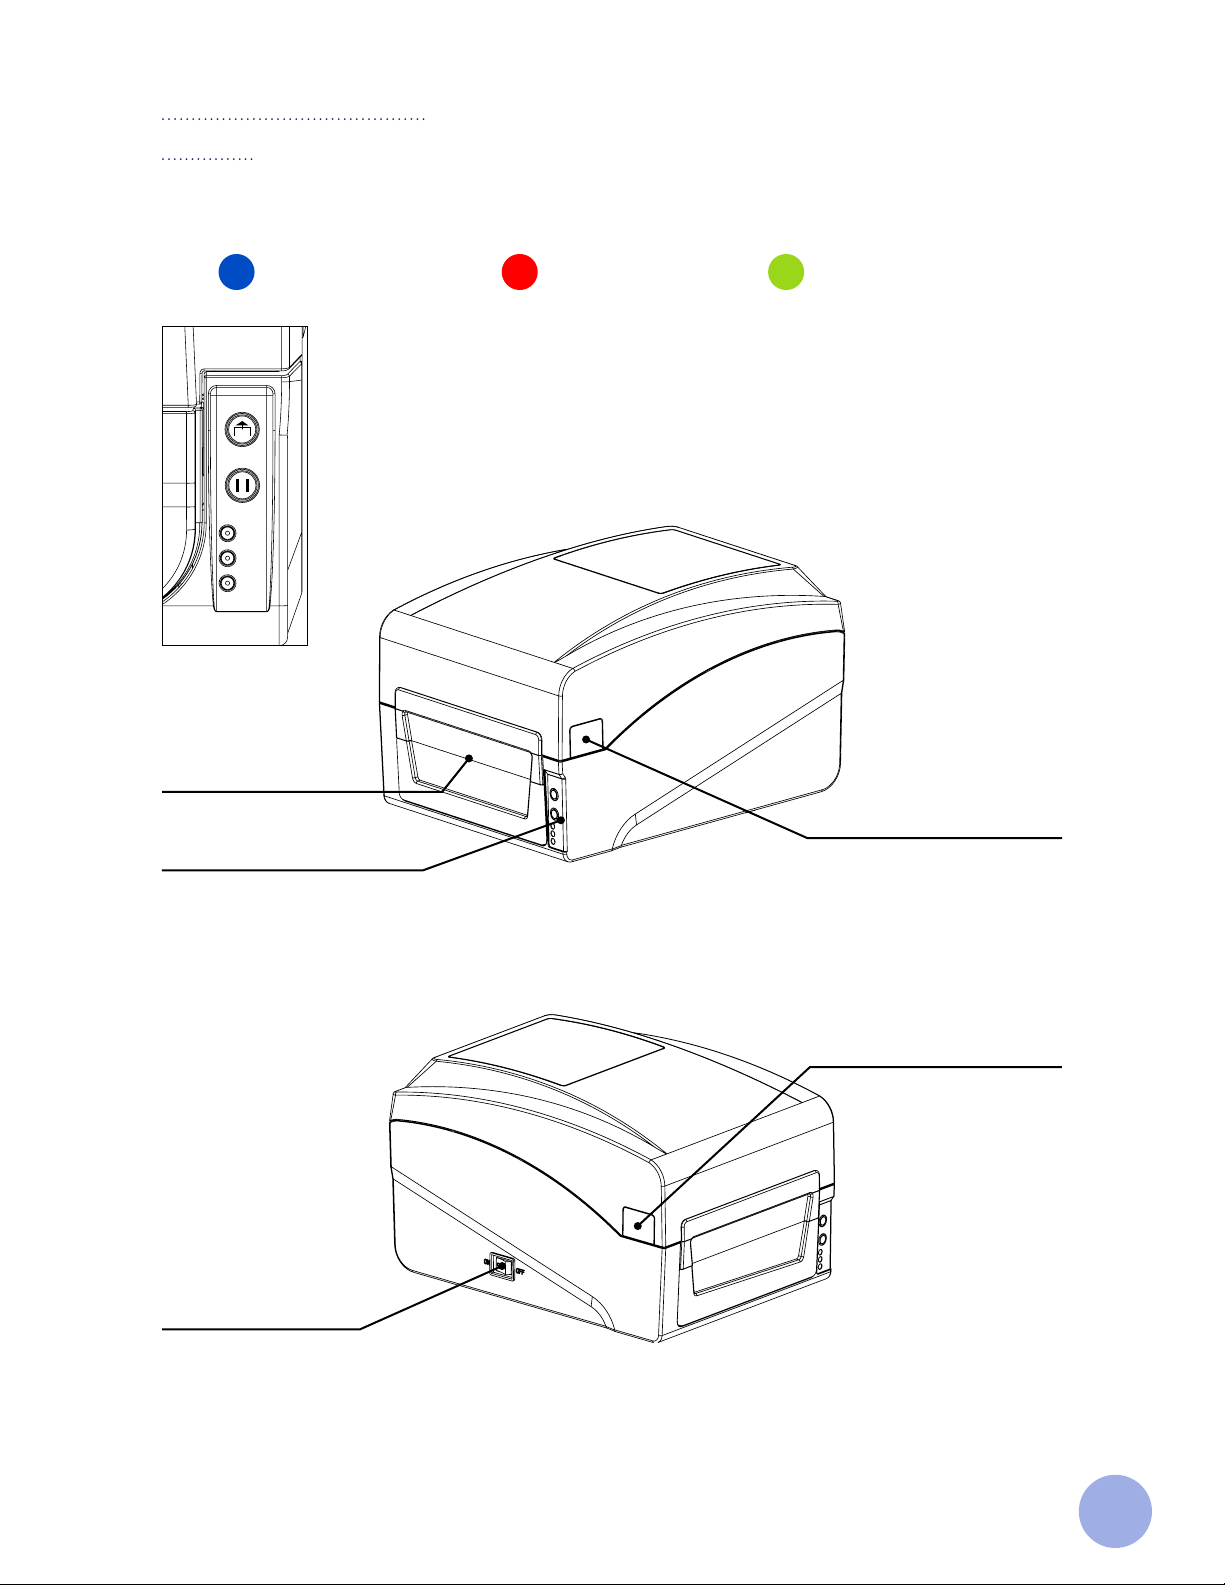
Common 1D barcode and 2D barcode fonts are built into the printer. It supports 4-direction printing, and
characters can be enlarged from 1 to 10 times. The printer also supports 5 dierent size bitmap fonts, OCR-A
and OCR-B fonts, making this printer your best choice among printers of the same class.
Instructions for Proper Use and Precautions
• The printer should only be used in a dry environment, do not expose it to moisture
(sprays of water, mists, etc.).
• Do not use the printer in an explosive atmosphere (under atmospheric conditions with a mixture of
dangerous substances in the air).
• The printer should not be used close to high-voltage power lines.
• If operating the printer with the cover open, ensure that any clothing, hair, jewelry etc. does not come
into contact with exposed rotating parts.
• Printer operation should be limited to only those actions outlined in the user manual. Work going beyond
this may only be performed by trained personnel or certified service technicians.
• The printer should always be stored and operated under the recommended environment conditions
(Please see page 4 of this manual).
• This product may cause radio interference, and users may need to take adequate preventive measures.
• Proper precaution must be taken by the user to avoid potential electrical shock hazards.
• Precaution should be taken by the user to prevent possible burn risks (e.g.: The printhead may be hot
and could cause severe burns. Allow the printhead to cool before manipulating it).
• Care should be taken when handling the product, to ensure it is not damaged (e.g.: Dropping the printer,
spilling liquids/chemicals into the printer, use of dierent power voltage than that specified).
• If precaution is not taken, the product’s electronics could be damaged by an electrostatic discharge
(e.g.: Always observe proper electrostatic safety precautions when handling static-sensitive components
such as PC boards and printheads. Switch o all aected devices, i.e. computer, printer, accessories,
before connecting or disconnecting them).
Limitation of Liability
In no event shall GA International Inc., its ailiates, or any of the parties involved in the creation, production, or
delivery of the accompanying product (including hardware and software) be liable for any loss, inconvenience,
or damage whatsoever, whether direct, indirect, special, incidental, consequential or otherwise (including,
without limitation, consequential damages including loss of business profits, business interruption, or loss
of business information/data) arising out of the use of, the results of use of, or inability to use such product,
even if GA International Inc. has been advised of the possibility of such damages.

4
Product features
Standard equipment
Accessories
External Media Holder.
Product Standard 300DPI
Direct Thermal Printing ✓✓
Thermal-Transfer Printing ✓✓
ABS plastic housing ✓✓
Gap sensor ✓✓
Ribbon sensor ✓✓
Print head open sensor ✓✓
USB 2.0 (full-speed) communication interface ✓✓
16 MB SD RAM ✓✓
8 MB FLASH ✓✓
LED indicators ✓✓
Built-in 8 dot matrix font ✓✓
Characters and barcodes can be printed in four degrees of rotation (0, 90, 180, 270). ✓✓
Built-in simplified or traditional Chinese and Korean font for programming. ✓✓
Can print text, barcodes, and pictures
✓✓
Supported barcodes Supported picture formats
1D Barcodes 2D Barcodes
BMP, PCXCode 39, Code 93,
ITF, EAN 128,
Code 128 subsets
A,B,C, Codabar,
EAN-8, EAN-13,
UPC-A, UPC-E,
EAN and UPC 2(5)
digits add-on, MSI,
MSIC, PLESSEY,
CPOST, ITF 14,
EAN14
QR Code
Datamatrix
Specifications
Model Cody-300™
Printer Size 210 (W) x 175 (H) x 278 (D) mm
Printer Weight 2.09 KG
Power Supply Input: AC 100-240V
Output: DC 24V/2A
Operating
Conditions
Work environment: 5°C to 45°C (41°F to 113°F), 25%-85% humidity
Storage environment: -10°C to 50°C (-14°F to 122°F), 10%-90% humidity

5
Print Specifications
Ribbon specifications
Media size
Print Head 300 dots/inch (12 dots/mm)
Dot Size (WxH) 0.083 x 0.083 mm ( 1 mm = 12 dots)
Print Speed (Inches/Second) 2-6 inch/s (50.8-152.4 mm/s)
Maximum Print Width 4.25” (108 mm)
Maximum Print Length 90” (2286 mm)
Pulse Excitation 1x10⁸pulses
Ribbon Diameter 2.64” (67 mm) Max
Ribbon Length 984’ (300 m)
Ribbon Core Diameter 1” (25.4 mm)
Ribbon Width Min. 1.18” (30 mm), Max. 4.3” (110 mm)
Ribbon Winding Coated side-out
Maximum Media Roll Diameter 5” (127 mm) OD
Media Type Continuous, gap (die-cut), fan-folded, notch.
Media Width Min 0.78” (20 mm) / Max 4.72” (120 mm)
Media Thickness Min 2.36 mil (0.06 mm)/Max 10 mil (0.254 mm)
Roll Core Diameter 1” / 25.4 mm (3” / 76 mm with external media holder)
Label Length 0.39”-90” (10-2286 mm)
Media Gap Height Min 0.09” (2 mm)

6
Product Introduction
What’s in the Box
1. Cody-300™ thermal-transfer/direct thermal printer
2. Power cable
3. Power adapter
4. USB cable
5. Ribbon holder and take-up spools
6. External media roll holder/unwinder
7. Flash drive with software and driver installation instructions
8. Cardboard take-up core
9. Media Holder
1
4
2
3
5
8
6
9
7

7
Printer Components
External
LED Light Indicators:
ONLINE ERROR RIBBON Status Light
Label Exit
LED Indicators
Push Button to Lift Top Cover
Power ON/OFF Switch
Push Button to Lift Top Cover
Picture 2
Picture 3
ONLINE
ERROR
RIBBON

8
Internal
The bottom
Picture 4
Picture 5
Top Cover
Media Holder
Ribbon Take-up Spool
Push Button to Open
Thermal Print Head
Power Socket
RS-232C Serial Port
Ethernet Port
USB Port
Label Entrance from External Holder
Parallel Port

9
Picture 1 1. Press the two buttons on the left and right
side to open the printer top cover.
2. Press the print head release button
to open it.
Picture 2 Picture 3
3. Place an empty cardboard core onto the
ribbon take-up spool. Next, clamp the left
and right side of the ribbon take-up spool
into the printer.
Picture 4 4. Place the ribbon in the holder then clamp
the left and right side of the holder in the
printer.
5. Attach the ribbon to the empty cardboard
core.
Next, turn the blue wheel clockwise to make
sure the ribbon is taut.
Picture 5 Picture 6
6. Close the print head by pressing on
the left and right side of the print head as
indicated by the arrows until you hear a
snapping sound.
Installation
Installing the printer
1. Place the printer on a stable surface.
2. Make sure the power is turned o. Do not plug in the power cord when the printer is turned on.
3. Connect a serial, USB, Parallel, or Ethernet cable to the printer and PC.
4. Connect the power plug to the power supply socket.
Installing the ribbon
Picture 6

10
Print Head
Ribbon Take-up Core
Media
Ribbon
Media Guide
Platen Roller
Picture 7
Ribbon and Media Installation Diagram
Installing the media
1. Press the two buttons on left and right side to open
printer top cover.
2. Insert the media holder into the media roll.
3. Place the media roll into the printer and adjust the
position of the media roll to center it on the media
holder.
4. Press the push button to open the print head.
5. Install the labels per the diagram on the left.
6. Close the print head by pressing on the left and
right side of the print head as indicated by the
arrows until you hear a snapping sound.
7. Close the printer top cover.
1.
3.
5. 6. 7.
4.
2.
Gap/Black Mark Sensor

11
LED Indicator and Button Functions
There are two buttons and three LED indicators, with many tasks that can be performed by using dierent
buttons, indicators, and the power on/o switch.
LED Indicators
LED Indicator status Description
Online indicator is on, Error indicator is o. Printer is powered on and printing status is normal.
Online indicator flashes.
Error indicator is o.
Printer is paused.
Online indicator is o, Error indicator single flashes,
and printer starts beeping.*
Print head is open.
Online indicator is o, Error indicator double
flashes.*
Label gap detection error.
Online indicator is o, Error indicator double
flashes.*
Paper out.
Online indicator is o, Error indicator double
flashes, and printer starts beeping.*
Black mark detection error.
Ribbon indicator is on. Ribbon is installed successfully.
Ribbon indicator flashes, and printer starts
beeping.*
Ribbon improperly installed; no ribbon or ribbon
end; ribbon broken.
*Beeper function has been disabled by default.

12
Function Description
Self-Test page A. Turn o the printer.
B. Make sure the media roll is installed correctly and the print head is
closed.
C. Press and hold the FEED button and turn the printer on. The Self-Test
page will be printed. Next, release the FEED button.
You can use this function to check if printing function is normal.
Print DIP Switch page A. Turn o the printer.
B. Make sure the media roll is installed correctly and the print head is
closed.
C. Press and hold the PAUSE button and turn the printer on. When the
media is fed through, release the PAUSE button and the DIP Switch page
will be printed out.
Debugging Mode A.Turn o the printer.
B. Make sure the media roll is installed correctly and the print head is
closed.
C. Press and hold the PAUSE and FEED buttons and turn on the printer.
When the Ribbon indicator (green) and the Error indicator (red) are on at
the same time, release the PAUSE and FEED buttons. The printer will go
into Debugging Mode, and you will find the following page printed out:
All label data received in this mode will be printed by machine code. The
right side shows ASCII character strings, and the left side shows the
hexadecimal value of ASCII character strings. This function is for users or
engineers to debug the program. If you turn o printer then turn it back on,
the printer will go back to normal printing mode.
Button Functions
1. Feed
When the printer is ready (Online LED is solid blue), press the button and the one label will be fed.
2. Print job timeout
For print job timeouts, press the PAUSE button to suspend printing; the Online LED indicator will flash.
To resume printing, press the PAUSE button again.
Start Functions
The printer has six power functions that can be used to set or test the printer hardware. When the system
boots up, these functions can be initiated by pressing the buttons as indicated in the table below.
*****************************
* NOW IN DUMP MODE *
*****************************

13
The printer configuration after the initialization will revert to the default values as follows:
Skip AUTO.BAS program User can use TSPL2 command to save a code auto-running file (AUTO.
BAS) into flash. When turning the printer on, it will run the program auto-
matically.
If you want to skip the AUTO.BAS program on power-up, then follow these
steps:
Press and hold the PAUSE and FEED buttons, then turn the printer on.
When the Online indicator (blue) is o, Ribbon indicator (green) is on, and
Error indicator (red) is on, release the PAUSE and FEED buttons. The
printer will skip running the AUTO.BAS program, and the Power indicator
will be on.
Printer Initialization A. Turn o the printer.
B. Press and hold the PAUSE and FEED buttons, then turn the printer on.
When the online indicator (blue) is on and the Error indicator (red) is o, re-
lease the PAUSE and FEED buttons. All data in the printer`s DRAM will be
cleared and the printer settings will be restored to factory default settings.
The Online indicator will be on and the printer will be in ready status.
*Factory default settings do not include ribbon settings.
Ribbon detection When the printer power is turned on, or it is in thermal-transfer printing
mode, the printer will automatically detect the ribbon status to check if the
ribbon is installed and works normally.
After ribbon detection, the printer will be set to thermal-transfer printing
mode. If no ribbon is present, the system will go to direct thermal printing
mode and shut o the ribbon rolling motor function.
Parameter Default setting
Speed 4 inch/sec (101.6 mm/sec), 300 dpi
Density 10
Gap 0 mm/in
Direction Printing from top to bottom
Reference Top left corner from printing direction
SHIFT 0
OFFSET 0
SET TEAR ON
SET HEAD (Cover open detect) ON
SET PRINTKEY OFF
SET REPRINT OFF
SET KEY1 (FEED) ON
SET KEY2 (PAUSE) ON
CLEAR RAM CLEAR
CLEAR FLASH NOT CLEAR

14
Troubleshooting
Common problems
Below are solutions to common printer problems. If you have tried these solutions and the printer is still not
working normally, contact our technical support department for additional help.
Problems Possible Reasons Solutions and Suggestions
Online indicator
‘‘OFF’’
Plug to AC outlet and plug to printer
not well connected.
Check power connector and AC outlet
to see if plugs are connected.
Printer power not turned on. Turn on power switch.
Print head not well closed. Close print head by pressing on the
entire print head mechanism.
Ribbon fully used. Change ribbon.
Ribbon improperly installed. Refer to Ribbon Installation steps on
page 9 of this manual to re-install
ribbon.
Media fully used. Insert new media.
Media improperly installed. Refer to media Installation steps on
page 10 of this manual to re-install
paper.
Gap sensor detection error. Adjust media specification and print
again.
Media jammed inside printer. Clear jammed media.
Printer not printing
Ethernet cable improperly connected. 1. Check if RJ-45 green/orange LED
indicator is on. When the printer
receives and process printing data,
the LED will be an orange color.
2. Check if printer IP is assigned in
DHCP mode.
3. Check if the fixed IP address
is correctly set in printer properties.
Wait a few minutes to make sure the
printer is connected to the server and
print a self-test page to confirm the
printer IP address.
4. Change the ethernet cable.
USB cable improperly connected. Check if USB cable is properly
connected or change the cable.
Ribbon is non-standard. Check the ribbon model
and specifications.
Incorrect ribbon installation. Check and re-install ribbon to make
sure it makes direct contact with the
media.
Print head not clean. Clean print head. (refer to page 16)
Incorrect command setting. Check if there is a PRINT command at
the end of the printing file or if there is
a CRLF command at the end of every
line.

15
Poor printing quality
Ribbon and/or media improperly
installed.
Re-install ribbon and/or media.
Too much dust or adhesive on print
head.
Clean print head and print again. (refer
to page 16)
Print head damaged. Print self-test page to check if printing
is complete to confirm if it is
necessary to change the print head.
Printing not stable
Wrong setting for media size. Check if media size is set correctly
and corresponds to the actual media
size.
Print head is unbalanced; ribbon and/
or media improperly installed; media
is not feeding smoothly.
Reset the label print density and ad-
just the media holder width to fit your
media size.
Printer in HEX Dump mode or RS-232
setting wrong.
Restart your printer and leave Dump
Mode or reset RS-232 PARAMETER.

16
Parts to be Cleaned Step Solutions and Suggestions
Print head
1. Turn o the printer.
2. Allow the print head to cool for
at least 1 minute.
3. Use a cotton swab and 100%
ethanol to clean the print head
surface.
Perform when changing media.
Platen roller
1. Turn o the printer.
2. Rotate the platen roller and
use a cotton swab to clean with
100% ethanol.
Perform when changing media.
Media tear bar Use a cotton swab and 100%
ethanol to clean. Perform when necessary.
Sensor Use air brush or vacuum to clean
dust o sensor. Perform monthly.
Inner side of printer Use air brush or vacuum to clean
the dust. Perform when necessary.
Maintenance
To maintain high printout quality, proceed with this maintenance section to keep your printer in good condi-
tion and to extend its lifespan.
Please use one of following materials to clean the printer.
• Cotton swabs
• Lint-free cloth
• Vacuum/Blower brush
• 100% ethanol
The cleaning process is described below:
Thermal-transfer print head
Thermal-transfer
print head
Direct-thermal print head
Direct thermal print head
Note:
Always turn o the printer power before cleaning it.
Do not touch print head with your hands.
Always use 100% ethanol, do not use medical alcohol. This avoids damage to the print head.

WARNING
All rights reserved. No part of this publication may be reproduced, stored in a retrieval system,
or transmitted in any form or by any means, electronic, mechanical, photocopying, recording,
or otherwise, without the prior written permission of GA International Inc.
info@ga-international.com
ga-international.com
Labtag.com
USA / CANADA INTERNATIONAL
+1-800-518-0364 +1-450-973-9420
INTERNATIONAL
Table of contents
Other GA Printer manuals
Popular Printer manuals by other brands

Philips
Philips CRYSTAL 660 - NETWORK Installation guidelines

Konica Minolta
Konica Minolta magicolor 7450 installation guide

Canon
Canon MK5000 user guide

TSC
TSC TA300 Series Quick installation guide

Cembre
Cembre Markingenius MG3 Operation and maintenance manual

TallyGenicom
TallyGenicom Intelliprint 9035 user guide