Warning! Make sure the concrete wall is solid
and at least 8 inches (20 cm) thick. If the
concrete exhibits cracks or other defects, this
may result in failure of the concrete anchors
and cause serious personal injury or damage to
your display.
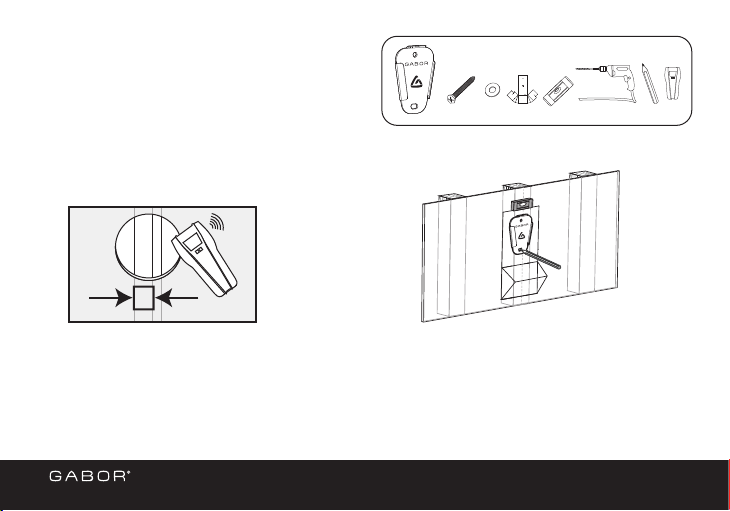
Wooden studs run vertically inside the wall, 16 inches
apart, behind the drywall or plaster. The wall bracket
must be mounted to a wooden stud, or the bracket could
fall out and damage your display or cause personal harm.
1. Use a stud finder to locate the edges of the
wooden stud, and mark the center.
2. Place the wall bracket template up to the
marked locations, and tape it to the wall. Use the
included bubble level to make sure the template
is level before drilling. Use a pencil to mark the
two drilling holes for the anchor screws, and then
apply a piece of tape over the marks.
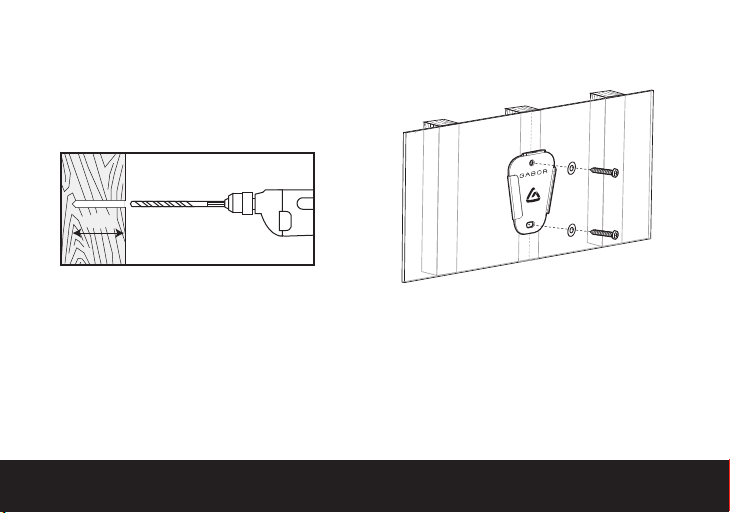
3. Use a 3/16-inch (4.5 mm) wood drill bit to
predrill the marked spots 2.2 inches (55 mm)
deep, and then clean out the debris from the
holes. Remove the template from the wall.
4. Attach the bracket to the wall by inserting the
two anchor screws through the washers and
the wall bracket’s mounting holes, and screw
them into the predrilled support holes until
secure. Do not overtighten the screws.
1. Place the wall bracket template up to the
marked locations, and tape it to the wall.
Use the provided bubble level to make sure
the template is level before drilling. Use a
pencil to mark the two locations as shown,
and place a piece of tape over each mark.
2. Use a 3/8-inch (10 mm) concrete drill bit to predrill
the marked spots 2.4 inches (60 mm) deep, and
then clean out the debris from the holes.
Attaching the Wall Bracket to
Wooden Studs (cont.)
10
2.2 in.
3/16-in.
3. Remove the template and Insert the concrete
anchors into the predrilled holes, and use a
hammer to tap the anchors into the concrete.
4. Attach the bracket to the wall by inserting the
anchor screws through the washers and the
wall bracket’s mounting holes, and screw them
into the anchors until secure. Do not overtighten
the screws.