manuals.online logo
Brands
  1. Home
  2. •
  3. Brands
  4. •
  5. Gaggenau
  6. •
  7. Cooker
  8. •
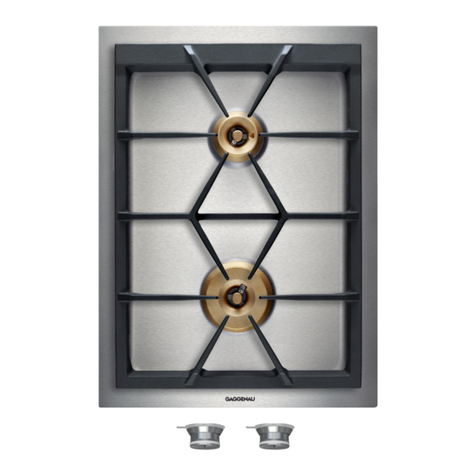
  9. Gaggenau VG 232 RK Product guide

Gaggenau VG 232 RK Product guide

Operating and assemb y instructions
VG 232 RK
Gas cooker
1
Preface
1. Important notes Page 3-4
1.1 For your safety Page 3
1.2 Operating for the first time Page 3
1.3 About use Page 4
2. Structure and operating principle Page 5-6
2.1 Structure Page 5
2.2 Specia accessories Page 5
2.3 Operating princip e Page 6
3. Operation Page 7
4. Cleaning and care Page 8
5. Maintenance Page 9
5.1 Genera Page 9
5.2 Remedying s ight ma functions yourse f Page 9
6. Tec nical data / Settings table Page 10
VG 232 RK
2
Cooking wit your new gas cooker will be
even more fun t an before.
The app iance offers you the fo owing
advantages:
– Regu ation from hot to co d in seconds.
– High safety standard thanks to therma
protection e ements for a burners.
– Thanks to the nove insta ation method
imp emented, insta ation is chi d's p ay!
To ensure that you wi be ab e to use this app i-
ance in a its diversity, read through the operating
and assemb y instructions conscientious y before
operating it for the first time. The instructions
contain important notes on use, insta ation and
maintenance of the app iance.
You wi find notes on page 3 that you ought to
observe before operating t e appliance for t e
first time.
The chapters entit ed “Structure and operating
principle" and “Operation" te you a the
things your cooker is capab e of doing and how
to operate the app iance.
The chapter entit ed “Cleaning and care" wi
make sure that your app iance wi stay operab e
and beautifu for a ong time.
And now we wis you lots of fun cooking.
Preface
Fig. 1
1.1 For your safety
You must not operate the app iance if it is damaged.
When connecting e ectrica app iances in the proxi-
mity of the app iance, make sure that connecting
eads do not come into contact with hot cooking
surfaces!
As the user, you yourse f are responsib e for
maintenance and proper use in the househo d.
On y ever operate the app iance under supervision.
Do not operate the app iance without pots and pans
p aced on it. Make sure that a the burner parts are
correct y fitted.
Important: The app iance heats up during opera-
tion. Keep chi dren away.
Note:
If you have fitted the app iance cover VD 201-010
(specia accessory) on the app iance, it must not be
c osed unti the app iance has coo ed down
comp ete y. Do not operate the app iance with the
cover c osed! Heat deve opment may damage the
app iance and the cover. Do not use the app iance
cover as a surface for p acing objects or for
keeping things warm.
Do not c ean the app iance with a steam c eaning
apparatus or with water pressure - risk of s ort-
circuits!
Iso ate the app iance from the mains during every
maintenance operation. To do this, remove the
mains p ug or actuate the corresponding fuse.
C ose the gas supp y.
Repairs must be carried out by authorised specia-
ists, thus ensuring e ectrica safety.
No warranty c aims can be odged for any damage
resu ting from fai ure to observe these instructions.
Observe caution with oi s and fats. They may
overheat and burn easi y.
Foodstuffs that are prepared in fat and oi must on y
be prepared under constant supervision!
Tec nical modifications reserved.
1.2 Operating for t e first time
Before operating the app iance for the first time,
p ease pay attention to the fo owing notes:
The app iance must on y be connected by an
authorised specia ist.
Read through these instructions attentive y before
operating the app iance for the first time.
Note:
The rating p ate for this app iance is inc uded on
a separate sheet. Keep the rating p ate in a safe
p ace a ong with your operating and assemb y
instructions.
Remove the packaging from the app iance and
dispose of it proper y.
Keep packaging e ements away from chi dren.
Thorough y c ean the app iance and accessories
before using them for the first time. This wi
e iminate any “newness" sme s and soi ing
(see chapter entit ed “C eaning and care").
3
1. Important notes
1.3 About use
The app iance is intended so e y for use in the
househo d and must not be put to any other uses.
Use the app iance to prepare mea s on y. It must not
be used to heat up the room in which it is insta ed.
Use of a gas cooker generates eat and umidity
in the room where it is insta ed. This is why atten-
tion must be paid to good kitchen venti ation.
The natural ventilation openings must be kept
unobstructed. Pro onged use of the app iance
with severa or a rings may ca for additiona
venti ation such as opening a window or a door,
or stronger air extraction by an extractor hood.
To guarantee good combustion, t e room in
w ic t e appliance is installed must ave
a minimum volume of 10 m3and must possess
a door t at opens outdoors or a window t at
can be opened.
Only ever use the burners after placing pots and
pans on t em. Do not eat up any empty pots
or pans; this may resu t in a bui d-up of heat. Use
pots and pans with thicker bottoms because heat
distribution is particu ar y improved in the ow
setting. The better the size of pots and pans is
adapted to the burner size, the better the heat of
the gas f ame wi be exp oited and the more costs
wi be saved.
Cooking vesse s with curved bottoms, e.g. woks,
must not be used.
It is not permitted to use roasting pans, frying pans
or gri stones heated simu taneous y by severa
burners because the resu ting heat bui d-up may
damage the app iance.
Switch the burners to the ow setting whenever you
remove pots or pans brief y. In this way, you reduce
the risk of burns when working next to naked
f ames; you a so save gas and reduce po ution.
Whenever the gas hob is fitted under a vapour
extractor hood, a ways cover the rings with pots
or pans. Otherwise, parts of the vapour extractor
hood may become damaged by the extreme heat
deve opment or grease residues in the fi ter may
ignite. Ensure an adequate supply of air w en
using a vapour extractor operating in t e
ex aust air mode.
After igniting, keep the contro knob pressed for
around 5-8 seconds more because the heat sensor
that opens the gas channe has to warm up first.
In the event of a power failure, you can a so ignite
the unit with matches or any other ignition aid. The
therma protection faci ity that prevent gas from
f owing out in the open position functions without
restriction.
Pots with a diameter of ess than 90 mm or more
than 220 mm shou d not be used. When using
arger pots, pay attention to keeping to a minimum
distance of 50 mm between the cooking vesse and
combustib e surroundings. A minimum distance of
15 mm must be observed between the contro knob
and the pot or pan.
In the event of malfunctions, contact your
specia ist dea er or your responsib e Gaggenau
after-sa es service.
Tip: When buying pots, pay attention to the fact
that the manufacturer frequent y specifies the top
pot diameter, which is genera y arger than the
diameter of the base.
Observe the manufacturer's specification! Use
cooking utensi s that the manufacturer states as
being “suitab e for gas".
Preferab y use the arger cooking zone for brief
cooking, deep fat frying and brief frying of arge
quantities. Preferab y use the sma er ring for
soaking, warming up and keeping warm, even
when arge quantities are invo ved.
4
2.1 Structure
2.2 Special accessories
1High-power burner B 2.8 kW
2 Norma burner A 1.9 kW
3 Pot support
4 Contro knob for the front cooking position
5 Contro knob for the rear cooking position
6 Burner cover
7 Burner head
8 Spark p ug for automatic ignition
9 Therma sensor for f ame monitor
You can order the fo owing specia accessories:
– VV 200-000: Connecting strip
– VD 201-010: App iance cover (If an app iance
cover is fitted, the pot support must
be removed when c osing.)
5
2. Structure and operating princip e
6
7
8
9
1
2
3
4
5
Fig. 2
Fig. 3
2.3 Operating principle
The app iance features one-hand operation. That
is to say, the ignition is activated when the contro
knob is pressed brief y.
After igniting, keep the contro knob pressed for
around 5-8 seconds more because the heat sensor
that opens the gas channe has to warm up first.
The gas hob has 1 normal burner (front burner)
and 1 ig -intensity burner (rear burner).
A burners have a t ermal protection device that
prevents unburned gas from escaping in the open
position.
The total rated t ermal load amounts to:
4.7 kW referred to Hs* (gross ca orific va ue)
4.2 kW referred to Hi(ca orific va ue)
The specified rated oad is defined by insta ation
of the fixed nozz es.
The gas hob is converted to a different gas
type by nozz e rep acement (fu and ow-burning
nozz es) (see nozz e tab e on page 10).
The symbols on t e control panel mean:
0Off
High setting
Low setting
The f ame is infinite y variab e between high and
ow-setting.
6
T e cooking positions must only be ignited
w en all burner parts are fitted. Ot erwise,
malfunctions may occur on t e ignition unit.
Switc ing on:
– P ace a pot or a pan on the corresponding
cooking position.
– Fu y press in the contro knob for the
corresponding cooking position. This activates
the ignition. Keep the contro knob pressed!
– Turn the contro knob to the eft to the “high"
position.
If the f ame shou d not ignite within 2 to 4 seconds,
turn the contro knob further to the eft to the “ ow"
position and then back to the “high" position after
ignition. It is often faster to ignite in the ow position
because the various gases have a differing ignition
response.
After igniting, keep the contro knob pressed
for around 5 - 8 seconds more because the heat
sensor that opens the gas channe has to warm
up first.
Repeat the operation if the f ame shou d go out
again.
The f ame size can be set continuous y between fu
and ow by s owing turning the contro knob.
Switc ing off:
Fu y turn the contro knob to the eft to the 0
position on the eft.
3. Operation
7
Fig. 4
Fig. 5
Wipe off spilt food immediately, thus ensuring
that it cannot burn in on the hob.
Caution! The burner gets very hot during
operation!
Never use abrasive or caustic c eaning agents.
You shou d on y c ean the control panel and the
control knobs with detergent and a a soft c oth.
To ensure perfect functioning, keep the therma
sensor and the spark p ug c ean.
Keep the incoming air openings on the rear of
the pane unobstructed and c ean.
P ease thorough y c ean the app iance before
operating it for t e first time and after every
use.
– Wait until t e appliance as cooled down.
– Remove the pot grid.
– Remove the burner cover.
– C ean t e ob, t e burner covers and t e
pot grid with commercia y avai ab e c eaning
agents (not in a dishwasher!), e.g. with warm
soap so ution and a dishwashing brush.
– Whenever required, c ean the burner ead with
a moist c oth.
– Soak burnt-in remainders in a itt e water and
detergent. This oosens even the most stubborn
of soi ing. Do not use any abrasive agents and
abrasive sponges.
– As the resu t of heat deve opment, s ight dis-
co oration can appear on the stain ess stee
surface. Do not attempt to scrape away suc
discoloration. This damages the surface.
Distribute stain ess stee care agents uniform y
and thin y on the hob (not on the contro pane !).
This wi ensure an even surface and wi keep
your hob in a good condition for a ong period of
time.
Important: A ow the burner covers to coo down
before c eaning them!
When assemb ing, p ace the burner cover (1) on
the burner ead (2) so that the four tabs on the
bottom edge of the burner cover engage in the
corresponding tabs on the burner head (see Fig. 6).
P ace the pot grids back in position.
4. C eaning and care
Caution:
Never use high-pressure or steam jet units to
c ean your app iance because otherwise the
e ectrica safety of the app iance wi no onger
be guaranteed.
8
Fig. 6
1
2
5.1 General
5.2 Remedying slig t malfunctions
yourself
In the event of malfunctions, check whether the
gas and e ectricity supp y is in proper working
order, i.e. the gas va ve is open and the p ug has
been p ugged into the socket.
If the power supp y is functioning correct y, but your
app iance sti does not work, p ease contact your
dealer or your oca Gaggenau customer service
agency. Specify the app iance type (see rating
p ate).
Repairs may on y be carried out by aut orised
tec nicians, in order to guarantee the safety of the
app iance.
Unauthorised tampering with the app iance wi
inva idate any warranty c aims.
On y ever use origina spare parts.
9
5. Maintenance
Fault Remedy
The burner does not ignite after severa attempts. Check whether ...
... the burner is correct y assemb ed.
... the gas shut-off faci ity is open.
... the burner is c ean and dry.
... the domestic fuse has tripped.
If necessary, inform after-sa es service.
The gas f ame goes off after ignition. Check whether ...
... the burner covers are fitted correct y,
... the f ame has been extinguished by a strong
draught in the room.
The cooking ring burner's e ectrica igniter is no Check whether there are food remainders
onger functioning. between the ignition e ectrode and the burner
cover. Carefu y remove these.
The f ame tips are ye ow and not b ue. Check whether the burners are dry and c ean.
Tec nical data (gas)
Burners: Normal burner
Fu burning 1.9 kW
Low burning < 0.35 kW
Hig -intensity burner
Fu burning 2.8 kW
Low burning < 0.56 kW
Gas connection:
R 1/2’’ union nut for R 1/2’’ bracket to DIN 1999,
conica -cy indrica
Tec nical data, gas
Tec nical data (electrical)
Rated consumption 0.8 W
Voltage 220 - 240 V
Frequency 50 - 60 Hz
Tec nical modifications reserved.
10
6. Technica data / Settings tab e
Gas family LNG LPG
Pressure 20 mbar 25-28 mbar
A burner, full burning 0.92 0.74
A burner, low burning 0.47 0.36
B burner, full burning 1.24 0.87
B burner, low burning 0.55 0.42
∑ Power 4.7 kW 4.7 kW
∑ Consumption 0.45 m3/h 337 g/h
11
7.1 Important notes
P ease observe the safety notes and the
important notes (Chapter 1).
T e installing tec nician is responsib e for
perfect functioning of the app iance at its insta a-
tion ocation.
He must exp ain the operating princip e to the user
with reference to the operating instructions and
must show how to switch off the e ectricity and gas
whenever required.
Caution:
Before connecting the app iance, p ease check
whether the local connection conditions such as
the gas type, gas pressure and mains vo tage and
the app iance settings are correct. Refer to the
adhesive abe on the gas connection or the rating
plate for the necessary information. This gas hob
conforms to the categories that are specified on the
rating p ate. The rating p ate can be found on the
app iance and additiona y on the enc osed adden-
dum sheet. By rep acing nozz es, it is possib e to
set the app iance to any gas isted on the rating
p ate.
If the data shou d not agree, the app iance must
be set to the required gas type and the avai ab e
pressure.
As this gas hob is not intended for connection to an
exhaust gas system, pay attention to the app icab e
insta ation conditions.
Note on ventilation:
To ensure good combustion, the room in which this
app iance is insta ed must have a minimum vo ume
of 10 m3and a door that opens out to outdoors or a
window that can be opened.
T e appliance may be insta ed in kitchen
combinations made of wood or simi ar combustib e
materia s without taking additiona measures. The
rear wa must consist of non-combustib e materia .
A minimum distance of 150 mm from heat-sensitive
items of furnishing or contact surfaces (cupboard
side pane ) must be observed.
The hob conforms to app iance c ass 3 and must be
insta ed in the worktop as shown in the insta ation
sketch.
The distance between the suspended cupboard
and the worktop must be at east 600 mm.
Attention must be paid to the manufacturer's
specified safety c earance when a vapour extractor
is insta ed.
Wa trims must be heat-resistant, and the minimum
distance between the hob and the wa trim is at
east 35 mm.
After unpacking, check the app iance for any
transportation damage and report this immediate y
to the transportation company.
Tec nical modifications reserved.
7. Assemb y instructions
TYPE HLVG232... RK
VG 232-... FDxxxx Made in ...
AC 220-240V 50/60Hz 0.8 VA Qn
LNG 4050 kca /h
LPG 337 g/h
7.2 Connecting t e appliance
Gas connection
The gas connection must be in a ocation that
permits access to the shut-off va ve and which,
if app icab e, is visib e after opening the door of
the furniture item.
By means of the inc uded R 1/2" connection bracket
(on the app iance end) with the affi iated washer,
the app iance must be connected to a fixed con-
necting ine or a gas safety hose to DIN 3383
Part 1 that corresponds to the type concerned.
An ambient temperature of 70 °K must not be
exceeded if the gas safety consists on y part y
of meta . The permissib e ambient temperature for
a gas safety hose that consists comp ete y of meta
is 115 °K.
If a f exib e ine is used, it must be aid in such a
way that it cannot come into contact with moving
parts of the kitchen e ement (e.g. drawer).
Electrical connection
E ectrica connection (AC 220-240 V) is estab ished
by means of a connecting cab e with an earthing
contact p ug connected to an earthed socket, which
must a so be accessib e after insta ation of the gas
hob.
If, after insta ation of the gas hob, not a po es can
be iso ated from the mains by removing the p ug,
an iso ating device with a contact gap of at east
3 mm must be permanent y insta ed. When estab-
ishing connections, make sure that the connecting
ead cannot come into contact with hot parts of the
gas hob or other hot parts.
12
40
73
Fig. 7
Seal
1/2”
7.3 Nozzle replacement
C anging over to a different gas type
On y aut orised specialists are permitted to
change over to a different gas type.
The nozz es needed for the gas type to be set
are avai ab e as a conversion kit. P ease specify the
app iance type and the required gas type.
Nozz es can be rep aced wit out aving to open
t e ousing.
Loads for all gases
For a gas types and pressures, the rated oad
is achieved by insta ing the high and ow setting
nozz es for the required gas type (see nozz e
tab e).
The ow setting nozz e is screwed in fu y at the
works, and so the owest quantity is set.
Replacing t e low-setting nozzle 1
Proceed as follows:
–Disconnect t e appliance from t e power
supply!
– Remove the cover from the underside of the
app iance under the gas va ves.
The ow-setting nozz e 1 is ocated in the gas
va ve and is screwed in from be ow. (see Fig. 8)
– Unscrew the nozz e and insert the new nozz e as
specified in the ow-setting nozz e tab e. The
nozz e must be screwed in fu y. Fit the cover
cap again.
If it shou d be necessary to correct the ow-setting
nozz e 1 as the resu t of deviating gas types and
pressure, the f ow rate can be increased by turning
to the eft.
13
Fig. 8
See table on Page 10
for details of nozzle settings.
Replacing t e main nozzle 2
Proceed as follows:
– The main nozz e 2 is visib e after detaching the
burner cover (see Fig. 9). It is unscrewed with a
specia screw key.
– Unscrew the nozz e and insert the new nozz e as
specified in the main nozz e tab e. The nozz e
must be screwed in fu y and firm y (torque
1.5 Nm) (meta ic sea ).
– P ease do not forget to stick the new adhesive
abe inc uded with the nozz e set over the o d
adhesive abe on the gas connection, thus
documenting the changeover to a different gas
type.
C ecking functions
The f ames are adjusted correct y if no ye ow tips
are visib e and if they do not go out when switching
over swift y from the high to the ow setting.
Adjusting t e primary air
The primary air setting for different gases is on y
defined by the diverse nozz e shapes and therefore
does not require adjustment.
14
Fig. 9
See table on Page 10
for details of nozzle settings.
5080006282ind01 en 06.03 SK 15
7.4 Installing t e appliance
–Produce t e recess for one or several Vario
appliance(s) in your worktop. Proceed as
indicated on the insta ation sketch and the
dimension tab e. The dimension tab e contains
detai s of the space requirement for the trim
between the app iances.
Important: The ang e between the cut surface
and the worktop must amount to 90° (Fig. 10).
–Mark t e centre of t e recess exactly.
Secure the securing rai s on the front and rear
edges of the recess. Make sure that the ugs of
the securing rai s ie on the worktop and that the
centre marking of the securing rai s is precise y
f ush with the centre marking on the worktop
(Fig. 11).
–Lower t e appliance into t e worktop. Make
sure that the engaging ugs on the app iance
ie exact y on the c amping springs. Press the
app iance firm y into the worktop. The engaging
ugs on the app iance “snap" into the c amping
springs (Fig. 12).
Note: When insta ing the app iance in granite
or marb e worktops, have the ho es produced by
a specia ist or stick on the securing rai s with a
temperature-resistant 2-component adhesive (meta
on stone).
Secure the cover on the app iance before instal-
lation. See assemb y instructions VD 201-010.
Note:
Severa app iances can a so be insta ed in indi-
vidua recesses, as ong as a minimum c earance
of 40 mm is kept to between the app iances.
1,4 m
55
8,5
288
510
490
1
147
854
561
268
min. 35
min. 50
42,5
Fig. 10
Fig. 12
Fig. 11
GAGGENAU HAUSGERÄTE GMBH
P.O. BOX 10 02 50 · 80076 MÜNCHEN
GERMANY
Y(089) 5 90-03
FAX (089) 5 90-23 7
www.gaggenau.com

Other manuals for VG 232 RK

1

Other Gaggenau Cooker manuals

Gaggenau KG491110 User manual

Gaggenau

Gaggenau KG491110 User manual

Gaggenau CX480 User manual

Gaggenau

Gaggenau CX480 User manual

Gaggenau KG260224RK Product guide

Gaggenau

Gaggenau KG260224RK Product guide

Gaggenau VK 230-610 Service manual

Gaggenau

Gaggenau VK 230-610 Service manual

Gaggenau VG 421 User manual

Gaggenau

Gaggenau VG 421 User manual

Gaggenau Wok Product guide

Gaggenau

Gaggenau Wok Product guide

Gaggenau VG 411 CA User manual

Gaggenau

Gaggenau VG 411 CA User manual

Gaggenau CG 492 User manual

Gaggenau

Gaggenau CG 492 User manual

Gaggenau VG 231 AU Product guide

Gaggenau

Gaggenau VG 231 AU Product guide

Gaggenau VG425115F User manual

Gaggenau

Gaggenau VG425115F User manual

Gaggenau VC 230-612 Product guide

Gaggenau

Gaggenau VC 230-612 Product guide

Gaggenau EE 214/215 Specification sheet

Gaggenau

Gaggenau EE 214/215 Specification sheet

Gaggenau CI 282-110 User manual

Gaggenau

Gaggenau CI 282-110 User manual

Gaggenau VG 232 CA Product guide

Gaggenau

Gaggenau VG 232 CA Product guide

Gaggenau CG 492 User manual

Gaggenau

Gaggenau CG 492 User manual

Gaggenau VG 421 User manual

Gaggenau

Gaggenau VG 421 User manual

Gaggenau KG260124 Product guide

Gaggenau

Gaggenau KG260124 Product guide

Gaggenau KG 260 CA Product guide

Gaggenau

Gaggenau KG 260 CA Product guide

Gaggenau KG260224CA Product guide

Gaggenau

Gaggenau KG260224CA Product guide

Gaggenau VG 231 CA Product guide

Gaggenau

Gaggenau VG 231 CA Product guide

Gaggenau VG 411 User manual

Gaggenau

Gaggenau VG 411 User manual

Gaggenau KG 291 CA Specification sheet

Gaggenau

Gaggenau KG 291 CA Specification sheet

Gaggenau VG 421 CA User manual

Gaggenau

Gaggenau VG 421 CA User manual

Gaggenau VG 411 User manual

Gaggenau

Gaggenau VG 411 User manual

Popular Cooker manuals by other brands

Siemens HG2L10B51M User manual and installation instructions

Siemens

Siemens HG2L10B51M User manual and installation instructions

Smeg Mista Aesthetic B61GMXI9 manual

Smeg

Smeg Mista Aesthetic B61GMXI9 manual

Technica 283150 user manual

Technica

Technica 283150 user manual

Bosch HCE422120 instruction manual

Bosch

Bosch HCE422120 instruction manual

Tricity Bendix L55M2 user manual

Tricity Bendix

Tricity Bendix L55M2 user manual

Tesla IC300B user manual

Tesla

Tesla IC300B user manual

Caple C 5210 instruction manual

Caple

Caple C 5210 instruction manual

Kaiser HGG 5 Series user manual

Kaiser

Kaiser HGG 5 Series user manual

Rizzoli ST instructions

Rizzoli

Rizzoli ST instructions

Bosch HGD745256N instruction manual

Bosch

Bosch HGD745256N instruction manual

Elba EGC 533 LG Instructions for the use - installation advices

Elba

Elba EGC 533 LG Instructions for the use - installation advices

Hotpoint EW41 Instruction and recipe book

Hotpoint

Hotpoint EW41 Instruction and recipe book

ORIGO JQD-16A manual

ORIGO

ORIGO JQD-16A manual

Siemens HL 445220 instruction manual

Siemens

Siemens HL 445220 instruction manual

Bosch HSG736255M instruction manual

Bosch

Bosch HSG736255M instruction manual

Amica 3022C2.334eEHiTbDX instruction manual

Amica

Amica 3022C2.334eEHiTbDX instruction manual

Nordica SCALDAVIVANDE - MILLY Installation

Nordica

Nordica SCALDAVIVANDE - MILLY Installation

Zanussi ZCM 700 Instruction booklet

Zanussi

Zanussi ZCM 700 Instruction booklet

manuals.online logo
manuals.online logoBrands
  • About & Mission
  • Contact us
  • Privacy Policy
  • Terms and Conditions

Copyright 2025 Manuals.Online. All Rights Reserved.