manuals.online logo
Brands
  1. Home
  2. •
  3. Brands
  4. •
  5. Gaggenau
  6. •
  7. Ventilation Hood
  8. •
  9. Gaggenau AH 530-720 Product guide

Gaggenau AH 530-720 Product guide

Other manuals for AH 530-720

1

This manual suits for next models

1

Other Gaggenau Ventilation Hood manuals

Gaggenau AW 200-790 Product guide

Gaggenau

Gaggenau AW 200-790 Product guide

Gaggenau VL040-707 Product guide

Gaggenau

Gaggenau VL040-707 Product guide

Gaggenau AW 400190 User manual

Gaggenau

Gaggenau AW 400190 User manual

Gaggenau AW 230 790 User manual

Gaggenau

Gaggenau AW 230 790 User manual

Gaggenau AW230120 User manual

Gaggenau

Gaggenau AW230120 User manual

Gaggenau AW 220 191 CN User manual

Gaggenau

Gaggenau AW 220 191 CN User manual

Gaggenau AC 200 User manual

Gaggenau

Gaggenau AC 200 User manual

Gaggenau AH 590-120 Product guide

Gaggenau

Gaggenau AH 590-120 Product guide

Gaggenau AH 600-190 Product guide

Gaggenau

Gaggenau AH 600-190 Product guide

Gaggenau AH 592-120 Product guide

Gaggenau

Gaggenau AH 592-120 Product guide

Gaggenau VL 410 User manual

Gaggenau

Gaggenau VL 410 User manual

Gaggenau AH 900791 User manual

Gaggenau

Gaggenau AH 900791 User manual

Gaggenau AA 490 710 User manual

Gaggenau

Gaggenau AA 490 710 User manual

Gaggenau AR413122 AD854048 User manual

Gaggenau

Gaggenau AR413122 AD854048 User manual

Gaggenau AL200180 User manual

Gaggenau

Gaggenau AL200180 User manual

Gaggenau AC 250 User manual

Gaggenau

Gaggenau AC 250 User manual

Gaggenau AL200190 User manual

Gaggenau

Gaggenau AL200190 User manual

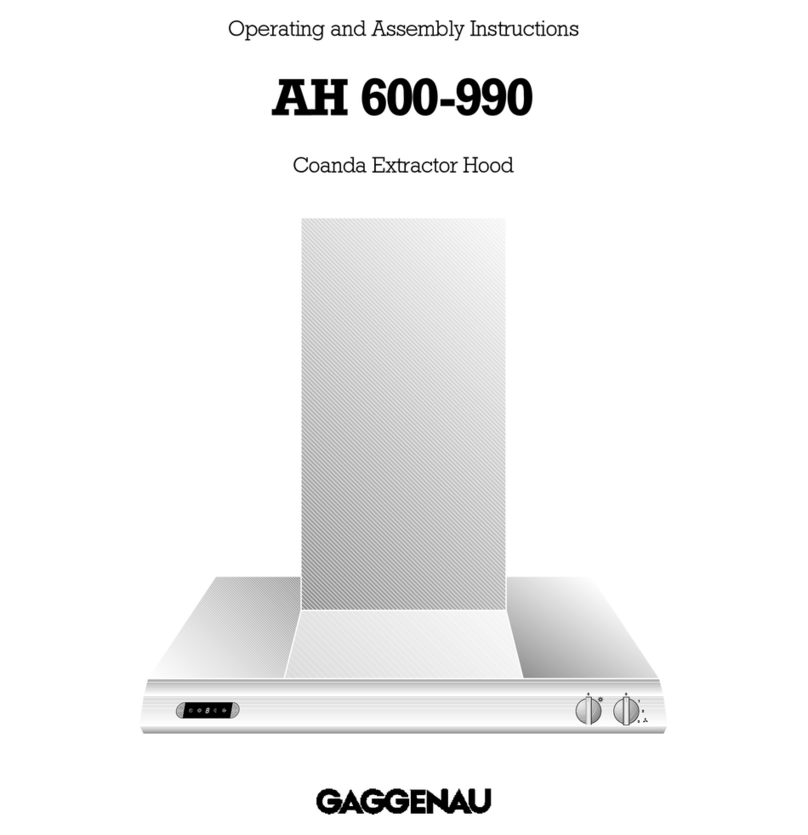
Gaggenau AH600990 Product guide

Gaggenau

Gaggenau AH600990 Product guide

Gaggenau AW24.120 User manual

Gaggenau

Gaggenau AW24.120 User manual

Gaggenau AH 400-731 User manual

Gaggenau

Gaggenau AH 400-731 User manual

Gaggenau AF 2 Series User manual

Gaggenau

Gaggenau AF 2 Series User manual

Gaggenau AW 480 User manual

Gaggenau

Gaggenau AW 480 User manual

Gaggenau AI 442 120 CN User manual

Gaggenau

Gaggenau AI 442 120 CN User manual

Gaggenau AW 2 Series User manual

Gaggenau

Gaggenau AW 2 Series User manual

Popular Ventilation Hood manuals by other brands

Gorenje S3 IHGC963S4X manual

Gorenje

Gorenje S3 IHGC963S4X manual

KOBE ISX2136SQB-1 Installation instructions and operation manual

KOBE

KOBE ISX2136SQB-1 Installation instructions and operation manual

U.S. Products ADVANTAGE-100H Information & operating instructions

U.S. Products

U.S. Products ADVANTAGE-100H Information & operating instructions

Kuppersberg DUDL 4 LX Technical Passport

Kuppersberg

Kuppersberg DUDL 4 LX Technical Passport

Framtid HW280 manual

Framtid

Framtid HW280 manual

Thermador HGEW 36 FS installation manual

Thermador

Thermador HGEW 36 FS installation manual

Electrolux LFT769X user manual

Electrolux

Electrolux LFT769X user manual

AEG X69453MVO UK user manual

AEG

AEG X69453MVO UK user manual

Broan B5836SS manual

Broan

Broan B5836SS manual

Heinner HDCH-6060RGBK quick start guide

Heinner

Heinner HDCH-6060RGBK quick start guide

Baumatic AS35SS instruction manual

Baumatic

Baumatic AS35SS instruction manual

Franke FTF 604 XS V2 Instructions for use and installation

Franke

Franke FTF 604 XS V2 Instructions for use and installation

Best UCB3I30SBW installation instructions

Best

Best UCB3I30SBW installation instructions

Gram EFU 503-90 X instruction manual

Gram

Gram EFU 503-90 X instruction manual

CIARRA CBCS6803 Installation and user manual

CIARRA

CIARRA CBCS6803 Installation and user manual

sauter SHG501 Instructions for installation and use

sauter

sauter SHG501 Instructions for installation and use

Franke 392-17 User instructions

Franke

Franke 392-17 User instructions

FALMEC Polar Black 35 Instruction booklet

FALMEC

FALMEC Polar Black 35 Instruction booklet

manuals.online logo
manuals.online logoBrands
  • About & Mission
  • Contact us
  • Privacy Policy
  • Terms and Conditions

Copyright 2025 Manuals.Online. All Rights Reserved.

1
AH 530-790
AH 530-720
Preface
Safety notes Page 3
1. Important notes Page 4-5
1.1 For your safety Page 4
1.2 Operating for the first time Page 5
1.3 A out use Page 5
2. Features Page 6
3. Operation Page 7-9
4. Cleaning and care Page 10-11
5. Maintenance Page 12
. Assembly instructions Page13-17
6.1 Technical data Page 13
6.2 Installation Page 14-17
2
Preface
With your new extractor hood, working in the
kitchen will be even more fun.
The appliance offers you a num er of
advantages:
– A good extraction capacity with low noise
values,
– a large num er of control functions,
– optimum illumination of the cooking surface y
a dimma le halogen light.
To ensure that you will e a le to use this appli-
ance in all its diversity, read through the operating
and assem ly instructions conscientiously before
operating it for the first time. The instructions
contain important notes on use, installation and
maintenance of the appliance.
On the following page you will find important
notes on safety and operation. These will serve
to ensure your personal safety and the lasting
value of your appliance.
You will find notes on Page 4 that you ought to
o serve before operating the appliance for
the first time.
The chapters entitled “Features” and
“Operation” will tell you all the things your
extractor hood is capa le of doing and how the
appliance is operated.
Tips and hints in the chapter entitled “Cleaning
and care” will make sure that your appliance will
stay opera le and eautiful for a long time.
And now we wish you lots of fun with your
new extractor hood.
Fig. 1
WARNING - TO REDUCE THE RISK OF FIRE,
ELECTRIC SHOCK, OR INJURY TO PERSONS,
OBSERVE THE FOLLOWING:
a.) Use this unit only in the manner intended y the
manufacturer. If you have questions, contact
the manufacturer.
.) Before servicing or cleaning unit, switch power
off at service panel and lock the service
disconnecting means to prevent power from
eing switched on accidentally. When the
service disconnecting means cannot e locked,
securely fasten a prominent warning device,
such as a tag, to the service panel.
CAUTION:
FOR GENERAL VENTILATION USE ONLY. DO NOT
USE TO EXHAUST HAZARDOUS OR EXPLOSIVE
MATERIALS AND VAPORS.
WARNING - TO REDUCE THE RISK OF A
RANGE TOP GREASE FIRE.
a.) Never leave surface units unattended at high
settings. Boilovers cause smoking and greasy
spillovers that may ignite. Heat oils slowly on low
or medium settings.
.) Always turn hood ON when cooking at high heat
or when cooking flaming foods.
c.) Clean ventilating fans frequently. Grease should
not e allowed to accumulate on fan or filter.
d.) Use proper pan size. Always use cookware
appropriate for the size of the surface element.
WARNING - TO REDUCE THE RISK OF INJURY
TO PERSONS IN THE EVENT OF A RANGE
TOP GREASE FIRE, OBSERVE THE
FOLLOWING:
a.) SMOTHER FLAMES with a close-fitting lid,
cookie sheet, or metal tray, then turn off the
urner. BE CAREFUL TO PREVENT BURNS. If the
flames do not go out immediately, EVACUATE
AND CALL THE FIRE DEPARTMENT.
.) NEVER PICK UP A FLAMING PAN - You may e
urned.
c.) DO NOT USE WATER, including wet dishcloth or
towels - a violent steam explosion will result.
d.) Use an extinguisher ONLY if:
1. You know you have Class ABC extinguisher,
and you already know how to operate it.
2. The fire is small and contained in the area
where it started.
3. The fire department is eing called.
4. You can fight the fire with your ack to an exit.
Safety notes
3
Read And Save These Instructions.
1.1 For your safety
– Damaged appliances must not e operated.
– The appliance must only e connected y an
authorised specialist, paying attention to
the relevant regulations of the power supply
companies and the regional construction
regulations.
Also observe the assembly instructions!
– Connecting ca les must not come into contact
with hot cooking surfaces.
– Do not operate the extractor hood without
inserted lamps.
– Never operate the appliance without a grease
filter.
– Hazardous or explosive su stances and vapours
must not e extracted!
– The user is responsi le for expert use and the
perfect condition of the appliance.
– Only ever operate the appliance under super-
vision.
–Caution! Over-greased filters are a fire risk!
Only ever deep-fry under the extractor under
constant supervision. Pay attention to cleaning
the grease filter on a regular asis.
–Fire risk! Do not flam é meals under the
extractor hood!
– Operation of the extractor hood a ove a hearth
for solid fuels (coal or wood etc.) is only partly
permitted.
– Gas appliances may only e used under the
extractor hood when pots and pans are placed
on them!
– When using more than 3 gas-operated rings at
the same time, please operate the extractor
hood at level 2 or higher. This prevents a uild-
up of heat in the appliance.
– For safety reasons, do not place any heavy
o jects on the top of the appliance.
– Do not clean the appliance with a steam
cleaning apparatus or with water pressure
ecause this poses a risk of short-circuits.
– Isolate the appliance from the mains during
every maintenance operation. To do this, actuate
the corresponding fuse.
– Repairs must e carried out y authorised
specialists, thus ensuring electrical safety.
– No warranty claims can e lodged in the event
of damage caused y failure to o serve these
instructions.
– Adequate incoming air must e ensured if a
wood, coal, gas or oil heater or an open hearth is
operated in the same room as the one in which
the hood is installed.
– Safe operation is possi le whenever the partial
vacuum in the place where the firing equipment
is installed does not exceed 4 Pa (0.04 m ar).
This can e achieved whenever the air needed
for com ustion is a le to enter through openings
that cannot e sealed, for example in doors,
windows, incoming/exhaust air wall oxes or
other technical means.
– If the appliance is to e operated only with the
window open (to ensure adequate incoming air),
you can use the window switch.
A switch (normally open) is fitted on the window.
On the appliance, this switch is connected to the
window switch terminal on the main electronics.
The appliance can now only e operated when
the window is open.
Important: The window switch must only e
connected y an authorised specialist.
Note: The light function works without restriction.
– After a power failure, the extactor will not go on
again automatically. You can recommence
operation y turning a kno or y pressing any
key.
Technical modifications reserved.
4
1. Important notes
1.2 Operating for the first time
Before operating the appliance for the first time,
please pay attention to the following notes:
– The appliance must e installed and connected
y a specialist efore it is operated for the first
time.
– The rating plate for this appliance is included
with the instructions on a separate sheet. Store
the rating plate in the same location as your
operating and assem ly instructions. You need
the rating plate for possi le damage and
warranty cases.
– Conscientiously read through the operating and
assem ly instructions efore operating the
appliance for the first time.
– Remove the packaging from the appliance and
dispose of it properly. Pay attention to the fact
that there are accessories in the packaging.
Keep packaging elements out of the reach of
children!
– Thoroughly clean the appliance efore using it
for the first time (see chapter entitled “Cleaning
and care”).
– Before operating the appliance for the first time,
check that the mains connection is in proper
working order.
1.3 About use
– The appliance is intended solely for use in the
household and must not e put to any other uses.
– In the event of malfunctions, first of all check the
household fuses. If the pro lem has nothing to
do with the power supply, please contact your
specialist dealer or your local Gaggenau after-
sales service.
5
6
2. Features
1Outgoing air duct
2Control panel
3Grease filter
4Lighting
Installation accessories:
Stainless steel-design ventilation duct:
LK 530-010 for ceiling heights of
7 ´´ 3 ´ ´ - 8 ´´ 6 ´ ´ / 2.20 - 2.66 m
LK 530-020 for ceiling heights of
8 ´´ 6 ´ ´ - 10 ´´ 1 ´ ´ / 2.66 - 3.15 m
Aluminium-design ventilation duct:
LK 530-011 for ceiling heights of
7 ´´ 3 ´ ´ - 8 ´´ 6 ´ ´ / 2.20 - 2.66 m
LK 530-021 for ceiling heights of
8 ´´ 6 ´ ´ - 10 ´´ 1 ´ ´ / 2.66 - 3.15 m
Fig. 2
1
2
34
Fig. 3
Motor off
Extraction level 1
Extraction level 2
Extraction level 3
Extraction level intensive
Run-on
Lighting
Grease filter
saturation display
7
3. Operation
The AH 530-790 is 35 3/8´ ´ / 90 cm wide, and the
AH 530-720 is 47 3/16 ´ ´ / 120 cm wide. Operation of
oth extractor hoods is identical.
After they have een pressed, all functions
selection keys except 0(“Motor off”) are acklit in
green.
Light
The lighting can e switched on or off, regardless
of whether the wall extractor is in operation, y
pressing the key (see Fig. 4).
When you riefly press the key, the lighting is
increased up to the maximum level.
You can dim the lighting to the required level y
keeping the key pressed.
Fan levels
Three fan speeds and one intensive speed are
availa le (see Fig. 5). You set the fan level required
for each respective cooking situation y pressing
the function selector keys 1, 2, 3 or Int.
Fig. 5
Fig. 4
or or or
8
The Int key for the intensive level should e
pressed when rowning and frying in an open pan
(see Fig. 6).
If you have switched on the hood y selecting the
intensive level, it will e switched off again
automatically after 5 minutes.
If you press the Int key while the hood is running at
fan level 1, 2 or 3, the electronic control will switch
ack automatically to the previously selected fan
level after 5 minutes (see Fig. 7).
If you would like to end the intensive level efore
the five minutes have elapsed, press the 0key
(“Motor off”) or select a different level (see Fig. 8).
You can of course switch off the hood’s extraction
function at any time y pressing the 0key (“Motor
off”).
Fig.
Fig.. 8
Fig. 7
9
Special functions:
Intensive time:
You can set the intensive level running time to 3, 5
or 10 minutes y simultaneously pressing the Int
key and the 1, 2 or 3key and you can store this
setting (see Fig. 9). When delivered, the appliance
is set to five minutes, i.e. the com ination of the Int
key and the key 2.
Delayed shut-off:
Delayed shut-off is possi le at any level. First press
the required key 1, 2, 3 or Int and then press the
key (see Fig. 10).
The delayed shut-off time for all levels is ten
minutes. After these ten minutes, the ventilation
switches off, ut the lighting stays on.
Interval ventilation:
Interval ventilation is a special feature of this
appliance which periodically activates the fan for
five minutes every hour. You can activate this
function y simultaneously pressing the 0key and,
depending on the required extraction capacity, the
1, 2 or 3key (see Fig. 11).
This mode of operation is indicated y alternating
illumination of the key together with the
corresponding fan level indicator.
You can switch off interval ventilation y pressing
the 0key (see Fig. 12).
Fig. 12
Fig. 10
or or
or
Fig. 9
or or
Fig. 11 or or
10
Cleaning the grease filters
The grease filter saturation display Fflashes after
an operating time of 30 hours to indicate that you
should clean the grease filter (see Fig. 3). The
grease filter can of course e cleaned at any time,
even if the grease filter saturation display should
not start to flash.
The stainless steel grease filters can e removed
easily for cleaning (see Fig. 13):
Grip the grease filter handle and push the slide
towards the rear. Then pull the grease filter
downwards out of the holder; repeat the operation
for the other grease filters.
You can clean the stainless steel grease filters in a
dishwasher at a maximum temperature of 150°F /
65 °C, where it should e supported vertically to
allow food or rinsing residues to drain off.
The inner parts of the housing should e wiped out
with hot rinsing water when replacing the filters.
Note:
When cleaning the inside of the housing avoid
protruding parts.
After having cleaned them, re-insert the grease
filters in the hood in reverse order.
Important:
The handles of the grease filters must e
visi le after assem ly.
Press the Fkey to set the elapsed hours counter to
zero. Flashing of the indicating lamp goes off.
4. Cleaning and care
Fig. 13
Fig. 14