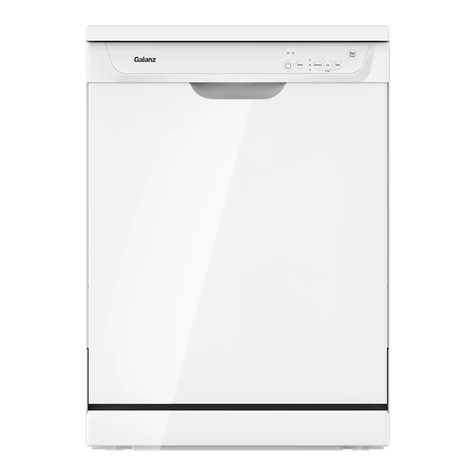
Galanz W3A1G2-0E0 User manual

DISHWASHER USER MANUAL
(3s除菌洗)
(3s照明)
www.galanz.com/in
W3A1G2-0E0

Read this Manual
Dear Customer,
Please read this User Information carefully
and keep it to refer to at a later date.
Pass it on to any subsequent owner of the
appliance.
This manual contains sections of Safety
Instructions, Operating Instructions, Installation
Instructions and Troubleshooting Tips, etc.
Carefully read it before using the dishwasher
will help you to use and maintain the
dishwasher properly.
Before Calling for Service
To review the section on Troubleshooting Tips
will help you to solve some common problems
by yourself and not need to ask for the help of
professional technicians.
NOTE:
The manufacturer, following a policy of
constant development and updating of
the product, may make modifications
without giving prior notice.
WARNING !
When using your dishwasher, follow the basic precautions including the following:
1
1. Safety Information
Under certain conditions, Hydrogen gas may be produced in a hot-water system that has not been
used for two weeks or more. HYDROGEN GAS IS EXPLOSIVE. If the hot-water system has not
been used for such a period, before using the dishwasher turn on all hot-water faucets and let the
water flow from each for several minutes. This will release any accumulated hydrogen gas. As the
gas is flammable, do not smoke or use an open flame during this time.
WARNING! PROPER USE
WARNING! HYDROGEN GAS IS EXPLOSIVE
1)Safety Information
2)Disposal.......................
4)Operation Instruction..........................
Control Panel......................................................4
Dishwasher Features ......................................4
5) Prior using for the first time .........................4-5
Power on.............................................................5
......5
..........................5
..............................5
6) Loading the Dishwasher Baskets................6-8
......................8
Damage to Glassware and other Dishes............8
7) Starting a washing program...........................9
Wash cycle table
Turning on the Appliance
............................................10
8) Maintenance and cleaning.......................10-13
9)Troubleshooting Tips..............................14-17
Error codes.......................................................14
Before calling for service.............................15-16
Technical information .......................................17
........................................
.........................
3)Installation instruction...............................3
.............4
Tableware placing.........................................
Put in detergent powder............
Start the dishwasher.............
Dish basket tableware placing...........................6
Dish basket foldable row...................................6
Suggestions for Selection...................................7
Precautions for tableware placing
...................................9
...................................9
Forget to Add Dish
1-2
2
Do not abuse, sit on, or stand on the door or dish basket of the dishwasher.
Do not touch the heating element during or immediately after use.
Do not operate your dishwasher unless all enclosure panels are properly in place. Open the door
very carefully if the dishwasher is operating. There is a risk of water squirting out.
Do not place any heavy objects or stand on the door when it is open. The appliance could tip
forward.
When loading items to be washed:
Locate sharp items so that they are not likely to damage the door seal;
Load sharp knives with the handles up to reduce the risk of cut-type injuries;
Knives and other utensils with sharp points must be loaded in the basket with their points down or
placed in a horizontal position.
When using your dishwasher, you should prevent plastic items from contacting with heating
element.
Check that the detergent receptacle is empty after completion of the wash cycle.
Do not wash plastic items unless they are marked dishwasher safe or the equivalent. For plastic
items not so marked, check the manufacturer's recommendations.
Use only detergent and rinse additives designed for an automatic dishwasher. Never use soap,
laundry detergent, or hand washing detergent in your dishwasher.
Other means for disconnection from the supply must be incorporated in the fixed wiring with at
least 3mm contact separation in all poles.
Keep children away from detergent and rinse aid, keep children away from the open door of the
dishwasher , there could still be some detergent left inside.
Young children should be supervised to ensure that they do not play with the appliance.
Dishwasher detergents are strongly alkaline. They can be extremely dangerous if swallowed.
Avoid contact with skin and eyes, and keep children away from the dishwasher when the door is
open.
The door should not be left in the open position since this could present a tripping hazard.
If the supply cord is damaged, it must be replaced by the manufacturer, its service agent or a
similarly qualified person in order to avoid a hazard.
Please dispose of packing materials properly.
This appliance is not intended for use by persons (including children) with reduced physical,
sensory or mental capabilities, or lack of experience and knowledge, unless they have been given
supervision or instruction concerning use of the appliance by a person responsible for their safety.

READ AND FOLLOW THIS SAFETY INFORMATION CAREFULLY
SAVE THESE INSTRUCTIONS
During installation, the power supply must not be excessively or dangerously bent or flattened.
Do not tamper with controls.
The appliance is to be connected to the water mains using new hose sets, and the old hose-sets
should not be reused.
Make sure that the carpet must not obstruct the openings at the bottom base.
Use the dishwasher only for its intended function.
2.Disposal
Packaging material could be dangerous for children!
For disposing of package and the appliance please go to a recycling centre. Cut off the power
supply cable and make the door closing device unusable.
Cardboard packaging is manufactured from recycled paper and should be disposed in the waste
paper collection for recycling.
By ensuring this product is disposed of correctly, you will help prevent potential negative
consequences for the environment and human health, which could otherwise be caused by
inappropriate waste handling of this product.
For more detailed information about recycling of this product, please contact your local city office
and your household waste disposal service
IMPORTANT!
To get the best performance from your dishwasher, read all
operating instructions before using it for the first time.
2
Dispose of the dishwasher packaging material correctly.
All packaging materials can be recycled.
Plastic parts are marked with the standard international abbreviations:
(e.g. PS for polystyrene, padding material)
This appliance is identified according to the European guideline
2012/19/EU on waste electrical and electronic equipment -WEEE. The
guideline specifies the framework for an EU-wide valid return and re-use of
old appliances.
WARNING!
3
This appliance is intended to be used in household and similar applications such as:
– staff kitchen areas in shops, offices and other working environments;
– farm houses;
– by clients in hotels, motels and other residential type environments;
– bed and breakfast type environments.
This dishwasher should be installed before use. Please do not use the machine before inlet
pipe and discharge pipe are installed!
Pipe opening installation
Schematic diagram of correct installation
1. Draining hose
2. Inlet hose
3. Power cord
Install pipes and power line at the corresponding installation openings.
Installation of discharge pipe
1. Installation opening of discharge pipe.
2. Insert the “double wire clamp” into the discharge pipe.
3. Put the discharge pipe into the installation opening and buckle the “double
wire clamp” inward.
Connect to water source
Connecting the water inlet hose
Connect the cold water supply hose to a threaded 3/4(inch)
connector and make sure that it is fastened tightly in place.
If the water pipes are new or have not been used for an
extended period of time, let the water run to make sure that
the water is clear and free of impurities. If this precaution is
not taken, there is a risk that the water inlet can get blocked
and the appliance could be damaged.
3. Installation instruction
1 2 3
123

5
4
Control Panel
4. Operation Instruction
1.
2.
3.
Power switch: To turn on/off the power supply.
Program Button: To select washing program when press the button.
Start/Pause Button: The appliance will start or pause the expected washing cycle.
DIY Rapid
Intensive
Eco
Start
Pause
1
2 3
Dishwasher Features
Front View
1. Discharge Hole
2. Inlet Hole
3. Spray Arms
4. Knife & Fork Basket
5. Dish Basket
1
2
3
4
5
5.Prior Using for the First Time
Before using your dishwasher for the first time:
A. Power on
B.
C.
D.
Tableware placing
Put in detergent powder
Start the dishwasher
A. Power on
1. Plug in
2. Voltage 220V~frequency 50Hz
3. Do not plug in with wet hand to prevent electric shock
B. Tableware placing
1.
2. Open dishwasher door
3. Pull out dish basket
4. Knife & fork basket tableware placing
Remove larger residue
C. Put in detergent powder
12
1. Put in proper amount of specialized detergent powder
2. Close the dishwasher door
Please use detergent powder designed especially for dishwasher. Other solvent like cleanser
essence should not be used for replacement.
Check if the dishwasher door is closed!
WARNING!
D. Start the dishwasher
123
Eco
Start
pause
Intensive
Rapid
DIY
1.
2. Choose proper washing program
3. Press “Start/Pause” botton to start washing
Press the “Power” botton
1. During the washing process, if you want to open the door, press first and wait until
the machine stops operation before opening the door.
2. Washing requires certain time, please wait patiently……
“Start/Pause”

7
A
A
A : the foldable row Two foldable rows
folded inward
After tableware placing, push back the dish basket into the dishwasher.
Dish basket tableware placing
1. You are recommended to place tableware as per the standard of the following figure.
2. No more than 5 sets of tableware should be placed in one time.
A. Noodle bowl
B. Rice bowl
C. Glass cup
D. Tea cup
E. Rice spoon
F. Soup spoon
G. Chopsticks
H. Seasoning dish
I. Small soup spoon
J. Deep plate
K. Shallow plate
Dish basket foldable row
When you need to place larger tableware, you may fold the dishbasket row which will make the
space more customized for your demand.
A
B
C
D
EF
GH
I
K
J
For best performance of the dishwasher, follow these loading guidelines.
6.Loading the Dishwasher Baskets
Figure (1) and Figure (2) are schematic diagram of tableware placing in the knife & fork basket only
for your reference. You may also place knife and fork based on actual demand.
6
A
B
C
D
Figure (1)
A
B
C
D
Figure (2)
A. Rice spoon
B. Soup spoon
C. Chopsticks
D. Small soup spoon
6
Small opening bottle cannot be washed in the dishwasher, as the small
opening may cause poor cleaning effect.
Rag and other cleaning products cannot be washed in the dishwasher to
prevent any machine failure.
Small opening
bottle
Rag and other
cleaning products
This type of tableware should not be washed in the dishwasher, as the gloss
finish may deteriorate.
Golden, silver
and other
expensive
Gloss finish of this tableware may deteriorate after repeated wash (hand wash
may also darken the tableware). Knife, fork and spoon should be placed in the
grids based on different materials. Metal products that can easily rust should
not be placed in the dishwasher.
Stainless steel,
aluminum and
other metal
products
Glass products
Usually it can be washed in the dishwasher. Some glass tableware with color
painted may fade after repeated wash. (Hand wash may also fade the color)
Some glass may present poorer transparency after repeated wash.
Ceramic
products
Usually it can be washed in the dish washer. Some antiquing tableware with
colorful paints may fade after repeated wash. (Hand wash may also fade the
color)
Plastics
products
Plastic tableware of light weight may turnover or drop during washing process,
or may crack due to the high temperature.
3
Suggestions for Selection
General household tableware can be washed in the dishwasher. However, the washing environment
(temperature, detergent powder, etc.) in the dish washer may have varied impact on tableware of
different materials. Thus we suggest you carefully refer to notes specified in the following table.
Tableware
Notes
Wooden
products
Wooden bowl, plate, utensil and chopping board and wooden tableware handle
may deform or crack under high temperature.

9
8
NOTE:
Do not use dish that is not suitable for dishwashers. This is important for good results and for
reasonable energy consumption.
Please do not overload your dishwasher. There is only space for 4 standard dishes.
Damage to Glassware and other Dishes
Possible causes:
■Type of glass or manufacturing process. Chemical composition of detergent.
■Water temperature and duration of dishwasher programme.
Suggested remedy:
■Use glassware or porcelain dishes that have been marked dishwasher-proof by the manufacturer.
■Use a mild detergent that is described as kind of dishes. If necessary, seek further information from
detergent manufacturers.
■Select a programme with a low temperature.
■To prevent damage, take glass and cutlery out of the dishwasher as soon as possible after the
programme has ended.
At the End of the Wash
When the working cycle has finished, the buzzer of dishwasher will ring for 6 times, then stop. Turn
off the appliance using the ON/OFF button, shut off the water supply and open the door of the
dishwasher. Wait a few minutes before unloading the dishwasher to avoid handling the dishes and
utensils while they are still hot and more susceptible to breakage. They will also dry better.
NOTE:
new dishes please make sure that they are suitable for dishwashers.
Do not put in items that are dirty of cigarette ash, candle wax, lacquer or paint. If you buy
WARNING! Do not let any item extend through bottom
1. Before loading tableware, remove larger food residue.
2. Tableware should be placed with certain gap in between, mounted on side with concave side facing
down. Place the tableware in order and avoid collision, which will facilitate water flow.
3. Tableware should be placed steadily to avoid ponding in bowl and cup due to turnover during the
washing process.
4. Tableware placed should not extend from the basket bottom which may resist gush arm rotation.
5. Objects of very small size will drop from the basket easily. Please don't wash these object with the dish
washer.
6. Place sharp knives or forks with handle facing upward to prevent hand injury.
To realize best washing effect and optimal dishwasher performance, please follow the operation
methods specified below:
Precautions for tableware placing
NOTE: A click could be heard when the door is closed perfectly.
7. Starting a Washing Program
Starting a wash cycle...
1. Draw out the basket, load the dishes and push it back. And then pour in the detergent.
2. Insert the plug into the socket. The power supply is 220-240V AC 50 Hz, the specification of the
socket is 12 A 250 VAC.50 Hz.
Make sure that the water supply is turned on to full pressure. Close the door, press the "Power"
button, press the program button to select a desired Wash cycle. (See the section entitled "Wash
Cycle Table") . With a little force to ensure the door is properly closed.
Turning on the Appliance
Wash cycle table
Program
Cycle Selection
Information
Description
of Cycle
Running
Time(min)
Energy
(kWh)
Water
(L)
Main wash(50℃)
Rinse1
Rinse2
Hot rinse
Drying
Main wash(50℃)
Rinse
Drying
Main wash(55℃)
Rinse1
Hot rinse
Drying
147
28
139
6.8
3.9
5.0
0.58
0.30
0.46
Main wash1(50℃)
Rapid
Eco
DIY
Intenseive
This program is suitable for
dishes difficult to wash. However,
it is not applicable to dishes
which cannot be washed with
high temperature water.
This program consumes less time
and energy. It is suitable for small
quantity dishes which are easy to
wash.
This program is more reasonable
in terms of energy consumption
compared with other programs.
We suggest using this program for
dishes without heavy oil and hard
to wash.
0.16
10
2.7
Detergent
powder(g)
6-10
6-10
9
0-10
Hot rinse
Rinse2
Main wash2(50℃)
Main wash3(50℃)
Main wash1(50℃)
The program provides customized
washing time from 3 selections which
range from 10 to 30 minutes. Press
for the first time, the program setting
minutes will be applied for each press
following. Press the program and hold
on for three seconds, the control panel
will start illumination mode.
is 10 minutes and an increase of 10
20
30 0.23 4.0
1.40.09
Main wash2(50℃)
Main wash1(50℃)

Forget to Add Dish
A forgotten dish can be added any time before the detergent cup opens.
1. Press “Start/Pause“ button
2. Open the dishwasher door
3. Pull out the dish basket and put in left-out tableware
4. Push back the dish basket into the dishwasher
5. Close the dishwasher door
6. Press Start and re-start the dishwasher
10 11
8. Maintenance and cleaning WARNING!
The filtering system is equipped for preventing large food residue or other objects from entering the
washing pump. Food residue sometimes may block the filtering system.
Cleaning filter
1. Rotate to the left to take out the filter.
2. The filter is made of three parts; please disassemble to wash.
3. After cleaning, assemble the filter and then install back to the dishwasher.
Filter assembly
To obtain optimal cleaning performance and effect, the filter assembly must be cleaned. The filtering
net can remove food particles in water during the washing period. The entire filter assembly should
be cleaned once per week. Please use cleaning brush to clean the rough and fine filter, and reinstall
into the dishwasher. The dishwasher should not be used without filter or with improper filter,
otherwise, the equipment may be damaged, and the tableware washing performance may be
reduced.
1. Do not operate the dishwasher without filter installed.
2. During cleaning, do not knock on the filter which may cause filter deformation and lower washing
performance.
Cleaning Sprayer
Sprayer sprayer holes
and spinning axle. Use mild soap water rinse the sprayer and brush gently the opening. Completely
rinse clean and install back to the dishwasher.
should be cleaned periodically, as the substances in tap water may block the
Pull out upward the
Use fine tool to clean the the sprayer
holes
sprayer
WARNING!
Never use a spray cleaner to clean the door panel for it could damage the door lock and electrical
component. It is not allowed to use the abrasive agent or some paper towel because of the risk of
scratching or leaving spots on the stainless steel surface.
WARNING!
1. After pressing Pause, don't open the door before the machine stops operation to prevent burn
danger!
2. Watch out for the steam and hot water when opening the door!
3. Carefully check if the door is closed!
4. Before re-starting the dishwasher, please check the settlement of the tableware and confirm if there
is any tableware extending out from the bottom dish basket!
Cleaning limescale
In areas with harder water quality, white lime scale may accumulate on the tub and heating plate
of the dishwasher. Lime scale will impact heating effect of the heating panel. Thus, the heating
panel should be cleaned periodically.
After lime scale generation, remove the filter and place into the dish basket. Start the “Intensive”
program of the dishwasher (no other tableware should be placed in the dish basket). After an
operation period of 2-10 minutes, press Pause and open the dishwasher. Add amount 100ml
vinegar or 50g anti-scaling agent. After the program operation stops, there may be a small amount
of lime scale film on the heating plate, you may take a towel and gently wipe away the thin film. If
there is any vinegar smell or anti-scaling agent residue in the dishwasher, you can operate the
“Sterilizing wash” for removal without any tableware or detergent placed in the dishwasher.
If the lime scale accumulate excessively, add more vinegar or anti-scaling agent with vinegar of over
200ml and anti-scaling agent between 75 and 150g. After cleaning, use a towel or brush to clean the
heating plate.
Notes

13
12
Clean the control panel, use wet cloth gently wipe and then dry thoroughly. Use good polishing
products to clean the exterior. Do not use any sharp objects, steel wool or fierce detergent to clean
any part of the dishwasher.
Anti-freezing protection
If the dishwasher is placed under 0℃, you are suggested to find customer service for taking
following measures:
Cleaning dish washer
1. Cut off the dishwasher power.
2. Close water supply equipment and break connection between the inlet pipe and faucet.
3. Discharge remaining water from inlet pipe and water valve (catch the water with a plate).
4. Re-connect the inlet pipe and faucet.
5. Take out the filter from the tub and dry the water cup with sponge.also cause machine damage or
leave traces on the surface.
Only soft wet cloth can be used for cleaning the door edge. Don't use any spray which may
penetrate into the door lock and electric element. Meanwhile, don't use objects with abradant to
wipe to prevent damaging the machine surface. Wiping with some tissue may also cause machine
damage or leave traces on the surface.
Cleaning door
Attention:
The installation of the pipes
and electrical equipments
should be done by professionals.
Electrical Shock Hazard!
Disconnect electrical power before
installing dishwasher.
Failure to do so can result in death or
electrical shock.
Warning
WARNING!
After Every Wash
After each washing, please cut off the power and open the door to prevent dampness and odor
generation.
Remove the Plug
Before cleaning or performing maintenance, always remove the plug from the socket. Do not run
risks.
No Solvents or Abrasive Cleaning
To clean the exterior and rubber parts of the dishwasher, do not use solvents or abrasive cleaning
products. Use only a cloth and warm soapy water. To remove spots or stains from the surface of the
interior, use a cloth dampened with water and a little white vinegar, or a cleaning product made
specifically for dishwashers.
When you are on holiday
Before you are on holiday, please operate the dishwasher with “sterilizing” program, and then cut
off the power, close the water inlet and slightly open the door of the dishwasher.
Moving the Appliance
If the appliance must be moved, try to keep it in the vertical position. If absolutely necessary, it can
be positioned on its back.
Seals
One of the factors that cause odors to form in the dishwasher is food that remains trapped in the
seals. Periodic cleaning with a damp sponge will prevent this.
1. Please carefully read the Manual as it contains important information including safe installation,
operation and product maintenance.
2. Please keep the Manual in safe place for future reference.
3. If the product is sold, presented or moved, please make the Manual along with the machine for
new user's reference and benefit.
4. After pressing Pause, don't open the door before the machine stops operation to prevent burn
danger!
5. Watch out for the steam and hot water when opening the door!
6. Carefully check if the door is closed!
7. Before re-starting the dishwasher, please check the settlement of the tableware and confirm if
there is any tableware extending out from the bottom dish basket!
How to Keep Your Dishwasher in Shape

15
14
9. Troubleshooting Tips
ERROR CODES
Codes
10 1 2 5
912
11
In case of any error, corresponding indicator light on the control panel of dishwasher will flash (refer to
the “schematic diagram of indicator light” for specific position of the indicator lights):
LED1+LED11
Meaning Possible Cause
Water inlet
warning
1.Part damage (inlet valve damage, flow meter damage).
2.No water flow in (water tap not on, inlet pipe not connected to
the inlet valve).
3. Line break (conductor connector of flow meter is off).
LED2+LED5 Temperature
sensor warning Open circuit or short circuit of temperature sensor.
LED5+LED10 Water shortage
warning
Water leaks, washing pump stops work and the micro switch
is off.
LED5+LED11 Heater warning
Heating panel is not heating, temperature controller on the
heating panel is off (one temperature controller should be
restored manually and the other automatically).
LED2+LED10 Water flow volume exceeds setting value.
High water
level warning
DIY Rapid
Intensive
Eco
Start
Pause
When some malfunctions happen, the appliance will display error codes to warn you.
Before Calling for Service
Reviewing the charts on the following pages may make you be free of calling for service.
Problem Possible cause Troubleshooting
The
dishwasher
does not run
Power supply is not
turned on
Ensure the power plug has correctly connected to
power source.
Ensure the dishwasher has been powered on and
the door is well closed.
Check the water supply equipment and ensure the
faucet is turned on.
Noise
Tableware in the basket
not well placed drops off
and collides with the
sprayer
Mechanical sound
Water pressure is low
Sound of the washing
pump
Well place each tableware and avoid collision with
the sprayer.
Sound generated from water flow rinsing the
tableware
The dishwasher is not used frequently. If so, ensure
water inlet and discharge every week, which will help
keep the sealing moisturized.
Bubble in tub
Dots and
membrane
substance on
tableware
Improper use of
detergent powder
To avoid bubble generation, please use detergent
powder especially designed for dishwasher.
If bubble generates, first open the dishwasher to let
the bubble evaporate, close the machine door and
start Fruit & Vegetable washing program to discharge
water; repeat the above procedure until the bubble
are cleared.
Excessively hard water
Excessively low
temperature of inlet
water
Overload use of the
dish washer
Incorrect loading
Use overdue or damp
detergent washerinlet
water
Wrong adding of
detergent powder
Remove dots on glass cups
Take out all metal devices in the dishwasher
Do not add detergent powder
Choose the longest washing program
Start the dishwasher and operate for 18-22
minutes, then the machine will enter main washing
process.
Open the dish washer, pour two spoons of vinegar
into the bottom inner container.
Close the door of the dishwasher and complete
the washing program. If the vinegar does not
work, repeat the above procedure and use 1/4
spoon (60ml) of lemon juice crystal to replace the
acetic acid.
1.
2.
3.
4.
5.
6.
1.
2.
3.
4.
5.
6.

17
16
Fault Possible cause Troubleshooting
Tableware
not cleaned
Improper washing
program selected
Choose more intense washing program for cleaning.
Do not let large tableware intervene with the rotation
of the sprayer.
Wrong dish basket
loading
Clean the inner container of the dish washer; use
sponge to dip with detergent power for dish washer
and wear rubber gloves to clean. Please don't use
other detergents which may cause bubble
generation.
Hard water minerals
Normal phenomenon
White thin
film on inner
surface
Steam
A small number of steam will spray out from vent
hole and right air inlet hole during drying and water
discharge process of the dish washer.
Black-grey
dots on
tableware
Water residue
at inner
contain bottom
Water leakage
of the
dishwasher
Stains on
inner
container
Dark dots on
glassware
Abrasion between
aluminum products and
dishes
Normal
The dish washer is
not kept level
Colored detergent
powder is used
Too much
detergent powder
A small number of water at inner container bottom
can keep the sealing moisturized.
Adjust the feet the dishwasher, and keep the
machine level.
Please use single-color detergent powder.
Select shorter-time washing program to wash.
Use mild detergent to clear the stains.
Technical Data Sheet
Manufacture Galanz
Standard place settings
Model
Galanz
Height
Width
Depth (with connectors)
Power consumption
Rated voltage / frequency
Water pressure / (flow pressure)
43.0cm
41.0cm
40.0cm
850W
AC220-240V/ 50Hz
0.03-0.6MPa
Technical Data Sheet
Galanz
4
W3A1G2-0E0
NOTE : The above values have been measured in accordance with standards under specified
operating conditions. Results may vary greatly according to quantity and pollution of the dishes ,
water hardness ,amount of detergent, etc.

26
WARRANTY
Galanz (The Company) warrants to the original domestic purchase of this dishwasher (Appliance)
that it is free from defects in workmanship and materials. During 1 year from the date of purchase of
the new dishwasher all the parts of the dishwasher which prove to be defective in workmanship
and/or materials shall be replaced or repaired free of charge on intimation. The appliance also carries
an additional 4 years warranty on motor. This warranty is subject to limitations of warranty.
LlMITATIONS OF WARRANTY
1. This warranty is not valid in case of the following events:
a) If the warranty card is not fully and properly filled in and signed at the time of purchase/installation
by the company's authorized dealer/service engineer.
b) If the completed warranty card is not presented to the authorized personnel at the time of
service/ maintenance
c) If the appliance is not used in accordance with manufacturer's instructions given the 'Operating
Manual'.
d) If the appliance has been installed, serviced, repaired, opened or tampered by any unauthorized
personnel.
e) If defects arise/caused by accidents, alteration, misuse, neglect, abuse, substitution" of original
components with spurious/non genuine components, attacked by household pest/rodents; fire, flood,
earthquake, lightning and/or any other acts of God/natural calamities.
f) If defects arise with optional accessories like machine cover, filter, inlet /exhaust extension hoses,
tap adapter, extended power supply cable, adjustment feet cover etc. thereof.
g) If damages occur by improper electrical circuits outside the washing machine or by any electrical
supply thereof.
h) If the machine serial number on the appliance is defaced, missing or altered.
i) If sea water or any sub-standard detergent has been used in the appliance.
j) If the appliance is taken out of India.
2. This warranty does not cover any type of painting, plating including rusting etc or defects thereof
3. The company is not liable for any incidental or consequential damages.
4. Parts replaced or rectified under this warranty are warranted throughout the remaining of the
original warranty period.
5. The company is not liable for any delay in servicing due to reasons beyond the control of the
company or any of its authorized service centers..
6. This warranty is 'not applicable, if the appliance is used for commercial purpose or at places
like institutions, hostels, hospitals, community halls and other similar applications.
7. The appliance is strongly suggested to use in a voltage of 220-240V"
27
Zhongshan Galanz Consumer Electric Appliances Co., Ltd.
No.3 Xingpu Avenue East, Huangpu Town, Zhongshan City, 528429,
Guangdong, China
Table of contents
Other Galanz Dishwasher manuals

Galanz
Galanz GLDW12TS2A5A User manual

Galanz
Galanz W45A1A401L User manual

Galanz
Galanz DWUK003W Operator's manual

Galanz
Galanz W60A1A401D User manual

Galanz
Galanz W60C4A101D-C User manual

Galanz
Galanz W60B1A401L-A User manual

Galanz
Galanz DWIUK001 Operator's manual

Galanz
Galanz GLDW09TS2A5A User manual

Galanz
Galanz W45A3A401S User manual

Galanz
Galanz W60B1A101M-A User manual