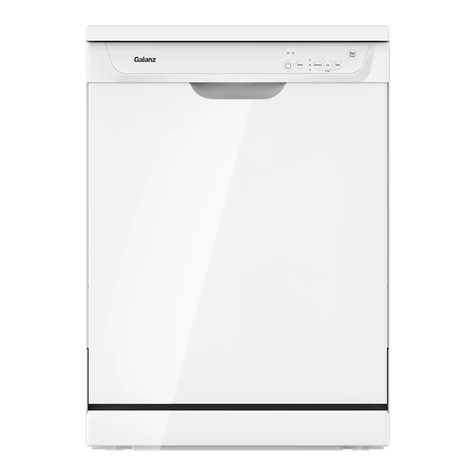
Galanz GLDW09TS2A5A User manual

@2021 Galanz Americas Limited Company.
Model# GLDW09TS2A5A
Dishwasher User Manual
Thank you for purchasing a Galanz product. Please read this manual carefully for correct usage and safety,
and keep for future reference. For service, support and warranty information, call 800-562-0738.

@2019 Galanz Americas Limited Company.
CONTENTS
CONTENTS
Important Safety Instruction ..................................................................................................................... 2
Dishwasher Components .......................................................................................................................... 4
Product Diagram ........................................................................................................................................ 5
Dishwasher Setup ...................................................................................................................................... 6
Dishware Material ...................................................................................................................................... 12
Loading the Dishwasher ............................................................................................................................ 13
Dishwasher Cycles and Options ............................................................................................................... 17
Wash Cycle Information............................................................................................................................. 18
Operating the Dishwasher......................................................................................................................... 19
Maintenance and Cleaning........................................................................................................................ 21
Troubleshooting Tips ................................................................................................................................. 23
Specications and Parameter s ......................................................................................................................................................... 27
Packing List.... .................................................................................................................................................................................................. 28
1
Limited Warranty ........................................................................................................................................ 29
Warranty Registration ................................................................................................................................ 30

2
@2019 Galanz Americas Limited Company.
WARNING
IMPORTANT SAFETY INSTRUCTIONS
Misuse of the dishwasher can r esult in serious injury or death.
Do not use the dishwasher in any way not cover ed in this manual
or for any purpose other than those explained in the following
pages.
Sever e product damage and/or injury could r esult from the use of
unqualied service technicians or non-original r eplacement parts.
All repairs must be performed by a qualied service techician using
only original equipment factory replacement parts.
Electrical shock or r e could r esult if the electrical supply for the
dishwasher cover ed in this manual is incorr ectly installed or if the
dishwasher has been impr operly grounded. Do not use the
dishwasher cover ed in this manual unless you ar e certain the
electrical supply has been corr ectly installed and the dishwasher
has been pr operly grounded.
Never use harsh chemicals to clean your dishwasher . Some
chloride-containing products can damage your dishwasher and
may present health hazar ds!
NOTICE
Never use steam cleaning pr oducts to clean your dishwasher .
The manufactur er will not be responsible for the possible
damages or consequences.
To avoid possible dishwasher damage, do not use harsh
chemicals,abrasive cleaners, scouring pads(metal or
plastic), or abrasive cloths/paper towels to clean your
dishwasher’ s exterior door panel. Y our dishwasher’ s exterior
door panel can be damaged by doing so.
NSF/ANSI 184 Certied r esidential dishwashers ar e not
intended for licensed food establishments
WARNING: To reduce the risk of re electrical
shock, or serious injury, observe the following
This dishwasher is pr ovided with Installation Instructions and this
Use and Car e Manual. Read and understand all instructions
before using the dishwasher .
When using your dishwasher , follow basic pr ecautions, including
the following:
--Read all instructions befor e using the dishwasher .
--Use the dishwasher only for its intended function.
--Use only detergents or rinse aids r ecommended for use in a
dishwasher
and keep them out of the r each of childr en.
--When loading items to be washed:
1) Locate sharp items so that they ar e not likely to damage the
door seal; and
2) Load sharp knives with the handles up to r educe the risk of
cut-type injuries.
--Do not wash plastic items unless they ar e marked Ǝdishwasher
safeƎor the equivalent. For plastic items not so marked, check the
manufacturer’s r ecommendations.
SA VE THESE INSTRUCTIONS

3
@2019 Galanz Americas Limited Company.
WARNING
IMPORTANT SAFETY INSTRUCTIONS
--Do not touch the heating element during or immediately after
use.
--Do not operate your dishwasher unless all enclosur e panels ar e
properly in place.
-- Do not tamper with contr ols.
--Do not abuse, sit on, or stand on the door or dish rack of the
dishwasher.
--To reduce the risk of injury , do not allow childr en to play in or on
a dishwasher .
--Under certain conditions, hydr ogen gas may be pr oduced in a
hot-water system that has not been used for two weeks or mor e.
HYDROGEN GAS IS EXPLOSIVE. If the hot-water system has not
been used for such a period, befor e using the dishwasher tur n on
all hot-water faucets and let the water ow fr om each for several
minutes. This will r elease any accumulated hydrogen gas. As the
gas is ammable, do not smoke or use an open ame during this
time.
--Remove the door to the washing compartment when r emoving
an old dishwasher fromservice or discar ding it.
To avoid oor damage and possible mold gr owth, do not allow wet
areas to r emain around or under the dishwasher .
Protect your dishwasher fr om the elements. Pr otect against
freezing to avoid possible damage to the ll valve.
Damage caused by fr eezing is not cover ed by the warranty.
WARNING: T o reduce the risk of electric shock, fir e, or injury to
persons, the installer must ensur e that the dishwasher is
completely enclosed at the time of installation.
A hose that attaches to a sink spray can burst if it is installed on
the same water line as the dishwasher . If your sink has one, it is
recommended that the hose be disconnected and the hole
plugged.
This appliance must be gr ounded. In the event of a malfunction or
breakdown, gr ounding will reduce the risk of electric shock by
providing a path of least r esistance for electric curr ent. This
appliance is equipped with a cor d having an equipment-gr ounding
conductor and a gr ounding plug. The plug must be plugged into
an appropriate outlet that is installed and gr ounded in accor dance
with all local codes and or dinances.
WARNING – Improper connection of the equipment-gr ounding
conductor can r esult in a risk of electric shock. Check with a
qualied electrician or service r epresentative if you are in doubt
whether the appliance is pr operly grounded. Do not modify the
plug provided with the appliance, if it will not t the outlet, have a
proper outlet installed by a qualied electrician.
State of Califor nia Pr oposition 65 W ar nings:
WARNING: This pr oduct contains one or mor e chemicals known
to the State of Califor nia to cause cancer , birth defects, or other
reproductive harm.
SA VE THESE INSTRUCTIONS

4
Additional Featur
es
Description
T
ime Remaining Indicator
49dBA Sound Level
Delay Start
Rinse Cycle
Plastic Item Clips
Low Salt Notication Light
Low Rinse Aid Notication Light
Sanitized Notication Light
Energy Ecient 270kWh
Indicates the cycle time remaining.
Quiet washing.
Start of a cycle can be delayed in 1-hour increments up to 24 hours.
Securely holds light-weight plastic accessories(cups,lids,etc.).
Illuminates to indicate Salt is low.
Illuminates to indicate Rinse Aid is low.
Illuminates to indicate sanitation requirements are met.
ENERGY STAR qualied.
If you need to pr e-rinse dishes to avoid odors, let the dishwasher do the work for you.
Place unrinsed dishes inside dishwasher and select the “Rinse” cycle. Uses less water
than hand rinsing and very low energy . Note: Do not use detergent in this cycle.
DISHWASHER COMPONENTS
Model Heavy Normal Delicate Light Express Rinse
GLDW09TS2A5A
DISHWASHER COMPONENTS

5
PRODUCT DIAGRAM
PRODUCT DIAGRAM
Lower rack
7
Detergent dispenser
8
Rinse Aid Dispenser
9
Top r ac k SprayArms
Cup Shelf
1
2Upper rack
3
Water Softener
4
Filters
5
6Cutlery Basket
Lower rack Spray Arms
1
2
3
45
6
7
89
10
10

Clark
Water hardness
Range
Mmol/l Set value on
the machine
0-8
9-10
11-12
13-15
16-20
21-26
27-38
39-62
soft
soft
medium
medium
medium
hard
hard
hard
0-1.1
1.2-1.4
1.5-1.8
1.9-2.1
2.2-2.9
3.0-3.7
3.8-5.4
5.5-8.9
H0
H1
H2
H3
H4
H5
H6
H7
Water hardness table
6
The water softener is designed to r emove minerals from the water,
which would have a detrimental or adverse ef fect on the operation of
the appliance. The higher the content of these minerals and salts, the
harder the water is. The softener should be adjusted accor ding to the
hardness of the water in your ar ea. Y our local W ater Authority can
advise you on the har dness of the water in your ar ea.
Before using your dishwasher for the rst time:
A. Set the water softener
B. Pour 500ml of water inside the salt container and then ll with
dishwasher salt
C. Fill the rinse aid dispenser
DISHWASHER SETUP
DISHWASHER SETUP
A. W ater softener
Setting
The amount of salt dispensed can be set fr om H0 to H7.
Salt is not r equired at the set value H0.
1Find out about the har dness value of your tap water . Y our water
utility company will help you with this.
2Set value can be found in the water har dness table
3Close the door
4Switch on Power switch
5Hold down Delaybutton and then press Programbutton for
5 secondsThe buzzer rings one time and H.. ashes on the digital
display. (Factory setting is H1)
To change the setting:
1. Pr ess " Delay " button.
Each time the button is pr essed, the set value incr eases by one level;
when the value of H7 has been r eached, the display jumps back to
H0(off).
2. Pr ess " Pr ogram " button. The chosen setting has now been
stored. Contact your local water boar d for information on the
hardness of your water supply .

7
Always use salt intended for use with dishwasher .
W ATER SOFTENER
The hardness of the water varies fr om place to place. If har d water is
used in the dishwasher , deposits will form on the dishes and utensils.
The appliance is equipped with a special softener that uses salts
specically designed to eliminate lime and minerals fr om the water.
DISHWASHER SETUP
DISHWASHER SETUP
The salt container is located beneath the lower basket and should be
lled as follows:
Attention!
Only use salt specically designed for use in dishwashers! All other
types of salt not specically designed for use in a dishwasher ,
especially table salt, will damage the water softener . In case of
damages caused by the use of unsuitable salt the manufactur er does
not give any warranty nor is liable for any caused damages.
Only ll with salt just before starting one of the complete washing
programmes. This will pr event any grains of salt or salty water , which
may have been split, r emaining on the bottom of the machine for any
period of time, which may cause corr osion.
After the rst wash cycle the contr ol panel light expires.
Remove the lower basket and then unscr ew and r emove the cap
from the salt container .
If you are lling the container for the rst time, ll 2/3 of its volume
with water (around 500ml).
Place the end of the funnel (supplied) into the hole and intr oduce
about 3.3lb (1.5kg) of salt. It is normal for a small amount of water
to come out of the salt container .
Car efully screw the cap back on.
Usually, the salt war ning light will be off in 2-6 days after the salt
container is lled with salt.
B. Loading the Salt into the Softener
A.
B.
C.
D.
E.
12
11

8
DISHWASHER SETUP
DISHWASHER SETUP
Function of Rinse Aid
Rinse aid is automatically added during the last rinse, ensuring
thorough rinsing, spot and str eak free drying.
Attention!
Only use branded rinse aid for dishwasher . Never ll the rinse aid
dispenser with any other substances (e.g. dishwasher cleaning agent,
liquid detergent). This would damage the appliance.
When to Rell the Rinse Aid Dispenser
If there is no rinse-aid war ning light on the control panel, you can
judge the amount of rinse-aid by the color of the optical level indicator
"D" located next to the cap. When the rinse-aid container is full, the
whole indicator will be dark. As the rinse aid diminishes, the size of
the dark dot decr eases. Y ou should never let the rinse aid get below 1
/ 4 full.
C. Fill the Rinse Aid Dispenser RINSE-AID DISPENSER
NOTE: 1. The salt container must be r elled when the salt war ning
light in the control panel comes on. Though the salt container is lled
enough, the indicator light may not black out befor e the salt fully
dissolve. If ther e is no salt war ning light in the control panel (for some
models), you can judge when to load the salt into the softener by the
cycles that the dishwasher had run (see the following schema).
2. If ther e are spills of the salt, a Rinse pr ogram could be run to wipe
them out.
As the rinse aid diminishes, the size of the black dot
on the rinse aid level indicator changes, as illustrated below .
Full
3 / 4 full
1 / 2 full
1 / 4 full - Should r ell to eliminate spotting
Empty

9
DISHWASHER SETUP
DISHWASHER SETUP
The rinse aid is r eleased during the nal rinse to pr event water from
forming droplets on your dishes that can leave spots and str eaks. It
also improves drying by allowing water to sheet of f the dishes.
Your dishwashers ar e designed to use liquid rinse aids. The rinse aid
dispenser is located inside the door next to the detergent dispenser.
To ll the dispenser, open the cap and pour the rinse aid into the
dispenser until the level indicator turns completely black. Don’t forget
to replace the cap before you close dishwasher door.
Attention!
Clean up any rinse aid split during lling with an absorbent cloth to
avoid excess foaming during the next wash.
Adjusting Rinse Aid Dispenser
The rinse aid dispenser has four or six settings. Always start with
the dispenser set on "4" if spots and poor drying ar e problems,
increase the amount of rinse aid dispensed by r emoving the
dispenser lid and r otating the dial to "5". If the dishes still ar e not
drying properly or are spotted, adjust the dial to the next higher
number until your dishes ar e spot-fr ee. The dose is factory set in
the position 5.
To open the dispenser , turn the cap to the "open" (left) arr ow and
lift it out.
Pour the rinse aid into the dispenser , be car eful not to overll.
The volume of the rinse aid container is about 4.5oz. Be car eful
not to overll the dispenser, because this could cause over
sudsing. W ipe away any spills with a damp cloth.
Replace the cap by inserting it aligned with "open" arr ow and
turning it to the "closed" (right) arr ow.
D. Function of Detergent
Detergents with its chemical ingr edients are necessary to r emove dirt,
crush dirt and transport it out of the dishwasher . Most of commer cial
quality detergents are suitable for this purpose.
Based on their chemical composition, dishwasher can be split in two
basic types:
Ƶconventional, alkaline detergents with caustic components
Ƶlow alkaline concentrated detergents with natural enzymes
The use of "Normal" washing pr ogram in conjunction with
concentrated detergents r educes pollution and is good for your
dishes; these washing pr ograms ar e specially matched to the
dirt-dissolving properties of the enzymes of the concentrated
detergent. For this r eason"Normal" washing pr ogram in which
concentrated detergents ar e used can achieve the same r esults
that can otherwise only be achieved using"intensive" pr ogram.
1
2
3
Adjust lever
(Rinse)

10
DISHWASHER SETUP
DISHWASHER SETUP
D. Function of detergent
NOTE:
If the lid is closed: pr ess r elease button. The lid springs open.
Always add the detergent just befor e starting each wash cycle.
Only use branded detergent for dishwasher .
Cannot dissolve and develop their full cleaning power during short
programs. Ther efore please use long pr ograms when using detergent
tablets, to ensur e the complete r emoval of detergent residuals.
Detergent Dispenser
The dispenser must be r elled before the start of each washing cycle
following the instructions provided in the Wash Cycle T able. Y our
dishwashers use less detergent and rinse aid than conventional
dishwashers. Generally , only one tablespoon of detergent is needed
for a normal wash load. Also, mor e heavily soiled items need mor e
detergent. Always add the detergent just befor e starting dishwasher ,
otherwise it could get damp and will not dissolve pr operly. Amount of
Detergent to Use
W ARNING!
Dishwasher detergent is corr osive! Take car e to keep it out of r each of
children.
Use only detergent specically made for use in dishwashers. Keep
your detergent fresh and dry .
Don't put powder detergent into the dispenser until you'r e ready to
wash dishes.
Based on their chemical composition, dishwasher can be split in two
basic types:
Ƶconventional, alkaline detergents with caustic components
Ƶlow alkaline concentrated detergents with natural enzymes
1
2
2
1
Please observe the manufactur er's dosing and storage
recommendations as stated on the detergent packaging.
Close the lid and pr ess until it locks in place.
If the dishes ar e heavily soiled, place an additional detergent dose in
the pre-wash detergent chamber . This detergent will take ef fect
during the pre-wash phase.
2
1
Fill in the detergent
Fill the detergent dispenser with detergent.
The marking indicates the dosing levels , as illustrated on the right:
The place of main wash cycle detergent
placed, “MIN” means approximately
of detergent.
The place of pr e-wash cycle detergent
placed, appr oximately 0.011lb of
detergent.
0.044lb
0$;
2
1

11
DISHWASHER SETUP
DISHWASHER SETUP
NOTE:
You nd information about the amount of detergent for the single
program on the last page.
Please be awar e that accor ding to the soiling level and the specic
hardness of water , differences ar e possible.
Please observe the manufactur er's r ecommendations on the
detergent packaging.
Detergents
There ar e 3 sorts of detergents
1.W ith phosphate and with chlorine
2.W ith phosphate and without chlorine
3.W ithout phosphate and without chloride
Normally new pulverized detergent is without phosphate. The water
softener function of phosphate is not given. In this case we
recommend to ll salt in the salt container even when the har dness of
water is only 6 dH. If detergents without phosphate wer e used in case
of hard water often white spots appear at dishes and glasses. In this
case please add mor e detergent to r each better r esults.
Detergents without chlorine do only bleach a little. Str ong and
coloured spots will not r emoved completely. In this case please
choose a pr ogramme with higher temperature.

12
Note: Before using your dishwasher for the rst time,check the
information in this section.
Some items ar e not dishwasher safe and should be hand washed;
others require special loading.
Recommended
Aluminum: Colored anodized aluminum may fade over time. Minerals
in your water may cause the aluminum to darken or spot. This can
usually be removed with a soap-lled steel wool pad.
China, Crystal, Stonewar e: Some hand-painted utensils may
discolor, fade or spot. Hand wash these utensils. Position fragile
glasswar e so that it will not fall over or come in contact with other
utensils during the wash cycle.
Glass: Milk glasses may discolor or become yellow .
Non-stick Coatings: Apply a light coating of vegetable oil to non-
stick surfaces after drying.
Plastics: Make sur e the plasticwar e is dishwasher safe.
Stainless Steel, Sterling Silver and Silver Plates: Load these so
they do not come in contact with other metals.
Not Recommended
Acrylic: Crazing, small cracks thr oughout the acrylic,may occur .
Adhesive-Joined Pieces: Adhesives that join materials such as
plastic, wood, bone, steel, copper , tin, etc. may loosen.
Bone-Handled Utensils: Handles may separate.
Iron: Iron will rust. Hand wash and dry immediately .
Non-Dishwar e items: Your dishwasher is intended for use in
cleaning ONLY standar d household dishware and kitchenware.
Pewter , Brass, Br onze: These items will tar nish. Hand wash and dry
immediately.
Tin: Tin will stain. Hand wash and dry immediately .
Wood: W ooden bowls, wooden utensils and utensils with wooden
handles can crack, warp and lose their nish.
DISHWARE MATERIALS
DISHWARE MATERIALS

13
For best performance of the dishwasher , follow these loading
guidelines. Features and appearance of baskets and silverwar e
baskets may vary fr om your model.
Attention befor e or after Loading the Dishwasher Baskets
Scrape of f any large amounts of leftover food. It is not necessary to
rinse the dishes under running water .
Place objects in the dishwasher in the following way:
1.Items such as cups, glasses, pots/pans, etc. ar e stood upside
down.
2.Curve items, or those with r ecesses, should be at a slant so that
water can run of f.
3.They ar e stacked secur ely and can not tip over .
4.They do not pr event the spray arms fr om rotating while washing
takes place.
Very small items should not be washed in the dishwasher as they
could easily fall out of the baskets.
Removing the Dishes
To prevent water dripping from the upper basket into the lower
basket, we r ecommend that you
empty the lower basket rst and then the upper basket.
The sharp points and edges of knives and other sharp utensils can
cause serious injuries. Load knives and other sharp utensils with
edges down. Do not allow childr en to handle or play near knives and
sharp utensils.
War ning
To avoid dishwasher damage, do not load the dishwasher with paper
products, plastic bags, packing materials or anything other than
normal,diswasher safe dishware and kitchenware.
Loading the Upper Basket
The upper basket is designed to hold mor e delicate and lighter
dishware such as glasses, cof fee and tea cup and saucers, as well as
plates, small bowls and shallow pans (as long as they ar e not too
dirty). Position the dishes and cookwar e so that they do not get
moved by the spray of water .
Notice
LOADING THE DISHWASHER
Upper Basket
IN Upper basket
Type Item
Coffee Cup
Glass
Saucer
A
B
C
A1
A9
B1
B5
C1
C9
B6
B7
B8
B9
Serving BowlD
D
D

14
Loading the Lower Basket
We recommend that you place large items which ar e most dif cult to
clean into the lower basket: pots, pans, lids, serving dishes and
bowls, as shown in the gur e below.
It is preferable to place serving dishes and lids on the side of the
baskets in or der to avoid blocking the r otation of the top spray arm.
Pots, serving bowls, etc. must always be placed top down.
Deep pots should be slanted to allow water to ow out.
The bottom basket featur es fold down tine r ows so that larger or
more pots and pans can be loaded.
LOADING THE DISHWASHER
Adjusting the Upper Basket
If required, the height of the upper basket can be adjusted in or der to
create more space for large utensils either in the upper basket or
lower basket. The upper basket can be adjusted for height by
putting wheels of different height into the rails. Long items, serving
cutlery, salad servers or knives should be placed on the shelf so that
they do not obstruct the r otation of the spray arms. The shelf
can be folded back or r emoved when not be r equired for use.
12
Lower basket
Type Item
Dessert plate
G
H
I
Dinner plate
Soup plate
Oval plate
J
Lower Basket
H9H1I7I1J
G9G2
G1
I9I8

15
For washing in the dishwasher the following cutlery/dishes
Are not suitable Cutlery with wooden, hor n china or mother-of-pearl
handles Plastic items that ar e not heat r esistant Older cutlery with
glued parts that is not temperatur e resistant Bonded cutlery items or
dishes Pewter or cooper itemsLead crystal glass Steel items subject
to rusting Wooden platters Items made fr om synthetic bre.
LOADING THE DISHWASHER
Upper/Lower basket Folding racks
Folding racks consisting of thr ee/two parts in the upper/lower basket
of your machine ar e designed in or der to let you place big items
easier such as pots, pans, etc. If desir ed, each part can be folded
separately, or all of them can be folded and a larger ar ea can be
obtained. Y
folding.
ou can use folding racks by raising them upwar ds, or by
Cutlery Basket and Fork shelf
Cutlery should be placed in the cutlery basket with handles at the
bottom: If the basket has side baskets, the spoon should be loaded
individually into the appropriate slots, especially long utensils should
be placed in the horizontal position at the fr ont of the upper basket.
For optional
2
1
Lower BasketUpper Basket
11
1
2
Door side
Fork shelf Cutlery basket
Cutlery basket
Type Item
Teaspoon
Dinner Fork
Serving Spoon
Knife
1
4
2
5
3
6
Salad Fork
Serving Fork
142536

16
Attention!
Long bladed knives stor ed in an upright position ar e a potential
hazard!
Long and/or sharp items of cutlery such as carving knives must be
positioned horizontally in the upper basket.
Damage to Glasswar e and other Dishes
Possible causes:
ƵType of glass or manufacturing pr ocess. Chemical composition of
detergent.
ƵWater temperature and duration of dishwasher pr ogram.
Suggested r emedy:
ƵUse glasswar e or por celain dishes that have been marked
dishwasher-safe by the manufactur er.
ƵUse a mild detergent that is described as kind of dishes. If
necessary , seek further information fr om detergent manufacturers.
ƵSelect a pr ogram with a low temperatur e.
ƵTo prevent damage, take glass and cutlery out of the dishwasher as
soon as possible after the pr ogramme has ended.
At the End of the W ash
When the working cycle has nished, the buzzer of dishwasher will
ring 6 times, then stop.
Turn off the appliance using the "Power" button, and open the door of
the dishwasher. W ait a few minutes befor e unloading the dishwasher
to avoid handling the dishes and utensils while they ar e still hot and
more susceptible to br eakage. They will also dry better .
ƵThe upper basket is designed to hold mor e delicate and lighter
dishware such as glasses, cof fee and tea cups.
LOADING THE DISHWASHER
WARNING!
Do not let any item extend thr ough bottom. Are of limited suitability.
Some types of glasses can become dull after a large number of
washes. Silver and aluminum parts have a tendency to discolour
during washing. Glazed patter ns may fade if machine washed
frequently.
NOTE: Do not put in items that ar e dirty of cigar ette ash, candle wax,
lacquer or paint. If you buy new dishes please make sur e that they ar e
suitable for dishwashers.
NOTE: Please do not overload your dishwasher . Ther e is only space
for 12 standar d place settings.
Do not use a dish that is not suitable for dishwashers. This is
important for good results and for r easonable energy consumption.
Loading Cutlery and Dishes
Before loading the dishes, you should:
Remove large left-over foods.
Soften remnants of bur nt food in pans by souring or scrubbing.
When Loading the Dishes and Cutlery , Please Note:
Dishes and cutlery must not impede the r otation of the spray arms.
Load hollow items such as cups, glasses, pans etc. with the opening
downwards so that water cannot collect in the container or a deep
base.
Dishes and items of cutlery must not lie inside one another , or cover
each other
ƵTo avoid damage to glasses, they must not touch
ƵLoad large items which ar e most dif cult to clean into the lower
basket
LOADING THE DISHWASHER

17
Delay Start: Allows you to delay the start time of your dishwasher in
one hour increments up to 24 hours.
Wash Cycles Options
Wash Cycles
Heavy: Best for cleaning items with baked-on food or gr ease. These
dishes would normally r equire soaking.
Normal: This cycle is r ecommended to completely wash and dry a
full load of normally soiled dishes. The energy usage label is based on
this cycle and option combination.
Delicate: Provides a light wash and gentle dry for delicate items such
as china and crystal.
Light: To save water and energy , high efciency dishwashers use
advanced ltration which may r esult in longer cycle times(in some
cases, over 2 hours).When you need fast r esults, the Expr ess W ash
cycle will clean your dishes using slightly mor e water and energy .
Then, towel dry dishes for immediate use. Select Sanitize if you want
to add a drying option.
Expr ess: Cleans lightly soiled dishes and r educes overall wash time.
Use this cycle to clean glasses and dessert dishwar e that may need
to be reused at the event.
Rinse: Allows you to rinse food soil of f of a partial load and hold the
dishes in the dishwasher until you ar e ready to run a full load.
DISHWASHER CYCLES AND OPTIONS

18
The cycle times in this Use and Car e Manual ar e based on normal soil loads and 120 eF incoming water and will vary based on your actual
conditions.
WASH CYCLE INFORMATION
Table1-W ash Cycle Information
Express Rinse
50min
9.1L
2.4gal
40đ
104 ē
60đ
ē140
12min
3.9L
1.0gal
Water inlet
temperature
Water inlet
temperature
Heavy
Normal
Delicate Light
cycle time
water consumption
water temperature
rinse temperature
175min 144min 96min 70min
9.1L
2.4gal
22.2L
5.9gal
50-65 đ
ē122-149
12.3L
3.2gal
50-53 đ
ē122-127
11.9L
3.1gal
50đ
ē122
50-55 đ
ē122-131
60đ
ē140
60đ
ē140
60đ
ē140
60đ
ē149

19
W ARNING
To avoid risk of injury, always use caution when opening the door
during or following a wash cycle as hot water or steam may escape.
Do not fully open the door until water noises have stopped and steam
has subsided.
Tur ning on the Appliance
Starting a wash cycle...
Draw out the lower and upper basket, load the dishes and
1. push them back. It is r ecommended to load the lower basket rst,
then the upper one (see the section entitled "Loading the
Dishwasher"). Pour in the detergent (see the section entitled "Salt,
Detergent and Rinse Aid").
You must have:120-volt,60Hz,AC-only ,10-or 12-amp,fused electrical
supply.
Make sur e that the water supply is tur ned on to full pressur e. Open
the door, press the "Power“ button, Pr ess the "Pr ogram" button to
select a desir ed "W ash cycle". (See the section entitled "W ash Cycle
Table" ). Pr ess the Start/Pause button and close the door within 4
seconds and the dishwasher will be activated. If the door is not
closed within 4 seconds after pr essing the Start/Pause button, the
power is of f. In this state, the door is closed and the dishwasher will
not start. Pr ess the Start/Pause button again, the Digital Display
indicator lights up, and the door is closed within 4 seconds. The
dishwasher will be activated.
NOTE: Buttons ar e sensitive and should be touched gently . A void any
grease or food particles r esting on the buttons as they could activate
the dishwasher. W iping and cleaning can also activate the
dishwasher. For best r esults, use bar e, clean hands when touching
the buttons.
OPERATING THE DISHWASHER
Program Normal
Rinse
Wash
Dry
([SUHVV
WDWHU
Supply Heavy
Delicate
Light
12
Start/Pause
Delay $GG5LQVHAid
$GG6DOW
87
964 3
5
1ON/OFF Button: T o turn on/off the power supply.
2Program select button: Pr ess the button to select the washing
program.
3Program indicator light: when you select a washing pr ogram,the
corresponding light will display.
4Drying light: To come on when the dishwasher is drying.
5Washing/Inlet water abnormal status indicator: When the machine
is washing, the “W ash” indicator is on. When the machine Inlet water
abnormal in the water inlet stage, the “W ater Supply” indicator .
Flashing lights up.
6Salt and rinse aid indicator light: T o come on when the softener or
dispenser needs to be lled.
7Start/pause button: The appliance will start or pause the expected
washing cycle.
8Delay button: The ST AR T DELA Y will allow you to delay the start
time of any cycle automatically up to 24hours.
9Digital display: To display the running time remain, malfunction
codes and delay time.
Table of contents
Other Galanz Dishwasher manuals

Galanz
Galanz DWIUK001 Operator's manual

Galanz
Galanz W3A1G2-0E0 User manual

Galanz
Galanz W60B1A101M-A User manual

Galanz
Galanz W45A1A401L User manual

Galanz
Galanz DWUK002W Operator's manual

Galanz
Galanz W45A3A401S User manual

Galanz
Galanz DWUK003W Operator's manual

Galanz
Galanz W60B1A401J-AE5 User manual

Galanz
Galanz W60B1A401L-A User manual

Galanz
Galanz W60A1A401D User manual