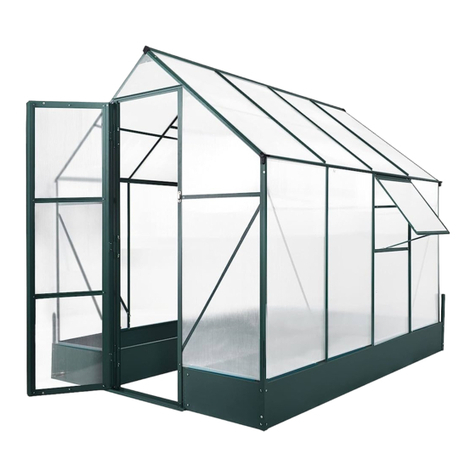
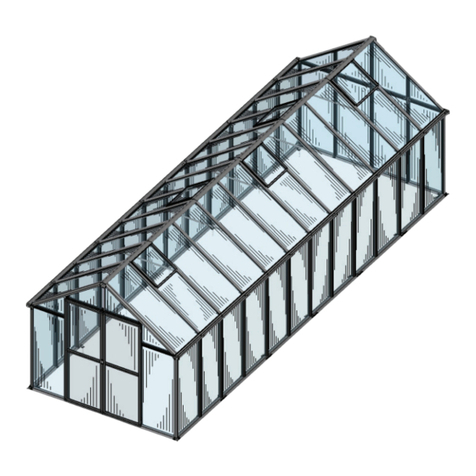
GardenMeister GM34404 User manual

Assembly Instructions

CONTENTS
1. Assembly Advice ................................................................Page 1
2. Product Features ................................................................Page 1 - 3
3. Parts List .............................................................................Page 4 - 8
7. Base Assembly ....................................................................Page 25 - 28
8. Framework Assembly ..........................................................Page 29 - 39
Overview of Front Wall .......................................................Page 10
Overview of Rear Wall ........................................................Page 11
Overview of Sides and Roof ...............................................Page 12 - 13
Overview of Roof Vents ......................................................Page 14
4. Overview of Doors ..............................................................Page 9
5. Roof Vent Assembly ..........................................................Page 15 - 17
6. Door Assembly ...................................................................Page 18 - 24
9. Glazing ................................................................................Page 40 - 48
Item No. & Packing List
GM34404
GM34406
GM34408
GM34410
4Section
AL
NO.1 PC/Glass
NO.1
2Section-1
AL
NO.3 PC/Glass
NO.2
1CTN 1CTN
1CTN 1CTN
1CTN 1CTN 2CTN 2CTN
1CTN 1CTN
Packing List
etc. etc.
256x261x250CM
380x261x250CM
504x261x250CM
628x261x250CM
AL
NO.2
1CTN
1CTN
1CTN
1CTN
etc.
1CTN 1CTN
3CTN 3CTN
etc. etc.etc.
Item No. Product Size
(LxWxH)

(4/6/8mm)PC Panel
(4/6/8mm)PC Panel
(3/6mm)Glass Panel
(4/6mm)Glass Panel
11
Functions and Features:
7mm/10mm
Assembly and Maintenance Advice
Free Tool Free Tool Free Tool Free Tool
1. For safety purposes, we strongly recommend that this product is assembled by at least
two people.
2. Some components have sharp metal edges. Please be careful when handling metal
components. Please wear gloves, shoes and safety goggles during assembly.
3. Lay all of the components on a soft carpet or blanket to avoid any scratches or damages.
4. DO NOT climb or stand on the roof. Heavy articles should not be leaned against
the greenhouse.
5. Keep the roof and gutter clear of snow, dirt & leaves. Allowing snow to build up on
the roof may damage the product.
6. Unlike steel, if the paint finish is scratched this will not harm the aluminium underneath.
7. When your product needs cleaning, use a mild detergent solution and rinse with cold
clean water. Do not use acetone, abrasive cleaners or strong detergents to clean
the panels.
1. Compared with traditional greenhouses this exciting new product features many significant
improvements. The hollow box profile aluminium framing is much stronger than other
greenhouses and it can withstand much greater pressure.
2. A great improvement for this new greenhouse is bar capping which is a neater and stronger
way to retain the glazing. Another benefit is that these greenhouses can be glazed with
glass or polycarbonate of varying thicknesses.
* If you are glazing this greenhouse with glass you will need to slide the rubber gaskets
into the bar capping.

Automatic Opener
2
Manual Opener
3. Base anchor brackets are included as standard with expanding bolts to ensure a secure
fixing into concrete or paving. Alternatively, you can use the brackets to fix into a
timber base with wood screws (not provided).
Expansion bolt
in concrete
4. Our unique frame connectors make much stronger joints than conventional greenhouses.
5. The strong two part eaves beam includes an integral gutter. Downpipes are also included
as standard so you can collect rainwater.
6. Manual window handles are included as standard with the roof vents. If required,
automatic roof vent openers are available as an inexpensive optional extra.
Steel bar/Lawn land

etc.
...
3
7. Remove approximately 2 inches of film from all sheet edges before installing and remove
all film immediately after the construction is completed. Please ensure that the side
with the white film faces outwards.
8. This product can be extended freely. We have basic 4 sections and EXT. 2 sections.
So, it can be extended to 6 sections or 8 or longer.
Attention: Framework for whole greenhouse needs to be completed before
installing polycarbonate panel/glass.
B01 B01 B01
B02 B02
B03
B03
L26
One Unit
9. Decorative crestings are available as an optional extra. Each 2' wide glazing panel in
the sides and roof requires one set. One set includes 3xB01, 2xB02, 2xB03 and 1xL26.
SUN
POLYCARBONATE
PANEL
White Film
Transparent Film
PC
sheet
Two sides of PC sheet are covered with thin films, one side's film is
white, another istransparent. The UV-protected side of PC sheet is
covered with white film and mustface towards the Sun.

GM34404(ALU. Box No.1)
ALU. Box No. 1
4
L03C 1
L03D 1
L11C 4
L08C 1
L03G 1
L12E 1
L05B 2
L13 1
PART NO QTY
L01A 2
L05A 4
L01B 2
L01C 2
L01D 2
L03E 1
L03F 1
L02C 1
L04A 6
L23 1
L11A 8
L11B 8
L11D 2
L11E 1
L10 1
L12C 2
L12D 2
L12F 1
L12G 6
L14 1
PART NO QTY
L16A 8
L17 2
L18A 2
L16B 8
L18B 1
L18C 1
L18D 4
L21C 8
L21D 8
L15A 2
L19A 4
L19B 2
L20 2
L21A 4
L21B 4
1
2
3
4
5
6
7
8
9
10
11
12
13
14
15
16
17
18

5
GM34404(ALU. Box No.2)
ALU. Box No. 2
PART NO QTY
L06B 1
L07B 2
L09B 2
L02A 6
L08C 2
L02B 6
L04A 2
L05C 8
L05D 6
L22 9
L22D 4
L11C 8
L12A 6
L12B 6
L12G 2
1
2
3
4
5
6
7
8
9
10
L30/J06 4
11
PART QTY
S14 175
M6X10
M03
M6
28
4X16D
Z02
180
S08 14
M8X60
220
4X16
Z22
5
4X8
Z04
9
4X50
Z12
S12 5
M8X30
M06
M8 5
S11 4
M6X20
S15 2
M4X10
H22
M4 2
H21 1
H23 2
H20 4
PART QTY
A26 6
D17 6
J09 2
J10R/L 2/2
J11 4
A27 8
A28 8
H18 4
D07 12
J12R/L 1/1
J94 4
J93 4
J92 4
A03 2
A01 2
D28 2
NEW OLD
A
W01
J01
J02R/L
J04
B
C
D
W05
J03R/L
J05
J07
J08
W08
W06
W09
W20
W21
W22
NEW OLD
S01
M01
Z02
S03
Z01
Z03
Z04
S02
M02
S04
S05
M05

6
L27 1
ALU. Box No. 3
(AU. Box No.3)
EXT. 2 Sections
A03 2
D07 4
S14 104
M6X10
M03
M6 113
S08 4
M8X60
62
Z22
PART QTY
4X16
D24 2
D25 2
D27 3
D26 1
A01 2
A27 8
9
Z02
4X16D
5
Z04
4X8
S11 8
M6X20
D28 2
PART NO QTY
L06 1
L07 2
L09 2
L02A 2
L08A 2
L02B 2
L04A 2
L05C 4
L05D 2
L22 3
L22A 4
L11C 4
L12A 4
L12B 4
L12G 2
L03A 2
L03B 2
L22C 6
1
2
3
4
5
6
10
7
8
9
11
L15A 2
L19A 4
L19B 2
L20 2
L21A 4
L21B 4
12
13
14
15
PART NO QTY
16
2
Z24
M5X25
NEW OLD
W06
W08
W05
S03
W02
W03
W04
W07
W09
S01
M01
S04
Z01
B
Z02
Z03
Z05

GM34404 (PC / Glass Box No. 1)
PC/Glass
N0.1
7
PART NO QTY
88M
J60
PART NO QTY
128M
Rubber for walls & roof
(Provided for glass only)
Rubber for walls only
(Provided for glass only)
J60
2
Y9
Y13 1
Y8 1
Y1 2
Y2 6
Y3 1
Y4 2
Y5 1
6
Y6 8
Y7
Y11 4
Y10 2
Y2
Y4
Y5 Y13
Y1
Y2
Y7
Y9
Y7
Y9
Y2
Y4 Y3 Y8 Y1
Y2Y2 Y2
Y7
Y7
Y6Y6Y6
Y6 Y6 Y6
Y7
Y7
Y6
Y6
Y11
Y11Y11
Y11

2
Y9
2
Y6 4
Y7
Y10 2PC/Glass
N0.2
8
(PC / Glass Box No. 2)
EXT. 2 Sections
PART NO QTY
23M
J60
PART NO QTY
40M
Rubber for walls & roof
(Provided for glass only)
Rubber for walls only
(Provided for glass only)
J60
Y7
Y9
Y6 Y6
Y7
Y9
Y6Y6

L18A
L18A
L16B
L16B
L18C
L18B
L18D
L18D
L16A
L16A
L16A
L16A
L16B
L16A L16A
L18D
L18D
L14
W03L
W03R
L16A
L16A
L17 L17
L16B
Y11 Y11
Y11
Y11
L21C L21C
L21D L21D
L21C L21C
L21D L21D
L21C L21C
Right Door
9
Aluminium Capping
Panels
Frames
PART NO QTY
L14 1
L16A 8
L17 2
L18A 2
L16B 8
L18B 1
L18C 1
L18D 4
L21C 8
L21D 8
PART NO QTY
A28 8
32
Z22
4X16
6
Z02
4X16D
PART NO QTY
Y11 4
8
4X50
Z12
H18 4
J12R/L 1/1
S12 4
M8X30
M06
M8 4
S14 3
M6X10
M03
M6 3
S15 2
M4X10
H22
M4 2
H21 1
H23 2
H20 4
Left Door
Door Assembly

L01A
L01B
L03E
L03F
L05A
L05A
L04A
L04A
L23
L02C
L01C L01D
L10
L11D
L11D
L12G
J09 L11B Y5 Y13
Y4
Y1
Y2
Y2
L12F
L11E
L12G
L12C
L12D
L30
L30
J93
J93
J92
J92
A26
A26
A26
D17
D17
D17
J11
J11
J10R
J94
L11A
J10L
J94
L11A
PART NO QTY
L01A 1
L05A 2
L01B 1
L01C 1
L01D 1
L03E 1
L03F 1
L02C 1
L04A 2
L23 1
L11A 4
L11B 4
L11D 2
L11E 1
L10 1
L12C 1
L12D 1
L12F 1
L12G 2
PART NO QTY
A26 3
D17 3
S14 31
M6X10
M03
M6
J09 1
J10R/L 1/1
J11 2
6
4X16D
Z02
31
D07 2
S08 2
M8X60
47
4X16
Z22
J94 2
L30 2
J93 2
J92 2
PART NO QTY
Y1 1
Y2 2
Y4 1
Y5 1
Y13 1
10
Front Wall Assembly
Overview
Aluminium Capping Panels
Frames

Y3 Y8
Y1
Y2
Y2
J92
Y4
Y2 Y2
J09 L11B
J10R
J10L
J94
J94
L30
L30
J93
J93
L11C L11C L11C L11C
L11A
L11A
L12D
L12C
L12E
L12G L12G L12G L12G
J11
J11
L08C
L01A
L01B
L03C L03D
L05A
L05A L04A
L04A
L01C L01D
J92
A26
A26
A26
D17
D17
D17
L04A L04A
L05B
L05B
L13
PART NO QTY
L01A 1
L05A 2
L01B 1
L01C 1
L01D 1
L03C 1
L03D 1
L04A 4
L11A 4
L11B 4
L11C 4
L08C 1
L12C 1
L12D 1
L12E 1
L12G 4
PART NO QTY
A26 3
D17 3
S14 37
M6X10
M03
M6
J09 1
J10R/L 1/1
J11 2
6
4X16D
Z02
37
D07 4
S08 4
M8X60
54
4X16
Z22
J94 2
L30 2
J93 2
J92 2
PART NO QTY
Y1 1
Y2 4
Y4 1
Y3 1
Y8 1
L03G 1
L05B 2
L13 1
L03G
11
Rear Wall Assembly
Overview
Aluminium Capping Panels
Frames

L15A 2
L19A 4
L19B 2
L20 2
L21A 4
L21B 4
A01 2
A27 4
8
Z02
4X16D
4
Z04
4X8
12
PART NO QTY
L06B 1
L07B 2
L09B 2
L02A 6
L08C 2
L02B 6
L04A 2
L05C 8
L05D 6
L22 9
L22D 4
L11C 8
L12A 6
L12B 6
L12G 2
A03 2
D07 8
S14 100
M6X10
M03
M6 104
S08 8
M8X60
82
4X16
Z22
PART NO QTY
Y6 8
Y7 6
Y9 2
D28 2
S11 4
M6X20
L11Cx8pcs
L12Ax6pcs
Y6x8pcs
Y7x6pcs
L09Bx2pcs
Y9x2pcs
L12Gx2pcs
L12Bx6pcs
L08Cx2pcs
L02Ax6pcs
L22Dx4pcs
L05Cx8pcs
L07Bx2pcs
W08x2pcs
Roof Vent Assemblyx2pcs
L06Bx1pc
L05Dx6pcs
L04Ax2pcs
L02Bx6pcs
Y10 2
Sides and Roof Assembly
Overview of Sides and Roof

PART NO QTY
L06 1
L07 2
L09 2
L02A 2
L08A 2
L02B 2
L04A 2
L05C 4
L05D 2
L22 3
L22A 4
L11C 4
L12A 4
L12B 4
L12G 2
A03 2
D07 4
S14 102
M6X10
M03
M6 110
S08 4
M8X60
58
Z22
PART NO QTY
4X16
L03A 2
L03B 2
L22C 6
D24 2
D25 2
D27 3
D26 1
PART NO QTY
Y6 4
Y7 2
Y9 2
13
D28 2
S11 8
M6X20
L27 1
2
Z24
M5X25
L03A
L03A
L12A
L12A
L03B
L12B
D24
D24
D25
D27
D27
D27
D25
D26
L22C
L22C
L22C
2 Section
+
L27
L08Ax2pcs
L02Ax2pcs
L22Ax4pcs
L05Cx4pcs
L07x2pcs
W08x2pcs
Roof Vent Assemblyx2pcs
L06x1pc
L05Dx2pcs
L04Ax2pcs
L02Bx2pcs
L11Cx4pcs
L12Ax2pcs
Y6x4pcs
Y7x2pcs
L09x2pcs
Y9x2pcs
L12Gx2pcs
L12Bx2pcs
Middle Section Assembly Instruction
L12B
L15A 2
L19A 4
L19B 2
L20 2
L21A 4
L21B 4
A27 8
Y10 2
8
Z02
4X16D
4
Z04
4X8
A01 2
EXT. 2 Sections Assembly
Overview of Sides and Roof

L15A
L20
L19A L19A
L19B
A01
A27
A27
A27
A27
Y10
L21B
L21B
L21A L21A
PART NO QTY
L15A 1
L19A 2
L19B 1
L20 1
L21A 2
L21B 2
A01 1
PART NO QTY
A27 4
8
Z22
4X16
4
Z02
4X16D
PART NO QTY
Y10 1
2
Z04
4X8
14
Roof Vent Assembly
Overview

15
A27
A27
L20
L19A
L19A L19B
12
1
1
2
2
A27 A27
L19A
L20
L19A
L19B
A27
A27
After connector A27 has been fitted,
use the hole in the profile to tighten
the connector in place.
Push down the button on connector A27 before inserting it
into the end of the frame profile.

16
Z22
Y10
Y10
L21B
L21A
L21A
L21B
L21A/L21B
Z22
First the glazing panel Y10 should be loosely retained by the bar capping
profiles L21A and L21B. Next tap the bar capping gently into position
with a rubber mallet, then fix the bar capping securely with Z22 screws.

17
L15A L15A
Z02
2121
2
Z04 Z04
A01
Y10
Z02
3
Install the Z02 screws to prevent the L15A from sliding off the vent.
Fix the A01 vent handles using Z04 screws.
If required, automatic vent openers can be installed
once the greenhouse is complete.
Fill silicone sealant all around Y10 and the gaps between the aluminium frames to avoid
any water leaking

L18A
L18A
L16B
L16B
L18C
L18B
L18D
L18D
L16A
L16A
L16A
L16A
L16B
L16A L16A
L18D
L18D
L14
W03L
W03R
L16A
L16A
L17 L17
L16B
Y11 Y11
Y11
Y11
L21C L21C
L21D L21D
L21C L21C
L21D L21D
L21C L21C
Left Door Right Door
18
PART NO QTY
L14 1
L16A 8
L17 2
L18A 2
L16B 8
L18B 1
L18C 1
L18D 4
L21C 8
L21D 8
PART NO QTY
A28 8
32
Z22
4X16
6
Z02
4X16D
PART NO QTY
Y11 4
8
4X50
Z12
H18 4
J12R/L 1/1
S12 4
M8X30
M06
M8 4
S14 3
M6X10
M03
M6 3
S15 2
M4X10
H22
M4 2
H21 1
H23 2
H20 4
Door Assembly
This manual suits for next models
3
Other GardenMeister Greenhouse Kit manuals