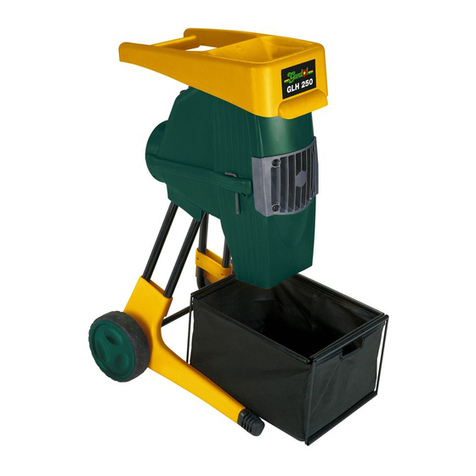
Gardol GLH 250 SB User manual

Art.-Nr.: 20006617
Art.-Nr.: 34.305.41 I.-Nr.: 01017 GLH 250 SB
(Bedienungsanleitung
Gartenhäcksler
tOperating Instructions
Refuse shredder
sMode dʼemploi
Broyeurs
*Manual de instrucciones
Trituradora para jardín
+Manuale istruzioni
Biotrituratori
lBetjeningsvejledning
Kompostkværn
8Bruksanvisning
Kompostkvarn
9Käyttöohje
Sähkökäyttöinen puutarhasilppuri
@Kezelési utasítás
Kerti komposztaprító
BNaputak za uporabu
Vrtna sječkalica
jNávod k obsluze
Zahradní drtič
VNavodila za uporabo
Vrtni rezalnik
Kullanma Talimat∂
Dal Öğütücüsü
MBruksanvisning
kompostkvern
ENotandaleiðbeiningar
Greinakuriari
HZaru smalcinātāja lietošanas
lietošanas instrukcija
Anleitung GLH_250_SB_SPK7:_ 30.07.2007 9:33 Uhr Seite 1

2
(Bitte Seite 2-5 ausklappen
tPlease fold out page 2 - 5
sVeuillez déplier les pages 2-5
*Desdoblar página 2-5
+Aprite le pagine dalla 2 alla 5
lKlap side 2-5 ud
Fäll ut sidorna 2-5
qOle hyvä ja käännä sivut 2-5 auki
@Kérjük a 2-től – 5-ig levőoldalakat szétnyitni
BOtvorite stranice 2-5
jNalistujte prosím stranu 2-5
XProsimo razgrnite strani 2-5
Lütfen Sayfa 2-5’i aç∂n
Vennligst brett ut side 2-5
EFletti› bls. 2-5 frá
HLūdzu, atveriet 2.-5. lpp.
Anleitung GLH_250_SB_SPK7:_ 26.06.2007 9:09 Uhr Seite 2

3
1
3
1
2
8910
11
3
4
5
12
13
14 15
1611
7
6
210 9 32
5
4
Anleitung GLH_250_SB_SPK7:_ 26.06.2007 9:09 Uhr Seite 3

4
45
6 7
89
3
A
A
1
12+13
12+13
Anleitung GLH_250_SB_SPK7:_ 26.06.2007 9:10 Uhr Seite 4

5
10 11
12
14
A
11
11
13
DC
E
B
Anleitung GLH_250_SB_SPK7:_ 26.06.2007 9:10 Uhr Seite 5

6
DE
Inhaltsverzeichnis Seite
1. Allgemeine Sicherheitshinweise 7
2. Technische Daten 7
3. Gerätebeschreibung und Lieferumfang 7
4. Bestimmungsgemäßer Gebrauch 7
5. Montage 8
6. Betrieb 8
7. Wartung und Lagerung 9
8. Entsorgung 10
9. Ersatzteilbestellung 10
10. Fehlersuche 11
Anleitung GLH_250_SB_SPK7:_ 26.06.2007 9:10 Uhr Seite 6

7
DE
Verpackung:
Das Gerät befindet sich in einer Verpackung
um Transportschäden zu verhindern. Diese
Verpackung ist Rohstoff und ist somit
wiederverwendbar oder kann dem
Rohstoffkreislauf zurückgeführt werden.
Beim Benutzen von Geräten müssen einige
Sicherheitsvorkehrungen eingehalten
werden, um Verletzungen und Schäden zu
verhindern:
Lesen Sie die Bedienungsanleitung
sorgfältig durch und beachten Sie deren
Hinweise. Machen Sie sich anhand dieser
Gebrauchsanweisung mit dem Gerät, dem
richtigen Gebrauch sowie den
Sicherheitsvorschriften vertraut.
Bewahren Sie diese gut auf, damit Ihnen
die Informationen jederzeit zur Verfügung
stehen.
Falls Sie das Gerät an andere Personen
übergeben sollten, händigen Sie diese
Bedienungsanleitung bitte mit aus.
Wir übernehmen keine Haftung für Unfälle
oder Schäden, die durch Nichtbeachten
dieser Anleitung entstehen.
1. Allgemeine
Sicherheitshinweise
Die allgemeinen Sicherheitsvorschriften und
die Erklärung der Hinweisschilder auf dem
Gerät entnehmen Sie bitte den beiliegenden
Heftchen.
2. Technische Daten
Netzspannung 230 V ~ 50 Hz
Leistungsaufnahme 2500 Watt (S6-40%)
2000 W (S1)
Leerlaufdrehzahl Messerwalze 40 min-1
Astdurchmesser max. 40 mm
Schalldruckpegel LpA 87,3 dB (A)
Schallleistungspegel LWA 96,3 dB (A)
Gewicht: 28 kg
Die Betriebsart S6 (40%) bezeichnet ein
Belastungsprofil, das 4 min Belastung und 6
min Leerlauf annimmt. Max. je nach
Beschaffenheit des Häckselgutes.
3. Gerätebeschreibung und
Lieferumfang (Abb. 1-3)
1. Motoreinheit
2. Häckselgutfangbox
3. Untergestell
4. Räder
5. Radkappen
6. Knauf zur Gegenmesser-Einstellung
7. Integrierter Netzstecker
8. Transportgriff
9. Drehrichtungsumschalter
10. Ein-/Ausschalter
11. Standfüße (incl. Befestigungsschraube)
12. 3x Schraube für Montage Motoreinheit
13. 3x Beilagscheibe für Montage Motoreinheit
14. 2x Schraubensatz für Radmontage (incl.
Radbuchse, Beilagscheiben und Mutter)
15. 2x Gabelschlüssel (SW 10/13)
16. 1x Kreuzschlitzschraubendreher
o. Abb.: 1 x Sicherheitshinweisheft
4. Bestimmungsgemäßer
Gebrauch
Der Elektrogartenhäcksler ist nur zum
Zerkleinern von organischem Gartenabfall
bestimmt. Führen Sie das biologisch
abbaubare Material wie z.B. Blätter, Zweige,
usw. in den Einfülltrichter ein.
Bitte beachten Sie, dass unsere Geräte
bestimmungsgemäß nicht für den
gewerblichen, handwerklichen oder
industriellen Einsatz konstruiert wurden. Wir
übernehmen keine Gewährleistung, wenn das
Gerät in Gewerbe-, Handwerks- oder
Industriebetrieben sowie bei
gleichzusetzenden Tätigkeiten eingesetzt wird.
Anleitung GLH_250_SB_SPK7:_ 26.06.2007 9:10 Uhr Seite 7

8
DE
5. Montage
1. Motoreinheit (Abb. 4/ Pos.1) mit Unter-
gestell (Abb. 4/ Pos.3) verschrauben.
Verwenden Sie hierzu die Schrauben (Abb.
3/ Pos. 12) und Beilagscheiben (Abb. 3/
Pos. 13).
2. Montieren Sie die Räder am Untergestell.
Schieben Sie hierzu je eine Buchse in die
Bohrung eines Rades (Abb.6).
Anschließend je 1 Schraube mit
Beilagscheibe durch die Buchse stecken
(Abb.7) und die Räder mit dem Untergestell
verschrauben (Abb.8). Legen Sie hierzu je
eine Beilagscheibe vor und nach dem
Rohrgestänge unter. Drücken Sie die
Radkappen auf die Räder (Abb.9).
3. Standfüße (Abb. 10/ Pos. 11) wie in Abb.
10 dargestellt am Untergestell montieren.
4. Häckselgutfangbox mit Sicherheitsschalter
(Abb. 12/ Pos. A) voran wie in Abb. 11
dargestellt in die Aufnahme schieben.
Achten Sie dabei darauf, dass die
Häckselgutfangbox oberhalb der
Führungsschienen (Abb. 4/Pos. A) läuft.
5. Häckselgutfangbox mit Sicherheitsschalter
(Abb. 12/ Pos. A) durch nach oben
schieben verriegeln.
6. Betrieb
Beachten Sie zu Betriebszeiten die gesetz-
lichen Bestimmungen zur Lärmschutzverord-
nung, die örtlich unterschiedlich sein können.
6.1 Netzanschluss
Schließen Sie das Gerät mit einem Verlänger-
ungskabel am integrierten Netzstecker
(Abb.13/ Pos. E) an. Beachten Sie hierzu auch
die Angaben in den Sicherheitshinweisen.
6.2 Ein-/ Ausschalter (Abb. 13/ Pos. B)
Zum Einschalten des Häckslers den grünen
Knopf drücken.
Zum Ausschalten den roten Knopf drücken.
Hinweis: Das Gerät verfügt über einen
Nullspannungsschalter. Dieser verhindert,
dass das Gerät nach einer
Stromunterbrechung unbeabsichtigt wieder
anläuft.
6.3 Sicherheitsschalter (Abb. 12/ Pos. A)
Zum Betrieb muss die Häckselgutfangbox sich
in ihrer Position befinden und der
Sicherheitsschalter wie in Abb. 12 dargestellt
verriegelt sein.
6.4 Drehrichtungsumschalter
(Abb.13/ Pos. C)
Achtung! Nur bei abgeschaltetem Häcksler
darf der Drehrichtungsumschalter betätigt
werden.
Stellung "⇓”
Vom Messer wird das Material automatisch
eingezogen und gehäckselt.
Stellung "⇑”
Das Messer arbeitet in entgegengesetzte
Drehrichtung, und eingeklemmtes Material wird
frei. Nachdem der Drehrichtungsum-schalter in
die Stellung "⇑” gebracht wurde, den grünen
Knopf des Ein-/Aus-Schalters gedrückt halten.
Das Messer wird auf entgegengesetzte
Drehrichtung gestellt. Wird der Ein-/Aus-
Schalter losgelassen, bleibt der Häcksler
automatisch stehen.
Achtung! Stets warten, bis der Häcksler
stillsteht, bevor er wieder eingeschaltet
wird.
Große Gegenstände oder Holzstücke werden
nach mehrmaliger Betätigung sowohl in
Schneide- als auch in Freigaberichtung
entfernt.
6.5 Motorschutz (Abb. 13 / Pos. D)
Eine Überlastung (z. B. Blockade der Messer)
führt nach ein paar Sekunden zum Stillstand
des Gerätes.
Um den Motor vor Beschädigung zu schützen
schaltet der Motorschutzschalter die
Stromzufuhr automatisch ab. Mindestens 1
Minute warten, bevor der Rückstellknopf für
den Neustart gedrückt werden kann.
Anschließend drücken Sie den Ein-/Aus-
Schalter.
Anleitung GLH_250_SB_SPK7:_ 26.06.2007 9:10 Uhr Seite 8

9
DE
Ist das Messer blockiert, schalten Sie den
Drehrichtungsumschalter in die Stellung "⇑”,
bevor Sie den Häcksler wieder einschalten.
6.6 Arbeitshinweise
Beachten Sie die Sicherheitshinweise
(beiliegendes Heftchen).
Arbeitshandschuhe, Schutzbrille und
Gehörschutz tragen.
Das zu häckselnde Material auf der Seite
mit der größeren Öffnung am Einfülltrichter
einfüllen.
Zugeführtes Häckselgut wird automatisch
eingezogen. ACHTUNG! Längeres, aus
dem Gerät ragendes Häckselgut kann beim
Einziehen rutenartig ausschlagen –
ausreichenden Sicherheitsabstand
einhalten.
Nur soviel Häckselgut einführen, dass der
Einfülltrichter nicht verstopft.
Welke, feuchte, bereits mehrere Tage
gelagerte Gartenabfälle sind im Wechsel
mit Ästen zu häckseln. Dadurch wird ein
Festsetzen des Häckselgutes im
Einfülltrichter vermieden.
Weiche Abfälle (z.B. Küchenabfälle) nicht
häckseln sondern direkt kompostieren.
Stark verzweigtes, laubhaltiges Gut erst
vollkommen häckseln, bevor neues
Häckselgut nachgeführt wird.
Die Auswurföffnung darf nicht durch
gehäckseltes Material verstopft werden –
Rückstaugefahr.
Die Lüftungsschlitze dürfen nicht abgedeckt
werden.
Vermeiden Sie das ununterbrochene
Einführen von schwerem Material oder
starken Ästen. Dies kann zur Blockierung
der Messer führen.
Benutzen Sie einen Stopfer (aus Holz) zum
Entfernen von blockierten Gegenständen
aus der Einfülltrichteröffnung, bzw. einen
Haken zum Entfernen von blockierten
Gegenständen aus der Auswurföffnung.
Hinweis: Das Häckselgut wird durch die
Messerwalze gequetscht, zerfasert und
geschnitten, was den Zerfallsprozess beim
Kompostieren begünstigt.
6.7 Entleeren der Häckselgutfangbox
Der Füllstand der Häckselgutfangbox kann
durch die seitlichen Schlitze an der Abdeckung
eingesehen werden.
Entleeren Sie die Häckselgutfangbox
rechtzeitig um ein Überfüllen zu vermeiden.
Zum Entleeren gehen Sie wie folgt vor:
Gerät am Ein-/Ausschalter ausschalten.
Häckselgutfangbox entriegeln. Hierzu den
Sicherheitsschalter (Abb. 12/ Pos. A) nach
unten schieben.
Häckselgutfangbox nach vorne entnehmen.
6.8 Einstellung des Gegenmessers
(Abb. 14)
Gegenmesser und Messerwalze sind vom
Werk optimal justiert. Nur bei Abnutzung ist
eine Nachjustierung (dazu Gerät einschalten)
des Gegenmessers erforderlich. Für einen
optimalen Betrieb ist es nötig, dass der
Abstand zwischen Gegenmesser (Abb14/Pos.
B) und Häckselmesser (Abb14/Pos. A) ca.
0,50 mm beträgt.
Auf der rechten Seite des Kunststoffgehäuses
befindet sich hierzu eine Einstellvorrichtung.
Drehen Sie den Knauf nach rechts, so dass
sich die Schraube (Abb14/Pos. C) zum
Häckselmesser hin bewegt. Nach einer halben
Drehung haben Sie das Gegenmesser 0,50
mm näher an das Häckselmesser gebracht.
Prüfen Sie nach dieser Einstellung, ob das
Messer wie gewünscht schneidet.
ACHTUNG: Falls das Häckselmesser das
Gegenmesser berührt, wird dieses
nachgeschnitten und kleine Metallspäne
können aus der Auswurföffnung fallen. Dies ist
kein Fehler, jedoch darf nur im erforderlichen
Maß nachjustiert werden, da sonst das
Gegenmesser vorzeitig verschleißt.
7. Wartung und Lagerung
Reinigen Sie das Gerät regelmäßig.
Dadurch gewährleisten Sie die
Funktionstüchtigkeit und eine lange
Lebensdauer.
Halten Sie während der Arbeit die
Lüftungsschlitze sauber.
Anleitung GLH_250_SB_SPK7:_ 26.06.2007 9:10 Uhr Seite 9

10
DE
Den Kunststoffkörper und die
Kunststoffteile mit leichtem
Haushaltsreiniger und einem feuchten
Tuch säubern. Verwenden Sie für die
Reinigung keine aggressiven Mittel oder
Lösungsmittel!
Den Häcksler nie mit Wasser abspritzen.
Vermeiden Sie unbedingt ein Eindringen
von Wasser in das Gerät.
Prüfen Sie die Befestigungsschrauben des
Fahrgestells von Zeit zu Zeit auf festen Sitz.
Wenn Sie den Häcksler länger nicht
benutzen, schützen Sie ihn mit
umweltfreundlichem Öl vor Korrosion.
Lagern Sie das Gerät in einem trockenen
Raum.
Lagern Sie das Gerät ausserhalb der
Reichweite von Kindern
8. Entsorgung
Zubehör und Verpackung einer
umweltgerechten Wiederverwertung
zugeführen. Zum sortenreinen Recycling sind
Kunststoffteile gekennzeichnet.
9. Ersatzteilbestellung
Bei der Ersatzteilbestellung sollten folgende
Angaben gemacht werden:
Typ des Gerätes
Artikelnummer des Gerätes
Ident- Nummer des Gerätes
Ersatzteil- Nummer des erforderlichen
Ersatzteils
Aktuelle Preise und Infos finden Sie unter
www.isc-gmbh.info
Anleitung GLH_250_SB_SPK7:_ 26.06.2007 9:10 Uhr Seite 10

11
DE
Störung Ursache Behebung
Motor läuft nicht Stromunterbrechung Netzleitung, Stecker und
Sicherung prüfen
Zu häckselndes Material wird
nicht eingezogen
Häckselmesser läuft rückwärts
Materialstau im Einfülltrichter
Häckselmesser ist blockiert
Drehrichtung umschalten
Drehrichtung umschalten und
das Material aus dem Einfüll-
trichter ziehen. Dicke Zweige
neu einführen, so dass das
Messer nicht sofort in die
vorgeschnittenen Kerben greift.
Drehrichtung umschalten. Das
Messer gibt das verklemmte
Material frei.
Zu häckselndes Material wird
nicht richtig gehäckselt
Gegenmesser falsch
eingestellt
Gegenmesser einstellen. Siehe
hierzu Kapitel 6.8
10. Fehlersuche
Anleitung GLH_250_SB_SPK7:_ 26.06.2007 9:10 Uhr Seite 11

Table of contents Page
1. General safety instructions 13
2. Technical data 13
3. Layout and items supplied 13
4. Intended use 13
5. Installation 13
6. Operation 14
7. Maintenance and storage 15
8. Waste disposal 15
9. Ordering spare parts 15
10. Troubleshooting 16
12
GB
Anleitung GLH_250_SB_SPK7:_ 26.06.2007 9:10 Uhr Seite 12

Packaging
The unit is supplied in packaging to prevent it from
being damaged in transit. The raw materials in this
packaging can be reused or recycled.
When using the equipment, a few safety
precautions must be observed to avoid injuries
and damage.
앬Read the operating instructions carefully and
comply with them at all times. It is important to
consult these instructions in order to acquaint
yourself with the unit, its proper use and the
important safety regulations.
앬Keep this manual in a safe place, so that the
information is available at all times.
앬If you give the equipment to any other person,
make sure that you pass on these operating
instructions as well.
We can accept no liability for damage or
accidents which arise due to non-compliance
with these instructions.
1. Safety information
The corresponding safety information can be found
in the enclosed booklet.
2. Technical data
Voltage: 230 V ~ 50 Hz
Power rating: 2500 W (S6-40%)
2000 W (S1)
Cutting unit idling speed 40 min-1
Branch diameter: max. 40 mm
LpA sound pressure level: 87,3 dB (A)
LWA sound power level: 96,3 dB (A)
Weight: 28 kg
S6 (40%) stands for a duty cycle based on 4 minutes
on-load and 6 minutes off-load operation. Maximum
power consumption depends on the consistency of
the material being shredded.
3. Layout and items supplied (Fig. 1-3)
1. Motor unit
2. Shredded material debris box
3. Base frame
4. Wheels
5. Wheel caps
6. Knob for setting the counter blade
7. Integral power plug
8. Transport handle
9. Reverse running switch
10. ON/OFF switch
11. Legs (including fastening screw)
12. 3x screws for fitting the motor unit
13. 3x washers for fitting the motor unit
14. 2x sets of screws for fitting the wheels (including
wheel sleeves, washers and nuts)
15. 2x open-ended spanners (10/13 mm)
16. 1x Philips screwdriver
Not illustrated: 1 x safety instruction booklet
4. Proper use
This electric garden refuse shredder is designed only
for shredding organic garden waste. Place biologi-
cally degradable material, e.g. leaves, branches,
dead flowers etc., into the loading funnel inlet.
Please note that our equipment has not been
designed for use in commercial, trade or industrial
applications. Our warranty will be voided if the
machine is used in commercial, trade or industrial
businesses or for equivalent purposes.
5. Installation
1. Screw the motor unit (Fig. 4/Item 1) and the base
frame (Fig. 4/Item 3) together. Use the screws
(Fig. 3/Item 12) and washers (Fig. 3/Item 13) to
do so.
2. Fit the wheels to the base frame. To do so, slide
one sleeve each into the hole in each of the
wheels (Fig. 6). Then insert one screw with
washer through each sleeve (Fig. 7) and screw
the wheels to the base frame (Fig. 8). To do so,
fit one washer in front of the tubular rod and one
behind it. Press the wheel caps onto the wheels
(Fig. 9).
3. Fit the legs (Fig. 10/Item 11) to the base frame
as shown in Fig. 10.
4. Slide the shredded material debris box into the
mount with the safety switch (Fig. 12/Item A) at
the front as shown in Fig. 11. Ensure that the
13
GB
Anleitung GLH_250_SB_SPK7:_ 26.06.2007 9:10 Uhr Seite 13

shredded material debris box runs above the
guide rails (Fig. 4/Item A).
5. Lock the shredded material debris box with
safety switch (Fig. 12/Item A) in position by
pushing upwards.
6. Operation
Please observe the statutory regulations governing
noise abatement during operating times, which may
differ from town to town.
6.1 Mains connection
Connect the device with an extension lead
connected to the integrated power plug (Fig. 13/Item
E). Be sure to observe the relevant information in the
safety instructions.
6.2 ON/OFF switch (Fig. 13/Item B)
앬Press the green knob to switch on the shredder.
앬Press the red knob to switch it off.
Note: The device has a zero voltage switch. This
prevents the device restarting unintentionally after a
power failure.
6.3 Safety switch (Fig. 12/Item A)
When using the device the shredded material debris
box must be securely in position and the safety
switch locked as shown in Fig. 12.
6.4 Direction selection switch (Fig.13/Item C)
Important! The switch for selecting the direction
of rotation can only be moved when the shredder
is switched off.
Position “⇓”
The material is automatically drawn in by the blade
and shredded.
Position “⇑”
The blade rotates in the opposite direction to release
jammed material. After moving the selector switch to
the “⇑” position, press and hold the green knob of the
ON/OFF switch. The blade will start to rotate in the
opposite direction. As soon as you release the
ON/OFF switch, the shredder will stop automatically.
Important! Always wait until the shredder has
reached a standstill before you switch it on
again.
Large items or pieces of wood will be discharged
both in the cutting and in the release direction after
the blade has been started and reversed several
times.
6.5 Motor protection (Fig. 13 / Item D)
An overload (for example if the blade is jammed) will
cause the machine to cut out after a few seconds. To
protect the motor from damage the motor protection
switch stops the power supply automatically. Wait for
at least one minute before you press the reset knob
so that you can restart the machine.
Then press the ON/OFF switch.
If the blade becomes jammed, turn the switch for
selecting the direction of rotation to the left to
position “⇑” before you switch on the shredder again.
6.6 Practical tips
앬Be sure to observe the safety instructions (see
supplied booklet).
앬Wear work gloves, goggles and ear protection.
앬Place the material you wish to shred into the ope-
ning on the right-hand side (the blade rotates anti-
clockwise).
앬The material is drawn into the shredder automatic-
ally. CAUTION! Long pieces of material projecting
out of the funnel inlet may whiplash when it is
drawn in – keep a safe distance between yourself
and the machine.
앬Judge the quantity of material which you put into
the funnel inlet so that the funnel does not clog.
앬If you want to shred withered, damp material that
has been lying in the garden for several days,
alternate between putting in this material and
branches. This will help to prevent the loading
funnel becoming clogged with material.
앬Do not shred soft waste (e.g. kitchen waste) – put
it straight in the compost box.
앬Entangled branches and leaves should be tho
roughly shredded before loading any more materi-
al.
앬Do not allow the discharge opening to become
clogged with shredded material – risk of pile-ups.
앬Do not cover the ventilation slits.
앬Do not place heavy material or thick branches into
the machine continuously. This may cause the
blade to jam.
앬Use a plunger or hook to remove jammed objects
from the funnel or discharge openings.
Important: The material will be crushed, mashed
and shredded by the cutting unit, thus accelerating
the decomposition process for composting.
6.7. Emptying the shredded material debris box
The level of material in the shredded material debris
box can be checked by looking through the slots on
the side of the cover.
Always empty the shredded material debris box in
14
GB
Anleitung GLH_250_SB_SPK7:_ 26.06.2007 9:10 Uhr Seite 14

good time to prevent it from overfilling.
To empty it, proceed as follows:
앬Switch off the device at the ON/OFF switch.
앬Release the shredded material debris box. To do
so, press the safety switch (Fig. 12/Item A) down.
앬Take the shredded material debris box out at the
front.
6.8 Adjusting the counter blade (Fig. 14)
The counter blade and cutting unit are perfectly
adjusted at the factory. Only if it suffers wear does
the counter blade require adjustment (switch the
machine on for this purpose). To ensure the best
possible results from your shredder, the gap between
the counter blade (item B) and the shredding blade
(item A) should be approx. 0.50 mm.
There is an adjustment device on the right-hand side
of the plastic housing for this purpose. Turn the knob
clockwise so that the screw (item C) moves towards
the shredding blade. After a half-turn the counter
blade will have moved 0.50 mm closer to the
shredding blade. After completing this adjustment
check whether the blade produces the desired
results.
IMPORTANT: If the shredding blade touches the
counter blade, it will cut it and small metal chips may
fall out of the discharge opening. This is not a fault,
but it must only be adjusted as much as necessary
since otherwise the counter blade will suffer
premature wear.
7. Maintenance and storage
앬Clean the machine regularly. This will help to keep
the machine in good working order and is the
basis for a long working life.
앬Keep the vent slots clean while you work.
앬Clean the plastic body and other plastic parts with
a mild household cleaning agent and a damp
cloth. Do not use any aggressive agents or
solvents for cleaning purposes.
앬Never clean the shredder by spraying with water.
앬Prevent water getting inside the machine at all
cost.
앬Check the chassis securing screws from time to
time to ensure that they are tight.
앬If you do not intend to use the shredder for a
lengthy period, protect it from corrosion using
environmentally friendly oil.
앬Store the device in a dry room.
앬Store the device out of reach of children.
8. Waste disposal
Accessories and packaging should be disposed of in
an environment-friendly fashion, i.e. by taking them
to a recycling depot. Plastic parts are coded for
purposes of separation when recycling.
9. Ordering replacement parts
Please quote the following data when ordering
replacement parts:
앬Type of machine
앬Article number of the machine
앬Identification number of the machine
앬Replacement part number of the part required
For our latest prices and information please go to
www.isc-gmbh.info
15
GB
Anleitung GLH_250_SB_SPK7:_ 26.06.2007 9:10 Uhr Seite 15

16
GB
Fault Cause Remedy
The motor does not start Power failure Check the mains lead, plug and
fuse.
Material is not drawn in by the
shredder
The shredding blade is running in
reverse.
Material blockage in the filling
funnel
The shredding blade is jammed
Change the direction of rotation.
Change the direction of rotation
and pull the material out of the
funnel. Feed in thick branches
again so that the blade does not
immediately engage again in the
notches it previously cut.
Change the direction of rotation.
The blade will now release the
jammed material.
The material is not shredded
properly
The counter blade is not set
correctly.
Adjust the counter blade. See
section 6.8 on how to do so.
10. Troubleshooting
Anleitung GLH_250_SB_SPK7:_ 26.06.2007 9:10 Uhr Seite 16

Table des matières Page
1. Consignes de sécurité dʼordre général 18
2. Caractéristiques techniques 18
3. Description de lʼappareil et volume de livraison 18
4. Utilisation conforme à lʼaffectation 18
5. Montage 18
6. Fonctionnement 19
7. Maintenance et entreposage 20
8. Elimination 20
9. Commande de pièces de rechange 20
10. Détection dʼanomalies 21
17
FR
Anleitung GLH_250_SB_SPK7:_ 26.06.2007 9:10 Uhr Seite 17

Emballage :
L’appareil se trouve dans un emballage permettant
d’éviter les dommages dus au transport. Cet
emballage est en matière naturelle et recyclable et
peut donc être réutilisé ultérieurement ou réintroduit
dans le circuit des matières premières.
En cas d’utilisation des appareils certaines
mesures de sécurité doivent impérativement être
respectées pour éviter tous dommages et
blessures :
앬Veuillez lire attentivement la totalité de ce mode
d’emploi et en respecter les consignes. Apprenez
à vous servir correctement de l’appareil à l’aide
de ce mode d’emploi et familiarisez-vous avec les
consignes de sécurité.
앬Veillez à le conserver en bon état pour pouvoir
accéder aux informations à tout moment.
앬Si l’appareil doit être remis à d’autres personnes,
veillez a leur remettre aussi ce mode d’emploi.
Nous déclinons toute responsabilité pour les
accidents ou dommages consécutifs au non-
respect de ce mode d’emploi.
1. Consignes de sécurité
Vous trouverez les consignes de sécurité
correspondantes dans le cahier en annexe
2. Caractéristiques techniques
Tension du réseau : 230 V ~ 50 Hz
Puissance absorbée : 2500 Watt (S6-40%)
2000 W (S1)
Vitesse de rotation à vide du rouleau à lame:
40 tr/min
Diamètre de branche : max. 40 mm
Niveau de pression acoustique LpA : 87,3 dB (A)
Niveau de puissance acoustique LWA: 96,3 dB (A)
Poids : 28 kg
Le mode de service S6 (40%) désigne un profil de
charge qui accepte 4 min. de charge et 6 min. de
marche à vide. Max. en fonction de la nature du
matériau à hacher.
3. Description de lʼappareil et étendue
de la livraison (fig. 1-3)
1. Unité moteur
2. Boîte collectrice de matériau à hacher
3. Support
4. Roues
5. Enjoliveurs
6. Bouchon de réglage de la contre-lame
7. Fiche secteur intégrée
8. Poignée de transport
9. Inverseur du sens de rotation
10. Interrupteur Marche / Arrêt
11. Pieds dʼappuis (y compris Vis de fixation)
12. 3x vis pour le montage de lʼunité moteur
13. 3x rondelles pour le montage de lʼunité moteur
14. 2x jeu de visserie pour le montage des roues (y
compris douille de roue, rondelles et écrou)
15. 2x clé à fourche (SN 10/13)
16. 1x tournevis à empreinte cruciforme
ou fig. : 1 x cahier de consignes de sécurité
4. Utilisation conforme à lʼaffectation
La hacheuse électrique est uniquement conçue pour
hacher les déchets de jardin organiques. Introduisez
le matériau biodégradable, comme par ex. des
feuilles, branches, restes de fleurs etc. dans
lʼentonnoir de remplissage.
Veillez au fait que nos appareils, conformément à leur
affectation, n’ont pas été construits, pour être utilisés
dans un environnement professionnel, industriel ou
artisanal. Nous déclinons toute responsabilité si
l’appareil est utilisé professionnellement,
artisanalement ou dans des sociétés industrielles,
tout comme pour toute activité équivalente.
5. Montage
1. Vissez lʼunité moteur (fig. 4/pos. 1) avec le
support (fig. 4/ pos. 3). Utilisez pour ce faire les
vis (fig. 3/ pos. 12) et les rondelles (fig. 3/pos.
13).
2. Montez les roues sur le support. Poussez pour
ce faire respectivement une douille dans le
perçage (fig. 6). Ensuite, enfoncez une 1 vis
avec rondelle à travers la douille (fig. 7) et vissez
les roues avec le support (fig. 8). Placez en
dessous avant et après le tube respectivement
une rondelle. Appuyez les enjoliveurs sur les
roues (fig. 9).
18
FR
Anleitung GLH_250_SB_SPK7:_ 26.06.2007 9:10 Uhr Seite 18

3. Montez les pieds dʼappui (fig. 10/ pos. 11) sur le
support comme représenté en fig. 10.
4. Poussez la boîte collectrice de matériau à
hacher avec interrupteur de sécurité (fig. 12/ pos.
A) vers lʼavant dans le logement comme
représenté sur la fig. 11. Veillez ce faisant, que
la boîte collectrice de matériau à hacher
fonctionne au-dessus des rails de guidage (fig.
4/pos. A).
5. Verrouillez la boîte collectrice de matériau à
hacher avec interrupteur de sécurité (fig. 12/ pos.
A) en la poussant vers le haut.
6. Fonctionnement
Veuillez respecter aux périodes de service les
directives légales relatives à lʼordonnance de la
protection contre le bruit. Elles peuvent différer dʼun
endroit à lʼautre.
6.1 Raccord réseau
Raccordez lʼappareil avec un câble de rallonge au
niveau de la fiche secteur intégrée (fig. 13/ pos. E).
Respectez aussi les indications figurant dans les
consignes de sécurité.
6.2 Interrupteur marche / arrêt (fig. 13/ pos. B)
앬Pour mettre la hacheuse en service, appuyez sur
le bouton vert.
앬Pour mettre hors service, appuyez sur le bouton
rouge.
Remarque: Cet appareil dispose dʼun interrupteur
de tension sur zéro. Celui-ci évite que lʼappareil ne
se remette en circuit de lui-même après une
interruption de courant.
6.3 Interrupteur de sécurité (fig. 12/ pos. A)
Pour fonctionner, la boîte collectrice de matériau à
hacher doit être dans sa position et lʼinterrupteur de
sécurité doit être verrouillé comment en fig. 12.
6.4 Inverseur du sens de rotation (fig.13/ pos. C)
Attention ! Il est uniquement possible dʼactionner
lʼinverseur du sens de rotation lorsque la
hacheuse est hors circuit.
Position “⇓”
Le matériau est automatiquement pris et haché par
le couteau.
Position “⇑”
Le couteau fonctionne dans le sens de rotation
inverse et libère le matériau coincé. Après avoir mis
lʼinverseur du sens de rotation en position “⇑”,
maintenez lʼinterrupteur vert Marche/arrêt appuyé. Le
couteau se règle pour le sens de rotation inverse.
Lorsque lʼinterrupteur Marche/arrêt est relâché, la
hacheuse sʼarrête automatiquement.
Attention ! Attendez toujours que la hacheuse
soit complètement arrêtée avant de la mettre à
nouveau en circuit.
Les objets importants ou les morceaux de bois sont
retirés après actionnement répété dans le sens de la
lame comme dans celui de la libération.
6.5 Disjoncteur-protecteur (fig. 13 / rep. D)
Une surcharge (p. ex. blocage du couteau) fait
sʼarrêter lʼappareil au bout de quelques secondes.
Pour protéger le moteur dʼéventuels
endommagements, le disjoncteur-protecteur met
lʼalimentation électrique automatiquement hors
circuit. Attendez au moins 1 minute avant dʼappuyer
sur le bouton de remise à zéro pour un nouveau
démarrage.
Ensuite, appuyez sur lʼinterrupteur Marche/arrêt.
Si le couteau est bloqué, commutez lʼinverseur du
sens de rotation vers la gauche en position “⇑”, avant
de remettre la hacheuse en circuit.
6.6 Consignes de travail
앬Respectez les consignes de sécurité (cahier
joint).
앬Portez des gants de protection, des lunettes de
protection et une protection de lʼouïe.
앬Remplissez le matériau à hacher par le côté droit
dans lʼorifice de remplissage (rotation à gauche
du couteau).
앬Le matériau à hacher sʼengage automatiquement
dans la machine. ATTENTION ! Lorsque le
matériau à hacher est long et dépasse de
lʼappareil, il peut frapper lʼair à la manière dʼune
perche pendant son introduction dans la
machine - maintenez un écart de sécurité
suffisant.
앬Introduisez juste assez de matériau à hacher
pour éviter que la trémie de remplissage ne se
bouche.
앬Les déchets de jardin fanés, humides et déjà
stockés depuis plusieurs jours doivent être
hachés alternativement avec des branches.
Cela évite que le matériau à hacher ne se coince
dans la trémie de remplissage.
앬Les déchets mous (par ex. les déchets de
cuisine) ne doivent pas être hachés mais doivent
être directement mis en compost.
앬Les branches très ramifiées et feuillues doivent
tout dʼabord être hachées complètement avant
19
FR
Anleitung GLH_250_SB_SPK7:_ 26.06.2007 9:10 Uhr Seite 19

de rajouter du matériau à hacher dans lʼappareil.
앬Lʼorifice dʼéjection ne doit pas être bouché par du
matériau haché – Danger de reflux.
앬Les fentes dʼaération ne doivent pas être
recouvertes.
앬Evitez dʼintroduire sans interruption du matériau
lourd ou des branches épaisses. Ceci peut
entraîner le blocage du couteau.
앬Utilisez un bouchon ou un crochet pour éliminer
des objets bloqués de lʼorifice de la trémie ou
dʼéjection.
Nota : Le matériau à hacher est écrasé par le
rouleau à lame, puis effiloché et coupé ce qui est
avantageux pour le processus de décomposition lors
du compostage.
6.7 Vidange de la boîte collectrice de matériau à
hacher
Le niveau de remplissage de la boîte collectrice de
matériau à hacher peut être vu à travers des fentes
latérales au niveau du recouvrement.
Videz la boîte collectrice de matériau à hacher en
temps utile afin dʼéviter de le surcharger.
Veuillez vider comme suit :
앬Eteindre lʼappareil ou niveau de lʼinterrupteur
marche / arrêt.
앬Déverrouillez la boîte collectrice de matériau à
hacher. Pour ce faire, poussez lʼinterrupteur de
sécurité (fig. 12/ pos. A) vers le bas.
앬Retirez la boîte collectrice de matériau à hacher
vers lʼavant.
6.8 Réglage du contre-couteau (fig. 14)
Le contre-couteau et le rouleau à lame sont réglés
impeccablement à lʼusine. Seule une usure rend
nécessaire un réajustage (pour ce faire : mettre
lʼappareil en circuit) du contre-couteau. Pour un
service optimal, il est nécessaire que lʼécart entre le
contre-couteau (rep. B) et le couteau à hacher (rep.
A)sʼélève à env. 0,50 mm.
Vous trouverez pour ce faire un dispositif de réglage
sur le côté droit du boîtier en matière plastique.
Tournez le bouchon vers la droite de façon que la vis
(rep. C) se déplace vers la lame de la hacheuse. Au
bout dʼun demi-tour, le contre-couteau sʼest
rapproché du couteau de 0,50 mm. Vérifiez après ce
réglage, si le couteau coupe correctement.
ATTENTION : Si le couteau touche le contre-
couteau, ce dernier sera coupé et de petits copeaux
métalliques peuvent tomber de lʼorifice dʼéjection.
Ceci nʼest pas une défaillance, cependant il vaut
mieux rajuster juste ce qui est nécessaire pour ne
pas user préalablement le contre-couteau.
7. Maintenance et stockage
앬Nettoyez régulièrement lʼappareil. Vous en
assurerez ainsi la bonne capacité de
fonctionnement et une longue durée de vie.
앬Gardez les fentes dʼaération propres pendant
que vous travaillez.
앬Le corps et les pièces de matière plastique
doivent être nettoyées à lʼaide dʼun produit de
nettoyage domestique et dʼun chiffon humide.
앬Nʼutilisez aucun produit agressif ni solvant pour
le nettoyage !
앬Nʼaspergez jamais la hacheuse dʼeau.
앬Evitez absolument que de lʼeau ne sʼimmisce
dans lʼappareil.
앬Vérifiez régulièrement si les vis sont bien
serrées.
앬Stockez lʼappareil dans une salle sèche.
앬Stockez lʼappareil hors de portée des enfants
8. Elimination
Les accessoires et lʼemballage doivent être éliminés
en les apportant dans un réseau de recyclage
écologique. Les pièces en matière plastique sont
marquées pour pouvoir être recyclées en fonction
des sortes.
9. Commande de pièces de rechange
Pour les commandes de pièces de rechange,
veuillez indiquer les références suivantes:
앬Type de lʼappareil
앬No. dʼarticle de lʼappareil
앬No. dʼidentification de lʼappareil
앬No. de pièce de rechange de la pièce requise
Vous trouverez les prix et informations actuelles à
lʼadresse www.isc-gmbh.info
20
FR
Anleitung GLH_250_SB_SPK7:_ 26.06.2007 9:10 Uhr Seite 20
This manual suits for next models
2
Table of contents
Languages:
Other Gardol Paper Shredder manuals


