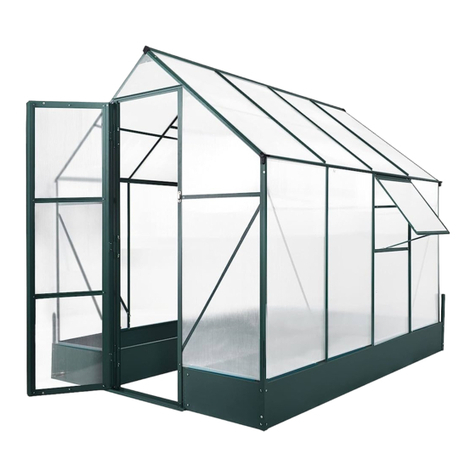
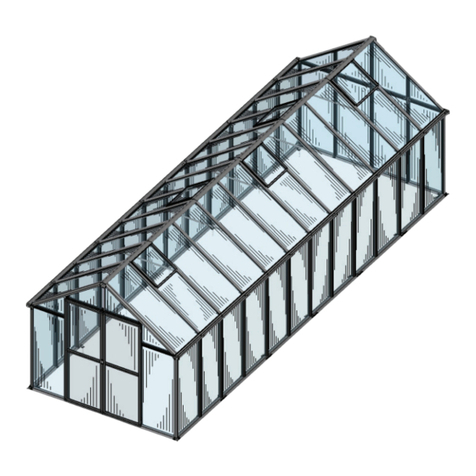
GARDY SHELTER 7022 User manual

NOTICE DE MONTAGE
Serre de jardin en bois 6m²
ASSEMBLY INSTRUCTIONS
Wood greenhouse 6m²
AUFBAUANLEITUNG
Gewächshaus aus Holz 6m²
INSTRUCCIONES DE INSTALACIÓN
Invernadero de jardín de madera de 6m²
ISTRUZIONI DI MONTAGGIO
Serra da giardino in legno 6m²
INSTRUKCJA MONTAŻU
Drewniana szklarnia ogrodowa 6m²
I

2
ENGLISH
2 people with little assembly experience can easily assemble the greenhouse
in 1 or 2 days.
BEFORE ASSEMBLING
PACKAGE CHECKING :
Please check the pieces in the package at reception and before assembly. Contact us in
case of missing or defective parts.
You can use the parts list for the checking.
All dimensions are approximate.
GROUND FOUNDATION :
A good foundation is very important. It must be level to avoid problem with window or door
opening.
According to your ground, we recommand to dig 15-20 cm, fill with sand, compact and then
put concrete or pavement slab foundation or cast concrete foundation (recommanded).
Foundation level should always be above ground level.
WALL PANELS PRETREATMENT :
Before starting to assemble, you must treat the rough wood with a stain or any other product
that optimally protects the wood. This product must be UV resistant and must guarantee the
wood protection against humidity and biological attacks.
Panels must be dry before assembly. ATTENTION! Do not clog the joints in the planks,
tongues and grooves with paint.
Once the greenhouse is assembled, we recommend the following treatment:
• Apply the 2nd coat of colored stain or paint with high UV protection. Colorless / clear stain
protects less well against UV rays than colored stain. For a better the protection, choose a
dark stain.
• Follow the instructions of your paint / stain supplier.
If you notice that the wood is starting to “ooze”, repeat the stain or paint treatment.
NECESSARY TOOLS:
Ladder, stain or paint, brush, roller, knife, hammer, rubber hammer, phillips and flathead
screwdrivers, level, saw, screwer, power drill, safety glasses.
SECURITY
TOOLS AND MATERIALS:
Although all the wooden parts have been sanded, there is always the possibility of splinters.
So be careful when handling the elements. Gloves, safety glasses and long sleeves should

2 3
always be worn while assembling the greenhouse. When using your hand or power tools, be
careful. Do not assemble the greenhouse if any parts are missing. Any damage that would
occur following a long interruption of the installation cannot be attributed to us.
LADDER OR ROOF WORK :
Be careful when climbing the ladder or the roof. Make sure your ladder is resting on a stable
surface and against a solid support. Do not leave heavy or sharp objects where they could
fall.
WEATHER CONDITIONS:
Do not set up the greenhouse when it is very windy or raining.
CHILDREN:
Keep children away from where you are working and keep them away from ladders, tools
and other greenhouse items. Do not let them climb onto the greenhouse.
MAINTENANCE
RENOVATION/MAINTENANCE:
Treating the wood will extend the life of your greenhouse. Just like your home, stain is
very important for your garden greenhouse. All wooden parts require maintenance, good
maintenance will give you more pleasure.
We recommend the following treatment for your garden greenhouse:
Maintenance should be done before the old coat of paint or stain is completely gone.
Depending on the condition of the surface, apply one or two coats of stain or paint. First,
sand the panels to remove residue from previous layers.
ROOF LOADING SUPPORTED:
Remove the snow and leaves from the roof. A large amount of snow on the roof can be a
source of danger for you due to the risk of collapse.
USEFUL TIPS:
LInsure your greenhouse
LEnsure ventilation
LLubricate regularly the lock
LClean the window with a suitable product
LRegularly check the stability of your greenhouse and also make sure that
it is always level.
LDo not place heavy objects against the walls to avoid distortion of the
structure
LLeave windows and doors closed to avoid wind damage

4
ENGLISH
WARRANTY
The warranty conditions listed below determine the outlines and application of these. The
seller oers his guarantee, regardless of the rights or requirements that are granted by
law to the consumer. The seller has a 2-year warranty for raw greenhouses and 5 years for
greenhouse treated in accordance with the following conditions:
1. Visible defects attributable to the product are replaced or repaired, after evaluation by the
seller and taking into account the conditions listed below, if these defects are reported to
the seller within 2 months of delivery.
2. The warranty does not cover anomalies which are inherent in the natural wood product
(conifer), in particular:
• Knots up to 20 mm that come o and fall from the wood;
• The knots that have grown with the wood;
• Knots which have fallen from the edge of the boards, but which are covered during
assembly;
• Wood discoloration;
• Small tears;
• shrinkage cracks;
• The resin pockets;
• Distortions and deformations of wood;
As long as these anomalies don’t influence the stability of the construction. The openings
left by falling knots should be filled with wood filler.
3. The warranty doesn’t cover defects which are as a result of:
• Not level foundation;
• Lack or insuciency of a coat of moisture-regulating paint, stain or preservative;
• Wind force 7 or plus on the Beaufort scale;
• Natural disasters or other destructive natural events, including lightning, torrential rains or
tornadoes.
4. Warranty claim is also not possible if defects in the greenhouse are attributable to
improper use, insucient maintenance or failure to follow the assembly instructions.
A warranty claim expires if the repairs or interventions are carried out by persons not
authorized for this purpose by the seller, or if the greenhouse is equipped with spare parts,
extensions or accessories other than original parts.
5. Warranty cases are resolved in such a way that improper parts will be repaired or
replaced with appropriate parts, at the discretion of the seller. This must be done against
delivery of the purchase order with purchase date or delivery date.
6. Other claims, in particular claims for compensation for damage caused outside the
greenhouse, are excluded as long as the liability does not arise from statutory provisions of
binding law.

4 5
7. Cases falling under the warranty do not lead to an extension of the warranty period, nor
do they constitute the start of a new warranty period. The warranty period for repaired or
replaced parts expires at the same time as the warranty period for the greenhouse as a
whole.
8. The warranty begins on the day of purchase (date indicated on the purchase order) for 2
years for raw greenhouses and 5 years for treated greenhouses.
9. Complaints relating to defects must be reported to us in writing within 2 months of
delivery, mentioning the model of the greenhouse, the code of the parts causing the
problem and providing proof of purchase of the grenhouse.
TECHNICAL DRAWINGS

6
ENGLISH
PARTS LIST
DESIGNATION DIMENSIONS
(MM) QTY MARQUE DRAWING
Little front plank 28 x 95 x 540 mm 40 A
Back plank 28 x 95 x 1980 mm 14 B
Side plank (right/left) 28 x 95 x 2924 mm 24 C
Columns 1, 2, 3, 4 40 x 40 x 2148 mm 4 Poteaux
Little side plank 28 x 95 x 312 mm 40 E
Little back plank 8 x 95 x 415 mm 20 F
Side door frame 1160 x 120 mm 2 U1
Upper door frame 1290 x 120 mm 1 U2
Lower door frame 820 x 45 mm 1 U3
Side window 2300 x 900 mm 2 T
Fixed rear window 1150 x 900 mm 1 T1
Side half plank 28 x 48 x 2924 mm 2 X

6 7
PARTS LIST
DESIGNATION DIMENSIONS
(MM) QTY MARQUE DRAWING
Gable 28 x 310 x 1980 mm 2 K
Upper ridge beam 40 x 130 x 2924 mm 1 G
Lateral ridge beam 40 x 130 x 2924 mm 2 G1
Single semi-glazed door 900 x 1900 mm 1 U
Polycarbonate panel Bandes
990x1080 mm 4 P
Polycarbonate h profile 12 x 40 x 1050 mm 4 H
Polycarbonate fixing
blade 100 x 20 x 1050 mm 4 Q
Polycarbonate
connection profile 41 x 83 x 2980 mm 1 Q1
Back/front edge beam 20 x 110 x 1108 mm 4 N
Back/front connection
panel beam 20 x 100 x 2044 mm 4 N1
Right/left connection
panel beam 20 x 80 x 2130 mm 4 N2
Bolts and screws (bag) 1
Nails (bag) 1
Assembly instructions
manual 1
Assembly wedge 1

8
ENGLISH
①BASE FRAME ASSEMBLY
NECESSARY TOOLS
COLUMN 1
COLUMN 2
COLUMN 3
COLUMN 4

8 9
MARQUE DESIGNATION DIMENSIONS (MM) QTY
B Back plank 28 x 95 x 1980 mm 14
C Side plank (right/left) 28 x 95 x 2924 mm 24
Poteaux Columns 1, 2, 3, 4 40 x 40 x 2148 mm 4
Start with lower and front/back planks (parts B,C) by positioning plank’s lug upward.
Form a base frame and screw them onto the columns.
To install planks use a rubber hammer and an assembly wedge. Place the wedge on the
tongue of the plank and tap with the hammer until the plank is pushed to the bottom.
Fix plan ks (parts B,C) with SC1 screws.

10
ENGLISH
②DOOR FRAME ASSEMBLY
MARQUE DESIGNATION DIMENSIONS (MM) QTY
U1 Side door frame 1160 x 120 mm 2
U2 Upper door frame 1290 x 120 mm 1
U3 Lower door frame 820 x 45 mm 1
T Side window 2300 x 900 mm 2
T1 Fixed rear window 1150 x 900 mm 1
To assemble the door frame : the RIGHT and LEFT side frames (parts I1), the upper door
frame (part I2) and the lower door frame (part I3) are fastened together with wood screws.

10 11
③DOOR FRAME AND WINDOWS FIXATION
MARQUE DESIGNATION DIMENSIONS (MM) QTY
A Little front plank 28 x 95 x 540 mm 40
E Little side plank 128 x 95 x 312 mm 40
F Little back plank 28 x 95 x 415 mm 20
After assembling 3 or 4 rows of planks, slide the door frame into the wall.
Then, put the planks, one by one : little front planks (parts A), little back planks (parts F), back
planks (parts B,B1), side planks (parts C,X) and back planks (parts B).

12
ENGLISH
④WALL PANELS ASSEMBLY
MARQUE DESIGNATION DIMENSIONS (MM) QTY
X Side half plank 28 x 48 x 2924 mm 2
Continue by assembling the planks, one by one : front planks (parts B), side planks (parts
C,X) and back planks (parts B).

12 13
⑤UPPER PART ASSEMBLY
Make a hole at
10cm of the end of
the gable et put 1
screw.
Ridges have to be
screwed from the
outside on each
gable side.

14
ENGLISH
⑥DOOR ASSEMBLY
MARQUE DESIGNATION DIMENSIONS (MM) QTY
U Single semi-glazed door 900 x 1900 mm 1
Put the door (part U) on the hinges.
MARQUE DESIGNATION DIMENSIONS (MM) QTY
K Gable 28 x 310 x 1980 mm 2
G Upper ridge beam 40 x 130 x 2924 mm 1
G1 Lateral ridge beam 40 x 130 x 2924 mm 2
Put gables (parts K) to end the panel and after, put the ridge beams (part G,G1).
WARNING! Each ridge beam is designed to respect the perfect gable alignment.
Check the inclination of each in order to position them correctly.

14 15
⑦POLYCARBONATE PANEL ASSEMBLY
Make a 3mm
hole into the
polycarbonate
panel.
Let the board protrude by 20 mm. Make pants 34 mm from the edge
of the floor so that the assembly can be screwed onto the gables.

16
ENGLISH
MARQUE DESIGNATION DIMENSIONS (MM) QTY
P Polycarbonate panel Bandes 990x1080 6
H Polycarbonate h profile 12 x 40 x 1050 mm 4
Q Polycarbonate fixing blade 20 x 100 x 1050 mm 4
Q1 Polycarbonate connection profile 41 x 83 x 2980 mm 1
Place the first polycarbonate panel (part P). Handle it with care, preferably with gloves.
Continue with the others polycarbonate panels sliding an H profile between each panel
and screw on the ridge beams. Install the polycarbonate connection profile then repeat the
same operation for the left side.
⑧ENDING ASSEMBLY

16 17
MARQUE DESIGNATION DIMENSIONS (MM) QTY
N Back/Front Edge Beam 20 x 110 x 1108 mm 4
N1 Back/Front Connection Panel Beam 20 x 100 x 2044 mm 4
N2 Right/Left Connection Panel Beam 20 x 80 x 2130 mm 4
Then assemble back/front edge beam, back/front connection panel beam and right/left
connection panel beam (parts N,N1,N2).
NOTE : edge beams may not be in one piece, depending on the sizes of lumber
available at the time of execution.

18
FRANÇAIS
2 personnes ayant peu d’expérience dans le montage peuvent monter
facilement la serre en 1 ou 2 jours.
AVANT DE COMMENCER LE MONTAGE
CONTRÔLE DU CONTENU DU PAQUET :
Veuillez vérifier le contenu du paquet dès réception et avant le montage.Contactez-nous en
cas de pièces manquantes ou défectueuses.
Vous pouvez contrôler le contenu du paquet à l’aide de la liste des pièces.
Toutes les dimensions sont approximatives.
SUPPORT :
Il est très important de réaliser correctement sa dalle. Elle doit être de niveau afin d’éviter
des problèmes tels que:
• Portes et fenêtres qui ne s’ouvrent pas;
En fonction du sol, nous recommandons de décaisser sur une profondeur de 15 à 20cm,
de remplir de sable, de compacter, et ensuite de positionner des dalles bloquées par un
bandeau béton ou de couler une dalle en béton sur toute la superficie (idéal). Le niveau de
la fondation doit toujours se trouver au-dessus du niveau de votre sol.
PRÉTRAITEMENT DES MADRIERS :
Avant de commencer à monter, vous devez traiter les bois bruts à l’aide d’une lasure ou de
tout autre produit protégeant le bois de façon optimale. Ce produit doit être résistant aux
UV et doit garantir au bois une protection contre l’humidité et les attaques biologiques.
Les madriers doivent être secs avant le montage. (ATTENTION ! Ne pas engorger de
peinture les raccords dans les madriers, languettes et rainures).
Une fois que la serre est montée, nous recommandons le traitement suivant :
• Appliquez la 2ème couche de lasure colorée ou de peinture ayant une protection élevée
contre les UV. La lasure incolore/transparente protège souvent un peu moins bien contre les
rayons UV que la lasure colorée. Plus la lasure est foncée, meilleure est la protection.
• Suivez les prescriptions de votre fournisseur de peinture/lasure.
Si vous constatez que le bois commence à « suinter », répétez le traitement à la lasure ou à
la peinture.
OUTILS NÉCESSAIRES
Échelle, lasure ou peinture, brosse, rouleau, couteau, marteau, marteau caoutchouc,
tournevis cruciforme et à tête plate, niveau, scie, visseuse, perceuse, lunettes de protection.
SECURITY

18 19
OUTILS ET MATÉRIAUX :
Bien que toutes les parties en bois aient été poncées, il subsiste toujours la possibilité
d’avoir des échardes. Soyez donc prudents en manipulant les éléments. Il faut toujours
porter des gants, des lunettes de protection pour les yeux et des manches longues pendant
le montage de la serre ou lorsque vous en faites l’entretien. Lorsque vous utilisez vos outils
à main ou électriques soyez prudents. Ne montez pas la serre s’il manque des pièces. Les
dégâts qui surviendraient, suite à une longue interruption du chantier, ne pourraient nous
être imputés.
TRAVAILLER SUR UNE ÉCHELLE OU SUR LE TOIT :
Soyez prudents lorsque vous montez sur l’échelle ou sur le toit. Assurez-vous que votre
échelle soit posée sur une surface stable et contre un support solide. Ne laissez pas des
objets lourds ou tranchants à des endroits où ils pourraient tomber.
CONDITIONS ATMOSPHÉRIQUES :
Ne montez pas la serre lorsqu’il y a beaucoup de vent ou s’il pleut.
ENFANTS :
Eloignez les enfants de l’endroit où vous travaillez et maintenez-les loin des échelles, des
outils et autres éléments de la serre. Ne les laissez pas monter sur la serre.
ENTRETIEN
RÉNOVATION/MAINTENANCE :
Le traitement du bois prolongera la durée de vie de votre serre. Tout comme pour votre
maison, la lasure est très importante pour votre serre de jardin. Toutes les pièces en bois
demandent un entretien. À long terme, un bon entretien vous assure plus de plaisir.
Nous recommandons le traitement suivant pour votre serre de jardin :
La maintenance doit être faite avant que l’ancienne couche de peinture ou de lasure ne soit
complètement partie. En fonction de l’état de la surface, appliquez une ou deux couches
de lasure ou de peinture. Au préalable, poncez les planches, afin d’éliminer les résidus des
couches précédentes.
CHARGE SUPPORTÉE PAR LE TOIT :
Ôtez la neige du toit ainsi que les feuilles. Une grande quantité de neige sur le toit peut être
une source de danger pour vous en raison du risque d’eondrement.
ASTUCES UTILES :
LAssurez votre serre
LVeillez à la ventilation
LLubrifiez régulièrement la serrure
LNettoyez les vitres avec un produit adéquat
LContrôlez régulièrement la stabilité de votre serre et veillez aussi à ce
quelle soit toujours bien de niveau

20
FRANÇAIS
LNe posez pas d’objets lourds contre les parois afin d’éviter une
distorsion de la structure
LLaissez les fenêtres et les portes fermées afin d’éviter les dégâts liés au
vent
CONDITIONS DE GARANTIE
Les conditions de garantie reprises ci-dessous déterminent les contours et l’application de
celles-ci. Le vendeur ore sa garantie, indépendamment des droits ou des exigences qui
sont accordées par la loi au consommateur.
Le vendeur octroie une garantie de 2 ans pour les serres bruts et 5 ans pour les serre traités
conformément aux conditions suivantes :
1. Les défauts imputables au produit, visibles sont remplacés ou réparés, après évaluation
par le vendeur et compte tenu des conditions reprises ci-dessous, si ces défauts sont
signalés au vendeur dans les 2 mois qui suivent la livraison.
2. Ne relèvent pas de la garantie les anomalies qui sont inhérentes au produit naturel en
bois (de conifère), notamment :
• Les noeuds jusqu’à 20 mm qui se détachent et tombent du bois ;
• Les noeuds qui ont poussé avec le bois ;
• Les noeuds qui sont tombés du bord des planches, mais qui sont recouverts lors du
montage ;
• Les décolorations du bois ;
• Les petites déchirures sur les champs ;
• Les fissures de retrait ;
• Les poches de résine ;
• Les distorsions et déformations du bois ;
Pour autant que ces anomalies n’influencent pas négativement sur la stabilité de la
construction. Les orifices laissés par des noeuds qui tombent doivent être rebouchés avec
de la pâte à bois.
3. Ne relèvent pas de la garantie les défauts qui sont apparus suite à :
• Une fondation qui n’est pas de niveau ;
• Le manque ou l’insusance de couche de peinture régulant l’humidité, de lasure ou
d’agent de préservation ;
• Une force de vents 7 ou supérieurs sur l’échelle de Beaufort ;
• Des catastrophes naturelles ou autres événements naturels destructeurs, notamment la
foudre, les pluies torrentielles ou les tornades.
4. Un recours à la garantie n’est pas davantage possible si les défauts à la serre sont
imputables à une utilisation inappropriée, à un entretien insusant ou au non-respect
des instructions de montage. Un recours à la garantie expire si les réparations ou les
interventions sont eectuées par des personnes non mandatées à cette fin par le vendeur,
ou si la serre est équipée de pièces de réserve, d’extensions ou d’accessoires autres que
Table of contents
Languages:
Popular Greenhouse Kit manuals by other brands

Halls Greenhouses
Halls Greenhouses Universal installation manual

Juliana
Juliana 05022016-MG Assembly instruction

Hanover
Hanover HANGRNHSP8X6-GRN Assembly instruction

Flower House
Flower House OrchidHouse Setup instructions

Palram
Palram Automatic Vent Opener Assembly instructions

harvst
harvst Terrace manual