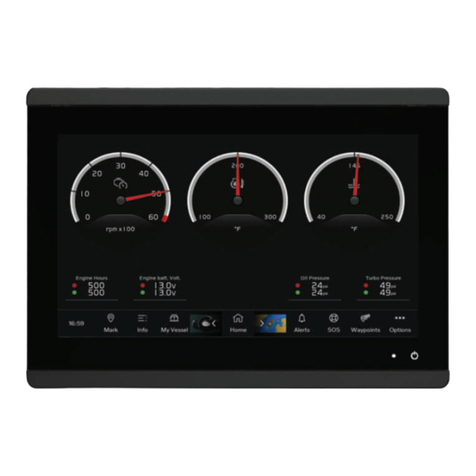
Garmin GPSMAP 12 3 Series User manual

GPSMAP®OWNER'S MANUAL
12x3, 9x3, 7x3

© 2021 Garmin Ltd. or its subsidiaries
All rights reserved. Under the copyright laws, this manual may not be copied, in whole or in part, without the written consent of Garmin. Garmin reserves the right to change
or improve its products and to make changes in the content of this manual without obligation to notify any person or organization of such changes or improvements. Go to
www.garmin.com for current updates and supplemental information concerning the use of this product.
Garmin®, the Garmin logo, ActiveCaptain®, ANT®, Fusion®, GPSMAP®, inReach®, and VIRB® are trademarks of Garmin Ltd. or its subsidiaries, registered in the USA and other countries.
ActiveCaptain®, Connect IQ™, ECHOMAP™, Fantom™, Fusion-Link™, Garmin ClearVü™, Garmin Connect™, Garmin Express™, Garmin Nautix™, Garmin Navionics Vision+™, Garmin
Quickdraw™, GC™, GCV™, GMR™, GRID™, GXM™, LiveScope™, MotionScope™, OneChart™, OneHelm™, Panoptix™, Reactor™, Shadow Drive™, SmartMode™, and SteadyCast™ are
trademarks of Garmin Ltd. or its subsidiaries. These trademarks may not be used without the express permission of Garmin.
Mac® is a trademark of Apple Inc., registered in the U.S. and other countries. The BLUETOOTH® word mark and logos are owned by the Bluetooth SIG, Inc. and any use of such
marks by Garmin is under license. CZone™ is a trademark of Power Products, LLC. Color Thermal Vision™ is a trademark of FLIR Systems, Inc. FLIR® and MSX® are registered
trademarks of FLIR Systems, Inc. HDMI® is a registered trademark of HDMI Licensing, LLC. Mercury® is a trademark of Brunswick Corporation. NMEA®, NMEA 2000®, and the NMEA
2000 logo are registered trademarks of the National Marine Electronics Association. microSD® and the microSD logo are trademarks of SD-3C, LLC. Optimus®, and SeaStation®
are registered trademarks of Dometic®. C-Monster® and Power-Pole® are registered trademarks of JL Marine Systems, Inc. SD® and the SDHC logo are trademarks of SD-3C, LLC.
SiriusXM® and all related marks and logos are trademarks of Sirius XM Radio Inc. All rights reserved. Wi‑Fi® is a registered mark of Wi-Fi Alliance Corporation. Windows® is a
registered trademark of Microsoft Corporation in the United States and other countries. Yamaha®, the Yamaha logo, Command Link Plus®, and Helm Master® are trademarks of the
YAMAHA Motor Co., LTD. All other trademarks and copyrights are the property of their respective owners.

Table of Contents
Introduction......................................1
Device Overview...................................... 1
GPSMAP 7x3 and GPSMAP 9x3
Connector View................................... 2
GPSMAP 12x3 Connector View.......... 3
Using the Touchscreen....................... 3
On-Screen Buttons.............................. 4
Locking and Unlocking the
Touchscreen........................................ 6
Tips and Shortcuts.................................. 6
Accessing Owner's Manuals on the
Chartplotter..............................................6
Accessing the Manuals from the
Web.......................................................... 6
Garmin Support Center........................... 6
Memory Cards......................................... 7
Inserting Memory Cards (GPSMAP
7x3/9x3/12x3)..................................... 7
Acquiring GPS Satellite Signals..............7
Selecting the GPS Source................... 8
Customizing the Chartplotter............8
Home Screen........................................... 8
Pinning a Feature Button.................... 9
Rearranging the Category Items.........9
Menu Bar..................................................9
Hiding and Showing the Menu Bar... 10
Setting the Vessel Type........................ 10
Adjusting the Backlight......................... 10
Adjusting the Color Mode..................... 10
Enabling Screen Lock........................... 11
Turning On the Chartplotter
Automatically........................................ 11
Automatically Turning Off the
System................................................... 11
Customizing Pages............................... 11
Customizing the Startup Screen...... 11
Creating a New Combination Page.. 12
Adding a SmartMode Layout............ 13
Customizing the Layout of a
SmartMode or Combination Page....13
Deleting a Combination Page........... 13
Customizing the Data Overlays........ 14
Resetting the Station Layouts.......... 14
Presets................................................... 14
Managing Presets............................. 14
Saving a New Preset......................... 14
Controlling the Chartplotter............ 15
Voice Control......................................... 15
Changing the Voice Control
Language........................................... 15
Supported Headsets......................... 15
Pairing a Wireless Headset with a
Garmin Chartplotter.......................... 15
Using a Wireless Headset with a
Garmin Chartplotter.......................... 15
Chartplotter Voice Commands......... 16
GRID Remote Control............................ 18
Pairing the GRID Device with the
Chartplotter from the Chartplotter... 18
Pairing the GRID Device with the
Chartplotter from the GRID Device... 18
Rotating the GRID Remote Input
Device.................................................18
ActiveCaptain App.......................... 19
ActiveCaptain Roles.............................. 19
Getting Started with the ActiveCaptain
App......................................................... 19
Enabling Smart Notifications............... 20
Receiving Notifications..................... 20
Managing Notifications.................... 21
Making Notifications Private............ 21
Updating Software with the
ActiveCaptain App................................ 21
Updating Charts with ActiveCaptain.... 22
Chart Subscriptions.............................. 22
Purchasing a Chart Subscription with
ActiveCaptain.................................... 22
Activating the Chart Subscription
Card.................................................... 22
Renewing Your Subscription............ 23
Communication with Wireless
Devices.......................................... 23
Wi‑Fi Network........................................ 23
Setting Up the Wi‑Fi Network............23
Connecting a Wireless Device to the
Chartplotter........................................ 23
Changing the Wireless Channel....... 23
Changing the Wi‑Fi Host................... 23
Wireless Remote Control...................... 24
Table of Contents i

Pairing the Wireless Remote Control
With the Chartplotter......................... 24
Turning On and Off the Remote
Backlight............................................ 24
Disconnecting the Remote Control
from All Chartplotters....................... 24
Wireless Wind Sensor........................... 24
Connecting a Wireless Sensor to the
Chartplotter........................................ 24
Adjusting the Wind Sensor
Orientation......................................... 24
Viewing Boat Data on a Garmin
Watch..................................................... 25
Viewing Boat Data on a Garmin Nautix™
Device.................................................... 25
Charts and 3D Chart Views............. 25
Navigation Chart and Fishing Chart..... 26
Chart Symbols................................... 26
Zooming In and Out Using the
Touchscreen...................................... 26
Measuring a Distance on the
Chart................................................... 27
Creating a Waypoint on the Chart.... 27
Viewing Location and Object
Information on a Chart...................... 27
Viewing Details about Navaids.........27
Navigating to a Point on the Chart... 28
Premium Charts.................................... 29
Fish Eye 3D Chart View..................... 29
Viewing Tide Station Information.....30
Showing Satellite Imagery on the
Navigation Chart................................31
Viewing Aerial Photos of
Landmarks......................................... 31
Automatic Identification System......... 31
AIS Targeting Symbols..................... 32
Heading and Projected Course of
Activated AIS Targets....................... 33
Activating a Target for an AIS
Vessel.................................................33
Setting the Safe-Zone Collision
Alarm.................................................. 34
Viewing a List of AIS and MARPA
Threats............................................... 34
AIS Aids to Navigation...................... 35
AIS Distress Signals.......................... 36
Turning Off AIS Reception................ 36
Chart Menu............................................ 37
Chart Layers.......................................37
Chart Settings.................................... 41
Fish Eye 3D Settings......................... 41
Supported Maps.................................... 42
Garmin Quickdraw Contours
Mapping......................................... 42
Mapping a Body of Water Using the
Garmin Quickdraw Contours Feature.. 42
Adding a Label to a Garmin Quickdraw
Contours Map........................................ 43
Garmin Quickdraw Community............ 43
Connecting to the Garmin Quickdraw
Community with ActiveCaptain........ 43
Connecting to the Garmin Quickdraw
Community with Garmin Connect.... 44
Garmin Quickdraw Contours
Settings.................................................. 45
Navigation with a Chartplotter........ 45
Basic Navigation Questions................. 46
Route Color Coding............................... 46
Destinations.......................................... 47
Searching for a Destination by
Name.................................................. 47
Selecting a Destination Using the
Navigation Chart................................47
Searching for a Marine Services
Destination.........................................47
Setting and Following a Direct Course
Using Go To....................................... 47
Stopping Navigation..........................48
Waypoints.............................................. 48
Marking Your Present Location as a
Waypoint............................................ 48
Creating a Waypoint at a Different
Location............................................. 48
Marking a Man Overboard (MOB)
Location............................................. 48
Projecting a Waypoint....................... 48
Viewing a List of all Waypoints........ 48
Editing a Saved Waypoint................. 49
Moving a Saved Waypoint................ 49
Browsing for and Navigating to a
Saved Waypoint................................. 50
Deleting a Waypoint or an MOB........50
Deleting All Waypoints...................... 50
ii Table of Contents

Routes.................................................... 50
Creating and Navigating a Route From
Your Present Location...................... 51
Creating and Saving a Route............ 51
Viewing a List of Routes and Auto
Guidance Paths................................. 51
Editing a Saved Route....................... 51
Finding and Navigating a Saved
Route.................................................. 52
Browsing for and Navigating Parallel
to a Saved Route............................... 52
Initiating a Search Pattern................ 53
Deleting a Saved Route..................... 53
Deleting All Saved Routes................. 53
Auto Guidance....................................... 53
Setting and Following an Auto
Guidance Path................................... 53
Creating and Saving an Auto Guidance
Path.................................................... 54
Adjusting a Saved Auto Guidance
Path.................................................... 54
Canceling an Auto Guidance
Calculation in Progress..................... 54
Setting a Timed Arrival......................54
Auto Guidance Path
Configurations................................... 55
Tracks.................................................... 56
Showing Tracks................................. 56
Setting the Color of the Active
Track.................................................. 57
Saving the Active Track.................... 57
Viewing a List of Saved Tracks........ 57
Editing a Saved Track....................... 57
Saving a Track as a Route................ 57
Browsing for and Navigating a
Recorded Track................................. 57
Deleting a Saved Track..................... 57
Deleting All Saved Tracks................. 58
Retracing the Active Track................58
Clearing the Active Track.................. 58
Managing the Track Log Memory
During Recording............................... 58
Configuring the Recording Interval of
the Track Log..................................... 58
Boundaries.............................................58
Creating a Boundary..........................59
Converting a Route to a Boundary... 59
Converting a Track to a Boundary.... 59
Editing a Boundary............................ 59
Linking a Boundary to a SmartMode
Layout................................................ 59
Setting a Boundary Alarm................. 59
Disabling all Boundary Alarms......... 59
Deleting a Boundary.......................... 60
Deleting All Saved Waypoints, Tracks,
Routes, and Boundaries........................ 60
Sailing Features..............................60
Setting the Vessel Type for Sailing
Features................................................. 60
Sail Racing............................................. 60
Starting Line Guidance...................... 60
Starting the Race Timer.................... 61
Stopping the Race Timer.................. 61
Setting the Distance between the Bow
and the GPS Antenna........................ 61
Laylines Settings................................... 62
Polar Tables.......................................... 62
Importing a Polar Table Manually.... 62
Showing Polar Data in Data Fields... 63
Setting the Keel Offset.......................... 64
Sailboat Autopilot Operation................ 64
Wind Hold.......................................... 65
Tack and Gybe................................... 65
Heading Line and Angle Markers......... 66
Setting the Heading Line and Angle
Markers.............................................. 66
Sonar Fishfinder............................. 67
Stopping the Transmission of Sonar
Signals................................................... 67
Traditional Sonar View..........................67
Split-Frequency Sonar View.............. 67
Split-Zoom Sonar View..................... 68
Garmin ClearVü Sonar View................. 68
Garmin SideVü Sonar View...................69
SideVü Scanning Technology........... 70
Measuring Distance on the Sonar
Screen................................................ 70
Panoptix Sonar Views........................... 70
LiveVü Down Sonar View.................. 71
LiveVü Forward Sonar View.............. 72
RealVü 3D Forward Sonar View........73
RealVü 3D Down Sonar View............ 74
RealVü 3D Historical Sonar View..... 75
Table of Contents iii

FrontVü Sonar View.......................... 76
LiveScope Sonar View.......................... 76
Perspective View................................... 77
Selecting the Transducer Type............ 77
Selecting a Sonar Source..................... 77
Renaming a Sonar Source................ 78
Creating a Waypoint on the Sonar
Screen.................................................... 78
Pausing the Sonar Display....................78
Viewing Sonar History.......................... 78
Sonar Sharing........................................ 78
Zooming in a Panoptix LiveVü or
LiveScope Sonar View.......................... 79
Adjusting the Level of Detail.................79
Adjusting the Color Intensity................ 80
Sonar Setup........................................... 80
Setting the Zoom Level on the Sonar
Screen................................................ 81
Setting the Scroll Speed....................81
Adjusting the Range.......................... 81
Sonar Noise Rejection Settings........ 82
Sonar Appearance Settings.............. 82
Sonar Alarms..................................... 83
Advanced Sonar Settings................. 84
Transducer Installation Settings...... 84
Sonar Frequencies............................ 85
Turning On the A-Scope.................... 86
Panoptix Sonar Setup........................... 86
Adjusting the RealVü Viewing Angle
and Zoom Level................................. 86
Adjusting the RealVü Sweep
Speed................................................. 86
LiveVü Forward and FrontVü Sonar
Settings.............................................. 87
RealVü Appearance Settings............ 89
Panoptix Transducer Installation
Settings.............................................. 89
LiveScope and Perspective Sonar
Settings.................................................. 91
LiveScope and Perspective Sonar
Setup.................................................. 91
LiveScope and Perspective
Appearance Settings......................... 92
LiveScope and Perspective Layout
Settings.............................................. 92
LiveScope and Perspective
Transducer Installation Settings...... 92
Radar............................................. 93
Radar Interpretation.............................. 93
Radar Overlay.................................... 93
Radar Overlay and Chart Data
Alignment...........................................94
Transmitting Radar Signals.................. 94
Stopping the Transmission of Radar
Signals............................................... 94
Setting Up the Timed Transmit
Mode.................................................. 94
Enabling and Adjusting a Radar No
Transmit Zone................................... 94
Adjusting the Radar Range................... 95
Tips for Selecting a Radar Range..... 95
MotionScope™ Doppler
Radar Technology................................. 95
Enabling a Guard Zone......................... 95
Defining a Circular Guard Zone........ 96
Defining a Partial Guard Zone.......... 96
MARPA...................................................96
MARPA Targeting Symbols.............. 97
Acquiring MARPA Targets
Automatically.....................................97
Removing MARPA Targets
Automatically.....................................97
Assigning a MARPA Tag to an
Object................................................. 97
Removing a MARPA Tag from a
Targeted Object................................. 97
Viewing Information about a MARPA-
tagged Object.................................... 97
Viewing a List of AIS and MARPA
Threats............................................... 98
Showing AIS Vessels on the Radar
Screen................................................ 98
VRM and EBL..................................... 98
Echo Trails............................................. 99
Turning on Echo Trails...................... 99
Adjusting the Length of the Echo
Trails.................................................. 99
Clearing the Echo Trails.................... 99
Radar Settings....................................... 99
Radar Gain......................................... 99
Radar Filter Settings........................101
Radar Options Menu....................... 102
Radar Setup Menu...........................102
Radar Appearance Settings............ 102
Radar Installation Settings............. 103
iv Table of Contents

Radar My Vessel Layer Settings.....103
Selecting a Different Radar Source....103
Autopilot...................................... 104
Autopilot Configuration...................... 104
Selecting the Preferred Heading
Source.............................................. 104
Opening the Autopilot Screen............ 104
Autopilot Screen..................................105
Adjusting the Step Steering
Increment.........................................105
Setting the Power Saver................. 105
Enabling the Shadow Drive™
Feature............................................. 106
Autopilot Overlay Bar.......................... 106
Engaging the Autopilot....................... 106
Adjusting the Heading Using the
Helm................................................. 107
Adjusting the Heading with the
Chartplotter in Step Steering Mode 107
Steering Patterns................................ 107
Following the U-Turn Pattern..........107
Setting Up and Following the Circles
Pattern............................................. 107
Setting Up and Following the Zigzag
Pattern............................................. 107
Following the Williamson Turn
Pattern............................................. 108
Following an Orbit Pattern.............. 108
Setting Up and Following the
Cloverleaf Pattern........................... 108
Setting Up and Following a Search
Pattern............................................. 108
Cancelling a Steering Pattern......... 108
Adjusting the Autopilot Response..... 108
Enabling the Autopilot Controls on a
Garmin Watch......................................109
Customizing the Autopilot Button
Actions............................................. 109
Controlling the Autopilot with a GRID 20
Remote Control................................... 109
Reactor™ Autopilot Remote Control.. 109
Pairing a Reactor Autopilot Remote
Control With a Chartplotter.............109
Changing the Functions of the Reactor
Autopilot Remote Control Action
Keys..................................................109
Updating the Reactor Autopilot
Remote Control Software............... 110
Yamaha Autopilot............................... 110
Yamaha Autopilot Screen............... 111
Yamaha Autopilot Overlay Bar....... 112
Force® Trolling Motor Control...... 112
Connecting to a Trolling Motor.......... 112
Adding the Trolling Motor Controls to
Screens................................................ 113
Trolling Motor Control Bar.............. 113
Trolling Motor Settings....................... 114
Assigning a Shortcut to the Trolling
Motor Remote Control Shortcut
Keys..................................................114
Calibrating the Trolling Motor
Compass..........................................114
Setting the Bow Offset.................... 115
Digital Selective Calling................ 115
Networked Chartplotter and VHF Radio
Functionality........................................ 115
Turning On DSC................................... 115
DSC List............................................... 115
Viewing the DSC List....................... 116
Adding a DSC Contact.................... 116
Incoming Distress Calls......................116
Navigating to a Vessel in Distress. 116
Man-Overboard Distress Calls Initiated
from a VHF Radio............................ 116
Man-Overboard and SOS Distress
Calls Initiated from the
Chartplotter......................................116
Position Tracking................................ 116
Viewing a Position Report.............. 117
Navigating to a Tracked Vessel..... 117
Creating a Waypoint at the Position of
a Tracked Vessel............................. 117
Editing Information in a Position
Report...............................................117
Deleting a Position-Report Call...... 117
Viewing Vessel Trails on the Chart 117
Individual Routine Calls...................... 117
Selecting a DSC Channel................ 118
Making an Individual Routine Call.. 118
Making an Individual Routine Call to
an AIS Target................................... 118
Table of Contents v

Gauges and Graphs...................... 118
Viewing the Gauges............................ 119
Engine Alert Icons........................... 119
Changing the Data Shown in a
Gauge............................................... 119
Customizing the Gauges................ 120
Customizing Engine Gauge and Fuel
Gauge Limits................................... 120
Selecting the Number of Engines
Shown in Gauges............................ 120
Customizing the Engines Shown in
Gauges............................................. 120
Enabling Status Alarms for Engine
Gauges............................................. 120
Enabling Some Engine Gauge Status
Alarms.............................................. 121
Yamaha Engine Gauges..................... 121
Engine Condition Icons................... 122
Engine Alert Icons........................... 123
Setting Up the Gauges.................... 123
Mercury® Engine Gauges...................125
Setting the Fuel Alarm........................ 126
Synchronizing the Fuel Data with the
Actual Vessel Fuel...........................126
Viewing the Wind Gauges...................126
Configuring the Sailing Wind
Gauge............................................... 126
Configuring the Speed Source........126
Configuring the Heading Source of the
Wind Gauge..................................... 127
Customizing the Close-Hauled Wind
Gauge............................................... 127
Viewing Trip Gauges........................... 127
Resetting Trip Gauges.................... 127
Viewing Graphs................................... 127
Setting the Graph Range and Time
Scales.............................................. 127
Disabling Graph Filtering................ 128
Battery Management.......................... 128
Setting Up the Battery Management
Page................................................. 128
inReach® Messages.....................128
Connecting an inReach Device to the
Chartplotter......................................... 128
Receiving inReach Messages............ 128
Sending an inReach Preset Message 129
Replying to an inReach Message....... 129
Digital Switching...........................129
Adding and Editing a Digital Switching
Page..................................................... 129
Garmin Boat Switch™.......................... 129
Configuring the Garmin Boat Switch
Device.............................................. 129
Using the Bilge Pump Switches..... 131
Using Dimmable Lights...................131
Controlling Third-Party Equipment
Installed on Your Boat.................. 132
Power-Pole® Anchor System.............132
Enabling the Power-Pole Anchor
Overlay............................................. 132
Setting Up the Power-Pole Anchor. 132
Power-Pole Overlay......................... 133
Enabling the Mercury Helm................ 133
Mercury Troll Control Features.......... 133
Adding the Mercury Troll Control
Overlay............................................. 134
Mercury Troll Overlay...................... 134
Mercury Cruise Control....................... 134
Enabling the Mercury Cruise Control
Overlay............................................. 134
Mercury Cruise Control Overlay..... 135
Mercury Engine Details....................... 135
Adding the Mercury Engine
Overlay............................................. 135
Mercury Engine Overlay.................. 136
Enabling the Mercury Engine Sport
Exhaust Setting............................... 136
Dometic® Optimus® Features.......... 136
Activating the Optimus Overlay
Bar.................................................... 136
Optimus Overlay Bar Overview....... 137
Optimus Overlay Symbols.............. 137
Optimus Limp Home Mode............ 137
Tide, Current, and Celestial
Information.................................. 138
Tide Station Information.....................138
Current Station Information............... 138
Celestial Information.......................... 138
Viewing Tide Station, Current Station, or
Celestial Information for a Different
Date...................................................... 138
vi Table of Contents

Viewing Information for a Different Tide
or Current Station................................ 138
Viewing Almanac Information from the
Navigation Chart................................. 139
Warning Manager......................... 139
Viewing Messages.............................. 139
Sorting and Filtering Messages......... 139
Saving Messages to a Memory Card. 139
Clearing All of the Messages............. 139
Media Player................................ 139
Opening the Media Player.................. 140
Media Player Icons..........................140
Selecting the Media Device and
Source.................................................. 140
Adjusting the Volume and Audio
Levels................................................... 140
Adjusting the Volume......................140
Adjusting the Audio Level............... 141
Muting the Media Volume.............. 141
Stereo Zones and Groups...................141
Selecting the Home Zone............... 141
Adjusting the Zone Volume............ 142
Disabling a Speaker Zone............... 142
Creating a Group............................. 142
Playing Music...................................... 142
Browsing for Music......................... 142
Setting a Song to Repeat................ 143
Setting All Songs to Repeat............ 143
Setting Songs to Shuffle................. 143
Radio.................................................... 143
Setting the Tuner Region................ 143
Changing the Radio Station............ 143
Changing the Tuning Mode............ 144
Presets............................................. 144
DAB Playback...................................... 144
Setting the DAB Tuner Region........ 144
Scanning for DAB Stations............. 144
Changing DAB Stations...................145
DAB Presets.....................................145
SiriusXM Satellite Radio..................... 145
Locating a SiriusXM Radio ID......... 145
Activating a SiriusXM Subscription 146
Customizing the Channel Guide..... 146
Saving a SiriusXM Channel to the
Presets List...................................... 146
Parental Controls............................ 146
Setting the Device Name.................... 147
Updating the Media Player Software. 147
SiriusXM Weather.........................147
SiriusXM Equipment and Subscription
Requirements...................................... 147
Weather Data Broadcasts.................. 148
Weather Warnings and Weather
Bulletins............................................... 148
Viewing Precipitation Information..... 148
Storm Cell and Lightning
Information...................................... 148
Hurricane Information.....................148
Forecast Information.......................... 148
Viewing a Marine Forecast or an
Offshore Forecast........................... 149
Viewing Forecast Information for
Another Time Period....................... 149
Weather Fronts and Pressure
Centers.............................................149
City Forecasts..................................150
Viewing Fish Mapping Data................150
Viewing Sea Conditions...................... 150
Surface Winds................................. 151
Wave Height, Wave Period, and Wave
Direction...........................................151
Viewing Forecast Sea Conditions
Information for Another Time
Period............................................... 151
Viewing Sea Temperature
Information.......................................... 151
Surface Pressure and Water
Temperature Data........................... 152
Changing the Sea Surface
Temperature Color Range.............. 152
Visibility Information........................... 152
Viewing Forecast Visibility Information
for Another Time Period................. 152
Viewing Buoy Reports......................... 152
Viewing Local Weather Information
near a Buoy...................................... 152
Weather Overlay.................................. 153
Viewing Weather Subscription
Information.......................................... 153
Viewing Video.............................. 153
Selecting a Video Source....................153
Table of Contents vii

Alternating Among Multiple Video
Sources............................................ 153
Networked Video Devices.................. 153
Using Video Presets on Networked
Video Cameras................................ 154
Camera Settings..............................154
Video Settings................................. 155
Associating the Camera to a Video
Source.............................................. 155
Video Camera Movement Control..155
Configuring the Video Appearance.... 156
Camera Tracking.................................156
Setting the Camera Angle and
Height...............................................157
Using Compass Lock...................... 157
Using Vessel Lock........................... 157
Garmin VIRB® Action Cameras......... 158
Connecting a VIRB 360 Action
Camera............................................ 158
Connecting a VIRB Action Camera 158
Controlling the VIRB Action Camera
with the Chartplotter....................... 159
Adding the VIRB Action Camera
Controls to Other Screens.............. 160
HDMI Out Video Considerations........ 161
Pairing the GC™ 100 Camera with a
Garmin Chartplotter............................ 161
Surround View Camera System.....162
Changing a Camera............................ 162
Viewing a Camera Feed Full Screen.. 163
Changing the Surround View Camera
Layout.................................................. 163
Showing and Hiding the Visual
Bumper................................................ 163
Adjusting the Visual Bumper.......... 163
Showing the Distance Marker............ 163
Surround View Camera Movement
Control................................................. 163
Renaming a Camera........................... 163
Setting the Camera to Mirrored Stern
View..................................................... 163
Device Configuration.................... 164
System Settings.................................. 164
Sounds and Display Settings.......... 164
GPS Settings....................................165
Station Settings............................... 165
Viewing System Software
Information...................................... 165
Viewing E-label Regulatory and
Compliance Information................. 165
Preferences Settings.......................... 166
Units Settings.................................. 166
Navigation Settings......................... 166
Communications Settings.................. 169
Viewing Connected Devices........... 169
NMEA 0183 Settings....................... 169
NMEA 2000 Settings....................... 170
Garmin Marine Network..................170
Setting Alarms.....................................170
Navigation Alarms...........................170
System Alarms................................ 171
Sonar Alarms................................... 171
Setting Weather Alarms.................. 171
Setting the Fuel Alarm.................... 171
My Vessel Settings............................. 172
Setting the Keel Offset.................... 173
Setting the Water Temperature
Offset............................................... 174
Fuel Settings.................................... 174
Calibrating a Water-Speed Device.. 174
Other Vessels Settings....................... 175
Settings that are Synced on the Garmin
Marine Network...................................175
Restoring the Original Chartplotter
Factory Settings.................................. 176
Sharing and Managing User Data.. 176
Selecting a File Type for Third-Party
Waypoints and Routes........................ 176
Copying User Data from a Memory
Card......................................................177
Copying User Data to a Memory
Card......................................................177
Updating Built-In Maps with a Memory
Card and Garmin Express................... 177
Backing Up Data to a Computer.........178
Restoring Backup Data to a
Chartplotter......................................... 178
Saving System Information to a Memory
Card......................................................178
Appendix...................................... 179
ActiveCaptain and Garmin Express... 179
Garmin Express App........................... 179
viii Table of Contents

Installing the Garmin Express App on a
Computer......................................... 179
Registering Your Device Using the
Garmin Express App....................... 180
Updating Your Charts Using the
Garmin Express App....................... 181
Software Updates............................181
Cleaning the Screen............................ 182
Viewing Images on a Memory card... 183
Screenshots........................................ 183
Capturing Screenshots................... 183
Copying Screenshots to a
Computer......................................... 183
Troubleshooting.................................. 183
My device will not acquire GPS
signals..............................................183
My device will not turn on or keeps
turning off........................................ 184
My device is not creating waypoints in
the correct location......................... 184
Contacting Garmin Support................184
Specifications......................................185
GPSMAP 7x3 Specifications.......... 185
GPSMAP 9x3 Specifications.......... 186
GPSMAP 12x3 Specifications........ 187
Sonar Models Specifications......... 188
NMEA 2000 PGN Information........ 189
NMEA 0183 Information................. 192
J1939 Information.......................... 194
Table of Contents ix


Introduction
WARNING
See the Important Safety and Product Information guide in the product box for product warnings and other
important information.
All route and navigation lines displayed on the chartplotter are only intended to provide general route guidance
or to identify proper channels, and are not intended to be precisely followed. Always defer to the navaids and
conditions on the water when navigating to avoid groundings or hazards that could result in vessel damage,
personal injury, or death.
NOTE: Not all features are available on all models.
The Garmin® website at support.garmin.com presents up-to-date information about your product. The support
pages will provide answers to frequently asked support questions, and you can download software and chart
updates. There is also contact information to Garmin support should you have any questions.
Device Overview
Touchscreen
Power key
Automatic backlight sensor
2 microSD® memory card slots are located on the back of the device. 32GB max. card size.
Introduction 1

GPSMAP 7x3 and GPSMAP 9x3 Connector View
POWER Power and NMEA® 0183 network
ETHERNET Garmin Marine Network
J1939 J1939 engine network
Ground screw
CVBS IN Composite video in
SONAR 12-pin transducer (Not available on all models)
USB Micro-USB for compatible Garmin card reader1
NMEA 2000 NMEA 2000® network
2 microSD memory card slots, 32GB max.
1 Only compatible Garmin card readers recommended. Third-party card readers are not guaranteed to be fully compatible.
2 Introduction

GPSMAP 12x3 Connector View
POWER Power and NMEA 0183 network
SONAR 12-pin transducer (Not available on all models)
HDMI OUT HDMI® video out
CVBS IN Composite video in
USB Micro-USB for compatible Garmin card reader2
Ground screw
ETHERNET Garmin Marine Network
NMEA 2000 NMEA 2000 network
J1939 Engine or J1939 network
2 microSD memory card slots, 32GB max.
Using the Touchscreen
• Tap the screen to select an item.
• Drag or swipe your finger across the screen to pan or scroll.
• Pinch two fingers together to zoom out.
• Spread two fingers apart to zoom in.
2 Only compatible Garmin card readers recommended. Third-party card readers are not guaranteed to be fully compatible.
Introduction 3

On-Screen Buttons
These on-screen buttons may be displayed on some screens and functions. Some buttons are accessible only
in a combination page or SmartMode™ layout or when accessories, such as a radar, are connected.
4 Introduction

Button Function
Clears the on-screen icons and re-centers the screen on the boat
Opens a full-screen view of the item
Creates a new waypoint
Creates a route, with turns, to the destination
Adds a turn to the route at the selected location
Removes the last added turn from the route
Creates a direct route, without turns, to the destination
Creates an Auto Guidance route to the destination
Begins navigation
Ends navigation
Stops and starts radar transmission
Opens the radar gain adjustment menu
Opens the radar sea clutter adjustment menu
Opens the radar rain clutter adjustment menu
Turns on and off the radar echo trails
Acquires a radar target and begins tracking it
Shows and sets the VRM/EBL line
Opens the menu for the page or function
Opens the Weather menu for the page or function
Opens the Radar menu for the page or function
Opens the Presets menu for the page or function
Introduction 5

Locking and Unlocking the Touchscreen
You can lock the touchscreen to prevent inadvertent screen touches.
1Select > Lock Touchscreen to lock the screen.
2Select to unlock the screen.
Tips and Shortcuts
• Press to turn on the chartplotter.
• From any screen, press repeatedly to scroll through the brightness levels, if available. This can be helpful
when the brightness is so low you cannot see the screen.
• Select from any screen to open to the home screen.
• Select Options to open additional settings about that screen.
• Select Toolbars to quickly add an overlay to the current page.
• Select to close the menu when finished.
• Press to open additional options, such as adjusting the backlight.
• Press , and select Power > Turn Off System, or hold until the Turn Off System bar fills to turn off the
chartplotter, when available.
• Press , and select Power > Sleep Station to set the chartplotter to standby mode, when available.
To exit standby mode, select .
• Depending on the features of your chartplotter, not all feature buttons are visible are on the home screen.
Swipe right or left to view the additional feature buttons.
• On some menu buttons, select the button to enable the option.
A green light on an option indicates the option is enabled .
• When available, select to open the menu.
Accessing Owner's Manuals on the Chartplotter
1Select Info > Owner's Manual.
2Select a manual.
3Select Open.
Accessing the Manuals from the Web
You can get the latest owner's manual and translations of manuals from the Garmin website. The owner's
manual includes instructions for using device features and accessing regulatory information.
1Go to garmin.com/manuals/GPSMAP7x3-9x3-12x3.
2Select the Owner's Manual.
A web manual opens. You can download the entire manual by selecting Download PDF.
Garmin Support Center
Go to support.garmin.com for help and information, such as product manuals, frequently asked questions,
videos, software updates, and customer support.
6 Introduction

Memory Cards
You can use optional memory cards with the chartplotter. Map cards allow you to view high-resolution satellite
imagery and aerial reference photos of ports, harbors, marinas, and other points of interest. You can use blank
memory cards to record Garmin Quickdraw™ Contours mapping, record sonar (with a compatible transducer),
transfer data such as waypoints and routes to another compatible chartplotter or a computer, and use the
ActiveCaptain® app.
This device supports up to a 32 GB memory card, formatted to FAT32 with speed class 4 or higher. Use of
an 8 GB or larger memory card with speed class 10 is recommended. An 8GB memory card is included with
GPSMAP 7x3/9x3/12x3 models.
Model Memory Card Location Memory Card Type
GPSMAP 7x3 Back of the device microSD
GPSMAP 9x3 Back of the device microSD
GPSMAP 12x3 Back of the device microSD
Inserting Memory Cards (GPSMAP 7x3/9x3/12x3)
This device supports up to a 32 GB microSD memory card, formatted to FAT32 with speed class 4 or higher.
Use of an 8 GB or larger memory card with speed class 10 is recommended. An 8GB memory card is included
with GPSMAP 7x3/9x3/12x3 models.
1Open the weather cap on the back of the chartplotter.
2Insert the memory card .
3Press the card in until it clicks.
4Press the weather cap firmly shut to prevent corrosion.
Acquiring GPS Satellite Signals
The device may need a clear view of the sky to acquire satellite signals. The time and date are set automatically
based on the GPS position.
1Turn on the device.
2Wait while the device locates satellites.
It may take 30 to 60 seconds to acquire satellite signals.
To view the GPS satellite signal strength, select Settings > System > GPS.
If the device loses satellite signals, a flashing question mark appears over on the chart.
For more information about GPS, go to garmin.com/aboutGPS. For help acquiring satellite signals, see My
device will not acquire GPS signals, page183.
Introduction 7

Selecting the GPS Source
You can select your preferred source for GPS data, if you have more than one GPS source.
1Select Settings > System > GPS > Source.
2Select the source for GPS data.
Customizing the Chartplotter
Home Screen
The home screen is an overlay that provides access to all of the features in the chartplotter. The features are
dependent on the accessories you have connected to the chartplotter. You may not have all of the options and
features discussed in this manual.
When viewing any screen, you can return to the home screen by selecting .
Settings menu button
Features buttons
Present time, present depth, or autopilot control button
Category tabs
Closes the home screen and returns to the previously open page
The categories tabs provide quick access to the main features of your chartplotter. For example, the Sonar tab
displays the views and screens related to the sonar feature. You can save items you commonly access to the
Pinned category.
TIP: To view the available categories tabs, you may need to click and drag a tab to scroll left or right.
The SmartMode items are geared toward an activity, such as cruising or docking. When a SmartMode button
is selected from the home screen, each display in the station can show unique information. For example, when
Cruising is selected from the home screen, one display can show the navigation chart and another display can
show the radar screen.
When multiple displays are installed on the Garmin Marine Network, you can group them together into a station.
A station enables the displays to work together, instead of as several separate displays. You can customize
the layout of the screens on each display, making each screen different on each display. When you change the
layout of a screen in one display, the changes appear on only that display. When you change the name and
symbol of the layout, those changes appear on all displays in the station, to maintain a consistent appearance.
8 Customizing the Chartplotter
This manual suits for next models
8
Table of contents
Other Garmin Control Panel manuals
Popular Control Panel manuals by other brands
Paradox
Paradox Esprit 727 Installation instructions manual
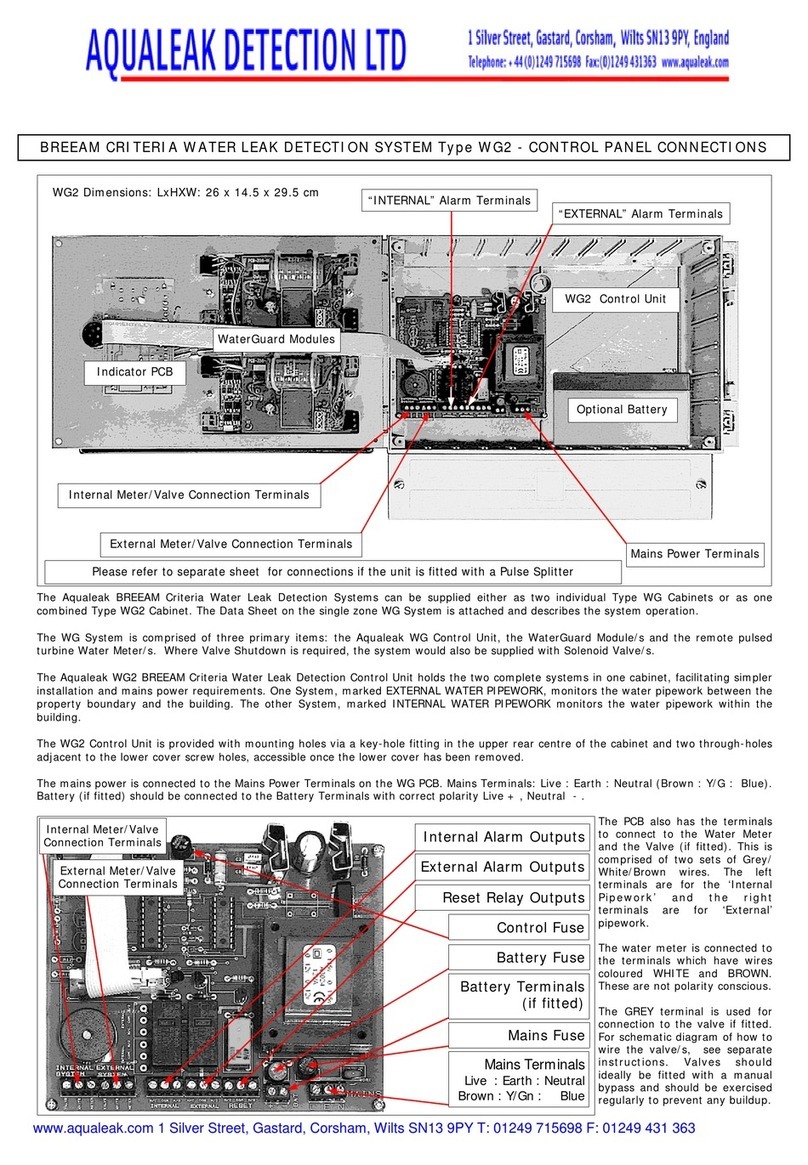
Aqua Leak Detection
Aqua Leak Detection WG2 Connections

Securakey
Securakey SK-ACP User & installation manual
Fire-Lite
Fire-Lite MS-9200UD user manual

CleaverBrooks
CleaverBrooks Master Panel 8 Operation manual
AutomationDirect
AutomationDirect Optimate OP-1212 manual
HIK VISION
HIK VISION Pyronix PCX 78 user guide

Paradox
Paradox DIGIPLEX DGP-NE96 Reference and installation manual

Delta
Delta DOP-100 Series instruction sheet

Scantronic
Scantronic 601 Installation and programming guide
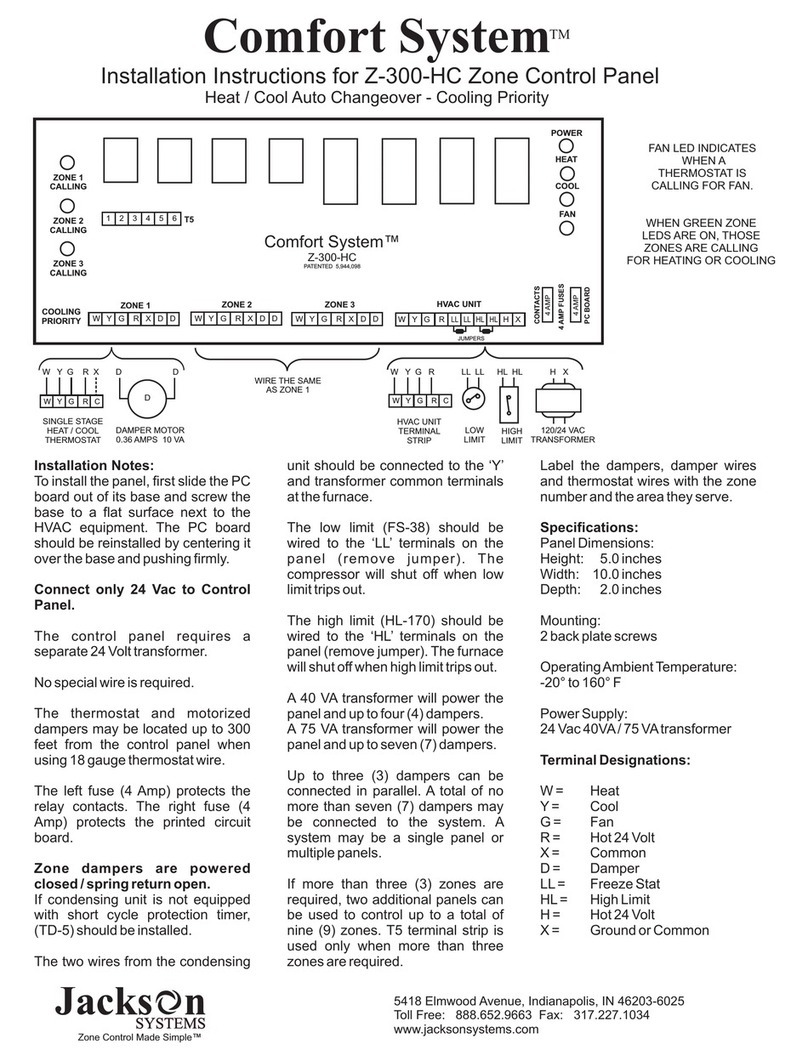
Jackson Systems
Jackson Systems Comfort System Z-300-HC installation instructions

Tyco
Tyco PowerSeries Pro HS3032 user manual
