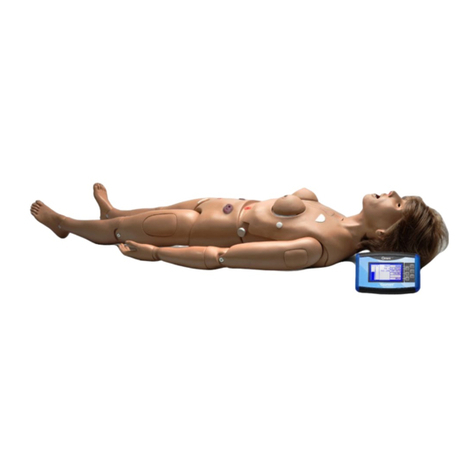
Gaumard SUSIE S2000 User manual

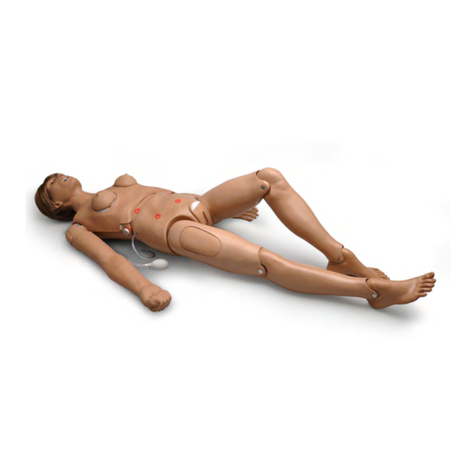
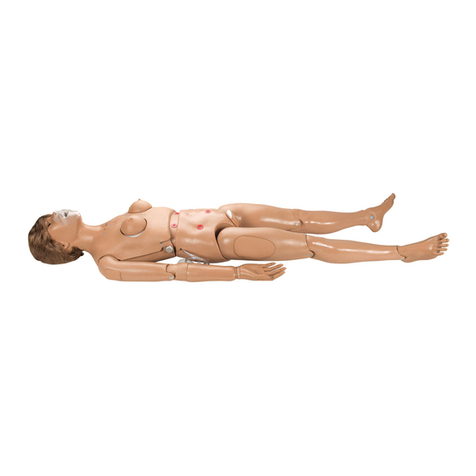
SUSIE® S2000
Prehospital and Nursing Care
User Guide
User Guide 17.10.1
© Gaumard Scientic Company, 2017
All Rights Reserved
www.Gaumard.com
SUSIE® S2000 is an interactive educational system
developed to assist a certied instructor. It is not a substitute
for a comprehensive understanding of the subject matter
and not intended for clinical decision making.


SUSIE® S2000 | User Guide
Table of Contents | iii
Contents
End User License Agreement vi
1. Introduction 1
1.1 Specifications 1
1.2 Care and Maintenance 1
General 1
Operating Conditions 1
Storage Conditions 1
IV Arm 2
Nasogastric Feeding 2
Procedures 2
Cleaning 3
Stoma and Breast Examination Insert Guidelines,
Warnings, and Maintenance 3
Electrical Therapy Warnings 4
2.1 Features 5
Airway 5
Spontaneous Breathing 5
Cardiac 5
Circulation 5
Systemic 6
BSE Techniques 6
Other 6
2.2 Terminology 6
Facilitator 6
Provider 6
3. Equipment Setup 7
Unboxing 7
Leg Assembly 7
Breast Examination Inserts 8
Battery 9
Battery Life 10
3.1 Initializing the Simulator in UNI 11

SUSIE® S2000 | User Guide
iv | Table of Contents
4. Using SUSIE® S2000 13
4.1 Airway 13
Nasal and Oral Intubation 13
Airway Complication 14
Airway Sounds 14
Tracheostomy Care 15
4.2 Breathing 16
Chest Rise 16
Breathing Patterns 16
Lung Sounds 16
Ventilation 16
4.3 Circulation 17
Central Cyanosis 17
Heart Sounds 17
Compression 18
Electrical Therapy 20
Palpable Pulses 25
Programmable Blood Pressure 25
Oxygen Saturation Monitor 27
Intravenous Extremities 29
Finger Stick Bleed 32
4.4 Neurologic 33
Reactive Eyes 33
Seizures 36
4.5 Systemic 36
Interchangeable Breast Examination Package 36
Breast Pathology 36
Bowel Sounds 37
Colostomy and Ileostomy 37
Nasogastric Feeding 38
Intestinal Access 40
Cleaning the Internal Reservoirs 40
Gynecology Package 41
Urinary Catheterization 44
Decubitus Ulcers 47
Intramuscular Injection Sites 47
Ulcerated Foot 48

SUSIE® S2000 | User Guide
Table of Contents | v
4.5 Options 49
Virtual Vital Signs Monitor 49
Drug Recognition 50
5. Working with UNI® 54
5.1 UNI Interface 54
Connection Status 54
Back-Up Battery Indicator 54
Power/Stand By 55
5.2 Quick Launch 55
Clinical Condition 55
Selecting the Scenario 56
Favorites 57
5.3 Status/Details Controls 58
Changing Vital Signs 59
Applying Changes 60
Creating Palette Items 61
5.4 Streaming Audio 63
6. Appendix 64
6.1 Troubleshooting 64
Communication/Power Issues 64
CPR is not detected 65
7. Scenarios 66
7.1 Scenario Description 66
8. Wireless Network 69
Configure the Vital Signs Broadcast 70
9. Warranty 72
9.1 Exclusive One-Year Limited Warranty 72
9.2 Extended Warranty 72
10. Contact Gaumard 73
10.1 Contacting Technical Support 73
10.2 General Information 73

SUSIE® S2000 | User Guide
vi | End User License Agreement
This is a legal agreement between you, the end user, and Gaumard® scientific company, inc. (“Gaumard”). This software is protected by copyright
laws and remains the sole property of Gaumard. By installing the UNI (the “software”) media, you agree to be bound by the terms of this agreement.
If you do not agree to the terms of this agreement, promptly return the uninstalled media and accompanying items to Gaumard at the address
indicated below.
1. Grant of License: Gaumard hereby grants to you (an individual or institution) the right to install and activate the software on one computer for use
with one interactive patient simulator system. The software may also be installed on any number of other computers at the same institution so that
students may access the learning resources. One copy of the software may be made for backup purposes. You may not network this software, or
allow multiple users unless you purchased a multi-user workstation license. Sharing this software with other individuals or allowing other individuals
to view the contents of this software is in violation of this license.
2. Copyright: The software is owned by Gaumard and protected by United States copyright laws and international treaty provisions. Therefore, you
must treat this software like any other copyrighted material. You may not make this software or copies thereof available in any manner or form or
use, copy or transfer the software, in whole or in part, except as provided herein.
3. Other Restrictions: You may not rent or lease this software to any other party. You may not alter, merge, modify, adapt, reverse engineer, decompile
or disassemble the software, or disclose the contents of this software to any other party.
4. Electronic Transmission of Software: If you received the software by electronic transmission or by internet delivery, by installation of the software,
you acknowledge that you have read and understand this license agreement and agree to be bound by its terms and conditions.
5. Term of Agreement: The term of this agreement and the license granted to you pursuant hereto shall commence upon installation of this software.
This agreement and the license granted herein may otherwise be terminated by Gaumard in the event that you are in breach of any provision of this
agreement. In the event of termination, you agree to immediately return this software, accompanying items, and any copies thereof to Gaumard.
6. Limited Warranty:
(A) The cd-rom media (the “media”) which contains this software is warranted, for a period of 30 days from the date of purchase, to be free from
defects in material and workmanship. Electronic transmission is warranted to be free from defects at the moment of transmission. Your sole and
exclusive remedy, and Gaumard’s sole liability, is to replace the defective media or to repeat the electronic transmission provided that you notify
Gaumard in writing of such defect or defective transmission and return the defective media, if any, during the 30-day warranty period.
(B) Except and to the extent expressly provided in paragraph (a), the software and accompanying written materials are provided on an “as is” basis,
without any warranties of any kind, including, but not limited to, any implied warranties of merchantability or fitness for any particular purpose. No oral
or written information or advice given by Gaumard, its dealers, distributors, agents or employees shall create a warranty or in any way increase the
scope of this warranty, and you may not rely on any such information or advice. Gaumard does not warrant, guarantee, or make any representations
regarding the use or the results of use, of the software or written materials in terms of correctness, accuracy, reliability, currentness, or otherwise, and
the entire risk as to the results and performance of the software is assumed by you. If the software or written materials are defective, you and not
Gaumard or its dealers, distributors, agents, or employees, assume the entire cost of all necessary servicing, repair or correction other than expressly
described above.
(C) Neither Gaumard nor anyone else who has been involved in the creation, production or delivery of this product shall be liable for any direct,
indirect, consequential or incidental damages (including damages for loss of business profits, business interruption, loss of business information,
and the like) arising out of the use or inability to use such product or related to this agreement even if Gaumard has been advised of the possibility
of such damages. Gaumard shall not be liable to you for any indirect, special, incidental, or consequential damages or lost profits arising out of or
related to this agreement or your use of the software and/or the related documentation, even if Gaumard has been advised of the possibility of such
damages. In no event shall Gaumard’s liability here under, if any, exceed the purchase price paid by you for the software.
All rights not expressly granted in this license agreement are reserved by Gaumard.
ACKNOWLEDGMENT
By installation of this software, you acknowledge that you have read and understand the foregoing and that you agree to be bound by its terms
and conditions. You also agree that this agreement is the complete and exclusive statement of agreement between the parties and supersedes all
proposed or prior agreements, oral or written, and any other communications between the parties relating to the license described herein.
End User License Agreement
SUSIE® S2000 | User Guide
Introduction | 1
1. Introduction
1.1 Specifications
Height: 63 inches (160 cm)
Weight: 53.4 lbs (24.2 kg)
1.2 Care and Maintenance
WARNING: Damage caused by misuse is not covered by your warranty.
It is critical to understand and comply with the following guidelines.
WARNING: The lubricants and other accessories provided are for
use with the accompanying patient simulator only. The lubricants
and other accessories are not suitable for human use or medical
treatment/diagnosis and should never be used for such purposes.
General
· Ball point pens, ink, and markers permanently stain the skin.
· Do not wrap this or any other Gaumard product in newsprint.
· Marks made with ballpoint pens, ink or marker cannot be removed.
· Replacement parts are available from Gaumard Scientific or from your
Distributor
Operating Conditions
· Operating temperature: 50°-95° F (10°-35° C)
· Humidity: 5%-95% (non-condensing)
Storage Conditions
· Store Simulator in a cool, dry place. Extended storage should be
between 32-85 degrees Fahrenheit (0-29 Celsius). Other temperatures
will cause the simulator to soften and slowly warp
· Humidity: 40%-60% (non-condensing)
· Do not stack or store heavy materials on top of the carton.
WARNING: To avoid damage to the simulator, please store and ship it
in the clear poly bag provided.

SUSIE® S2000 | User Guide
2 | Introduction
IV Arm
· Only use Gaumard’s provided simulated blood. Any other simulated
blood containing sugar or any additive may cause blockage and/or
interruption of the vasculature system.
· The use of needles larger than 22 gauge will reduce the lifetime of the
lower arms’ skin and veins.
· Always purge with clean water and then drain the vein reservoirs at the
end of the simulation session. Doing so will retard the formation of
mold and prevent clogging of the system.
· We recommend flushing veins with 70:30 solution of clean water to
isopropyl alcohol (IPA) at least once per month to prolong the life of
the vasculature.
· When the arm skin and/or veins require replacement, refer to the
“Consumables” section of this guide. For more information regarding
the replacement of veins and other consumable items please contact
customer service.
WARNING: Vein tubing contains latex, which may cause allergic
reactions. Users allergic or sensitive to latex should avoid contact.
Discontinue use of this product and seek medical attention if an
allergic reaction occurs.
Nasogastric Feeding
Before introducing fluids through an NG tube, please review the following
requirements:
· Maintain the simulator with a 30° inclination angle or higher.
· Wait until the software logs the tube placement. Inserting fluids before
the software logs the tube placement will void the warranty and can
permanently damage the simulator.
· Do not exceed a feeding rate of 1 mL/second.
· SUSIE S2000 must be powered on for fluids to be extracted through
the stomach/ intestine fluid access port. Failure to do so can
permanently damage the system.
Procedures
· Do not attempt to intubate without lubricating the airway adjunct with
mineral oil lubricant. Failure to lubricate the device will make intubation
very dicult and is likely to result in damage to the simulator.

SUSIE® S2000 | User Guide
Introduction | 3
· Mouth to mouth resuscitation without a barrier device is not
recommended, as it will contaminate the airway.
· Treat the simulator with the same precautions that would be used with
a real patient.
Cleaning
· The simulator should be cleaned with a cloth dampened with diluted
liquid dish washing soap.
· Remove all traces of any lubricant.
· Do not clean with harsh abrasives.
· Do not use povidone iodine on the simulator.
· Dry thoroughly.
· The simulator is “splash-proof” but not water-proof. Do not submerge
or allow water to enter the interior of the simulator.
Stoma and Breast Examination Insert Guidelines,
Warnings, and Maintenance
· The stomas and breast inserts are constructed of material that
approximates tissue texture; therefore, use the same gentle techniques
as you would when working with a patient.
· Always handle the stomas and inserts with clean hands.
· Always palpate the breast using the fatty pads of the middle three
fingers.
· Prevent items from resting or pressing against the stomas/breasts as
indentations will form on the pressure points. The stomas/breasts may
return to the normal shape after the pressure is relieved.
· When removing the stomas, gently separate the stoma flange from the
torso, and do not apply force directly to the stoma tissue itself.
· Place talcum powder on the stoma/breast surface to reduce tackiness.
Reapply talcum powder as needed.
· Clean the stomas/breast using a mild solution of soap and water.
· Apply talcum powder to return the surface to a skin-like feel and
appearance.
· Always remove the stomas/breasts during transport.
· Store the breast examination inserts facing down inside the protective
case when not in use.
· Do not palpate the breast using fingernails
· Do not clean the inserts with alcohol or aggressive solvents
· Do not pack any sharp objects with the stomas/breast
· Do not press the stomas/breast against soiled surfaces, ink, or
newsprint. The stoma/breast material is absorbent.

SUSIE® S2000 | User Guide
4 | Introduction
Electrical Therapy Warnings
· Defibrillation is only allowed on the large sternum and apex sites.
· Only deliver electrical therapy when the simulator is fully assembled,
dry, and undamaged.
· Make sure the defibrillation patches on the simulator are in good
condition, including removing any and all gel residue on the
defibrillation patches from previous use(s).
· It is a good practice to remove gel residues after every use. Failure to
do so will leave behind a film of electrode gel that hardens causing
arcing and pitting.
· Do not re-use the gel-adhesive pads. Do not leave them on for next day
use.
· Use hard paddles or wet-gel pads preferably.
· Avoid using solid-gel pads since they present higher risk of burning the
simulator’s skin.
· Gel pads have a shelf life. Make sure they are not expired to avoid
arcing.
· Make sure the simulator is not in contact with any electrically
conductive surfaces.
· Use the simulator only in a well-ventilated area, free of all flammable
gases.
· NEVER attempt to service or modify any of the electrical connections,
especially those between conductive skin sites and the internal
electronics.
· Discontinue use if any wires are found exposed with damaged
insulation.
· Real medical products, especially electrodes, sometimes use powerful
adhesives that can be dicult to remove. A gentle, degreasing cleanser
may be needed.
· Electrode gel on the skin between any two electrode targets can
become a pathway for electrical current, just as in real life. If this
occurs, Susie S1001’s skin can be burned.
· Should dark traces appear on the conductive patches due to gel
residue or previous arcing, use a pencil eraser to remove the traces and
then clean with alcohol.
· DO NOT SCRATCH the conductive patches with abrasive objects;
doing so will cause irreversible damage to the conductive sites and
subsequently cause arcing.

SUSIE® S2000 | User Guide
Overview | 5
2. Overview
2.1 Features
The SUSIE® S2000 is a prehospital and nursing care simulator is equipped
with the following features:
Airway
· Oral and nasal intubation
· Tongue edema and laryngospasm
· Sensors detect depth of intubation
· Automatic unilateral chest rise with right mainstem intubation
· Tracheostomy Care
Spontaneous Breathing
· Ventilation is measured and logged
· Select independent left and right lung sounds
· Multiple lung sounds are synchronized with selectable breathing
patterns
· Accommodates assisted ventilation, including bag-valve-mask and
mechanical support with chest rise
Cardiac
· Multiple heart sounds
· Chest compressions are measured and logged
· Electrical therapy using real equipment
Circulation
· Take blood pressure readings on the left arm using palpation or
auscultation via modified cu
· Bilateral carotid and femoral pulse and left radial pulse
· Pulses are continuous, synchronized with the ECG, even during a paced
rhythm
· Bilateral IV training arms
· Oxygen saturation monitors placement detection on the left index
finger
· Monitor and cardiovert rhythms using a real AED/defibrillator
· Deliver up to 360 Joule of real energy to skin patches

SUSIE® S2000 | User Guide
6 | Overview
Systemic
· Programmable bowl sounds
· Decubitus ulcers
· Colostomy and ileostomy exercises
· Perform female/male catheterization and irrigation
· Enema exercises
BSE Techniques
· Interchangeable left breasts
· Right breast contains 8, 10, 16, and 20 mm lumps
Other
· One year limited warranty
2.2 Terminology
Facilitator
The person conducting the simulation; an instructor or lab sta member.
Provider
A person participating in the simulation as a healthcare provider.

SUSIE® S2000 | User Guide
Equipment Setup | 7
3. Equipment Setup
Unboxing
Remove the simulator from the blue case with the assistance of at least
two persons. Avoid lifting the simulator by the arms as it could damage
the shoulder joints. Rest the simulator on a patient table capable of
supporting the weight of a real adult patient.
WARNING: To avoid damage to the simulator, please store and ship it
in the clear poly bag provided.
Leg Assembly
Follow the steps below to install the lower legs.
1. Remove the fixed bolts from the
knee joints using the hexagonal
wrench included.
2. Connect the red pedal pulse line
and tuck the hose into the lower
leg
3. Align the lower leg to the
upper leg

SUSIE® S2000 | User Guide
8 | Equipment Setup
4. Insert the leg bolts
5. Secure the knee bolts without
over tightening.
Breast Examination Inserts
SUSIE S2000’s breast examination
inserts are shipped in a protective
case. There are two right breasts
labeled (R1, R2) and five left breasts
(L3, L4, L5, L6, L7).
WARNING: Always store the breast inserts inside the protective
case after simulation and during transport. Go to page 3. for more
maintenance and care information.
1. Begin by extending SUSIE’s arms
on a flat surface.
2. Unscrew the waist knobs

SUSIE® S2000 | User Guide
Equipment Setup | 9
3. Unfasten the skin from the
VELCRO attachment located on
both shoulders.
WARNING: Do not pull the skin’s
ECG lead connection located on
the left side of the chest cavity.
Damage to this connection will
require repair not covered under
warranty.
4. Carefully place the breast inserts
beneath the chest skin.
5. Secure the chest skin by first
attaching the VELCRO located on
both shoulders.
6. Adjust the skin around the power
port located on the right side.
7. Tightly fasten the skin’s lateral Velcro attachments.
Battery
SUSIE S2000 is shipped with the internal battery disconnected. Connect
the battery lead as part of the first install process.
1. Locate the white connectors on
Susie’s right side

SUSIE® S2000 | User Guide
10 | Equipment Setup
2. Connect the internal battery leads
by clipping the white connectors
together.
3. Unscrew the waist knob and lift
the chest skin slightly
4. Tuck the battery wiring
underneath the skin.
5. Screw the waist knobs back in
place
Plug the charger into the port and let
her charge.
Battery Life
Once the battery is fully charged, the simulator can be operated on
battery power for up to 4 hours.

SUSIE® S2000 | User Guide
Equipment Setup | 11
To display the battery level, the UNI® software must first establish
a connection with the simulator. For more information about the
battery indicator, refer to “Working with UNI®” section.
WARNING: Do not store the simulator with a discharged battery. It is
good practice to re-charge the battery at the end of every simulation
session. In addition, re-charged the battery at least once every 2
months even if the simulator is not being used; permanent loss of
capacity might occur because of self-discharge.
3.1 Initializing the Simulator in UNI
The laptop operates the simulator wirelessly.
Follow the steps below to connect to UNI:
1. Plug in the RF module to the PC
2. Turn on the tablet
3. Double-click on the UNI icon

SUSIE® S2000 | User Guide
12 | Equipment Setup
4. Select Susie S2000 and click
“START”
Susie S2000 will establish
communication within 1 minute.

SUSIE® S2000 | User Guide
Using SUSIE® S2000 | 13
4. Using SUSIE® S2000
4.1 Airway
Nasal and Oral Intubation
SUSIE’s airway can be intubated
through the left nasal opening and
orally using LMA or endotracheal
tubes.
The airway has anatomical landmarks
and can be intubated orally or nasally.
If the endotracheal tube is inserted
too deep, the left lung is automatically
disabled, realistically demonstrating
right mainstem intubation.
Before intubating, follow the steps below:
1. Lubricate the ET tube or any
other invasive device
2. Click “Respiratory Rate”
3. Reduce the respiratory
rate to 0 bpm and click the
green check.

SUSIE® S2000 | User Guide
14 | Using SUSIE® S2000
WARNING: Do not spray mineral oil directly into the mouth or the
airway.
Do not introduce liquids into the airway until reading the nasogastric
feeding in the Systemic section.
4. Perform the intubation
5. UNI will log correct or incorrect
intubation
Procedure Recommended Device Size
Intubation (Blade size) Miller 4 or MAC 3.5
LMA Size 4
Nasal Intubation 8 mm catheter
Oral Intubation ETT 7.0 or 7.5
Airway Complication
Use the software controls to
enable the airway complications
and make intubation
more dicult. SUSIE can
display tongue edema and
laryngospasm.
Airway Sounds
SUSIE can produce audible
airway sounds synchronized with
her breathing. Use the software
controls to change the sound
type and adjust the volume.
Auscultate using a standard
stethoscope.
Table of contents
Other Gaumard Medical Equipment manuals

Gaumard
Gaumard HAL S1030 User manual

Gaumard
Gaumard S230.40 User manual

Gaumard
Gaumard Clinical Chloe S222 User manual

Gaumard
Gaumard CODE BLUE S303 User manual

Gaumard
Gaumard CPR SUSIE S306 User manual

Gaumard
Gaumard S402.100 User manual

Gaumard
Gaumard Susie Simon S200 User manual

Gaumard
Gaumard S230.7 User manual

Gaumard
Gaumard Super Chloe S222.100 User manual

Gaumard
Gaumard SUSIE S1001 User manual