manuals.online logo
Brands
  1. Home
  2. •
  3. Brands
  4. •
  5. GCTek
  6. •
  7. Water Filtration System
  8. •
  9. GCTek AlphaONE User manual

GCTek AlphaONE User manual

AlphaONE Instructions
Congratulations
on your new AlphaONE Filter
You have made a wise choice in choosing the AlphaONE filter. Your filter was
carefully thought out and designed to give you many years of faithful, worry free ser-
vice. Some of the care and planning of your filter is self evident in even the small things,
such as the Lifetime Warranty on the tank itself. The tanks are made of the ultimate filter
vessel material, fiberglass. This is a higher quality tank than the typical plastic tank
used on many filters.
Your clear spring check valve for the AlphaONE bead Agitator is designed so
in time (normally many, many years) when the check valve goes out you can simply
unscrew the union and replace just the valve seat itself in just a few minutes.
Your Multiport valve was carefully chosen to be the least restrictive backwash
valve on the market to give maximum flows for the least energy dollars. The internals
were carefully designed with maximum flows in mind to give further energy savings, by
allowing you to use the most energy efficient pumps on the market.
The AlphaONE Life Support System allows you to hook up a koi pond air
pump to the supplied fitting on the front of the multiport valve and supply life giving
oxygen to the filter bacteria during times of medical bypass or pump failure.
The AlphaONE Bead Agitator is a high quality air blower that injects huge
amounts of air into the vessel prior to backwash, this breaks up the bead pack which
allows for a very thorough backwash.
Rest assured that quality was the main consideration
when your AlphaONE filter was designed and assembled.
Getting to know your
AlphaONE filter
Taking a few minutes to get to know the
different components of your
AlphaONE will assure that you are using
it to it’s maximum potential.
Assembly of your
AlphaONE
AlphaONE
Spring check valve
AlphaONE
Tank
5. Open Tank enclo-
sure. Unscrew the
black Omni-
fuser at the
top inside of
the tank.
Cover
exposed
pipe with
rag or tape.
Pour MEDIA
into filter.
Reattach
Omnifuser.
Replace
Tank enclo-
sure cap
and tighten
black ring.
If you have any questions on your filter feel free
to give us a call and we’ll be glad to help.
AlphaONE
Multiport Valve
AlphaONE
Pressure gauge
AlphaONE
“ALISS”
AlphaONE
Life Support
System
AlphaONE
Water drain
AlphaONE
Tank enclosure
opening
AlphaONE
Air release valve
AlphaONE
Media Agitator
AlphaONE
Agitator Slide valve
AlphaONE
Sight Glass
2. Hand tighten
Multiport valve to
the tank. It just slips
into position and
hand tightens with
no solvent gluing.
NOTE: top fitting is
hidden in this pic-
ture.
3. Thread the
“ALISS” into place
on the front of the
Multiport valve
(Use thread tape on
threads)
4. Set the MEDIA
AGITATOR in place
on top of the spring
check valve/Slide
valve. You may use
a set screw to attach
it to the pipe if
desired. Do not use
glue to attach.
6. Thread the
Pressure Gauge into
place.
(Use thread tape on
threads)
1. Tighten Water
Drain being careful
to not over tighten.
AlphaONE
Life Support System
Your AlphaONE filter addresses the age old problem of
“how do I keep my beneficial bacteria from dying when I
have to do a medical bypass or I experience pump fail-
ure?”
Easy and simple. Just run a line from your koi pond
air pump and attach it to the barbed fitting on the front of
the multiport valve. Set the Multiport valve to the “RINSE”
setting prior to turning on the air pump. Turn on the air
pump and the oxygen supplied by the air pump will keep
the bacteria happy and safe for several days if necessary.
Remember, never run the water pump at the same time that
you are running your air pump. It will cause damage to the
air pump.
Winterizing the AlphaONE
1. Turn pump off and drain water from pump basket and volute.
2. Open water drain on filter. No media will come out, only wa-
ter. Make sure all water is out of filter or damage will occur
not covered by warranty.
3. Loosen the Multiport valve from the housing and back the
valve away from the tank to release any water in the valve.
4. Now just wait for Spring.
I
IF
F
YOU
YOU
HAVE
HAVE
QUESTIONS
QUESTIONS
ABOUT
ABOUT
YOUR
YOUR
FILTER
FILTER
SYSTEM
SYSTEM
AND
AND
NEED
NEED
HELP
HELP,
, PLEASE
PLEASE
CON-
CON-
TACT
TACT
YOUR
YOUR
DEALER
DEALER
OR
OR
GC T
GC TEK
EK
AT
AT
405
405-
-258
258-
-5551
5551
F
FAX
AX 866
866-
-728
728-
-0678
0678
I
INFO
NFO@
@GCTEK
GCTEK.
.COM
COM
T
THANK
HANK
YOU
YOU
FOR
FOR
CHOOSING
CHOOSING
A
ALPHA
LPHAONE
ONE
—
—
G
GARY
ARY C
CRYER
RYER
Backwashing the
AlphaONE filter
1. Turn off water pump. Move Multiport valve to “RINSE”. See NOTE
above. Open Slide Valve(pull outward). Turn on AlphaONE Agitator.
Run and cycle Agitator with 20 second on and 5 second off cycles for 5
or 6 cycles. Turn off Agitator. Close Slide Valve(Push inward) shown
above.
2. While still in the “RINSE” mode, turn water pump on and run until
water starts to go out the waste line and then stop water pump.
3. Move Multiport valve to “BACKWASH” position, start water pump
and run until water is clear in sight glass. Usually 1-3 minutes. Stop
pump.
4. Move Multiport valve to the “RINSE” position, restart pump and run
until water is clear in sight glass. Stop water pump.
5. Move Multiport valve to the “FILTER” position and restart the water
pump. You’re done, it’s that simple.
Your AlphaONE filter was designed to get rid of the solids when back-
washed thus providing you with a more efficient filter and fewer back-
washings being needed.
Other settings on your dial are the following:
Waste: Bypasses the filter and sends water to waste.
Recirculate: Bypasses the filter and sends water back to
the pond.
Closed: keeps water from going through filter.
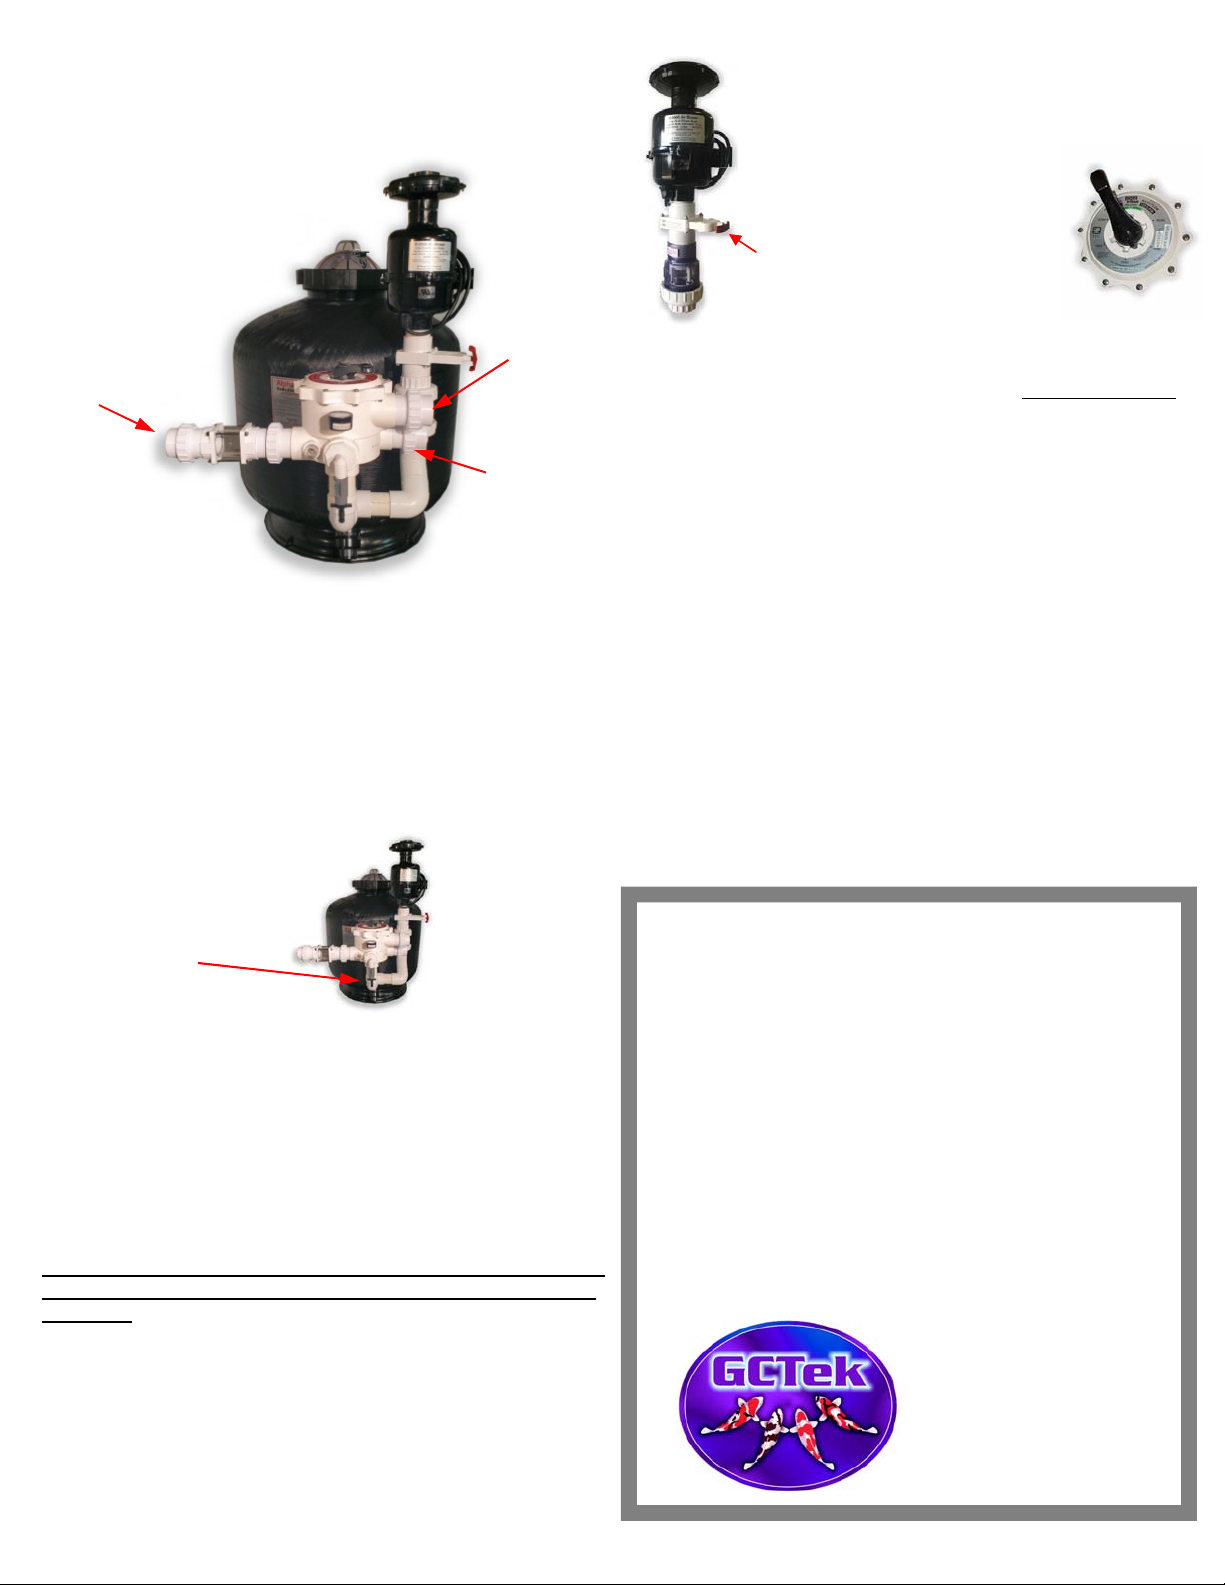
AlphaONE
Plumbing hook up assembly
Make plumbing hook ups as shown in
the picture. Use 2” pipe to connect to
unions to secure plumbing to valve.
Waste line hook up.
Note: opening on
left side of valve.
ALISS
Valve
NOTE: New for 2018
Before proceding to the steps be-
low perform this step.
Turn and pull the handle out be-
fore turning on Agitator.
Immediately following the Agita-
tion cycle close the valve before
completing Backwashing cycle.
Water line from the
pump.
(Upper opening)
Return line back to
pond.
(Lower opening)

Other GCTek Water Filtration System manuals

GCTek AquaBead User guide

GCTek

GCTek AquaBead User guide

GCTek PondKeeper User guide

GCTek

GCTek PondKeeper User guide

GCTek AquaBead User manual

GCTek

GCTek AquaBead User manual

GCTek AlphaONE User manual

GCTek

GCTek AlphaONE User manual

Popular Water Filtration System manuals by other brands

Lincat L3 User and installation instructions

Lincat

Lincat L3 User and installation instructions

Ferplast bluextreme 700 user manual

Ferplast

Ferplast bluextreme 700 user manual

Amway eSpring Easy installation guide

Amway

Amway eSpring Easy installation guide

AQUAMAXX cTech Nano Calcium Reactor user manual

AQUAMAXX

AQUAMAXX cTech Nano Calcium Reactor user manual

Wilkerson WSO-**-000 Series Installation & service instructions

Wilkerson

Wilkerson WSO-**-000 Series Installation & service instructions

LARQ Bottle Movement Online manual

LARQ

LARQ Bottle Movement Online manual

GE Osmonics E4H Series Operation and maintenance manual

GE

GE Osmonics E4H Series Operation and maintenance manual

Kongskilde RVS 5000 Operator's manual

Kongskilde

Kongskilde RVS 5000 Operator's manual

PUR PQC3R0 owner's manual

PUR

PUR PQC3R0 owner's manual

urmet domus Agora 1372 Installation sheet

urmet domus

urmet domus Agora 1372 Installation sheet

VITO FT 440 user manual

VITO

VITO FT 440 user manual

3M Purification AP101 instructions

3M Purification

3M Purification AP101 instructions

Fumex FA1 Series Operation manual

Fumex

Fumex FA1 Series Operation manual

GE MILLENIUM  OSMONICS MILLENIUMTM REVERSE OSMOSIS... Operation and maintenance manual

GE

GE MILLENIUM OSMONICS MILLENIUMTM REVERSE OSMOSIS... Operation and maintenance manual

Solaxx Salt3 Installation and operating manual

Solaxx

Solaxx Salt3 Installation and operating manual

BWT Diago HWS-A Installation and operating instructions

BWT

BWT Diago HWS-A Installation and operating instructions

A.O. Smith X5 user guide

A.O. Smith

A.O. Smith X5 user guide

Canature RO 75 GPD 4 STAGE BP Installation and operation manual

Canature

Canature RO 75 GPD 4 STAGE BP Installation and operation manual

manuals.online logo
manuals.online logoBrands
  • About & Mission
  • Contact us
  • Privacy Policy
  • Terms and Conditions

Copyright 2025 Manuals.Online. All Rights Reserved.