Chungho IGUASSU SPARKLING RO User manual

CHP-5361DL
▶
Read the u er' manual thoroughly before u ing the unit.
▶
De ign and color may differ from the picture.
▶
Unit appearance, pecification, etc. are ubject to change without
prior notice if nece ary for improving unit performance.
▶
The rated voltage of thi unit i 220-240 V~ / 50 Hz only
User's manual

01
Unit features
Easy extract function of carbonated water
t is convenient to extract carbonated water by pressing the button once.
Reverse osmosis purifying system without pump
This unit serves purified water from reverse osmosis system without booster pump. This decreases the function noise and
power consumption accordingly.
ACS smart cleaning function
This makes users not to worry about contamination by bacteria as it empties the ambient water and cold tank automatically
every 4 days in fixed time and fill the clean water which is sterilized by UV sterilizer.
Detachable carbonated water holder and hygienic operation
Detachable carbonated water holder helps stay clean by rinsing it with water simply.
All-in-one water purifier with carbonated water
Water with 3 different temperature (hot, cold and ambient), ice and extract function offer various beverages on
user's preference.
Compact size (width: 29 cm)
Compact-sized water purifier can be installed by effectively utilizing the space.
Extended water dispensing space
t is convenient to take water with any shape of bottle as height of water dispensing space is up to 25 cm.
Dual heating system
Hot water is made by standby heating mode or hot tank heating mode. User can easily select the mode by their preference.
t enhances energy efficiency.
24 hour natural water circulation system(N.W.P.W)
ChungHo Nais purification system is designed to allow water to continuously flow for 24 hours within the water purifier by
adopting a natural circulation method. This mode, entitled N.W.P.W. applies the natural weight of water pressure in order to
supply always clean and fresh water. (patent : No.105585)
Filter structure is designed for user friendly
t is convenient to replace filters as they could be detached by lifting them.
Easy maintenance system
t is more convenient that empty water tank by pressing the button once for cleaning inside.
1
2
3
4
5
6
7
8
9
10
11
his appliance is intended to be used in household and similar applications such as
- staff kitchen areas in shops, offices and other working environments
- farm houses
- by clients in hotels, motels and other residential type environments
- bed and breakfast type environments

We greatly appreciate your purchase of " GUASSU SPARKL NG RO". This unit is manufactured according to standard specification,
and produced with a reliability test on all integrated components. The system is tested thoroughly on strict quality guidelines including
temperature, moisture, shock, dust, vibration, drop, etc. We are sure that these various production processes will provide the utmost
customer satisfaction in both quality and excellence.
Before installing or using the unit, read this user's manual thoroughly and keep it for your future reference.
1.제품의특징02
Greetings
Safety precautions 03~06
Names of each part 07
nstallation cautions 08
nstallation method 09
How to use carbonated water 10~14
Extract button for carbonated water 10
LED display for carbonated water 10 ~11
How to use carbonated water tray 12
How to replace the cylinder 13
Replacement cycle of cylinder 14
Operation 15
Display and function settings (A) 15
Water dispensing selection (B) 15
Usage 16~19
Function setting and releasing 16 ~17
ce and water dispensing method 18 ~19
Smart cleaning function 19
Cautions during use 20
Cleaning 21~23
Water tank 21~22
ce dispensing spout 22
Water dispensing spout 23
Carbonated water spout 23
Carbonated water tray 23
Maintenance 24
Filters 25
Filter function 25
Filter service life 25
Replacement 26
Specification 27
Flow diagram 28
Recommended replacement part 28
Troubleshooting 29
Memo 30

●
When the power cord has
been damaged, change the
power cord in order to
prevent danger such as an
electric shock, etc.
(Do not use damaged or loose
wall outlets. An electric shock
or fire may occur.)
●
Keep the cord out of heavy
traffic areas.
(This can lead to overheating
the outlet.)
●
nsert the plug to the outlet
firmly to avoid loosening.
(Unstable connection may
cause a fire.)
●
Do not bend the power cord
excessively or put heavy
objects over the power cord.
(An electric shock or fire may
occur.) ●f there is dust, water or etc.
on the power plug pin, wipe it
off well.
(Wipe it off dust, water or etc.
on the power plug pin before
connection.)
Associated with the possibility for serious injury or death.
Danger
Cautions are divided into 2 categories : ‘Danger’ and ‘Caution’
Safet precautions
●
Leave the unit unplugged,
before cleaning the inside
of the unit.
(An electric shock or fire
may occur.)
●
Do not touch the power plug
with wet hands.
(An electric shock may occur.) ●Do not put candles, lit
cigarettes, etc. on the unit.
(There is danger of a fire.)
●Do not put a bowl containing
water, chemicals, small
metals, etc. on the unit.
( f these materials drop into
the inside of the unit, this
may cause an electric shock
or fire.)
●
To disconnect the unit, be sure
to pull by the plug and not the
cord.
(Be sure to pull by the plug, not
the cord to disconnect the unit.)
03

●f the unit is damaged or
malfunctioning, do not disa-
ssemble, repair, or remodel it
on your own.
●
Close supervision is required
when any appliance is used
by or near children.
●
Children shall not play with the
appliance.
●
Cleaning and user maintenance
shall not be made by children
without supervision.
●
this appliance can be used by
children aged from 8 years and
above and persons with reduced
physical, sensory or mental capa-
bilities or lack of experience and
knowledge if they have been
given supervision or instruction
concerning use of the appliance
in a safe way and understand the
hazards involved ●Do not install the unit in or
around largely damp areas,
at a place near flammable
materials, or at a place
exposed to rain or snow.
(There is danger of an
electric shock or fire.)
●Be careful when replacing the
cylinder with remaining gas.
( t may cause injure or unit
damage by pressure.)
Associated with the possibility for serious injury or death.
Danger
04
●
Do not expose the cylinder to
heat or direct sunlight or store at
temperatures above 50 OCand
keep in a cool place.
●
Do not tamper with this cylinder
in any way, including puncturing,
incinerating or removing the valve.
( t may cause explosion.)
●
Do not put carbonated water into
fishbowl, aquarium.
( t may kill the fish.)

05
●
Do not put any covering on
the rear and side of the unit.
Blocking ventilation holes may
raise inside temperature and
cause system malfunction or even
system stoppage.
●
To avoid burns from hot water,
use containers such as a cup during
hot water dispensing.
●
Do not install the unit in a place
where the temperature may drop
below 32 °F(0 °C).
●
Do not operate the unit standing
unbalanced.
( t can cause malfunction.)
●
Do not tilt the unit over 45°
during transportation.
(Severe inclination can cause
performance degradation.)
●
Do not install the unit in a
sloped or unstable position.
(This can cause a reduced
performance, system damage
or overall trouble.)
Associated with the possibility of injury, property damage and reduced performance of unit.
Caution
Safety precautions
●
When taking ice, place a contain-
er close to the ice dispensing
hole not to drop ice on the floor.
(Be careful in order not to allow
containers such as cups, etc. to
be inserted into the inside of ice
dispensing hole.)
●
When taking ice, avoid using a glass
cup and avoid taking ice with cup
filled with beverage, coffee etc.
(A glass cup can be broken by abrupt
temperature change or the ice strike.
Beverage and coffee can splash into
ice dispensing hole and it can cause
mold.)
●
Do not put foreign materials into
the ice dispensing hole or block the
dispensing hole.
(This can cause system malfunction.)

06
●
After transporting the unit, do
not supply the power for at
least 30 minutes to stabilize the
unit.
Symptoms under normal operations
1. During use of the unit, a murmuring water-flow sound, a clattering ice dropping sound, etc. may occur during cold water
making process or ice making process.
2. Opaque ice may occasionally be served, but there is no abnormality in unit performance or ice quality.
3. TDSs (Total Dissolved Solids) found in ambient water, cold water, and ice may vary from one another.
(This is a result of the freezing point method.)
4. After the system power source is interrupted and then again restarted, irregular ice may temporarily be served.
Associated with the possibility of injury, property damage and reduced performance of unit.
Caution
●
Do not insert the fingers into
carbonated water outlet with
holder separated.
(Finger can be injured by being
caught.)
●
While carbonated water is extract-
ing, never try to separate the car-
bonated water holder.
( t can cause malfunction.)
●
Make sure carbonated water tray is
properly placed when you put the
cup on the tray.
(carbonated water can spill over.)
●
Keep tube fixed properly so as not to splash around
area with water from brine tube.
30 Minutes

07
Names of each part
Drain switch
Water dispensing button
Water dispensing spout
Hot/Ambi./Cold water display
Hot water : Red, Ambient water : Green, Cold water : Blue
CE/LOCK setting touch button
Water tray
Lock display
ce making display
ce full display
Hot water selection touch button
Carbonated water
extract display and control panel
Cold water selection touch button
Ambient water selection touch button
Hot tank heating/Off/Standby
heating selection switch
carbonated water tray
ce dispensing
touch button
ce dispensing display
ce dispensing spout
carbonated water holder
Water full display
Hot water display

08
Installation cautions
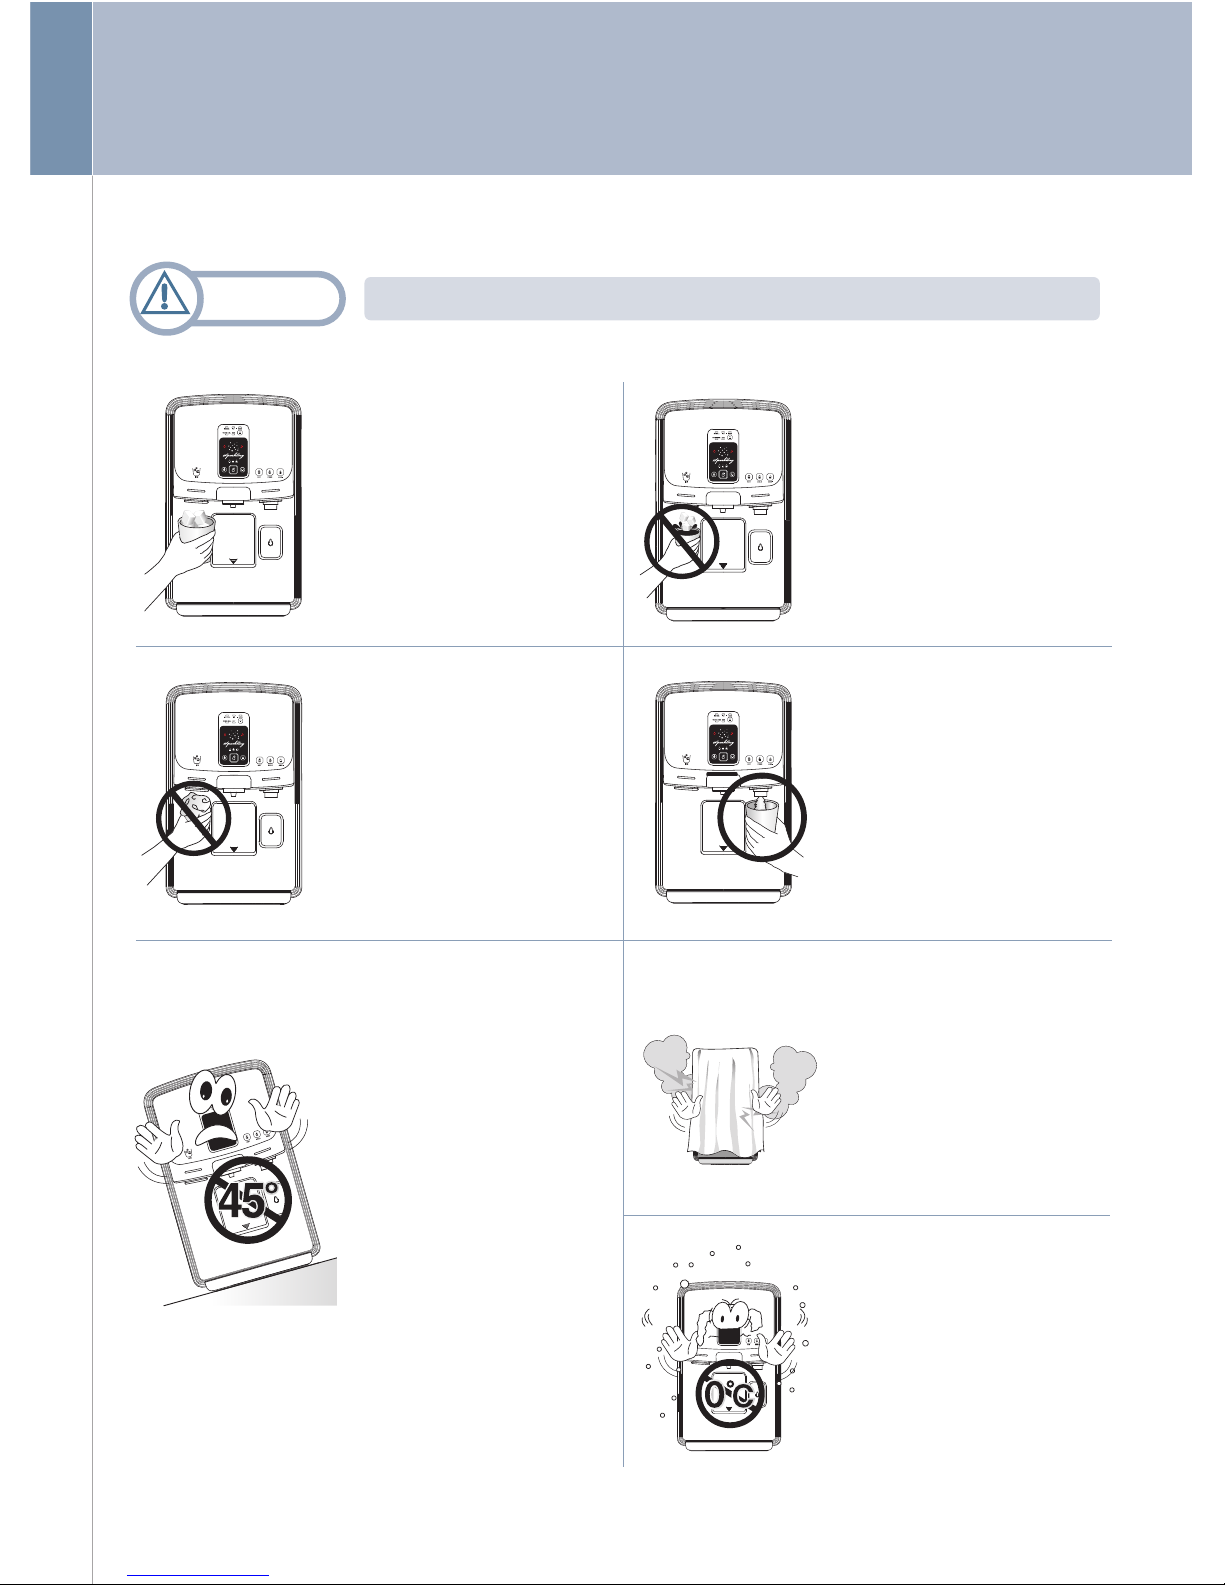
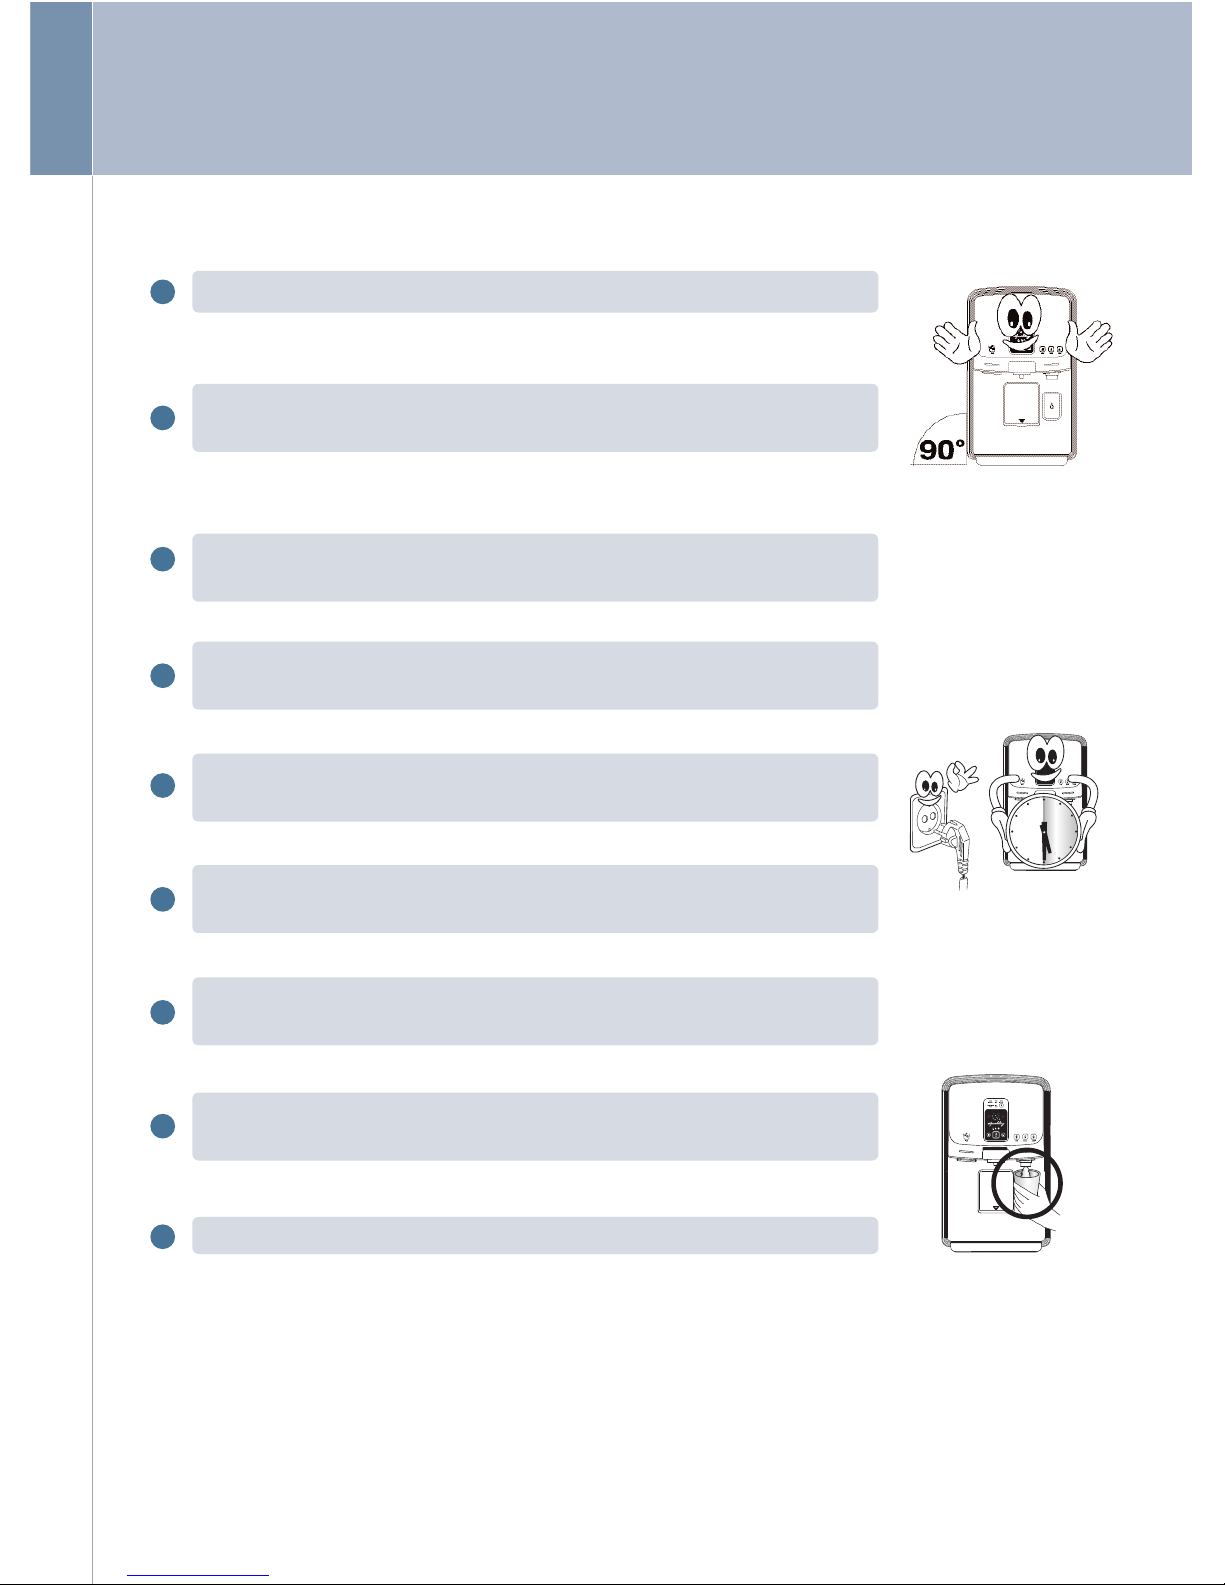
When transporting the unit, do not tilt it over 45°
※Severe tilting can cause performance degradation.
Keep the unit approximately 8" (20 cm) away from the wall for proper ventilation.
Use the following water quality range.
• Water pressure : 1.4~7 kgf/cm2(137~686 kPa) • Water temperature : 39~100 °F(4~38 °C)
• pH : 5.8~8.5 • Water hardness : 300 ppm or less
• Evaporated residue : 500 ppm or less • Water quality : Biologically safe water quality
※When using the water out of range, discuss it with the distributor. f not, the unit can be excluded from the stated warranty.
Do not connect hot water over 100 °F(38 °C) to this unit.
※This can cause trouble and malfunction.
When connecting tube, ensure that the tube is not bent or pressed down by any heavy objects.
※f tube is bent or pressed, water does not flow well and can cause problems.
The highest point of installed brine tube must be less than 12"(30 cm) away from the flat floor.
Total length of brine tube must be less than 118"(3 m). Otherwise, water is not drained well.
When installing more than one unit(water purifier, shower softener, etc.), tubes of source water, brine water
need to be independent for one another.
Adjust the tube so that brine water may not splash around area.
※Brine water can easily be used for other purposes, such as bathroom cleaning, house cleaning, laundering, washing, etc.
Never use the brine water for drinking or cooking.
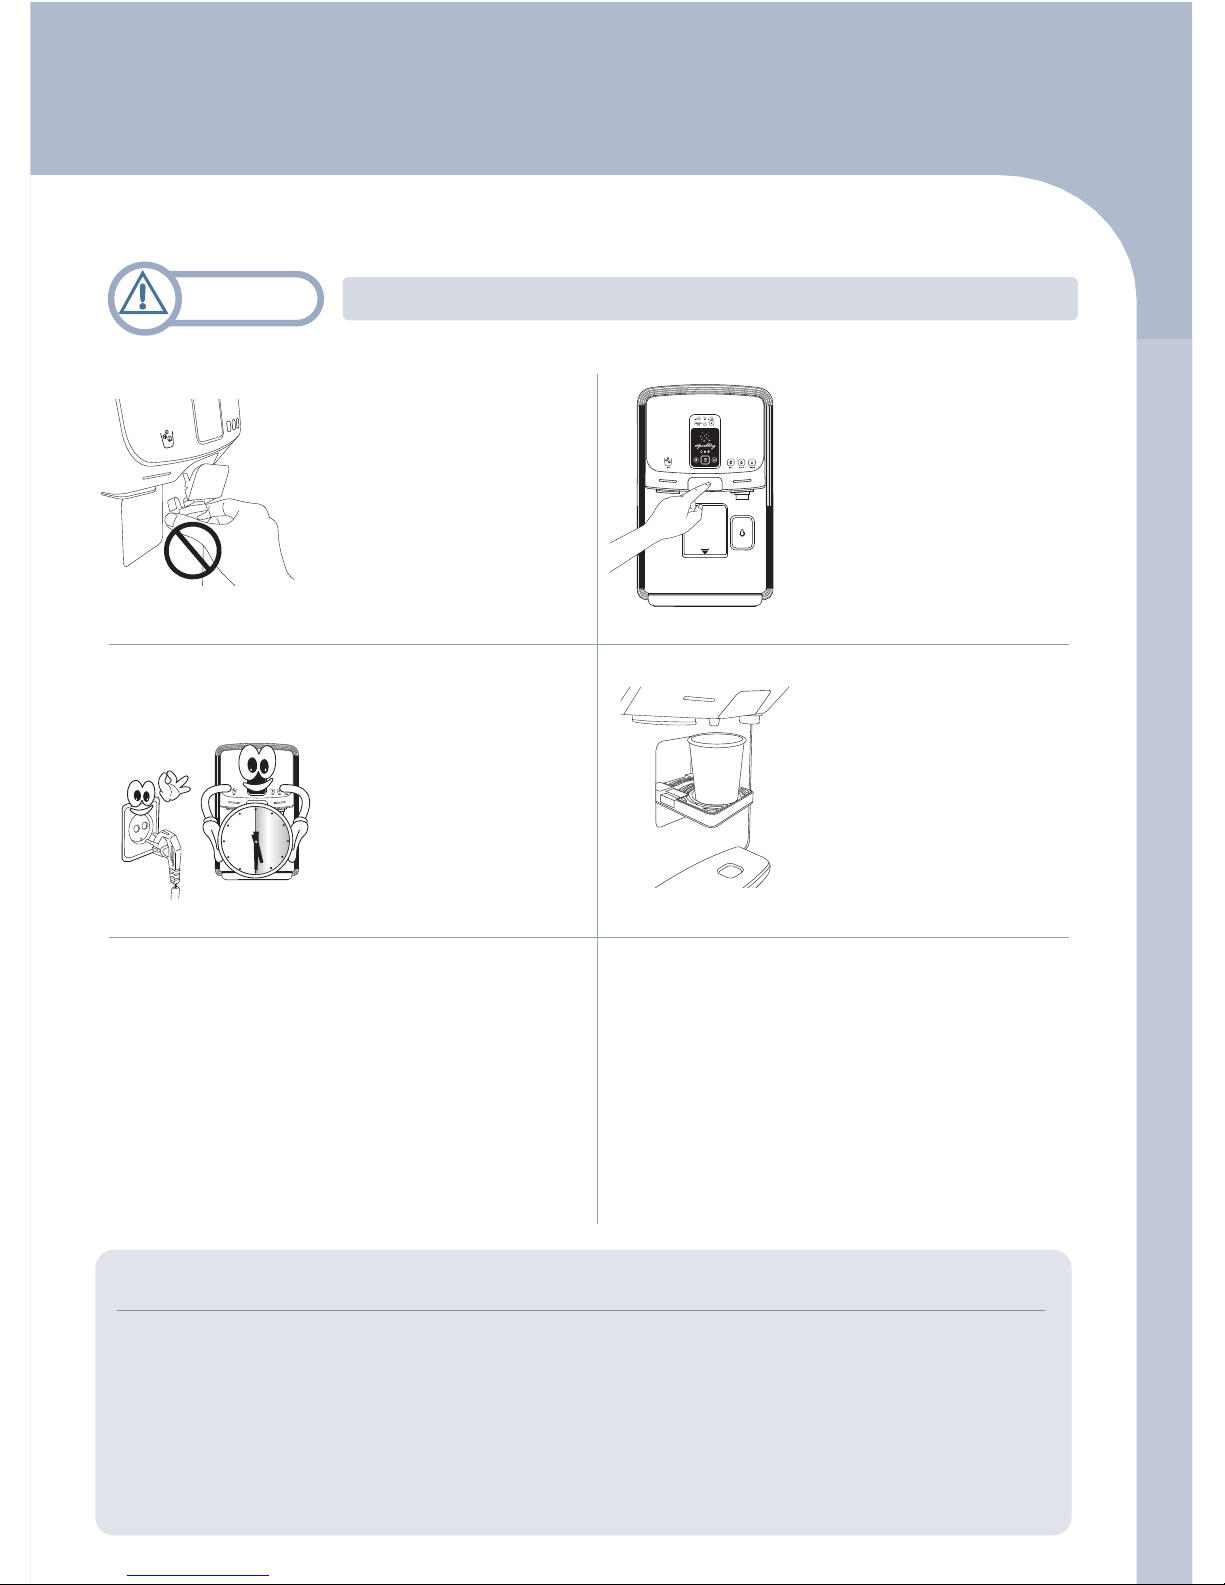
Do not install the unit at the following places.
• Near fire or heater • Near flammable material • Wet place • Near the toilet
• A place exposed to rain or snow • A place exposed to direct sunlight
• Near chemicals(volatile material, organic solvent, etc.)
• A place below 32 °F(0 °C) or a place with the possibility of dropping below 32 °F(0 °C).
• A place above 104 °F(40 °C) or a place with the possibility of rising above 104 °F(40 °C).
nstall the unit at a place where the surface is flat, and after installation, always adjust the level of the unit
by using a level gauge.
※More 3˚ tilting can cause performance degradation.
Do not place any electric heater near the rear of the unit.
1
2
3
4
5
6
7
8
9
10
11

09
Installation method
1
2
3
6
8
9
4
5
7
Connect tube to brine on the rear of the product. And then, connect tube to
drain hole such as sink, toilet etc..
Turn on water supply valve connected to the house and position the adapter(source
water valve) "OPEN".
Do not plug in the power for 30 minutes in order to stabilize the cooling system
and safe use of unit.
Check if water is supplied into the unit properly and any leakages on every con-
nection.
After 1 hour has passed from supplying the power, check if water is coming out by
pressing the water dispensing button.
Empty the water in the tank when "WATER FULL" lights on.
nstall horizontally.
Shut off water supply valve and separate the connector part of tap water in order
to connect an adapter(source water valve). Then, connect the adapter.
※f a sealing rubber(packing) is missing or the thread of a screw is damaged, it may occur
water leakage.
※The unit is recommended to install on the sink or table above 80 cm from the floor.
Connect the adapter(source water valve) and a water inlet on the rear of the unit
with a tube.
30 Minutes

10
How to use carbonated water
t is normally operated when water is dispensed. While carbon-
ated water is extracting, it will be operated faster
t blinks when water is empty in Ambi. water tank. (Red)
t blinks when gas is empty. (Red)
t displays amount of carbonated water.
Animation for
water dispensing
No water
No gas
LED display for
carbonated water
amount
t is operated while making carbonated water.
Animation for
carbonated water
Extract button for carbonated water
Used to extract the carbonated
water
carbonated water
extracting button
Turns ON/OFF the carbonated
water function.
Power button
Carbonated water
amount selection
button
Used to set the amount of carbon-
ated water
LED display for carbonated water

11
- Touch carbonated water extracting button when water level is set.
Then, designated carbonated water amount will be served.
- carbonated water is continuously extracted while touching extracting button.
(More than 1 second)
※When setting the gas concentration as "Low" : Around 26 ℓcan be served.
※When setting the gas concentration as "High" : Around 20 ℓcan be served.
③Touch carbonated water extracting button to extract the carbonated water.
※After extracting carbonated water, small amount of water can be generated.
t is normal operation.
How to use carbonated water
< Water amount of each level >
①Touch "POWER".
※"No water" LED blinks when water is empty in the tank.
※"No gas" LED blinks when gas is empty.
※Extracting carbonated water causes noise and vibration of
pump.
②Put the cup on the carbonated water tray.
※When users use small size of cup, press the button in
the bottom of tray to take it out.
※When setting the gas concentration as "Low".
WATER
AMOUNT Approx. 120
㎖
Approx. 240
㎖
Approx. 360
㎖
LED
LEVEL LEVEL 1 LEVEL 2 LEVEL 3

12
<Low>
For tumbler or big sized mug
<High>
For general sized paper cup
(Around 180 ㎖)
●
Adjust the height of carbonated water tray so as not to splash the carbonated water in surrounding area.
●
How to adjust height of carbonated water tray
<Middle>
For mug or big sized paper
cup(Less than 400 ㎖)
How to use carbonated water tray
※Take down the drip tray 1 more time as it has protection function at 60 degree to prevent fingers from being caught.
※Check if carbonated water tray is fixed properly by moving it up and down.
1. Press the button in the bot-
tom of carbonated water
tray.
3. Hook the carbonated water tray to
the groove and detach a hand from
the drip tray to fix it.
2. Pull out carbonate water tray
by pressing both sides of but-
tons to adjust height.
※Do not extract the carbonated water by leaning the
cup to the hump. Water can spill over.
●
Cup holder function of carbonated water tray
There are groove for paper cup and hump for mug on
the carbonated water tray to fix the cups stably while
extracting carbonated water.
※Temperature below 10 °C makes the best taste of carbonated water.
※Wait for around 2 hours after installation and use.

13
How to use carbonated water
③Turn the new cylinder to the right side to place it.
※Gas leaking sound can be caused if cylinder is not fixed properly.
※f gas leaking sound is loud, fit the cylinder again.
①Gas cylinder is placed under back of the unit.
④Set the gas concentration by controlling the lever.
※After setting the concentration, users can enjoy the carbonated
water of desired concentration.
②Lift the cylinder and turn to the left to pull it off.
※Remaining gas can be discharged with gas leaking sound.
※When replacing the cylinder, turn it slightly to discharge
the remaining gas and separate it by turning 2~3 times
more.
How to replace the cylinder

14
- No gas LED blinks when touching the "POWER" button.
- Water flow is weak when extracting carbonated water.
- When gas concentration is weak.
※Replacement cycle of cylinder is varied depending on actual working condition.
※Actual amount of gas might be different.
※Gas can not be discharged when amount of gas is under 10 g.
Replacement cycle of cylinder

ICE FULL LED
Ice making /
Hot water function
Lock setting button
15
Operation
ICE LED
LOCK LED
Lights up when ice storage is full.
(Red)
Lights up when " CE" is set. (Red)
Lights up when "LOCK" is set. (Red)
WATE FULL LED Lights up when ambient water tank is full.
(Red)
HOT LED
Lights up when "HOT" is set.
(HOT TANK HEAT NG : RED, STANDBY
HEAT NG : YELLOW)
Display and function settings (A)
HOT TANK
HEATING/OFF/
STANDBY
HEATING SELECTION
SWITCH
ON
OFF
D AIN
SWITCH
Press the switch up and middle and down
to select the HOT TANK HEAT NG /OFF/
STANDBY HEAT NG.
Press the switch up and down to select
the drain setting/releasing.
C
D
※Hot tank heating mode : Hot water is always served.
※Standby heating mode : Hot water is made in short time when it is in need.
AMBI
COLD(COLD
WATE SELECTION)
HOT(HOT WATE
SELECTION)
WATE
DISPENSING
BUTTON
Used to take water into a container such as
a cup after selecting the desired water se-
lection among hot, cold and ambient water.
Used to set/release ce making/
Lock-ing function
ICE
(ICE DISPENSE ) Used to take ice.
Used to take hot water.
Used to take cold water.
Used to take ambient water.
Water dispensing selection (B)
CD
A
B
B

16
• Hot tank heating function setting
1. Press heating selection switch attached on the rear.
2. "HOT" LED is on(Red).
• Standby heating function setting
1. Press heating selection switch attached on the rear.
2. "HOT" LED is on(Yellow).
• Hot tank heating / Standby heating function releasing
1. Press heating selection switch attached on the rear.
2. "HOT" LED is OFF.
Function setting and releasing
• Lock function ( ce/Hot water locking function) setting
1. Press " CE/LOCK" touch button softly for over 3 seconds.
2. "LOCK" LED (Red) is turned on and lock function is set.
(Setting sound : Ding~Ding~Ding~)
3. Hot water operation, ice dispensing function will not work
after the lock function is set.
※LOCK" is designed to avoid any accidental burns or spout of ice cube
due to carelessness.
• Lock function releasing
1. Press " CE/LOCK" touch button softly for over 3 seconds.
2. "LOCK" LED (Red) is turned off and the lock function is released.
(Releasing sound : Ding~Ding~Ding~)
3. Hot water operation, ice dispensing function work when the setting of lock function is released.
• ce-making function setting
1. Press " CE/LOCK" touch button for 10 seconds.
※Press the " CE/LOCK" touch button for 3 seconds to change the lock function. And
then, keep pressing the " CE/LOCK" touch button until 12 seconds to set the ice
making function. After setting the ice-making function, set the lock function again
according to user's preference.
2. " CE" LED (Red) is turned on and ice making function is set.
(Setting sound : Ding~ Ding~ Ding~)
• ce-making function releasing
1. Press " CE/LOCK" touch button for 10 seconds.
2. " CE" LED(Red) is turned off and the ice making function is released.
(Releasing sound : Ding~Ding~Ding~)
※When it is released, ice-making function will be disabled. However, ice is served until the ice storage is empty.
※Press the " CE/LOCK" touch button for 3 seconds to change the lock function. And then, keep pressing the
" CE/LOCK" touch button until 12 seconds to release the ice-making function. After releasing the ice-making
function, set the lock function again according to user's preference.
3 SECONDS
10 SECONDS
Usage

17
Usage
●Beep function releasing
1. Touch ambient water selection button for 10 seconds to release the beep
sound.
2. LED of ce full/water full/ice making/hot water blinks with beep sound when
it is released. (Ddiri~Ddiring)
10 SECONDS
●Constant water dispensing function
1. t is the function to use constant water dispensing. Please push the button
for 2 seconds. t beeps and this function is set.
(LED blinks when using this function.)
2. f you touch the dispensing button when constant dispensing function is set, it
beeps and the water is continuously dispensed.
※f constant water is set but not taking water, then the function will be automatically
released after 10 seconds.
※When dispensing the water continuously, approximate 0.5 Liter is automatically
dispensed. Actual amount of water might be different.
●Constant water dispensing function releasing
When dispensing ambient or cold water continuously, if you touch
the dispensing selection button or the dispensing button, it beeps
and this function is released.
2 SECONDS
or
●Beep function setting
1. Touch ambient water selection button for 10 seconds to set the beep sound.
2. LED of ce full/water full/ice making/hot water blinks with beep sound when it
is set. (Ddiri~Ddiring)
10 SECONDS

18
Ice and water dispensing method
●ce dispensing mode
f " CE"(ice dispenser) touch button is pressed, the door of the ice storage is opened
and ice is served from the dispensing hole.
●Cold water dispensing mode
f "COLD"(cold water selection) touch button is selected and water dispensing button
is pressed, cold water is served.
●Ambient water dispensing mode
f "AMB ."(ambient water selection) touch button is selected and water dispensing
button is pressed, ambient water is served.
※f you don't use the ambient water when the ambient water is chosen, it will automatically
convert to cold water mode.
●Hot water dispensing mode
f "HOT"(hot water selection) touch button is selected and the water dispensing
button is pressed, hot water is served.
※f "LOCK" function ( ce and hot water dispensing lock) is set, hot water is not served.
Use it after releasing the lock function.
※f you don't use the hot water when the hot water is chosen, it will automatically convert
to cold water mode.
●Hot tank heating water dispensing mode
1. Press heating selection switch
attached on the rear.
2. f "HOT"(Hot water selection) touch
button is selected and "WATER
D SPENS NG BUTTON" is pressed,
hot water is served.

19
Usage
●Standby heating water dispensing mode
1. Set heating mode as standby heating.
2. Please touch the "HOT"(Hot water selection) touch button.
※Hot water LED blinks(Yellow).
※2.5 minutes are taken until completion of standby heating.
※Dispensing the hot water is available after completion of
standby heating for 10 minutes.
3. LED is changed in accordance with standby heating process as below.
Yellow
→
Orange
→
Red
※When standby heating function is completed, "HOT" LED blinks(Red)
with beep sound.
4. f "HOT" touch button is selected and "WATER D SPENS NG
BUTTON" is pressed, hot water is served.
●Hot water function releasing
Set the switch to Oon the rear of the unit.
※f it is not pre-heated, the hot water cannot be dispensed.
※When taking hot water constantly, temperature of water can be below 50 °C. Then, hot water is not served automatically.
※When the unit stops dispensing hot water, standby heating starts off automatically.
Standby heating Level
Yellow Orange ed
Level 1 Completion of standby heating
Hot water temperature Under 60 °C
Level 2
60 ~ 85 °C More than 85 °C
Smart cleaning function
t is the function to automatically clean the inside of the water tank in order to prevent the contamination during
the time when people seldom use the unit once every 4 days (UV unit) / 15 days (Normal unit)
●t operates same time every 4 days / 15 days, as it is set the standard time
which is 12 hours later after connection of power.
e.g.) When the power is connected at 2 P.M, it is operated at 2 A.M
every 4 days / 15 days. f users want to change the operation time,
turn off the power at desired time and turn on.
1. Water dispensing LED blinks around 9 minutes and users cannot use the
unit at this time.
2. Use the unit when this function is finished and cold/ambient water tanks
are filled again. (Around 60 minutes until water full.)
This manual suits for next models
1
Table of contents
Other Chungho Water Filtration System manuals

Chungho
Chungho Premium Plus User manual

Chungho
Chungho Iguassu T-461 User manual

Chungho
Chungho Iguassu ICE 500 User manual

Chungho
Chungho Iguassu Tiny 900 User manual

Chungho
Chungho NEW DIGITAL CHP-4010S User manual

Chungho
Chungho Whi Caffe Water Purifier New 700 User manual

Chungho
Chungho Iguassu ICE 500 User manual

Chungho
Chungho EDGE CHP-3990DL User manual

Chungho
Chungho 500 PLUS CHP-3720S User manual

Chungho
Chungho Water Purifier 450 User manual