10. Running-in your filter
10.1 Establishing Nitrification
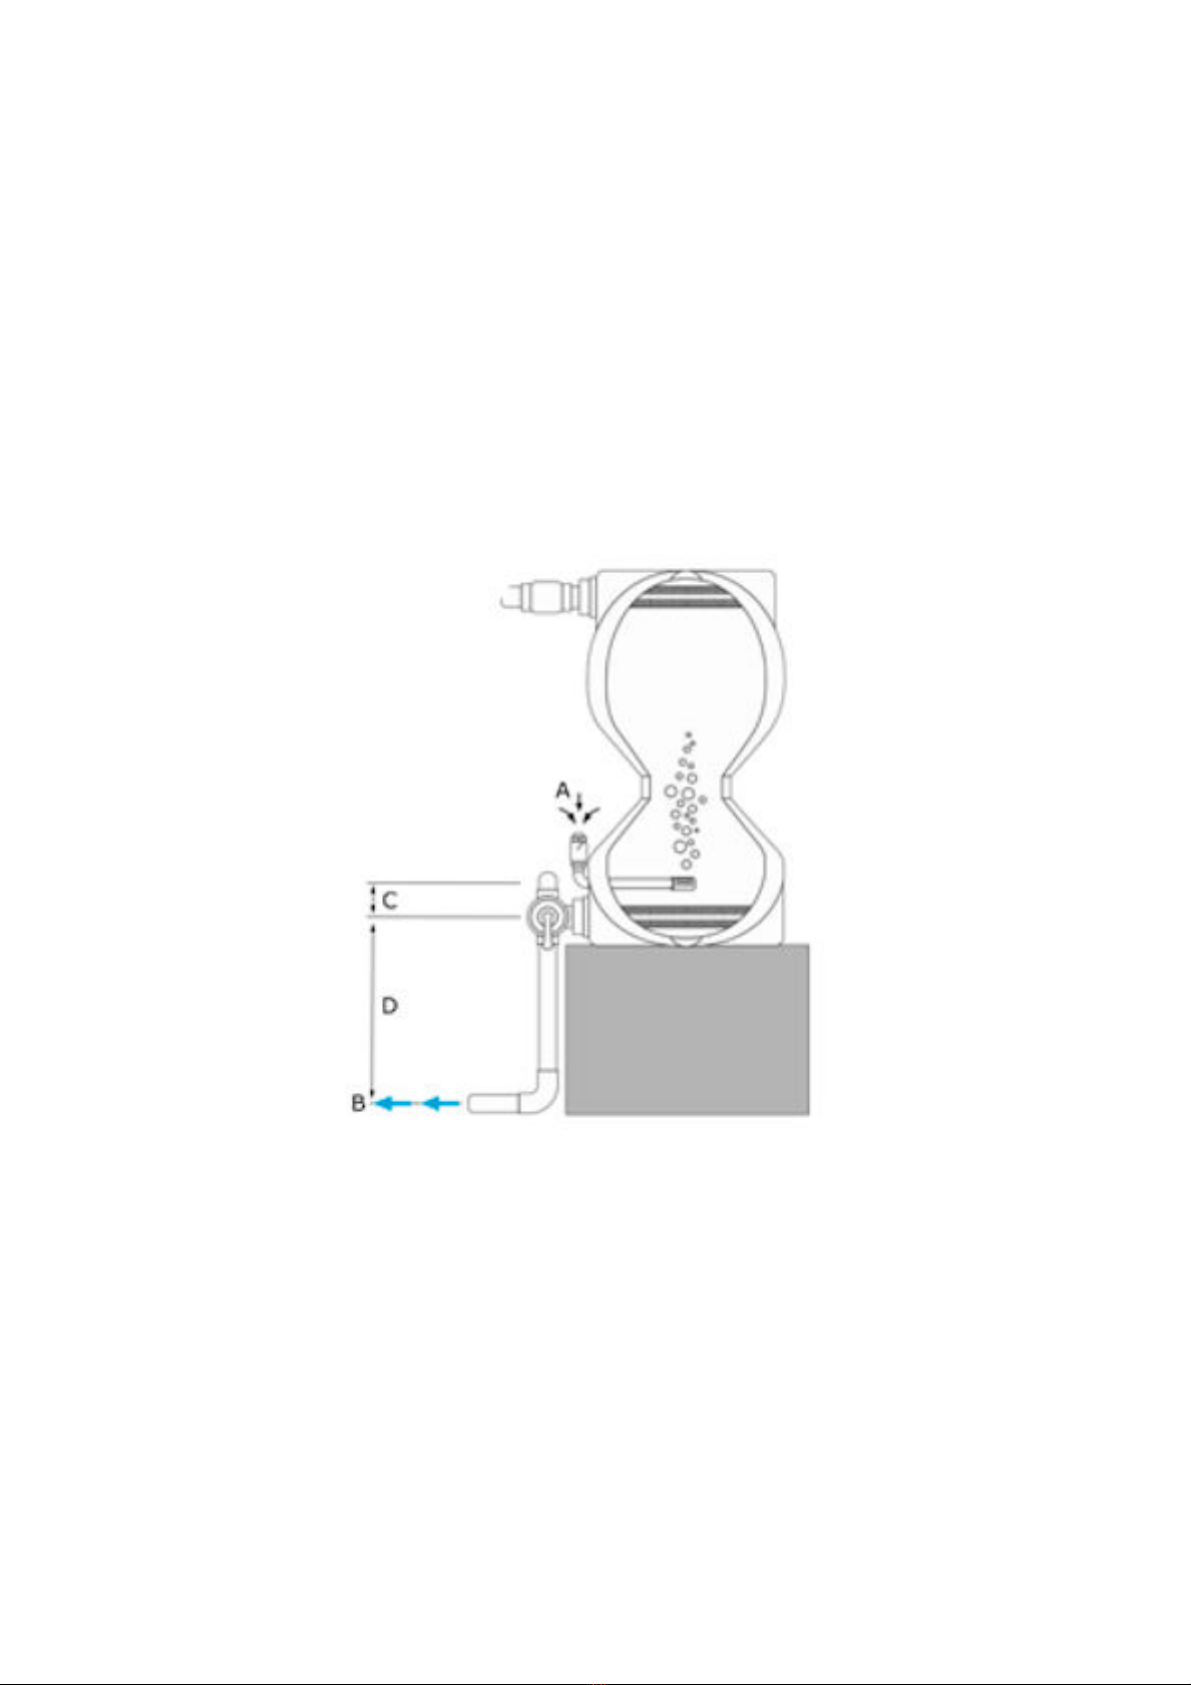
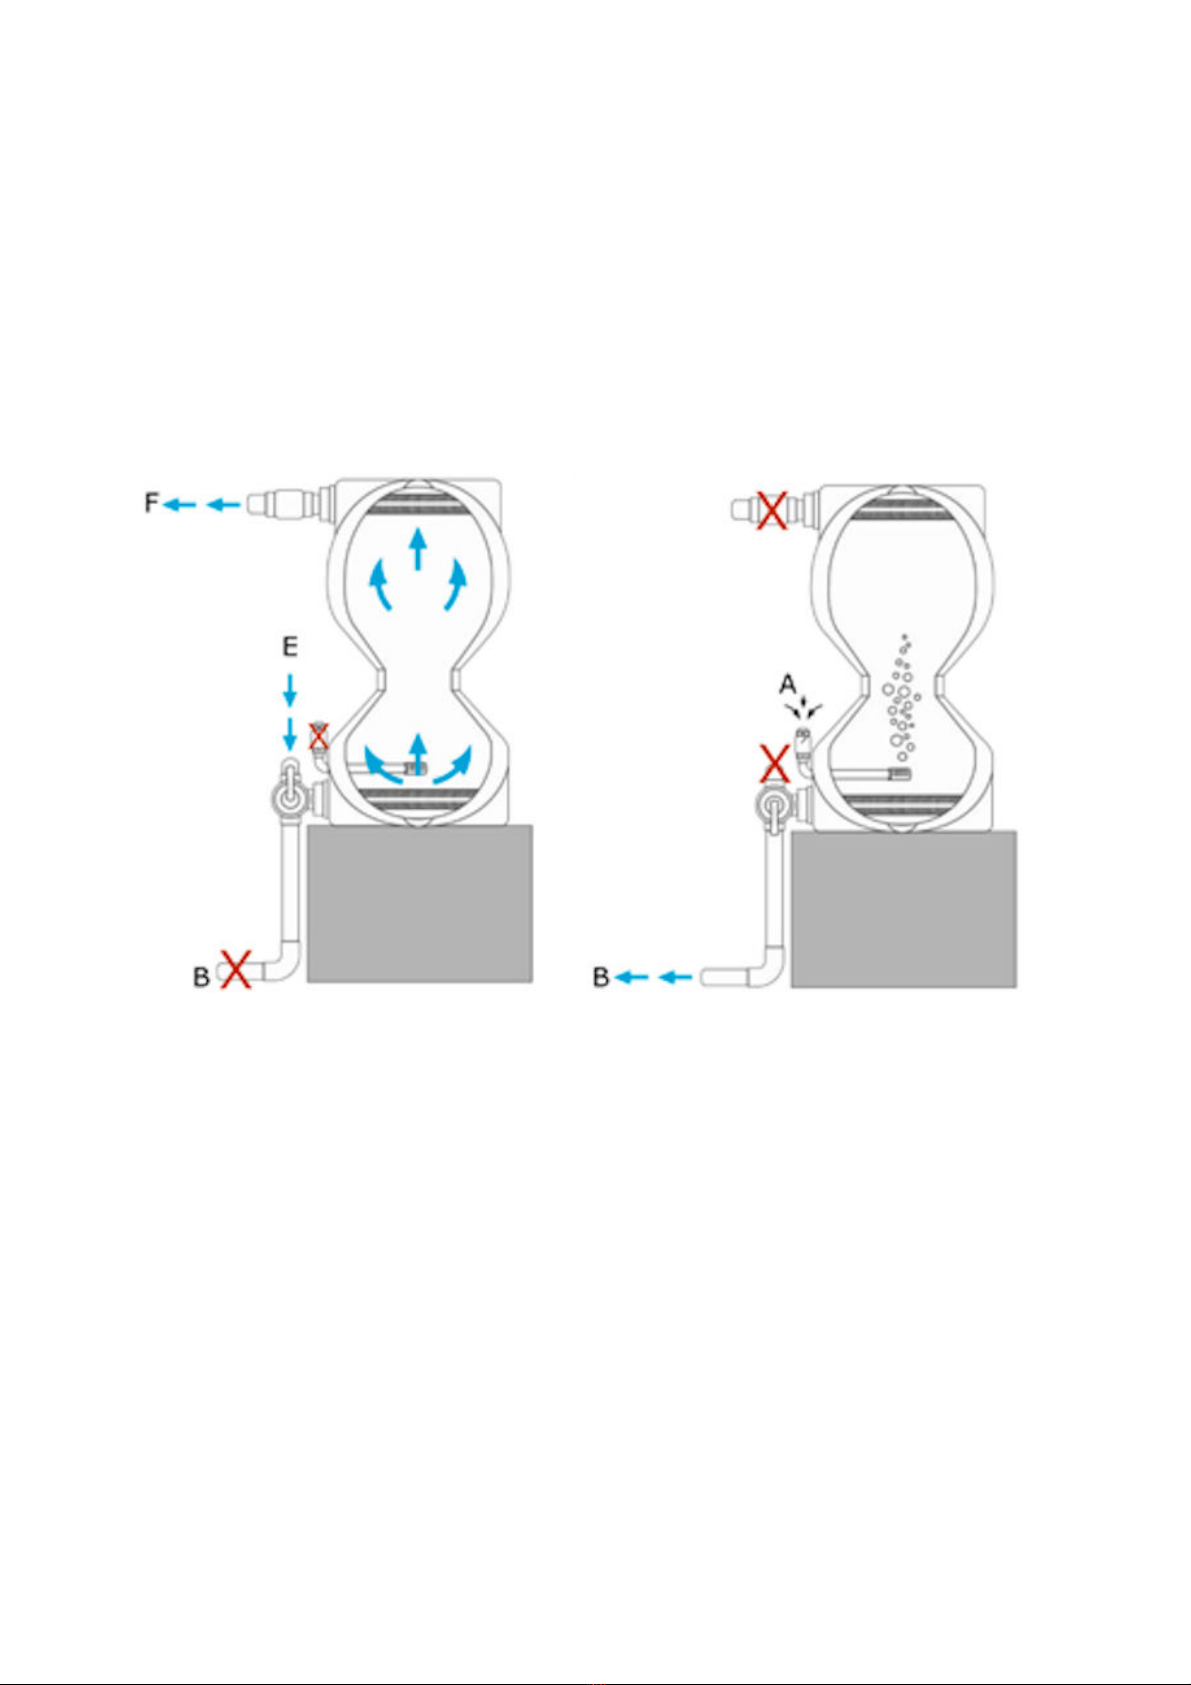
11. When to backwash the SuperBead filter
11.1 Monitoring the standard backwash
11.2 Recommended minimum backwash cycles
11.3 Making the backwash fully automatic
12 Long term maintenance
12.1 Monitoring
12.2 Additional Monthly Maintenance
12.3 Check valves
12.4 Pump Strainers
12.5 Waste and Top Outlet Screens
13 Winter Running
13.1 Closing the filter down as an option
14 Water Quality Maintenance
14.1 Partial water changing
14.2 Set the backwash frequency to water change for you
14.3 Monitor your pond and fish to avoid problems
15 Filter Troubleshooting
1. Foreword
This guide aims to provide you with correct and complete information.
PLEASE KEEP UP THIS USER GUIDE CAREFULLY! ON CHANGE OF OWNERSHIP PASS ON
THE COMPLETE USER GUIDE!
Read this guide through carefully before you start to install the product. If you are uncertain about
the contents of this guide or do not fully comprehend the assembly instructions and/or do not
understand something regarding this product please contact the shop where the product was
purchased.
The General Terms and Conditions of Air-Aqua apply for all products.
2. Defects and claims for compensation, disclaimer
2.1 Defects and claims for compensation
Except in the case of a further claim, we are only liable for defects to the delivered goods until the
risk has been transferred to the purchaser. Minor deviations between the appearance and
workmanship of the product delivered and the specifications in the contract or minor limitations of
usability will be deemed insignificant.
The warranted condition, endurance and usability of the product is solely subject to the
specifications agreed in writing, in the product specification and/or in this guide.
Further oral agreements, especially from preliminary talks, advertising and/or in related industrial
standards are only valid as an integral part of a written contract. Only conditions and specifications
specifically laid down by us are valid. We do not accept conditions or specifications laid down by
third parties. The specifications laid down in this guide are valid. If the customer wishes to use the
product for a purpose other than the intended purpose, he or she is obliged to thoroughly examine
the suitability of the product for this other purpose. We give no warranty and accept no liability for
any use other than that explicitly approved by us in writing.
Any changes made to the product will result in the loss of warranty and all claims and rights will
lapse.
The user is held responsible for the proper use of the filter. The user guide does not discharge you
from your liability for the proper and safe application, installation, operation and maintenance of
the filter.
On using this guide you agree that in no circumstances can or will the manufacturer be held liable
for any personal injuries or damage to property that might result from using the device. This
applies specifically for any damage due to improper piping or plumbing. Damage due to failure to
clean or maintain the filter regularly is not covered by the warranty.