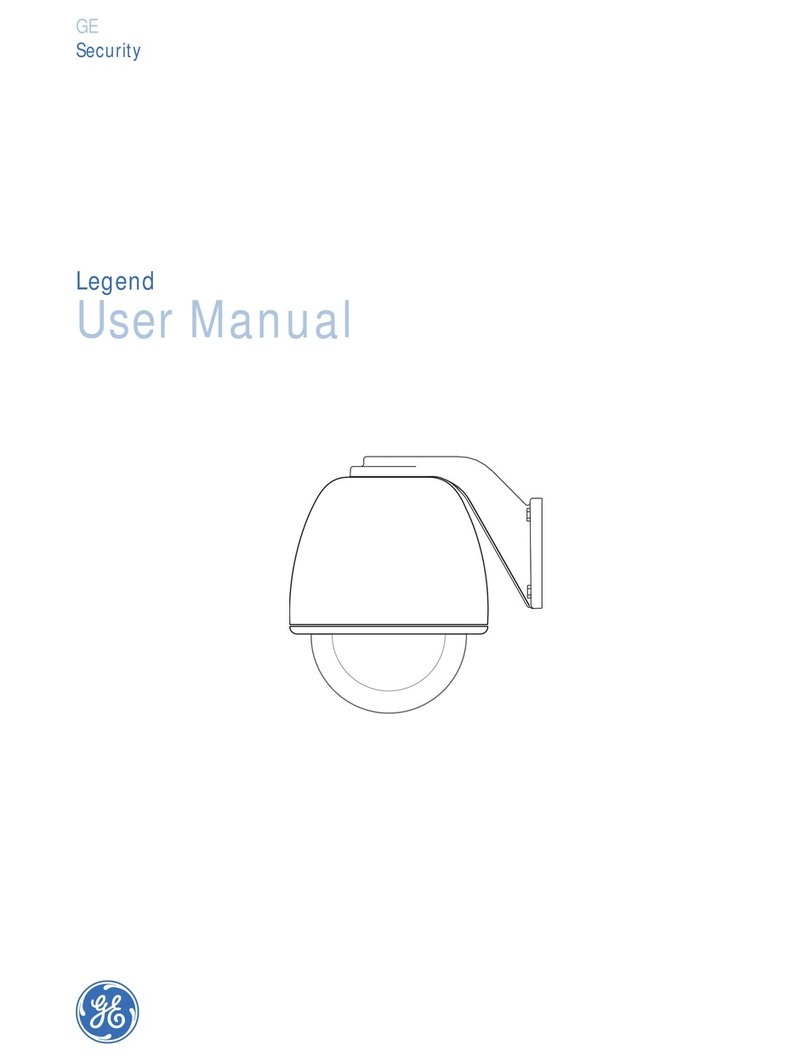
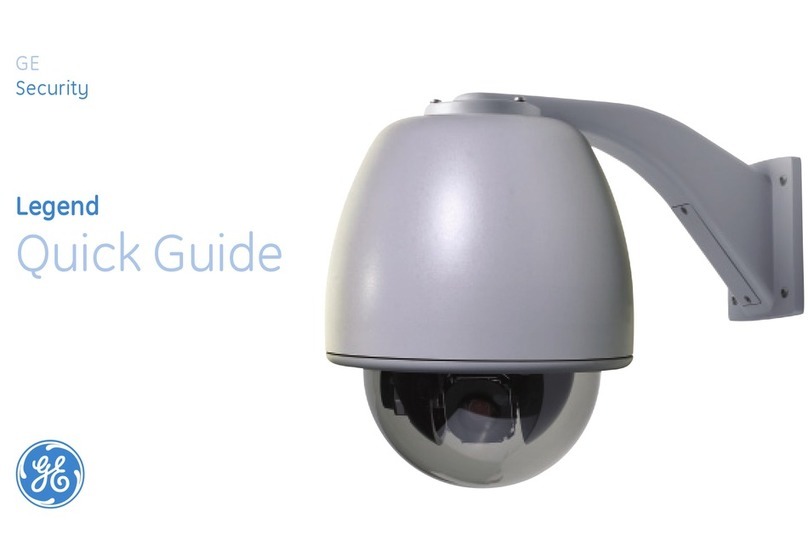
GE Security Legend IP User manual

Legend IP
Installation Manual

Copyright Copyright © 2006, GE Security Inc. All rights reserved.
This document may not be copied or otherwise reproduced, in whole or in part, except as
specifically permitted under US and international copyright law, without the prior written
consent from GE.
Document number: 1055712A (August 2006)
Disclaimer THE INFORMATION IN THIS DOCUMENT IS SUBJECT TO CHANGE WITHOUT NOTICE. GE ASSUMES
NO RESPONSIBILITY FOR INACCURACIES OR OMISSIONS AND SPECIFICALLY DISCLAIMS ANY
LIABILITIES, LOSSES, OR RISKS, PERSONAL OR OTHERWISE, INCURRED AS A CONSEQUENCE,
DIRECTLY OR INDIRECTLY, OF THE USE OR APPLICATION OF ANY OF THE CONTENTS OF THIS
DOCUMENT. FOR THE LATEST DOCUMENTATION, CONTACT YOUR LOCAL SUPPLIER OR VISIT US
ONLINE AT WWW.GESECURITY.COM.
This publication may contain examples of screen captures and reports used in daily operations.
Examples may include fictitious names of individuals and companies. Any similarity to names
and addresses of actual businesses or persons is entirely coincidental.
Trademarks and patents GE and the GE monogram are registered trademarks of General Electric.
Legend product and logo are trademarks of GE Security.
Other trade names used in this document may be trademarks or registered trademarks of the
manufacturers or vendors of the respective products.
Software license agreement GE software supplied with GE products is proprietary and furnished under license and can be
used or copied only in accordance with the license terms.
THE ENCLOSED PROGRAM IS FURNISHED SUBJECT TO THE TERMS AND CONDITIONS OF THIS
AGREEMENT. RETENTION OF THE PROGRAM FOR MORE THAN 30 DAYS, OPENING OF THE SEALED
WRAPPER, IF ANY, SURROUNDING THE PROGRAM, OR USE OF THE PROGRAM IN ANY MANNER
WILL BE CONSIDERED ACCEPTANCE OF THE AGREEMENT TERMS. IF THESE TERMS ARE NOT
ACCEPTABLE, RETURN THE UNUSED PROGRAM AND ANY ACCOMPANYING DOCUMENTATION TO
GE FOR A FULL REFUND OF THE LICENSE FEE PAID. (FOR INFORMATION REGARDING THE RETURN
OF PROGRAMS ENCODED OR INCORPORATED WITHIN EQUIPMENT, CONTACT THE NEAREST GE
SALES OFFICE.)
Intended use Use this product only for the purpose it was designed for; refer to the data sheet and user
documentation. For the latest product information, contact your local supplier or visit us online
at www.gesecurity.com.
FCC compliance This equipment has been tested and found to comply with the limits for a Class A digital device,
pursuant to part 15 of the FCC Rules. These limits are designed to provide reasonable protection
against harmful interference when the equipment is operated in a commercial environment.
This equipment generates, uses, and can radiate radio frequency energy and, if not installed
and used in accordance with the instruction manual, may cause harmful interference to radio
communications.
Changes or modifications not expressly approved by the party responsible for compliance
could void the user’s authority to operate the equipment.

iii
Contents
Contents. . . . . . . . . . . . . . . . . . . . . . . . . . . . . . . . . . . . . . . . . . . . . . . . . . . . . . . . . . . . . . . . . . . . . . . . . . . .iii
Preface . . . . . . . . . . . . . . . . . . . . . . . . . . . . . . . . . . . . . . . . . . . . . . . . . . . . . . . . . . . . . . . . . . . . . . . . . . . . . . . . . . . . . . . . . v
Conventions used in this document. . . . . . . . . . . . . . . . . . . . . . . . . . . . . . . . . . . . . . . . . . . . . . . . . . . . . . . . . . . . . . . . .v
Safety terms and symbols. . . . . . . . . . . . . . . . . . . . . . . . . . . . . . . . . . . . . . . . . . . . . . . . . . . . . . . . . . . . . . . . . . . . . . . . . .v
References . . . . . . . . . . . . . . . . . . . . . . . . . . . . . . . . . . . . . . . . . . . . . . . . . . . . . . . . . . . . . . . . . . . . . . . . . . . . . . . . . . . . . . . vi
Chapter 1. Introduction . . . . . . . . . . . . . . . . . . . . . . . . . . . . . . . . . . . . . . . . . . . . . . . . . . . . . . . . . . . . 1
Product description. . . . . . . . . . . . . . . . . . . . . . . . . . . . . . . . . . . . . . . . . . . . . . . . . . . . . . . . . . . . . . . . . . . . . . . . . . . . . . 2
Installation overview . . . . . . . . . . . . . . . . . . . . . . . . . . . . . . . . . . . . . . . . . . . . . . . . . . . . . . . . . . . . . . . . . . . . . . . . . . . . 2
Operational overview . . . . . . . . . . . . . . . . . . . . . . . . . . . . . . . . . . . . . . . . . . . . . . . . . . . . . . . . . . . . . . . . . . . . . . . . . . . . 3
System configurations . . . . . . . . . . . . . . . . . . . . . . . . . . . . . . . . . . . . . . . . . . . . . . . . . . . . . . . . . . . . . . . . . . . . . . . . . . . . .3
Product contents . . . . . . . . . . . . . . . . . . . . . . . . . . . . . . . . . . . . . . . . . . . . . . . . . . . . . . . . . . . . . . . . . . . . . . . . . . . . . . . . 6
Components supplied by the customer . . . . . . . . . . . . . . . . . . . . . . . . . . . . . . . . . . . . . . . . . . . . . . . . . . . . . . . . . . . . 7
Recommended power management equipment . . . . . . . . . . . . . . . . . . . . . . . . . . . . . . . . . . . . . . . . . . . . . . . . . . . .7
Compatible network switches . . . . . . . . . . . . . . . . . . . . . . . . . . . . . . . . . . . . . . . . . . . . . . . . . . . . . . . . . . . . . . . . . . . . . .7
Compatible video cards . . . . . . . . . . . . . . . . . . . . . . . . . . . . . . . . . . . . . . . . . . . . . . . . . . . . . . . . . . . . . . . . . . . . . . . . . . . .7
Compatible IP decoders. . . . . . . . . . . . . . . . . . . . . . . . . . . . . . . . . . . . . . . . . . . . . . . . . . . . . . . . . . . . . . . . . . . . . . . . . . . .8
Compatible digital video management software . . . . . . . . . . . . . . . . . . . . . . . . . . . . . . . . . . . . . . . . . . . . . . . . . . . .8
Compatible digital video viewers . . . . . . . . . . . . . . . . . . . . . . . . . . . . . . . . . . . . . . . . . . . . . . . . . . . . . . . . . . . . . . . . . . .8
Compatible web browsers . . . . . . . . . . . . . . . . . . . . . . . . . . . . . . . . . . . . . . . . . . . . . . . . . . . . . . . . . . . . . . . . . . . . . . . . .8
Compatible operating systems . . . . . . . . . . . . . . . . . . . . . . . . . . . . . . . . . . . . . . . . . . . . . . . . . . . . . . . . . . . . . . . . . . . . .8
Compatible digital video storage devices . . . . . . . . . . . . . . . . . . . . . . . . . . . . . . . . . . . . . . . . . . . . . . . . . . . . . . . . . . .8
Dome requirements . . . . . . . . . . . . . . . . . . . . . . . . . . . . . . . . . . . . . . . . . . . . . . . . . . . . . . . . . . . . . . . . . . . . . . . . . . . . . 9
Minimum load requirements . . . . . . . . . . . . . . . . . . . . . . . . . . . . . . . . . . . . . . . . . . . . . . . . . . . . . . . . . . . . . . . . . . . . . . .9
Cable requirements. . . . . . . . . . . . . . . . . . . . . . . . . . . . . . . . . . . . . . . . . . . . . . . . . . . . . . . . . . . . . . . . . . . . . . . . . . . . . . . .9
Cable management . . . . . . . . . . . . . . . . . . . . . . . . . . . . . . . . . . . . . . . . . . . . . . . . . . . . . . . . . . . . . . . . . . . . . . . . . . . . . 10
Power requirements . . . . . . . . . . . . . . . . . . . . . . . . . . . . . . . . . . . . . . . . . . . . . . . . . . . . . . . . . . . . . . . . . . . . . . . . . . . . . 11
Power cable size and length requirements . . . . . . . . . . . . . . . . . . . . . . . . . . . . . . . . . . . . . . . . . . . . . . . . . . . . . . . . 11
System planning . . . . . . . . . . . . . . . . . . . . . . . . . . . . . . . . . . . . . . . . . . . . . . . . . . . . . . . . . . . . . . . . . . . . . . . . . . . . . . . 12
Digital video networks . . . . . . . . . . . . . . . . . . . . . . . . . . . . . . . . . . . . . . . . . . . . . . . . . . . . . . . . . . . . . . . . . . . . . . . . . . . 12
Video resolution and compression standards . . . . . . . . . . . . . . . . . . . . . . . . . . . . . . . . . . . . . . . . . . . . . . . . . . . . . 15
Storage requirements and options . . . . . . . . . . . . . . . . . . . . . . . . . . . . . . . . . . . . . . . . . . . . . . . . . . . . . . . . . . . . . . . 16
Networking IP domes . . . . . . . . . . . . . . . . . . . . . . . . . . . . . . . . . . . . . . . . . . . . . . . . . . . . . . . . . . . . . . . . . . . . . . . . . . . . 17

Legend IP
Installation Manual
iv
Chapter 2. Installing the housing and cables. . . . . . . . . . . . . . . . . . . . . . . . . . . . . . . . . . . . . . . . 21
Various mounting and housing styles . . . . . . . . . . . . . . . . . . . . . . . . . . . . . . . . . . . . . . . . . . . . . . . . . . . . . . . . . . . . 22
Flush-mount housings . . . . . . . . . . . . . . . . . . . . . . . . . . . . . . . . . . . . . . . . . . . . . . . . . . . . . . . . . . . . . . . . . . . . . . . . . . 23
Preparing the mounting surface . . . . . . . . . . . . . . . . . . . . . . . . . . . . . . . . . . . . . . . . . . . . . . . . . . . . . . . . . . . . . . . . . . 23
Installing the housing . . . . . . . . . . . . . . . . . . . . . . . . . . . . . . . . . . . . . . . . . . . . . . . . . . . . . . . . . . . . . . . . . . . . . . . . . . . . 24
Pendant-mount housings . . . . . . . . . . . . . . . . . . . . . . . . . . . . . . . . . . . . . . . . . . . . . . . . . . . . . . . . . . . . . . . . . . . . . . . 26
Preparing the mounting surface . . . . . . . . . . . . . . . . . . . . . . . . . . . . . . . . . . . . . . . . . . . . . . . . . . . . . . . . . . . . . . . . . . 26
Installing the housing . . . . . . . . . . . . . . . . . . . . . . . . . . . . . . . . . . . . . . . . . . . . . . . . . . . . . . . . . . . . . . . . . . . . . . . . . . . . 27
Preparing the cables. . . . . . . . . . . . . . . . . . . . . . . . . . . . . . . . . . . . . . . . . . . . . . . . . . . . . . . . . . . . . . . . . . . . . . . . . . . . 29
Chapter 3. Wiring and addressing the dome . . . . . . . . . . . . . . . . . . . . . . . . . . . . . . . . . . . . . . . . 31
Components used for basic and advanced operation . . . . . . . . . . . . . . . . . . . . . . . . . . . . . . . . . . . . . . . . . . . . . . 32
Wiring the housing board . . . . . . . . . . . . . . . . . . . . . . . . . . . . . . . . . . . . . . . . . . . . . . . . . . . . . . . . . . . . . . . . . . . . . . . 33
Installing the cable ring . . . . . . . . . . . . . . . . . . . . . . . . . . . . . . . . . . . . . . . . . . . . . . . . . . . . . . . . . . . . . . . . . . . . . . . . . 36
Addressing the camera site and setting the protocol . . . . . . . . . . . . . . . . . . . . . . . . . . . . . . . . . . . . . . . . . . . . . . 37
Setting the termination . . . . . . . . . . . . . . . . . . . . . . . . . . . . . . . . . . . . . . . . . . . . . . . . . . . . . . . . . . . . . . . . . . . . . . . . . 39
Chapter 4. Installing the camera assembly and bubble . . . . . . . . . . . . . . . . . . . . . . . . . . . . . . 41
Installing the camera assembly. . . . . . . . . . . . . . . . . . . . . . . . . . . . . . . . . . . . . . . . . . . . . . . . . . . . . . . . . . . . . . . . . . 42
Installing the bubble. . . . . . . . . . . . . . . . . . . . . . . . . . . . . . . . . . . . . . . . . . . . . . . . . . . . . . . . . . . . . . . . . . . . . . . . . . . . 44
Chapter 5. Using passcodes. . . . . . . . . . . . . . . . . . . . . . . . . . . . . . . . . . . . . . . . . . . . . . . . . . . . . . . 47
Passcodes off by default . . . . . . . . . . . . . . . . . . . . . . . . . . . . . . . . . . . . . . . . . . . . . . . . . . . . . . . . . . . . . . . . . . . . . . . . 48
Turning on passcodes . . . . . . . . . . . . . . . . . . . . . . . . . . . . . . . . . . . . . . . . . . . . . . . . . . . . . . . . . . . . . . . . . . . . . . . . . . 48
Chapter 6. Troubleshooting, maintenance, support . . . . . . . . . . . . . . . . . . . . . . . . . . . . . . . . . 51
Troubleshooting . . . . . . . . . . . . . . . . . . . . . . . . . . . . . . . . . . . . . . . . . . . . . . . . . . . . . . . . . . . . . . . . . . . . . . . . . . . . . . . 52
Common installation issues . . . . . . . . . . . . . . . . . . . . . . . . . . . . . . . . . . . . . . . . . . . . . . . . . . . . . . . . . . . . . . . . . . . . . . 52
Diagnostic LEDs. . . . . . . . . . . . . . . . . . . . . . . . . . . . . . . . . . . . . . . . . . . . . . . . . . . . . . . . . . . . . . . . . . . . . . . . . . . . . . . . . . 53
Verifying network connections. . . . . . . . . . . . . . . . . . . . . . . . . . . . . . . . . . . . . . . . . . . . . . . . . . . . . . . . . . . . . . . . . . . . 54
Maintenance. . . . . . . . . . . . . . . . . . . . . . . . . . . . . . . . . . . . . . . . . . . . . . . . . . . . . . . . . . . . . . . . . . . . . . . . . . . . . . . . . . . 56
Rebooting versus resetting a dome . . . . . . . . . . . . . . . . . . . . . . . . . . . . . . . . . . . . . . . . . . . . . . . . . . . . . . . . . . . . . . . 56
Cleaning the bubble. . . . . . . . . . . . . . . . . . . . . . . . . . . . . . . . . . . . . . . . . . . . . . . . . . . . . . . . . . . . . . . . . . . . . . . . . . . . . . 57
Spare parts list. . . . . . . . . . . . . . . . . . . . . . . . . . . . . . . . . . . . . . . . . . . . . . . . . . . . . . . . . . . . . . . . . . . . . . . . . . . . . . . . . . . 58
Contacting technical support. . . . . . . . . . . . . . . . . . . . . . . . . . . . . . . . . . . . . . . . . . . . . . . . . . . . . . . . . . . . . . . . . . . . 59
Online publication library . . . . . . . . . . . . . . . . . . . . . . . . . . . . . . . . . . . . . . . . . . . . . . . . . . . . . . . . . . . . . . . . . . . . . . . . . 59
Appendix A. Installing the individual mounts . . . . . . . . . . . . . . . . . . . . . . . . . . . . . . . . . . . . . . . . . 61
GEA-102 wall-mount arm . . . . . . . . . . . . . . . . . . . . . . . . . . . . . . . . . . . . . . . . . . . . . . . . . . . . . . . . . . . . . . . . . . . . . . . 62
Installing the wall-mount arm . . . . . . . . . . . . . . . . . . . . . . . . . . . . . . . . . . . . . . . . . . . . . . . . . . . . . . . . . . . . . . . . . . . . 62
Opening the conduit hole. . . . . . . . . . . . . . . . . . . . . . . . . . . . . . . . . . . . . . . . . . . . . . . . . . . . . . . . . . . . . . . . . . . . . . . . . 65
GEA-114 T-bar ceiling support kit . . . . . . . . . . . . . . . . . . . . . . . . . . . . . . . . . . . . . . . . . . . . . . . . . . . . . . . . . . . . . . . . 67
Installing the T-bar ceiling support kit . . . . . . . . . . . . . . . . . . . . . . . . . . . . . . . . . . . . . . . . . . . . . . . . . . . . . . . . . . . . . 68
Appendix B. Tyco/AD wiring . . . . . . . . . . . . . . . . . . . . . . . . . . . . . . . . . . . . . . . . . . . . . . . . . . . . . . . . 71
Verifying dome software and AHC firmware versions . . . . . . . . . . . . . . . . . . . . . . . . . . . . . . . . . . . . . . . . . . . . . . 72
Wiring Tyco/AD keypads to Legend IP domes . . . . . . . . . . . . . . . . . . . . . . . . . . . . . . . . . . . . . . . . . . . . . . . . . . . . . 72
v
Index . . . . . . . . . . . . . . . . . . . . . . . . . . . . . . . . . . . . . . . . . . . . . . . . . . . . . . . . . . . . . . . . . . . . . . . . . . . . . . 73

Legend IP
Installation Manual
vi

v
Preface
This is the GE Legend IP Installation Manual. It provides an overview of the product and detailed instructions
explaining how to install all models. There is also information describing how to contact technical support if you
have questions or concerns. For programming and operation instructions, refer to the Legend IP User Manual.
To use this document effectively, you should have the following minimum qualifications:
• a basic knowledge of CCTV systems and components; and
• a basic knowledge of electrical wiring and low-voltage electrical connections.
Read these instructions and all ancillary documentation entirely before installing or operating this product. The
most current versions of this and related documentation may be found on our website. Refer to Online
publication library on page 59 for instructions on accessing our online publication library.
Note: A qualified service person, complying with all applicable codes, should perform all required hardware installation.
Conventions used in this document
The following conventions are used in this document:
Safety terms and symbols
These terms may appear in this manual:
Bold Menu items and buttons.
Italic Emphasis of an instruction or point; special terms.
File names, path names, windows, panes, tabs, fields, variables, and other GUI elements.
Titles of books and various documents.
Blue italic (Electronic version.) Hyperlinks to cross-references, related topics, and URL addresses.
Monospace Text that displays on the computer screen.
Programming or coding sequences.
CAUTION: Cautions identify conditions or practices that may result in damage to the equipment or other property.
WARNING: Warnings identify conditions or practices that could result in equipment damage or serious personal injury.

Legend IP
Installation Manual
vi
References
If you want to investigate related topics, these other documents may prove helpful:
• GE Security. Legend IP User Manual (1055713)
• GE Security. SymNav Video Navigator User Manual (0150-0303)
• GE Security. SymSecure System Guide (1055580)
• GE Security. SymSecure User Guide (online help)
• GE Security. KTD-405 Controller Keypad User Manual (1036547)
• GE Security. Networking Cable Types Technical Reference Guide (1047213)
• GE Security. ASCII Protocol Reference Manual (1038010)

This chapter provides an overview of your Legend IP dome system, including
product description, dome and system requirements, and system planning.
In this chapter:
Product description. . . . . . . . . . . . . . . . . . . . . . . . . . . . . . . . . . . . . . . . . . 2
Installation overview. . . . . . . . . . . . . . . . . . . . . . . . . . . . . . . . . . . . . . . . . 2
Operational overview . . . . . . . . . . . . . . . . . . . . . . . . . . . . . . . . . . . . . . . . 3
System configurations . . . . . . . . . . . . . . . . . . . . . . . . . . . . . . . . . . . . 3
Product contents . . . . . . . . . . . . . . . . . . . . . . . . . . . . . . . . . . . . . . . . . . . . 6
Components supplied by the customer . . . . . . . . . . . . . . . . . . . . . . . . . . . 7
Dome requirements. . . . . . . . . . . . . . . . . . . . . . . . . . . . . . . . . . . . . . . . . . 9
Minimum load requirements . . . . . . . . . . . . . . . . . . . . . . . . . . . . . . . 9
Cable requirements . . . . . . . . . . . . . . . . . . . . . . . . . . . . . . . . . . . . . . 9
Cable management. . . . . . . . . . . . . . . . . . . . . . . . . . . . . . . . . . . . . . 10
Power requirements . . . . . . . . . . . . . . . . . . . . . . . . . . . . . . . . . . . . . 11
Power cable size and length requirements. . . . . . . . . . . . . . . . . . . . 11
System planning . . . . . . . . . . . . . . . . . . . . . . . . . . . . . . . . . . . . . . . . . . . 12
Digital video networks . . . . . . . . . . . . . . . . . . . . . . . . . . . . . . . . . . . 12
Video resolution and compression standards . . . . . . . . . . . . . . . . . 15
Storage requirements and options . . . . . . . . . . . . . . . . . . . . . . . . . . 16
Networking IP domes . . . . . . . . . . . . . . . . . . . . . . . . . . . . . . . . . . . . 17
Chapter 1 Introduction

Legend IP
Installation Manual
2
Product description
Legend IP™ is a line of advanced PTZ domes that stream digital video. Digital video is easier to transmit,
share, and store than conventional analog video signals. Digital video systems also integrate well into most
communications and media networks and are easily operated from software applications that manage digital
video, such as GE’s SymSecure™ or SymNav™. SymSecure is GE’s complete digital video management
software. SymNav is GE’s free digital video viewer that is provided with each dome. Compatible software
applications, like these, allow you to control your domes and video over an IP (Internet Protocol) network from
computers, instead of using analog keypads, recorders, multiplexers, and switchers.
Legend IP domes use an MPEG-4 video encoder to compress and digitize streaming video that is of up to
30 fps (frames per second) for NTSC and up to 25 fps for PAL. At the maximum frame rates, the domes
require a bandwidth from 1 to 2 Mbps (Megabits per second). The encoder supports QCIF, CIF, and D1 video
resolutions. The MPEG-4 video stream that is created is compatible with GE’s SymDec family of MPEG-4
recorders, SymNet family of MPEG-4 codecs, and Video Navigator™ software. The Legend IP interface is
open to allow compatibility with third party software and recording equipment.
Besides their networking ability, Legend IP domes also feature powerful cameras, SilkTrak™ direct-drive
positioning for smoother camera travel, a graphical programming interface for easier customization of camera
settings, passcodes for protection against unauthorized access, and the ability to flash software upgrades over
your IP network using a standard web browser.
The Legend IP protocol is backward compatible with the Digiplex protocol. You can replace older domes in an
existing Digiplex system with Legend IP domes. You must, however, replace the entire dome (camera,
housing, and mounts), because the hardware is not backward compatible.
Be aware that digital Legend IP domes have greater power requirements than do CyberDome or analog Legend
domes. Refer to Power requirements on page 11 and Power cable size and length requirements on page 11.
For additional details, refer to the data sheet and the Legend IP User Manual (1055713) for product
specifications and programming and operation instructions.
Installation overview
The installation of domes has been made much easier with many of the innovations that are now available in the
Legend IP line of domes. To start, all cable connections are now built into the housing. The Ethernet cable
provides both video and data. You can also connect UTP and coaxial cables for analog video and data, if
desired. Cameras operate using the housing's memory, since programming is now stored in the housing. This
allows you to replace cameras or move them between housings without having to reprogram them for each new
site.
After installation, programming will be completed by using either the web-based programming menus from a
PC, or the graphical menus on the analog video output. Both methods provide the same programming menus.
Optional installer, administrator, and operator passcodes are available to protect the dome from unauthorized
access. By default, no passcodes are enabled. For details, see Chapter 5, Using passcodes on page 47.
CAUTION: To ensure the security of your surveillance system, your IP network should be isolated and secured from
unauthorized access.

Chapter 1
Introduction
3
The general steps for installing your dome include:
• preparing the mounting surface and installing the mount (if used) and housing;
• preparing the cables and wiring the housing;
• addressing the camera site, setting the protocol, and setting the termination;
• installing the camera assembly;
• installing the bubble; and
• turning on passcodes, if passcodes are to be used.
Operational overview
Legend IP domes work in both IP network and in analog systems (see System configurations). In a network
system, Legend IP domes use a standard Ethernet connection to provide video and control to a software
application, such as GE’s SymSecure or SymNav. When used in an analog system, Legend IP domes also
include analog video and data connections, along with the network connection. You can mix analog Legend
and digital Legend IP domes in the same system.
Legend IP domes can be operated from keypads, in addition to digital video management software. The
housings have Ethernet, RS-485, and RS-422 connections for data control, and Ethernet, UTP, and coaxial
connections for video. The Ethernet cable provides both video and communication data. The network interface
is 10/100/Base-T Ethernet compliant and supports TCP/IP communication protocols on private networks,
intranets, and the Internet.
GE’s SymSecure digital video management software offers many ways to complete tasks so as to
accommodate the various ways that people are comfortable working. The documentation for Legend IP will
provide one basic method for each basic task described. For complete usage instructions for SymSecure, refer
to the SymSecure online help. If you are using SymNav or another compatible digital video management tool
to operate your Legend IP domes, refer to that software’s documentation for its instructions.
System configurations
Legend IP domes can be used in a variety of digital and analog system configurations. They still maintain their
built-in receivers that decode analog commands originating from a compatible controlling devices, such as a
Digiplex controller keypad or ASCII control software.

Legend IP
Installation Manual
4
Typical digital system
A typical digital system is shown in Figure 1. In this configuration, control commands come from a software
application, such as GE’s SymSecure or SymNav, instead of keypads or ASCII control software. The dome’s
built-in encoders stream video to external decoders before it is transmitted to monitors, digital recorders, and
alarm equipment. For additional details, refer to the data sheet, user manual, or application guide.
Figure 1. Typical digital system in an IP codec network
Legend
Network
Ethernet Ethernet
SymNet
decoder
Coax analog
line
CCTV monitor
KTD-405
Legend
Network
Ethernet
Ethernet
Client PC with SymNave. Used
for setup and control.

Chapter 1
Introduction
5
Typical advanced analog system
A typical advanced analog system is shown in Figure 2. In this configuration, control commands pass through
digital recorders and alarm equipment and video is switched to various monitors. For additional details, refer to
the data sheet, user manual, or application guide.
Figure 2. Typical advanced analog system
1 8
78910653214
POWER
12VDC
BIAS
SWITCH
78910653214
RS485
A
B
A
B
+
AUDIO KEYPAD RS485 RS485
A
B
RS422IN
RS422OUT
SPEAKERSHIELD
SPEAKER
REMOVABLE
TERMINALSTRIP
EARTHGROUND
78910653214
POWER
12VDC
BIAS
SWITCH
78910653214
RS485
A
B
A
B
+
AUDIO KEYPAD RS485 RS485
A
B
RS422IN
RS422OUT
SPEAKERSHIELD
SPEAKER
REMOVABLE
TERMINALSTRIP
EARTHGROUND
N/O
N/C
COM
Digital recorder
Video
loop-
through
Matrix switcher
Dome
Local alarm
inputs
(dry contacts)
Local relay
outputs
Mon 1 Mon 2 Mon 3 Mon 4
Data distributor Alarm chassis
Controller
keypad
Controller
keypad
Alarm input
module
Alarm inputs
Alarms/relays
Video
RS-422 data
RS-485 data

Legend IP
Installation Manual
6
Typical basic analog system
A minimum of one keypad, which is the most common controlling device, is required for operation. See
Figure 3. From the keypad, an operator can pan, tilt, and zoom the camera, find presets, and start macros and
ShadowTours.
Figure 3. Basic analog system
Product contents
Each Legend IP dome system consists of the following:
• 1 housing
• 1 package containing 4 connectors (one 2-pin for power, one 4-pin for data, one blue 12-pin for six
alarms, and one green 12-pin for two alarms, two relays, and UTP video), and 1 small screw driver
• 2 manuals (installation and user, which covers programming and operation)
• 1 PTZ camera assembly (with built-in IP encoder)
• 1 bubble (mirror bubbles are shipped with cotton gloves for special handling)
• 1 mount (wall-mount and flush-mount versions only)
You may receive the package contents in one large carton containing several smaller boxes, or if shipped
individually, you may receive the smaller boxes separately. One box will contain the housing, connectors, and
manuals. The PTZ assembly, bubble, and mount (for wall-mount versions) are each packaged in separate
boxes.
Inspect the package and contents for visible damage. If any components are damaged or missing, do not use the
unit; contact the supplier immediately. If you need to return the unit, you must ship it in the original box.
Spare parts can be purchased for the domes. See Spare parts list on page 58.
78910653214
POWER
12VDC
BIAS
SWITCH
78910653214
RS485
A
B
A
B
+
AUDIO KEYPAD RS485 RS485
A
B
RS422IN
RS422OUT
SPEAKERSHIELD
SPEAKER
REMOVABLE
TERMINALSTRIP
EARTHGROUND

Chapter 1
Introduction
7
Components supplied by the customer
Legend IP domes are part of an overall IP video system. Customers supply the other components of the system,
such as network switches, IP decoders, and power management equipment. See the following recommended
and required system components that the customer must supply. See Dome requirements on page 9 for what
cables are required.
Recommended power management equipment
The following are recommended to protect your equipment from power issues.
Recommended power management equipment:
• Surge suppressor
• Power conditioner
• UPS (uninterruptible power supply)
Compatible network switches
The following network switches have been tested and found compatible with Legend IP domes. For
performance differences, see Qualified network switches on page 13.
• D-Link DES-3526
• D-Link DES-3550
• D-Link DGS-3024
• Nortel 425-24T
• Nortel 425-48T
Compatible video cards
The following video cards have been tested and found compatible with Legend IP domes.
•ATI
™Radeon®X300 series
•ATI
™Rage®XL PCI 8MB
•ATIRage
®XL PCI B41
•nVIDIA
®GeForce®FX 5900
•nVIDIA
®Quadro®FX1400
CAUTION: All network-based video equipment should be provided with surge suppression, power conditioning, and
UPS protection.
Exterior cameras are susceptible to power surges due to electrical storms. Power surges can disrupt system
performance and/or damage equipment. In-line surge suppressors can protect performance and
equipment. Provide them for all at-risk cameras.

Legend IP
Installation Manual
8
Compatible IP decoders
The following IP decoders have been tested and found compatible with Legend IP domes.
•SymNet
Compatible digital video management software
The following digital video management software applications have been tested and found compatible with
Legend IP domes. For differences, see Product description on page 2.
• GE’s SymSecure
• OMNICAST version 3.6 or higher
Compatible digital video viewers
The following digital video viewers have been tested and found compatible with Legend IP domes. For
differences, see Viewing options on page 19.
• GE’s free SymNav (provided)
• GE’s free SymBrowser
• GE’s SymNet
• GE’s SymSecure
Compatible web browsers
The following web browsers have been tested and found compatible with Legend IP domes.
• Internet Explorer 5 (or later) for viewing and control
Compatible operating systems
The following operating systems have been tested and found compatible with Legend IP domes.
•Windows
®2000
•Windows
®XP
•Windows
®XP Pro
Compatible digital video storage devices
The following digital video storage devices have been tested and found compatible with Legend IP domes. For
performance differences, see Storage requirements and options on page 16.
• GE’s SymSecure NVR archiver
• GE’s SymDec

Chapter 1
Introduction
9
Dome requirements
For proper operation, adhere to the following operational, load, cable, and power requirements for Legend IP domes.
Minimum load requirements
Table 1 lists the load requirements for all Legend IP dome configurations.
Cable requirements
Table 2 lists the requirements for the cables that connect to the dome.
Note: When using unshielded twisted-pair cable for video and data, the wires can share the same jacket but must remain
separate twisted pairs.
CAUTION: For safety, the mounting surface, hardware, and procedure used for securing the dome must support
the weight of the dome, mount (if used), cables, and any structural or environmental vibration according
to local codes.
Table 1. Minimum load requirements of dome configurations
Minimum load Dome configuration
100 lb. • Rugged, cast aluminum pendant-mount housing (with any mount)
• Heavy duty housing (with any mount)
• Pressurized housing (with any mount)
• Swing-arm mount (with any dome)
50 lb. All other dome and mount configurations
CAUTION: To ensure the security of your surveillance system, your IP network should be isolated and secured from
unauthorized access.
Table 2. Cable requirements
Operation Cable requirement
Length
feet meters
Ethernet (for digital
video and data)
CAT-5 Ethernet cable (without cable boots) 385 100
Power 24 VAC cable. To determine the size of cable needed for individual applications, see
Power cable size and length requirements on page 11.
Alarms and relays 22 to 26 gauge (0.64 to 0.4 mm) unshielded, two-conductor, twisted-pair (UTP) cable
Analog video 75 ohm coaxial cable; or
22 gauge (0.64 mm) unshielded, two-conductor, twisted-pair (UTP) cable
Note: Use only crimp-on BNC connectors. Do not use screw-on connectors.
Analog data For RS-422: 22 gauge (0.64 mm) unshielded, two-conductor, twisted-pair (UTP) cable 10,000 3,000
For RS-485: 22 gauge (0.64 mm) shielded, two-conductor, twisted-pair (STP) cable 3,000 900

Legend IP
Installation Manual
10
Cable management
Follow all local codes for cable management. As a general rule, you can fill a cable conduit to a maximum of
60% of its capacity. You must maintain 40% free space. A variety of factors will determine how many cables
you can run into the dome. Capacity limitations include:
• number of cables
• size of the cables
• number of alarms and relays wired
• use of single-conductor or multiple-conductor cable
• use or lack of use of a junction box
Figure 4 provides an illustration of the cable capacity of three typical applications. It is important to note that
all cables of the same gauge are not of the same diameter. Manufacturer, shielding, and rating affect the actual
diameter of cables of the same gauge. GE leaves the selection of the appropriate cable to the discretion of the
installer who is working with the local codes of the installation site.
Figure 4. Three acceptable typical cabling scenarios
3/4in. dia.
Power
Ethernet
Data
(daisy chained)
Data
(daisy chained)
Alarms
(multiconductor)
Video
Alarms (4)
Relays (2)
3/4in. dia.
Power
Ethernet
Data
(daisy chained)
Data
(daisy chained)
Video
Ethernet
3/4in. dia.
Power
Percentage conduit fill = 16%
Includes:
• Ethernet: CAT-5 (0.16 in. dia.)
• Power: one 18 AWG UTP (0.21 in. dia.)
• Alarms: none
• Relays: none
• Video: no analog video cable
• Data: no analog data cable
Percentage conduit fill = 38%
Includes:
• Ethernet: CAT-5 (0.16 in. dia.)
• Power: one 16 AWG UTP (0.25 in. dia.)
• Alarms: none
• Relays: none
• Video: one 59U/6U coaxial (0.24 in. dia.)
• Data: two 22 AWG UTP (0.19 in. dia.)
Percentage conduit fill = 53%
Includes:
• Ethernet: CAT-5 (0.16 in. dia.)
• Power: one 18 AWG UTP (0.21 in. dia.)
• Alarms: 24 AWG UTP (0.11 in. dia.)
• Relays: 24 AWG UTP (0.11 in. dia.)
• Video: one 59U/6U coaxial (0.24 in. dia.)
• Data: one 22 AWG UTP (0.19 in. dia.)
3/4 in. dia. 3/4 in. dia. 3/4 in. dia.
Power
Video
Ethernet
Power
Data
(daisy-chained)
Data
(daisy-chained)
Ethernet
Power
Data
(daisy-chained)
Data
(daisy-chained)
Ethernet
Alarms
(multiconductor)
Alarms (4)
Video
Relays (2)
Note: The diameters for cables of the same gauge will vary per manufacturer, rating, and shielding. So be aware that
you may get more or fewer cables within the 60% conduit fill requirement depending on the cables that you select.

Chapter 1
Introduction
11
Power requirements
All Legend IP domes require a 24 VAC power supply to operate the domes’ PTZ, camera, and heater/blower,
if present. The startup and running power requirements vary depending on the model (Table 3).
Be aware that Legend IP domes have greater power requirements than do CyberDome or analog Legend
domes, which may require upgrading the power cabling for Legend IP domes.
Power cable size and length requirements
Using the proper gauge of power cable will ensure proper operation and avoid voltage drops. See Table 4 for the
recommended cable gauge for varying maximum cable lengths for the different models of domes.
CAUTION: Use only a Class 2 power supply of the required output rating as listed on individual units and specified.
Table 3. Power requirements at 24 VAC (±4 VAC) operating voltage
Model Start-up power Running power
Dome without heater/blower 30 W 24 W
Dome with heater/blower 60 W 44 W
Rugged and HD dome with 25 W heater/blower 100 W 74 W
Table 4. Recommended power cable gauges based on maximum lengths for an operating voltage of 24 VAC (±4 VAC)
Wire gauge
Domes without
heater/blower
(30 W)
Domes with
heater/blower
(60 W)
HD domes with
heater/blower
(100 W)
AWG mm2feet meters feet meters feet meters
10 2.60 1565 477 780 238 470 143
12 2.05 985 300 490 149 295 90
14 1.62 620 189 310 94 185 56
16 1.29 390 119 195 59 115 35
18 1.02 245 75 120 37 70 21
20 0.81 150 46 75 23 45 14
22 0.64 95 29 45 14 25 8

Legend IP
Installation Manual
12
System planning
Before you install and program your surveillance equipment, make sure that you have planned a system that
will meet your needs. You need to balance the various network issues that affect the compression and
transmission of video to get the video quality, transmission speed, and storage capacity that you need your
system to deliver. Consider each of the following related issues.
If you have questions that this section does not answer, GE Security has system design engineers available to
help you design your system. Contact your dealer, sales representative, or GE Security at www.gesecurity.com.
Digital video networks
Network topologies can be quite different between the design of a single building with a high-speed network
and the design for a number of satellite locations being managed by a central location. If you are connecting
remote offices to each other or to a central office, you must consider the network throughput, latency, and
bandwidth when defining the speed and capacity of a network. Bandwidth is the physical component that is
most easily controlled.
•Throughput is the amount of data that can be transmitted over a network connection in a fixed amount
of time, which is usually expressed as bits per second (bps) for digital devices and as cycles per second
(Hz) for analog devices. The higher the throughput, the faster the transmission speed will be.
•Latency is the amount of time it takes a packet to travel from a source to a destination. The
lower the latency, the faster the transmission speed will be.
•Bandwidth is the actual capacity of a network cable. The higher the bandwidth, the faster the
transmission speed will be.
Bandwidth
First, determine what your video payload (amount of video data, not operational data) is likely to be, then
determine how fast you need your video to transmit through the network. After you have considered such
issues as resolution (Video resolution standards on page 15), data rate (Video compression standards and data
rates on page 15), throughput, and latency, you can determine what capacity you need your network cable to
be. Real-time digital video generally requires the bandwidth found on high-speed (gigabit-per-second) LAN
networks for reasonably high resolution, bitrate, or channel count.
Table 5 shows a range of sample bandwidths. For help analyzing your system, contact GE Security System
Design or Technical Support.
Table 5. Sample bandwidth requirements for 1 to 48 high-quality, MPEG-4 video streams
Video resolution
standard
fps (frames per
second)
Bandwidth by number of streams in Mbps (megabits per second)
14816 24 32 48
D1 30 2.42 9.68 19.36 38.72 58.08 77.44 116.16
D1 15 1.27 5.09 10.18 20.36 30.54 40.71 61.07
2CIF 15 0.70 2.72 5.44 10.88 16.32 21.76 32.64
Other manuals for Legend IP
1
Table of contents
Other GE Security Security Camera manuals

GE Security
GE Security PTZ User manual

GE Security
GE Security GEC-EVR User manual

GE Security
GE Security TruVision User manual

GE Security
GE Security Security Lend Camera User manual

GE Security
GE Security PTZ 12X User manual

GE Security
GE Security Security Lend Camera User manual

GE Security
GE Security DM2 User manual

GE Security
GE Security UVD-XP3DNR(-P) Assembly instructions

GE Security
GE Security CyberDome II User manual

GE Security
GE Security CyberDome II User manual