manuals.online logo
Brands
  1. Home
  2. •
  3. Brands
  4. •
  5. GE
  6. •
  7. Answering Machine
  8. •
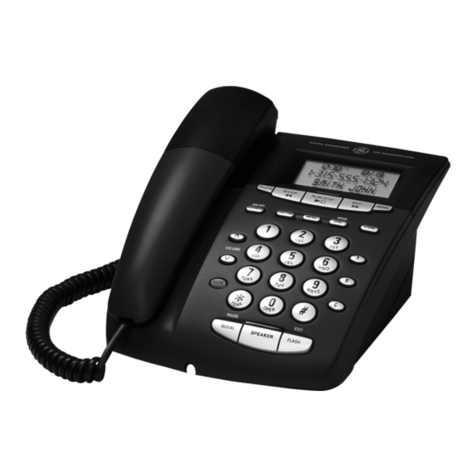
  9. GE 25952 Series User manual

GE 25952 Series User manual

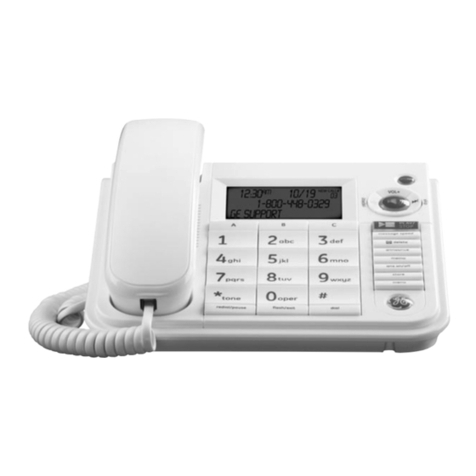
Model 25952 Series
5.8 GHz Cordless
Handset Speakerphone
Answering System
User's Guide
Your new GE telephone system is EXPANDABLE
up to atotal of 4 handsets (by purchase of optional
Model 25902 handset with charge cradle)
Equipment Approval Information
YourtelephoneequipmentisapprovedforconnectiontothePublic5witchedTelephoneNetworkand
isincompliancewithparts15and68,FCCRubsandRegulationsandtheTechnicalRequirementsfor
TelephoneTerminalEquipmentpublishedbyACTA
1 NotificationtotheLocalTelephoneCompany
Onthebottomof thisequipmentisa bbelindicating,amongotherinformation,theUSnumber
andRingerEquivalenceNumber{REN)fortheequipmentYoumust,uponrequest,providethis
informationtoyourtelephonecompany
TheRENis usefulindeterminingthenumberof devicesyoumayconnecttoyourtelephonelineand
stillhaveallofthesedevicesringwhenyourtelephonenumberiscalled Inmostbut notalllareas,
thesumoftheRENsofalldevicesconnectedtoonelineshouldnotexceed5 Tobecertainofthe
numberof devicesyoumayconnectto yourlineasdeterminedbytheREN,youshouldcontactyour
localtelephonecompany
Aplugandjackusedto connectthisequipmenttothe premmeswiringandtelephonenetworkmust
complywiththeapplicableFCCPort68rubsandrequirementsadoptedbytheACTA.Acompliant
tebphonecordandmodularplugisprovidedwiththisproduct.Itisdesignedtobeconnectedtoa
compatiblemodularjackthatisalsocompliantSeeinstallationinstructionsfordetails
Notes
•Thisequipmentmaynotbeusedoncoinsen/iceprovidedbythetelephonecompany
• Partylinesaresubjecttostatetariffs,andtherefore,youmaynotbeabletouseyourown
telephoneequipmentifyouareonapartylineCheckwithyourlocaltelephonecompany.
• Noticemustbegiventothetelephonecompanyuponpermanentdisconnectionofyour
telephonefromyourline
• Ifyourhomehasspeciallywiredabrmequipmentconnectedto thetelephoneline,ensurethe
instollafionof thisproductdoesnotdisableyouralarmequipmentIfyouhavequestionsabout
whatwilldisableabrmequipment,consultyourtelephonecompanyoraqualifiedinstallec
USNumberislocatedonthecabinetbottom
RENNumberis locatedonthecabinetbottom
2 RightsoftheTelephoneCompany
Shouldyourequipmentcausetroubleonyourlinewhichmayharmthetelephonenetwork,the
telephonecompanyshall,wherepracticable,notifyyouthattemporarydiscontinuanceofservice
mayberequiredWherepriornoticeisnotpracticableandthecircumstanceswarrantsuch
action,thetelephonecompanymaytemporarilydiscontinueserviceimmediately.Incaseofsuch
temporarydiscontinuance,thetelephonecompanymust:I1)promptlynotifyyouofsuchtemporary
discontinuance;(21affordyoutheopportunitytocorrectthesituation;and(5)informyouofyour
righttobringacompbinttotheCommissionpursuantto proceduressetforthinSubpartEofPart
68,FCCRulesandRegulations
Thetelephonecompanymaymakechangesinitscommunicationsfacilities,equipment,operations
orprocedureswheresuchactionisrequiredintheoperationofitsbusinessandnotinconsistent
withFCCRubsandRegulationsIfthesechangesareexpectedto affecttheuseor performanceof
yourtelephoneequipment,thetebphonecompanymustgiveyouadequatenotice,inwriting,to
allowyoutomaintainuninterruptedservice ThomsonInc.
10330NorthMeridianStreet
Hodel
25952 Indianapolis,IN 46290
000017254(Rev0DamE) I_OMSON ©2007ThomsonInc
0®02 _ Trademark(s)® Registered
PrintedinChino THOMSON _ Marco(s)Registrado(s)
Interference Information
ThisdevicecompbswithParti5 oftheFOgRules.Operationissubjectto thefollowingtwo
conditions:(1)Thisdevicemaynotcauseharmfulinterference;and(2)Thisdevicemustacceptany
interferencereceived,includinginterferencethatmaycauseundesiredoperation.
ThisequipmenthasbeentestedandfoundtocomplywiththelimitsforaClassBdigitaldevice,
pursuanttoPart15oftheFat RubsTheselimitsaredesignedtoprovidereasonableprotection
againstharmfulinterferenceinamsidentblinstallation
Thisequipmentgenerates,uses,andcanradiateradiofrequencyenergyand,ifnotinstalledand
usedinaccordancewiththeinstructions,maycauseharmfulinterferenceto radiocommunications
Nowever,thereisnoguaranteethatinterferencewill notoccurinoparticularinstallation
PrivacyofCommunicationsmaynotbeensuredwhenusingthisproduct
ifthisequipmentdoescauseharmfulinterferencetoradioortelevisionreception,whichcanbe
@terminedbyturningtheequipmentoffandon,theuserisencouragedtotrytocorrectthe
interferencebyoneormoreofthefollowingmeasures:
• Reorientorrelocatethereceivingantenna(thatis,theantennafor radioor tebvisionthat is
"receiving"theinterference)
• Reorientorrelocateandincreasetheseparationbetweenthetelecommunicationsequipment
andreceivingantenna
•Connectthetelecommunicationsequipmentintoanoutbtona circuitdifferentfromthatto
whichthereceivingantennaisconnected.
Ifthesemeasuresdonoteliminatetheinterference,pleaseconsultyourdealeroranexperienced
radio/televisiontechnicianforadditionalsuggestionsAlso,theFederalCommunicationsCommission
hasprepareda helpfulbooklet,"NowToIdentifyandResolveRadio/TVInterferenceProblems._This
bookbtisavailablefromtheUS.GovernmentPrintingOffice,Washington,DC.20/402Pleasespecify
stocknumber004-000-00395-awhenorderingcopies
Notice:Thechangesormodificationsnotexpresslyapprovedbythepartyresponsibbforcompliance
couldvoidtheuser'sauthorityto operatetheequipment
Hearing Aid Compatibility (HAC)
ThistelephonesystemmeetsFCCstandardsforHearingAidCompatibility
Licensing
LicensedunderUSPatent6,927,009
FCCRFRadiation Exposure Statement
ThisequipmentcomplieswithFCCRFradiationexposurelimitssetforthforanuncontrolled
environmentThisequipmentshouldbeinstalledandoperatedwitho minimumdistanceof 20
centimetersbetweentheradiatorandyourbodyThistransmittermustnotbecodocatedor
operatedinconjunctionwithanyotherantennaortransmittec
Forbodyworn operation,thisphonehasbeentestedandmeetsthe FCCRFexposureguidelines
whenusedwiththebeltdipsuppliedwiththisproductUseofotheraccessoriesmaynotensure
compliancewithFCCRFexposureguidelines.
WARNING:TO
PREVENT FIRE OR
ELECTRICAL SHOCK
HAZARD, DO NOT
EXPOSETHIS
PRODUCT TO RAIN
OR MOISTURE,
A
THE LIGHTNING
FLASHAND ARROW
HEAD WITHIN THE
TRIANGLE IS A
WARNFNG SIGN
ALERTING YOU OF
"DANGEROUS
VOLTAGE" INSIDE
THE PRODUCT
CAUTION: TOREDUCE THE
RISKOF ELE[;I HICSHOCK, Dg
NOT REMOVE COVER {OR
BACK}¸NO USER
SERVICEABLE pARTS INSIDE
REFER SERVICING TO
QUALIFIED SERVICE
PERSONNEL¸
THE EXCLAMATION
POINT WITHIN THE
TRIANGLE ISA
WARNING SIGN
ALERTING YOU OF
IMPORTANT
INSTRUCTIONS
ACCOMPANYING
THE PRODUCT¸
SEE MARKING ON BOTTOM /BACK OF PRODUCT
Introduction
CAUTION: When using telephone equipment, there ere basic
_ safety instructions that should always be followed, Refer to the
IMPORTANTSAFETY INSTRUCTIONSprovided with this product
and save them for future reference,
IMPORTANT:Because cordless phones operate on electricity, you
should have at least one phone in your home that isn't cordless, in
case the power in your home goes out,
Before You Begin
Pa rts Checklist iforsgs2xxmodel)
Makesureyour packageincludesthe items shown here.
Nandset comB;tatr_ent
Base battery puck cover
_Do
OQ_m
_OG
_ _ _j_ @Nandset
Wall mount Telephone ACpower Belt
bracket line cord adaptor clip
ForModel 25952xx2them will be ONEadditional handset, chargecradle, belt clip,
battery packand coverthan shown above
ForModel 25952xx3there will be TWO additional handsets,chargecradles, beltclips,
battery packsand covers than shown above.
ForModel 25952xx4there will be THREEadditional handsets, charge cradles,beltclips,
battery packsand coversthan shown above.
Telephone Jack Requirements
Touse this phone,you needan RJIIC typemodular telephone
jack, which might look like the one picturedhere, installedin
your home. Ifyou don't have a modularjaek, call your local
phone companyto find out how to getone installed.
Installation
Wa,p, te
Modular _ I
telephon_
linejack o _J
Digital Security System
Yourcordless phoneusesa digital securitysystem to protect against falseringing,
unauthorizedaccess,and charges toyour phoneline.
INSTALLATIONNOTE: Some cordless telephones operate at
frequencies that may cause or receive interference with nearby
TVs, microwave ovens, and VCRs.To minimize or prevent such
interference, the base of the cordless telephone should not be
placed near or on top of a TV, microwave ovens, or VCR. If such
interference continues, move the cordless telephone farther away
from these appliances.
Certain other communications devices may also use the 5.8 GHz /900
MHzfrequency for communication, and, if not properly set, these
devices may interfere with each other and/or your new telephone.
Ifyou are concerned with interference, please refer to the owner's
manual for these devices on how to properly set channels to avoid
interference. Typical devices that may use the 5.8 GHz frequency
for communication include wireless audio/video senders, wireless
computer networks, multi-handset cordless telephone systems, and
some long-range cordless telephone systems.
Important Installation Guidelines
•Avoidsourcesof noiseand heat, such asmotors, fluorescent lighting,microwave
ovens,heating appliances and directsunlight.
• Avoidamas of excessivedust, moistureand bw temperatum
• Avoid other cordlesstebphones or persona(computers
• Never installtelephone wiring during a lightning storm.
• Never installtelephonejacks inwet locations unlessthejack is specifically
designedfor wet locations
• Nevertouch non-insulated telephonewires ar terminals, unlessthe telephoneline
has beendisconnected at the network interface
• Usecaution when installing or modifyingtelephone lines
Handset Layout
display
TALK/CALLBACK
(button) X
CALLERID-_
VOLUME(_)X
(button)
redial
format/trans
(format/transfer
button)
repeat
)button)
erase
SPEAKER
(button)
CALLER ID-
VOW ME(-_ )
(button)
mum
button}
chan/delete
(button)
skip (button)
#PAUSE/ringer
(button)
*EXll
)button)
mute/menu flash/answerer/
(buttonl call waiting (button}
Base Layout
day/check hour min _ skip
Ring To Answer (button) (button) (minute button)
MESSAGES PLAY/STOP
(indicator)- (button)
memo
_ repeat" erase
)button) )button)
announce
(button)
page
(button}
anson/off
)answereron/off
charge/in use (-/+) do not disturb button)
)indicator) )buttons) )button)
Installing the Phone
Installing the Handset Battery
NOTE:You must connect the handset battery before use.
CAUTION: To reduce the risk of fire or personal injury, use only
_ the Thomson Inc, approved Nickel-Metal Hydride (Ni-MH} buttery
model 5-2522, which iscompatible with this unit,
1 Locate batteryand batterydoor which arepackagedtogether insidea pbstic bag
and are separatefrom the handset
2, Locate the battery compartment on the backof thehandset
3. Plugthe batterypack cordintothejack inside the compartment.PLEASEREGISTER
shows inthe display
NOTE:To ensure proper battery installation, the connector is keyed
and con be inserted only one way.
[ l/ battery II
Iill pack" I
f t _. black wire
ow. red wire
4 Insert the battery pack.
5 Closethe battery compartment by pushing the door up until it snaps into place.
Base Station
t Choosean areanear an electricaloutlet and a telephonewall jack (RJttC}, and
place your cordlesstelephone on a level surface,suchas a desktop or tabletop,or
2. Plugone end of the telephone (inecord intothe TELUNEjack at the back af the base
and the other end intoa modularjack
3 Plugthe AC powerconverter into the electrical outlet and the DCconnector intothe
jack at the back of the base
a Placethe handset in the basecradle Thecharge/in useindicator turns on, verifying
the battery,ischarging Theunit will take 20 secondsto register and verify itssecurity
code.READYshows in the display
NOTE: In case of a power failure, the handsets may display
UNAVAILABLEwhen the TALK/CALL BACKbutton is pressed. You
must then place all handsets on the main bose cradle for 20
seconds to re-register.
5 Allow the phone tocharge far 16hours prior to first use Ifyou don't properlycharge
the phone,battery performance is compromised
CAUTION: To reduce risk of personal injury, fire, or damage
,_ use only the 5-2732 power adaptor listed in the user's guide.
This power adaptor is intended to be correctly orientated in a
vertical or floor mount position.
Wall Mounting
1. Turnthe base oven
2. Attach the wall mounting pedestal byfirst inserting the tabs on the open edgeof
the pedestalinto the slots on the lower portion of the bottom of the base Then push
down and snapthe pedestalinto p(aee.
3. Slipthe mounting holes(on the back of the base}over thewall plate posts,andslide
the unit down into place MJoIIplate not included)
NOTE: If desired, gather the extra telephone line end power adaptor
cord and store inside the wall mounting pedestal.
Answering System Setup
Thissectionshows you how to setup },our answeringsystem to receiveincoming calls.
Beforeyou begin the set upprocess,you must turn on the answering system
• Pressthe ans on/off button to turn the answering system ONand OFF.
TheMESSAGESindicator lightswhen the answering systemis ON.The indicator
NOTE: The answering system displays "- -" when it is OFF.
Setting the Voice Prompt Language
Thedefault voice prompt languageis English.
Tochange the answering system'svoice prompt language, pressand holdthe skip
button for two seconds The unit announces "SELECCIONADOESPANOL"(Spanish
selected)
NOTE: To change to English, press and hold the skip button again for
2 seconds, The unit announces "ENGLISH SELECTED".
NOTE:In remote access mode, the system follows the selected
language. The voice prompt language cannot be switched remotely,
Voice Time/Day Stamp
1Makesurethe answering system isON
2. Pressand holdthe day/check button on the base to set the day of the week.
3 Pressand hold the hour button on the baseto set the hour {am. or pmj. Example:
12AM,1AM,or 12PM,1PM.
4 Pressand hold the rain button on the baseto set the minute Thetime advancesin
5-minute intervals,or tap and releaseto advance in iminute intervals.
Speaker Volume
Usethe speaker volume 1-/+1buttons to adjust speaker volume on the base to a
comfortable level.L1is the minimum speakervolume and L8isthe maximum.
Recording the Outgoing Announcement
Forbest resultswhen recording,you should be about nineinches from the microphone,
andeliminate as much backgroundnoise as possible
1 Makesure the answeringsystem isON
2. Pressand holdthe announce button on the base
3 Beginspeakingafter you hear the beep
4 Releasethebutton when you finish your announcement.
NOTE:If you choose not to record an outgoing announcement, a default
announcement plays instead. Toreturn to the default announcement after
you have recorded your own outgoing announcement, pressthe announce
button and release it when you hear the beep.
SampleOutgoing Announcement
"H!,THISIS (USEYOURNAMEHERE),I CAN'TANSWERTHEPHONERIGHTNOW,50
PLEASELEAVEYOURNAME,NUMBERANDA BRIEFMESSAGEAFTERTHETONE,AND
I'LLGETBACKTOYOU.THANKS."
Reviewing the Announcement
Pressand releasetheannounce button to reviewyour outgoing announcement
Rings to Answer
Usethe RINGSTOANSWERswitch onthe backofthe baseta setthe numberof times
you want the phone to ring beforethe answering system answersthe call Youmay
choose3 rings, 5 rings,or TOLLSAVER{%1
NOTE:If you select Toll Saver (TS)the unit answers after the 3rd ring
if there ARE new messages, OR the unit answers after the 5th ring if
there ARE NO new messages.
Handset Setup
Thereare nineprogrammable menusavailable: Language,HandsetName,Area Code,
RingerON/OFF,RingerTone,VIPRingTone,Tone/Pulse,Transferand DefauRSetting.
Duringprogramming,you may pressthe mute/menu button at anytime to go to the
nex_option.Toexit the menu,keepthe previoussetting and returnto the standby
mode,pressthe *EXIT/tonebutton.
Display Language
i.Pressthe mute/menu button until _ 1ENG2FRA3ESPshows in the display 1ENGis
the defau(t (ENGstandsfor EnglishFRAstandsfor French.ESPstandsfor Spanish)
2 Usethe CALLER@-VOLUME(-_or-,- ) button or the touch-tone pad on the
handset to enter your selection
3 Pressmute/menu again to save
Handset Name
i,Pressthemute/menu button until ENTERNAMEshows in the display
2 Usethe touch-tone pad to enter the name (up to 15characters) More than one
letter isstored in eachof the number keys Forexampb, ta enter the name Bill
Smith, pressthe 2 key twice for the letter B. Pressthe a key 3 times for theletter
k Pressthe 5 key3 timesfor the letter L Wait for onesecond. Pressthe 5 key3
times forthe second letter L Pressthe 1keyto insert aspacebetween the Land
the S.Pressthe 7 key4 times for the letter S;pressthe 6 keyonce for the letterM;
pressthe 4 key3 times for the letterI; pressthe 8key for the letter T; pressthea
NOTE:If you make a mistake, use the chan/delete button to
backspace and delete one character at a time,
3. Pressmute/menu againto save.
NOTE:If no name is entered, REAOYshows in the display.
Local Area Code
1. Pressthe mute/menu button until AREACODE- -- shows in the display. - - - is
the default
2.Usethe touch-tone padon the handset to enter your three digit oma code
3 Pressmute/menu again to save
NOTE:If you make a mistake, press the chon/delete button to erase
a wrong number.
Ringer ON/OFF
1 Pressthe mute/menu button until RINGER _1 ON shows in the display
1ONisthe default
2 Use the CALLERID-VOLUME(,_ or-, ) buttonor the touch-tone pad on the handset
ta scroll to 1ONor 2 OFF
3 Pressmute/menuto save.
NOTE:If you turn the ringer off, RINGER OFFshows on the display.
Ringer Tone
Youcan choosefrom i0 nngtones
LPressthe mute/menu button until RINGERTONE _01 shows in the display
01 is the default.
2.Usethe CALLER@-VOWME (-_ or.- ) button or the touch-tone pad on the handset
to select from O1ta10
3Pressmute/menu to save.
VIP Ring Tone
Thisfeature a(Iowsyouto assigna specific ringtone to a numberstored inMemory It
is recommendedthat you storea Calbr ID record into Memoryfor this purpose
1Pressthe mute/menu button until VIPRINGTONEshowsin the display
2 Pressthe desiredmemory Iocatbn (0through 9) if there is a number stored in the
selectedmemorylocation,VIPRT _DEFAULTshowsinthe display.
3. PressCALLER}D-VOLUME(-_or.- ) on the handsetto selectfrom 01to 10or
DEFAULTto use ring tone set inthe RingerToneMenu or SILENTto silence ringe_
4 Pressmute/menu to save
Tone/Pulse
1. Pressthe mute/menu button until },1 TONE 2PULSEshows in the dispby.
1 TONEisthe default.
2.Usethe CALLERID-VOLUME(-_or.- ) button orthe touch-tone padon the handset
to scrollto 1 TONEor2 PULSE
3 Pressmute/menu to save
Transfer ON/OFF
In orderto use the Ca(ITransferfeature (applicableONLYwith additional handsets),
you must havethe TransferON/OFFsetto ONthroughthe menuaf the transferring
handset
LPressthe mute/menu button until TRANSFER_1OFFshows in the display.
2. Usethe CALLERID-VOLUME( --or-- ) button or the touch tone pad on the handset
andselect2ON.
3Pressmute/menu again to save
Default Setting
Youmay return handset settings tothe factory defaultsetup using this menu.
1 Pressthe mute/menu button until DEFAULT_NO shows inthe display NOis
the default
2 Use the CALLERID-VOLUME(-,or- )buttononthehandsettoscro((toYESorNO
NOTE: If you choose YES,all settings in the programmable menu
return to the factory defaults,
3Pressmute/menu to save.
Cordless Phone Basics
Charge/In Use Indicator
ThephoneisONwhenthe charge/in useindicatoron thebaseis lit Thehandsetvisual
ringerand baseindicatorflashwhenyoureceiveacall
Answering a Call
1. Whenthe phone rings,pick up the handset and pressthe TALK/CALLBACKor
SPEAKERbutton
2 When finished,pressthe TALK/CALLBACKor SPEAKERbutton againor place the
handset onthe base cradleto hang up
Making a Call
1Pickup the handset and pressthe TALK/CALLBACKor SPEAKERbutton Wait for the
dial tone The call timer starts counting minutesand secondsin the display
2. Dial a telephone number.
3. When finished,pressthe TALK/CALLBACKor SPEAKERbutton againor place the
handset onthe base cradleto hang up.
NOTE:In case of power failure, the handset may display
UNAVAILABLEwhen the TALK/CALL BACKor SPEAKERbutton is
pressed. You must then place the handset on the main base for 20
seconds to reset the unit.
Pre-dialing
i.Makesure the phone isOFF{not in TALKmode}
2 Dial atebphone number (thenumber you dialshows inthe display)
NOTE:If you make o mistake dialing the number, use the chon/
delete button to backspace and erase the wrong number, and enter
the correct number.
3. Pressthe TALK/CALLBACKor SPEAKERbutton on that handset.Thenumber
automaticofly dialsand the call timer starts counting the minutes and secondsin the
display.
4When finished,pressthe TALK/CALLBACKorSPEAKERbutton againto hang up
NOTE : You may enter up to 32 pre-diol digits.
Redial
Whilethe phone is ON{inTALKor SPEAKERPHONEmade},pressthe redialbutton to
redialthe lastnumber you dialed(upto 32digits).
-OR-
Whilethe phoneis OFF(instandby mode),pressthe redial button and then the
TALK/CALLBACKorSPEAKERbutton to redial the last numben
Flash
Usethe flash/answemr/ca, waiting button to activate custom ca,ing services suchas
call waiting, which are availablethrough your heal phonecompany.
TIP: Do not use the TALK/CALL BACK button to activate custom
calling services such as coil waiting or you'll hang up the phone.
Channel Button
Whiletalking onthe phone, it may be necessaryfor you to manua(lychange the
channel to improvereceptionand reducenoiseor static on theline Pressand release
the chan/delete button to move to the next clear channel
Exit
Pressthe *EXF/tone buttonto cancelany command you initiated.
Page
Thisfeatum assistsin locating amisplacedhandset.
Pressthe pagebutton onthe base.Thehandset beeps continuouslyfor about 2
minutesuntil youpressthe TALK/CALLBACKor SPEAKERbutton onthe handset or the
page button on the base.
NOTE:You may still page the handset when the ringer is off.
Do Not Disturb
This feature al(ows you to turn off handset ringers for all handsets registered
with the base unit. The answerer speaker will be silenced when the unit is
receiving incoming messages.
Pressthe do not disturb button on the base. Handsetwill display DONOTDISTURB
NOTE: If DO NOT DISTURB is activated during on incoming ring, it
will only be effective from the next incoming call,
Ringer ON/OFF Shortcut
Apart from the setting in the main menu, thereis a shortcut to set the ringer Make sure
the phone isOFF(not in talk mode}.
1 Pressthe #PAUSE/nngerbutton to go to the RINGERON/OFFmenu
RINGER_1ONshows in the display. 1ONis the defoult.
2. Usethe CALLERID-VOLUME(-_ or- )button or the touch-tone pad onthe handsetto
scrollto 1ON,or 2 OFF
3 Pressthe #PAUSE/nngerbutton to save your selection.Youwill hear a confirmation
tone.
Volume
When the phone isON (inTALKorSPEAKERPHONEmode) pressthe CALLERID-VOLUME
(--or.- ) button to adjust the listening level.Choosefrom fivevolume settings. VOL1is
the lowestvolumeand VOL5is the highest vdume
NOTE:The phone will automatically reset VOL 5 to VOL 4 after you
hang up,
Mute
Usemute during a phone conversationto speak privatelyand affdinewith a third party
1 Pressthe mute/menu button MUTEshows in the disp(ayThe party an the telephone
will not hear you
2. Pressthe mute/menu button when finished.
Switching between the Speakerphone and
Handset
L Ifyou are usingthe handsetearpiece andwant to switchto the speakerphone,press
the SPEAKERbutton,you canthen pressSPEAKERbutton again to end conversation
2.If you are using the speakerphoneand want to switch to the handset earpiece,press
the TALK/CALLBACKbutton,you can then press the TALK/CALLBACKbutton again ta
end conversation,
Temporary Tone
Thisfeature is usefulonly if you havepulse(rotary}service TemporaryToneDialing
enables pulse(rotary,,)service phoneusersta access touch toneservices offeredby
banks,credit card companies,etc, Forexample,when youcall your bank you may need
to enter your bankaccount numbenTemporarilyswitching to touch tone modeallows
you to sendyour number
L Dial the telephonenumber and wait for the line to connect.
2.Whenyour call is answered,pressthe *EXIT/tonebutton on the handset to
temporarily changefrom pulsedialing to tonedialing
3 Follow the automated instructionsto get the informatbn you need
4 Hangup the handset and the phone automatica(lyreturns to pulse (rotary)
dialing mode.
Call Transfer (applicable only with additional handsets)
Duringan external call, youmaytransfer the external call to another handset
NOTE:The transfer feature MUST be set to ON, this can be done
through each handset's setup menu function, Transfer ON/OFF.
i.Pressthe format/trans button on the originating handset. TRANSFERRINGshowsin
the display A(Iregistered handsetswill be paged
2 Pressthe format/trans button or TALK/CALLBACKon receivinghandset to
answercall
NOTE:To cancel the call transfer, you may press *EXIT/tone button
or the format/trans button on the originating handset.
NOTE: Ifthere is no answer within 2 minutes after transferring
the call, then the handsets will be rung back (callback). If no
handset answers within 30 seconds, then the external call will be
automatically dropped.
Caller ID (CID)
IMPORTANT:In order to use this unit's Caller ID features, you must
subscribe to either the standard Name/Number Caller ID Service or
Coil Waiting Caller ID Service, To know who is calling while you are
on the phone, you must subscribe to Call Waiting Caller ID Service.
Thisunit receivesand displaysinformation transmitted byyour local phonecompany.
Thisinformation canincludethe phonenumber,date,andtime; or the name,phone
number,date,and time.
FRED.PAGErCallerID name
317 555wl2341- Caller lD phone number
_O;L3S pM l#/_._O REZT CALL" O_ _ Cafler ID record number
Time Date Caller status; NEWor REPT
Call Waiting Caller ID
Providedyeusubscribe to CallWaiting CallerID servicefrom your phone company;if
you receivean incoming call andyou are alreadyon the phone,a beep indicatesthe
presenceof a CallWaiting call on the line. Only the handsetthat isin use atthe time of
the call will display andstore the CallWaiting Caller IDinformation.
• Whenyouhearthe call waiting beepin the handsetreceiver,pressthe flash/answerer/
callwaiting button to put the current callon holdand answer theincomingcall Press
flash/answerer/callwaiting againto return to the originalcall.
Receiving CID Records
Whenyou receivea call,the CallerIDinformation istransmitted betweenthe first and
second ring.The CallerID information appearson the displaywhile the phonerings,
giving you achance to monitorthe information and decide whether or notto answer
thecalL
Storing CID Records (In CID Memory)
Ifyou are not athome or cannot answer,your telephone's CallerID memory storesthe
data for the 40 most recentcalls youreceived soyou can seewho called while you
were unavailable.When the alst call is received,the oldestCaller ID record(1stcall} is
automatically deleted
Youmay review the storedinformation at any time Cal)sreceivedsinceyour last review
show asNEW in the display Callsthat havenot been previouslyreviewed but were
receivedfrom the same number morethan once show as REPTin the display
Reviewing CID Records
Ascalls are receivedandstored, the displayis updatedto let ),,ouknow how man),,calls
havebeen received Toscroll CIDrecords:
i,Makesure the phone is OFF(not intalk mode).
2. PresstheCALLERID-VOLUME( ,_) button to review the newest CIDrecord.
3. PresstheCALLERID-VOLUME(., } button to reviewthe oldest CIDrecordfirst.
Dialing a CID Number
i.Makesurethe phone is OFF(not inTALKmade).
2. Usethe CALLERID-VOLUME( -- or.- )button to display the desiredrecord
3. PresstheTALK/CALLBACKor SPEAKERbutton. Thenumber dials automatically.
NOTE:Depending on (a) how the incoming caller's phone number is
formatted when it is received, and (b) whether or not you previously
pre-progrommed your local area code into the set up menu, you
may need to adjust the format of the incoming caller's stored phone
number before making the cell, press the format/trans button to
adjust the number, and try again
Availableformats inJude:
Eleven digits long distance code "1 " 1-317-5S5-8888
+3-digit area code
+7-digit telephone numbe_
Ten digits 3-digit area code + 317-5S5-8888
7-digit telephone numbe_
Seven digits 7-digit telephone numbe_ $55-8888
Storing CID Records in Internal Memory
Youmay alsostore CIDinformation inthe phone's internalmemory
NOTE: It is important that you format CID records correctly BEFORE
storing in internal memory as you cannot reformat CID records
stored in memory.
1.Makesure the phone isOFF(not in talk mode)
2 Usethe CALLERID-VOLUME( Aor v ) buttonto scrollto the desired CIDrecord
S. Pressthemem button.
4. Usethe touch4one padto enter a memory location (0-9}to store the number in that
memorylocation.Youwill heara confirmation tone
NOTE: If the memory location is occupied, REPLACEMEMO? is
displayed, and you must confirm replacement by pressing the mum
button.
NOTE: Press the *EXIT/tone button once to keep the previous setting
(making no changes) end return to the menu.
NOTE: If the selected CID record contains any information that is non-
numeric, the unit will not allow this record to transfer to the internal
user memory. The handset will display UNABLE TO STORE.
To Replace a Stored CID Record
1. Repeatsteps i through 3 in Storing CIDRecordsin Internal Memory.Afteryou enter
the memory locution,REPLACEMEMO?shows in the display.
2 Pressthe mem button again, and the newCIDrecord replacesthe old memory in
that location You will heara confrmation tone
Deleting a CID Record
1. Makesure the phone is OFF(notin TALKmode).
2 Usethe CALLERID-VOLUME (A or v ) button to display the CIDrecordyou want
to delete
3 Presschar/deleteThedisplayshowsDELETECALLIO?
4,Presschan/deleteagaintoerasethe recordandDELETEDshowsinthedisplay.You
willheara confirmationtone.
NOTE:Press the *EXIT/tone button to return to the standby mode.
Deleting All CID Records
1. Makesure the phoneis OFF(not in TALKmode).
2. Usethe CALLERID-VOLUME( _.or.- ) button to displayany CallerID record
3 Pressand holdthe chan/deletebutton until DELETEALL?showsin the display
4 Presschar/delete again to eraseallrecords You will heara confirmation tone The
displayshowsNOCALLS
NOTE: Press the *EXIT/tone key to return to the standby mode.
Memory
Eachhandset can store upto ten 24-digit numberswith upto 15-characternames in
memory for quick dialing.This memoryfeature is in addition to the CIDmemory log,
which storesup to 40 OD recordsin each handset
Storing a Name and Number in Memory
1, Makesure the phone is OFF(notin TALKmode).
2. Pressthe mem button.
3. Pressthe desiredmemory location (0through 9) or useCALLERID-VOLUME(-_ or._ }
to scrollto the desiredmemory location
NOTE: If the memory location is occupied, the memory location
number and stored name and telephone number shows in the
display, If the memory location is empty, ENPTYshows in the display,
4. Pressthe mum button again Thedisplay shows ENTERNAME.
NOTE:If you don't went to enter the name, skip step 5.
5 Use thetouch-tone podon the handset to enterthe name(upta 15 characters)
and pressthe memory button to save. Morethan one letter is stored in eachof the
number keys Forexample, to enter the nameBill Smith,pressthe 2 key twice for the
letter B.Pressthe 4 key 3times for the letter I Pressthe 5key 3 times for the letter L
Wait for one second Pressthe Skey 3 timesfor the second letter L Pressthe i key
to insert a space betweenthe Land the S Pressthe 7 key4 times for the letter S;
pressthe 6 keyonce for the letter M;press the 4 key3 times for the letter I; pressthe
8 keyfor the letter T;press the 4key twice for the letter H.
NOTE:If you make o mistake press the chon/delete button to
backspace and erase the wrong character(s) or number(s).
6 Pressthe mum button to savethe name Thedisplay showsENTERTELNUMBR
7 Usethe touch-tone padto enter the telephonenumber you want to store (up to
24digits}.
NOTE: The system treats PAUSESas delays or spaces in the dialing
sequence.
8 Pressmumagain tostore the numberYouwill hear aconfirmation tone
Storing the Last Number Dialed
1.Repeatsteps 1 through 6 in Storinga Name and Numberin Memory.
2. Presstheredial button.
3 Pressthe mum button to store the number Youwill hear a confirmation tone
Toreplace an old numberwith a new radial number:
1 Repeatsteps 1through 6 in Storing a Nameand Number in Memory
2. Pressthe radialbutton
3 Pressthe merebutton, andREPLACEMEMO?showsin the display.
zi Pressthe mem button again to replace the old number with the new number.You
will heara confirmationtone.
Inserting a Pause in the Dialing Sequence of a
Stored Number
Ifo pause is neededto wait for adial or access tone, pressthe#PAUSE/ringerbutton to
insert a delayin dialing sequenceof a stored number (forexample,after you dial 9 for
an outside line,or to wait for acomputer access tone).Pauseshows in the displayas a
P,and eachpause counts as onedigit Jnthe dialing sequence
Changing a Stored Number
1 Repeatsteps i through 7 in Storinga Name and Number in Memory
2. Pressthe mem button,and REPLACEMEMO?showsin the display.
3 Pressthe membutton tostorethe number Youwill heara confirmation tone
Reviewing and Deleting Stored Numbers
1. Toreview storednumbers, pressthe mem button, and usethe CALLERIS-VOLUME
( A or- ) buttonto scrollto the memory location,or pressthe corresponding number
keyfor a desiredmemory location(0-9)
2. Whenthe data shows in the display,pressthe chan/delete button. The display
showsDELETE?
3, Presschan/deleteagain to delete the data.The display showsDELETED,
Dialing a Stored Number
1, Makesure the phone isON by pressingthe TALK/CALLBACKbutton,
2. Pressthe mum button
3 Pressthe memory location 10-9)Thenumber dialsautomatically
- OR-
1, Makesure the phone isOFF(not in TALKmode).
2. Pressthe mem button
3 Usethe touch4one pad orthe CALLERID-VOLUME(_.or.- )button to scrollto the
numberyou wont to dial
a Pressthe TALK/CALLBACKor SPEAKERbutton Thenumber dialsautomatically
Chain Dialing from Memory
Usethis featureto make callswhich requirea sequenceof numbers,such ascalling
card calls to a frequentlycalled long distance number Eachpart of the sequence is
dialed from memory.Thefollowing example shows you howto use chain dialing to
makea callthrough a longdistance service:
The Number For Memory Location
Longdistanceaccessnumber 7
Authorizationcode 8
Frequentlycoiledlongdistancenumber 9
1. Makesure the phone isON {in TALKor SPEAKERPHONEmode)
2. Pressthe merebutton and thenpress 7
3 Whenyou hear the accesstone, pressthe mere button and then press 8.
4 At the next accesstone, pressthe mem button and then 9.
TIP:Wait for the access tones before pressing the next mem button,
or your call may not go through.
Answering System Operation
Thissection discussesthe buttons and features on the answering system
Messages Indicator
The messagesindicatorshows youhow many messagesyou havereceived,and the
indicator blinkswhen new messagesare received Theans on/off button mustbe ON
inorder for the messages indicatorto work,
NOTE: The answering system displays "- -" when it is turned off.
Screening Calls from the Base
1. Waitfor thecaller to begin leavinga message(todeterminewho is calling).
2. Tospeakto the caller, pickup the handset, and pressthe TALK/CALLBACKbutton
Theansweringsystemautomatically stopsrecordingwhen youactivatethe handsetor
pickup an extension phone.
TIP:Hake sure the volume on the base is set loud enough to hear
your incoming calls.
Message Playback
The messagesindicator on the boselets you know when you havemessages.Toplay
messages,pressPLAY/STOP
Whilea messageis playing,you maydo the following:
• PressPLAY/STOPto stopthe message playback.
• Pressand release<4repeat to restart thecurrent message;continue pressingand
releasing_ repeatto reviewpreviousmessages.
• Pressand release_ skip to go to the next message
Memory Full
When the answeringsystem memory isfull, the system answersafter 10 rings.You
should erasesome messagesso the answeringsystem may recordnew messages.
Erasing Messages
Youmay erasemessagesthree ways:one messageat a time from the base;all
messagesfrom the base;or one messageat a time from the handsetor a phone in
another location.
TOerase one messageat etime from the base:
• PressPLAY/STOPThemessageplays.
• Pressandrelease the erasebutton.
Toerase all reviewed messagesfrom the base:
• Pressandhold the erase button until the unit beeps.
Toerase o message from the handset:
• Pressflash/answerer/callwaiting buttonto enterinto thehandsetremote access
operation
• PressPLAY/STOPon the handset(the2 button}.The messageplays
• Presserase{the 0 button}to erase the messageduring message playback.
NOTE:Erased messages cannot be restored.
Leaving a Memo
Usethe memo featureto leavea message.
1 Pressand hold the memo button on the base.You must hold the button until you
finish recording the memo.
2. Beginspeakingafter you hear the beep.
3 Releasethe memo buttonwhen finished
Remote Access
Youmay accessthe answering systemwith the cordless handsetor from any tone-dial
compatibletelephone.
Cordless Handset
1 Pressthe flash/anewerer/callwaiting button to accessthe answering system
2, Usethe correspondinghandset keysjust like youwould use the base buttons {see
AnsweringSystemSetup),Thebutton functions are IDeatedon the handset above
each number key,For example,to play messages:
• Pressthe flash/answerer/callwaiting button,ThedisplayshowsANSWERERREMOTE
• Press2(PLAY/STOP)
• Whenyou arefinishedlistening toyour messages,pressthe
Screening Calls from the Handset
usethehandsettoscreencallsevenwhenyoucan'theartheansweringsystem
1 Pressthe flash/answerer/ca, waiting button to accessthe answering system.
2. Listenas the caller leavesa message.
3 Pressthe TALK/CALLBACKbutton to speak to the personor pressthe flash/
answeredcaHwaiting button to stop screening the call
Memory Full
When answeringsystem memory isfull, the systemanswers after i0 rings,beepsand
waits for you to enter the 3-digit security code Ifyou don't enter the security code
Youshould erasesome messagessothe answering system canrecord new ones.
NOTE:The unit also answers after the lOth ring if it is turned off. To
access the answering system, enter your 3-digit security code after
you hear the beep.
Accessing the Answering System from Another
Location
Youcan accessyour answering systemfrom anytouch-tone phone by entering your
S-digit securitycode after you hearthe outgoing announcement.
1 Dialthe telephone number towhich the answeringsystem isconnected to
2. Enterthesecurity code after you hearthe tone.
3 Followthe voice menuto use the answeringsystem's remotefunctions
The remotefeature Jetsyou performthe following functions:
To PressthisButton
Reviewmessage 1
Playback messages 2
Stopmessageplayback 2
Erasemessage 0{dudng messageplayback)
Skipmessage 3
Turn off/on answerer 4
Reviewvoice menu options 7
TIP:You can bypass the outgoing announcement by pressing any
numbered key on the touch-tone pod while the ennoancement
is playing. Then, you con enter your security code to access the
answering system.
Changing the Security Code
Thedefaultsecuritycodeforaccessingtheansweringsystemfromanother locationis 12
3 Youmust usethehandsetto changethe securitycode Withthe phoneOFF(notin TALK
model,followthesesteps:
1. Pressthe flash/answerer/callwaiting button to displayANSWERERREMOTE.
2. Pressthe *EXIT/tonebutton
3Enterthe new 3-digit securitycode
a Pressthe *EXIT/tonebuttonagain.Theunitannouncesthe newcode,pauses,beeps,
andthen announces the menu options again
Headset and Belt Clip Operation
Connecting an Optional Headset to the Handset
Forhands free operation:
1 Removethe rubber cap coveringthe headsetjack
2, Connectthe headset to the headsetjack on the handset Thehandset receiveris
disabledwhen the headset isconnected.
3, Adjustthe headsetto rest comfortably on topof yourheadand over yourear Move
the microphoneto approximatelytwo to threeinchesfrom your mouth.
a Pressthe TALK/CALLBACKbutton on the handsetto answer a call or make callswith
the headset
5 Toreturn to normal operation, unplug the headsetfrom the jack
Attaching the Belt Clip
Toattach the belt clip, insert the sidesof the belt clip intothe slots on each sideof the
handset Snapthe endsof the belt clip into place
Changing the Battery
_ CAUTION: To reduce the risk of fire or personal injury, use only
the Thomson Inc. approved Nickel-Metal Hydride (Ni-MH) battery
model 5-2522, which iscompatible with this unit.
1. Makesure the telephone is OFF(not inTALKmode)before youreplace battery.
2. Removethe battery compartment door
3 Disconnectthe cord attached to the battery pack and removethe battery packfrom
the handset
a Insert the new battery packand connectthe cord to thejack insidethe battery
compartment.
5. Put the battery comportment door back on
6. Placehandset in the baseto charge Allow the handset battery to properly charge
(for 16 hours) prior to first use orwhen you install e new battery pack. Ifyou do
net properly charge the phone, battery performance will becompromised.
Battery Safety Precautions
• Do not burn, disassemble,mutilate,or puncture, Likeother batteries of this type,
toxic materials could bereleasedwhich can cause injury
• Toreduce the risk af fireor personal injuly, useonly the Nickel-Metal Hydride
(Ni-HH) battery listed inthe User'sGuide.
• Keepbatteries out of the reach of children
• Removebatteries if storing over30 days.
fNOTE: TbeRBRCseal on the battery used in your Thomson Inc. product _1
indicates that weare participating ina program to collect and recycle the /
rechargeable battery (or batteries). /
Formore informationgo to the RBRCwebsite at www.rbrc.org /
orcall 1-8OO-8-BATTERYor contact alocal recyclingcenter. .)
Display Messages
Thefollowing messagesshow the statusof the phone or help youset upand use
your phone.
ANSWERER REMOTE
BLOCKED CALL
BLOCKED
NAME/NUMBER
DELETEALL?
DELETECALL ID?
Indicatesthe handset isaccessing the answeringsystem
Callerinformation is blockedfrom transmission
Callername and number is blockedfrom transmission
Prompt askingif you want to eraseall CallerID records.
Prompt askingif youwant to erase the currentCaller ID record
DELETE?
DELETED
DO NOT DISTURB
EMPTY
END OF LIST
ENTERNAME
Prompt askingif youwant to erase oneof the 10 numbers
storedin the phone's outgoing memory
Promptconfirminga CIDrecordis erased
IndicatesDONOT DISTURBfunction is turned on. Ringerand
callscreening issilenced.
Indicatesa memory location isvacant
Indicatesthere is no additional information in the Caller ID
memory log
Prompttelling you to name the handsetor enter a name for
oneof the 10memory locations.
INCOMPLETE
DATA
LOW BATTERY
NEW
NO DATA
NO CALLS
PAGING FRM BASE
PLEASEREGISTER
PRESSTALKKEY
READY
REPT
TRANSFERRING
UNABLE TO DIAL
UNABLE TO STORE
UNAVAILABLE
UNKNOWN
NAME/CALLER/
NUMBER
Caller informationis interrupted during transmissionor
the phone line is excessivelynoisy.
Indicatesthe handset battery is low andneedscharging
Indicatescall ar calls havenot been reviewed
NoCaller ID informationwas received.
Indicatesno calls have beenreceived.
Someoneis paging the handsetfrom the base.
Indicatesthe andset needsto be registered beforeuse
Indicatesthe CIDnumber is a DirectoryDial Number (DDN}
and cannot be formatted
Indicatesthe handsetis registeredandavailable foruse.
Repeatcall message,indicatesthat a new call from the same
number was receivedmore than once.
Indicatesthe call is beingtransferred from one handsetta
another.
Indicatesthe CIDor memory contents cannot be dialed.
Indicatesthe CIDor memory contents cannot be stored
Indicatesthe handset isout of range.
Or an additional handset isin use
Or there has beena base powerfailure, in which caseyou
must placeall handsetson the mainbasecradle for 20
secondsto re-register
The incomingcall is from an areanot serviced by CallerIDor
caller information is not sent.
Answering System Display Messages
The following messages show the status of the answering sys-
tem or helpyou set up and use the system.
0-59 Indicates the total number of messages.
CL (blinking} The voice time/day stamp needs to be set.
- - Answering system is turned off.
An (blinking} The system is answering a call and
recording an incoming call.
F (blinking} Answering system memory is full.
Six bars The system is recording a memo or an
(blinking} announcement.
LA(Line Access} External line remote answering system.
Handset Sound Siqnals
Signal t4eoning
Along warbling tone{with ringeron) Signalsan incomingcall
Threeshort beeps(severaltimes} Pagesignal
Onelongtone Confirmationtone
Onebeepevery7 seconds Lowbattery,warning
Troubleshooting Tips
Caller ID Solutions
Nodisplay
• Fullycharge (for 16hours)or replace the battery.
• If you areusing AC(electrical}power,makesure that the unit isconnected to a
non-switchedelectrical outlet. Unplug the ACpowerconverter from the unitand
plugit back in.
• To seeCallerID information in your display,you must be subscribedto Ca,at ID
servicethrough your localtelephonecompany
Ca,erIDincomplete
• The unit displaysthis messageif it detects anything other than validCallerID
information during the silent period after the first ring.This messageindicatesthe
presenceof noiseon the line,
Telephone Solutions
Handsetcan net link
• If anyhandsets becomeinoperable, place iton the main base cradle for 20
secondsto re-register
Nodial tone
• Checkor repeatinstallation steps
•Makesurethe basepower cord isconnectedto a working electricaloutlet
• Makesurethe telephone line cord isconnected to the base unit and the modular
phonejack?
• Disconnectthe basefrom the wall phonejack and connect another phone to the
samejack. If there isno dial tone on the secondphone, the problem might beyour
wiring or local service.
• Thehandsetmight beout of rangeof the baseHove closer tothe base
• Makesure the battery is properly charged(for 16 hours).
• Ensurethe battery pack isinstalled correctly
• Didthe handset beep whenyou pressedthe TALK/CALLBACKbutton?Did the in
use indicator comeon? Thebattery may need to be charged.
Handset doesnot ring
• Makesure the ringer isset to ON,this can be donethrough the handsetsetup
menu RingerVolume
• Youmay havetoo many extensionphones onyour line Tryunplugging
somephones.
• Seesolutionsfor "Nodialtone,"
Youexperiencestatic, noise,or fading in and out
• Changechannels
• Thehandset may beout afiange Hovecloser to the base
• Relocatethe base
• Chargethe battery.
• Makesure baseis not pluggedinto an electrical outlet with another
householdappliance
Unit beeps
• Placehandset in basecradle for 20 seconds to resetthe security code Ifthat
doesn'twork, charge the battery for 16hours
• Seesolutionsfor "Nodialtone."
• Replacethe battery
Memorydialing
• Makesure you correctly program the memory location keys
• Makesure you follow the properdialing sequence
• Youmay needto reprogram numbers into memoryafter a poweroutage or
battery replacement,
Outof range
• Movedoser tothe base
• Resetthe battery Unplugthe battery and plug it in again after five seconds
• Resetthe power supply Unplug the supply andplug it in again after five seconds
Phonewith tone servicedials out in pulse mode
• Makesure phone is in tonedialing mode,
Phonewon't dial out with pulse service
• Makesure phone is in pulsedialing mode
• Placethe handset onthe mainbase for reset
• An additional handsetis in use
• Movedoser tothe base
Answering System Solutions
Can'thearmessages,beep,etc.
• Adjustspeakervolume
Time/Daysetting isincorrect.
• Set the time dock.
Answerson lOth ring
• Makesure answering systemis turned on
• Answering systemmemory may be full Erasesome messages
Incoming messagesare incomplete
• An extensionphone may have beenlifted as a messageis received.
• Answering systemmemory isfull Erasesome messages.
• You may haveaeddenfly pressedthe PLAY/STOPbutton during playback and
stopped the message
Won't respondto remotecommands
• You must usea tone-dial phone.Thisphone does not support pulse(rotary)dialing.
• Makesure to enter the correct securRycode
• Did unit hang up?If youtake no action for a pedodof time, it automatically hangsup
Causes of Poor Reception
• Aluminumsiding,
• Foil backingon insulation
• Heating ducts andother metal construction can shield radiosignals
• You'retoo closeto appliances suchas microwaves, stoves,computers, etc
• Atmosphericconditions, suchas strong storms.
• Baseis installed inthe basement or lower floor of the house
• Baseis plugged into an ACoutletwith other electronic devices
• Babymonitor is usingthe samefrequency
• Handsetbattery islow.
• You'reout of range of the base.
General Product Care
To keepyourtelephoneworking and lookinggood, followthese guidelines:
• Avoid putting the phone near heating appliancesand devicesthat generate
electrical noise{for example,motors or fluorescent lamps),
• DONOTexposeto direct sunlight or moisture,
• Avoid dropping and other rough treatment to the phone,
• Clean with a soft cloth.
• Never usea strong cleaning agent or abrasive powder becausethis will damage
the finish
• Retainthe original packagingin case you needto ship the phone at a later date.
Service
This product may be servicedonly by the manufacturer or its authorized serviceagents Changes
or modifications not expresslyapproved by Thomson Inc could void the user'sauthority to
operate this product. Forinstructions onhow to obtain service,refer to thewarranty included in
this guide or call customer service at 1-800-448-0329.
Or refer inquiriesto:
ThomsonInc
Manager,ConsumerRelations
P O Box1976
Indianapolis,IN 46206
during thewarranty period
Purchasedate
Nameofstore
Limited Warranty
Whatyourwarrantycovers:
• Defectsin materialsor workmanship
Forhowlongafteryour purchase:
• Oneyear.fromdateofpurchase
What wewill do:
Howyou get service:
Thomson Inc.
11721 8AlamedaAve.
Socorro, Texas79927
• Pay any charges billed to you by the Exchange Centerfor service not covered by the
warranty.
• Insure your shipmentfor lossor damage ThomsonInc accepts no liability incase of damage
or loss.
• A new or refurbished unit will be shipped to you freight prepaid
What your warranty does not cover:
dealed
• Installation end setup service adjustments
• Batteries
• Damage from misuse or neglect
• Products which have been modified or incorporated into other products
• Products purchasedor serviced outside the USA
• Acts ofnature, suchas but not limitedto lightning damage
Product Registration:
warrantycoverage.
LimitationofWarranty:
scopeofthiswarranty
Howstate law relates to this warranty:
• Some statesdo not allow the exclusion nor limitation of incidental or consequential damages,
or limitations on how long an implied warranty lasts so theabove limitations or exclusions
may not apply to you.
• Thiswarranty givesyou specificlegal rights, and you alsomay have other rights that vary
from state to state
Ifyou purchased your product outside the USA:
• Thiswarranty doesnot apply.Contactyour dealer for warranty information.
Instructions For Optional/Additional
Handset(s)
Thisphone is EXPANDABLEup to a total of 4handsets(byadditional purchaseofthe
optional Model25902handsetwith charge cradle)
IMPORTANT:You con only use one handset at o time and there is
NO conference and intercom features for these units. If the TALK/
CALL BACKor SPEAKERbutton is pressed on one handset while
another handset is in use, UNAVAILABLEshows on the display.
Parts Checklist
Makesureyour packageincludesthe items shown here
Charge Handset Battery Belt
cradle battery pock compartment clip
cover Handset
Installing the Handset Battery
NOTE:You must connect the handset battery before use.
,_ CAUTION: To reduce the risk of fire or personal injury, ase only
the Thomson Inc. approved Nickel-Metal Hydride (NJ-MH) battery
model 5-2522, which is compatible with this unit.
1 Locatebattery and battery door whichare packaged together insidea plastic bag
andare separate from the handset
2, Locatethebattery compartment onthe backof the handset
3, Plugthe battery pack cord into thejack inside the compartment.
NOTE:To ensure proper battery installation, the connector is keyed
and con be inserted only one way.
4 Insertthe battery pack.
S dose the batterycompartment bypushing the doorupuntil itsnapsinto place
6. Placethe handsetin the base to charge
Extra Charging Cradle
1 Hug the ACpowerconverter of the extra charging cradle into the electrical outlet
2, Placethe handset in the extra charging cradle The chargeindicator turns on,
verifyingthe batteryis charging.
3. Allowthe phoneto chargefor 16hours.
Registration
YOUMUSTREGISTERTHEHANDSETTOTHEMAIN BASEBEFOREUSE!
After theoptional handsethaschargedfor 16 hoursonthe extracharger,placeit on the
mainbasestationfor 20seconds,itwillthenautomaticallyregiste_
NOTE:PLEASEREGISTERshows on the display if the handset has
not been registered. Once o handset has completed registration
successfully, READYwill show on the handset's display.
NOTE: In case of o power failure, the handsets may display
UNAVAILABLEwhen the TALK/CALL BACKbutton is pressed. You
must then place oil handsets on the main base cradle for 20
seconds to re-register.
Accessory Information
DESCRIPTION
Handset Replacement Battery
Power adaptor
Belt Clip
Headset
Optional/Additional handset cradle
MODEL NO.
5-2528
5-2738
5-2736
5-2425 (black}
5-2740
To placeorder,haveyour Visa,MasterCard,orDiscoverCord readyand call
toll-free 1-800-338-0376.Ashipping and handlingfee will becharged upon
ordering.We are requiredby law to collectappropriate salestax for each
individualstate, country,and localityto which the merchandiseisbeing sent.
Itemsare subject toavailability. Pricesaresubject to changewithout notice.

Other GE Answering Machine manuals

GE 29878 User manual

GE

GE 29878 User manual

GE 29875GE1 User manual

GE

GE 29875GE1 User manual

GE 29869GE2 User manual

GE

GE 29869GE2 User manual

GE 29993 User manual

GE

GE 29993 User manual

GE Digital Answer-Phone 2-9827 User manual

GE

GE Digital Answer-Phone 2-9827 User manual

GE 29861GE2 User manual

GE

GE 29861GE2 User manual

GE 24178 User manual

GE

GE 24178 User manual

GE 29582 User manual

GE

GE 29582 User manual

GE 55897990 User manual

GE

GE 55897990 User manual

GE AU 29878 User manual

GE

GE AU 29878 User manual

GE 29869 Series User manual

GE

GE 29869 Series User manual

GE 2-9824 User manual

GE

GE 2-9824 User manual

GE 29888 User manual
GE

GE 29888 User manual
GE 16174120 User manual

GE

GE 16174120 User manual

GE 29878 User manual
GE

GE 29878 User manual

GE 23598 User manual

GE

GE 23598 User manual

GE 29869 Series User manual

GE

GE 29869 Series User manual

GE 347A8232-0001 User manual

GE

GE 347A8232-0001 User manual

GE 2-9876 User manual

GE

GE 2-9876 User manual

GE 2-9876 User manual

GE

GE 2-9876 User manual

GE 29869 Series User manual

GE

GE 29869 Series User manual

GE 29878 User manual

GE

GE 29878 User manual

GE 29875 User manual

GE

GE 29875 User manual

GE 2-9866 User manual

GE

GE 2-9866 User manual

Popular Answering Machine manuals by other brands

AUDIOLINE TAM-809 user guide

AUDIOLINE

AUDIOLINE TAM-809 user guide

Panasonic 2-LINE KX-TG9552 quick guide

Panasonic

Panasonic 2-LINE KX-TG9552 quick guide

Panasonic KX-TCM943 user guide

Panasonic

Panasonic KX-TCM943 user guide

Panasonic KX-TG2356C operating instructions

Panasonic

Panasonic KX-TG2356C operating instructions

Lucent Technologies Definity System 75 user guide

Lucent Technologies

Lucent Technologies Definity System 75 user guide

Panasonic KX-TG6821AL operating instructions

Panasonic

Panasonic KX-TG6821AL operating instructions

Uniden 7100A operating guide

Uniden

Uniden 7100A operating guide

Philips SE659 user manual

Philips

Philips SE659 user manual

Clarity Easy Recall operating instructions

Clarity

Clarity Easy Recall operating instructions

Panasonic KX-TG2200B operating instructions

Panasonic

Panasonic KX-TG2200B operating instructions

Panasonic KX-TG6631 operating instructions

Panasonic

Panasonic KX-TG6631 operating instructions

Panasonic KX-TG6671 operating instructions

Panasonic

Panasonic KX-TG6671 operating instructions

Panasonic KX-T1470BA operating instructions

Panasonic

Panasonic KX-T1470BA operating instructions

Panasonic KX-TG2583PW operating instructions

Panasonic

Panasonic KX-TG2583PW operating instructions

Panasonic KX-TG2260BXS Service manual

Panasonic

Panasonic KX-TG2260BXS Service manual

Panasonic KX-T5006E-1 Service manual

Panasonic

Panasonic KX-T5006E-1 Service manual

Philips DECT2252G Specifications

Philips

Philips DECT2252G Specifications

Panasonic KX-TG5471 operating instructions

Panasonic

Panasonic KX-TG5471 operating instructions

manuals.online logo
manuals.online logoBrands
  • About & Mission
  • Contact us
  • Privacy Policy
  • Terms and Conditions

Copyright 2025 Manuals.Online. All Rights Reserved.