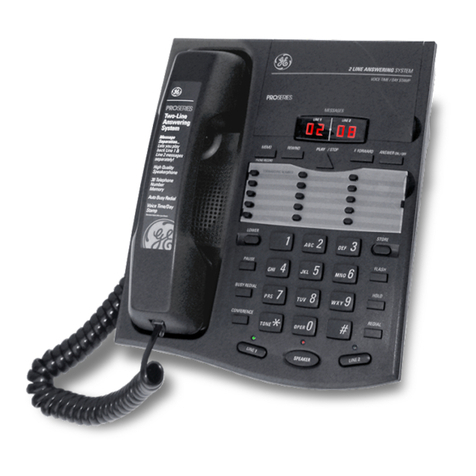
GE 29582 User manual

Model 29582
Digital Answerer with
Call Waiting Caller ID and
Speakerphone Telephone
User's Guide

Equipment Approval Information
Yourtelephoneequipment isapproved for connectionto the PublicSwitchedTelephoneNetworkand
isin compliance with ports 15and68,FCCRulesand Regulationsandthe TechnicalRequirementsfor
TelephoneTerminalEquipment publishedby ACTA.
1 Notification to the LocalTelephone Company
Onthe bottom ofthis equipmentis alabel indicating,among other information,the USnumberand
RingerEquivalenceNumber (REN}for theequipment. Youmust, upon request, providethis information
toyour telephonecompany.
TheRENisusefulin determiningthe numberof devicesyou mayconnect to your telephonelineand
still haveall ofthese devicesringwhen your telephone numberiscalled. Inmost (butnot all)areas,the
sum ofthe RENsof alldevicesconnectedto one lineshouldnotexceed 5.Tobecertain ofthe number
of devicesyou may connect toyour lineas determined by the REN,you shouldcontact your local
telephonecompany.
Aplug andjack usedto connect this equipmentto the premiseswiring andtelephone network must
comply with the applicable FCCPart68rulesand requirementsadopted by the ACTA.Acompliant
telephonecordand modular plug isprovidedwith this product. It isdesignedto beconnected to a
compatible modularjack that isalsocompliant. Seeinstallation instructions for details.
Notes
• Thisequipmentmay notbeusedon coinservice providedbythe telephonecompany.
• Party linesare subjectto state tariffs, andtherefore,you may not beableto useyourown telephone
equipment if you areon a party line.Checkwith your local telephone company.
• Notice must begivento the telephonecompany upon permanent disconnectionofyour telephone
from your line.
• Ifyour home hasspeciallywired alarm equipment connectedto the telephoneline,ensurethe
installation of thisproduct doesnot disableyour alarm equipment. Ifyou havequestionsabout what
willdisable alarm equipment, consultyour telephonecompany or a qualifiedinstaller.
USNumber is located on the cabinet bottom
RENnumber is located on the cabinet bottom
2 Rightsof the Telephone Company
Shouldyour equipmentcausetrouble onyour linewhich may harm thetelephone network,the
telephonecompany shall,where practicable,notifyyou that temporary discontinuance of service
may berequired.Whereprior notice isnot practicableandthe circumstanceswarrant such
action,thetelephonecompany may temporarily discontinue serviceimmediately. Incaseof such
temporary discontinuance,thetelephone company must:(1)promptly notifyyou of suchtemporary
discontinuance;(2)afford you theopportunity to correct the situation;and (3)inform you ofyour rightto
bringa complaint to theCommissionpursuant to proceduresset forth in Subpart Eof Part68,FCCRules
and Regulations.
Thetelephone company may makechanges in its communications facilities,equipment, operations
or procedureswheresuch actionis requiredinthe operation of its businessand not inconsistentwith
FCCRulesand Regulations.Ifthesechanges are expectedto affect the useor performance of your
telephoneequipment,the telephonecompany must giveyou adequate notice,in writing, to allowyou to
maintain uninterrupted service.

Interference Information
Thisequipment has beentested andfound to complywith the limitsfor a ClassBdigital device,pursuant
to Part15of the FCCRules.Theselimitsare designedto provide reasonableprotection againstharmful
interference ina residentialinstallation.
Thisequipment generates,uses,andcan radiate radio frequencyenergy and, if not installedand usedin
accordancewith the instructions,may causeharmful interferenceto radiocommunications. However,
there isnoguarantee that interferencewill notoccur in a particular installation.
PrivacyofCommunicationsmay notbeensuredwhen usingthis product.
Ifthis equipmentdoes causeharmful interferenceto radio or televisionreception,which can be
determined byturning the equipmentoff andon,the userisencouragedto try to correct the interference
by oneor more ofthe following measures:
• Reorientor relocatethe receivingantenna (that is,theantenna for radio or televisionthat is"receiving"
the interference).
• Reorientor relocateand increasethe separationbetween thetelecommunications equipment and
receivingantenna.
• Connectthetelecommunications equipment into anoutlet on a circuit different from that to which the
receivingantenna isconnected.
Ifthese measuresdo noteliminate the interference,pleaseconsult your dealer or anexperienced
radio/televisiontechnician for additional suggestions.Also,the FederalCommunicationsCommissionhas
prepareda helpful booklet, "How ToIdentify and ResolveRadio/TVInterferenceProblems."Thisbooklet is
available from the U.S.Government Printing Office,Washington,D.C.20402.Pleasespecifystock number
004-000-00345-4whenordering copies.
Notice:Thechanges or modifications notexpresslyapproved by the party responsiblefor compliance
couldvoidthe user'sauthority to operatethe equipment.
Hearinq Aid Compatibilit F
Thistelephone systemmeets FCCstandardsfor Hearing AidCompatibility.
Licensinq
Licensedunder USPotent6,427,009.
FCC RF Radiation Exposure Statement
Thisequipment complieswith FCCRFradiation exposurelimitsset forth for onuncontrolled environment.
Thisequipment shouldbeinstalledand operated with aminimum distanceof 20centimeters between the
radiator andyour body.Thistransmitter must not beco-located or operated in conjunction with any other
antenna or transmitter.

Table of Contents
EQUIPMENT APPROVAL INFORMATION .......... 2
INTERFERENCE INFORMATION ...................... :3
HEARINGAID COMPATIBILITY..................... 3
LICENSING .............................................. 3
FCC RF RADIATIONEXPOSURE
STATEMENT...................................... 3
INTRODUCTION ........................................ 6
BEFORE YOU BEGIN ................................. 6
PARTSCHECKLIST......................................... 6
TELEPHONE JACK REQUIREMENTS................ 6
IMPORTANT INSTALLATION INFORMATION ...... 7
BASE LAYOUT .......................................... 8
INSTALLING THE PHONE ............................. 9
DESKTOP INSTALLATION................................ 9
WALL MOUNTING THE PHONE ................. 10
IMPORTANT INSTRUCTIONSFOR MOVING THE
ANSWERER ................................................ 11
ANSWERING SYSTEM SET UP ................... 11
RECORDING THE GREETING................... 11
TELEPHONE SET UP ............................... 12
SETTING YOUR LOCAL AREA CODE .......... 12
SETTING THE DISPLAY CONTRAST ............. 13
SETTING THE TIMEAND DATE ................... 13
SETTING THE INCOMING MESSAGE
LENGTH ..................................................... 15
SETTING THE RECORDING QUALITY .......... 15
SETTING THE RINGS TO ANSWER .............. 15
TOLL SAVER............................................... 16
SETTING THE SECURITY CODE ................... 16
SETTING THE DIALING MODE .................... 17
MESSAGE VOLUME .................................... 17
RINGER VOLUME ....................................... 17
HANDSET VOLUME .................................... 17
SPEAKERPHONE VOLUME ........................... 17
TELEPHONE OPERATION .......................... 18
USING THE SPEAKERPHONE....................... 18
SPEAKERPHONE LOCATION.................... 18
SPEAKERPHONE USE............................. 18
RECEIVING A PHONE CALL ........................ 18
PLACING A PHONE CALL ........................... 19
SWITCHING BETWEEN SPEAKER AND
HANDSET .............................................. 19
TEMPORARY TONE DIALING ....................... 19
FLASH ........................................................ 19
REDIAL ....................................................... 20
MUTE ........................................................ 20
ANSWERER OPERATION ........................... 20
CALL ANSWERING ..................................... 20
AUTO DISCONNECT ................................... 21
PLAYING MESSAGES.................................. 21
ERASE MESSAGES...................................... 22
LEAVING A MEMO ..................................... 22
MEMORY FULL .......................................... 22
REMOTE ACCESS ....................................... 22
REMOTE ACCESS COMMANDS ............... 23
CALLERID FEATURES............................. 24
SUMMARY SCREEN.................................... 24
CALLERID WITH CALL WAITING .............. 24
RECEIVING AND STORING CALLS ............... 25
REVIEWING CALL RECORDS....................... 25
ERASING CALLER ID INFO......................... 25
DIALING BACK........................................... 26
Table of Contents
MEMORY .............................................. 27
STORING A NUMBER IN MEMORY............ 27
STORING CALLER ID RECORDS ................. 28
INSERTING A PAUSE IN THE DIALING
SEOUENCE ................................................. 28
CHANGING A STORED NUMBER ................ 29
DIALING A STORED NUMBER ..................... 29
DIALING A QUICK DIAL NUMBER .............. 29
REVIEWING STORED NUMBERS ................. 30
CHAIN DIALING FROM MEMORY ................30
MESSAGE INDICATORS.............................31
TROUBLESHOOTINGGUIDE.......................32
GENERAL PRODUCT CARE .......................34
WARRANTY ASSISTANCE..........................34
LIMITEDWARRANTY ...............................35
INDEX .................................................. 38
WARNING: TO
PREVENT FIRE OR
ELECTRICAL SHOCK
HAZARD, DO NOT
EXPOSETHIS
PRODUCT TO RAIN
OR MOISTURE.
THELIGHTNING
FLASHAND ARROW
HEAD WITHIN THE
TRIANGLE IS A
WARNING SIGN
ALERTINGYOU OF
"DANGEROUS
VOLTAGE"INSIDE
THEPRODUCT.
CAUTION: TO REDUCETHE
RISKOFELECTRICSHOCK,O0
NOT REMOVECOVER(OR
BACK). NO USER
SERVICEABLEPARTSINSIDE.
REFERSERVICING TO
QUALIFIEDSERVICE
PERSONNEL.
THE EXCLAMATION
POINT WITHIN THE
TRIANGLE IS A
WARNING SIGN
ALERTING YOU OF
IMPORTANT
INSTRUCTIONS
ACCOMPANYINO
THE PRODUCT.
SEE MARKING ON BOTTOM /BACK OF PRODUCT

Introduction
CAUTION: When using telephone equipment, there are basic
safety instructions that should always be followed. Refer to the
IMPORTANT SAFETY INSTRUCTIONS provided with this product
and save them for future reference.
Before You Beqin
Parts Checklist
Make sure your package includes the following items:
Base
Coiled cord
ACpower adaptor
ii
fi o //
Handset
/
Mounting bracket Line cord
Telephone Jack Requirements
Touse this phone, you need an RJ11Ctype modular telephone
jack, which might look like the one pictured here, installed in
your home. Ifyou don't have a modular jack, call your local
phone company to find out how to get one installed.
Wall plate
Telephon__
linejackf_

Important Installation Information
• Neverinstalltelephonewiringduring a lightningstorm.
• Nevertouch non-insulatedtelephonewiresor terminals,unlessthe telephoneline
hasbeendisconnectedatthe networkinterface.
• Usecaution wheninstallingor modifyingtelephonelines.
• Neverinstalltelephonejacksin wet locationsunlessthejack isspecifically
designedfor wet locations.

Base Layout
display
Quick dial/emergency SPEAKERPHONE(button)
memory (buttons)
,mute (button)
* tone
redial/pause
(button)
flash/exit (button) dial(button)
+/-buttons)
(button)
PLAY/STOP (button)
speed
(button)
(button)
(button)
memo (button)
ans on/off
(button)
menu (button)
Hicrophone

Installing the Phone
Desktop Installation
CAUTION: To reduce risk of personal injury, fire, or damage use
i, only the 5-2806 (white) or 5-2807 (black) power adaptor listed in
the user's guide. This power adaptor is intended to be correctly
orientated in a vertical or floor mount position.
1. Plug the coiled cord into the handset. Plug the other end into thejack on the side of
the base.
2.Placethe handsetinthe base.
B.Plugthe telephonelinecordinto
the LINEjack onthe backofthe
phone.Plugthe otherend intoa
walljack.
/4.Connectthe smallend ofthe
poweradaptorinto the POWER
7.5VACjack onthe backof the
answerer.Plugtheotherend into
an ACpoweroutlet.Thescreen
displaysPLEASEWAIT.....,then
announces"Pressmenukey to set up the unit".Theunitisreadyfor setup orto
answercallswith the defaultgreetingand settings.
NOTE: The phone automatically defaults to touch-tone dialing. To
change to pulse (rotary) dialing, see "Setting the Dialing Mode."
If you don't know which type of service you have, check with the
phone company.
NOTE: The unit is properly installed if you pick up the handset and
hear the dial tone. Otherwise, recheck all the installation steps.

Wall Mounting the Phone
1. To preparefor wall mounting,wrap excess
telephonecord,ifany,aroundthe hooks
providedon thewall mount bracket.Besureto
leaveenoughcordfor connectingto the baseat
thetop andthe walljack throughthecenter cut
outof thewall bracket.
2. Plugthe linecordinto thejack of the base.
3. Alignthe linecordwith thesmallcut out inthe
wallmount bracket.
4. Alignand insetthe two setsofsmalltabs of thewall mount bracketintothe base
atthe top.Thengently pressintothe two setsof bottomgroovesuntilit snapsin
place.
5. Connectthe smallend ofthe poweradapterintothe POWER7.5VACjack on the
backof theanswerer.Securethe cordof thepoweradapter inthe grooveon the
wallmount bracket.
6. Carefullyturn thehandset hook180with a coinor screwdriveruntil it points
upward(theWALLimprint willbe rightsideup).Youneedto do thissothe at the
handsetdoesn'tfall out ofthe base.
7. Connectthe linecordto the wallphonejack,through thecenter cutoutof thewall
mounting bracket.
8. Slipthe mountingof the base(onbottomof unit)overthe wallplate postand slide
thebasedownuntilthe phoneisfirmly inplace.
9. Plugone endofthe coiledcordintothe handset.Plugtheotherend intothejack
onthe sideof the base.
lO.Pk]ce the hc]ndset on the boise.
11.Plug the AC Power (]dc]pter into (In ACpower outlet. The screen dispk]ys PLEASE
WAIT...then announces: "Press menu key to set up unit". The unit is rec]dyfor
Answering System Set Up.
10

Important Instructions for Moving the Answerer:
Tomovetheanswererto a differentlocation inthe house,follow these instructions:
1.Disconnectthe phoneline.
2.Goto the electricaloutlet and unplugthe poweradaptor.
3.Movethe unitand phonelineto the desiredlocation.
/4.Pluginthe poweradaptorinto an electricaloutlet.
5.Thedisplayshowsthat the messageshavenot beenerased.
6.Connectthe phoneline.
7.Resetthe time/datesettingsor wait for the next callto setthem automatically.
Answerinq System Set Up
Recording the Greeting
Beforeusingyournewanswerer,youshouldrecorda greeting(theannouncement
callershearwhenyouransweringsystemanswersa call).If youdon't recorda
greeting,callersheara defaultgreetingwhich says,"Weare unavailable to take
your call. Pleaseleavea messageand thank you for calling."
Whenrecordingthe greetingyoushouldbe about6 inchesfrom the unit. Eliminateas
much backgroundnoiseaspossible.
1.Prepareyour greeting.
SompleGreeting: "Hi,this is(useyour homehere).I con'tonswerthephoneright
now,sopteoseleoveyour nome,number,ond o briefmessogeofter thetone,ondI'll
getbocktoyou.Thanksfor coiling."
2.Holddownthe ANNOUNCEbutton.Theunitannounces"Recordyour
announcementafter the tone,"anddisplaysANNOUNCERECORD.After thetone,
youhave30secondsto recordyourgreeting.
3.Releasethe ANNOUNCEbutton whenyoufinish.
• Toreviewthegreeting,pressand releasethe ANNOUNCEbutton.Theunit plays
backyourgreetingautomatically.
• Toreturnto theanswerer'sdefault greetingafter you'verecordedone,pressthe
ANNOUNCEbutton and releaseit whenyou hearthetone, or pressand holdthe
DELETEbutton whenthe greetingisplaying.
11

Telephone Set Up
Youcancustomizethe following settingstosuit yourneeds.
LocalAreaCode Setsyourlocalareacodefor DialBack.
DisplayContrast Selectsthe displaycontrast.
Time/Date Setsthetime and date.
MessageLength Setsthe lengthoftime allowedfor
incomingmessages.
Recording Setstherecordingquality between
Quality standard(STD)andlongplay(LONG).
Ringsto Answer Selectsthe numberof ringsbefore
theunit answers.
rDefault Settings
Local Area Code - - -
Display Contrast 3
Time/Date 12 a.m. 1/01
Message Length 2 minutes
Recording Quality Standard (STD)
Rings to Answer 4
Security Code 123
Dialing Tone J
Remote Access
TONE/PULSE
Dialing
SetsyourB-digitcodeusedfor remoteaccessto the unit.
Setsthephonefor toneor pulsedialing.
Setting Your Local Area Code
i. Pressand releasethe MENUbutton.ThescreendisplaysLOCALAREACODE.The
unitannounces,"Setupmenu. UseSKIPor REPEATto changesetting, press MENU
to savesetting."
2.Theleft-mostdigit, or a (_)signflashesindicatingthe unit isreadyto acceptthe
areacodeentry.
3.Usethe keypadto enteryourthreedigit LocalAreaCode.
/4.Afterthe 3rdand last digitare entered,pressthe MENUbutton to storethearea
codeandgo to the nextsetting.
NOTE:If you make a mistake, you can use the SKIPor REPEAT
button to move between 1st to 3rd digit and input the number from
the keypad again.
NOTE: To skip to the next setting, press the MENU button. To exit setup,
press the FLASH/E×IT button.
12

Setting the Disploy Controst
Thissettingallowsyouto adjustthe displaycontrast for easierreadability.
1.Ifyou recentlyadjustedthe LocalAreaCodemenu,skipto Step2.Ifyouhaven't
adjustedanyothersetting,pressand releasethe MENUbutton untilthe screen
displaysSETCONTRAST.
2.Usethe SKIPor REPEATbutton to selectthe desiredsetting(1-5).
3.Whenfinished,pressthe MENUbuttonto confirmand goto the nextsetting.
NOTE:Toskip to the next setting, press the MENUbutton. To exit setup,
press the FLASH/EXITbutton.
Setting the Time ond Dote
NOTE:If you hove subscribed to the Coller ID disploy feoture from
your telephone compony, the telephone compony sends the time
ond dote with the Coller ID informotion. The unit outomoticolly sets
the time ond dote when the first coil is received.
Hour
1.Ifyoujust adjustedthe DisplayContrastmenu,skipto Step2.Ifyouhaven't
adjustedanyothersetting,pressand releasethe MENUbutton untilthe screen
displaysSETTIlE/DATE.
2.Thehourdigitsflashing indicatesthat the unit isreadyto acceptentry.Usethe
keypadnumbersto entera two digitnumberto setthe hour.
3.Whenfinished,the cursor movesto the Minutefield. Nowyou'rereadyto enterthe
minutes.
Minutes
1.Usethe keypadnumbersto entera two digitnumberto setthe minutes.
2.Whenfinished,the cursor movesto the AN or PHfield. Nowyou're readyto
enter the time of day,AM or Ptff.
13

AM/PM
1.Press"* "on the keypadfor AMand press"#"for PMto set thetime of day.
2.Whenfinished,the cursor movesto the Monthfield.Nowyou'rereadyto enterthe
month.
Month
1.Usethe keypadto entertwo digitnumbersto setthe month.
2.Whenfinished,the cursor movesto the Datefield.Nowyou'rereadyto enterthe
day.
Date
1.Usethe keypadto entertwo digitnumbersto setthe date.
2.Whenfinished,pressthe MENUbuttonto confirm.
TIP:For exemple, to enter 8:09 e.m. 7/4:
1.Press08.
2.Press09.
5.Press* (fora.m.).
/4.Press07.
5.Press0/4.
6.Pressthe MENUbutton.
NOTE:To skip to next setting, press the SKIPbutton. To exit setup,
press the FLASH/EXITbutton.
14

Setting the Incoming Messoge Length
Thissettingallowsyouto setthe maximumlengthof time allowedfor a single
incomingmessage.Youcan choosefrom 1-8minutes.
1.Ifyoujust adjustedthe LocalAreaCodemenu,skipto Step2.Ifyou haven't
adjustedanyothersetting,pressand releasethe MENUbutton untilthe screen
displaysMESSAGELENGTH.
2.Usethe SKIPor REPEATbutton for the desiredsetting.
3.Whenfinished,pressthe MENUbuttonto confirm.Theunitbeeps.
NOTE:Toskip to the next setting, press the MENUbutton. To exit setup,
press the FLASH/EXITbutton.
Setting the Recording Quolity
Thissettingallowsyouto setthe recordingquality betweenstandard(STD)and long
play(LONG).Longplaywill givemorerecordingtime (approx.25 min.)thanstandard
(15min.).
1.Ifyoujust adjustedthe RemoteAccessmenu,skipto step2.Ifyou haven'tadjusted
anyothersetting,pressand releasethe MENUbutton untilthescreendisplays
REC:_,STDLONG.
2. Usethe SKIPor REPEATbutton or select the desired setting.
3.Pressthe HENUbutton to confirmsetting andgo to nextsetting.
Setting the Rings to Answer
Thissettingallowsyouto setthe numberofringsbeforethe unit answersa call.You
canchoosefrom 2-8or TollSaver(see"TollSaver.")
1.Ifyoujust adjustedthe RecordingQualitymenu,skipto Step2.Ifyou haven't
adjustedanyothersetting,pressand releasethe MENUbutton untilthe screen
displaysSETRINGSTOANS".
2.Usethe SKIPor REPEATbutton for the desiredsetting(2-8,TollSaver).
15

3.Whenfinished,pressthe MENU buttonto confirm.Theunitbeeps.
NOTE:Toskip to the next setting, press the MENUbutton. To exit setup,
press the FLASH/E×ITbutton.
Toll Saver
TollSavercan save you the cost of a callwhen you access your messages from
another phone:
• Ifyou havenewmessages,theunit answersafter the 2ndring.
• Ifyou haveno newmessages,the unit answersafter the Sthring.
Youcan hangupafter the3rdring andsavethe paytelephoneor longdistancecharge.
Setting the Security Code
Thisfeatureallowsyouto changethefactory default remote accesscodeusedfor
remoteaccessto youanswerer.Thedefaultcodeis123.
1.Ifyoujust adjustedthe Ringsto Answermenu,skipto Step2.Ifyou haven't
adjustedanyothersetting,pressand releasethe MENUbutton untilthe screen
displaysREMOTEACCESS.
2 Theleft-mostdigit, or a (_)signwillflash indicatingthe unit isreadyto acceptthe
securitycodeentry.
3.Usethe keypadto entera threedigit SecurityCode.
/4.Afterthe 3rdand last digithavebeenentered,pressthe MENUbutton to storethe
securitycodeand go to thenext setting.
NOTE:Toskip to the next setting, press the MENUbutton. To exit setup,
press the FLASH/E×ITbutton.
NOTE:If you make amistake, you can use the SKIPor REPEAT
button to move between 1st to 3rd digit and input the number from
the keypad again.
16

Setting the Dialing Mode
This adjustment allows you to select tone (touch-tone) or pulse (rotary) mode dialing.
The phone is automatically set for touch-tone use.
1. Ifyou just adjusted the Remote Access menu, skip to Step 2. Ifyou haven't adjusted
any other setting, press and release the MENUbutton until the screen displays
TONEPULSE" i_" indicates which set up the unit iscurrently in.
2. Use the SKIPor REPEATbutton for the desired setting.
B.When finished, press the MENU button to confirm. The unit beeps.
NOTE: To skip to the next setting, press the MENU button. To exit setup,
press the FLASH/EXIT button.
Message Volume
Use the VOLUME (+or -) buttons to adjust the volume when playing back messages
and while reviewing or changing the setting.
Ringer Volume
Use the switch, located on the right side of the unit, to adjust the loudness of the
ringer.
Handset Volume
Usethe VOLUME (+ or -) buttons to adjust the handset listening volume while it is in use.
Speakerphone Volume
Use the VOLUME (+ or -) buttons to adjust the speakerphone listening volume while it
is in use.
17

Telephone Operation
Using the Speakerphone
IMPORTANT:In the event of a power outage, the speakerphone and
answerer will not be operational.
Speakerphone Location
Forbest speakerphoneperformance,avoidthefollowing:
• Areaswith high backgroundnoise.(Themicrophonemight pickup thesesounds
and preventthe speakerphonefrom going intothe receivingmodewhenyoufinish
talking.)
• Surfacesaffected byvibration.
• Recessedareassuchasin a corner,undera cupboard,or nextto a cabinet,which
cangeneratean echoeffect.
Speakerphone Use
Notethefollowing guidelineswhen usingthe speakerphone:
• Thespeakerphoneworkssimilarto atwo-way radio inthat youcanonlylistenor
talk at onetime.
• Stayreasonablycloseto the phonesothat youcanbe clearlyheardbythe person
towhom youare talking.
• Youcanadjustthe speakerphonevolumebypressingthe VOLUME(+or -) buttons.
• Thespeakerphoneindicator comeson whenthespeakerphoneisinuse.
Receiving a Phone Call
1.Whenthe phonerings,the speakerphoneindicatorblinksandthe caller's
information,if any,willbe shownonthe displaypanel.Liftthe handsetor pressthe
SPEAKERPHONEbutton to connectyourphonecall.
2.Youcanadjustthe volumeofthe caller'svoicebypressingthe
VOLUME(+or -}buttons.
18

Placing a Phone Call
1.Liftthe handsetor pressthe SPEAKERPHONEbutton and wait for a dialtone.
2.Dialthetelephonenumberyouwishto call.
B.Youcanalsodialthe numberonthe keypadfirst, then pressthe SPEAKERPHONE
button to dialout. ThescreendisplaysPREDIAL.Incaseofa mistakeinentering
the number,pressthe DELETEbuttonto erasethelast digit.
8.Youcanadjustthe volumeofthe caller'svoicebypressingthe
VOLUME(+or -) buttons.
Switching between Speakerphone and Handset
Youcanswitch betweenspeakerphoneand handsetwhilethephone isdialing a
number,or anytimeduringa conversation.
• Speakerphoneto Handset- Pickup the handset.
• Handsetto Speakerphone- Pressthe SPEAKERPHONEbutton,then hang up
handset.
Temporary Tone Dialing
Ifyou havepulseservice,youcantemporarilychangefrom pulseto toneservice.
Afterdialingthe telephonenumber,pressand releasethe TONE(*)button on
thetelephone.Thisallowsaccessto phoneservicesthat requireatone, suchas
bankingand long-distanceservices.Afteryou hangup the handset,thetelephone
automaticallyreturnsto pulseservice.
Flash
Pressthe FLASH/E×ITbutton to activate customercallingservicessuchascall
waiting or calltransfer,which areprovidedbyyour localphonecompany.
19

Redial
Redialthe lastnumberyoucalledbypressingthe REDIALbutton after youget a dial
tone.
NOTE: The Redial feature holds in memory the last phone number
you dialed (as many as 28 digits). If you pressed any numbers after
dialing the phone number, (for example, when accessing a
voice-menu system) those numbers also are redialed.
IMPORTANT: In the event of a power outage, your phone will still
be able to make and receive calls, however, the speakerphone and
answerer will not be operational.
Mute
1.Pressthe MUTEbutton to mute a call,the muteindicator willlight up.Youwill still
beableto hearthecallingparty butthey will notbeable to hearyouspeaking.
2.Pressthe MUTEbutton againto unmutethe call.
Answerer Operation
Call Answering
Whena callcomesin,the unitwill ringthe numberoftimesset,playthe greeting,and
recordthe incomingcall.
Youcan:
• Answerthe callbeforethe unitanswers.
• Pickupthe phoneduring the greeting.
• Listento the incomingmessage(Callscreening).
• Pickupthe phoneduring the incomingmessage,if desired.
• Disconnectthe callerby pressingthe PLAY/STOPbutton.
2O
Other manuals for 29582
1
Table of contents
Languages:
Other GE Answering Machine manuals