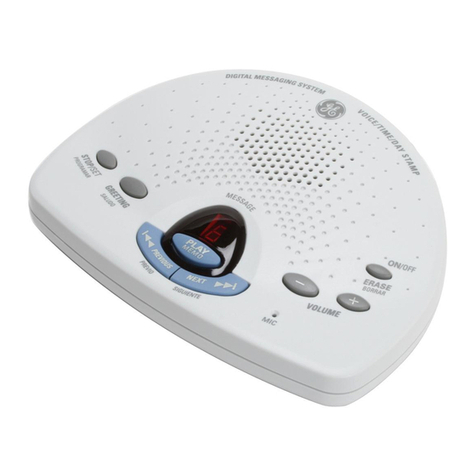
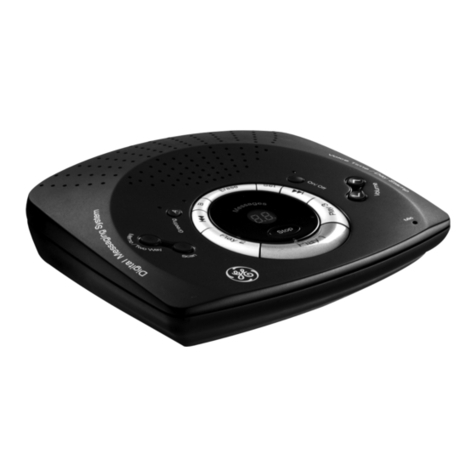
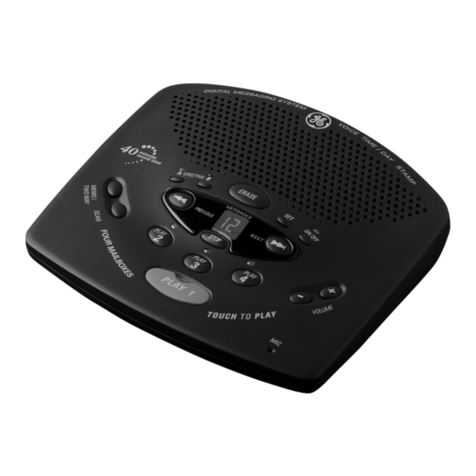
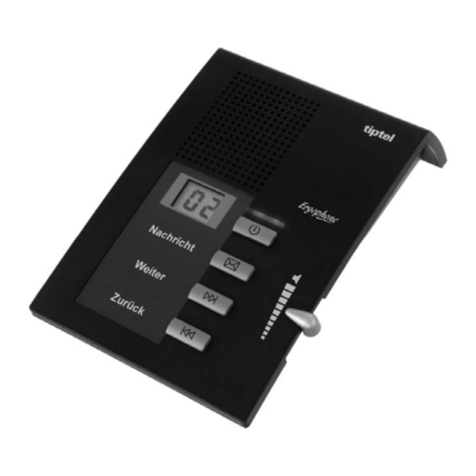
Modelo 29878
15638680 (Rev. 1 E/S)
01-12
Impreso en Chin
ATLINKS USA, Inc.
10330 North Meridi n Street
Indi n polis, IN 46290
© 2001 ATLINKS USA, Inc.
Tr dem rk(s) ® Registered
M rc (s) Registr d (s)
29878
Cre mos cos s buen s p r l vid .
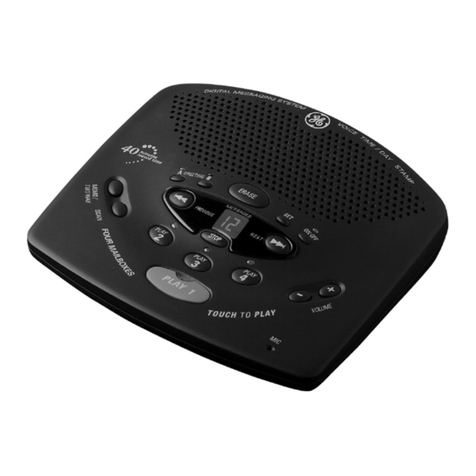
Contest dor Digit l
Guí del Usu rio
INFORMACIÓN DEL REGISTRO ALA FCC
Su equipo telefónico de l h sido registr do con l Comisión Feder l de
Comunic ciones (FCC) y está en cuerdo con l s P rtes 15 y 68 de l s Regul ciones y
Regl s de l FCC.
1 Notificación a la Compañía Telefónica Local
Al fondo de este equipo Ud. h ll rá un rótulo indic ndo, entre otr inform ción, el
número de l Registr ción con l FCC y el Número del Equiv lente Timbre (REN)
p r este equipo. Ud. deberá, petición, proveer est inform ción su comp ñí
telefónic .
El REN es útil p r determin r el número tot l de rtef ctos que Ud. puede conect r
su líne telefónic , tod ví segur ndo que todos estos rtef ctos son rán cu ndo
se ll me su número telefónico. En l m yorí de l s áre s (pero no en tod s), el tot l
de los números REN de todos los rtef ctos conect dos un líne no debe exceder
5. P r est r seguro del número tot l de rtef ctos que Ud. pued conect r su
líne (determin do por el REN), Ud. deberá ponerse en cont cto con su comp ñí
telefónic loc l.
NOTAS:
• No se puede us r este equipo con un teléfono de previo p go proveído por l
comp ñí telefónic .
• L s líne s comp rtid s son sujet s l s t rif s del est do, y por eso, es posible
que Ud. no pued us r su propio equipo telefónico si Ud. estuvier comp rtiendo
l mism líne telefónic con otros bon dos.
• Se debe notific r l comp ñí telefónic cu ndo se desconecte perm nentemente
su teléfono de l líne .
2 Derechos de la Compañía Telefónica
Si su equipo c us se lgún problem en su líne que pudier d ñ r l red
telefónic , l comp ñí telefónic siempre que se posible le vis rá de l posible
interrupción tempor l de su servicio. En c so que l comp ñí no pudier vis rle
de ntem no y hubier necesid d de tom r t l cción, l comp ñí telefónic podrá
interrumpir su servicio inmedi temente. En c so de t l interrupción telefónic
tempor l l comp ñí debe : (1) d rle viso l momento de t l interrupción tempor l
de servico, (2) concederle Ud. l oportunid d de corregir l situ ción, (3)
inform rle Ud. de sus derechos de present r un quest l Comisión de cuerdo
con los procedimientos dict dos en l Subp rte E de l P rte 68 de l s Regul ciones
y Regl s de l FCC.
L comp ñí telefónic puede h cer los c mbios en sus inst l ciones de
comunic ción, en equipos, en sus funcion mientos o procedimientos que digne
neces rios p r el m nejo de sus negocios y que no se n incomp tibles con l s
Regl s y Regul ciones de l FCC. Si estos c mbios pudier n lter r el uso o el
funcion miento de su equipo telefónico, l comp ñí telefónic deberá d rle viso
decu do en escrito p r que Ud. goce de un servico ininterrumpido.
INFORMACIÓN DE INTERFERENCIAS
Este rtef cto cumple con l P rte 15 de l s Regl s de l FCC. Su funcion miento es
sujeto l s dos condiciones siguientes: (l) Este rtef cto no puede c us r interferenci
d ños , y (2) Este rtef cto debe cept r cu lquier interferenci recibid , incluyendo
interferenci que puede c us r un funcion miento no dese do.
Este equipo h sido prob do y cumple con los límites p r un rtef cto digit l de l
Cl se B, de conformid d con l P rte 15 de l s Regl s de l FCC. Estos límites h n sido
diseñ dos p r proporcion r un protección r zon ble contr un interferenci d ños
que pued existir en un inst l ción doméstic .
Este equipo gener , us y puede r di r l energí de frecuenci de un r dio y, si no
fuer inst l do y us do de cuerdo con l s instrucciones, puede c us r interferenci
d ños l s tr nsmisiones r di les. Sin emb rgo, no h y g r ntí que l interferenci
no ocurrirá en un inst l ción en p rticul r.
Si este equipo c us en efecto un interferenci d ños l recepción de l r dio o de l
televisión, lo cu l puede ser determin do p g ndo y prendiendo el equipo, le
nim mos Ud. de tr t r de corregir l interferenci por medio de un (o más) de l s
sugerenci s siguientes:
• C mbie l posición o l ubic ción de l nten (quiere decir l nten de l r dio o
de l televisión que está recibiendo l interferenci ).
• C mbie l posición o c mbie l ubic ción y umente l dist nci entre el equipo de
telecomunic ciones y l nten receptor de l r dio o de l televisión que está
recibiendo l interferenci .
• Conecte el equipo de telecomunic ciones un tom en un circuito diferente del
circuito l cu l l nten receptor esté conect d .
Si est s medid s no elimin n l interferenci , f vor de consult r su distribuidor o un
técnico de r dio/televisión experto por otr s sugerenci s. T mbién, l Comisión Feder l
de Comunic ciones (FCC) h prep r do un folleto muy útil, “How To Identify nd Resolve
R dio/TV Interference Problems” (“Como Identific r y Resolver Problem s de
Interferenci de R dio/Televisión”). Este folleto se puede obtener del U.S. Goverment
Printing Office, W shington, D.C. 20402. F vor de especific r el número 004-0 00-00345-4
cu ndo h g su pedido.
El número de l FCC está ubic do en el fondo de l b se
El numero REN est ubic do en el fondo de l b se
VEAADVERTENCIA EN LA PARTE POSTERIOR/BASE DEL PRODUCTO.
RIESGODE SACUDIDA
ELÉCTRICANO ABRA
ADVERTENCIA: PARA PREVENIR
EL RIESGO DE UNFUEGO O DE UNA
SACUDIDA ELECTRICA, NO EXPONGA
ESTE APARATO A LA LLUVIA O A LA
HUMEDAD.
ELRELÁMPAGO Y LA
PUNTADE FLECHA
DENTRODEL TRIÁNGULO
ESUNA SEÑAL DE
ADVERTENCIA,
ALERTÁNDOLEA UD. DE
QUEHAY "VOLTAJE
PELIGROSO"DENTRO DEL
PRODUCTO.
CUIDADO: PARA REDUCIR
EL RIESGO DE UNA SACUDIDA
ELÉCTRICA, NO QUITE LA
CUBIERTA(O PARTE
POSTERIOR) NO USE PARTES
DE REPUESTO DENTRO.
CONSULTE A ALGUNA
PERSONA CALIFICADA DEL
SERVICIO DE REPARACIONES.
ELSIGNO DE
EXCLAMACIÓNDENTRO
DELTRIÁNGULO ES UNA
SEÑALDE
ADVERTENCIA,
ALTERTÁNDOLEA UD. DE
QUEEL PRODUCTO, TRAE
INCLUCIDO,
INSTRUCTIONESMUY
IMPORTANTES.
ATTENTION:
INTRODUCCIÓN
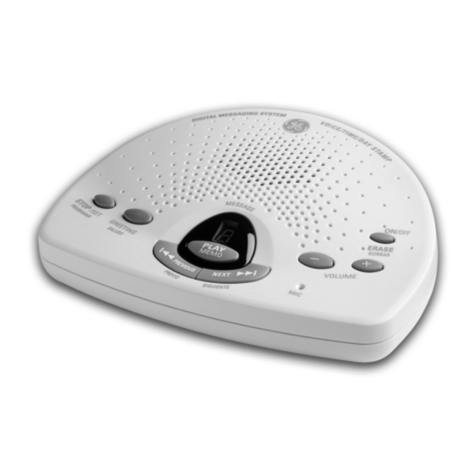
Su Contest dor Digit l está diseñ do p r d rle flexibilid d de
uso y l más lt c lid d de funcion miento. P r provech r
l máximo su nuevo contest dor, le sugerimos que se tome
unos minutos hor mismo p r leer este m nu l de
instrucciones.
CUIDADO: Cuando utilice equipo telefónico, hay
instrucciones básicas de seguridad que siempre deben
seguirse. Refiérase a la guía de INSTRUCCIONES DE
SEGURIDAD IMPORTANTES provista con este producto
y guárdela para referencia futura.
ANTES DE COMENZAR
LISTA DE PARTES
Asegúrese de que su p quete incluye los siguientes rtículos:
REQUISITOS DE CONEXIÓN
P r conect r el teléfono se necesit un enchufe
modul r
telefónico
RJ11, que es el tipo de enchufe
más común y se p rece l ilustr do. Si usted no
tiene este tipo de enchufe, ll me su comp ñí
telefónic loc l p r pregunt r cómo conseguirlo.
INSTALACIÓN DE LA BATERÍA
En c so de un corte de corriente, un b terí lc lin de 9
voltios (no incluid ) le permite l contest dor retener
mens jes lm cen dos en l memori . P r inst l r l b terí :
1. Quite l puert del comp rtimento de l b terí en l p rte
de b jo del p r to floj ndo el tornillo con un
destornill dor Phillips. Lev nte l puert .
2. Conecte un b terí lc lin nuev de 9 voltios (no incluid ).
Ambos cont ctos gr ndes y pequeños del comp rtimento se
conect rán con los de l b terí . Un vez conect d , coloque
l b terí dentro del comp rtimento de l b terí .
3. Vuelv coloc r l puert del comp rtimento y priete el
tornillo.
NOTA: Si la batería está baja o no está instalada, el aparato
anuncia “Low Battery” (Baja Batería) al final de sus mensajes.
INSTALACIÓN
CUIDADO:
•Desconecte el cable de línea telefónico de la pared
antes de instalar o re-cargar las baterías.
•Nunca instale el cableado del teléfono durante una
tormenta de relámpagos.
• Nunca toque alambres telefónicos o terminales que no
estén aislados, a menos de que la línea telefónica haya
sido desconectada en la interfaz de la red.
• Sea cuidadoso cuando instale o modifique líneas
telefónicas.
1. Conecte el c ble de líne telefónic en un cont cto modul r
de p red.
2. Conecte el c ble de líne telefónico desde su teléfono l
enchufe en l p rte posterior del contest dor m rc do
“PHONE”. (Usted no tiene que conect r su teléfono p r que
el contest dor gr be nuncios entr ntes).
3. Conecte el extremo corto del c ble de corriente dentro del
enchufe m rc do “POWER 9V AC” en l p rte posterior del
contest dor. Conecte el otro extremo en un enchufe de
corriente AC. El p r to emite un tono l rgo y le indic que
espere (“ple se w it”). Después de l p us , el p r to
emite otro tono indic ndo que está listo p r progr m rse o
p r contest r ll m d s con el s ludo y l progr m ción de
fábric .
CUIDADO: Utilice únicamente el cable de corriente
ATLINKS USA 5-2515 que viene con este aparato. El uso
de otros adaptadores puede resultar en daño al aparato.
INSTRUCCIONES IMPORTANTES PARA MOVER EL
CONTESTADOR
P r mover el contest dor un loc liz ción diferente dentro
de l c s , sig l s siguientes instrucciones:
1. Desconecte l líne telefónic o los teléfonos que pudier
tener conect dos l p r to.
2. Inst le l b terí si es que tod ví no lo h hecho. Con esto
se segur que sus mens jes no se pierd n. Ve l sección
“Inst l ción de l B terí ”.
3. V y l cont cto eléctrico y desconecte el c ble de
corriente.
4. Muev el p r to y l líne telefónic l loc liz ción
dese d .
5. Conecte el c ble de corriente en un enchufe eléctrico.
6. Conecte l s líne s telefónic s neces ri s.
PROGRAMACIÓN
PARA GRABAR EL SALUDO
Antes de us r su nuevo contest dor, usted debe de gr b r un
s ludo (el nuncio que l person que ll m escuch cu ndo
su sistem de contest dor contest un ll m d ). Si usted no
gr b un s ludo, l s person s que ll m n escuch rán el
s ludo por omisión (pre-progr m do de fábric ) que dice,
“Grabe su mensaje después del tono”.
Cu ndo gr be el s ludo, usted debe est r proxim d mente
6 pulg d s del p r to. Elimine t nto ruido de fondo como le
se posible.
1. Prep re su s ludo.
Ejemplo de un s ludo: Hol , h bl (use su nombre quí). No
puedo contest r el teléfono en este momento, pero por
f vor deje su nombre, número de teléfono y un mens je
breve después del tono, y yo le ll m ré más t rde. Gr ci s.
2. Sosteng oprimido el botón de s ludo (“GREETING”).
Después del tono, usted tiene 30 segundos p r gr b r su
s ludo.
3. Suelte el botón de s ludo (“GREETING”) un vez que h y
termin do. El mens je se reproducirá utomátic mente.
NOTA: Su tiempo de grabado no debe ser menos de 2 segundos.
De otra manera el aparato regresará al saludo de fábrica.
PARA CAMBIAR LAS PROGRAMACIONES
Est función le permite c mbi r l Hor /Dí , Timbres p r
Contest r, y l s progr m ciones de Códigos de Segurid d.
PARA PROGRAMAR LA HORA/DÍA
Est progr m ción le permite progr m r l inform ción de
Hor /Fech que comp ñ c d Mens je.
DÍA
1. Oprim y sosteng el botón “STOP/SET” dur nte dos
segundos, después suéltelo. El p r to nunci “Time” (Hor )
(l progr m ción ctu l de l hor ) “To set day, press next…press
set to continue” (P r progr m r el dí , oprim el botón p r
siguiente (next)…oprim el botón de progr m ción (set)
p r continu r).
2. P r c mbi r el dí , oprim y suelte el botón “NEXT”
(siguiente) o “PREVIOUS” (previo) h st que l
progr m ción dese d se nuncie.
3. P r lm cen r el dí , oprim y suelte el botón “STOP/SET”.
El p r to confirm l progr m ción e inscribe el menú de
l Hor .
HORA
1. El p r to nunci , ” (l progr m ción ctu l de l hor ) “To
set hour, press next…press set to continue” (P r progr m r l hor ,
oprim el botón p r siguiente (next)…oprim el botón de
progr m ción (set) p r continu r).
2. P r c mbi r l hor , oprim y suelte el botón “NEXT”
(siguiente) o “PREVIOUS” (previo) h st que l
progr m ción dese d se nuncie.
3. P r lm cen r l s hor s, oprim y suelte el botón “STOP/
SET”. El p r to confirm l progr m ción e inscribe el
menú de los Minutos.
MINUTOS
1. El p r to nunci ” (l progr m ción ctu l de l minutos)
“To set minutes, press next…press set to continue” (P r progr m r
los minutos, oprim el botón p r siguiente (next)…oprim
el botón de progr m ción (set) p r continu r).
2. P r c mbi r los minutos, oprim y suelte el botón “NEXT”
(siguiente) o “PREVIOUS” (previo) h st que l
progr m ción dese d se nuncie.
3. P r lm cen r los minutos, oprim y suelte el botón
“STOP/SET”. El p r to confirm l progr m ción e inscribe
el menú de Timbres p r Contest r.
PARA PROGRAMAR TIMBRES PARA CONTESTAR
Est progr m ción le permite seleccion r el número de
timbres ntes de que el p r to conteste un ll m d .
1. El p r to nunci , “Rings to Answer” (el número ctu l de
timbres p r contest r) “To set rings, press next…press set to
continue” (P r progr m r el número de timbres, oprim el
botón p r siguiente (next)…oprim el botón de
progr m ción (set) p r continu r).
2. P r c mbi r el número de timbres p r contest r, oprim y
suelte el botón “NEXT” (siguiente) o “PREVIOUS” (previo)
h st que l progr m ción dese d se nuncie.
3. P r lm cen r l progr m ción de Timbres p r Contest r,
oprim y suelte el botón “STOP/SET”. El p r to confirm l
progr m ción e inscribe el menú de código de segurid d.
AHORRADOR DE CARGOS
El Ahorr dor de C rgos le puede horr r el costo de un
ll m d cu ndo usted tiene cceso sus mens jes desde otro
teléfono:
• Si usted tiene mens jes nuevos, el p r to contest después
del segundo timbre.
• Si usted no tiene mens jes nuevos, el p r to contest
después del quinto timbre.
Usted puede colg r después del tercer timbre y horr rse
p g r el costo de l ll m d o el c rgo de l rg dist nci .
PARA PROGRAMAR EL CÓDIGO DE SEGURIDAD
Est progr m ción le permite c mbi r el código de segurid d
progr m do de fábric que se us p r tener cceso su
contest dor desde un loc liz ción remot . El código de
segurid d progr m do es 123.
1. El p r to nunci , “Security code (el código de segurid d
ctu l) To set security code, press next…press set to continue” (P r
progr m r el código de segurid d, oprim continu ción…
oprim “set” p r continu r).
2. P r c mbi r el primer número del código de segurid d,
oprim y suelte el botón “NEXT” o “PREVIOUS” h st que
l progr m ción dese d se nuncie. El p r to nunci rá
los tres números, pero únic mente el primero c mbi rá.
3. P r lm cen r el primer número, oprim y suelte el botón
“STOP/SET”. Un tono corto se escuch rá.
4. P r c mbi r el segundo y tercer número, repit los p sos 2
y 3. Después de que el tercer número es lm cen do, el
p r to nunci rá tod s l s progr m ciones lm cen d s.
PARA REVISAR LAS PROGRAMACIONES
Est función le permite revis r l hor ctu l, número de
timbres p r contest r, y código de segurid d.
• Oprim y suelte el botón “STOP/SET” p r empez r
revis r. El p r to nunci l s progr m ciones ctu les.
PARA AJUSTAR EL VOLUMEN
Utilice los botones de volumen “VOLUME” y los botones + y –
p r ument r o disminuir el volumen. El p r to emite un
tono cu ndo no está nunci ndo un progr m ción o
reproduciendo un mens je.
INDICADORES DE MENSAJES
El indic dor de mens jes (“MESSAGES”) le h ce s ber el
est do ctu l de su p r to.
ESTADO EXPLICACION/SOLUTION
El indic dor de mens jes p rp de Los mens jes nuevos h n sido
continu mente recibidos; oprim “PLAY/MEMO”
p r escuch r sus mens jes.
El Indic dor de Mens jes p rp de L memori está llen . Borre
rápid mente. lgunos mens jes.
El Indic dor de Mens jes está ilumin do No se requiere ningun cción; el
y no p rp de . p r to está listo p r recibir
mens jes.
El Indic dor de Mens jes está p g do. Oprim el botón “ON/OFF/ERASE”
p r ctiv r.
NOTA:
1. Un mensaje viejo es aquel que ha sido escuchado
completamente, incluyendo la marca de la hora/día. Un mensaje
nuevo es aquel que NO HA sido escuchado completo.
2. Cuando el contestador está desactivado, contesta una llamada
después del décimo (10) timbre, pero no reproduce el saludo. El
contestador no toma mensajes cuando está desactivado.
PARA REPRODUCIR MENSAJES
Cu ndo el indic dor de mens jes p rp de continu mente,
usted h recibido mens jes nuevos.
• P r reproducir mens jes, oprim y suelte el botón “PLAY/
MEMO”.
• P r detener l reproducción, oprim y suelte el botón
“STOP/SET”.
• P r volver empez r el mens je ctu l, oprim y suelte el
botón “PREVIOUS”.
• P r regres r l principio de un mens je nterior, oprim y
suelte el botón “PREVIOUS” dos veces en un segundo.
• P r s lt r l principio del siguiente mens je, oprim y
suelte el botón “NEXT”.
• P r borr r un mens je mientr s se reproduce, oprim y
suelte el botón “ERASE”. El contest dor nunci “Message
Erased” (Mens je Borr do) p r confirm r que el mens je h
sido borr do.
PARA BORRAR TODOS LOS MENSAJES
Cu ndo el contest dor no está reproduciendo o gr b ndo
mens jes, oprim y sosteng el botón “ERASE” h st que usted
escuche l indic ción “Message Erased” (Mens je Borr do). Si
usted no tiene ningún mens je, el p r to nunci rá “Zero
Message” (Cero Mens je).
NOTA: Los mensajes nuevos deben ser escuchados de principio a
fin, incluyendo la grabación de la hora/fecha antes de que
puedan ser borrados.
PARA DEJAR UN RECADO
Oprim y sosteng el botón “MEMO”. Gr be su rec do
después del nuncio y se escuch rá un tono. Suelte el botón
“MEMO” cu ndo usted h y termin do de h bl r. El p r to
tr t el rec do como si fuer mens je, y l luz del indic dor de
mens jes (“MESSAGES”) p rp de rá.
NOTA: El tiempo máximo digital para grabar el recado
(“MEMO”) y el mensaje es de 60 segundos.
PARA FILTRAR LLAMADAS (FUNCIÓN DE AUTO
DESCONECTAR)
Usted puede filtr r ll m d s entr ntes escuch ndo mientr s l
person que ll m dej su mens jes. Si usted quiere h bl r
con es person , lev nte cu lquier extensión del teléfono.
NOTA: Antes de contestar la llamada, deje que el saludo se
reproduzca por lo menos durante 2 segundos.
ACCESO REMOTO
Usted puede tener cceso su contest dor desde cu lquier
teléfono con mod lid d p r m rc r por tono en otr
loc liz ción, simplemente inscribiendo su código de segurid d
de 3 dígitos (el código progr m do de fábric es 123, pero
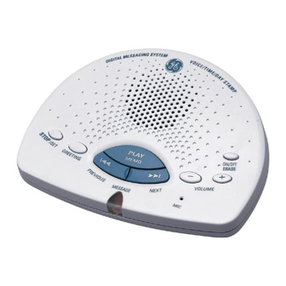
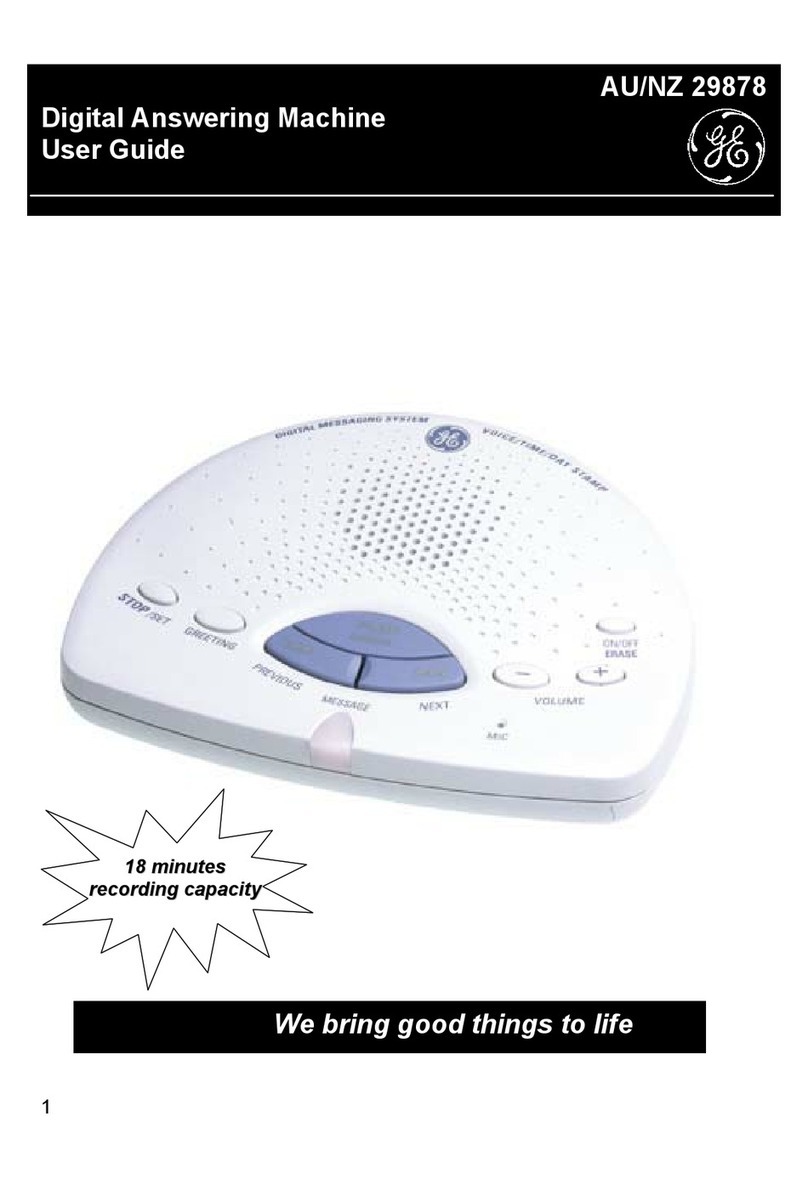
Contestador Cable de corriente AC
STOP/SET GREETING
VOLUME
MESSAGE
PREVIOUS
NEXT
PLAY
MEMO
ON/OFF
ERASE
MIC
-
-
+
+
Puerta del compartimento de
la Batería
Batería
Gancho de
la batería
STOP/SET GREETING
VOLUME
MESSAGE
PREVIOUS
NEXT
PLAY
MEMO
ON/OFF
ERASE
MIC
Botón para
programar
(“STOP/
SET”)
Botón para
siguiente
(“NEXT”)
Botón para previo
(“PREVIOUS”)
Botón para el saludo
(“GREETING”)
Micrófono
(MIC)
Botones para
volumen
(“VOLUME”)
Botón para
reproducir
(“PLAY/
MEMO”)
Indicador de
mensajes
(“MESSAGE”)
Botón para borrar y
activar (“ON/OFF/
ERASE”)
usted puede c mbi rlo). Teng en cuent que l s funciones del
control remoto no funcion n con teléfonos rot torios, o
teléfonos de botones o de pulso. Usted puede recort r l
t rjet t m ño c rter con l s funciones del control remoto
p r que usted pued tener los com ndos de tecl s (“touch-
tone”) l m no cu ndo usted esté recogiendo sus mens jes
desde otr loc liz ción con el control remoto.
Cómo tener cceso su contest dor:
1. Ll me su número telefónico.
2. Después de que usted escuch el bip que sigue l s ludo,
inscrib su código de segurid d de 3 dígitos. P r s lt rse el
s ludo, usted puede inscribir su código de segurid d de 3
dígitos en cu lquier momento mientr s el s ludo se está
reproduciendo.
3. El p r to reproduce el menú de control remoto después de
que el código de segurid d correcto se h inscrito. L s
selecciones del menú pueden h cerse mientr s se
reproduce el menú.
NOTA: El aparato contesta al décimo (10) timbre cuando está
desactivado o la memoria está llena. Para tener acceso al
contestador, inscriba los 3 dígitos de su código de seguridad
después del tono. Si la memoria está llena, reproduzca los
mensajes y borre algunos de ellos para recuperar memoria. Si el
contestador está desactivado, oprima el 2 para activarlo.
NOTA: Después de que el aparato reproduce el menú de
funciones remotas, se espera 10 segundos para recibir un
comando. Si no recibe ningún comando, el aparato se
desconecta.
CUIDADO GENERAL DEL PRODUCTO
P r m ntener su contest dor funcion ndo bien y con buen
p rienci , observe l s siguientes p ut s:
• Evite poner el teléfono cerc de c lent dores (c lef ctores)
de mbiente y dispositivos que generen interferenci
eléctric ejemplo, motores o lámp r s fluorescentes).
• No lo expong l luz sol r direct o l humed d.
• No deje c er l extensión móvil y no m ltr te el teléfono.
• Limpie el teléfono con un tr po su ve
• Nunc use un gente de limpiez fuerte ni un polvo
br sivo, y que esto d ñ rá el c b do.
• Reteng el emp que origin l en c so de que necesite
emb rc r el uricul r en el futuro.
SOLUCIÓN DE PROBLEMAS
NOCONTESTA, OCONTESTA EN EL DÉCIMO (10) TIMBRE
• Asegúrese de que el contest dor esté ctiv do.
• L memori está llen , borre lgunos mens jes.
• Verifique que h y corriente AC y verifique l s conexiones
de los c bles telefónicos.
LOS MENSAJES ENTRANTES ESTÁN INCOMPLETOS
• ¿Se lev ntó un de l s extensiones?
• L person que ll mó dejó un mens je más l rgo que los 60
segundos permitidos.
• L memori está llen .
• Usted oprimió ccident lmente el botón “STOP/SET”
cu ndo est b reproduciendo sus mens jes.
NORESPONDE ALOS COMANDOS DEL CONTROL REMOTO
• Usted debe utiliz r un teléfono de tono (touch-tone).
• Usted debe inscribir el código de segurid d correcto.
• ¿El p r to colgó? Si usted no oprime ningún botón dur nte
un período de tiempo, el p r to cuelg utomátic mente.
ELCONTESTADOR NO FUNCIONA
• Desconecte el c ble de corriente del enchufe eléctrico y
vuelv conect rlo p r re-progr m r el contest dor. Si eso
no funcion , desconecte el c ble de corriente de l p rte
posterior del p r to y vuelv conect rlo. Esto constituye
l re-progr m ción complet .
NOPUEDE ESCUCHAR EL MENSAJE
• Ajuste el control del volumen.
ELAPARATO ANUNCIA “LOW BATTER Y”(BAJA BATERÍA)
• Inst le un b terí nuev de 9 voltios.
NOPUEDE VOLVER ACOMENZAR EL MENSAJE
• Usted debe reproducir los mens jes por lo menos dur nte 5
segundos ntes de oprimir el botón “PREVIOUS.”
ELINDICADOR DE MENSAJES PARPADEA RÁPIDAMENTE
• L memori está llen . Borre lgunos mens jes.
LABATERÍA ESTÁ BUENA, PERO SE PERDIERON MENSAJES
• ¿Est b el c ble de corriente desconect do de l p rte
posterior del p r to?
ELSALUDO CONTINÚA REPRODUCIÉNDOSE INCLUSO DESPUÉS DE QUE
SE LEVANTA UNA EXTENSIÓN
• Esto es l oper ción norm l. El desconect do utomático se
retr s dur nte 2 segundos después de que el p r to
contest un ll m d . Si usted está cerc del p r to,
oprim el botón “STOP/SET” p r detener el s ludo.
CÓMO OBTENER SERVICIOS DE MANTENIMIENTO
L FCC requiere que este producto se sometido servicios de m ntenimiento
sol mente por el f bric nte o por sus gentes de servicio utoriz dos. De cuerdo con
los requerimientos de l FCC, los c mbios o l s modific ciones que no h y n sido
expres mente prob d s por ATLINKS USA podrí n nul r l utorid d que tiene el
usu rio de oper r este producto. P r recibir instrucciones sobre cómo obtener servicios
de m ntenimiento, por f vor consulte l g r ntí incluid en est Guí , o ll me
Inform ción p r el Usu rio, 1-800-448-0329.
O envíe sus pregunt s :
ATLINKS USA, Inc.
Gerente, Servicio l Consumidor
P.O. Box 1976
Indi nápolis, IN 46206
Adjunte su recibo l folleto, p r futur referenci , o note l fech en l que se compró
o recibió este producto como reg lo. Est inform ción será v lios si se lleg se
requerir dur nte el período de g r ntí .
Fech de compr _________Nombre de l tiend _______________________________________
GARANTÍA LIMITADA
Lo que cubre su g r ntí :
• Cu lquier defecto en m teri l o m no de obr .
Por cuánto tiempo después de l compr :
• Un ño, p rtir de l fech de compr .
(El periodo de g r ntí p r unid des rrend d s se inici con l primer rent o 45
dí s de l fech del emb rque l firm de rrend miento, lo que ocurr primero).
Lo que h remos:
• Proporcion rle un unid d nuev o, nuestr opción, un re condicion d .
• L unid d de interc mbio qued rá b jo g r ntí por el resto del periodo de g r ntí
del producto origin l.
Cómo h cer un recl mo de g r ntí :
• Emp que bien l unid d, incluyendo todos los c bles, etc., que origin lmente vení n
con el producto. Se recomiend us r el c rtón y m teri les de emp que origin les.
• “Prueb de compr como f ctur o recibo de compr , que ofrezc evidenci de que el
producto está dentro del periodo de g r ntí , debe ser present do p r obtener
servicio b jo g r ntí .” T mbién escrib cl r mente su nombre, dirección y l
descripción del defecto. M nde ví UPS o un servicio de p queterí equiv lente :
Thomson multimedi Inc.
11721 B Al med Ave.
Socorro, Tex s 79927
• P gue cu lquier c rgo que le f cture el Centro de Interc mbio por servicio que no
esté cubierto por g r ntí .
• Asegure su p quete contr pérdid o d ños. Thomson multimedi Inc. no cept
respons bilid d en c so de d ños o pérdid dur nte el tr yecto Thomson
multimedi Inc.
• Un p r to nuevo o uno remoz do se le envi rá con los c rgos p g dos.
Lo que
no
cubre l g r ntí :
• Instrucciones l cliente. (Su m nu l de propiet rio le proporcion l inform ción con
respecto l s instrucciones de oper ción y los controles del usu rio. Cu lquier
inform ción dicion l debe obtenerse con su gente de vent s.
• Ajustes de inst l ción y de prep r ción del servicio.
• B terí s.
• D ño por m l uso o negligenci .
• Productos que h n sido modific dos o incorpor dos otros productos.
• Productos compr dos o que h n recibido servicio fuer de los Est dos Unidos.
• Des stres n tur les, por ejemplo y sin limit rse ellos, d ños por relámp gos.
Registro del Producto:
• Por f vor llene y envíe por correo l T rjet de Registro del Producto que se emb rcó
con su producto. H rá más fácil que h g mos cont cto con usted si fuer neces rio.
No se requiere l devolución de l t rjet p r tener l cobertur de l g r ntí .
Limit ciones sobre l G r ntí :
• LA GARANTÍA ESPECIFICADA ANTERIORMENTE ES LA ÚNICA GARANTÍA APLICABLE
A ESTE PRODUCTO. CUALQUIER OTRA GARANTÍA, EXPRESA O IMPLÍCITA
(INCLUYENDO TODAS LAS GARANTÍAS IMPLÍCITAS DE MERCADO O DE SALUD
PARA CUALQUIER PROPÓSITO) SON CONSIDERADAS NO VÁLIDAS. NINGUNA
INFORMACIÓN VERBAL O ESCRITA OTORGADA POR THOMSON´S MULTIMEDIA, INC.,
SUS AGENTES, O EMPLEADOS SERÁ CONSIDERADA PARA CREAR UNA GARANTÍA
NI PARA AUMENTAR BAJO NINGUNA CIRCUNSTANCIA LA COBERTURA DE ESTA
GARANTÍA.
• LA REPARACIÓN O REEMPLAZO DE UN PRODUCTO COMO SE ESPECIFICA BAJO
ESTA GARANTÍA ES EL REMEDIO EXCLUSIVO DEL CONSUMIDOR. THOMSON
MULTIMEDIA, INC. NO SE HACE RESPONSIBLE POR DAÑOS INCIDENTALES, DAÑOS
DERIVADOS COMO CONSECUENCIA DEL USO DE ESTE PRODUCTO, O COMO
RESULTADO DEL INCUMPLIMIENTO DE CUALQUIER GARANTÍA IMPLÍCITA O
EXPRESA DE ESTE PRODUCTO. LA INVALIDEZ DE LAS GARANTÍAS O LAS
GARANTÍAS LIMITADAS ESTÁN REGLAMENTADAS POR LAS LEYES DEL ESTADO DE
INDIANA. EXCEPTO POR EL ALCANCE ESTABLECIDO POR LAS LEYES APLICABLES,
CUALQUIER GARANTÍA IMPLÍCITA DE MERCADO O DE SALUD PARA CUALQUIER
PROPÓSITO, EN ESTE PRODUCTO ES LIMITADA AL PERÍODO DE GARANTÍA
ESPECIFICADO ANTERIORMENTE.
Cómo se Rel cion l Ley Est t l est G r ntí :
• Algunos est dos no permiten l exclusión ni limit ción de d ño incident l o deriv do
de lgun consecuenci , o l limit ción con respecto l período de tiempo que debe
plic rse p r g r ntí s implícit s, por lo t nto l s limit ciones y exclusiones
mencion d s nteriormente pueden no ser plic bles p r usted.
• Est g r ntí le d usted derechos leg les específicos y podrá tener otros derechos
que v rí n de est do est do.
Si compró su producto fuer de los Est dos Unidos:
• Est g r ntí no se plic . Ve su distribuidor p r inform ción sobre l g r ntí .
Hora
Horas 12 a.m. - 11 p.m.
Minutos 0 - 59
Día Domingo - Lunes
Timbres para 2, 4, Ahorrador de
Contestador Cargos
Código de 0 - 9, 0 - 9, 0 - 9
Seguridad
Rango de Programaciones Programaciones de Fábrica
Hora 12 a.m. Domingo
Timbres para 4
Contestar
Código de 123
Seguridad
Recorte est t rjet con
l s funciones del control
remoto p r que usted
pued llev rl consigo.
P r : Oprim :
Reproducir los mens jes ................. 1
Reproducir el mens je ctu l.......... 7
(oprim dos veces p r reproducir el nterior)
S lt r l siguiente mens je .......... 9
(dur nte l reproducción)
Borr r el mens je .......................... 0
(dur nte l reproducción)
Activ r Contest dor ......................... 2
Des ctiv r Contest dor ................... 3
Dej r un Rec do ............................... 4
(oprim nuev mente 6 l termin r)
Gr b r un rec do .............................. 5
(
oprim nuev mente 6 l termin r
)
Detener l reproducción .................. 6
(dur nte l reproducción)
Progr m r el código de segurid d . 7
Reproducir s ludo ............................ 8
Borr r el mens je ............................. 0
Escrib quí su código de segurid d de
3 dígitos.
C
ONTESTADOR
D
IGITAL
29878
1. M rque el número telefónico del
contest dor.
2. Inscrib su código de segurid d
de 3 dígitos dur nte el s ludo o
después del tono.
3. Inscrib un com ndo de “touch-
tone”.
4. Cuelgue.
DOBLAR
