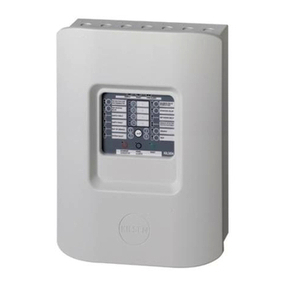
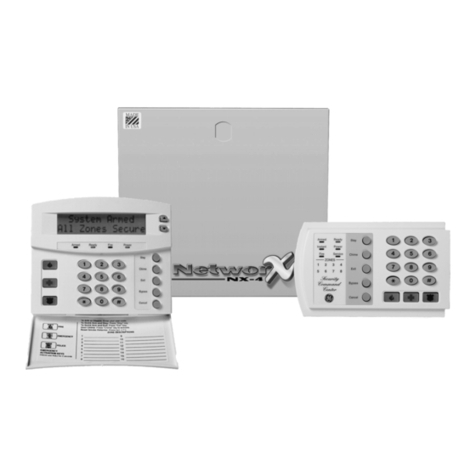
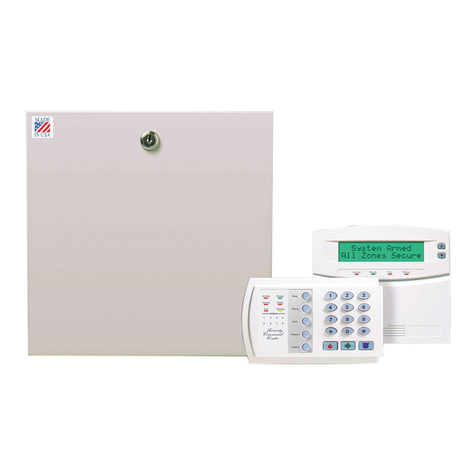
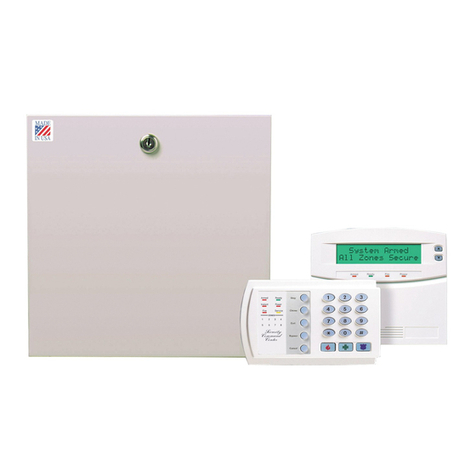
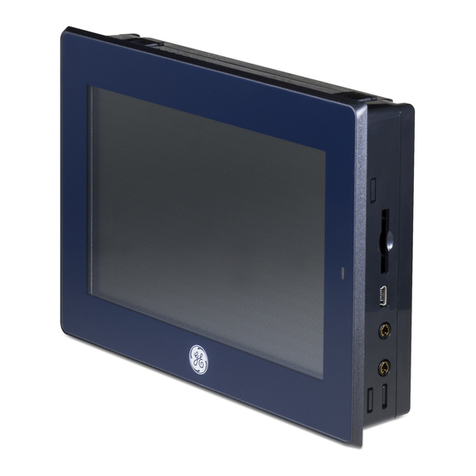
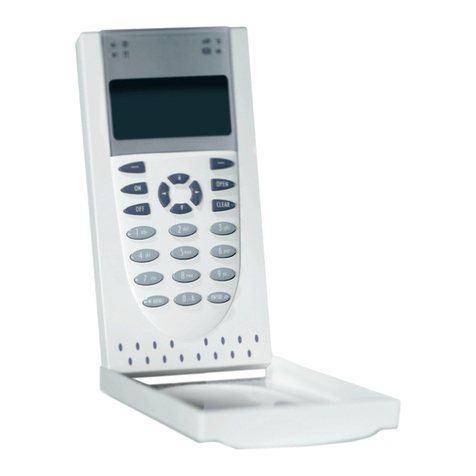
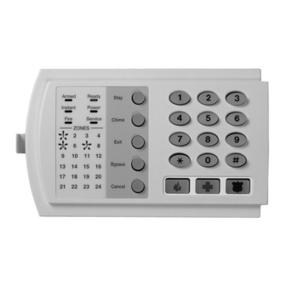
GE NetworX NX-8-EUR User manual

GE
Security
NetworXTM Series
NX-8-EUR Control Panel
Installation manual
g
imagination at work

NX-8-EUR Installation manual Page 2 02/07/06

CONTENTS
CONTENTS .................................................................................................................................................................................... 3
GENERAL INFORMATION............................................................................................................................................................ 5
ORDERING INFORMATION ......................................................................................................................................................... 5
FEATURE DEFINITIONS ............................................................................................................................................................... 6
PROGRAMMING THE NX-8 KEYPADS......................................................................................................................................14
PROGRAMMING THE LED KEYPADS .............................................................................................................................................................................. 14
PROGRAMMING THE NX-148 LCD KEYPADS.............................................................................................................................................................18
KEYPAD FUNCTIONS FOR THE NX-148 LCD KEYPAD ...............................................................................................................................................21
PROGRAMMING THE NX-8 CONTROL PANEL........................................................................................................................26
PROGRAMMING THE NX-8 CONTROL PANEL VIA THE LED KEYPAD ......................................................................................................................... 26
ENTERING THE PROGRAM MODE.................................................................................................................................................................26
SELECTING THE MODULE TO PROGRAM.................................................................................................................................................... 26
PROGRAMMING A LOCATION..........................................................................................................................................................................26
EXITING A LOCATION .......................................................................................................................................................................................... 26
EXITING THE PROGRAM MODE....................................................................................................................................................................... 27
PROGRAMMING DATA........................................................................................................................................................................................ 27
LOADING FACTORY DEFAULTS.......................................................................................................................................................................28
ENROLLING MODULES AND KEYPADS........................................................................................................................................................28
PROGRAMMING THE NX-8 CONTROL PANEL VIA LCD KEYPAD ................................................................................................................................30
ENTERING THE PROGRAM MODE.................................................................................................................................................................30
SELECTING THE MODULE TO PROGRAM.................................................................................................................................................... 30
PROGRAMMING A LOCATION..........................................................................................................................................................................30
EXITING THE PROGRAM MODE....................................................................................................................................................................... 32
LOADING FACTORY DEFAULTS.......................................................................................................................................................................32
ENROLLING MODULES AND KEYPADS........................................................................................................................................................32
IMPORTANT REMARKS..............................................................................................................................................................33
TAMPER MEMORIZATION................................................................................................................................................................................................. 33
DISABLING TAMPER ALARMS IN PROGRAM MODE ........................................................................................................................................................ 33
COUNTRY CODE ...............................................................................................................................................................................................................33
KEYPAD TAMPER LOCKOUT.............................................................................................................................................................................................33
CLC/TS 50131-3 COMPLIANCY................................................................................................................................................................................. 34
CONTROL PANEL PROGRAMMING LOCATIONS....................................................................................................................35
TELEPHONE NUMBER 1...................................................................................................................................................................................................35
FORMAT SELECTIONS ...................................................................................................................................................................................................... 36
REPORTING EVENTS TO PHONE NUMBER 1................................................................................................................................................................... 37
TELEPHONE NUMBER 2...................................................................................................................................................................................................38
REPORTING EVENTS TO PHONE NUMBER 2................................................................................................................................................................... 39
TELEPHONE NUMBER 3...................................................................................................................................................................................................40
REPORTING EVENTS TO PHONE NUMBER 3................................................................................................................................................................... 41
SPECIAL FORMATS ........................................................................................................................................................................................................... 43
DOWNLOAD PARAMETERS..............................................................................................................................................................................................44
FEATURE AND REPORT SELECTIONS (FOR PARTITION 1) ..............................................................................................................................................45
ENTRY/EXIT TIMERS......................................................................................................................................................................................................... 46
ZONE CONFIGURATIONS AND PARTITION SELECTION .................................................................................................................................................. 47
GENERAL OPTIONS .......................................................................................................................................................................................................... 53
PROGRAMMING THE OUTPUTS ....................................................................................................................................................................................... 57
NX-8-EUR Installation manual Page 3 02/07/06

SETUP FOR AUTO-TEST, AUTO-ARM AND OPENING/CLOSING TIMES .........................................................................................................................60
COMMUNICATOR CODES FOR SLOW SPEED FORMATS ONLY ...................................................................................................................................... 62
PROGRAMMING PARTITION PARAMETERS ..................................................................................................................................................................... 70
PROGRAMMING ZONE CONFIGURATION GROUPS ........................................................................................................................................................75
NX-8-EUR PROGRAMMING WORKSHEETS.............................................................................................................................86
BOARD INSTALLATION ...........................................................................................................................................................102
NX-8-EUR WIRING DIAGRAM.................................................................................................................................................103
TERMINAL DESCRIPTION........................................................................................................................................................104
TECHNICAL SPECIFICATIONS.................................................................................................................................................105
TECHNICAL SPECIFICATIONS NX-8 ............................................................................................................................................................................ 105
TECHNICAL SPECIFICATIONS NX-108, NX-116, NX-124................................................................................................................................... 105
TECHNICAL SPECIFICATIONS NX-1308, NX-1316, NX-1324........................................................................................................................... 106
TECHNICAL SPECIFICATIONS NX-148....................................................................................................................................................................... 106
APPENDIX 1: REPORTING FIXED CODES IN CONTACT-ID AND SIA..................................................................................107
APPENDIX 2: REPORTING ZONE CODES IN SIA OR CONTACT ID .....................................................................................108
APPENDIX 3: EXPANDER NUMBERS FOR REPORTING EXPANDER TROUBLE .................................................................110
KEYPADS........................................................................................................................................................................................................................ 110
REMOTE POWER SUPPLY NX-320E .......................................................................................................................................................................... 110
WIRELESS RECEIVER NX-448E.................................................................................................................................................................................. 110
OUTPUT MODULE NX-507E OR NX-508E............................................................................................................................................................. 111
HARDWIRED EXPANDER NX-216.............................................................................................................................................................................. 111
CE DECLARATION ....................................................................................................................................................................112
NX-8-EUR Installation manual Page 4 02/07/06

GENERAL INFORMATION
The NX-8-EUR (from now on called NX-8) NetworX from Caddx represents a new approach to
the design of security systems. The NX-8 is probably the most flexible, durable, and user-
friendly control panel ever seen in our industry. Its features include sophisticated software
enabling as many as 99 users to interface up to 48 zones, 8 partitions, with access, audio
verification, and input/output modules, all reported with SIA and Contact ID formats which are
extremely fast and very comprehensive. Thanks to the NetworX design, a fully loaded system
can be housed in one single metal enclosure, establishing for the first time, a logical solution
and design response to modular systems. Up to 32 modules can be added to expand the
capabilities of the NX-8.
ORDERING INFORMATION
For detailed ordering information and part numbers, please refer to the EMEA Distribution
price list of the Caddx product range.
NX-8-EUR Installation manual Page 5 02/07/06

FEATURE DEFINITIONS
Abort
If this option is enabled, the NX-8 will wait the programmed number of seconds (0-255) in
location 40 prior to sending an alarm. During this delay time, the “Cancel” LED will flash. To
abort the report, type in a code and press the [Cancel] key. The LED will go out. If the report is
not aborted within the allotted time, the LED will go out when the report is sent. The dialler
delay is programmed at location 40, segment 8. Each zone can be defined as a “dialler delay
zone” by defining the relevant option in segment 3 of the appropriate zone configuration
group (see locations 110-169).
AC fail / low battery report/warning
The NX-8 can be programmed to report an AC failure and/or low battery conditions to the
central station. Low battery will be detected as the battery gets discharged down to 10,5Vdc
and lower. It can also be programmed to sound the keypad immediately when the condition is
detected. The AC failure report/warning can be delayed (see locations 37, 39 and 40).
AC power / low battery sounder alert
If this option is enabled, the NX-8 will beep the keypad sounder upon arming or disarming, if
the AC power is not present or if a low battery has been detected (see location 23, segment 2).
Arm / disarm codes
The NX-8 may have 99 four-digit codes or 66 six-digit codes to arm/disarm the control panel.
All the codes must have the same number of digits. The factory default for user 1 is [1]-[2]-[3]-
[4] when using a 4-digit code, or [1]-[2]-[3]-[4]-[5]-[6] for a 6-digit code. This code can then be
used to enter the new arm/disarm codes (see location 41).
Automatic arming
If programmed, the NX-8 will Auto Arm at a specified time. At this time, the keypad will start
beeping before the panel arms and this for the amount of time set as warning time (warning
timer). The arming process will be stopped during the warning time if a code is entered on the
keypad or when movement has been detected. The NX-8 will attempt to arm again after the
amount of time set as retry time (retry timer) until the next “opening” time (loc. 52), or until the
system is armed. The panel will not try to re-arm if the retry feature has been disabled. If a
zone is faulted before the warning timer starts and stays faulted when the panel tries to auto-
arm, the zone will automatically be bypassed. The auto arming of a partition can be
programmed so that it is silent. If closing reports are sent, the user code will be 97 (see
locations 23 segment 2, location 40 segment 12 and 13 and location 52-55).
Automatic bypass / instant arming
When this option is enabled, the control panel can automatically bypass interior follower
zones if no exit is detected during the exit delay time. Entry delay zones can also be made
instant (see location 23, segments 1 and 2).
Auto cancel
If enabled, the Cancel and/or Abort features will be automatic (pressing the [Cancel] button is
not required). The Cancel and Abort features, in locations 23 & 40 respectively, must be
enabled to permit this Auto feature to work. For proper operation of these features, “Dialer
Delay” must be enabled in the zone configuration group (see locations 110-169).
NX-8-EUR Installation manual Page 6 02/07/06

Auto-test
This feature will cause the panel to call the central station, in order to report a communicator
test at a specified interval (see location 51). Also, the auto-test report may be enabled ONLY
when the control panel is armed see location 37 segment 4).
Auxiliary outputs
The NX-8 has two programmable relay outputs and four open collectors which can be used to
activate LED’s, sirens, flashes, etc. (see the terminal description and locations 47-50).
Auxiliary power overcurrent
The NX-8 will light up the “Service” LED on the keypad whenever too much current is being
drawn from any device powered by the system. This condition can be reported to the central
station (see location 37 segment 3).
A+B alarm reporting (Sweden)
When this feature is enabled, a first trigger from a zone will send a BG report
(unverified alarm or B-alarm) for that zone. The B-alarm message will be written in the log. In
addition, a fix 30 minutes timer will start. If a zone is triggered for a 2nd time within the 30
minutes time frame, this zone will send a BA report (burglary alarm or verified alarm) to the
monitoring station. If there is no 2nd zone that was triggered within 30 minutes, the timer will
be cleared. A+B alarm reporting only works with intrusion zone types using the SIA formats.
When this feature is enabled, the standard cross-zoning feature will be in-active (see location
37 segment 3).
Box tamper
The NX-8 has an input for a normally closed tamper switch (see wiring diagram). The box
tamper can be programmed to report, and/or sound the siren and/or the keypad. These
terminals can be enabled or disabled by programming (see locations 37 segment 2 and 3, and
location 39).
Built In siren driver
The NX-8 has a built-in 112 dB siren driver. If desired, this built-in driver can easily be
converted to a 1 amp voltage output by programming (see location 37 segment 2).
Bypass toggle
This feature will enable the end user to toggle (turn on or off) the bypass of an interior zone
while the system is armed. This is done by pressing the [Bypass] key (see location 23 segment
2).
Call back
When this feature is enabled, the control panel will use the call back phone number to call the
download computer before it begins a download (see locations 21 and 22).
Cancel
If this feature is enabled, the NX-8 will send a “Cancel” report when the system is disarmed
and the [Cancel] button is pressed within 5 minutes of an alarm. Once the [Cancel] key has
been pressed, the “Cancel” LED will light up until the central station acknowledges the “Cancel”
report (see location 23 segment 3).
Chime
This feature can be turned on and off using the “chime” key. When the system is in the
disarmed state, a trip on selected zones will generate either a DING-DONG or a single tone
through the keypad sounder (depending on the keypad programming). This lowest level of
security can be enabled by zone; this is done by programming the appropriate zone
configuration for it, or by customizing its zone configuration (see locations 111-169).
NX-8-EUR Installation manual Page 7 02/07/06

Code required options
The NX-8 can be programmed to require a code in order to bypass zones and/or to initiate a
download using the [*]-[9]-[8] or [*]-[9]-[9] function (see locations 23 segment 2 and 41).
Communication formats
The NX-8 can report in multiple formats. You are recommended to use Contact ID or SIA
formats if possible. If you wish to report to a private phone (using the voice module) or to a
central station in a 4+2 format, you must program each code that is to be reported (see
locations 56-83 and 111-169).
Configuration groups
The NX-8 has 30 configuration groups that determine how each zone will function and report.
The default configuration groups are listed on pages 44-46. All configuration groups are fully
programmable via downloading and via the keypad (see locations 111-169).
Country code
The NX-8 has the ability to set different “country codes”. Each country code has specific
default settings. Before start programming the NX-8, it is important to select the country code
that is required. Once the country code has been selected, it will remain set, even after an
installer reset. When changing the country code during programming, all existing
programming will be cleared to the defaults for that country (see location 213).
Cross zoning
This feature requires two or more trips within a specified time on one or more zones that are
programmed as “cross zones” before it will report an alarm. During the time between trips, the
NX-8 can be programmed to sound the keypad and/or the siren. The NX-8 can also be
programmed to report an alarm after two or more trips on the same zone. The first trip on a
cross-zone is also logged (see locations 37 segment 1, 39, 40 and 110-169).
Daylight savings time
The NX-8 has the possibility to switch automatically from summer to wintertime and vice
versa. This option will move the clock backward on the last Sunday of October (3 a.m.
becomes 2 a.m.) and will move the clock forward on the last Sunday of March (2 a.m. becomes
3 a.m.) (see location 37, segment 5, option 8).
Dual / split / multiple reports
The NX-8 can send communication reports to three different phone numbers for dual, split or
multiple reports: these can be selected by event or by partition (see locations 4, 10, and 16).
Duress code
If a duress code is programmed, the NX-8 will send a duress signal whenever the panel is
armed or disarmed with this code. If open/close reports are sent, the user code will be 254
(see location 44).
Dynamic battery test
The NX-8 can be programmed to perform a dynamic battery test for a selected duration when
the panel is armed or disarmed for the first time each day. The NX-8 can also be programmed
to perform a ‘missing battery’ test every 12 seconds (see locations 37 segments 2 and 3 and
location 40).
NX-8-EUR Installation manual Page 8 02/07/06

End of line resistor defeat
The NX-8 can be programmed to make zones 1-8 for normally closed operation only,
eliminating the need of the end of line resistors on these zones. When a zone is programmed
for normally closed operation, a short on that zone will not change the loop condition, and an
open on that zone will produce a faulted condition. This feature will be ignored by any priority
zone (see locations 110-169).
Entry-guard
This unique low level arming mode has been developed to reduce the most common source of
false alarms. When armed in the “Stay Instant” mode, opening any zone designated as an
“Entry Guard Zone” will initiate the keypad sounder and start the entry delay before
generating an alarm. All the other zones will function as normal. This arming mode will
encourage system owners to use their systems more frequently when the premises are
occupied (see locations 111-169).
Exit error / Exit error Delay 1
If the option Exit error is enabled on location 23 segment 3, the NX-8 will send an “Exit Error
Report” when an entry/exit zone is faulted, at the instant the exit delay expires. If also the
option “Exit Error Delay 1” is enabled on location 37 segment 7, the NX-8 will send an “Exit
Error Report” when only an entry/exit delay 1 zone is faulted, at the instant the exit delay
expires. An entry/exit delay 2 zone that is faulted at the end of the exit delay will not have
siren activation and will not log an exit error. The “Exit Error Report” will be sent together with
the user number that was used to arm the system, provided that the panel is not disarmed
before the entry delay expires. The alarm report will also be sent. If both features “Exit Error
Report” and “Exit Error Delay 1” are not enabled the siren will sound if any entry/exit zone is
faulted, as soon as the exit delay expires. If the option “Exit Error Delay 1” is enabled, the siren
will sound if only an entry/exit 1 zone is faulted (see location 23 segment 3 and location 37
segment 7).
Expander trouble
The NX-8 will report expander trouble to the central station if this option is enabled. This
condition will light up the “Service” LED on the keypad, even if it is not reported.
NOTE: The keypads are considered to be expanders. The number of expansion devices that
are reported can be found in appendix 3 (see location 37 segment 3).
Early to Open/ Late to Close
If an opening occurs before the opening and closing times, the NX-8 will send an “Early Open”
report. If it fails to close on or before the designated closing time, the NX-8 will send a “Late to
Close”report. (see location 23 segment 4)
Fail to communicate
The NX-8 will light up the “Service” LED if a report fails to reach the central station. If this
option is enabled, a fail to communicate code will be reported when the next report is
successfully communicated. A fail to communicate is always logged as “data lost” (see
location 37 segment 4).
Final set door
If this feature is enabled, it will only be applicable for secondary entry/exit zones (f.e.
configuration group 9 or 19). If the final set door option is enabled, the exit time will
immediately expire as soon as the secondary entry/exit zone (type 9 or 19) becomes ready
again. This feature can only be used in combination with magnetic contracts (see location 23,
segment 2, option 8).
NX-8-EUR Installation manual Page 9 02/07/06

Fire alarm verification
When this feature is enabled, the NX-8 will verify a fire alarm by requiring more than one trip
on a smoke detector (the same or another one) within a specified time (120-255 seconds)
before it generates an alarm (see location 40 segment 9).
First opening/last closing report for multiple partitions
If this feature is enabled, the NX-8 will only transmit a closing report after ALL partitions have
been armed. An opening report will be sent as soon as one partition has been disarmed (see
location 37).
Force arming
If this option is enabled, the NX-8 can be “Force Armed” when zones have been violated. In this
condition, the “Ready” LED will flash if a “Force Armable” zone is not secure. At the end of the
exit delay, these zones will become bypassed, unless the option “No auto-bypass for force
armable zones” is set (location 23, segment 5 option 1). If these zones become secured at any
time during the arming cycle, they will be unbypassed and will become active in the system. If
“Bypass Report” is enabled, the force arming zones can be programmed to report bypass
when they are force armed (default), or not to report bypass even if “Bypass Report” is enabled
(see locations 37 segment 5, and 111-169 segment 2).
Guard codes (Sweden)
User codes 16 and 17 can be considered as so called “guard codes”. In this case, user codes
16 and 17 cannot be programmed or changed anymore via a master code. They can only be
changed via downloading. Guard code 16 will be able to arm/disarm at any time. Guard code
17 will only be able to arm/disarm during an alarm condition. Only when an alarm condition
occurs, guard code 17 will be able to disarm the system. After having evaluated the alarm
condition, guard code 17 can arm the system again but will not be able to disarm anymore
(see location 41, segment 1, option 7).
Group bypass
A designated group of zones can be programmed to bypass by pressing [Bypass]-[0]-[0]-
[Bypass] prior to arming (see locations 111-169 segment 2).
Immediate restore by zone
The NX-8 can be programmed to send alarm and restore reports as soon as they occur, or to
wait until the siren time has expired or the system has been disarmed. (see location 37
segment 2).
Internal event log
Up to 512 events can be stored in memory together with the date and time of the event. These
events can be viewed later on via the LCD keypad, or by downloading. All reportable events
are reported to the log.
Keypad activated panics
The NX-8 has three keypad activated panics that will send reports to the central station,
auxiliary 1 (Fire), auxiliary 2 (Medical) and keypad panic. Auxiliary 1 will activate the steady
(Fire) siren, auxiliary 2 will sound the keypad, and the keypad panic can be programmed to be
silent or audible (see location 23 segment 1).
Keypad shutdown mode
This feature will extinguish all the LED’s on the keypad, except the “Power” LED, after 60
seconds have elapsed without a keypress. Pressing a valid user code (not an installer code) will
light up all the LED’s (see location 41, segment 1, option 5). This option requires bilingual LCD
keypads. This option is an alternative for LED-extinguish.
Keypad sounder control
The NX-8 can be programmed to sound the keypad sounder for certain events (see location
39).
NX-8-EUR Installation manual Page 10 02/07/06

Keypad tamper
If this option is enabled, the NX-8 will disable the keypad for 60 seconds, and will
communicate a tamper signal to the central station whenever 30 keypresses are entered
without producing a valid code (see location 23 segment 1).
Keyswitch arm/disarm
Any zone on the NX-8 can be programmed as a momentary or maintained keyswitch zone. If a
zone has been programmed as a momentary keyswitch, momentary shorts on this zone will
arm/disarm the control. A zone can be also being programmed as a maintained keyswitch.
The control panel will be armed as long as such a zone is shorted. A keyswitch zone can arm
in AWAY or STAY mode (see location 23, segment 4, option 8). If opening/closing reports are
sent, the user code will be 99 (see “default zone configurations”)
LED extinguish
This feature will extinguish all the LED’s on the keypad, except the “Power” LED, after 60
seconds have elapsed without a keypress. Pressing any numeric key will light up all the LED’s
(see location 23 segment 2).
Local programming lockout
This feature will disable programming of all locations, or for specified locations, from the
keypad (see location 21).
Log full report
A report can be sent to the central station when the event log is full (see location 37 segment
4).
Log protection
This feature will prevent a single, non-zone reportable event to fill up the event memory. The
event will only be logged for a maximum of 3 times between closings or code entry. (see
location 37 segment 6).
Lost clock service light
The NX-8 can be programmed to light up the “Service” LED on a LED keypad or give a “Service”
message on a LCD keypad when the internal clock time is invalid due to power loss. On LCD
keypads, if programmed to show the system time, a “Set Clock, *97” message will always be
displayed (see location 37 segment 5).
Manual test
The NX-8 can be programmed to perform a bell and/or communicator test; to do this, enter
[*]-[4]-[4] while the system is in the disarmed state. Each time that [*]-[4]-[4] is entered, a
dynamic battery test will also be performed (see location 37 segment 2).
Night Mode
Applies to NX-1208E / NX-1248E keypads. In this mode, the control panel will bypass all zones
that have the Entry Guard feature enabled. (See location 23 and 111-169)
On board zone disable
The eight zones on the NX-8 panel can be disabled, in order to obtain a completely wireless
alarm system. A mix of hardwired and wireless zones for zones 1-8 is also possible (see
location 37 segment 5).
Partitions
The NX-8 can be partitioned into a maximum of eight separate systems with distinct reporting
codes, user codes, and operating features for each system (see locations 26- 36 and locations
171-205).
NX-8-EUR Installation manual Page 11 02/07/06

Program code
The factory default for the “Go To Program” code is [9]-[7]-[1]-[3] when using a 4-digit code; or,
if the 6-digit option is used, the default is [9]-[7]-[1]-[3]-[0]-[0]. The program code can also be
used as an arm/disarm code. If it is used as an arm/disarm code, and if open/close reports are
sent, the user code will be 255 (see location 43).
Quick arm feature
The NX-8 has a single-button “Quick Arm” feature which can be used to arm the system by
pressing the [Exit] key or the [Stay] key on the keypad. If closing reports are sent, the user code
will be 98 (see location 23 segment 1).
Recent closing
If this option is enabled, the NX-8 will send a “Recent Closing Report” to the central station if
an alarm occurs within 5 minutes after the panel is armed. The user number that was used to
arm the system will also be sent (see location 23 segment 3).
Re-exit
The NX-8 can restart the exit delay for a quick exit without the need to disarm the system; this
is done by pressing the [Exit] key while the system is still armed (= after exit delay has expired).
The re-exit is also logged (see location 23 segment 1).
Shutdown
This mode will cause the keypads to extinguish all LED’s, except the “Power” LED, and to refuse
keypresses (see location 21).
Siren blast for arming
The NX-8 can be programmed to give a one-second siren blast when the panel is armed, at
the end of the exit delay, or when the central station receiver acknowledges the closing report.
It can also give one blast for remote (keyswitch) arming, and two blasts for remote disarming
(see location 37 segment 1).
Siren supervision
The NX-8 has a “Siren Supervision” circuit that will constantly monitor the siren on the NX-8; it
can also be programmed to report if the wires are cut (see location 37 segment 3).
Silent exit option
The exit delay can be silenced by pressing [*]-[Exit] before arming the control panel, or when
using the re-exit feature. The exit delay can also be silenced permanently in all partitions (see
location 37 segment 5).
Start/end programming and end downloading
A report can be sent when local programming is started and ended. A report can also be sent
when a download session ends (see location 37 segment 4).
Swinger shutdown
This feature allows one or more zones to be bypassed automatically after a specified number
of alarms (from 0 to 255). If immediate restore is enabled in location 37, the alarms (and
restores, if this option is enabled) will be sent as they occur. If immediate restore is not
enabled, a second or subsequent alarm will not be sent until the siren times out (see location
37 segment 2 and location 38).
Telephone line monitor
The NX-8 has a telephone line monitor which monitors the voltage and current of the
telephone line, in order to detect a faulty phone line. This condition can also be reported to the
central station. If the report is enabled, only the telephone line restore will be reported. A
telephone line cut is always logged (see locations 37 segment 3, location 39 and location 40
segment 5).
NX-8-EUR Installation manual Page 12 02/07/06

Two call answering machine defeat
If this option is enabled, two telephone calls must be made to the premises in order to defeat
an answering machine. On the first call, let the phone ring one or two times. The control panel
will detect these rings and start a 45-second timer; during this time, the control panel will
answer the next call on the first ring. This is not recommended for commercial applications
(see location 21).
User authorization to enter program mode
Entering program mode via the installer code is only possible within 60 seconds following a
user code entry (see location 41,segment1, option 6).
Walktest mode
Walktest mode is used to test your system without activating the siren and/or communicator.
The walktest mode is activated by pressing [*]-[chime] followed by the master code.
Walktest mode is not possible if any partition is armed or if the communicator is active.
Wireless sensor absent/low battery
The NX-8 will send a report to the central station when a wireless sensor has detected a low
battery, or has not reported to the receiver. The “Service” LED will light up when either of these
conditions exists (see location 37 segment 4).
Zone activity monitor
This feature will send a report to the central station when a particular zone does not change
conditions within the specified number of hours/days programmed (see location 37, location
40 and locations 110-169).
Zone bypassed sounder alert
With this feature enabled, if a zone is bypassed, the NX-8 will beep the keypad sounder when
the zone is armed (see location 23 segment 2).
Zone Doubling
This feature allows you to use the eight zones on the panel as sixteen normally closed zones.
When this feature is used, European double E.O.L. configuration cannot be used on the first
sixteen zones. THIS FEATURE DOES NOT INCREASE THE TOTAL NUMBER OF AVAILABLE ZONES
BEYOND 192. If one of the sixteen zones
must be a fire zone, it must be one of Zones 1 to 8. The corresponding upper zone will become
unavailable. For example: if Zone 6 is a fire zone, then Zone 14 will not be available. (See
location 37, segment 5).
NX-8-EUR Installation manual Page 13 02/07/06

PROGRAMMING THE NX-8 KEYPADS
Programming the LED keypads
This section describes how to program the address and partition for each keypad, and it also
explains the options that are available. The address of the keypad is important because the
panel uses it to supervise the keypads.
The factory default for the master code is [1]-[2]-[3]-[4] when using a 4-digit code, or [1]-[2]-
[3]-[4]-[5]-[6] for a 6-digit code. The factory default for the “Go To Program” code is [9]-[7]-[1]-
[3] for a 4-digit code, or [9]-[7]-[1]-[3]-[0]-[0] for a 6-digit code.
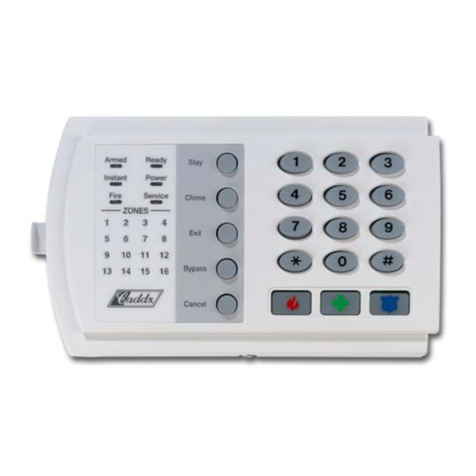
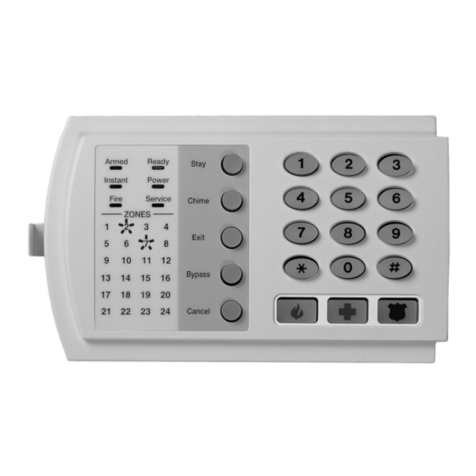
[*]-[9]-[3] SET KEYPAD OPTIONS
1. Enter [*]-[9]-[3] [program code]- the “Service” LED will flash.
2. LED’s 1-8 can now be toggled on/off to enable/disable the following functions:
3. After enabling/disabling the desired functions press [*]
LED Keypad feature enabled
1 Box tamper on
2 Enable silent keypad option (no entry/exit delay sounder, no chime)
3 Enable Ding Dong sound for chime - If this is off, the chime will be a single tone
(see location 40).
4 Enable keypress silence option
(Silences the pulsing keypad sounder for 5 seconds when a key is pressed).
5 Enable armed status suppression
(Will not allow the keypad to display faulted or bypassed zones when the system is
armed).
6 Enable panic, fire, medical beep tone
(Will sound a short beep to verify that the keypress has been accepted).
7 Suppresses the “Service” LED
(Will not allow the “Service” LED to light up for any reason. If there is a system
malfunction (trouble), pressing [*]-[2] will still display the service menu.)
8 Enable multi-partition viewing
(Enables temporary viewing of all partitions, by pressing [*]-[1]-[partition number]).
NX-8-EUR Installation manual Page 14 02/07/06

[*]-[9]-[4] SET KEYPAD NUMBER AND PARTITION
1. Enter [*]-[9]-[4]-[program code]- the “Service” LED and the “Instant” LED will flash.
2. Enter the keypad number (1-8).
3. Press [*]- the “Instant” LED will illuminate steadily, and the “Service” LED will carry on
flashing.
4. Enter the partition number for the keypad. The keypad will automatically exit this mode
now).
[*]-[9]-[5] SET ELAPSED INCREMENTS (HOURS/DAYS) SINCE LAST AUTOTEST
1. Enter [*]-[9]-[5]-[program code]- the “Service” LED will flash.
2. Enter [100's digit] -[10's digit]-[1's digit]-[#].
[*]-[9]-[6] SET SYSTEM DATE
1. Enter [*]-[9]-[6]- the “Service” LED will flash.
2. Enter [master code]-[day of week (1=Sun)]-[month 10's digit]-[month 1's digit]-[day 10's
digit].
3. [day 1's digit]-[year 10's digit]-[year 1's digit].
[*]-[9]-[7] SET SYSTEM CLOCK
1. Enter [*]-[9]-[7]- the “Service” LED will flash.
2. Enter [master code]-[hour 10's digit]-[hour 1's digit]-[minutes 10's digit]-[minutes 1's
digit].
Note: the clock is a 24-hour clock.
[*]-[9]-[8] INITIATE CALLBACK
Pressing [*]-[9]-[8] while the system is disarmed will cause the control panel to perform a
callback for a download.
NOTE: A VALID USER CODE MAY BE REQUIRED AFTER [*]-[9]-[8], IF ENABLED IN LOCATION
41.
[*]-[9]-[9] ANSWER DOWNLOAD
Pressing [*]-[9]-[9] while the system is disarmed will cause the control panel to seize the phone
line for a download.
NOTE: A VALID USER CODE MAY BE REQUIRED AFTER [*]-[9]-[9], IF ENABLED IN LOCATION
41.
NX-8-EUR Installation manual Page 15 02/07/06

[*]-[5] CHANGING USER CODES
1. Enter [*]-[5]-[master code]- the “Ready” LED will flash.
2. Enter the 3 digit user number (always 3 digits, such as “003” for user 3)- the “Ready” LED
will illuminate steadily.
3. Enter the new user code designated for the person in question - the “Ready” LED will
flash, indicating that the code has been accepted. If the code is rejected, the sounder will
beep 3 times.
4. If another user code needs to be programmed, return to step 2.
5. Press [#] while the “Ready” LED is flashing in order to exit the user code programming
mode.
6. Pressing four times (for 4-digit code) can erase a user code or six times (for 6-digit code)
the “Cancel” key.
[*]-[6] ASSIGNING AUTHORITY LEVEL
1. Enter [*]-[6]-[master code]- the “Ready” LED will flash.
2. Enter [3 digit user number] (always 3 digits, such as 003 for user 3)- the “Ready” LED will
illuminate steadily and the “Instant” LED will flash. Refer to the chart below for the
description of each LED. Turn on the LED for the features that you want.
LED ATTRIBUTES IF LED 8 IS OFF LED ATTRIBUTES IF LED 8 IS ON
1 Reserved 1 Activate output 1
2 Arm only 2 Activate output 2
3 Arm only after closing window 3 Activate output 3
4 Master arm/disarm (can program
other codes)
4 Activate output 4
5 Arm/disarm code 5 Arm/disarm code
6 Allowed to bypass zones (see location
23)
6 Allowed to bypass zones (see location
23)
7 Code will send open / close reports 7 Code will send open / close reports
8 If this LED is on, LED’s 1-7 will use the
chart too the right
8 If this LED is off, LED’s 1-7 will use the
chart on the left
1. Enter [*]: The “Instant” LED will illuminate steadily.
This moves you to the ‘partition enable’. (This tells the system which partition this user
can arm/disarm.) LED’s 1-8 will light up for each partition that the user is authorised to
arm/disarm. To change any of these numbers, press 1-8 to permit or deny access to the
user. (Example: If LED 2 is lit, then the user has been assigned access to that partition. By
pressing the [2] key, the LED will go out, indicating the user has been denied access to
that partition.)
2. Enter [*]:
This brings you back to step 2 above. At this point, you may enter another user number to
which you can assign attributes. You may continue this procedure until you have
assigned authority levels to all user numbers; otherwise, you may press the [#] key to exit
the assigning authority level program.
NX-8-EUR Installation manual Page 16 02/07/06

NOTE:
ANY MASTER ARM/DISARM CODE CAN ADD OR CHANGE A USER CODE IF THE MASTER CODE
HAS ACCESS TO THE SAME PARTITIONS AS THE CODE BEING ADDED/CHANGED.
CONSEQUENTLY, WHEN PROGRAMMING THE USER CODES FOR A PARTITIONED SYSTEM,
LEAVE AT LEAST ONE CODE WITH ACCESS TO ALL PARTITIONS. UNLESS YOU DO THIS, YOU
WILL NOT BE ABLE TO ADD NEW USERS. (THE CODE CAN BE THE “GO TO PROGRAM CODE”,
IF ENABLED IN LOCATION 43). IF YOU WANT TO LET THE END USER ADD NEW CODES, YOU
MUST REMOVE THE PARTITION AUTHORITY FROM ALL BLANK CODES.
[*]-[CHIME] ACTIVATING WALKTEST:
1. Enter [*]-[CHIME].
2. Enter [Master code].
3. Activate all sensors to test. Each activation of a sensor is confirmed with a “ding dong”
sound with a corresponding flashing zone-indicator.
4. Enter [Master code]. Herewith the walktest-mode is left.
Remark: Walktest mode is not possible if any partition is armed or if the communicator is
active.
Additional keypad functions are described in the appropriate user manual
NX-8-EUR Installation manual Page 17 02/07/06

Programming the NX-148 LCD keypads
This section describes how to program the address and partition for each keypad, and it also
explains the options that are available. The address of the keypad is important because the
panel uses it to supervise the keypads.
The factory default for the Master code is [1]-[2]-[3]-[4] when using a 4-digit code, or [1]-[2]-
[3]-[4]-[5]-[6] for a 6-digit code. The factory default for the “Go To Program” code is [9]-[7]-[1]-
[3] when using a 4-digit code, or [9]-[7]-[1]-[3]-[0]-[0] for a 6-digit code.
[*]-[9]-[1] ADJUSTING THE VIEW / BRIGHTNESS OF THE LCD
1. Enter [*]-[9]-[1] The LCD screen will prompt for a “master” code.
2. Enter [master code] The LCD will now prompt you to increase or reduce
the viewing angle. By using the scroll keys to the right
of the LCD, you can increase or reduce the text-
viewing angle.
3. To advance to the brightness
option, press [*]
The LCD will prompt you to brighten or dim the LCD
lighting. Use the scroll keys again to set the desired
brightness. When completed, exit by pressing [*].
[*]-[9]-[2] PROGRAMMING CUSTOM MESSAGES IN THE KEYPAD
1. Enter [*]-[9]-[2] The LCD screen will prompt for the “Go To Program”
code.
2. Enter [program code] The LCD will now prompt you to enter the message
number followed by [#]. Zones 1 through 192 custom
messages are message numbers 1-192 respectively.
Message 193 - Custom message top line.
Message 194 - Custom message bottom line.
Message 195 – Shutdown message top line.
Message 196 – Shutdown message bottom line.
3. Enter message number to edit,
followed by [#]
The LCD will display the zone number on the top line.
The zone description will be displayed on the bottom
line. Use the instructions on page 29-30 to edit
character data.
4. When finished, exit by pressing [EXIT] while the LCD screen is prompting for a zone
message #. Any changes will automatically be copied to all other LCD keypads in the
system. NOTE: If you want a LCD keypad to have a different custom message, you must
enable custom message lock under the [*]-[9]-[3] function.
NX-8-EUR Installation manual Page 18 02/07/06

[*]-[9]-[3] SET KEYPAD OPTIONS
1. Enter [*]-[9]-[3] The LCD screen will prompt for a code.
2. Enter [program code] The LCD will now prompt you through the options
listed in the following chart. The current state of the
option will be shown in the lower right corner of the
display. Press [*] to exit the current state without any
changes. Otherwise, follow the directions on the
bottom line to select the desired option. When
finished, press [*] to move to the next option.
OPT KEYPAD FEATURES
1 CASE TAMPER ON?
Tamper switch of keypad housing active
2 SILENT KEYPAD?
Enable silent keypad option. If this is on, silent keypad is enabled for entry/exit
delay and chime.
3 DING-DONG CHIME?
Enable ding-dong sound for chime. If this is off, the chime will be a single tone.
4 5 SEC. SILENCE?
Enable keypress silence option. Silences the pulsing keypad sounder for 5
seconds when a key is pressed.
5 ARMED ZONE INFO?
Enable armed status suppression. If this is on, the keypad will not display faulted
or bypassed zones when the system is armed.
6 BEEP ON PANICS?
Enable panic, fire, medical beep tone. Will sound a short beep to verify that the
keypress has been accepted.
7 DISABLE SERVICE?
Suppresses the “Service” Message. This will not allow the “Service” message to be
displayed for any reason. If there is a system malfunction (trouble), pressing [*]-
[2] will still display the “Service” menu.
8 MASTER KEYPAD?
Enable multi-partition mode.
9 CUSTOM MESSAGE?
Enable custom message display.
10 CLOCK?
Enable clock display.
11 CUSTOM MSG. LOCK?
Enable custom message lock. Prevents the custom message from being
overwritten during keypad copy.
12 SELECT AN OPTION
1234 - - - -
NX-8-EUR Installation manual Page 19 02/07/06

Remark : In the menu “Select an option” 8 additional options can be selected. The
options 5 until 8 are not used for the moment and may therefore not be
selected. The options 1 and 4 are described below:
Option 1 : On the LCD screen “press * for help”. By this the status of the system and
the message “press * for help” are alternately displayed on the LCD screen.
This is only to inform the user of the user’s menu.
Option 2 : Light continuously on. By this the lights of the LCD display and the keys will
continue to light up, independently of the programming of the control panel.
(Adr 23, Segm. 2, option 1 = turn off the lights after one minute of inactivity).
Option 3 : ON if PIN should be hidden when programming user codes.
Option 4 : ON suppresses beeps when an RF transmission is lost.
Option 5 : Reserved (Do not program).
Option 6 :
Option 7 :
Disable ARM and BYPASS led for Norway/Sweden (NX-148E v3.47)
Any zone Alarm has priority over the Pre-Alarm message “Type code to
disarm” on the LCD screen (NX-148E v3.49)
Option 8 : Reserved (Do not program).
[*]-[9]-[4] SET KEYPAD NUMBER AND PARTITION
1. Enter [*]-[9]-[4] The LCD screen will prompt for a code.
2. Enter [program code] The LCD will now prompt you for the keypad number
followed by [*]. The current keypad number will be
displayed in the lower right hand corner.
3. Enter the keypad number
followed by [*]
The LCD will now prompt you for the partition number.
The current partition will be displayed in the lower
right hand corner.
4. Enter the partition number for
the keypad
The keypad will automatically exit this mode now.
NX-8-EUR Installation manual Page 20 02/07/06
Table of contents
Other GE Control Panel manuals

GE
GE SIMON XT User manual

GE
GE Interlogix User manual

GE
GE NX-4V2 Installation manual

GE
GE EST iO64 Product manual

GE
GE Interlogix ARITECH ATS1211 User manual

GE
GE Allegro User manual

GE
GE ATS4000 Operating instructions

GE
GE Entelli-Switch 250 User manual

GE
GE Concord express User manual

GE
GE SIMON XT User manual

GE
GE NetworX Series Installation and operation manual

GE
GE NetworX NX-8E User manual

GE
GE ZITON ZP3 User manual

GE
GE 45129 User manual

GE
GE Kilsen KFP-CF2 User manual

GE
GE NetworX NX-6 Installation manual

GE
GE Kilsen KFP-CF Series User manual

GE
GE Allegro 60-874-95R User manual

GE
GE SIMON XT Operating instructions

GE
GE SIMON XT User manual