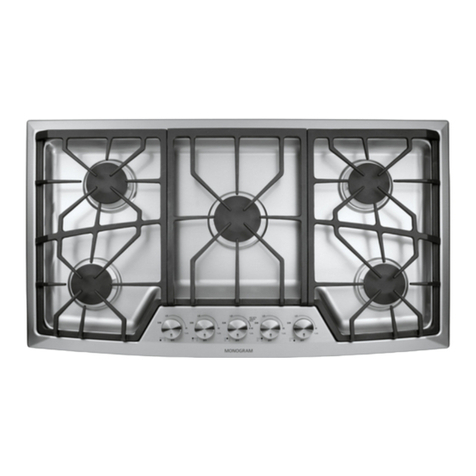
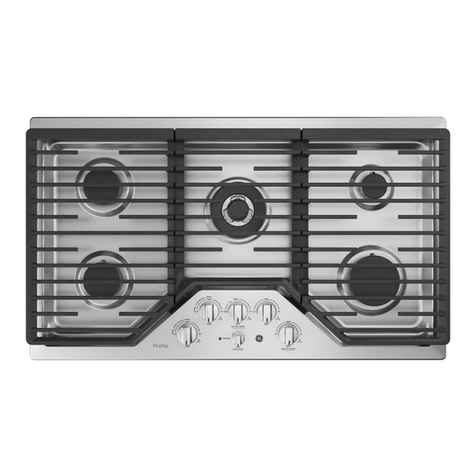
GE JGP329 User manual

GEAppliances.com
(.13
LD
I
Safety Instructions ....... 2-4
Operating Instructions
Control Lock .................... S
Cookware ...................... 6
Dual Stuck Burner ............... 5
Flame Size ..................... 6
Lighting a Burner ............... 5
PowerBoiF" Burner .............. 5
Sealed Gas Burners ............. 5
Care and Cleaning
Burners and
Cooktop Electrodes .............. 8
Burner Bases....................8
Burner Cops and Heads .........8
Burner Grates ................... 9
Burner Head and
Cop Replacement ............... 9
Control Knobs ................... 7
Electrodes ...................... 8
Gloss Cooktop ............. 10, 11
Porcelain Enamel Cooktop ....... 7
Shipping Film and Tope .......... 7
Stainless Steel Surfaces ......... 7
Troubleshooting Tips.. 12,13
Consumer Support
Consumer Support ............ 20
Ownership Registration
for Customers in
Canada only ............... 15, 16
Warranty (Canada) ............. 19
Warranty (U.S.)................. 18
JGP329
JGP333
JGP940
JGP970
POP943
POP966
In Canada:
www.G EAppliances.ca
Write the model and serial
numbers here:
Model #
Serial #
You can findthem on a label
underthecooktop.
Printed on
Recycled Paper
Printed in the United States 49-80640 11-11 GE

IMPORTANT SAFETY INFORMATION.
READ ALL INSTRUCTIONS BEFORE USING.
[ik WARNING I If the information in this manual is not followed exactlg, a fire or explosion mag
result, causing propertg damage, personal injurg or death.
- Do not store or use gasoline or other flammable vapors and liquids in the vicinity of this or any other appliance.
- WHAT TO DO IFYOU SMELL GAS
::, Do not try to light any appliance.
::, Do not touch any electrical switch; do not use any phone in your building.
::, Immediately call your gas supplier from a neighbor's phone. Follow the gas supplier's instructions.
::_ If you cannot reach your gas supplier, call the fire department.
- Installation and service must be performed by a qualified installer, service agency or the gas supplier.
SAVE THESEINSTRUCTIONS

IA WARNING IGENERALSAFETYINSTRUCTIONS
GEAppliances.com
WARNINGI
NEVER use this appliance as a space heater to heat
or warm the room. Doing so may result in carbon
monoxide poisoning and overheating of the oven.
Use this upplionce for its intended purpose os described
in this owner's munuol.
Hove your cooktop instolled und properly grounded by
o quolified instuller in uccordonce with the provided
instollotion instructions. Any udjustment und service
should be performed only by quolified gos oppliunce
instollers or service techniciuns. Do not uttempt to
repoir or reploce uny port of your cooktop unless it is
specificolly recommended in this monuol.
::_Your cooktop is shipped from the fuctory set for use
with noturol gos. It con be converted for use with LP
gos. If required, these odjustments must be mode by o
quolified technicion in occordonce with the instollotion
instructions ond Iocol codes. The ogency performing this
work ossumes responsibility for the conversion.
i Hove the installer show you the Iocotion of the cooktop
gos shut-off volve ond how to turn it off if necessory.
Before performing ony service, unplug the cooktop
or disconnect the power supply ot the household
distribution ponel by removing the fuse or switching off
the circuit breoker.
Be sure oil pocking moteriols ore removed from the
product before operoting to prevent ignition of these
moteriols.
iiiiiil
iiiiiiili_
iiiiiiili_
iiiiiiili_
iiiiiiili_
iiiiiiili_
iiiiiiili_
iiiiiiili_
Avoid scrotching or impocting gloss cooktop. Doing so
moy leod to gloss breokoge. Do not cook on o product
with broken gloss. Shock, fire or cuts moy occur.
Do not leove children olone or unottended in on
oreo where on opplionce is in use. They should never
be ollowed to climb, sit or stond on ony port of the
opplionce.
Do not store items of interest to children obove the
cooktop - children climbing on the cooktop to reoch
items could be seriously injured.
Do not ollow onyone to climb, stond or hong on the
cooktop.
Use only dry pot holders-moist or domp pot holders on
hot surfoces moy result in burns from steom. Do not let
pot holders touch surfoce burners or burner grotes,
Be coreful not to touch hot surfoces of the cooktop.
Potentiolly hot surfoces include burners, grotes, ond
cooktop.
Do not heot unopened food contoiners. Pressure could
build up ond the contoiner could burst, cousing on
injury.
Cook meot ond poultry thoroughly-meot to ot leost on
internol temperoture of 160°F ond poultry to ot leost
on internol temperoture of 180°F. Cooking to these
temperotures usuolly protects ogoinst foodborne illness.
SAVE THESE INSTRUCTIONS 3

IMPORTANT SAFETY INFOR/V/AT/ON.
READ ALL INSTRUCTIONS BEFORE USING.
IA WARNING IKEEPFLAMMABLE MATERIALSAWAY FROM THE COOKTOP
Do not store or use flammable materials near the
cooktop, including paper, plastic, pot holders, linens,
wall coverings, curtains, drapes and gasoline or other
flammable vapors and liquids.
Never wear loose-fitting or hanging garments while
using the appliance. Avoid storing commonly used items
in cabinets above the cooktop and be careful when
iii}}i
iii}i}}li_
reaching over the cooktop. Clothing in close proximity to
burners or hot surfaces may ignite causing severe burns.
Do not let cooking grease or other flammable materials
accumulate in or near the cooktop. Grease on the
cooktop may ignite.
Clean ventilating hoods frequently. Grease should not
be allowed to accumulate on the hood or filter.
IA WARNINGI INTHEEVENTOFA FIRE,TAKETHEFOLLOWINGSTEPS
TO PREVENTINJURYAND FIRESPREADING:
Do not use water on grease fires. Never pick up a
flaming pan. Turn the controls off. Smother a flaming
pan on a surface burner by covering the pan completely
with a well-fitting lid, cookie sheet or flat troy. If
necessary, use o multi-purpose dry chemical or foam-
type fire extinguisher.
[A WARNING1COOKTOP SAFETYINSTRUCTIONS
Never leave the surface burners unattended at medium
or high heat settings. Foods, especially oily foods, may
ignite resulting in fire that could spread to surrounding
cabinets.
_::Never leave oil unattended while frying. If allowed to
heat beyond its smoking point, oil may ignite resulting
in fire that may spread to surrounding cabinets. Use a
deep fat thermometer whenever possible to monitor oil
temperature.
To ovoid oil spillover and fire, use a minimum amount of
oil when shallow pan-frying and ovoid cooking frozen
foods with excessive amounts of ice.
_:: Use proper pan size and avoid pans that are unstable
or easily tipped. Select cookware that ismatched to the
size of the burner. Burner flames should be adjusted so
that they do not extend beyond the bottom of the pan.
Excessive flame may be hazardous.
Always use the LITEposition when igniting the top
burners and make sure the burners have ignited.
When usingglass/ceramic cookware, make sure itis
suitable for cooktop service;others may break because
of sudden change intemperature.
To minimize the possibility of burns, ignition of
flammable materials and spillage, the handle of a
container should be turned toward the center of the
cooktop without extending over nearby burners.
When preparing flaming foods under a hood, turn the
fan on.
Do not use a wok with a round metal support ring. the
ring may trap heat and block air to the burner resulting
in a carbon monoxide hazard.
iii}}i
iii}i}}li_
Do not attempt to lift the cooktop. Doing so may
damage the gas tubing to the surface burners resulting
in a gas leak and risk of fire.
When disabling Gas/Control Lockout (on some models),
make sure the surface controls are set to the OFF
position. This will prevent unintended gas flow from the
burners.
iii}}i
Do not use aluminum foil to cover the grates or line
any part of the cooktop. Doing so may result in carbon
monoxide poisoning, overheating of the cooktop
surfaces, or a potential fire hazard.
4 SAVE THESE INSTRUCTIONS
Usingthe cooktopburners. GEAppliunces.com
Throughout this manual, features and appearance may vary from your model.
Control Lock (onsomemodels)
LOCKt
CONTROL LOCK
To lock the cooktop and prevent unwanted use,
turn the control lock knob counterclockwise to
LOCK.An indicator light will glow to show that
the cooktop islocked.
When locked,the cooktop will sound if any
control knob isset to any position other than
OFF.
Tounlock,turn the control lock knob to
UNLOCK.
/How to Light a Burner
Make surethe control lock knob isin the
UNLOCKposition.
Your cooktop burnersare lit by electric ignition,
eliminating the need for standing pilot lights
with constantly burning flames.
Pushthe control knobdown and turn it to the
LITE position.After the burner ignites,turn
the knobto adjust the flame size.Toturn the
burner off,turn the knob clockwise asfar as it
will go,to the OFF position.
Checkto be surethe burner you turn on isthe
oneyou want to use.
Besureyou turn the control knobto OFF
when you finish cooking.
Incase ofa power failure, you can light the
burnerswith a match. Hold a lit match to
the burner;thenpush in and turn thecontrol
knobto the LITEposition. Useextreme caution
when lighting burnersthis way. Burnersin use
when an electricalpower failure occurswill
continue to operate normally.
Do not operate the burner for an extended
period of time without cookware on the grate.
The finish on the grate may chip without
cookware to absorb the heat.
Besurethe burners and gratesare cool
beforeyou placeyour hand, a pot holder,
cleaningcloths or other materials on them.
Sealed Gas Burners
Thesmallest burner in the right rear and the
center burner (onsome models)are the simmer
burners.These burners can be turned down
to LOor SIMMER(depending on model)for a
very low setting. They provide precise cooking
performance for delicate foods such as sauces
or foods that require low heat for a long
cooking time.
The medium (left rear)and the large (leftfront)
burners are the general-purpose burners that
can be turned down from HI to LOto suit a
wide range of cooking needs.
Dual Stack Burner (onsome models)
Theextra large right front burner has maximum
heating and precisesimmer capability. It can be
turned down from PowerBoilTM to SIMMERfor a
wide range of cooking applications.
PowerBoiF Burner (on some models)
Theextra large right front burner has special
PowerBoiF"settings.Thisfeature should only be
usedwith cookware lY' or larger in diameter,
and flames should never be allowed to extend
up the sidesof the cookware.Thisfeature is
designedto quickly bring large amounts of
liquid in pots lY' or larger in diameter to a boil.

Using the cooktopburners.
How to Select Flame Size
Forsafe handling of cookware, neverletthe
flames extend upthe sidesof the cookware.
Watch the flame, not the knob, asyou reduce
heat.Theflame size on a gas burner should
match the cookware
you are using.
Anyflame larger than the bottom of the
cookware iswasted and only servesto heat the
handle.
Use a flat-bottomed wok.
Wok This Way
Werecommend that you usea 14-inch or
smaller flat-bottomed wok. Thegare available at
gout local retail store.
Onlyaflat-bottomed wok should be used.
Hake surethe wok bottom sitsflat on the
grate.
Donot usea wok support ring.Placingthe
ring over the burner or grate may causethe
burner to work improperly, resulting in carbon
monoxide levelsabove allowable standards.
Thiscould be dangerous to your health.
Cookware
Aluminum: Hedium-weight cookware is
recommended because it heats quickly and
evenly.Host foods brown evenly in aluminum
cookware. Usesaucepanswith tight-fitting
lidswhen cooking with minimum amounts of
water.
Enamelware: Under some conditions, the
enamel of some cookware may melt. Follow
cookware manufacturer's recommendations
for cooking methods.
Glass: Thereare two types of glass cookware:
those for oven useonly and those for cooktop
cooking (saucepans,coffee and tea pots).Glass
conducts heat very slowly.
Cast Iron: Ifheated slowly, most cookware will
give satisfactory results.
HeatproofGlass-Ceramic: Canbe used for
either surface or ovencooking. It conducts
heat very slowlyand cools very slowly.Check
cookware manufacturer's directions to be sure
it can be usedon o gas cooktop.
Stainless Steel: This metal alone has poor
heating properties and is usuallycombined
with copper, aluminum or other metals for
improved heat distribution. Combination metal
cookware usuallyworks satisfactorily if it is
usedwith medium heat asthe manufacturer
recommends.
Home Canning Tips
Be sure the canner is centered over the burner.
To prevent burns from steam or heat, use
caution when canning.
Userecipes and procedures from reputable
sources.Theseare available from
manufacturers such as Ball®and Kerr and the
Department of Agriculture ExtensionService.

Care and cleaning of the cooktop. OEAppliances.com
Be sure electrical power is off ond oil surfaces ore cool before cleaning any port of the cooktop.
How to Remove Protective Shipping Film
Carefullygrasp u corner of the protective
shippingfilm with your fingers and slowly peel
it from the appliance surface. Donot useany
sharp items to remove the film. Removeall of
the film before usingthe appliance for the first
time.
and Packaging Tape
Toassure no damage is done to the finish of
the product, the safest way to remove the
adhesive left from packaging tape on new
appliances isan application of a household
liquid dishwashing detergent. Applywith a soft
cloth and allowto soak.
NOTE:Theadhesivemust be removed from
all parts beforeusingthe cooktop. It cannot be
removed if it isbakedon.
Pull the knob straight up off the stem.
Control Knobs
Thecontrol knobs mag beremoved for easier
cleaning.
Hake surethe knobs are in the OFFpositions
and pull them straight off the stems for
cleaning.
Theknobs can be cleaned in a dishwasher or
they may also be washed with soap and water.
Hake surethe insidesof the knobsare dry
before replacing.
Replacethe knobs inthe OFF position to
ensure proper placement.
Porcelain Enamel Cooktop (onsomemodels)
Theporcelain enamel finish issturdy but
breakable if misused.Thisfinish isacid-
resistant. However,any acidic foods spilled
(suchasfruit juices,tomato or vinegar) should
not be permitted to remain on the finish.
If acidsspill on the cooktop while it ishot, use
a dry paper towel or cloth to wipe it up right
awag. Whenthe surfacehas cooled,wash with
an all-purpose cleanerand water. Rinsewell
Forother spillssuch asfat spatterings,wash with
soapand water or on all-purposecleanerafter
the surfacehas cooled.Rinsewell. Polishwith a
dry cloth.
Stainless Steel Surfaces (onsome models)
Do not use a steel wool pad; it will scratch the
surface.
Toclean the stainless steelsurface, use warm
sudsywater or a stainless steelcleaner or
polish.Always wipe the surface in the direction
of the grain. Followthe cleaner instructions for
cleaning the stainless steel surface.
Toinquire about purchasing stainlesssteel
appliance cleaner or polish,or to find the
location of u dealer or Camco PartsStore
nearest you, pleasecallour toll-free number:
National Parts Centerl.800.626.2002(U.S.)
1.800.661.1616(Canada]
GEAppliances.com(U.S.)
www.GEAppliances.ca (Canada]

Care and cleaning of the cooktop.
WARNING
DO NOT OPERATE A BURNER
WITHOUT ALL BURNER PARTS
IN PLACE.
Burners and Cooktop Electrodes
Turnall controls off beforeremoving burner
parts.
INOTE:Before removing the burner caps
and heads, remember their size and
location. Replace them in the same
location after cleaning.
The burner assembliesshould always be
kept clean. Spilloversshould be cleaned
immediately; they can clog the openings inthe
burner assemblies.
Removethe burner grates, burner caps and
burner heads for easy cleaning.
NOTES:
Do not attempt to remove the electrode from
the cooktop or ang screws from the burner
head or burner bose.
Donot usesteelwool or scouring powders
to cleonthe burners.
Burner Cups and Heads
Wash burner caps and burner heads inhot,
soapy water and rinsewith clean running
water. You may scour with a plastic scouring
pad to remove burned-on food particles.
Usea sewing needleor twist tie to unclog the
small holes inthe burner head, if required.
To remove burned-on food, soakthe burner
heads in a solution of mild liquid dishwashing
detergent and hot water for up to 20-30
minutes, if required. Formore stubborn stains,
usea toothbrush.
If the spillwent insidethe burner head
assembly (rightfront burner on models JGP333,
PGP943,and PGP966),wash it under running
water. Shaketo remove any excesswater. Air
dry and make surethe small ignitor holesare
open.
NOTE:Do not wash any burner parts
in adishwasher.
Burner Bases
The burner bases should not be removed for
cleaning.
To clean the burner bases, use soapy water and
aplastic scouring pad. Hake sure that no water
gets into the burner bases and the brass gas
orifices.
Wipe cleanwith adamp cloth.Allow them to
dry fully before using.
Cooktop Electrode
Clean this metal part
Do not clean this
white ceramic part
with an emery board
NOTE: Do not attempt to remove
the electrode from the cooktop.
Electrodes
Theelectrode of the spark igniter isexposed
beyond the surface of the burner base.When
cleaning the cooktop, be careful not to snag the
electrode of the spark igniter with your cleaning
cloth. Damage to the igniter could occur.
Becareful not to push in any cooktop controls
while cleaning the cooktop.
A slight electrical shock might result which
could cause you to knock over
hot cookware.
Hake surethat the white ceramic electrodes
in the cooktop are clear of soiland dry. Clean
the metal part of the electrode with a soft cloth.
Forstubborn, hardened soil,clean the metal
portion of the electrode with an emery board.
Do not clean the white ceramic portion of the
electrode with the emery board. It isacceptable
to clean the white portion ofthe electrode with
a soft cloth, but not with an emery board.
Before reassemblingthe surface burners, push
down on each of the white ceramic electrodes
to make surethey are pressed against the
burner bases.

GEAppliances.com
Burner cap properly seated
€
Burner cap notproperly seated
Burner Head and Cap Replacement
Replacethe burner head onto the burner base,
making surethat the head is properly oriented
overthe burner base andthe electrode. Make
sureto placethe correct burner head on the
correct burner baseand that the burner head
sitslevelon the burner base.The burner heads
are not interchangeable.
Replacethe burner cap onto the burner head,
making sureto placethe correct burner cap on
the correct burner head.Theburner caps are
not interchangeable.Also,make surethat the
burner caps are properly seated on the burner
heads.
JGP940 and JGP970 Kollburners)
Burner cop
Burner head
indentations base
Make sure thepins in the burner heads match
the burner base indentations and that they are
properly seated in them by rotating the heads
until they are level
JGP329, JGP333, PGP943 and
PGP966
L_
Burner base
Makesuretheslotin the burner head ispositioned
over the electrode.Theburner cap has three
to four pins.When replacing the cap, make sure
none of the pins sits in the stability chamber.
JGP333, PGP943 and PGP966
flight front burner onlg)
Burner cap
Burner head,/_
assembly _ Orifice
Electrode base
Makesure the hole in theburner head assembly
ispositioned over the electrode and that the burner
headis fully inserted inside the burner base.A small
gap between the base and head is normal
(On some models)
"OUTSIDE.... INSIDE.... OUTSIDE"
edge edges edge
(On some models)
"INSIDE"
edges
I
"OUTSIDE"
edge
Tabs
Burner Grates
Your cooktop has professionalstyle grates.
Thesegrates are designedfor specific
positions.Thesegrates should only be used
in their proper positions;they should not be
interchanged. Foryour convenience, the
undersidesof
the left and right grates are marked "OUTSIDE"
and "INSIDE".Makesurethat the sidesmarked
"OUTSIDE"are facing the outer edge ofthe
cooktop and the sidesmarked "INSIDE"are
facing eachother. All grates should
touch once they are
fully assembledon the
cooktop surface.
"OUTSIDE"
edge
Forcooktops with three grates,make
surethat the tabs on either sideof
the center grate fit into the slots
located on the "INSIDE"edge of the
sidegrates.
Liftthe burner grates out only when cool.
Grates should be washed regularly and,of
course,after spillovers.Wash them in the
dishwasher or in hot, soapy water and rinse
with cleanwater. When replacing the grates,
be sure they are positioned securely overthe
burners.
Although they are durable,the grates will
gradually losetheir shine, regardless ofthe
best careyou can give them. Thisisdue to their
continual exposure to high temperatures. You
will notice this sooner with lighter color grates.
Donot operate a burner for an extended period
of time without cookware on the grate. The
finish on the grate may chip without cookware
to absorb the heat.
NOTE:Donot cleanthe grates in a self-cleaning
oven.

Cleaningthe glass cooktop surface,consomemode s;
Clean gour cooktap after
each spill. Use CERAMA
BRYTE®Ceramic Cooktop
Cleaner.
Normal Dailg Use Cleaning
ONLYuseCERAMABRVTE®CeramicCooktop
Cleaneron the glasscooktop. Other creams
may not be aseffective.
To maintain and protect the surface ofyour
glasscooktop, follow these steps:
%Beforeusing the cooktop for the first time,
remove the burner grates and clean the
cooktop with CERAMABRYTE®Ceramic
Cooktop Cleaner.Thishelps protect the
top and makes cleanup easier.
[_] Daily useof CERAMABRYTE®Ceramic
Cooktop Cleanerwill help keepthe
cooktop lookingnew.
[] Shakethe cleaning cream well. Applya
few drops of CERAMABRYTE®Ceramic
Cooktop Cleanerdirectly to the cooktop.
[] Usea paper towel or CERAMABRYTE®
CleaningPad for CeramicCooktops to
cleanthe entire cooktop surface.
[] Use a dry cloth or paper towel to
remove all cleaning residue. No need to
rinse.
NOTE:It is verg important that gou DO NOT
heat the cooktop until it has been cleaned
thoroughlg.
Use a CERAMABRYTE®Cleaning
Pad for Ceramic Cool<tops.
Burned-On Residue
WARNING: DAMAGEragout
g/ass surface may occur if gou use scrub
pods other than those recommended.
[-_ Allow the cooktop to cool.
EERemovethe burner grates and spread a
few drops of CERAMABRYTE®Ceramic
CooktopCleaner on the entire burned
residuearea.
@Using the included CERAMABRYTE®
Cleaning Padfor Ceramic Cooktops,rub
the residue area, applying pressure as
needed.
@
If any residue remains, repeat the steps
listed above as needed.
For additional protection, after all
residue has been removed, polish the
entire surface with CERAMABRYTE®
Ceramic CooktopCleanerand a paper
towel.
The CERAMABRYTE® Ceramic
Cool<top.Scraper and all
recommended supplies are
available through our Parts Center.
.Seeinstructions under "ToOrder
Parts" section on next page.
NOTE:Do not use adull or
nicked blade.
Heavg, Burned-On Residue
%
EEAllow the cooktop to cool.
Removethe burner grates. Use a single-
edge razor blade scraper at
approximately a/45° angle against the
glass surface and scrape the soil. It will
be necessary to apply pressure to the
razor scraper in order to remove the
residue.
%After scraping with the razor scraper,
spread a few drops of CERAMABRYTE®
CeramicCooktop Cleaneron the entire
burned residuearea. Use the CERAMA
BRYTE®Cleaning Padto remove any
remaining residue.
For additional protection, after all
residue has been removed, polish the
entire surface with CERAMABRYTE®
Ceramic Cooktop Cleanerand a paper
towel.
10

GEAppliances.com
Metal Marks and Scratches
%Be careful not to slide pots and pans
across your cooktop. It will leave metal
markings on the cooktop surface.
These marks are removable using the
CERAIV]ABRYTE®Ceramic Cooktop Cleaner
with the CERAIV]ABRYTE®Cleaning Pad for
Ceramic Cooktops.
[] If pots with a thin overlay of aluminum or
copper are allowed to boil dry, the overlay
may leave black discoloration on the
cooktop.
Thisshould be removed immediately
before heating again or the discoloration
may be permanent.
Ak WARNING: Care u/Ucheck
the bottom of pans for roughness that would
scratch the cooktop.
Glass surface-potential for permanent damage.
Our testing shows that if
you are cooking high sugar
mixtures such asjelly or
fudge and have a spillover,
it can cause permanent
damage to the glass
surface unless the spillover
is immediately removed.
Damage from Sugary Spills and Melted Plastic
[] Turn off all surface burners and,with an
oven mitt, remove hot pans and grates.
Wearing an oven mitt:
a. Usea single-edgerazor blade scraper
(CERAIVlABRYTE®Ceramic Cooktop
Scraper)to move the spillto acool area
on the cooktop.
I-_ Don't usethe surface units again until all
of the residue has been completely
removed.
NOTE:Ifpitting or indentation in the glass
surfacehas already occurred,the cooktopglass
will haveto bereplaced.In this case,servicewill
be necessary.
b. Removethe spillwith paper towels.
r-_ Any remaining spillover should be left until
the surface of the cooktop has cooled.
To Order Parts
Toorder CERAIVlABRYTE®CeramicCooktop
Cleanerand the cooktop scraper,pleasecall
our toll-free number:
National Parts Center 800.626.2002.
CERAMABRYTE®Ceramic
Cooktop Cleaner .......... # WXIOX300
CERAMABRYIE®Ceramic
Cooktop Scraper .......... # WXIOX0302
Kit........................ # WB64XS027
(Kitincludes cream and cooktopscraper)
CERAMABRYI"E®Cleaning Pads for Ceramic
Cooktops ................. # WXlOX350
11

Before you call for service...
Troubleshooting Tips
Save time and money! Review the charts on these pages
first and you may not need to call for service.
PossibleCauses
Burners have yellow or Thecombustion quality of
yellow-tipped flames burner flames needs to be
determined visually.
What To Do
• Usethe illustrations belowto determine ifyour burner
flames are normal. If burner flames look likeA, call for
service.Normal burner flames should look likeB or C,
depending on the type of gasyou use.With LPgas,some
yellow tipping on outer cones isnormal.
A-Vellow flames B-Vellow tips C-Soft blue flames
Call for service on outer cones Normal for natural
Normal for LPgas gas
Control knobs Knob isn't pushed down. • Toturn from the OFF position, push the knob down
will not turn and then turn.
Burners do Plugon cooktopis not • Hakesure electrical plug isplugged into a live,properly
notlight completely inserted in the grounded outlet.
electrical outlet.
Gassupply not connected • Seethe Installation Instructions that came with your
or turned on. cooktop.
Afuse in LIourhome may be • Replacethe fuse orreset the circuit breaker.
blown or the circuit breaker
tripped.
Burnerparts not replaced • Seethe Coreand cleaning of thecooktop section.
correctly.
The electrodes under the • Seethe Coreand cleaning of thecooktop section.
burners are soiled.
Thewhite ceramic electrodes • Seethe Coreand cleaning of thecooktop section.
ore not securely seated under
the burners.
Cooktop is locked. • Unlockthe cooktop.Seethe Usingthe cooktop
burners section.
The igniter hole (on some • Seethe Coreand cleaning of thecooktop section.
models} is plugged.
Ticking sound of spark Control knob is still • Turnthe knob out of the LITEposition to the desired setting.
igniter persists after in the LITE position. • Turn the burner off and relight. If ticking is still present,
burner lights call for service.
Burner flames very Improper air to gas ratio. * If cooktop is connected to LPgas, check all steps
large or yellow in the Installation Instructions that came with
your cooktop.
12

GEAppliances.com
Cooktop makes sound
when acontrol knob
is turned on
Possible Causes
The cooktop is locked
{on some models}.
What To Do
•Turn the control lock knob to UNLOCK.
Scratches on cooktop
glass surface Cookware has been slid
across the cooktop surface,
leaving deposits.
Incorrect cleaning
methods being used.
Cookwore with rough bottoms
being usedor coarse particles
{salt or sand} were between
the cookware and the surface
of the cooktop.
• Seethe Cleaningtheglass cooktop surfacesection.
• Scratches ore not removable.Tiny scratches will
become lessvisible in time as o result of cleaning.
• Toovoid scratches, usethe recommended cleaning
procedures. Make surebottoms of cookwore ore cleon
before use,and use cookwore with smooth bottoms.
Areas of discoloration Hot surface on o model • This isnormal. The surface may appear discolored
on the glass cooktop with a light-colored cooktop, when it is hot. This istemporary and will disappear
surface as the gloss cools.
Food spillovers not cleaned • See the Cleaning the gloss cooktop surface section.
before next use.
Plastic melted Hot cooktop came into • See the Gloss surface potential for permanent
to the glass cooktop contact with plastic placed damage section in the Cleaning the gloss cooktop
surface on the hot cooktop, surface section.
Pitting (or indentation) Hot sugar mixture spilled • Coil o qualified technician for replacement.
ofthecooktop on the cooktop.
13

Notes.
14

Please place in envelope and mail to:
Veuillez mettre dans une enveloppe et envoyez & :
OWNERSHIPREGISTRATION
P.O. BOX1780
MISSISSAUGA,ONTARIO
L4Y4G1
(FORCANADIANCONSUMERSONLY)
15

For Canadian
Customers
Pour les
Consommateurs
Canadiens
Z
cG
Z
n_
n_
C_
Z
LU
Z
Z
c.)
]_--tlqr-'_l--t_
•VV_ " " " " "_, •_ " ,_
Pleaseregisteryour product to enableusto contact you Veuillezenregis_erv_e produitafindenouspermetl_ede
inthe remote eventa safetynotice isissuedforthis product communiqueravec voussijamais un avisdes6curit6 concemant
and toallow for efficientcommunica_on undertheterms ceproduit_ait 6misetde communiquerfacilementavecvousen
ofyour warranty,shouldthe needarise, vertudevotregara_e, sile besoins'enfaitserCdr.
REGISTERON-LINE: www.geappliances.ca MAILTO: RO.BOX 1780,MISSISSAUGA
ENREGISTREMENTSURINTERNET_,:www.electromenaqersge.ca POSTERA: ONTARIO, L4Y4G1
[][]MISS/MLLE.MR'/M[][]Ms.MRS'/MME'FIRSTNAME/PRENOM LASTNAME/NOM
STREETNO/NORUE STREETNAME/RUE
CITY/VlLLE
AP%.NO/APP,/RR#
PROVINCE POSTALCODE/POSTAL
AREACODE/IND.REG.[TELEPHONE JE-MAIL
DIDYOUPURCHASEA SERVICECONTRACTFORTHISAPPLIANCE? YES/OUI [] IFYES/SlOUl:EXPIRATION
Y/A M D/J
AVEZ-VOUSACHETEUN CONTRATDESERVICEPOURCETAPPAREIL? NO/NON []
NAME OFSELUNGDEALER/NOMDU MARCHAND MODEL/MODI_LE
SERIAL/SCRIE
INSTALLATIONDATE/DATED'INSTALLATION
Y/A M D/J CORRESPONDENCE [] ENGUSH
CORRESPONDANCE [] FRAN?AIS
[] Ido notwishto receiveanypromotionaloffersregardingthisproduct.
[] Jened_sirepasrecevoird'o_es promotionnellesconcernantceproduit.
16

Notes.
17

GE Gas Cooktop Warranty. ( orCustomersintheUnitedStates)
All warranty service provided bg our Factors Service
Centers, or an authorized Customer Care®technician.
To schedule service, visit us on-line at GEAppliances.com,
or call 800.GE.CARES (800.432.2737). Please have serial
number and model number available when coiling for service.
Staple gout receipt here.
Proof of the original purchase
dote isneeded to obtain service
under the warrants.
One Vear
From the date of the
origino!purchose
GE Will Replace:
Any part of the cooktop which foils due to odefect in materials or workmanship.
Duringthis limited one-gear warranty, GEwill also provide,free of charge, oll lobar
and related servicecosts to replacethe defective port
Service trips to gour home to teach gou how to use
the product.
Improper installation, delivery or maintenance.
Failure of the product if it is abused, misused,
or used for other then the intended purpose or
used commercially.
Replocement of house fuses or resetting of circuit
breokers.
Domoge to the product coused bg occident, fire, floods or
acts of God.
Incidentol or consequentiol domoge coused bg possible
defects with this opplionce.
Domoge coused ofter deliverg.
Product not occessible to provide required service.
EXCLUSION OF IMPLIED WARRANTIES--Vour sole and exclusive remedg is product repair as provided in this Limited
Warranty. Any implied warranties, including the implied warranties of merchantability or fitness for a particular
purpose, are limited to one gear or the shortest period allowed by law.
This warrants is extended to the original purchaser and ang succeeding owner for products purchased for home
use within the USA. If the product is located in an area where service by a GEAuthorized Servicer is not available, you
mag be responsible for a trip charge or Sou mag be required to bring the product to an Authorized GEService location
for service. In Alaska, the warranty excludes the cost of shipping or service coils to gout home.
Some states do not allow the exclusion or limitation of incidental or consequential damages. This warrants gives
Sou specific legal rights, and you may also hove other rights which varg from state to state. To know what your
legal rights are, consult your local or state consumer affairs office or your state's Attorney General.
Warranton General Electric Compang, Louisville, KV 40225
18

GasCooktop Warranty. (ForCustomersin Canada)
All warranty service provided bg our Factory Service Centres
or an authorized Customer Care®technician. To schedule
service, visit us on-line at www.GEAppliances.ca or call
1.800.561.3344. Please have serial number and model number
available when calling for service.
_Staplesour receipt here.
Proof of the original purchase date
is needed to obtain service under the
warranty.
OneVear: Any part of the cooktop which fails due to a defect in materials or workmanship.
From the dote of the Duringthis limited one-year warranty, IVlabewill also provide, free of charge, all labor
Originalpurchose and related servicecosts to replace the defective part.
Service trips to your home to teach you how to use
the product.
Improper installation, delivery or maintenance.
Failure of the product if it is abused, misused,
or used for other than the intended purpose or
used commercially.
Replacement of house fuses or resetting of circuit
breakers.
Damage to the product caused by accident, fire, floods or
acts of God.
Incidental or consequential damage caused by possible
defects with this appliance.
Damage caused after delivery.
Product not accessible to provide required service.
EXCLUSION OF IMPLIED WARRANTIES--Vour sole and exclusive remedy is product repair as provided in this Limited
Warranty. Any implied warranties, including the implied warranties of merchantability or fitness for a particular
purpose, are limited to one year or the shortest period allowed by law.
This warranty is extended to the original purchaser and any succeeding owner for products purchased in Canada
for home use within Canada. In-home warranty service will be provided in areas where it is available and deemed
reasonable bg Mabe to provide.
Some provinces do not allow the exclusion or limitation of incidental or consequential damages, so the above exclusion
mag not apply to you. This warranty gives Sou specific legal rights, and you may also have other rights which vary from
province to province. To know what gout legal rights are in gout province, consult gout local or provincial consumer
affairs o_ce.
Warrantor: Mabe Canada Inc.,
Burlington, Ontario
19

ConsumerSupport.
GEAppliances Website In the U.S.:GEAppliances.com
Have a question or need assistancewith your appliance?Try the GEAppliancesWebsite 24 hours a day,
any day of the year! Forgreater convenience and faster service,you can now download Owner's Manuals,
order parts or even schedule serviceon-line. In Canada: www.GEAppliances.ca
Schedule Service Inthe U.S.:GEAppliances.com
Expert GErepair serviceisonly one step away from your door. Geton-line and schedule your serviceat your
convenience any day of the year! Or call 800.GE.CARES(800.4322737)during normal businesshours.
In Canada, call 1.800.581.3344
Real Life Design Studio Inthe U.S.:GEAppliances.com
GEsupports the Universal Designconcept-products, servicesand environments that can be used by people of
all ages,sizesand capabilities.We recognize the need to design for awide range of physical and mental abilities
and impairments. Fordetails of GE'sUniversalDesignapplications, including kitchen design ideasfor people with
disabilities,check outourWebsite today. Forthe hearing impaired, pleasecall 800.TDD.GEAC(800.833.4322).
In Canada, contact: Hanager, Consumer Relations,Habe Canada Inc.
Suite310, 1 Factory Lane
Honcton, N.B.EIC 91v13
ExtendedWarranties Inthe U.S.:GEApplionces.com
Purchase a GEextended warranty and learn about special discounts that are available while your warranty isstill
in effect. Youcan purchase iton-line anytime, or call 800.626.2224during normal businesshours.GEConsumer Home
Serviceswill still be there after your warranty expires. InCanada, call 1.888.261.2133
Partsand Accessories In the U.S.:GEApplionces.com
Individuals qualified to servicetheir own appliances can have parts or accessoriessent directly to their homes (VISA,
MasterCard and Discovercards are accepted).Order on-line today, 24 hours every day or by phone at
800.626.2002during normal businesshours.
Instructions contained in this manual cover procedures to be performed byany user.Other servicinggenerally should
be referred to qualified service personnel.Caution must be exercised,since improper servicing may cause unsafe
operation.
Customers in Canada should consult the yellow pages for the nearest Mabeservicecenter, or call 1.800.661.1616.
Contact Us In the U.S.:GEApplionces.com
If you are not satisfied with the serviceyou receivefrom GE,contact uson our Website with all the details including
your phone number, or write to: General Manager, Customer Relations
GEAppliances,Appliance Park
Louisville,KY40225
In Canada: www.GEAppliances.ca, or write to: Director, Consumer Relations,IVlabeCanada Inc.
Suite310, 1_Factory Lane
IVloncton,N.B.EIC 91v13
2O
Register YourAppliance Inthe U.S.:GEAppliances.com
Register gour new appliance on-line--at gour convenience!Timely product registration will allow for enhanced
communication and prompt service under the terms of your warranty, should the need arise.You may also mail
in the preprinted registration card included in the packing material. In Canada: www.GEAppliances.ca
Other manuals for JGP329
3
This manual suits for next models
5
Table of contents
Languages:
Other GE Cooktop manuals

GE
GE JGP970BEKBB Manual

GE
GE Profile JP938 User manual

GE
GE CP350 User manual

GE
GE Profile JP340 User manual

GE
GE JGP18 Training manual

GE
GE PGP943SETSS Manual

GE
GE Profile JGP656 Series Installation instructions

GE
GE JP961 User manual

GE
GE PP989 Operating instructions

GE
GE PVM9179, PSA9120, PSA9240 User manual