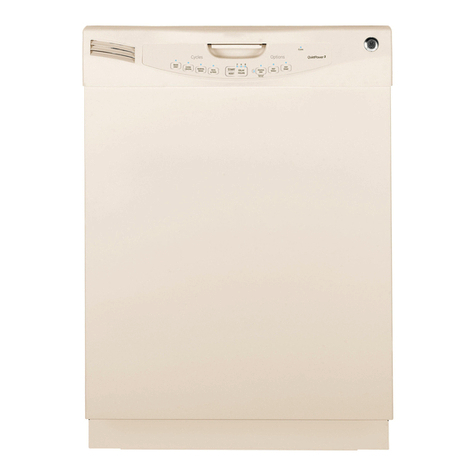
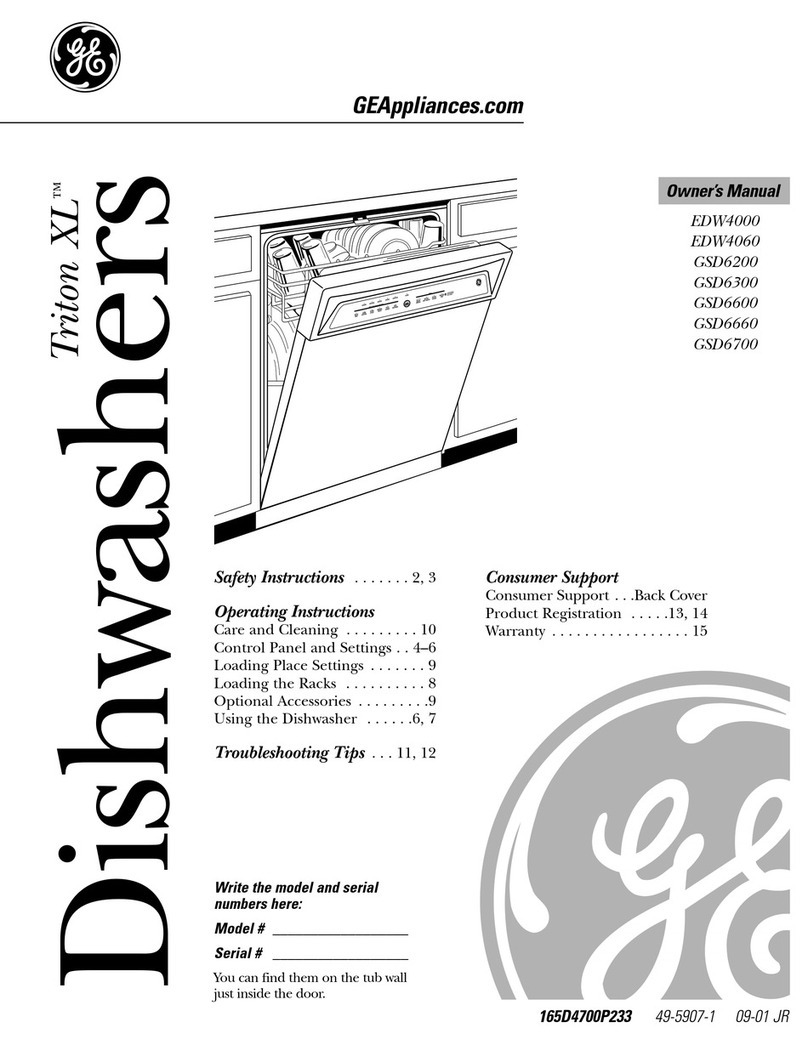
GE GSD5610D01AA User manual

GEAppliances
J
GS05610
GSD5620
GSD5630
GSD5640
GSD5650
GSD5720
GSD5730
GSD5750
GSD5910
GSD5920
GSD5930
GSD5940
GSD5950
GSDL322
GSDL332
GSDL352
ww_.geappliances.com 165D4700P218 49.,5BgZq 05.01JR

Congratulations!
YouAre Now Part of the GEFamily.
Welcome to the GE famil):
We're proud of our quality
products and we are
committed to providing
dependable service, You'll
see it in this easy-to-use
Owner's Manual and
you'll hear it in the friendly
_soices of OUr co_tomer
service department
Best of all, you'll experience
these values each time you
use your dishv,_asher, That's
important, because your new
dlsh_asher will be part of
your family for many years.,
And we hope you x_ll be
part of ours for a long time
tO come,
We thank you for buying
GE. We appreciate your
purchase, and hope you
•a_l continue to rely on us
whenever you need quality
appliances for your home,
Important!
Till out and return the Consumer Product
Registration Card. There are r,vo easy wa)_
to register your appliance,
_,_Through the Inter'net at
x_¢_v,geappliances com,
Z Complete and mail the enclosed card
Write the model and serial
numbers here.
#
You can find them on the tub wall ]ust
inside the door,
Staple sales slip orcancelled check
here.
Proof of the original purchase date is
needed to obtain service under the
warran_

GE& You,
A ServicePartnership.
Ask any GEappliance owner and they will
tell you we stand behind our products with
unmatched quality service. However, did
you know that most questions result from
simple problems that you can easily fix
yourself in just a few minutes? This
Owner's Manual can tell you how,
Manual
Inside you x_ll find many
helpSaI hints on how to use and
maintain your dishwasher
properly Just a little preventive
care on your part can save you
a great deai of time and money
over the life of}our dishwasher.
ReviewtheSection
onTroubleshooting
77ps
"'_,,,You'll find many answers to
common problems here
ff you re_e_v our chart of
Troubleshooting Tips first,
you may not need to call for
service at all.
If YouNeedService
If you do need servlce, you can
relax 'knm@ag help is only a
phone call awa_zA list of toll-Dee
customer service numbers is
included in the back section
Or you can al_ys call the
GE Answer Center e at
8006262000, 24 hours a da);
7 days a week_
Safety Information ......... 4-7
OperatingInstructions
ControlPaneland
Settings ......................... _ 1 1
UsingtheDishwasher, i. i2-13
LoadingtheRacks ........ 14-16
OptionalAccessories ........ 27
Careand Cleaning ..... ,,.. 18
TroubleshootingTips
Before You
CallForService ......... 19-23
CustomerService
ProductRegistration..... 29-30
Warranty ................... 31
ServiceTelephone
Numbers..... BackCover

ii:_,_i__
IMPORTANTSAFETYINFORMATION.
READALLINSTRUCTIONSBEFOREUSING.
•WARNING!
Foryour safety, the information in this manual must be
followed to minimize the risk of fire, explosion, electric
shock, or to prevent property damage, personal injury,
or loss of life.
WATERHEATERSAFETY
Under certain conditions hydrogen gas may be produced
in a water heater that has not been used for two weeks or
more. HYDROGENGASIS EXPLOSIVE.
If the hot water has not been used for two weeks or more, prevent
the possibility of damage or injury by turning on all hot x_ter
faucets and allow them to nm for several minutes Do this before
using any electrical appliance which is connected to the hot water
s3_tem, This simple procedure will allow an}, built-up hydrogen gas
m _cape Since the gas is flammable, do not smoke or use an
open flame or appliance during this process,

iiiiiii iiii ii i
Use this appliance only for its intended purpose as
described in this Owner's Manual
PROPERINSTALLATION
ANDMAINTENANCE
Thisdishwasher must be properly installed and located in
accordance with the Installation instructions before it is
used. If you did not receive an Installation Instructions
sheet with your dishwasher, you can receive one by calling
us toll-free at the GEAnswer CenteP,800,626,2000.
E:_Connect to a grounded
metal, permanent wiring
system; or run an equipment-
grounding conductor with
the circuit conductors and
connect m the equipment-
grounding terminal or lead
of the appliance,,
Improper connection of
the equlpment-groundlng
conductor can result in
a risk of elecUic shock
Check with a qualified
eIectridan or service
represemative if you are
in doubt whether the
appliance is properly
grounded
I_ Dispose of discarded
appliances and shipping or
packing material propefl):
F_Do not attempt to repair
or replace any part of your
dishwasher unless it is
specifically recommended
in this manual_ All other
servicing should be referred
to a qualified technician..
To minimize the possibifity of
electric shock, disconnect this
appliance from the power
supply before auempting any
maintenance NOTE,'Turning
the dish_asher offdoes not
disconnect the appliance
from the power supply.
We recommend hav_qg a
qualified technidan service
your appliance.
,5

IMPORTANTSAFETYINFORMATION.
READALLINSTRUCTIONSBEFOREUSING.
•WARNING!
DONOT,..
Do not tamper wkh controls,
Do not abuse, sit on, or stand
on the door or dish rock of
the dish_+msher_
[_ Do not allow children to
play inside, on or with this
appliance or any discarded
appliance°
[7 Do not discard a dlshx_rasher
without first removing
the door of the x+_tshlng
compartment,
E: Do not store or use
combustible materiaL%
gasoline or other flammable
vapors and liquids in the
vicinity of this or any other
appliance+
i ? _2 b"

ill i i .....................
_0 WHENUSINGYOURDISHWASHER
_IUT_ON: Contents
washed in SaniWash cycle
may be hot to the touch.
Use care before unloading.
[3 Use only powder, tabs,
liquid detergents or rinse
agents recommended for use
in a dishwasher and keep
them out of the reach of
children Cascade ®
Automatic Dish,,_shing
Detergent has been approved
for use in all GE dlshvrashers
_L"Loire sharp items so that
they are not likely to damage
the door seal
Load sharp "knees with the
handles up to reduce the
rkskof cut-type injuries
[--Do not wash plastic items
unless marked dishwasher
safe or the equivalent. For
plasdc items not so marked,
cheek the manufacturer's
recommendations
iENon-Dish_are Items: Do not
_¢ash items such as electronic
air cleaner filters, furnace
filters and paint brushes in
your dishwasher. Damage to
dish,,_herand discoloration ;:i:.i;!;_'_
or staining of dlshvrasher ........
m_yres_.
element during or i:::Iii2:!
immediately after use.. _ _.:!'
dishxcasher unless all !:
enclosure panels are
properly in place
hoses pe ionnece
if this appliance is used by or
near children.
::;Load light, plastic items
so they will not become
dislodged and drop to the
bottom of the dishwasher--
they might come into contact
with the heating element and
be damaged.
Readandfollow this
SafetyInformationcarefully.
SAVETHESEINSTRUCTIONS

Aboutthedishwashercontrolpanel
Youcan locate your model number on the tub waltjust inside the door.
Throughout this manual, features and appearance may vary from your model.
STATUS
II _E_S!_tG
|WA_II_t_G
--FI: L_
_1111:_2 D EEL ECTIBH_; DPTIOX_ _,_
ControlSettings
theStat,s
The Status display mils you what's happening while the dish_asher is in operation
and also any malfunctions if they occur (see page 10), The lights _fill come ON
indicating the sequence of operation the dlsh_asher is in,
SENSING DisplayedduringperiodsusingCleangeesorwchnolo_ to mBasurethoamountof soil
in the_oa_anddecideif anotherprewashisneededTheSENSINGlightisdisplayed
onI¥duringNORMALandPOTS& PANScycles
WASHING Displayedduringprewashandmainwash_riods.
RINSING Displayedduringrinseperiods
DRYING DisplayedduringSPEEDDRYING,
SANITIZED Oisplayedwh_ncyclehasmatsanitizationconrlitionsLightramainsONuntitdooris
opened

_LoadSelections
Thelightabove theselectedpadwill be ONto indicatewhichLOADSELECTIONhas
beenseleated
Thiscycleraisesthewater temperaturein the fina}rinseto sanitizeyour
dishware Thecycle lengthwill varydependingonthetemperatureof your
inletwater
NOTE TheSoniWashcycleis monitDradfor sanitizationrequirements
!f thec_le is interrupteddlJrir_gorafter the mainwash portionor if the
incomingwater temperatureisso low that adequatewater heatingcannot
beachieved,the sanitizingconditionswill notbomet Inthesecases,the
sanitizedlightwill notilluminate at theendaf thecycle
POTS& PANS tlel_Wll,Sg_t,70-85min Ple_',_,_Pt_w_hPmv_hPrew_shM_inv,_shP_it_e5_e
Me_tlur_SB gal 65 m_a, P_ov_shPr_w_shPrewashMaln wash P_efins_F_ret_irtsa
Ug_ta2o_I, a}m_n ProwashPiewash Matnv,_shPi_dnsetqr, aldn_
Forheavgysoileddishesor cookwamwith dried+onor baked+onsoils
Everydaydishesmay beincludedThiscyclewill notremove
burned-onfoods
NORMAL eo,W_l_S_l.r_m_, Pl_wash_ewashP_evJa_hMainw,ashPi_r_n_;_P_r_eF_nal=i==so
Me_hztn_ggal 5_min, Pr_¢ashPmwashPi_ashMainw_hP+_li_ei_'_ins_r,a_L_s_
Ug_S2Sal 55rain. P+_v,*a_hMainw_shP+_lins_Pr+zdn++.eJq+_ahinsa
Forloadsofeverydaydishesandg_asswarewith mediumsoils
CHINACRYSTALsseal.34mi. PmwashM_+i_v,m++hPmrir_eR_alrir+,m
Forlightlysoiledchinaandcrystal
SPEEDWASH B.3g+l 3Brain hewashPlawashMa}nwa!;hhat}nseFinaliir=se
Forlighth/soileddishesandgt_sswam
RINSE ONLY __S+_.sm_. m+_
Forrinsingpartialloadsthatw+}lbewashedlater Donatused_targantwith
thiscycle

About the dishwasher controlpanel.
_- Options
Thelightabovetheselected pad will be ONtoindicate which OPTIONhas been selected.
POWER }:orusew}tb heavilysoiledand!ordried-on,baked-onsoils.ThisoptionMUSTbe
PRESOAK selectedPRIORIDstartingthecycle This optionadds 16minutes to the
cycle time
SPEEDDRY Shutsoffthedryingheatoption Dishesair drynaturallyand energyissaved
OFF Youcanpropthedasrapenafterthe CLEANlight illuminates
SPEEDDRY Turnstheheateranfor lastdrying,Thiscyclewill extendthetime to yourwash
ON cycleby 23 minutes forthe NORMALcycleend30minutesfor the SAN/WASH
cycle NOTBCannat beselectedwith RINSEONLYcycle
LOC!( WhentLeLOCKpadistouchedtwicewithin3secunds,aIIpedsbecomeineperative
Youcanlockthecontrolstopreventanyselectionsfrombeingmade Oryoucanlockthe
controlsafteryouhavectatteda cycleorse_ctedDELAYSTARTsothee_le orDELAY
STARTisnatintenupt_ff
Children cannot accidentallystart dishwasher by touching pads with this
option selected
Tounlockthedishwasherafterithasbeenlocked,touchtheLDCKpBdtwicew_th]n
3secondsThelightabovetheLOCKpadwifl turnoff
'i!
DELAYSTART Youcandelaythestarl of awash cyclefor upto8 hours Pressthe DELAYSTART
padtocheesethenumberofhoursyouwanttodelaythestartofthecycleThe
machinewill countdownendstart automaticallyat thecorrecttime Pressingthe
START/RESETbuttonwill cancel the DELAYSTARTselection
NOTE=IfyouforgettDlatchthedoora remindersignalwillbeepuntilyoudoso
RESET Tochangeecycleafterwashingstarts,touchthe START/TIESETpadtocancel
thecycteAfter wateris pumpedoat andthemeterstops,youcanrepragram
andrestartthedishwasher Thiswill takeapproximately90seconds
staa
Lo._,5.
Closeand latch the door Touch the START/RESETpadto begin the cycle
Water fill begins, and approx_ately 40 seconds later the _h action begins
NOTE:Thedishwasher remembers your last cyclesoyou don't have to
reprogram each time When the dishwasher is loaded and the door latch is in
the locked position, the control panel lightswill be ON and display the last
settings you selected.
If you don't _mat to change any of the settings, simplytouch the START/RESET
pad to begin the cycle
Also, ira power failure occurs, NORIV#ILand SPEED DRYwitl automatically be
programmed, Make any new selections ,and touch the STAtrt'/BESErpad m beon
the cycler
Clean
ThL_light is illunfinated when a _¢sh cycle is complete The light _ll stay ON
until the door is opened,
tO
Flashingdisplay!ights.
StatusLights WhatIt Means What ToDo
:::_|.STA"tlJS
'
_WA_ftING
IRINS_
In SANmTEI]
STA1US
._ S_S]N6
CLEANSENSORError If the sensing light doesn't come
on during the first part of the
NORMALor POTS& PANScycles,
the CLEANSENSORisnot working
Call for service The dishwasher
_4dlcontinue towork without the
CLEANSENSOR,
NOTE:This light w;U NOT stay on
the entire cycle.
START/RESETpad has
beenpressed Allow up to 90 seconds for the
dlsh_sher to drain and reset
before selecting a new cycle
STATUS
|SENS_N_
_. WASXINg
_f. _INSING
_ DEYIN_
SANnI_D
PLUS P
BEEPING
SOUND
Control Error Press the START/RESETpadto ram
off the beeper, Turn off power at
the ciroAt breaker for 10 seconds,
then restore power,, If the rinsing
light continues to flash, then call
for service
STATUS
II _"JSING
|WAS_NG
il,NSI,G
_RYING
PLUS A
BEEPING
SOUND
Contro! or Sequence
Switch Error Press the START/RESETpadto turn
offthe beeper and the dishwasher
will attempt to reset Then re.slm-t the
wash cycle, tf this error continues
call for service.

Using the dishwasher.
mm,n
ChecktheWaterTemperature
The entering water must be at least ]20°E and not more than
150°E, for effecdve cleaning and to prevent dish damage Check
the water temperature _th a candy or meat thermometer Turn on
the hot _ter faucet nearest the dishwasher, place the thermometer
in a glass and let the ,,_ater rnn continuously into the glass until the
temperature stops rising
UseJet-Dry_RinseAgent
Jet-Dry_rlnse agent removes spots and prevents new film huild_up
on your dishes, glasses, flat_re, cookwa.re and plastic
Fill the rinse agent dlspen_r
until it reaches the bottom of lip
inside the opening. Do not overfill
the dispenser. Replace cap.
To check i£rinse agent is needed, ,_
press the clear center of the fill cap 2 or 3 dmes If rinse agent fills
the center of the fill cap, you have enough.
A full dispensershouldlastabout one month,
ff rinse agentis spilled,wipe upthe excess.
12
DishPreparationPriortoLoading
7No preodnslng of normal food soi! isrequired
i_ Scrape off hard soils, including bones, toothpicks, skins,
and seeds
I2_Remove large quantifies of any remaining food.
F_Remove leaf),vegetables, meat trimmings, and
excessive amountsofgrease or oil
Remove acidic food soils that can discolor stainless steel.
UsingtheDishwasherDoor
[_i The door must be dosed and locked into place to select a
;_':_LOADSELECTIONor an OPTION.
If the door is opened during a cycle and left open, thedishwasher
..... willbeep once every minute unfit the door is dosed and latched
into place

ProperUseof Detergent
Use only detergent specifically made for use in dishwashers, Cascade ®
Automatic Dishwashing Detergent has been approved for use in all
GE dishwashers Keep your detergent fresh and dry, Don't put
detergent into the dispenser until you're ready to u_ash dishes
You'll find nqo detergent dispensers on the
insidedoor of your dishwasher_ All wash c/des
except RINSE ONtYreqtfire detergent in the
main cup,, Wash cycles with a pre-wash and a
main wash _I also use the open cup The
amount of detergent to use depends on
whether your water is hardor soft _qth hard Mainf
water, fill the main cup and open cup
completel); "_5th soft water, fill both cups halfi_),_ When using
automatic dishwashing detergent tabs, simply place one tab in the
main cup and close,
Protect your dishes and dish'_asher by contacting your water
deparunent and askin_ how hard your water is Twelve or more
grains is extremely hard water, A water softener is recommended.
_qthout it, lime can build up in the _ter valve, which could stick
while open and cause flooding Too much detergent _6th soffw_ter
can cause a permanent cloudiness of glass_re, called etching.,
/VOTE'To open detergent cup meter it has
been dosed, unlatch the door, Press the
START/RESEFpad three times within two
seconds and the detergent cup -_11 release,,
You may also turn the detergent cup handle
counter<lock'wise until it rele&ses, A snapping sound may be heard,
toAddaDish?
A forgotten dish can be added any time before the main _¢ash
i'_ Push the door latch to the left
Do not open the door until the water spray action stops, Steam
_z- may rise out of the dishwasher
_7_ Add forgotten dishes
_.i_:_Close the door and push the latch to the far right
13

!i¸iiiiiiiiii!i i: iil
Loadingthe dishwasher racks.
I,HI,IHHHHII,H,,
Forbest dishwashing results, follow these loading guidelines, Features and
appearance of racks and silverware baskets may vary from your model
UpperRack
Although the upper rack is for glasses, cups and
saucers, pots and pans can be placed in this rack
for effective cleaning. Cups and glasses fit best
along the sides This is also a secure place for
dJsh_casher-safe plastics
The cup shelf(oh some models) may be placed
in the up or down position to add flexibility A
wine glass holder (on some models) secures wine
glasses at an angle for best washabilit3_ Because
wine glasses come in various sizes, ",filerloading,
slowly push in the race to make sure they will
clear the top of the dishwasher..
The upper rack is good for a_ 'kinds of odd-
shaped utensils, Saucepans, mixSng bowls and
other items should be placed face down, Fold-
do_aa fingers (on some models) provide flezdbility
for extra-large and hard-to-fit items,
Securelargerdishwasher.safeplasticsovertwo fingers
whenpossible
Makesuresmallplasticitemsaresecureso theycan'tfall
ontotheheater.
Besurethatitemsdonotprotrudethroughthebottomof
therackandblockrotationof themiddlesprayarm This
couldresultinpoorwashperformanceforitemsin the
upperreck
Checktomakesurethattatlitemswiltnotblockrotationof
thetopwasharm
i::,ii!i
14
The Wash Tower
Keepthecenterareaclearin thelowerrack
The wash tower rises through the center of the
lower rack during the wash and rinse portions of
the cycle, The wash tower shoots waler into the
mid-level _¢ash arm located under the upper rack
Blocking the wash tower could result in poor wash
performance for items in the upper rack.
Ben'tblockortoadtallthingsnexttothe
WashTower.

Lower Rack
Whenloadingthelowerrack,donot loadlargeplattersor
traysin thefrontrightcorner,Theymaypreventdetelgent
fromcirculatingduringthewashcycle
The lower rack is best used for plates, saucers, and
cookncare.. Large items such as broiler pans and
racks should go along the right-hand side. Load
platters, pots and bowls along the sides, in comers,
or in the back The soiled side of items should face
the center of the rack If necessary, oversized
glasses and mugs can be placed in the lower rack
to maximize loading flexibility.
.Also, be careful not to let a portion of an item such
as a pot or dish handle extend through the bottom
rack This could block the wash arm and cause
poor _a.shing results
Fold-down fingers (on some models) provide
flexibility for extra-large and hard-to-fit items
The fingers may be left in the up position or
folded down to customize the lower rack.
l!ili!:.,"
i! !?1_
Don'tletany
itemextend
throughbottom,
Toremoveandbaskets,graspthe
basketat oppositecomersandslide
apart.Thebasketsectionsshouldbe
placedin thelowerrackbyhanging
themonthetophoop,
Silverware Basket
Avariety of options is available regarding the
three-piece silverware basket in your dishwasher.
The complete basket is designed to fit on the
right side or back of the lower rack Additionally,
each end of the basket is removable to better
accommodate flatxcare and lower rack capacity
needs
To load flar_re, simply push the adjustable handle
to either side. Put flare.re in the basket x_th "knife
handles up to protect your hands. Place spoons in
the basket _fith handles down Mix "knives, form
and spoons so they don't nest together, Distribute
evenly Small plastic items, such as measuring
spoons and lids for small containers, should go in
the bottom of the sitvencace basket with silverware
on top
The lids of both end baskets can be dosed m
contain small items. Long items can be placed
on the cupshelfin the upper rack
75 L_::

Loadingplace settings...
Follow these guidelines for loading I0 place settings° Features and
appearance of racks and silverware baskets may vary from your model
UpperRac!r--lO place se_'ngs Lower Rack-- lOplace settings
Follow these guidelines for loading 12place settings, Features and
appearance of racks and silverware baskets may vary from your model
Upper Rack--12 place settings
16
Lower Rack--12 place settings

About optionalaccessories.
Youcan change the door and lower access panel appearance of your
dishwasher by ordering one of these optional accessories:
_, Color Panels
_::_I/4" Wood Panel Trim Kit
3/4" Trimless Panel Kit
These accessories are available at extra cost (VISA, MasterCard, or
Discover cards accepted) by calling 800-626-2002.
Specify accessory number when ordering_
Descriptionsof OptionalAccessories
Co!orpanels--Replacement door panels and Iower accesS panels
are available in the following colors:
_-_GPF4OOA(Almond}
_GPF4OOB(Black)
,TzGPF4OOW(White)
,7,_6PF400S(StainlessSteel)
_:; GPF400C(Bisque)
NOTE_The GPFIO0dishwasherdoorspring kit is included _dth the
stainlesssteel colorpanel kit and must be installed with it
(GPF400S)_
Woodpaneltrim kit-- This accesSorycontains trim andinstructions
for you to supply and install a 1/4"thick decomtlve wood door and
lower accesS panel:
_,-_GPF425A{Almond)
;:::_GPF425B(Black)
_-;_6PF425W(White)
GPF425C{Bisque)
NOT_The GPF100dishwasherdoorspringkit must also be ordered
and inst_dled when the doorpanel weighsfour lhs or more.
Trimlesspanel kit-- Tlfis accesSorycontains parts and instructions
for you to supply and install a 3/4" thick decorative wood door and
lower access panel:
GPF475
NOTE."The GPFIO0dishwasherdoerspring kit is included wkh the
trimlesspanelkitand must be installed _dth it, 17

Caringfor the dishwasher.
Toclean the control panel use a lightly dampened cloth then dry thoroughly,
Toclean the exterior use a good appliance polish wax.
Never use sharp objects, scouring pads or harsh cleaners on any part of
the dishwasher.
/
Protect Against Freezing
Kyour dish_sher is left in an unheated place during the _inter, ask a service
technidan m:
["_ Cut off electrical power to the dishwasher, Remove fuses or trip circuit breaker
!2i Turn off the x_ter supply and disconnect the water inlet line from the
...... water valve.
_3-_{Drain _ter from the _mter inlet line and water valve, (Use a pan to catch
!:",_ the _ter)
[._j_ Reconnect the water inlet tine to the water valve,
Checktheairgapany
timeyourdishwasherisn't
drainingwell
Does Your Dishwasher Have an Air Gap ?
An air gap protects your dishwasher against water
backing up into it ffa drain dogs, The air gap is not
a part of the dlshx_ashe_: It is not covered by your
warrmlt 7 Not all plumbing codes require air gaps,
so you may not have one,
The air gap is easy to clean°
_=_ Turn off the dishwasher and llft offthe chrome
i_. cover,
I_ Remove the plastic cap and clean with a toothpick.
TheStainless Steel Panels
The stainless steel panels can be cleaned with Stainless Steel Magic or
a similar product using a clean, soft cloth
You can order StainlessSteelMegic #WXlOXlSthrough GE Parts by
calling 800626-2002
18

Beforeyou call forservice...
Troubleshooting tips
Review the charts on the following pages first and you may not
need to cal! for service.
!Problem ' " ( / Passible Causes What ToDo
Controlpanellightsgo Tinae too long between ,:Each pad must be touched
offwhenyou'resetling touchlng of selected pads within 30 seconds of the
_o_ols others, To relight, touch
any pad again, or unlock
and relatch door
Noise Some of the sounds _ Hard food disposal
you'll hear are normal shredding acdon,
Drain valve opening to
pump water out,
Timer conn-ol as q,de
progresses.
_.Detergent cup opening
.' The motor stopping during
the drying perioct
_Water draining out of the
tub immediately after you
touchSTART/RESETp_
U_ are not secure
in the reek or something
small has dropped into
the rack
,, Make sure everything is
secured in dishxcasher.
Momrhun_ Dish_,asher has not been
used on a regular basis, If
you do not use your
dish_asher often, set it to
fill and pump out once
every weetc This wil! help
keep the seal moist and
the garbage disposer dear,
Oetergentleltin Di_es are bloddng the _Reposition the dishes.
dispensercups detea-gent cups
Detenjentcuplid
latched accidentally
_y user
,"Unlatch the door Press
the START/RESETpad
three times within two
seconds, The detergent
cup will trip.
19

iiii!_:i!i!!i_
i__ii_
.20
Before you call for service...
IIIII I
IProblem _Possible Causes What ToDo
Waterstandingin 'I'hlsis normal _,A small amount of dean
thebottom ofthe tub water around the outlet on
the tub bottom at the back
of the tub keeps the water
seal lubricated.
Water won'tpump Drain is dogged _'If you have an air gap,
outofthetub dean it.
Suds in the tub Correct detergent
gnasm't used
Stainedtubinterior
Rinse agent
was _illed
Detergent with
colorant was used
Some tomato-based
foods e.an stain
Check to see ffyour "kitchen
sink is draining well. If not,
you may need a plumber
if the dishwasher drains into
a disposer, rim disposer dea_,
Use only automatic dish_sher
detergents to avoid sudsing,
Cascade _ Automatic
Dishwashing Detergent has
been approved for use in all
GE dishvaashers
To remove suds from the tub,
open the dishwasher and let
suds dissipate. Add 1 gallon
of cold water to the tub.. Close
the door unfiI it locks into
place Pump out water by
pressing START/RESk"£then
immediately press START/RESET
again_ Repeat if necessary
A]_)_ x_4peup rinse agent
spills immediately.
, Some detergents contain
colorant (pigment or dyes)
that _U discolor the tub
interior with extended use,
Check the detergent cup
for signs of any discoloration°
If cup is discolored, change to
detergent without any colorant,
Cascade ®Automatic
Dlshwnashing Detergent has
been approved for use in ntl
GE dishwashers,
_,Use of the RINSEONLYcycle
after adding the dish to the
load can decrease the level of
staining_
This manual suits for next models
31
Table of contents
Other GE Dishwasher manuals

GE
GE GE Profile PDW7800G User instructions

GE
GE GSD3300 User manual

GE
GE Triton XL GSD6900 Series User instructions

GE
GE Profile PDW8900 Series User manual

GE
GE GLD6360LSS Manual

GE
GE PDWF800RBB - Profile 24 in. Dishwasher Manual

GE
GE GLC4000 Series User manual

GE
GE Profile PDW8900 Series User manual

GE
GE Monogram ZBD4700 User manual

GE
GE Monogram ZBD6400 Series User manual