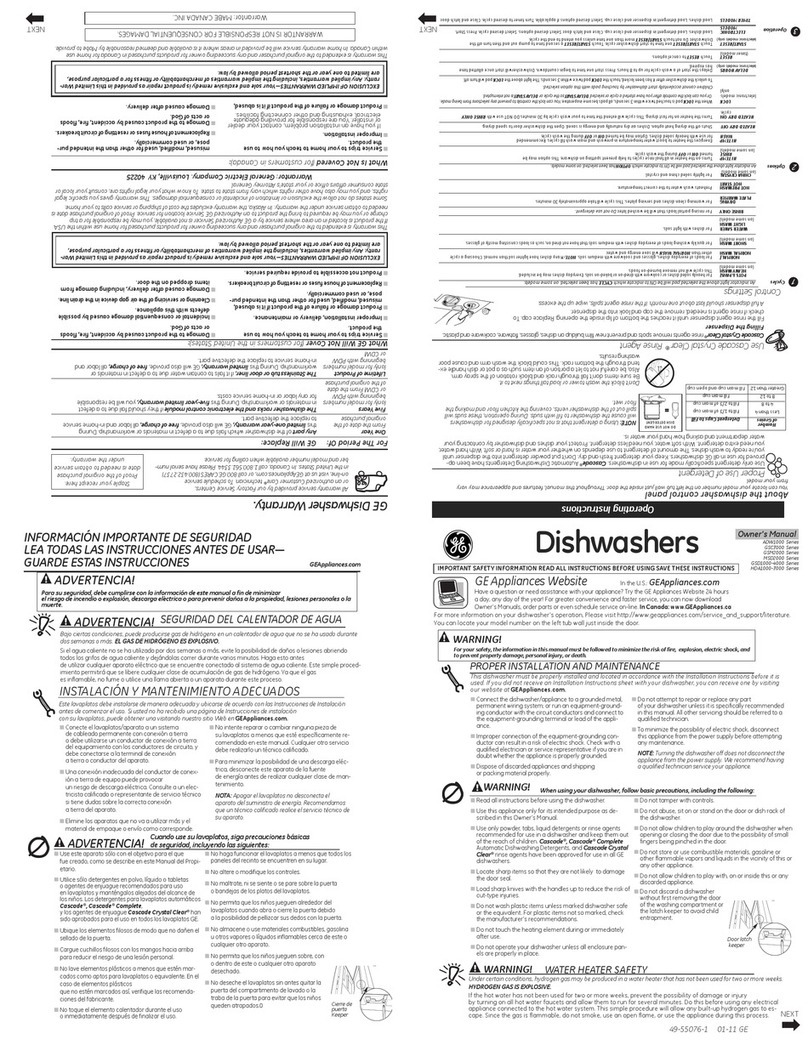
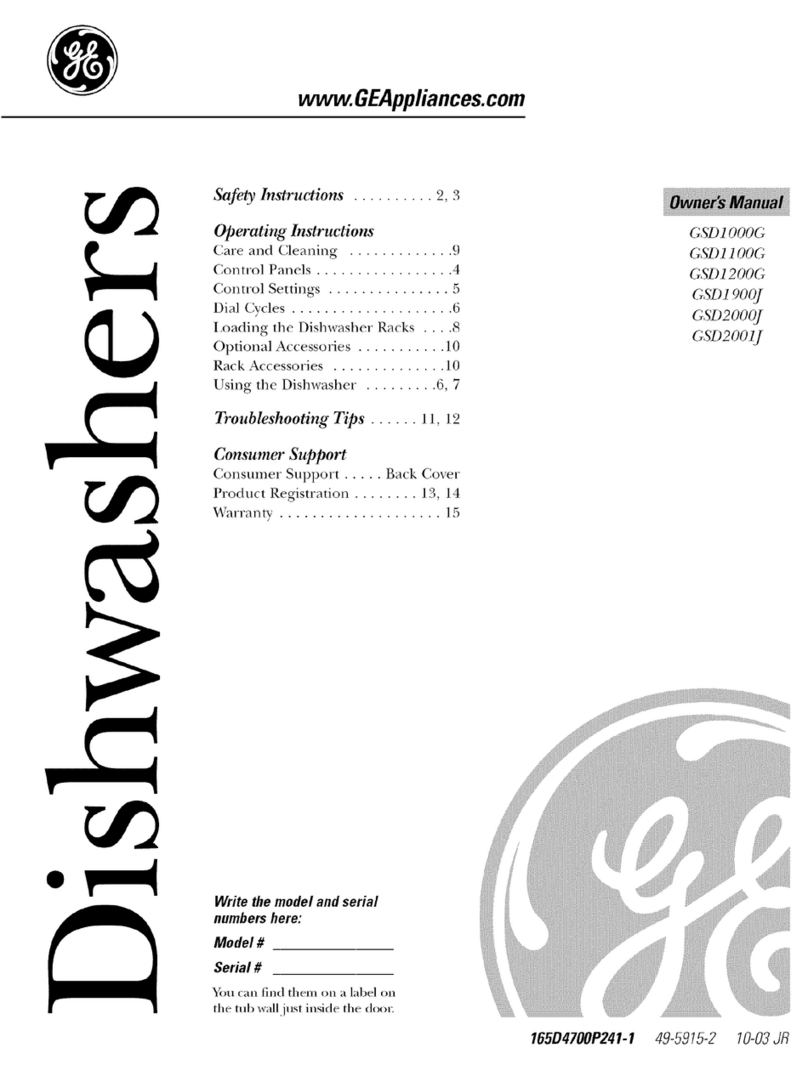
GE GLC4100N User manual

ge.com
Safety Instructions ...... 2-4
Operating Instructions
Care and Cleaning ............ 12
Control Panel and Settings ... S,6
Loading Place Settings ........ 11
Loading the Racks ............ 10
Unicouple ...................... 7
Using the Dishwasher ........ 8, 9
Troubleshooting Tips .. is, 14
Consumer Support
Consumer Support ..... Back Cover
Warrants .................... 1S
165D4700P360
GLC41O0Series
Write the model and serial
numbers here:
Model #
Serial #
Youcan find them on the tub wall
just insidethe door
49-55055-1 06-07 JR

IMPORTANT SAFETYINFORMATION.
READ ALL INSTRUCTIONS BEFORE USING --
SAVE THESE INSTRUCTIONS
WARNING!
For your safety, the information in this manual must be followed to minimize the risk of fire
or explosion, electric shock, and to prevent property damage, personal in]ur 9, or death,
_tls AWARNING! WATERHEATERSAFETY
f _..J'._ "_ Under certain conditions, hydrogen gas may be produced in o water heater that has not been used
for two weeks or more. HYDROGEN GAS IS EXPLOSIVE.
Ifthe hot water has not been usedfor two weeksor more, prevent the possibility of damage or injurg
bgturning on all hot water faucets and allow them to run for several minutes. Dothis before using ang
electrical appliance which is connected to the hot water sgstem.Thissimple procedure will allow ang built-
up hgdrogen gasto escape.Sincethe gas isflammable, do not smoke or usean open flame or appliance
during this process.
%PROPERINSTALLATIONAND MAINTENANCE
This dishwasher must be properly installed and located in accordance with the Installation
Instructions before it is used. If you did not receive on Installation Instructions sheet with
your dishwasher, you con receive one bg visiting our website at ge.com.
• Connectto a grounded metal, permanent wiring
sgstem;or run an equipment-grounding
conductor with the circuit conductors and
connect to the equipment-grounding terminal
or lead of the appliance.
• Improper connection of the equipment-grounding
conductor can result in a risk of electric shock.
Checkwith a qualified electrician or service
representative if you are in doubt whether the
appliance is properly grounded.
• Disposeof discarded appliances and shipping
or packing material properly.
• Donot attempt to repair or replaceany part
of your dishwasher unlessit isspecifically
recommended in this manual. All other servicing
should be referredto a qualifiedtechnician.
• Tominimize the possibility of electric shock,
disconnect this appliance from the power supply
beforeattempting any maintenance.
NOTE:Turningthedishwasher off does not
disconnect theappliance from the power supply.
Werecommendhaving o qualified technician
serviceyour appliance.
ACAUTION: To prevent minor injurg or propertg damage
• Usinga detergent that is
not specifically designed
for dishwashers will cause
the dishwasherto fillwith
suds.
• If your dishwasher is connected to a
wall switch, ensure that the switch is
on prior to use.
• Non-Dishware Items:Do not wash items
such aselectronic air cleanerfilters,
furnace filters and paint brushes in gour
dishwasheEDamage to dishwasher and
discoloration or staining of dishwasher
mag result.
• Closesupervision isnecessargif this appliance
isusedbg or near children.
• Load light, plastic items so theg will not
become dislodged and drop to the bottom
of the dishwasher-theg might come into
contact with the heating element and be
damaged.

ge.com
.¢ CAUTION:
For personal safety:
DO NOT USEAN EXTENSION CORDOR AN ADAPTER PLUG WITH THIS APPLIANCE.
DO NOT, UNDER ANY CIRCUMSTANCES, CUT OR REMOVE THE THIRD GROUNDING PRONG
FROM THE POWER CORD.
GROUNDING INSTRUCTIONS--This appliance must be grounded. In the event of a malfunction
or breakdown, grounding will reduce the risk of electric shock by providing a path of least
resistance for electric current. This dishwasher is equipped with a cord having a grounding
conductor and a grounding plug. The plug must be plugged into an appropriate outlet that
is installed and grounded in accordance with the NATIONAL ELECTRICAL CODE, ANSI/NPFA
NO. 7O.
WARNING!
Improper connection of the equipment/grounding conductor can result in a risk of electric
shock. Check with a qualified electrician or serviceman if you are in doubt as to whether the
dishwasher is properly grounded. Do not modify the plug provided with the appliance; if it
will not fit the outlet, have a proper outlet installed by a qualified electrician.
ELECTRICALREQUIREMENTS
• This appliance must be
suppliedwith 120V,60 Hz,
and connected to an _ _,)
individual, properly
grounded branch circuit, _protected by a 15 or 20
amp circuit breaker or
time-dela9 fuse. Ensureproperground
• If the electric supply existsbeforeuse.
provided does not meet
the above specifications,it is recommended that a
licensedelectrician install an approved outlet.
• Yourdishwasher circuit should not be usedfor
any other appliance while the dishwasher isin
operation as the dishwasher requiresthe full
capacity ofthe circuit.
• If the wall receptacle you plug the dishwasher's
power cord into iscontrolled by a switch,turn on
the switch.

IMPORTANT SAFETY INFORMATION.
READ ALL INSTRUCTIONS BEFORE USING --
SAVE THESE INSTRUCTIONS
./k WARNING! RISK OF CHILD ENTRAPMENT
PROPER DISPOSAL OF THE DISHWASHER
Junked or abandoned dishwashers are
dangerous_.even if they will sit for "just a
few days." If you are getting rid of your old
dishwasher, please follow the instructions
below to help prevent accidents.
Before You Throw Away Your Old
Dishwasher:
• Take off the door of the washing compartment
or remove the door latch keeper (asshown). Door latch keeper
WARNING! When using your dishwasher, follow basic precautions,
including the following:
• Usethis appliance only for its intended purpose
as described in this Owner's Manual.
• Useonly powder,tabs,liquid detergents or rinse
agents recommended for usein a dishwasher and
keepthem out ofthe reach of children. Cascade®,
Cascade®Complete and Electrosol®Automatic
Dishwashing Detergents,and Jet-Dry ®and
Cascade Crystal Cleare rinseagents have been
approved for usein all GEdishwashers.
• Locate sharp items sothat they are not likely
to damage the door seal.
• Load sharp kniveswith the handles up to reduce
the risk of cut-type injuries.
• Donot wash plastic items unlessmarked
dishwasher safe or the equivalent. Forplastic
items not so marked,check the manufacturer's
recommendations.
• Donot touch the heating element during or
immediately after use.
• Donot operate your dishwasher unlessall
enclosure panelsare properly in place.
• Donot tamper with controls.
• Donot abuse, sit on or stand on the door or dish
rack of the dishwasher
• Donot allow childrento play around dishwasher
when opening or closing door due to the possibility
of small fingers being pinched in doo_
• Donot discard a dishwasher without first removing
the door ofthe washing compartment.
• Donot store or usecombustible materials, gasoline
or other flammable vapors and liquidsin the
vicinity ofthis or any other appliance.
• Donot allow childrento play with, on or insidethis
appliance or any discarded appliance.
READAND FOLLOWTHISSAFETYINFORMATION
CAREFULLY.
SAVE THESE INSTRUCTIONS
4

About thedishwashercontrol panel.
You can locate your model number on the tub wall just inside the door Throughout this manual, features and
appearance may vary from your model.
ge,com
Jf •Cgcles _"--.__
FI El IN
!!
._Options • " OuietPower3]
CLEAN
•HOT
L o,_j L J
Control Settings
HStatus Indicator Lights
The Status display tells you what's happenmg while the dishwasher is in operation and may flash,
indicating a malfunction. The lights will come ON indicating the sequence of operation the
dishwasher is in.
m
CLEAN Displayed when a wash cycle is complete. The light stags ON as a reminder that
the dishes are clean until the door is opened or until another cycle is selected.
Cycles
The light above the selected pad will be ON to indicate which cycle has been selected.
HEAVY WASH 8.5 gal., 89 min.
This cgcle is meant for heavily soiled dishes or cookware with dried-on or baked-
on soils. Everyday dishes are safe to be used in this cycle.
NORMALWASH 5,9 gal. 55 min.
This cgcle is for medium/heavily soiled dishes and glassware.
LIGHT WASH 6.1 gal., 36 min.
This cgcle is for everyday dishes and glassware.
CHINA CRYSTAL 6.1 gal., 39 min.
This cycle is for lightly soiled china and crystal.
RINSE ONLY 1.2 gal., 6 min.
For rinsing partial loads that will be washed lateE Do not use detergent with
this cgcle.

About the dishwasher control panel.
_l Options
The light above the selected pod will be ON to indicate which OPTIONhas been selected,
HOT START For use with heavily soiled and/or dried-on, baked-on soils.This option MUSTbe
(on some selected PRIORto starting the cycle. This optionwill improve both wash and dry
models) performance. This option adds 20 minutes to the cycle time.
NOTE:Cannot be selected with RINSEONLYcycle.
HEATEDDRY Shuts off the drying heat option. Dishes air dry naturally and energy is saved.
Light OFF For faster air dry you can prop the door open after the CLEAN light illuminates.
HEATEDDRY Turns the heater on for fast drying. This will extend the total run time by B8 minutes.
Light ON NOTE:Cannot be selected with RINSEONLYcycle.
LOCK
(on some
models)
You con lock the controls to prevent ang selections from being mode. Or gou con lock
the controls after blOUhave started acgcle.
Children cannot accidentallbl start dishwasher bg touching pads with this option
selected.
ToLOCKthedishwashercontrol,touchand holdtheHEATEDDRYpadfor 3seconds.Thelightbelow
the HEATEDDRYpadwillturnon.ToUNLOCKthedishwashercontrol,touchandholdtheHEATED
DRYpadfor3 seconds.TheLOCKlightwillturn off.
HOT WASH When selected, the cycle will run longer with the heating element on to improve both
wash and dry performance. NOTE: Cannot be selected with RINSE ONLY cycle.
DELAY HOURS You can delay the start of a wash cycle for 2, 4 or 8 hours {delay time options may
vary by model). Touch the DELAY HOURS pad to choose the number of hours you want
to delay the start of the cycle; then touch START/RESET one time. The dishwasher will
count down and start automatically at the correct time. Touching START/RESETa
second time will cancel the DELAY START selection.
RESET To change a cycle after washing starts, touch the START/RESETpad to cancel the
cycle. The START/RESETlight will flash while the water is pumped out if needed. This
takes approximately 90 seconds. When the light stops flashing, the dishwasher can be
reprogrammed and restarted.
ElStart
Close and latch the dishwasher door and select the cycle and desired enhancements. Touch the
START/RESETpad once to begin the cycle. Water begins to fill the dishwasher, and approximately 60
seconds later the wash action begins. Touching the START/RESETpad a second time will cancel the
cycle and cause the water to drain ouL This will take approximately 90 seconds.
NOTE:When the dishwasher door is fully closed, the control panel lights will display the last settings
you selected.
If you don't want to change any of the settings, simply touch the START/RESETpad once to begin
the cycle.
If the door is closed, the indicator lights will turn off if the START/RESETpad is not pressed within two
minutes. To activate the display, open and close the door or touch any pad.
Also, if a power failure occurs or the unit is first plugged into the wall, NORMAL and HEATEDDRVwill
automatically be programmed.

About the unicouple, ge.com
f
Before Operating the Dishwasher the First Time
Attach the faucet adapter. Thespecialfaucet adapter supplied with your dishwasher must be
assembled to the sink faucet before you can useyour dishwasheE
Thefaucet adapter isdesignedto fit standard spouts having internal or external threads. Youwill find
the adapter and two washers in the faucetadapter pocket in your dishwasher.
Toinstall faucet adapter, first remove the old aerator or trim ring on your faucet spout.
If faucet has external threads: Insertthe thinner of the two washers into the faucet adapter and
attach it to the faucet spout.
Tighten with pliers.
If faucet has internal threads: Insertboth of the washers into the faucet adapter and attach it to
the faucet spout.
Tighten with pliers.
Ifthe faucet adapter threads do not match your faucet spout, your local hardware or plumbing
supply store normally has additional fittings to adapt your faucet spout to the specialfaucet
adapter.
NOTE:A sinkspinFattachment hosecan burst if it isinstalled on the somesink with your dishwasher.
Wesuggest that you disconnectthe sink spray attachment if Four sinkhasone and plug the hole.
How to Connect the Unicouple
HI Runthe hot water faucet to purge cold
water from the hot water line.Thehot water
must be between 120% and 150°Ffor best
wash performance.
r-_ Pull Unicoupleand its hoses completely out
from storage compartment located at rear
of dishwasher.
r-_ Attach the Unicouple connector to the
faucet adapter by depressing the collar at
the top of the connector.When Unicouple is []
all the way up onto the adapter, releasethe
collar.It will then snap into position to lock
the Unicouple in place. []
The Unicouple'ssmall hosecarries water
from the faucet to the dishwasher.Itslarge
hosecarries drain water to the sink.Besure
Unicouple ispointing toward the sink bowl
drain opening and the sink drain isopen for
water that will drain from your dishwasher.
If your dishwasherdrains into a disposer,
operate the disposer until it iscompletely
empty before starting the dishwasher.
Turn hot water fully on before starting the
dishwasher.
Plugthe dishwasher power cord into the
outlet.
Pressure
release
butto_
How to Disconnect the Dishwasher
[] Unplug the dishwasher.
r-_ push the cord back into its storage location.
r_Turn off the hot water.
]Release the water pressureby depressing
the pressure releasebutton.
]Release the Unicouplefrom the faucet
by depressingthe collar at the top of the
Unicouple connector.
]Drain excesswater from the unicouple hoses
(seebelow). Pushthe hoses back into their
storage location.
ACAUTION:Toprotect yourself and
the room from severesplashing,relievewater
pressureprior to disconnecting the unicouple.
How to Drain Excess Water From Unicouple Hoses
Ifthe sink is 34" or higher from the floor, the excess water in Unicouple hoses cannot be drained
directly into the sink. It will be necessary to drain excess water from hoses into a bowl or suitable
container that is held outside and lower than the sink.

Using the dishwasher.
Check the Water Temperature
The entering water should be at least 120°F Turn on the hot water faucet nearest the
and not more than 150°R for effective cleaning dishwasher, place the thermometer in a glass
and to prevent dish damage. Check the water and let the water run continuously into the
temperature with a candy or meat thermometen glass until the temperature stops rising.
®or Cascade stal Clear®Rinse ent
Jet-Dry ®or Cascade Crystal Clear ®rinse agents remove spots and prevent new film buildup on
your dishes, glasses, flatware, cookware and plastic.
Filling the Dispenser
The rinse agent dispenser holds 100 ml (3.5 fl. oz.) of rinse agent.
Under normal conditions, this will last approximately one month.
Try to keep it full, but do not overfill.
m
D
B1
_] Replace the dispenser cap.
Rinse Aid Setting
The amount of rinse agent released into the final wash can be
adjusted. The factory setting is at the midpoint. If there are rings
of calcium (hard water) spots on dishes, try a higher setting. If you
see foam in the dishwasher, move the indicator to a lower setting.
Make sure the dishwasher door is fully open.
Turn the dispenser cap to the left and lift it out,
Add rinse agent until the indicator window looks full.
Clean up ang spilled rinse agent with a damp cloth.
To adjust the setting
Remove the dispenser cap; then turn the adjuster counterclockwise
_ii Indicat°r
Rinse
agent
to increase the amount of rinse agent, clockwise to reduce the amount of rinse agent.
Dish Preparation Prior to Loading
• No pre-rinsing of normal food soil is required.
• Scrape off hard soils, including bones,
toothpicks, skins and seeds.
• Remove large quantities of ang remaimng
food.
• Remove leafy vegetables, meat trimmings
and excessive amounts of grease or oil.
• Remove acidic food soils that can discolor
stainless steel.
8

Proper Use of Detergent
Use onlUdetergent specificall Umade for use
in dishwashers. Cascade_ and Electrasol _
Automatic Dishwashing Detergents have been
approved for use in all GEdishwashers. Keep
gout detergent fresh and drg. Don't put powder
detergent into the dispenser until gou're readg
to wash dishes.
The amount of detergent to use depends on
whether gout water is hard or soft. With hard
water, gou need extra detergent. With soft water,
gou need less detergent.
Protect gout dishes and dishwasher bg
contacting gout water department and asking
how hard gout water is.Twelve or more grains
is extremelg hard water. A water softener is
recommended. Without it, lime can build up
in the water valv< which could stick while open
and cause flooding. Too much detergent with
soft water can cause a permanent cloudiness
of glassware, called etching.
Use the information in the table below as a
guideline to determine the amount of automatic
dishwasher detergent to place in the dispenser.
Number
of Grains Detergent Cups to Fill
Lessthan 4 Fillcup to first line
4 to 8 Fillcup to second line
8 to 12 Fillmainwash cup
Greater Fillboth MainWash and
than 12 PreWash cup
ge.com
Medium Hedium Extremelg
Soft Soft Hard Hard
L
For heavily-soiled loads, use the Pots and Pans or
Heov_t Wash cgcle and odd o little extra detergent.
DO NOT USE HAND DISH DETERGENT
NOTE:Usinga detergent that is not specifically
designedfordishwashers will causethe dishwasher
to fill with suds.Duringoperation, these sudswill spill
out of thedishwasher vents,coveringthe kitchen
floor and making the floor wet.
Becauseso many detergent containers lookalike,
store the dishwasher detergent in a separate space
from all other cleaners.Showangone who mag use
the dishwasherthe correct detergent and where
it isstored.
Whilethere will be no lasting damage to the
dishwasher,gour disheswill not get clean using a
dishwashing detergent that is notformulated to
work with dishwashers.
Forget to Add o Dish?
A forgotten dish can be added ang time before
the main wash.
r_ Squeeze the door latch to release the door.
E]Do not open the door until the water sprag
action stops. Steam mag rise out of the
dishwasher.
[] Add forgotten dishes.
[] Close the door.

Loading the dishwasher racks.
For best dishwashing results,
baskets may vary from your model.
Upper Rack
Althoughtheupperrackisforglasses,cupsand
saucers,potsandpanscanbe placedinthisrack
foreffectivecleaning.Cupsandglassesfit best
alongthesides.Thisisalsoasecureplacefor
dishwasher-safeplastics.
Theutilityshdf(onsomemodels)magbeplacedin
theupordownpositiontoaddflexibilitg.A wine
glossholder(onsomemodels)secureswine
glassesfor bestwashabilitg.Becausewineglasses
comeinvarioussizes,afterloading,slowlgpush
intherackto makesurethegwillclearthetop of
thedishwasher.
Theupperrackisgoodfor allkindsofodd-shaped
utensils.Saucepans,mixingbowlsandotheritems
shouldbeplacedfacedown.Fold-downtines(on
somemodels)provideflexibilitgfor extra-largeand
hard-to-fititems.
follow these loading guidelines. Features and appearance of racks and silverware
Securelargerdishwasher-safeplasticsover2tines
whenpossible.
Hakesuresmallplasticitemsaresecuresothey
can'tfallontotheheate_
Besurethatitemsdonotprotrudethrough
thebottomoftherackandblockrotationofthe
middlesprayarm.Thiscouldresultinpoorwash
performanceforitemsintheupperrack.
Check to make
sure that no items
will block rotation
of the wash arms.
Lower Rack
Thelowerrackisbestusedfor plates,saucersand
cookware.Largeitemssuchasbroilerpansand
bakingracksshouldgo alongtheleft-handside.
Loadplatters,potsandbowlsalongthesides,in
cornersor intheback.Thesoiledsideofitems
shouldfacethecenteroftherack.Ifnecessarg,
oversizedglassesandmugscanbeplacedinthe
lowerrackto maximizeloadingflexibilitg.
Also,becarefulnotto leta portionofan itemsuch
asa potor dishhandleextendthroughthebottom
rack.Thiscouldblockthewasharmandcause
poorwashingresults.
Fold-downtines(onsomemodels)provide
flexibilitgfor extra-largeand hard-to-fititems.The
tinesmagbeleftintheuppositionorfoldeddown
tocustomizethe lowerrack.
.......................................................................i; Oonotlet anuitem
extendthroughthe
bottomofthesilverware
basket.Itemsthat
extendthroughtherack
couldpreventthespray
arm fromturning and
causepoor wash
performance.
Single basket Ion some models)
One-piece basket Ion some models)
Three-piece basket (on some models)
To remove end baskets, grasp the
basket at opposite corners and slide
apart.
Silverware Basket
Toloadflatware,simplgpushtheadjustable
handleto eitherside(onsomemodels).Put
flatwareintheremovablebasketwithfork and
knifehandlesupto protectgourhands.Place
spoonsinthebasketwith handlesdown.Hix
knives,forksandspoonssothegdon'tnest
together.Distributeevenlg.Smallplasticitems,
suchasmeasuringspoonsandlidsfrom small
containers,shouldgo inthebottomofthe
silverwarebasketwiththesilverwareontop.
Theone-piecesilverwarebasket(onsomemodels)
canbe placedinthefront,rightsideorbackofthe
lowerrack.
Avarietgofoptionsisavailableregardingthe
three-piecesilverwarebasket(onsomemodels)
in gourdishwashenThecompletebasketis
designedtofit ontherightsideofthelowerrack.
Additionallg,eachendofthebasketisremovable
toaddloadingflexibilitgto accommodateflatware
andlowerrackcapacitgneeds.
Thelidsofbothendandmiddlebaskets
(onsomemodels)canbeclosedto containsmall
items.Longitemscanbeplacedontheutilitgshelf
intheupperrack.
The accessor_l _.
basket (onsome
models)can hold _.
small itemssuch _ _.q_
as: babg bottle
nipples,plastic lids_
corn cob holders, etc.
10
Loading place settings.., ge.com
Follow these guidelines for loading 10 place settings. Features and appearance of racks and silverware baskets
mag vary from gour model.
Upper Rack--lO place settings Lower Rack--lO place settings Lower Rack--lO place settings
Follow these guidelines for loading 12 place settings. Features and appearance of racks and silverware baskets
mag varg from gour model.
Upper Rack--12 place settings Lower Rack--12 place settings
11

Caring for the dishwasher.
Cleaning the Door Panel
Before cleaning the front panel, make sure
Uouknow what tupe of panel Uou have.
Referto the last two letters of uour model
number. You can locate uour model
number on the left-hand tub wall just
inside the door. If uour model number ends
with BB,WW, CC,SAor BG,then Uou have
a Painted Door panel. If uour model
number ends with SS,then Uou have a
Stainless Steel Door panel. If uour model
number ends with CS,then Uou have a
CleanSteel Door panel.
Follow the instructions below for cleaning
the door panel for uour specific model.
Painted Door Panel (model numbers
ending in BB-black, WW-white, CC-bisque,
SA-silver metallic, BG-graphite metallic or
GS-silver)
Use a clean, soft, lightlu dampened cloth,
then dru thoroughlu. You mau also use a
good appliance wax or polish.
Stainless Steel Door Panel (model
numbers ending in SS)
The stainless steel panels can be cleaned
with Stainless Steel Hagic or a similar
product using a clean, soft cloth. Do not
use appliance wax, polish, bleach or
products containing chlorine on Stainless
Steel doors.
You can order Stainless Steel Magic
#WXlOX15 through GEParts bu calling
800.626.2002.
CleanSteel Door Panel (model numbers
ending in CS)
Use a clean, soft, lightlg dampened cloth,
then drg thoroughlg. Do not useappliance
wax, polish or ang chemical agent on
CleanSteel doors.
Do not wipe the dishwasher with a soiled
dish cloth or wet towel. Thesemay leave
aresidue. Do not use scouring pads or
powdered cleaners because these
products can scratch the finish.
Cleaning the Control Panel
To clean the control panel, use a lightly
dampened cloth. Then dry thoroughly.
Protect Against Freezing
If your dishwasher is left in an unheated
place during the winter, ask a service
technician to:
IT] Unplug the dishwasher from the
wall outlet.
[_ Remove the Unicouple from the
faucet. Disconnect the hose from
the water valve.
['_1 Drain water from the water inlet line
and water valve. (Use a pan to catch
the water.)
[_ Reconnect the water inlet line to the
water valve.
12

Before you call for service.., gecom
_,_ roubleshooting Tips
Save time and money! Review the charts on the following
pages, or visit ge.com You may not need to call for service.
Error Messages Possible Causes What To Do
START/RESETstatus Youhave pressedthe • PresstheSTART/RESETpadonetimeto startthedishwasher.Pressit a
indicator light flashingSTART/RESETpad while the secondtime only if youwish to cancelthe cycleand start over with
a newcycle.dishwasherisrunning.Thiswill
cancelthecgcle.Thelight will
stopflashingafter thedishwasher
drains(about90seconds).
Dishwasher BEEPS This iso reminder that gout , Closeand latchthedoorafteropeningitmid-cycle.
onceevery 30 secondsdishwasher door hasbeen left
open during operation. It will
continue beeping until gou close
the door.
Problem Possible Causes What To Do
Dishesandflatware Lowinletwater temperature • Hakesuretheinletwatertemperatureisat least120°ERemovethe
natclean Unicouple,ifattached,andrunthehotwaterfaucetuntilthewater
temperaturestopsrisingtopurgecoldwaterfromthehotwater line.
Turnoff thefaucet.ReconnecttheUnicoupleandthenturnthefaucet
backon.Ifthewatertemperaturedidnotreach!20°F,consider
increasingthewatertemperatureatthewater heaterWater
temperaturemustnotexceed1SO°F.
Spatsandfilming
onglossesand
flatware
Water pressureistemporarilg low • Turnon afaucet.Iswatercomingoutmoreslowlythan usual?
Ifso,waituntilpressureisnormalbeforeusingyourdishwasher
Improperrackloading • Hakesurelargedishwaredoesnotblockthedetergentdispenser
orthewasharms.Seethe Loadingthedishwasherrackssection.
Extremelyhardwater * UseJet-Dry®orCascadeCrystalCleaPrinseagentstoremovespotsand
Lowinletwater temperature preventnewfilm buildup.
Overloadingthedishwasher • Toremovestubbornspotsand pre-existingfilmfrom glassware:
Improperloading 1 Removeall metalutensilsfromthedishwasher
Oldor damppowderdetergent 2 Donotadddetergent.
Rinseagentdispenserempty 3 SelectthePOTS&PANSor HEAWWASHcycle.
Toolittle detergent 4 Startthedishwasherandallowtorunfor 18to 22minutes.Dishwasher
willnowbeinthemainwash.
5Openthedoorandpour2cups(SO0ml)ofwhitevinegarintothe
bottomofthedishwasher.
6 Closethedoorandallowto completethecycle.Ifvinegarrinsedoesn't
work:Repeatasabove,exceptuse1/4cup(60ml)ofcitricacidcrystals
insteadofvinegar.
Cloudinesson Combinationofsoftwater and • Thisiscalledetchingandispermanent.Topreventthisfrom happening,
glassware too muchdetergent uselessdetergentif youhavesoftwater.Washglasswareintheshortest
cyclethatwillgetthemclean.
Water temperatureentering • Thiscouldbeetching.Lowerthewaterheatertemperature.
the dishwasherexceeds150°F
Sudsin thetub Wrongdetergent * Useonlgautomaticdishwasherdetergentstoavoidsudsing.
Cascade®andElectrasoPAutomaticDishwashingDetergents
havebeenapprovedforuseinallGEdishwashers.
Toremovesudsfromthetub,openthedishwasherandlet
sudsdissipate.Closeandlatchthedishwasher.Pumpoutwater
bgtouchingtheSTART/RESETpadonce;then30secondslater,
touchtheSTART/RESETpadagain.Repeatif necessary.
Rinseagentwasspilled Alwagswipeup rinseagentspillsimmediatelg. 13

Beforeyou callfor service...
Problem Possible Causes What To Do
Detergent/eft in Dishesare blocking the • Repositionthedishes,sothe water from the lowerspray armcan
dispensercups detergent cup flush the detergentcup. Seethe Loadingthedishwashersection.
Blackorgray Aluminumutensilshave • Removemarkswitha mild,abrasivecleane_
markson dishes rubbedagainstdishes
Dishesdon'tdry Lowinletwater temperature • Hakesureinletwatertemperatureisat least120°R
• SelectHEATEDDRY.
• UseHOTSTART,HOTWASHorADDEDHEAToptions.
• Selecta highercycle,suchasANTI-BACTERIA,POTS&PANS
or HEAWWASH.
Rinseagentdispenserisempty • Checktherinseagentdispenserandfillasrequired.
ControlpanelrespondedDoorlatch magnot beproperly • Hakesurethedoorisfirmly closed.
toinputsbutdishwasher seated
neverfilledwithwater Faucetmay beturnedoff • Hakesurehotwaterfaucetisturnedon.
Floodfloat may bestuck • Removethelowerrackandtap lightlyonthefloodfloatcover(dome
Stained tub interior locatedatthe leftfront cornerofthetubbottom).
• UseoftheRINSEONLYcycleafteraddingthedishto theload
candecreasethelevelofstaining.GErecommendsCascade®
PlasticBoosterto helpremovethesetLjpesofstains.
• Removethestainbyhand,usinga solutionof 1/2cupbleach
and3 cupswarmwaten
Dishwasherwon't run
Control panel lights
go off when you're
setting controls
Water standing in
the bottom of the tub
Steam
Noise
Sometomato-basedfoodscan
causereddishstains
Teaor coffeestains
Anoverallyellowor brownfilm can •
becausedbgirondepositsinwater
White film oninsidesurface- •
hardwater minerals
Fuseisblownor circuitbreaker •
istripped
WARNING
Beforecleaninginterior,waitat least20minutesaftera cycleforthe
heatingelementstocooldown.Failureto dosocanresultin burns.
Aspecialfilterinthewatersupplylineisthe onlywagto correct
this problem.Contacta watersoftenercompany.
GErecommendsJet-Dry ®or CascadeCrystalCleaPto help
preventhardwatermineraldepositsfromforming.
Rundishwasherwith citricacidto removemineraldeposits.Citricacid
(Partnumber:WD35X151)canbeorderedthroughGEParts.Seeback
coverfororderinginformation.
Replacefuseorresetcircuitbreaker.Removeanyotherappliancesfrom
the circuit.
Poweristurned off • Insomeinstallations,thepowertothedishwasherisprovidedthrougha
wallswitch,oftenlocatednextto thedisposerswitch.Hakesureitison.
Controlpanelislocked • Unlockcontrolpanel.Seepage6.
Reboot gour control
Time too long between
touching of selected pads
• Unplugthe dishwasherfor 30seconds;thenplugbackin.
• Eachpad must betouched within 30 secondsof the others.
Torelight, touch any pad again,or unlockand relatch door.
This isnormal
Thisisnormal
Normal operating sounds
Rattling disheswhen the spray
arm rotates
• Asmall amount of cleanwater aroundthe outlet on the tub
bottom at the backof thetub keepsthe water seallubricated.
• Warm,moistaircomesthroughtheventbythedoorlatchduringdrying
andwhenwaterisbeingpumpedout.Thisisnecessaryfordrying.
• Detergentcup opening.
• Waterenteringdishwasher.
• Themotor stopsand starts at varioustimesduring thecycle.
• Drainpumpsoundsdurinqthe pumpout.
• Hake suredishesare properlyloaded.Seethe Loadingthe
dishwasherrackssection.
14

GEDishwasher Warrants.
All warranty serviceprovidedby our FactoryServiceCenters,
or an authorized CustomerCare_technician.Toschedule
service,on-line,24hours a day, visitus atge.com,or call
800.GE.CARES(800.432.2737).Pleasehaveserial number
and model numberavailablewhen coilingfor service.
Staple your receipt here.
Proof of the original purchase
date is needed to obtain service
under the warranty.
For The Period Of:
One Year
From the dote ofthe
original purchase
GE Will Replace:
Any part of the dishwasher which fails due to a defect in materials or workmanship. During this
limited one-gear warranty, GEwill also provide, free of charge, all labor and related service to
replace the defective part.
What GE Will Not Cover:
• Service trips to gour home to teach gou how to use
the product.
• Improper installation, deliverg or maintenance.
• Failure of the product if it is abused, misused, or used for
other than the intended purpose or used commerciallg.
• Replacement of house fuses or resetting of circuit
breakers.
• Damage to the product caused bg accident, fire, floods
or acts of God.
• Incidental or consequential damage caused bg possible
defects with this appliance.
• Cleaning or servicing of the air gap device in the
drain line.
• Damage caused after deliverg.
• Product not accessible to provide required service.
EXCLUSION OF IMPLIED WARRANTIES--Your sole and exclusive remedy is product repair as provided in this Limited
Warranty. Any implied warranties, including the implied warranties of merchantability or fitness for a particular
purpose, are limited to one year or the shortest period allowed by law. I
This warrantF is extended to the original purchaser and any succeeding owner for products purchased for
home use within the USA. Ifthe product is located in an area where service by a GE Authorized Servicer is not
available, you may be responsible for a trip charge or you may be required to bring the product to an Authorized GE
Service location for service. Proof of original purchase date is needed to obtain service under the warranty. In
Alaska, the warranty excludes the cost of shipping or service calls to your home.
Some states do not allow the exclusion or limitation of incidenta! or consequential damages. This warranty
gives you specific legal rights, and you may also have other rights which vary from state to state. To know
what your legal rights are, consult your local or state consumer affairs office or your state's Attorney General.
Warrantor: General Electric Compang. Louisville, KY 40225
15

Consumer Support.
GEAppliances Wetsite
Have a question or need assistancewith your appliance?Try the GEAppliances Website 24 hours a day,
anu day ofthe year! Forgreater convenience and faster service,you can now download Owner's Manuals,
order parts or even schedule serviceon-line.
ge.com
ScheduleService ge.com
ExpertGErepairserviceisonly one step awagfrom your door Geton-line and scheduleyour serviceat
your convenience24 hoursany day ofthe year!Or call800.GE.CARES(800.432.2737)duringnormal businesshours.
RealLifeDesignStudio ge.com
GEsupports the UniversalDesignconcept-products, services and environments that can be usedby
people of all ages,sizesand capabilities.We recognizethe need to design for a wide range of physical and
mental abilities and impairments. Fordetails of GE'sUniversalDesignapplications, including kitchen designideas
for peoplewith disabilities,check out our Website toda9. Forthe hearing impaired, pleasecall 800.TDD.GEAC
(800.833.4322).
ExtendedWarranties
Purchasea GEextended warranty and learn about special discounts that are available while your warranty
isstill in effect. You can purchase it on-line anytime, or call800.626.2224during normal businesshours.
GEConsumer Home Serviceswill still be there after your warranty expires.
ge.com
Parts and Accessories ge.com
Individuals qualifiedto servicetheir own appliances can haveparts or accessoriessent directly to their homes
(VISA,MasterCardand Discovercards are accepted).Order on-line today, 24 hours every day or by phone at
800.626.2002during normal businesshours.
Instructions contained in this manual cover procedures to beperformed 6g ang user. Other servicing
generally should be referred to qualified service personnel Caution must be exercised,since improper
servicing mag cause unsafe operation.
Contact Us
If you are not satisfied with the service you receive from GE,contact us on our Website with all the details
including your phone number, or write to: General Manager, Customer Relations
GEAppliances, Appliance Park
Louisville, KY40225
ge.com
Register YourAppliance
Register sour new appliance on-line--at sour conveniencesTimely product registration will allow for
enhanced communication and prompt service under the terms of your warranty, should the need arise.
Youmay also mail in the pre-printed registration card included in the packing material, or detach and
usethe form in this Owner's Manual.
ge.com
_Printed in the United States
_Printed on Recycled Paper
Other manuals for GLC4100N
1
This manual suits for next models
1
Table of contents
Other GE Dishwasher manuals

GE
GE GSD940D User manual

GE
GE GSC902 Installation instructions

GE
GE GDT225 Series User manual

GE
GE GSC451 User manual

GE
GE ADT521PGFBS User manual

GE
GE GSD906 User manual

GE
GE GSD400P User manual

GE
GE Monogram ZBD4700XWW User instructions

GE
GE Monogram ZBD 1800 User manual

GE
GE CleanDesign GSD400T User manual