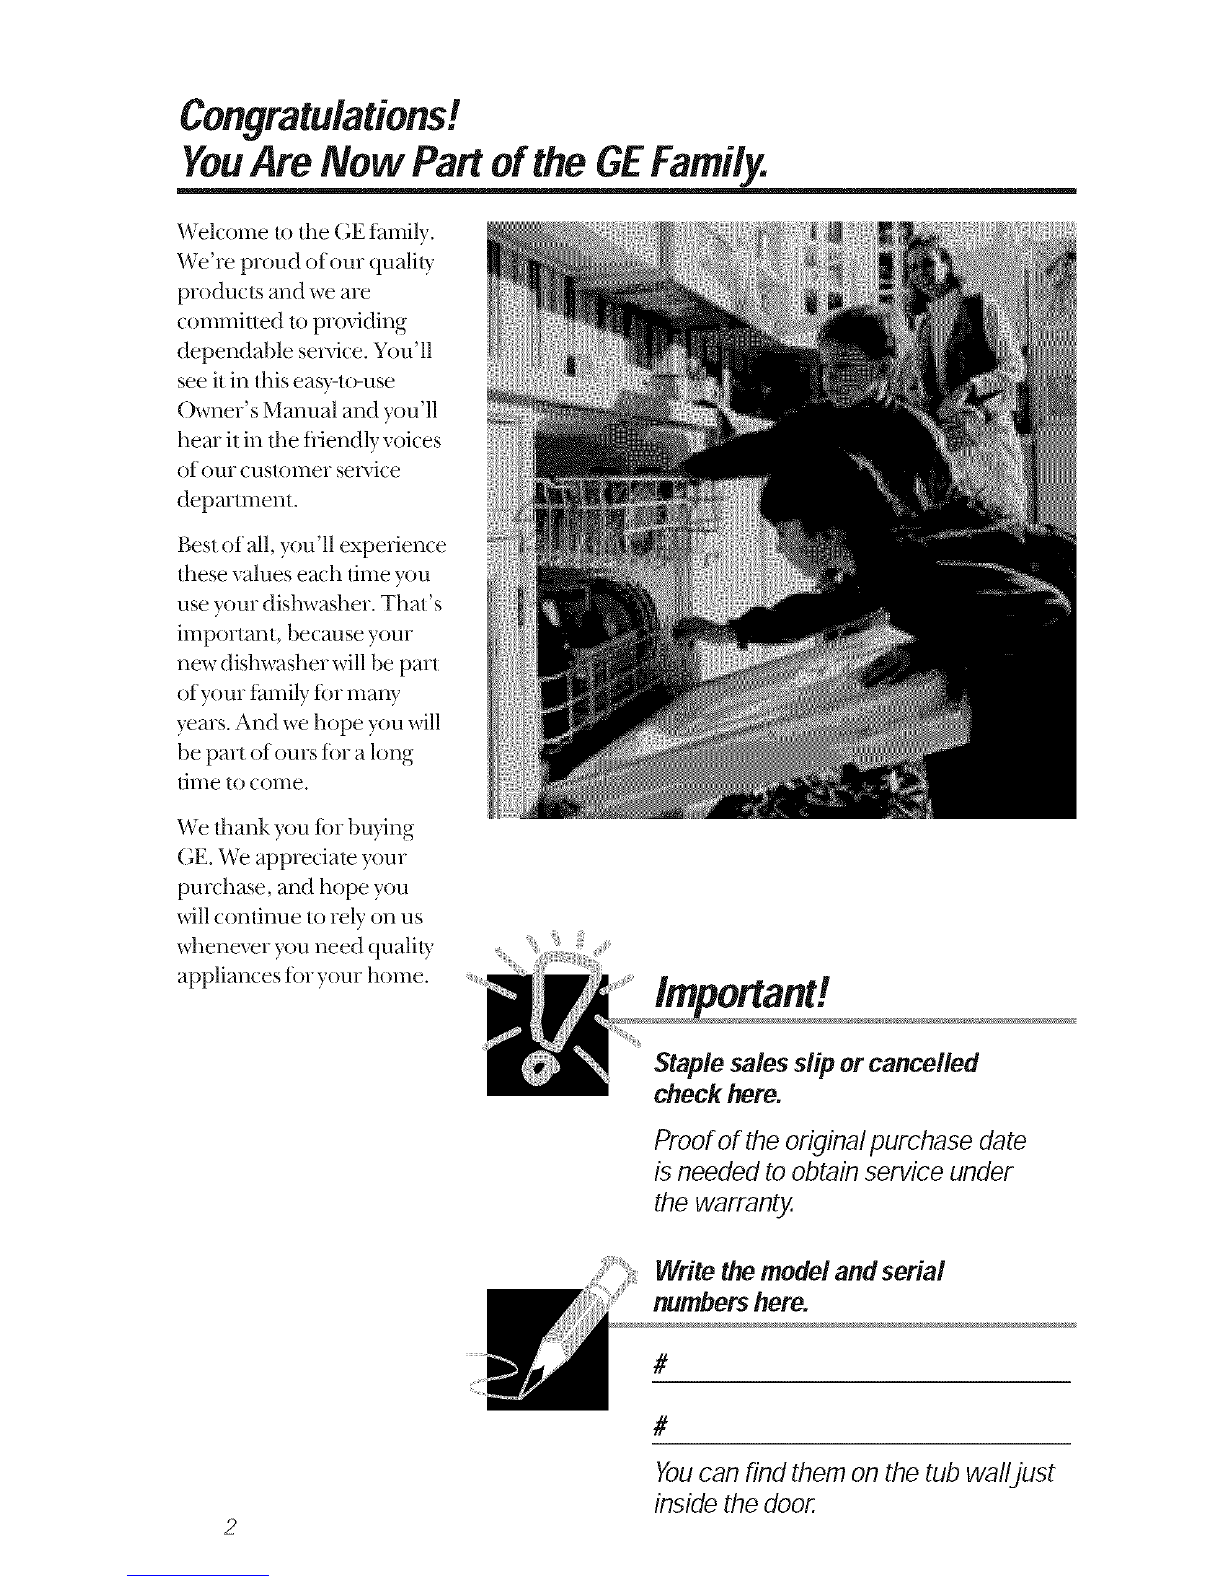
GE GSD7750 User manual

GEAppliances
GSD7750
GSD7780
Part No. 165D4788P141 Pub.No. 49..5794

Congratulations!
YouAreNow Partof theGEFamily.
Welcome/o tim GE f_tmily.
We're proud of our quality
products and we are
commitmd toproviding
dependable se_,ice. You'll
see it in fl_iseasyqo-use
Owner' s Mmmal and you'll
hem il in tim fiiendly voices
of our customer se_,ice
departmenl.
Best of all, you'll expe_Jence
fl_ese values each time you
use your dishwasher. That's
important, because your
new dishwasher will be part
of your family for ma W
years. And we hope you will
be part of ours tor a long
time tocome.
Weflmnkyou tor bwing
GE. Weappreciate your
purchase, and hope you
_ll continue to rely on us
whenever you need quality
appliances tor your home.
@
Staple sales dip or cancelled
check here.
Proof of the original purchase date
isneeded to obtain service under
the warranty.
Write the modeland serial
numbershere.
#
#
Youcan find them on the tub walljust
inside the door.

GE& You,
A ServicePartnership.
Ask any GEappliance owner and they will
tell you we stand behind our products with
unmatched quality service. However, did
you know that most questions result from
simple problems that you can easily fix
yourseff injust a few minutes? This
Owner's Manual can teflyou how.
Readthis Manual
Inside you will find ma W
helpfhl hints on how to use and
maintain your dishwasher
properly..Just a little prevenlive
care on your part Call save you a
great deal of time and money
over the life of your dishwasher.
ReviewtheSectionon
TroubleshootingTips
You'll find many answers to
coinInt/n probleuls here.
If you review our chart of
Troubleshooting Tips first,
you may not need to call tar
service at all.
If YouNeedService
If you do need sei_ice, you can
relax know,ringhelp is only a
phone call away. A list of toll-fiee
customer sei_:ice numbers is
included in the back section.
Or you Call alwws call tile
GE Answer Center ®at
800.626.2000, 24 hours a dW,
7 days a week.
Safety information ....... 4- 7
Operating Instructions
ControlPanel ............... 8
ControlSettings............. 8
Dial Cycles............. 10-77
UsingtheDishwasher .... 12,13
Loadingthe
DishwasherRacks....... 14,t5
ChangingColorPanels....... 16
CareandCleaning.......... 18
TroubleshootingTips
BeforeYou
CallForService......... 19-23
CustomerService
Warranty ................ 27
ServiceTelephone
Numbers .......... BackCover
3

IMPORTANTSAFETYINFORMATION.
READALLINSTRUCTIONSBEFOREUSING.
WARNING!
Foryour safety, the information in this manual must be
followed to minimize the risk of fire, explosion, electric
shock, or toprevent property damage, personal injury,
or loss of life.
WATERHEATERSAFETY
Under certain conditions hydrogen gas may be produced in
a water heater that has not been used for two weeks or
more. Hydrogen gas can be explosive under these
circumstances.
If the hot water has not been used tbr t_vo weeks or more, prevent
the possibilily of damage or injm 7 by turning on all hot water
/hucels and allow them to run tbr several minums. Do Ibis betore
using any eIectiica] appliance which is connected to the hot water
system. This simple procedure will allow any buih-up hydrogen gas
to escape. Since the gas is flammable, do not smoke or use an ()pen
flame or appliance du|ing this process.

Useyour dishwasher only for its intended purpose as
described in this Owner's Manual.
PROPERiNSTALLATION
ANDMAINTENANCE
This dishwasher must be properly installed and located in
accordance with the Installation Instructions before it is used.
Ifyou did not receive an Installation Instructions sheet with
your dishwasher, you can receive one by calling us toll-free
at the GEAnswer Center_'800.626.2000.
Connect to a grounded
metal, permanent _dxing
system; or run an equipment_
gTounding conductox with
tile circuit conduclors and
connect 1o the equipmenI_
gTounding lenninal or lead
of tile appliance.
Improper connection of tile
equipment-gTounding
conductor can resuh in a xisk
of eleclxic shock. Check with
a qualified elecuician or
service representative if you
ae in doubt wheflmr the
appliance is properly
gTounded.
Dispose of discarded
appliances and shipping or
packing matexial properly.
Do not attempt/o repair or
replace aW part of your
dishwasher unless it is
specifically recommended in
fills manual. All odmr
sex,Tieing should be refened
/o a qualified technician.
To minimize tim possibilib: of
elecuic shock, disconnecl
fllis appliance flx)m file
power supply betbre
allempfing any mainlenance.
NOEE:Turning tile
dishwasher offdoes not
disconnect tile appliance
flom tile power supply. We
recommend having a
qualified lechnician sex_ice
your appliance.
5

IMPORTANTSAFETYINFORMATION.
READALLINSTRUCTIONSBEFOREUSING.
WARNING!
DONOL..
Do not tamper with controls. Do not allow children toplay
inside, on or _th this
} Do not abuse, siton, or stand
on the door or dish rack of appliance or any discarded
the dishwasher, appliance.
Do not discmd a dishwasher
_qd_out first removing the
door of the washing
compartmenl.
Do noÁstore or use
combustible mamrials,
gasoline or other tlammable
vapors and liquids in fl_e
vicinily of this or aW other
appliance.

WHENUSINGYOURDISHWASHER
1Jseonly powder or liquid
dele_genls or welling agenls
recommended tbr use in a
dishwasher.
D_cate sharp ilems so that
they are not likely to damage
the door seal.
Dmd sharp knives _th the
handles up It reduce the _Jsk
of cut-type il_jmJes.
Do not wash plastic items
unless marked dishwasher
safe or the equivalent. For
plastic imms not so marked,
check the manutacmrer's
recommendations.
iiiiiiiiiiiii_iil
iiiiiiiiiiiii_iil
iiiiiiiiiiiii_iil
Do not touch the heating
element during or
immediately atier use.
Do not operate your
dishwasher unless all
enclosure panels me properly
in place.
Close supe_,ision is necessm T
if this appliance is used by or
near children.
Dmd light plastic ilems so
they will not become
dislodged and drop/o lhe
bottom of the dishwashe_
they might come into contact
_4th the heating element and
be damaged.
REMEMBER...
Your continued health and safety are important to us.
Please read and follow this Safety Information carefully,
We want you to remain a happy and healthy part of our
GE family.
SAVETHESEINSTRUCTIONS

Aboutthe dishwasher centre/panel
Youcan Iocate your model number on the tub walljust inside the door.
Throughout this manual, features and appearance may vary from your model.
I START
START DELAY
(HRS)
CYCLES ENERGY OPTIONS STATUS
I I I I I I I I
8
ControlSettings
cycle,
POTSCRUBBERForheavilysoileddishesor cookwarewith dried-on
or baked-onsoils.Everydaydishesmaybeincluded.
Thiscyclewill notremoveburned-onfoods.
NORMALWASH Forloadsof everydaydishes,glassesandcookware
with mediumsoils.NOTE:Manydisheshavelighter
soil than normal.Choosinga cycleotherthan
NORMAL WASHwill saveenergyand water.
LIGHTWASH/For disheswith light soils.
WATERSAVER
SHORTWASH Forquickly washingloadsof everydaydisheswith
mediumsoilsthat havenotdriedon, suchas loads
consistingmostlyof glasses.
RINSE& HOLDForrinsingpartial loadsthat will bewashedlater.
Donot usedetergent.
PLATEWARMER Forwarmingcleandishesandserving plates.This
cyclewill takeapproximately32minutes.
, Make sure the Dial is at the OFFposition.
Latch the door.

......E, gy@tJo,
TFMP BOOSTProvidesextraheatfor best performance.It isused
bestwith heavily-soileddishes.
HEATEDDRYTurnsthe dryingheateronfor fast drying.This
cyclewill extendthetime to yourwash cycle.
ENERGYSAVERTurnsall ENERGYOPTION.Soft.
Slowly turn the Dial to the STARYposition. Don't mm it
past the $TARTposition, or you could accidenlally miss a
_{nse. There is a time del W between stml-up and water
till so you will not hem any wash action right awW.
9

About the dial cycles.
WARM£R
(PRE_ RINSE & HOL D
.EATEDQRV}
Short Wash
For quickly washing loads of eveuday dishes with
medium soils lhal have not dried on.
Select the NORMAL WaSHq, cle and any options.
{{
_t_ sure the door is unlatched.
ii_Slowly turn the Dial to SHORTWASH.
i{i{
STARTDELA_,S, .... /
(HRS) "_ SHORT
2
RINSE&HOLD
Rinse & Hold
For rinsing partial loads that will be washed later. Do not
use detergent.
Make sure HEATEDDRYOFFisselected.
_Be sme the door is unlatched.
:}
_Slowly turn the Dial to RINSE &HOLD.
_ii,iiiii
START
START DELAY '),
(HRS) ."_ SHORT
o_,
Ha_Ny) RJNSE & HOLD
iO
Plate Warmer
For wa_-ming clean dishes and sepdng plates. This _3,cle
will lake approximately 32 minutes.
{{_ Load clean dish'ware to be win-reed.
{{{::)
_lecl HEATEDDRY..
sme the door is unlatched.
;{i//Slowly turn the Dial toPLATEWARMER.
:{7"1

% START
START DELAY ').
(HRS) "_ SHORT
__ASH
OFF
PLATE
WA
(pRESS RINSE &HOLD
H_Tm DR
StartDelay
The STARTDELAYwill allow you lo delay tlae stall time of
any cycle no! on the Dial automaIically tbr up Io 6 hours.
lk_ sme tim door is unlatched,
_lect fi_e wash tycle and option you wanL
!i iiii'_
!_Slowlv mm the Dial to desired time, The CYCLEON
light Will come on.
ffLalch the door to stml the (vole.
Cycle Sequence
POTSCRUBBER 9.9gal. 63min. RinseRinseRinseMainWash RinseRinseRinse
LIGHTWASH 7.7gal. 63rain. RinseRinseMainWash RinseRinse
SHORTWASH 6.9gal. 55min. RinseMainWash RinseRinseRinse
Drying Options:
HEATED DRY.Available on all wash cycles except
RINSE &HOLD.Add approximately 32 minutes to
fi_e cycle.
ENERGYSAVER.Duing heater is turned oiE Dishes
dUnatmally.
ii

Usingthedishwasher.
Checkthe WaterTemperature
The entering waler must be at least 120°F. and not more than
150 oF., for effective cleaning and to prevent dish damage. Check
the water temperalure _th a can@ or meat thermometer. Turn on
the hot water fimcet nearest the dishwasher, place the thermometer
in a glass and let the water run continuously into tl_e glass until tl_e
temperature slops _Jsing. Ac!just your wamr healer, ifneeded.
72
Usinga RinseAgent
A _inse agent,such as JET-DRY, makes water flow off lhe dishes
quickly thereby reducing water spotting.
Fill the rinse agent dispenser
until it reaches the bottom of lip
inside tl_e opening. Replace cap.
To check it_Jnse a,g_nt is needed,
remove the cap and look into tim
dispenser. On some models, the
dispenser can be checked by
pressing the clear center of the
fill cap 2 or 3 times. If_inse agent
fills the cenmr of the fill cap, you
have enough.
Afull dispensershouldlastabout3months.
Ifrinse agentspills,wipeit up immediately.Itcan keepyour detergent
from working.

ProperUseof Detergent
Use only detergent specifically made for use in dishwashers. Keep
your detergent ilesh and dU. Don't put powder detergent into the
dispenser until you're ready to wash dishes.
The amount of detergent to use depends on whether your water is
hardor soft.With hard water, you need extra detergent. With soft
water, you need less detergent.
Promct your dishes and dishwasher by contacting your wamr
depmlment and asking how hard your water is. Twelve or more
grains is exuemely hard water. A water softener is recommended.
Without it, lime can build up in the water valve, which could stick
while open and cause flooding. Too much dem_gent with soil waler
cm_cause a permanent cloudiness ofglasswme, called etching.
You'll find two detergent dispensers on the OpenCup
inside door ofyour dishwasher. All wash o,des
_equi_e detergent in the main cup. Wash q,cles
with two washes will also use the open cup.
Be sure dm Dial is at 0YYposition befbre
adding detergent. Otherwise, the detergent
cup will not close and latch properly. Add
detergent then close the main cup.
MainCup
NOTE:To open detergent cup after it has
been closed, simply turn the detergent cup
handle counter-ulockwise until it releases. A
snapping sound may be heard. !
ForgettoAdd a Dish?
k tbrgotten dish can be added any tilne before the main wash.
{{_()nce the water calms, open the door. Steam may rise out of the
}i!!!!!dishwasher.
{JAdd tbrgotlen dishes.
It;'the far _ight. 73

Loadingthe dishwasher racks.
For best d/shwashing results, fo//ow these loading gu/de/ines. Features and
appearance of racks and silverware baskets may vary from your model.
UpperRack
The upper rack is tbr glasses, cups and saucers.
(]ups and glasses fit best along the sides. This is
also asecure place tbr dishwashe>sate plastics. A
cup shelf (on some models) may be placed in lhe
up or down position to add flexibility. The upper
rack is good fbr all kinds of odd-shaped utensils.
Saucepans, mixing bowls and other imms should
be placed t_tce doxm.
Securelargerdishwasher-safeplasticsovertwofingers
whenpossibfe.
Makesuresmattplasticitemsaresecuresotheycant fail
ontotheheatingelernenL
74
The Wash Tower
Keepthecenterareaclearin thelowerrock.
The wash lower _ises through fl_ecenter of tl_e
lower rack during the wash and iinse portions of
d_e wcle.
Dontblock it or load taft thingsnext to it.
Also, be carefbl not to let a
portion of an i/era such as a pot or
dish handle exmnd d_rougt_ the
bottom rack. This could block tl_e
wash ann and cause poor washing
results.

Lower Rack
WhenIoadingtheiowerrack,donottoaUlargpta tersor
traysin thefrontrightCornerTheymaypreventdetergent
fromcirculatingduringthewashcycle,
The lower rack is best used fbr plates, saucers,
and cool<ware. Lmge imms such as broiler pans
and racks should go along the sides. Load
platmrs, pots and bowls along tlle sides, in
comers, or in the back. The soiled side of items
should t_tce tile center of the rack.
item extend
throughbottom,
Silverware Basket
Put flatware in file removable basket _ith tbrk
and knife handles up to p_otect your hands. Place
spoons in tile basket widl handles d(m_l. Mix
knives, fbrks and spoons so dmy don't nest
together. Disuibum evenly. Small plastic imms,
such as measming spoons and lids fiom small
containers, should g_)in tile bottom of the
silve_vme basket _ith silver,rare on lop.
A secmiW cell cover (on some
...... .... ')
.... ......... models) hinged in some
_{•_ /_ i} handles_ ca_l be lo,_ered to
__) either side to secure
_lll_/_ lightxveight items fiom the
! # ) v_Tash a(l]on.
75

Changingcolorpanels.
If.you are redecorating, .you can change .your dishwasher's front
panel to match or blend withyour new colors by flipping it over.
Each side of each panel is a different color. Youmay also paint a
panel with a color of.your own choice.
WARNING!
Weargloves when handling door panels. Failure to do so can
cause serious cuts.
Donot operate dishwasher while changing panels.
ChangingtheDoor Panel
Take oul Uim screws on either side of the
dishwasher door. Remove the side uim.
JS|ide the door panel (s) oul. (Careful-edges may
be sharp.)
{{i_Tum the door panel around and put the cok_ryou
_{ want in fiont.
!{_Replace fl_edoor panel, side uim and screws.
NOTE:Do not operate dishwasher while changing panels
or when bottolll panel is removed.

F--%_.-Top i
IT°.p _Mountir!g I
!i_iii_ ii
BottomPanelAttachmentScrews
Changing theBottomPanel
Remove the bottom panel attachment screws.
:} top mounting screws.
{{{_Take out tile top Uim screws and remove tile top
{ { |iilll.
!{1_Slide tile color panel (s) up and oul and pul the
color vou want in hont.
Replace the top uim and
1,7 screws.
{{dReplace tile entire assembly by reversing tile steps.
Adding 1/4"Wood Inserts
Color insert panels fbr both tile door and tile bottom panel can be
replaced by 1/4" thick wood inserts to match your kitchen cabinets.
Get them flom your nearest cabinet or lumber dealer.
Dimensions fbr 1/4" wood inserts:
Door Panel: 19_//' H x 23%J'W.
Bot tOlll Pal_iel: .:)ol lfll<i_'H x 2;)_o {_16t*_/_.7
/7

Caringfor the dishwasher.
Toclean the control panel use a lightly dampened cloth then dry
thoroughly. Toclean the exterior use a good appliance polish wax.
Never use sharp objects, scouring pads or harsh cleaners on any
part of the dishwasher.
3umocoverscrews
Protect againstfreezing
|fyour dishwasher is left in an unheated place dining
tile winter, askasel_qcetechnician to:
:/_ Cut offelettlital power to tile dishwasher. Remove
fuses oi tlJp circuit breaker.
_um off tile water supply and disconnect the water
..............inlet line flom the water valve.
_Drain water flom tile inlet line and water valve.
==_' (( )sea pan to c ate h tile water.)
_;/Reconnect the water inlet line to tile water valve.
:!
dRemove the plastic sump cover in tile tub
bottom and use a sponge to soak up water in the
rubber boot.
di5hwashaisn'tdr_finingwell,
78
Does your dishwasher have an air gap?
An air gap promcts your dishwasher against wamr
backing up into it if a drain clogs. The air gap is not a
part of the dishwasher. It is not covered by your
wananty. Not all plumbing codes require air gaps, so
you may not have one.
The air gap is easy to clean.
:J:i{_Turn off the dishwasher and lift off the chrome
cover.
( nscrew the plastic and dean with
{}}_/--i....... cap a toothpick.

Beforeyou call for service...
Troubleshooting Tips
Review the charts on the following pages first and you may not
need to call for service.
Possible Causes What To De
Dishwasfier won't run Fuse is blown, or the Replace fhse or reset
circuit breaker tripped circuit breaker. Remove
aW other appliances tiom
the circuit.
Noise Some of the sounds
you'll hear are normal
Detergentcuplid
won'tlatch
Utensils are not secure
in the rack or something
small has dropped into
the rack
Soft tbod disposal
shredding action.
Drain valve opening to
pump water out.
Timer control as wcle
pro,gvesses.
Demr,gent cup opening.
The UlOtOF stopping during
the duing period.
Make sure everything is
secured in dishwasher.
Motor hums
Dial is not in the OFF
position
Dishwasher has not been
used on a re,g_lar basis. If
you do not use your
dishwasher often, set it to
fill and pump out once
eve_y week. This will help
keep the seal moist and
the garbage disposer clear.
Turn the Dial to OFF
and slide the door latch to
the left.
Detergent left in
dispenser cups Dishes are blocking the
detergent cups Reposifion the dishes.
_iiiiiiii!)iiiiiiii/ii[iiii/ii/iiii
!ililiNiiiiJ iliii i
/9

Beforeyou call for service...
Troubleshooting Tips
Water standing m
the bottom ofthe tub
Waterwon'tpump
outofthetub
Sudsin thetub
Possible Causes What ToDe
This is normal
Drain is clogged
Correct detergent
wasn't used
Rinse agent
was spilled
Steam This is normal
A small amount of clean
water mound the outlet on
tim mb bottom at the back
of the tub keeps tim water
seal lubficamd.
Ifyou have an air gap,
clean it.
Check to see ifyour kitchen
sink is draining well. If not,
you may need a plumber.
If the dishwasher drains
into a disposer, run
disposer clear.
l) se only automatic
dishwasher detergent s to
avoid sudsing.
To remove suds flom the
tnb, open the dishwasher
and let suds evaporate.
Add 1gallon of cold water
to the rob. Close and latch
the dishwasher. Pump out
water by slowly turning the
Dial until a drain period
is reached. Repeat if
necessaU.
Always_4peup rinse agent
spillsimmediamly.
Steam comes through the
vent by tim door latch
during &Ting and when
wamr is being pumped out.
20
This manual suits for next models
3
Table of contents
Other GE Dishwasher manuals

GE
GE Appliances EDW3000 Series User manual

GE
GE Monogram ZBD3500ZWW User instructions

GE
GE Profile Series User manual

GE
GE HDB920 User manual

GE
GE Profile PDW8680N User manual

GE
GE GSD1400 Series User manual

GE
GE PDW7300GBB User manual

GE
GE GLFS1224SSI User manual

GE
GE Triton XL GSD6900 Series User manual

GE
GE GSD3800 User manual