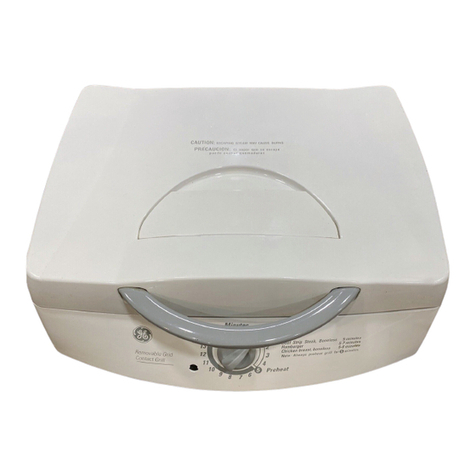
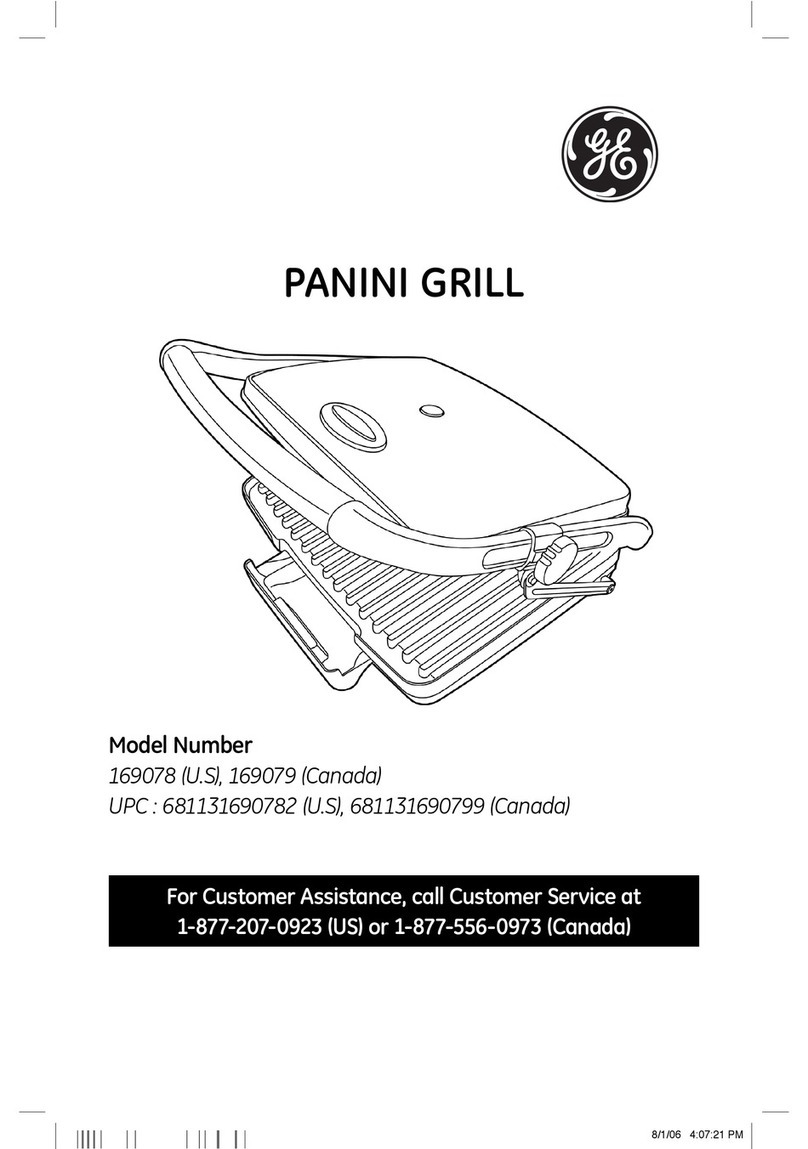
GE 106796 User manual

For Customer Assistance Please Call: 1-877-556-0973
840081300
Indoor/Outdoor Grill
g
Grill Safety................................................ 2
Know Your Grill........................................ 3
How to Grill .............................................. 4
Grilling Chart............................................ 5
How to Clean............................................ 5
Recipes...................................................... 6
Customer Assistance............................ 16

2
This appliance is intended for household
use only.
This appliance is equipped with a grounded-
type 3-wire cord (3-prong plug). This plug
will only fit into an electrical outlet made for
a 3-prong plug. This is a safety feature. If the
plug should fail to fit, contact an electrician
to replace the obsolete outlet. Do not
attempt to defeat the safety purpose of the
grounding pin, part of the 3-prong plug.
This appliance has a short cord to reduce
hazards of becoming entangled or tripping
IMPORTANT SAFEGUARDS
SAVE THESE INSTRUCTIONS!
Grill Safety
1. Read all instructions. Keep these
instructions for future use.
2. Do not touch hot surfaces. Use handles
or knobs.
3. To protect against electrical shock, do not
immerse cord assembly or plug in water
or other liquid.
4. Close supervision is necessary when any
appliance is used by or near children.
5. Unplug from outlet when not in use and
before cleaning. Allow to cool before
putting on or taking off parts and before
cleaning the appliance and before
moving the appliance.
6. Always attach plug to appliance first, then
plug cord into the wall outlet. To
disconnect, turn control to off (MIN)
and remove plug from wall outlet.
7. Do not leave the appliance unattended
when in use.
8. Do not operate any appliance with a
damaged cord or plug, or after the
appliance malfunctions, or is dropped or
damaged in any manner. Call our toll-free
customer assistance number for informa-
tion on examination, repair, or electrical
or mechanical adjustment.
9. Do not let cord hang over edge of
table or counter, or touch hot surfaces,
including the stove.
10. Do not place on or near a hot gas or
electric burner, or in a heated oven.
11. Always use the appliance on a dry level
surface.
12. Do not use appliance for other than
intended use.
13. Use extreme caution when moving an
appliance containing hot oil or other
hot liquids.
14. Always unplug grill and then remove
cord before attempting to move the grill.
15. The use of accessory attachments not
recommended by appliance manufacturer
may cause injuries.
16. Do not use without base in place. Clean
after each use.
17. Fuel, such as charcoal briquettes, is not
to be used with appliance.
18. Use only on properly grounded outlet.
19. When in operation, a fire may occur if
the grill is touching or near flammable
material, including curtains, draperies,
walls, backsplashes, cabinets and the like.
Consumer Safety Information
over a longer cord. A grounded-type 3 wire
extension cord may be used if the electrical
rating of the extension cord is equal to or
greater than the rating of the electric grill.
Use only an extension cord rated 15
amperes or greater. Care must be taken
to arrange the extension cord so that it
will not drape over countertop or tabletop
where it can be pulled on by children or
tripped over.
Do not leave this appliance unattended
while in use.
When using electrical appliances, basic safety precautions should always be followed,
including the following:

3
WARNING: To reduce risk of fire do not
allow flammable materials such as curtains,
draperies, walls, cabinets, backsplashes and
the like to touch any part of the grill or
grilling surface when the grill is in operation.
Place grill at least 6 inches away from walls,
appliances, or any object that could be
damaged by heat.
Do not put hot grill on countertop unless
properly placed in base.
WHEN USING OUTDOORS
CAUTION: To ensure continued protection
against risk of electric shock, connect to
properly grounded outlets only.
WHEN USING AN EXTENSION
CORD OUTDOORS
CAUTION: To reduce the risk of electric shock,
keep extension cord connection dry and off
the ground.
Outdoor extension cords should be used with
outdoor use products and are surface marked
with suffix letters “W-A” and with a tag stating
“Suitable for Use with Outdoor Appliances.”
Store unit indoors, out of reach of children.
Do not clean this product with a water spray
or the like.
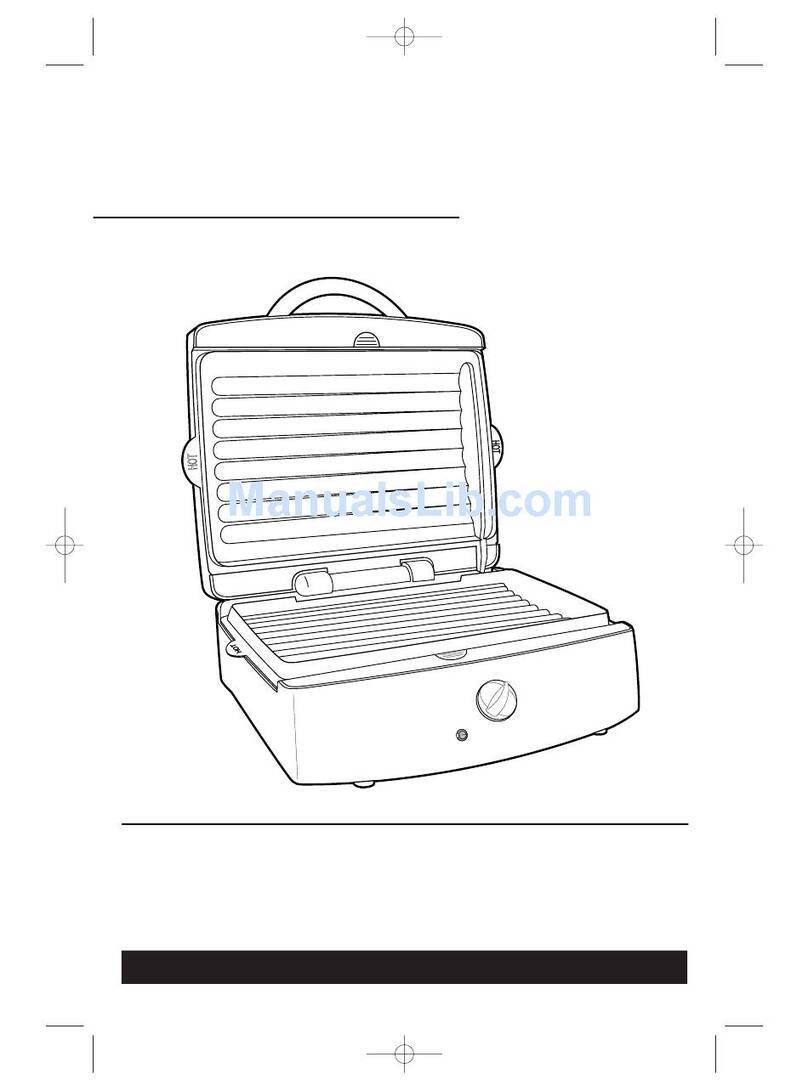
Grill
Cord Receptacle
Power Cord
Base
Know Your Grill
Before First Use: Wash the grill and base in hot, soapy water. Rinse and dry
thoroughly. Do not immerse power cord in water or other liquid.
Parts and Features
1
2
3
4
1
2
3
4

4
• Please remember that your grill is
coated with a nonstick surface and
that plastic utensils should always
be used.
• If grilling vegetables, fish, or lean
meat, spray the grilling surface with
a cooking spray. If grilling meat with
any amount of fat, or if the food has
been marinated, there is no need to
treat the grill.
• For best results, preheat the grill for
5 to 10 minutes before grilling.
• Skewers are available in most large
supermarkets. If using the disposable,
wooden type skewers, soak the skewers
in water at least 10 minutes before
threading on food. This prevents the
skewer from scorching and makes a
more attractive presentation.
• If using a marinade with oil, place grill
near an exhaust hood. Oil or fat will
produce some smoke.
Great Grilling Tips
1. Set base on countertop. Place grill
on base correctly.
2. Plug power cord into the cord
receptacle, then plug into outlet.
The indicator light on the power
cord will glow. The light will remain
on as long as the unit is plugged in.
How to Grill
Variable Heat Power Cord
• The variable heat power cord offers
heat settings from 1 (low) to 4 (high).
The recipes and cooking chart were
developed using setting 4. The addi-
tional heat settings can be used for
more versatile cooking options.
• Setting 3 is for thick cuts of meat or
large pieces of bone-in chicken.
This setting will assure thorough
cooking without drying out the food.
3. Preheat 5 to 10 minutes before
grilling.
4. When finished grilling, turn control
to MIN. Then remove plug from
outlet, then from cord receptacle.
5. Let grill cool completely. Carefully
dispose of any grease. Clean grill.
• Start cooking at a higher setting then
reduce heat if needed.
• Settings 1 and 2 should be used to
keep food warm after it has been
cooked.
• Always make sure the power cord is
turned to MIN and unplugged from
wall outlet before inserting or remov-
ing the power cord.

5
Food
Bacon
Steaks, beef
1⁄2-inch thick
Pork chops,
1⁄2-inch thick
Chicken breasts,
boneless
Hamburgers
1⁄2-inch thick
Sausage links
or patties
Hot dogs
Fish fillets
Grilling Chart
How to Clean
1. Let grill cool. Carefully dispose of
any grease.
2. Wash the grill and base in hot, soapy
water. Use a nylon or plastic scouring
pad and a non-abrasive liquid cleanser.
Do not use metal scouring pads.
3. Rinse and let dry.
4. The grill and base can also be washed
in a dishwasher after cooling and
disposing of any grease.
5. Never immerse the power cord in
water or place in the dishwasher.
To clean, wipe with a damp cloth.
NOTE: Do not leave the grill on in order
to “burn off” any food or drippings that
remain on the grill surface after cooking.
In addition to causing unnecessary
smoke, this can reduce the life of the
nonstick coating and may present a fire
hazard.
Approximate Time
(Minutes)
4 to 8
8 to 15
15 to 20
25 to 30
8 to 10
12 to 15
8 to 10
10 minutes per
1-inch thickness
Doneness Test
Desired doneness
Desired doneness
Generally, until no
longer pink
Pierce with knife;
juice runs clear
Until no longer pink
Hot through
Opaque and flakes
with fork

6
Recipes
Indicates preparation and
grilling times.
• Grilling Times: Recipe cooking times
are estimates. Cooking time will vary
based on the temperature of the grill,
the surrounding air, and the food
itself. Watch food carefully while
grilling and adjust the cooking time
as necessary.
• Marinating Tips: Never marinate
foods in metal containers for extended
lengths of time (2 or more hours).
The acids in foods can react with
metal, causing an unpleasant taste.
Instead, use glass, ceramic, or plastic
bag containers for marinating.
• Meat Safety Tip: To reduce the risk of
spoiling, store meat in the refrigerator
until you’re ready to cook. Never thaw
or marinate meat at room tempera-
ture, especially in warm climates.
• Never use leftover marinade as a
finishing sauce on cooked foods.
The leftover marinade must first be
boiled for one to two minutes to kill
any bacteria from the raw food that
was marinated.
• Although some cookbooks may say to
bring your food to room temperature
before cooking, with few exceptions,
we don’t recommend this tip for
grilled foods. If the temperature is in
the 80s or 90s, foods can spoil quickly.
• Nonstick Grilling Tip: Without the use
of oil, certain foods will stick slightly to
nonstick surfaces. This is easily pre-
vented. Before turning on your grill,
brush or spray the grids lightly with oil
or nonstick cooking spray. (Never add
oil or spray to a heated grill
—
this is
dangerous.)
• Always read all safety information.
The following recipes are from Grilling
For Dummies®by Marie Rama and John
Mariani. Copyright© 1998 IDG Books
Worldwide, Inc. All rights reserved.
Reproduced here by permission of
the publisher. “...For Dummies” is a
registered trademark of IDG Books
Worldwide, Inc.
Basic Burger (and Variation Section)
Western Beef Kabobs with Peppers
and Onions
Grilled Steak 101
Texas Beef Barbecue
Jerk-Seasoned Chicken Breasts
Spicy Chili Chicken Wings
Grilled Potato Planks
Grilled Tomatoes with Cumin Butter
Tomato Brushetta
Grilling Guidelines

7
Preparation time: 15 minutes
Grilling time: 14-20 minutes
Yield: 4 servings
11⁄2pounds ground chuck
1⁄4teaspoon salt, or to taste
1. Combine the ground chuck, salt, and pepper in a medium mixing bowl, mixing
lightly but thoroughly, using your hands. Shape the mixture into four patties,
each 3⁄4inch thick in the center and at the edges. (Even thickness ensures even
cooking and prevents the edges from drying out before the center is cooked.)
2. Place the patties on grill. Grill for 7 to 10 minutes per side, turning once.
(According to the U.S. Department of Agriculture, all ground meat should be
cooked to at least medium doneness—160ºF—or until the center of the patty is
no longer pink.) Make a small incision in the center of each patty to determine
doneness.
3. Toast the buns by placing them, split side down, on the edges of the grill grid for
about 1 minute or until lightly browned.
4. Remove the burgers from the grill and serve on toasted hamburger buns.
Variation Section:
Italian Burger: Add the following ingredients to the ground meat mixture:
1 egg yolk, 1⁄4cup grated onion, 1 large clove garlic minced, 2 tablespoons chopped
fresh basil or 2 teaspoons dried crushed basil, 1⁄2teaspoon dried oregano, and salt
and pepper to taste. Place grated Parmesan cheese on top of each burger (if
desired) about 2 minutes before the burger is done and grill until the cheese melts.
Mexican Burger: Add the following ingredients to the ground meat mixture:
1⁄4cup finely chopped onion, 1⁄2to 1 teaspoon seeded and chopped jalapeno
pepper, 3⁄4teaspoon ground cumin, and salt and pepper to taste. Serve on
toasted buns or in warmed tortillas with a prepared tomato salsa or taco sauce and
slices of ripe avocado.
Asian Spiced Burger: Add the following ingredients to the ground meat mixture:
1⁄4cup finely chopped scallions, 3 tablespoons teriyaki sauce, 1 large clove garlic,
minced, and salt and pepper to taste.
1⁄4teaspoon pepper
4 hamburger buns
Basic Burger

8
6 tablespoons vegetable oil
3 cloves garlic, peeled and coarsely
chopped
1 to 2 large jalapeno peppers, seeded
and chopped
3⁄4teaspoon cumin
11⁄2teaspoons chili powder
1⁄2teaspoon paprika
Salt and pepper to taste
2 tablespoons butter
Western Beef Kabobs with Peppers and Onions
Preparation time: 25 minutes
Marinating time: 6 hours or overnight
Grilling time: 14-16 minutes
Yield: 4 servings
11⁄2 to 2 pounds sirloin, or other tender
beef such as top loin or round
tip steak
2 medium red peppers
1 medium onion
1⁄2cup apple juice, divided
6 tablespoons lime juice
(about 3 large limes)
11⁄2teaspoons grated lime peel
1. Working on a cutting board, trim all visible fat from the beef; cut the meat into
cubes of about 11⁄2inches. Place the cubes in a large, resealable plastic bag or
other non-reactive container.
2. Core and seed the red peppers and slice them into strips about 11⁄2inches wide;
slice each strip crosswise into 1- to 2-inch pieces. Cut the onion in half lengthwise
and remove the skin. Cut each half into thirds break them apart into slices. Place
the peppers and onions in the bag or container with the beef cubes.
3. Combine 6 tablespoons of the apple juice with the lime juice, grated lime peel,
oil, garlic, jalapeno peppers, cumin, chili powder, and paprika, in a blender
container, whirl the mixture for a few seconds into a coarse puree. Pour the
resulting marinade over the beef and vegetables, seal the bag or cover the
container, and refrigerate for at least 6 hours or overnight, turning occasionally.
4. Remove the beef from the marinade. Reserve any remaining marinade and place
in a small saucepan. Thread 3 to 4 beef cubes, alternating with pieces of pepper
and onion, on skewers. (Soak wooden skewers in water for at least 30 minutes to
prevent them from burning.) Sprinkle kabobs with salt and pepper.
5. Place skewers on grill. Grill the kabobs for about 14 to 16 minutes for medium,
turning every 5 to 6 minutes.
6. As the kabobs grill, bring the marinade in the saucepan to a boil over high heat
on top of the stove, reduce heat and simmer for 1 minute. Whisk in 2 tablespoons
butter and 2 tablespoons of the remaining apple juice. Spoon sauce over the
grilled kabobs just before serving.

9
Grilled Steak 101
Preparation time: 5 minutes
Grilling time: 35-45 minutes
Yield: 4 servings
2 tablespoons olive oil
2 boneless sirloin beef steaks,
cut 1-inch thick (about 2 pounds total)
1. In a small bowl, combine the olive oil and garlic. Generously rub or brush the
flavored oil on both sides of the steaks. Sprinkle the steaks lightly with salt
and pepper.
2. Place the steaks on the grill. Grill 35 to 45 minutes for medium doneness,
turning every 15 minutes.
3. Remove the steaks from the grill, cover loosely with foil and let the steaks rest
for a few minutes before thinly slicing across the grain. Season with salt and
additional pepper (if desired) before serving.
Texas Beef Barbecue
Preparation time: 10 minutes
Marinating time: 3 hours or overnight
Grilling time: 35-45 minutes for medium-rare
Yield: 4 servings
1 cup bottled chili sauce
1 teaspoon ground cumin
1⁄2cup beer
1⁄2teaspoon dried red pepper flakes
1⁄3cup vegetable oil
1. In a medium bowl, make the marinade by combining all the ingredients except
the steak.
2. Place the steak in a glass baking dish or a large, resealable plastic bag. Pour the
marinade over the steak, turning to coat. Cover the dish or seal the bag, pressing
out as much air as possible. Refrigerate 3 hours or overnight.
3. Remove the steak from the marinade, shaking off any excess. Discard the
marinade, if desired, sprinkle the steak with salt. Place the steak on the grill
and grill 35 to 45 minutes for medium doneness, turning every 15 minutes.
4. Transfer the steak to a cutting board and let stand for 5 minutes, loosely
covered with foil. Thinly slice across the grain.
1 clove garlic, crushed
Salt and pepper to taste
1⁄4cup finely chopped green onion
(white and green parts)
1 boneless beef top round steak,
cut 1-inch thick (about 11⁄2to 2 pounds)
3 tablespoons chili powder
Salt to taste (optional)

10
Jerk-Seasoned Chicken Breast
Preparation time: 15 minutes
Marinating time: 6 hours or overnight
Grilling time: 30-35 minutes
Yield: 4 to 6 servings
8 boneless, skinless chicken breast
halves (about 2 or 3 pounds)
1⁄4cup vegetable oil
1⁄4cup orange juice
3 scallions, finely chopped (green and
white parts)
4 medium cloves garlic, peeled and
finely chopped
2 tablespoons lime juice
2 tablespoons soy sauce
1. Trim the breasts of any loose fat; rinse them under cold running water and pat
dry with paper towels.
2. In a medium bowl, combine the remaining ingredients, beating with a fork or
whisk to incorporate the spices into the oil and orange juice.
3. Place the breasts in a large, resealable plastic bag or shallow dish; pour the
marinade over the breasts. Seal the bag, pressing out any air, or cover the dish;
refrigerate 6 hours or overnight, turning occasionally to coat the breasts in the
marinade.
4. Remove the chicken breasts from the marinade; discard the marinade. Place the
chicken breasts on the grill. Grill 30 to 35 minutes or until done, turning every 10
minutes. To test for doneness, cut into the breasts; the meat should be white and
moist, with no sign of pink.
Spicy Chili Chicken Wings
Preparation time: 20 minutes
Marinating time: 2 to 4 hours
Grilling time: 25-30 minutes
Yield: 4 main dish servings or 8 to 10 appetizer servings
3 to 31⁄2pounds chicken wings
(about 15 to 18 wings)
3 tablespoons olive oil
3 tablespoons fresh lime juice
4 large cloves garlic, peeled and minced
2 teaspoons ground cumin
2 teaspoons ground coriander
1. Rinse the chicken wings under cold running water and pat dry with paper
towels. Cut off the wing tips at the joints and discard the tips. (Or wrap and freeze
tips to use later to add flavor to canned or homemade soups and stocks.)
1 small jalapeno pepper, seeded and
finely chopped
1 teaspoon brown sugar, packed
1⁄2teaspoon kosher salt, or to taste
1⁄2teaspoon ground allspice
1⁄2teaspoon dried leaf thyme
1⁄2teaspoon cinnamon
1⁄4teaspoon cayenne pepper
1⁄4teaspoon nutmeg
2 teaspoons paprika
1 teaspoon peeled and grated ginger
1 teaspoon salt, or to taste
1⁄2teaspoon hot chili powder or cayenne
pepper
1⁄2teaspoon cinnamon

11
1 teaspoon dried marjoram, oregano,
or dill
1⁄2teaspoon Tabasco sauce, or to taste
1⁄2teaspoon kosher salt (or table salt),
to taste
Pepper to taste
2. Combine all the remaining ingredients in a large, resealable plastic bag or
mixing bowl, blending them well.
3. Add the chicken wings; toss well to coat the wings in the oil-spice mixture. Seal
the bag, pressing out any air, or cover the bowl; refrigerate for 2 to 4 hours.
4. Place the wings on the grill. Grill for 25 to 30 minutes or until done, turning with
tongs every 10 minutes to prevent burning and to ensure even cooking. To test
for doneness, cut into the thickest part of the wing, the meat should be white,
with no trace of pink and the juices should run clear.
Grilled Potato Planks
Preparation time: 15 minutes
Marinating time: 30 minutes to 1 hour
Grilling time: 15 minutes
Yield: 4 servings
4 medium potatoes (about 11⁄2pounds
total), scrubbed
6 tablespoons extra-virgin olive oil
11⁄2tablespoons white wine vinegar
2 cloves garlic, peeled and finely minced
1. Cut the potatoes lengthwise into 1⁄3-inch-thick slices. Place the slices in a
medium saucepan with enough lightly salted water to cover. Cover the pan
and bring to a boil. Boil for 5 minutes or until nearly tender when pierced with
the blade of a thin, sharp knife; drain thoroughly. Place the potatoes in a large,
shallow baking dish.
2. Make the marinade by combining the remaining ingredients; pour the marinade
over the warm potato slices, turning to coat. Cover and let stand for 30 minutes to
1 hour.
3. Before grilling, brush both sides of the potatoes with the marinade, being sure to
include bits of garlic and herb. Place the potatoes on the grill and grill until lightly
browned for 6 to 8 minutes. Turn and grill until lightly browned and crisp on
the second side 6 to 8 minutes more. If desired, season before serving with addi-
tional salt and pepper and Tabasco sauce.

12
Grilled Tomatoes with Cumin Butter
Preparation time: 10 minutes
Grilling time: 5-6 minutes
Yield: 4 servings
21⁄2tablespoons butter
1 teaspoon ground cumin
1. Melt the butter in a small saucepan; remove from heat and stir in the cumin and
salt and pepper.
2. Brush the tomato slices on one side with half of the cumin butter. Place them,
brushed side down, on the grill and grill for 2 to 3 minutes or until very lightly
browned on one side.
3. Brush the tops of the tomatoes with the remaining cumin butter. Turn and grill
for 2 to 3 minutes more or until very lightly browned, but not falling apart.
Tomato Bruschetta
Preparation time: 15 minutes
Grilling time: 4 minutes
Yield: 6 to 8 appetizer servings
2 large red ripe tomatoes (about
11⁄4pounds), cored, seeded, and diced
1⁄2cup coarsely chopped fresh basil
2 tablespoons peeled and diced
red onion, (optional)
About 1⁄4cup extra-virgin olive oil, divided
1. In a small bowl, combine the tomatoes, basil, red onion (if desired),
2 tablespoons of the olive oil, the minced garlic, vinegar, and salt and
pepper. Cover and let stand at room temperature for at least 30 minutes
but not longer than 2 hours.
2. Place the bread slices on the grill. Grill for 4 to 5 minutes or until the bread is
lightly toasted and golden on both sides, turning once.
3. Remove and immediately rub the edges and one side of each slice with a garlic
clove half. (Use a half clove for every 2 slices.) Drizzle about 1⁄2teaspoon of olive
oil onto the garlic-rubbed side of each slice.
4. Stir the tomato mixture with a large spoon to thoroughly moisten; top each bread
slice with about 11⁄2tablespoons of the tomato mixture. Place on a platter and
serve immediately.
1 clove garlic, peeled and minced
1 teaspoon balsamic or red wine vinegar
Salt and pepper
12 slices crusty French bread, cut
diagonally, about 3⁄4inch thick
3 cloves garlic, peeled and halved
Salt and pepper to taste
2 large, firm ripe tomatoes, sliced
about 3⁄4-inch thick

13
Plum Fancy Pork Swords
Recipe Courtesy of the National Pork Producers Council
Preparation time: 10 minutes
Marinating time: 1 hour
Grilling time: 10 minutes
Servings: 4
4 bamboo skewers (soak in water
before using)
3⁄4pound ham, fully cooked, cut into
1-inch cubes
Place ham in shallow bowl. Combine remaining ingredients in small pan. Heat until
dissolved. Pour sauce over ham. Marinate for 1 hour. Place cubes on bamboo skewers
that have been soaked in water. Grill for 10 minutes, turning skewers frequently and
basting ham with sauce. Discard any leftover sauce.
Caribbean Pork Kabobs
Recipe Courtesy of the National Pork Producers Council
Preparation Time: 10 minutes
Cooking Time: 18-20 minutes
Servings: 4
1 pound pork tenderloin, cut into
1-inch cubes
1⁄2cup orange juice
1⁄4cup lime juice
2 tablespoons brown sugar
Combine all ingredients in a self-sealing plastic bag; seal bag and refrigerate 2 to 24
hours. Remove cubes from marinade; discarding leftover marinade. Thread cubes
evenly onto four skewers (if using wooden skewers, soak them in water for an hour
before using to prevent burning). Grill 18 to 20 minutes, turning often, until nicely
browned. Serve with hot rice and kabobs of grilled fruit and pepper chunks,
if desired.
Nutritional Information
Per Serving
Serving Size: 3 oz.
Nutrient Per Serving
Calories 146
Total Fat 4g
Cholesterol 67mg
Sodium 60mg
Protein 23g
1⁄4cup plum preserves
1 tablespoon Dijon-style mustard
1 teaspoon lemon juice, fresh
1⁄4teaspoon cinnamon
1⁄2teaspoon thyme
1⁄4teaspoon ground nutmeg
1⁄4teaspoon ground cloves
1⁄8teaspoon ground cayenne pepper
Nutritional Information
Per Serving
Serving Size: 1
Nutrient Per Serving
Calories 183
Total Fat 5g
Cholesterol 44mg
Sodium 1340mg
Protein 19g

14
Heartland Barbecue Pork Chops
Recipe Courtesy of the National Pork Producers Council
Preparation Time: 5 minutes
Cooking Time: 30 minutes
Servings: 4
4 pork chops, bone-in or boneless,
about 11⁄4inch thick
1⁄2cup bottled barbecue sauce
1⁄3cup honey
For sauce, mix all ingredients except pork chops together in a small bowl. Place
pork chops on the grill. Grill chops for about 10 minutes, until nicely browned on
one side; turn and brush liberally with sauce. Grill for 10 minutes more; turn and
brush with more sauce. Grill for 5 to 10 minutes more, turning and brushing with
sauce. Discard any leftover sauce. Serve chops immediately.
Southwestern Grilled Pork Tenderloin
Recipe Courtesy of the National Pork Producers Council
Marinating time: 2 to 24 hours
Preparation time: 10 minutes
Cooking time: 50-55 minutes
Servings: 6
2 whole pork tenderloins,
about 11⁄2pounds total
5 teaspoons chili powder
11⁄2teaspoons oregano
In a small bowl, mix well all seasonings and vegetable oil. Rub mixture over
all surfaces of tenderloins. Cover and refrigerate 2 to 24 hours. Grill, turning
occasionally, for 50 to 55 minutes, until thermometer inserted reads 155 to 160°F.
Pork is done when there is still a hint of pink in the center. Slice to serve.
3⁄4teaspoon ground cumin
2 garlic cloves, crushed
1 tablespoon vegetable oil
Nutritional Information
Per Serving
Serving Size: 3 oz.
Nutrient Per Serving
Calories 154
Total Fat 6g
Cholesterol 66mg
Sodium 141mg
Protein 26g
Nutritional Information
Per Serving
Serving Size: 1
Nutrient Per Serving
Calories 371
Total Fat 11g
Cholesterol 104mg
Sodium 382mg
Protein 39g
1 tablespoon Worcestershire sauce
1 teaspoon prepared mustard
Dash hot pepper sauce

15
Spicy Grilled Shrimp
1⁄2cup soy sauce
1 tablespoon olive oil
1 tablespoon sesame oil
5 tablespoons cajun seasoning mix
2 tablespoons fresh lemon juice
Combine all ingredients except shrimp. Mix well then add shrimp. Marinate 1 to 4
hours. Drain marinade and discard. Place shrimp on grill and cook 2 minutes. Turn
and cook 2 minutes longer or until done.
Sesame Soy Sea Scallops
1 tablespoon sesame oil
2 tablespoons white wine
1⁄4 cup tamari sauce or soy sauce
1 teaspoon crushed garlic
Combine all ingredients and let marinate in refrigerator for 30 minutes to 1 hour.
Thread onto skewers. Place on grill and cook for 5 minutes or until done. Turn
halfway through cooking time. Makes 4 servings.
Crispy Grilled Sea Trout
1⁄4cup bread crumbs
1 tablespoon dried parsley
1 teaspoon garlic salt
Combine bread crumbs, parsley, garlic salt, and tarragon; set aside. Beat egg white
with fork or whisk until frothy. Dip fish in egg white then coat with bread crumb mix-
ture. Place on grill and cook 5 minutes. Turn and cook 5 minutes more or until done.
Makes 2 servings.
Salmon with Dill
1⁄2pound salmon steak
1 tablespoon lime juice
Brush salmon with lime and sprinkle with dill weed. Spray grill with cooking spray.
Cook salmon 4 minutes. Turn and cook 4 minutes or until done. Makes 2 servings.
Mahi Mahi with Ginger and Dill
1⁄4cup lime juice
1⁄4teaspoon black pepper
Combine lime juice, pepper, ginger root, and dill weed. Marinate fish in this mixture for
2 hours. Place on grill and cook 5 minutes. Turn and cook 5 minutes more or until
done. Makes 2 servings.
1⁄8teaspoon ground ginger
Dash garlic salt
Dash pepper
1 pound sea scallops
1 teaspoon tarragon
1 egg white
3⁄4pound sea trout
2 tablespoons fresh minced ginger
2 teaspoons dry mustard
2 teaspoons hot pepper sauce
32 large raw shrimp, peeled and
deveined, but tails on
1⁄4teaspoon fresh grated ginger root
1⁄4teaspoon dill weed
3⁄4pound mahi mahi (or monkfish)
1 teaspoon dill weed

16
4/01
840081300
Two-Year Limited Warranty
gis a trademark of
General Electric Company
and is used under license by
WAL★MART Stores.
If you have a claim under this warranty, please call our Customer Assistance
Number. For faster service please have model, series, and type numbers ready for
operator to assist you. These numbers can be found on the back of the power cord.
MODEL: ________________ TYPE: _________________ SERIES: __________________
Customer Assistance Number: 1-877-556-0973
Keep this number for future reference!
E-mail inquiries: www.wal-mart.com
Customer Assistance
What does your warranty cover?
• Any defect in material or workmanship.
For how long after the original purchase?
• Two years.
What will we do?
• Provide you with a new one.
How do you make a warranty claim?
• Save your receipt.
• Properly pack your unit. We recommend
using the original carton and packing
materials.
• Return the product to your nearest
WAL★MART store or call Customer
Assistance at 1-877-556-0973.
What does your warranty not cover?
• Glass parts, glass containers, cutter/strainer,
blades and/or agitators.
• Commercial use or any other use not
found in printed directions.
• Damage from misuse, abuse, or neglect.
• Products purchased or serviced outside
Canada.
How does state law relate to this warranty?
• This warranty gives you specific legal rights,
and you may also have other rights which
vary from state to state.
• WAL★MART expressly disclaims all
responsibility for consequential damages
or incidental losses caused by use of this
appliance. Some states do not allow this
exclusion or limitation of incidental or
consequential losses so the foregoing
disclaimer may not apply to you.
What if you purchased your product in the
U.S., Canada or Mexico and encounter a
problem while using it outside the country
of purchase?
• The warranty is valid only in the country of
purchase and if you follow the warranty
claim procedure as noted.
WAL★MART Canada Corp.
Mississauga, Ontario L5N 1P9

Pour assistance à la clientèle, composez le 1-877-556-0973
840081300
Gril pour l’intérieur et l’extérieur
g
Sécurité du gril........................................ 2
Connaissez votre gril.............................. 3
Utilisation.................................................. 4
Tableau de cuisson ................................ 5
Nettoyage.................................................. 5
Recettes .................................................... 6
Assistance à la clientèle .................... 16

2
Cet appareil est destiné à l’utilisation domes-
tique seulement.
Cet appareil est équipé d’un cordon à 3 fils
reliés à la terre (fiche à 3 broches). Cette
fiche conviendra seulement dans une prise
électrique à trois alvéoles. Il s’agit d’une
caractéristique de sécurité destinée à réduire
PRÉCAUTIONS IMPORTANTES
CONSERVEZ CES INSTRUCTIONS!
Sécurité du gril
1. Lire toutes les instructions. Garder ces
instructions pour usage ultérieur.
2. Ne pas toucher les surfaces chaudes.
Utiliser les poignées ou les boutons.
3. Pour protéger contre le risque de choc
électrique, ne pas immerger le montage
du cordon ou la fiche dans l’eau ou
autre liquide.
4. Une bonne surveillance est nécessaire
pour tout appareil utilisé par des enfants
ou près d’eux.
5. Débrancher l’appareil de la prise de
courant électrique lorsqu’il n’est pas
utilisé et avant le nettoyage. Le laisser
refroidir avant d’y ajouter ou d’y enlever
des pièces et avant le nettoyage de
l’appareil et avant de déplacer l’appareil.
6. Toujours brancher la fiche sur l’appareil
en premier, ensuite brancher le
cordon dans la prise murale. Pour le
déconnecter, tourner la commande à
off (MIN) et débrancher la fiche de la
prise murale.
7. Ne pas laisser l’appareil sans surveillance
lors de son utilisation.
8. Ne pas faire fonctionner l’appareil avec
un cordon ou une fiche endommagés,
ou lorsque l’appareil ne fonctionne pas
bien ou a été endommagé d’une
manière quelconque. Veuillez composer
notre numéro d’assistance aux clients
sans frais d’interurbain, pour des
renseignements concernant l’examen, la
réparation ou le réglage.
9. Ne pas laisser le cordon pendre du
bord d’une table ou d’un comptoir, ou
toucher des surfaces chaudes, y compris
la cuisinière.
10. Ne pas placer l’appareil sur ou près d’un
brûleur chaud à gaz ou électrique, ou
dans un four chauffé.
11. Toujours utiliser l’appareil sur une
surface à niveau et sèche.
12. Ne pas utiliser l’appareil pour toute
autre fin que son utilisation déterminée.
13. Utiliser une précaution extrême lors
du déplacement d’un appareil
contenant de l’huile chaude ou autre
liquide chaud.
14. Toujours débrancher le gril et enlever
ensuite le cordon avant de déplacer
le gril.
15. L’utilisation d’accessoires non
recommandés par fabricant de
l’appareil peut causer des blessures.
16. Ne pas utiliser sans que le plat
ramasse-gouttes soit en place.
Nettoyer après chaque utilisation.
17. Un combustible, tel que des briquettes
de charbon de bois, ne doit pas être
utilisé avec l’appareil.
18. Utiliser uniquement sur une prise de
courant bien reliée à la terre.
19. Lors du fonctionnement, un incendie
peut survenir si la grille touche ou est
proche d’un matériau inflammable,
y compris rideaux, tentures, murs, écrans
anti-éclaboussures, armoires et articles
semblables.
Renseignements généraux de sécurité aux
consommateurs
le risque de choc électrique. Si la fiche ne
convient pas, faire remplacer la prise désuète
par un électricien qualifié. Ne pas essayer
d’enlever ou d’éviter la broche de sécurité
de la fiche polarisée d’une façon ou d’une
autre.
Lors de l’utilisation du gril-santé, des précautions de sécurité doivent toujours être
observées y compris ce qui suit :

3
La longueur du cordon de cet appareil a été
choisie de façon à ce que l’on ne risque pas
de trébucher dessus. Si un cordon plus long
est nécessaire, utiliser une rallonge
appropriée. Le calibrage de la rallonge
doit être le même que celui de l’appareil ou
supérieur. Lorsqu’on utilise une rallonge,
s’assurer qu’elle ne traverse pas la zone de
travail, que des enfants ne puissent pas tirer
dessus par inadvertance et qu’on ne puisse
pas trébucher dessus.
Ne pas laisser cet appareil sans surveillance
lorsqu’il fonctionne.
AVERTISSEMENT : Pour réduire le risque
d’incendie, ne pas laisser des articles
inflammables tels que rideaux, tentures,
murs, armoires, écrans anti-éclaboussures
et matériaux semblables toucher toute partie
du gril ou la surface de grillage lorsque le
gril est en fonctionnement. Veuiller faire
griller au moins à 6 pouces des murs,
d’appareils ménagers ou de tout autre objet
qui pourrait être endommagé par la chaleur.
LORS DE L’UTILISATION À L’EXTÉRIEUR :
MISE EN GARDE : Pour assurer une protection
continue contre le risque de choc électrique,
brancher l’appareil seulement sur une prise
correctement reliée à la terre.
LORS DE L’UTILISATION D’UNE RALLONGE À
L’EXTÉRIEUR :
MISE EN GARDE : Pour réduire le risque de
choc électrique, veiller à garder la rallonge
au sec et au-dessus du sol.
Les rallonges d’extérieur devraient être
utilisées avec les produits d’extérieur et elles
sont marquées des suffixes « W-A » sur leur
surface et d'une étiquette portant la mention
« Suitable for Use with Outdoor Appliances »
(convient aux appareils d’extérieur).
Ranger l’appareil à l’intérieur, hors de la
portée des enfants.
Ne pas nettoyer ce produit avec une
pulvérisation d’eau ou autre liquide.
Grille
Réceptacle du cordon
Cordon d’alimentation électrique
Base
Connaissez votre gril
Avant le premier emploi: Laver le gril et la base à l’eau savonneuse chaude. Rincer
et sécher à fond. Ne pas immerger le cordon d’alimentation dans l’eau ou autre
liquide.
Pièces et caractéristiques
1
2
3
4
1
2
3
4

4
• Veuillez vous rappeler que votre gril
est enduit d’une surface non adhésive
et que des accessoires de plastique
doivent toujours être utilisés.
• Si on fait griller des légumes, poissons
ou viande maigre, vaporiser la surface
de cuisson avec un vaporisant pour
cuisson. Si on fait griller une viande
avec section grasse, ou si l’aliment a
été mariné, il n’est pas nécessaire de
traiter le gril.
• Pour obtenir les meilleurs résultats,
préchauffer le gril 5 à 10 minutes
avant la cuisson.
• Des brochettes sont disponibles dans
la plupart des supermarchés. Si on
emploie des brochettes jetables en
bois, tremper les brochettes dans l’eau
environ 10 minutes avant d’y enfiler
les aliments. Cette action empêche la
brochette de brûler et fournit une
présentation plus attrayante.
• Si on emploie une marinade à base
d’huile, placer le gril près d’une hotte
de ventilation. L’huile ou la graisse
produiront un peu de fumée.
Conseils pour la cuisson au gril
1. Bien placer la base sur un comptoir.
Placer le gril correctement sur
la base.
2. Brancher le cordon d’alimentation
électrique dans le réceptacle sur
l’appareil, ensuite brancher le cordon
dans une prise de courant. Une
lampe-témoin sur le cordon
d’alimentation électrique s’allumera.
L’appareil restera allumé aussi
longtemps qu’il est branché à une
prise murale.
Utilisation
Cordon électrique de chaleur variable
• Le cordon électrique de chaleur
variable offre des réglages de chaleur
à partir de 1 (faible) à 4 (élevée).
Les recettes et le tableau de cuisson
ont été mis au point en utilisant le
réglage 4. D’autres réglages de chaleur
peuvent être utilisés pour des options
de cuisson plus souples.
• Les réglages 3 et 4 sont pour les
morceaux épais de viande ou les gros
morceaux de poulet avec os. Ces
réglages assureront une cuisson à fond
sans déshydrater l’aliment.
3. Préchauffer l’appareil pendant
5 à 10 minutes.
4. Lorsque la cuisson au gril est
terminée, tourner la commande à
MIN. Débrancher d’abord la fiche de
la prise murale, puis du réceptacle du
cordon.
5. Laisser complètement refroidir le
gril. Jeter prudemment toute graisse.
Nettoyer le gril.
• Commencer la cuisson au réglage le
plus élevé, ensuite réduire la chaleur
au besoin.
• Les réglages 1 et 2 devraient être
utilisés pour garder les aliments
tièdes après la cuisson.
• Toujours s’assurer que le cordon
d’alimentation électrique est à la
position MIN et qu’il est débranché
de la prise murale avant de l’insérer
ou de l’enlever.
This manual suits for next models
1
Table of contents
Languages:
Other GE Grill manuals

GE
GE Monogram ZX27CTYSS User manual

GE
GE ZX48CTACSS User manual

GE
GE ZGG48L31YSS User manual

GE
GE Monogram ZGG420LBPSS User manual

GE
GE ZGG540LCPSS Manual

GE
GE 169044 User manual

GE
GE 169015 User manual

GE
GE ZGG542LCPSS User manual

GE
GE Monogram ZGG36N31YSS User instructions

GE
GE Monogram ZGG48N31CSS User guide

GE
GE Monogram ZGG24L User manual

GE
GE JP380 Training manual

GE
GE Monogram ZGG420LBPSS User manual

GE
GE Profile PT970 User manual

GE
GE 106668 User manual

GE
GE RK959 User manual

GE
GE Monogram ZGG48N42 User manual

GE
GE Professional Outdoor Grills and Cooktop User manual

GE
GE JP380 Training manual

GE
GE JGHC60GEN User manual