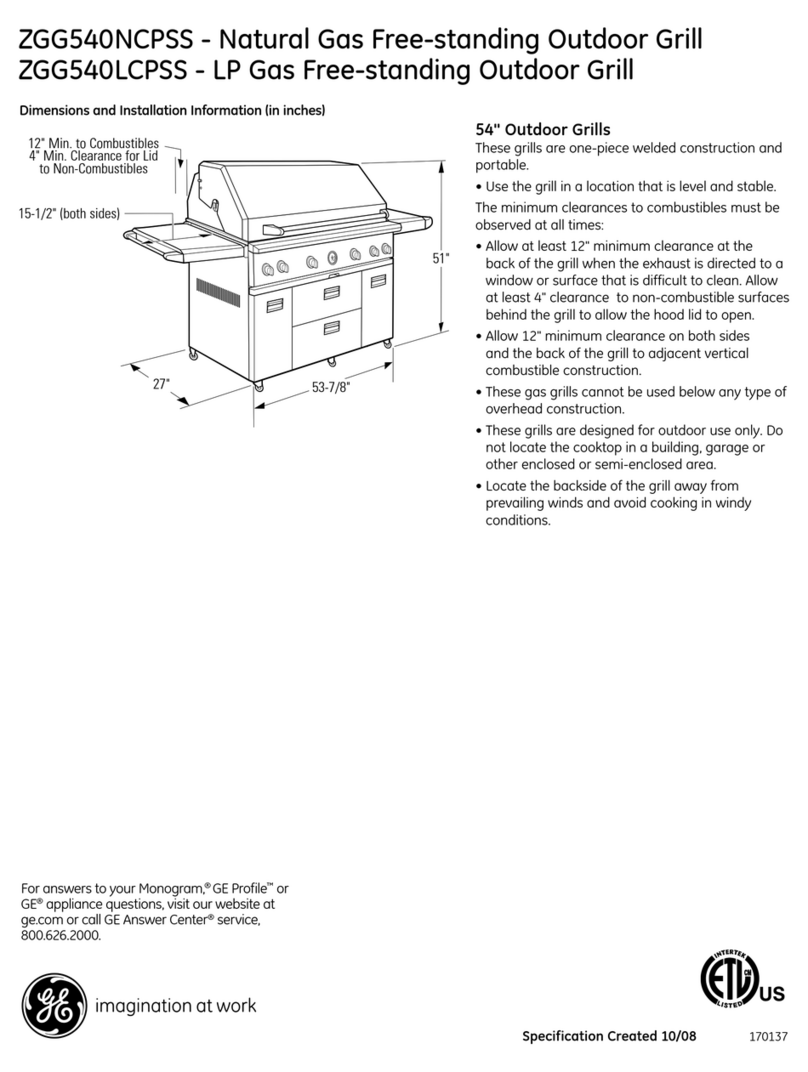
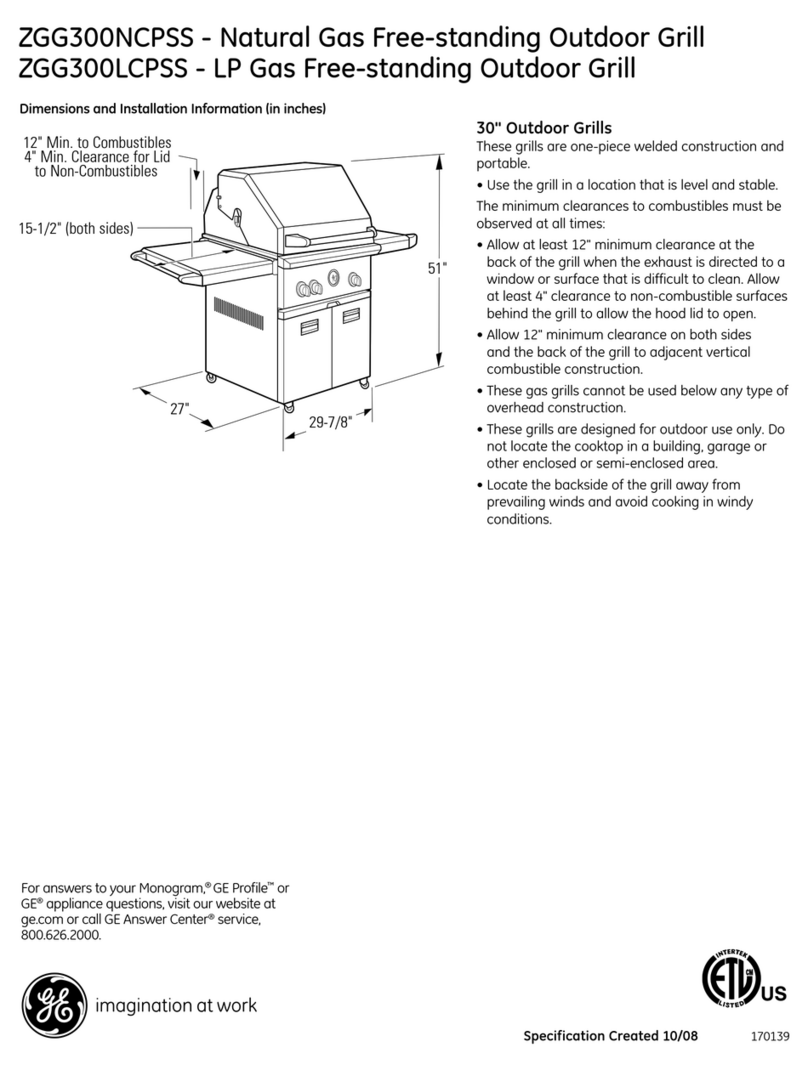
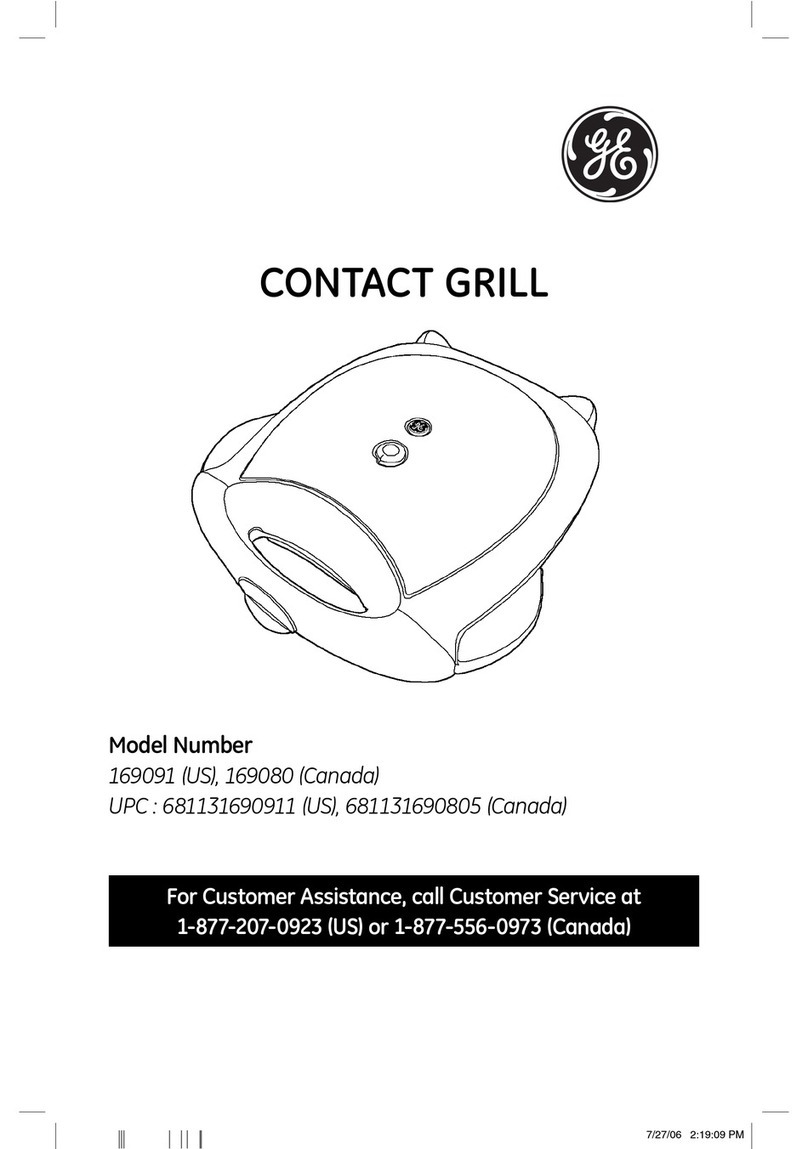
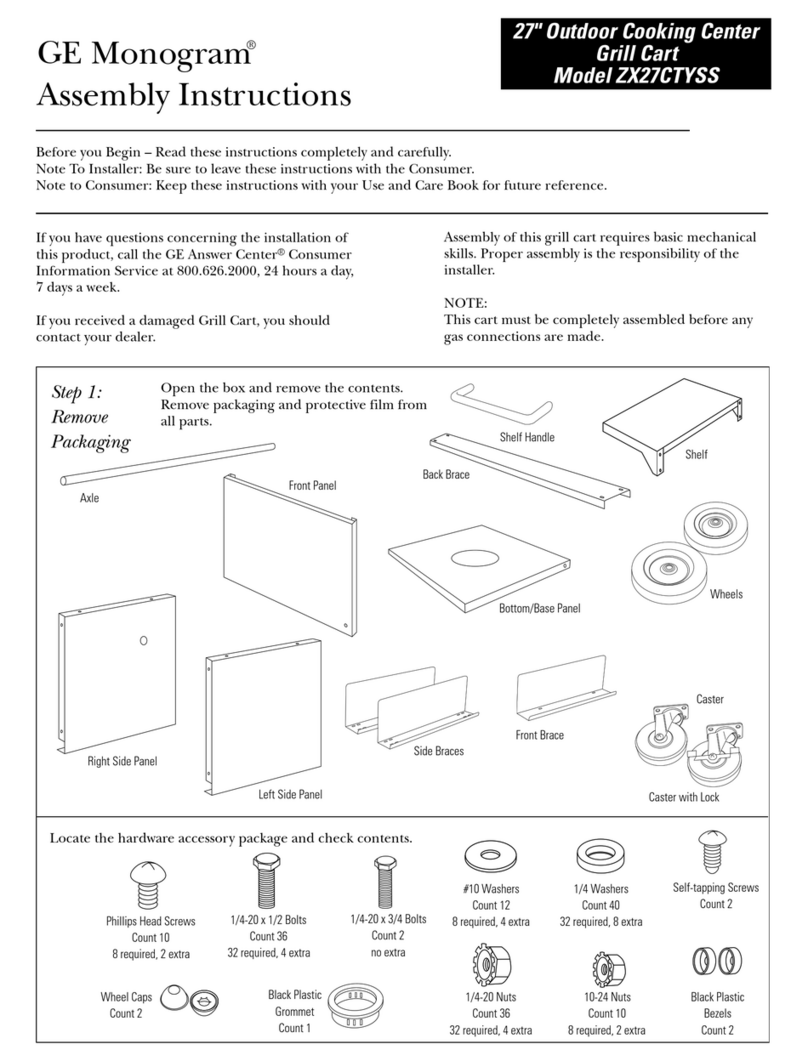
GE JP380 Training manual

E
❑
!Saf* Instrudions...................2-4
OperatingInstructions,~ps
Controls............................................................5
Features...........................................................4
GrillModules..............................................6–9
GrillingGuide..................................................9
Ventilation System..................................... 10
CareandCleaning...................l&I 2
ControlKnobs.............................................. 10
GreaseJar..................................................... 10
GrillElement................................................. 11
GrillGrates.................................................... 12
GrillRocks..................................................... 12
PorcelainCooktop...................................... 11
Ventilation System..................................... 11
Problem Solver..............................20
Morequestions?...call
GEAnswerCenter@800.626.2000
Installation
Instructions...............................13-19
Consumer SeWiCeS ..................23
ApplianceRegistration.................................2
Important PhoneNumbers.......................23
ModelandSerialNumbers.........................2
Warran~ .......................................................24
GEAppliances Model: JP380
209622A
164D2966P183
49-8670
5-95CG

~LP US~LP YOU...
Beforeusingyourgrill,readthisguide
carefully.
It is intended to help you operate and maintain your
new grill properly.
Keep it handy for answers to your questions.
Eyou don’tunderstandsomethingorneedmorehelp,cM:
GEAnswerCenter”
800.626.2000
24hoursaday,7daysaweek
Howto RemovePackagingTape.
To assure no damage is done to the finish of the
product, the safest way to remove the adhesive left
frompackagingtapeon new appliancesis an application
of ahousehold liquid dishwashing detergent, mineral
oil or cooking oil. Apply with asoft cloth and allow
to soak. Wipe dry and then apply an appliance polish
to thoroughly clean and protect the surface.
Writedownthemodelandserialnmbers.
You’11find them on the right side of the vent chamber.
It is visible inside the cabinet~.
These numbers are also on the Consumer Product
Ownership Registration Card that came with your
grill. Before sending in this card, please write these
numbers here:
Model Number
Serial Number
Use these numbers in any correspondence or service
calls concerning your grill.
Ifyou receivedadamagedgrill...
Immediately contact the dealer (or builder) that sold
you the grill.
Savetimeandmoney.
Beforeyou requestservice...
Check the Problem Solver in the back of this guide. It
lists causes of minor operating problems that you can
correct yourself.
~YOU~ED SERVICE...
To obtain service, see the Consumer Services page
in the back of this guide.
We’reproud of our service and want you to be
pleased. If for some reason you are not happy with
the service you receive, here are 3steps to follow for
further help.
FIRST, contact the people who serviced your
appliance. Explain why you are not pleased. In most
cases, this will solve the problem.
NEXT, if you are still not pleased, write all the
details-including your phone number—to:
Manager, Consumer Relations
GE Appliances
Appliance Park
Louisville, KY 40225
FINALLY,if your problem is still not resolved, write:
Major Appliance Consumer Action Program
20 North Wacker Drive
Chicago, IL 60606
2

When usingelectricalappliances,basic safety
precautionsshouldbe followed,includingthe
following:
●Use thisgfll onlyforifi intendeduse
as describedin this use and care guide.
●Besureyourapptianceisproperlyinstalledand
grounded
by aqualifiedtechnicianin accordance
withthe providedinstallationinstructions.
QDo notassumethatyouknowhowtooperate
allparts ofthegriH.Somefeaturesmay work
differentlyfrom those on yourpreviouscooktop.
●Donot attempttorepair or replaceany part
ofyour grillunlessit isspecifica~y
recommendedin thwguide.All other servicing
shouldbe referred to aqualifiedtechnician.
●Havetheinsta~ershowyouthelocationofthe
circuit
breakeror fuse.Markitfor easyreference.
●Beforeperforminganyservice,disconnectthe
grillpowersupplyatthehousehold
distributionpanelby removingthe fuse or
switchingoff thecircuitbreaker.
●Donot leavechildrenaloneor unattended
whilethegrillunitsare inoperation.
They couldbe seriouslyburned.
●Donot aEowanyoneto efimb,standor hang
onthegrill.
●CAU~ONItemsofinteresttoctidrenshould
notbestoredincabinetsabovethe@+dren
chbing onthe@to reachthemcouldbe
seriouslyinjured.
●Neverwearloose-fittingorhanginggarments
whileusingthegrill.Becarefulwhenreachingfor
itemsstoredoverthe@l. Fkunmablematerialcould
beignitedifbroughtincontactwithhotsurfacesand
maycausesevereburns.
●Useonlydry potholders—moistordamppot
holdersonhotsurfacesmayresultinbumsfrom
steam.Do not letpot holderstouchhot surface
units.Do not use atowelor otherbuky clothsin
placeof apotholder.
●For yoursafety,neveruseyourappliancefor
warmingor heatingthe room.
●Keepthe ventgfile, ventchamberand the
greasefilterscleantomaintaingoodventing
andtoavoidgreasefues.
●Donotletcookinggreaseor other flammable
materialsaccumulateonor near thegrill.
●Donot storeflammablematerialsnear the
grill.Do notstoreor usecombustiblematerials,
gasolineor otherflammablevaporsand liquidsin
thevicinityof thisor anyotherappliance,
●Donotheatunopenedfoodcontainers.
Pressurecouldbuildupand the containercould
burst causingan injury.
●Donottouchthegrillsurfacesorareasnear
thegri~ingsurface.Thesesurfacesmaybe hot
enoughto burn even thoughthey are dark in color.
During and afteruse, do not touch,or let clothing
or otherflammablematerialscontactgrill surface
or areas nearbygrill surface;allow sufficienttime
for coolingfirst,
Potentiallyhotsurfacesincludethegrilland areas
facingthe grill.
●Whencookingpork,followthedirections
exactlyandalwayscookthemeattoaninternal
temperatureofatleast170°F,Thisassuresthat,
intheremotepossibilitythattrichinamaybe
presentinthemeat,itwillbekilledandthemeat
willbesafetoeat.
●Donotusealuminumfoiltobnethe grillbasin
or grill.Misusecouldresultinashock,fire
hazardordamagetothegrill.
●Onlythegrillgrate maybeplacedoverthegrill
heatingelement.
●Keepthegrillbasin,thegrill-rocks,thegrill
grateandthegreasecollectorjarclean.Be sure
the drain hole in the grillbasin is open. If clogged,
afire can occur.Emptythe greasejars frequently.
●Nevercleanthegri~surfacewhenitishot.Some
cleanersproducenoxiousfumesandwetclothscould
causesteamburnsifusedonahotsurface.
●Donotusecookwareontheg~l sectionof
thiscooktop.
(continuednextpage)
3

U
!WORTANT SAFETY~STRUC~ONS
(c5ndnued)
oToavoidthepossibtiityofabumorelectric ●Neverusewateronagreasefire.Smotherf~re
shocktiwaysbecertainthatthecorttrolsareat or flame or use amulti-purposedry chemicalor
the off positionand all unitsare coolbefore foam-typeextinguisher,
attemptingto removethegrillgratesandgrill-rocks. oTheuseofanyaccessorynotrecommendedby
●Neverleavetheareawhileusingthegrill. GEmaycauseinjuries.
●Donotreplacethegreasecollectorjarwitha
mayonnaisejarwhichcouldbreak whenhot
greasedrips into it. Replacewith any regular
canningjar.
●Tocontrolflame-ups,turndowntheheatsettingto
FANratherthanoff.Thiskeepsthedowndraftvent
bloweron.Usealong-handledutensiltocarefully
removetie foodfromthegtil. Thesestepsshould
controltheflameuntiliteventurdIygoesout.If it
doesnot,covertheentiregriIlmodulewithacoohe
sheetortie lidfromalargeroastingpan.Useapot
holdertoremovethisla~r becauseit willbe hot.
sFuelsuchascharcoalbriquettesisnottobe
usedwiththisapptiance.
●Donotoperatewithdamagedtooting element
after any malfunctionuntilproperrepair has
been made.
●Keepallswitchesoffwhenunitisnotinuse.
●Thisapplianceisforhouseholduseonly.
SAVET~SE
~STRUCTIONS
FEATURESOFYOURGmL
Model: JP380
Explained
FeatureIndex onpage
1Grill Modules ]69,12
2Control fiob for Left Grill Element I5,10
3Control tiob for Right Grill Element I5,10
4Model and Serial Numbers 2
(Located on the right side of the ventilation chamber.)

CONTROLS
The variable controls for the grill element provide flexibility in heat g
setting selection. *
~
Howto Set the Controls R
1.fish the control knob down. 2. Turn the knob in either direction
to the desired heat setting.
Thecontrolmustbe pushed
downtosetonlyfromthe OFF
position.Whenthecontrolisin
anypositionotherthanOFF,it
mayberotatedwithoutpushing
itin.
Be sure you turn the control knob
to OFF when you finish cooking.
I
CookingGuidefor UsingHeatSettings
The amount and type of food being cooked, weather
conditions and voltage will influence the setting
@
99<
needed for best cooking results. The setting indicated *@
should serve as aguide while you become familiar G
with your cooktop. m
N
HI Preheat for all foods, cook steak and o
hot dogs. 3+ I+’
9-10 Cook pork chops, fish and chicken.
Fan Manual control of fan. OFF
I
5

G~L
me
grill consists of two black grill grates, agrill element and two
grill-rocks.
ToInstallthe Grill
1.Before installing grill components, be certain the
control knobs are in the OR position.
2.Lifttie grillelement.Placethetwo grill-rocksintoan
emptygrillbasinwiththeirhandlesrunningparallelto
thefrontofthecooktop.~ese grill-rocksmustbe
usedsincetheysupportthegrillelement.
3. Lowerthegrillelementuntilitresfion thehandlesof
thegrill-rocks.
4. Placetheblackgrillgrateson thetopof thecooktop.
ToRemovethe Grill
1.Remove the grill components once they are cool.
Be sure the control knobs are in the 0~ position.
2. Remove the grill grates.
3. Lift the grill element and remove the grill-rocks.
AutomaticVentilation
me vent fan comes on automatically when the grill is turned on and turns
off automatically when the grill is turned off.
6

—
UsingtheGrill
●Before using the grill for the first time, wash grill ●Allowing excessive amounts of grease or drippings
grates in hot soa~v water. Rinse and drv. to constantly flame voids the warranty on the grill
. .
●Precondition new grates and grill-rocks by brushing grates. Exc~ssive flare-ups indicate that either-tie
with vegetableoilor sprayingwith anon-stickcoating grill interior needs to be cleaned, excessive amounts
such as PamG.Do this every time before you grill. of fat are in the meat or that the meat was not
properly trimmed.
●For easier clean-up, spray grates and grill-rocks with
anon-stick coating. ●Grease drippings will occasionally ignite to produce
●Preheat the grill on HI for 5to 10minutes.
Preheating improves the flavor and appearance
of meats and quickly sears the meat to help retain
thejuices.
●Excessiveamountsoffatshouldbetrimmed
frommeati.Some fat is necessary to produce the
smoke needed for that smoked “outdoor” flavor.
However, excessive fat can create cleaning and
flare-up problems.
●Neverleavethegrillunattendedduringoperation.
harmless puffs~f flame for asecdn{or two.-This is
anormal part of the cooking process.
IMPORTANT
●Do not use aluminum foil inside the grill area.
●Do not use charcoti or wood chips in the
grill area.
●Do not cover grates completely with meat.
Leave air space between each steak, etc. to allow
proper ventilationas well as to prevent flare-ups.
●Do not allow the grill-rocks to become
overloaded with grease. Clean frequently.
GrillingTips
The following suggestions are good rules to follow
and will increase your enjoyment of the equipment. Be
sureto followdirectionsin thisguidefor usingthe grill.
Suggested cooking times and control settings are
approximate due to variations in meats and electrical
voltage. Additionally,times will also vary depending
on the location of the grill (enclosed versus open area;
cross ventilation). Experience will quickly indicate
cooking times as well as which settings work best.
For best results, buy top grade meat. Meat that is at
least 3/4 inch will grill better than thinner cuts.
For the attractive“branded’ look on steaks, be sure the
grillis preheated.Allow one sideof the meat to cook to
the desired doneness, or until thejuices appear on the
top surface,before turning.Turn steaksand hamburgers
just once.Movingthe food aroundcausesloss ofjuices.
To help retain meatjuices, salt after turning meat or
after cooking is completed.
Should grilled foods be prepared and ready before
you’re ready to serve, turn controls to alow setting
and cover food with asingle sheet of foil. Food will
continue to cook.
Men basting meats or applying sauces to foods,
remember that excessive amounts wind up inside your
grill and do not improve the food flavor. Apply sauces
during the last 15to 20 minutes of cooking time unless
the recipe specifies otherwise. Sugar-based marinade
(for example, barbecue sauce) will caramelize on grill
grates and grill-rocks and will create acleaning chore.
Themaremanymeatmarinadeswhichwillhelptenderim
less expensive cuts of meat for cooking on the grill.
Certain foods, such as poultry and non-oily fish, may
need some extra fat. Brush with oil or melted butter
occasionally while grilling.
Use tongs with long handles or spatulas for turning
meats. Do not use forks as these pierce the meat,
allowingjuices to be lost.
Score the fat on the edges of steaks but do not cut into
the meat to prevent curling while cooking.
WhatToDo If aFlare-UpWillNotStop
1.Immediately turn the control switch to the fan position.
2. Remove the meat from the grill. (continuednextpage)
7

GmL~G
(continued)
QuestiomandAnswers
Q.Ifollowedthecookingtimessuggestedinthe
grillingguidebutmyfoodswerenotdone
properly.ktheresomethingwrongwithmy@?
A.Probably not. Suggested cooking times should
be used only as ageneral guide. Variables in food
and location of the grill can change cooking times
required.
Q.HowcanIkeepbarbecuedmeatsfrom
developinganunattractiveburnedlook
andtiste?
A. Sauces containing sugar will often burn if used
during the entire cooking time. If your favorite
sauce contains sugar,try adding it only during the
last 15to 20 minutes of cooking time for best
results.
Q.Whencookingmanyindividualfoods,whatan
Idoto insurethatfoodswillcookevenly?
A.men cooking foods of various sizes and
thicknesses, start larger or thicker pieces first
and add quicker cooking, smaller pieces later,
Press the meat lightly to lie flat on the grill. Slash
the fat on the edges of steaks and chops to prevent
curling. Break thejoints of split chickens so they
will lie flat.
Q.Mygrilledmeatssometimescomeoutdrier
thantheyshould.WhatcanIdo to help
preventthis?
A. Season meats after cooking rather than before—
salt can draw outjuices and dry out meat. Use
tongs to turn and rearrange meats on the grill;
forks will pierce the meat and releasejuices.
8

Seasongrillgrates.Preheatthe grillon highfor 5to 10minutesfor bestflavor.
The timesgiven ubasedon grillingin an enclosed area. Hthe grillis located
in an areawith crossventilation,cookingtimes will need to be increased(up to
twiceas long).
Meat
Steak (1/2-3/4’7
Rare
Medium
Well
Steak (1–1fi’~
Rare
Medium
Well
Hamburgers (1/2-5/8”)
Pork chops
Fully cooked smoked pork chops
Ham slices
Pork ribs
Fully cooked sausages
Hot dogs, brats, polish
Fresh sausages
Links
Patties (3“ diameter)
Italian sausage
Poultry
Chicken
Pieces:bone-in
Bonelessbreasts
Wings
Cornish hen (halved)
Fish
Small,whole(1X“)
Steaks (1’7
Fillets—with skin on (1/2”)
Shrimp (skewered)
Bread
Garlic bread
ControlSetting
HI
HI
HI
HI
HI
HI
10
10
HI
10
10
HI
10
9
9
10
10
10
10
10
10
10
10
HI
HI
CookingTime
9to 12minutes
12to 19minutes
16to 23 minutes
10to 17minutes
19to 26 minutes
24 to 32 minutes
15to 25 minutes
30 to 40 minutes
10to 15minutes
15to 20 minutes
50 to 60 minutes
5to 10minutes
10to 15minutes
20 to 25 minutes
20 to 25 minutes
45 to 60 minutes
25 to 35 minutes
20 to 25 minutes
35 to 40 minutes
20 to 25 minutes
25 to 30 minutes
10to 15minutes
10to 15minutes
2to 3minutes
1to 2minutes
Procedure
Turn after 5to 6minutes.~
Turn after 6to 9minutes.
Turn after 8to 11minutes.
Turn after 5to 8minutes.~
Turn after 9to 12minutes.
Turn after 12to 16minutes.
Turn after half the time.
Turn occasionally.
Turn once. Glaze if desired.
Turn once.
Turnoccasionally.Brush with
barbecue sauce during the
last 15minutes.
Turn once.
Turn occasionally.
Turn after half the time.
Pierce casing with afork.
Turn once.
Turn occasionally.
Start skin side down,
turn occasionally.
Turn frequently. Brush with
marinade or glaze during
last 5minutes.
Turn occasionally.
Brush with butter. Turn after
half the time.
Brush with butter. Turn after
half the time.
Start skin side down. Brush
with butter. Turn after half
the time,
Turn and brush with butter
or marinade frequently.
Hot dog or hamburger buns
TTheU. S. Department of Agriculture says “Rarebef is popular,but youshouldknowthat cooking
foodpoisoting organismsmay survive.”(Source:SafeFoodBook,Yourfitchen Guide.USDARev.June 1985.)
Turn after half the time.
to only 140°F.meanssome
9

WNT~ATION SYSTEM
Thebuilt-inventsystemhelpsremovecookingvapors,odorsand
smokefromfoodspreparedonthegrill.
Thevent fan comes on automatically when either grill is turned on and
turns off automatically when both grills are turned off.
To operate the vent fan manually, turn the control knob to the FAN setting.
CAW Am CLEA~G
Before cleaning any part of your grill, be sure all controls are off.
Do not operate the grill without all parts in place.
ControlKnobsand ControlArea
The knobs on the control panel can be removed with To clean the area under the control knobs, use
the controls in the OFF position. Pull each knob mild cleansers, such as soapy water or mild liquid
straightup. Wash the knobs in warm soapy water or asprays such as 409. Wipe with asponge, damp cloth
dishwasher; do not use abrasive cleansers or or paper towel. Do not scrub with S.O.S. pads or
materials. To replace each knob, match the flat part of abrasive cleansers.
the knob opening with the spring on the shaft,
returning to the 0~ position.
GreaseJar
Agreasejar is located below each grill basin under
the countertop.Checkperiodicallyto preventspillovers.
Unscrew and remove. If thejar is broken, replace with
any heat temperedjar, such as acanningjar, which
has astandard screw neck.
NOTE:Make sure the greasejar is in place
before grilling.
10

PorcelainCooktop
This finish is acid-resistant.However, any acidic foods spilled (such as fruit
juices, tomato or vinegw) shouldbe cleaned up right away.Acids will
damage the finish if left on the porcelain.
If acidsspillonthegrillwhileitishot,use adry paper towel to wipe it
up right away. When the surface has cooled, wash with soap and water.
Rinse well.
Forotherspills,suchasfatsmatterings,wash with soap and water after
the surface has cooled. Rinse well. Polish with adry cloth.
GrillElement
Do not clean the grill element. Most soil will burn off during use.
VentilationSystem
VentGrille:The vent
grille lifts off easily.
Wipe clean or wash
in the sink with mild
household detergents.
Filter: Turn off the fan
before removing. Turn
the filter retainer clip
to remove the filter.
The filter is apermanent
type and should be
cleaned when soiled.
Clean in the sink with
warm water and liquid
dishwashing detergent.
AIMPORTANTDo not operate the fan’without the
filter.The filter should always be placed at an angle.
As you face the front of the cooktop, the top of the
filter should rest against the left side of the vent
opening and the bottom of the filter should rest
against the right side of the ventilation chamber at the
bottom. If the filter is flat against the fan wall,
ventilation effectiveness is reduced.
VentilationChamber:This area, which houses the
filter, should be cleaned in the event of spills or
whenever it becomes coated with afilm of grease.
The ventilation chamber may be cleaned with apaper
towel, damp cloth or sponge and amild household
detergent or cleanser.
(continuednextpage)
11

W
,..--
”..
.,.,;j;
‘“.:,,,. CAm Am CLEA~G
(continued)
GrillGrates
These are made from cast aluminum and have anon-
stick finish.
Thegratesshouldbecleanedaftereachuse.
Theycanbe cleaned with detergent and aplastic
scrubber, such as Tuffy,or washed in the dishwasher
if burned-on residue is first removed. For heavy soil,
grates can be soaked in hot, soapy water mixed with
household ammonia.
Donotusemetalbrushesorabrasivescouringpads
orotherscrubbersintendedtocleanoutdoorgrills.
Thesewillremovethefinishaswellasscratchthe
grates.Donotcleaninaself-cleaningovenoruse
ovencleanersonthegrates.
Grill-Rocks
These are made from cast-iron which have been
coated with porcelain enamel.
The grill-rocks should be cleaned frequently or after
any excessive build-up of grease.
To clean light soil, use detergent and aplastic
scrubber or wash in the dishwasher after burned-on
residue is first removed.
For heavy soil, soak in hot, soapy water to which a
cleanser, such as household ammonia, has been added.
Stubbornspotson grill-rocks,suchas burned-onresidue
from sauces, can be scrubbed with astiff brush.
An oven cleaner can be used for burned on soil.
Follow manufacturer’s directions; spray on cleaner
and let soak overnight.
Donotcleangrill-rocksinaself-cleaningoven.
PorcelainGrillBasin
This area, located under the grill-rocks, should be
cleaned after each heavy use of the grill. The grill
element must be lifted during the cleaning process.
To remove light soil, clean with soapy water or with a
cleaner such as 409. For easier cleanup, soak paper
towels in ahousehold cleanser, lay in the burner basin
and soak for at least ahalf-hour or longer.
To remove moderate soil, scrub with Comet, Bon
Ami, asoft scrub cleanser or plastic scrubber.
To remove stubborn soil, spray with an oven cleaner.
Let soak overnight. Wipe clean. Rinse and dry.
12

BEFOREYOUBEGIN
Read these instructions complete& and
carefu@.
IMPORTANT-OBSERVE-GOWRNING
CODESANDORDINANCES.
NOTETO INST~R Be sure to leave
these instructions tith the consumer.
PARTSLIST
●Electric grillbase unit
●Uterature pack
●4Grillgrates
●4Grillrocks
●1Ventfilter
●1Ventgrille
●2Grease jars
IMPORTANTIHSTMMTIOHINSTRUCTIONS
Gfl is U.L fistedforoutdoorinsWtion ofi.
CA~ON: Warranty is void on GE equipment
installed other than as recommended by
manufacturer. Recommended wallcaps and
transitions must be utifizedfor proper operation
and installation.
CAWON: Forpersonalsafety,remove
house fuse orcircuitbre~er before
beginninginitiation.
This apptiancemust be suppfiedwith the
proper voltageand frequency, and connected
to an individual,properly grounded branch
circuit,protected by acircuit breaker or time
delayfuse. Proper electrical ratings should be
verifiedwith fisting on product’srating plate.
me rating plate is located on the right side
ofthe ventilationchamber.
Be sure your cooktop is installedproperly
by aqua~ied installer or service technician.
TOOLSMD PARTSNEEDED
●Mge flatblade screwdriver
●saw
●Carpenter’s square
●Measuring tape or scale
(continuednextpage)
13

PREPARINGFORIHSTMMTION
For ducting through the floor.
e
iner
“The blower may be rotated for horizontal or verti=l direction
by loosening nuts around the blower inlet,accessible inside the
ventilation chamber.
PREPARINGFORIHSTALMTIOH
For ducting through the back wall.
9%”
23.81 cm
‘The blower may be rotated for horizontal or vertical direction
by loosening nuts around the blower inlet, accessible inside the
ventilation chamber.
i, 4b4k\i
3(7.62 cm)
+
5/8~~
.69 cm
limum
!arance
A30,16cm ~
IMPORTMT
Dimension “Y-Provide Zmin. (5.08 cm)
—---
cabinet clearance to motor for coolingpu~oses.
N~: mere possible, W(15.24cm) is
recommended for motor/blower service.
Side Clearance—Grillsinstalled near aside
wallshould allow amhimum clearmce of
6(15.24cm) for best venting performance, but
may be safelyinstalled as near as 1“ (2.54cm)
from aside wall if required by space limitations.
Electrical Hooku~fie unit should be properly
circuit protected md wired according to local
electrical codes. See electrical wiring information
on back. Unit power requirements are located on
the data plate.
Ducting Requirements—Use of awall cap
required. See Step 5“Install the Ductwork.”
You must allow room enough to remove and
empty grease containers.
14

STEP1
INSTMLIHG ~BIHETS OVERYOUR COOKTOP
I:-n%oII
~lmi”towall(2.54cm)
We recommend at least 6(15.24
cm) for best venting performance.
Avoidplacingcabinets abovethe cooktopunit,
ifpossible, in order to reduce the hazards caused
by reaching overheated surface units.
●Make sure the wallcoverings around the
cooktopcan withstand heat generated by the
cooktopUP to 200°F
●Ifcabinets are placed abovethe cooktop,allow
aminimumclearance of3V between the cooking
surface and the bottom ofunprotected cabinets
unless the underside ofthe cabinets abovethe
cooktopis protected with not less than 1/4’
insulatingflame-retirdant millboard covered
with sheet metal not less than 0.012Y
(0.031cm) thick.
●Clearancebetween the cooking surface and
protected cabinets MU= NE~R BE LESS
H24INCHES.me vertical distance from
the plane ofthe cooking surface to the bottom of
adjacentoverhead cabinets extending closer
than 1“to the plane ofthe cooktop sides must
not be less than lV.
~CE~ON: Instillation ofafisted microwave
oven or cooking appfianceover the cooktop shall
conform to the installationinstructions packed
with that appfiance.
Workingareas adjacentto the cooktop should
have an lV (45.7cm) minimum clearance
between the countertop and the bottom ofthe
cabinet. Ethe clearance is less than lW
(45.7cm), the adjacentcabinets should beat
least V(5.08cm) from the side ofthe cooktop.
ProperElectricalSupply
Youmust provide an adequate electrical supply
system as required for your cooktop.N1wire
connections must be in accordance with local
codes and properly insulated. Check with local
utitityfor governing electricalcodes and
ordinances. In the absence oflocalelectrical
codes, the nationalElectricalCode, NFPANo.
70,must be followed.Acopyofthe National
ElectricalCode, NFPANo. 70,can be obtained
by writing to:
NationalFire Protection Assoc.
Batterymarch Park
Quincy,Massachusetts 02269
Athreewire, single phase, A.C. 120/240voltor
120/208volt,60cycleelectricalsystem @roperly
circuit protected to meet bcal Codes or NFPA
No. 70)must be provided.Unitmust be properly
grounded in accordance with localwiring code.
me followingchart recommends the minimum
circuitprotection and wire size ifthe appfianceis
the onlyunit on the circuit. If smaller sizes of
wire are used, the unit efficiencywillbe reduced
and afire hmard maybe created. It is advisable
that the electricalwiring and hookup be
accomplished by acompetent electrician.
(continued next page)
15

SupplyConndion
NIelectricalconnections are to be protected
from the elements and be in accordance with
localcodes for outdoor wiring.This applianceis
to be permanently wired.
Bringsupp~ leadsintobottomopeningofthe intern;
wiring box. MakeML wire connections inside thi
box. Installthe wiring box cover suppliedwiththi~
unitand insurethat the covergasket isinpkce.
IRecommended Minimum
Ko~~&n~g ICircuit IWire Sk
Protecdon AWG
Plate in Amperes
0-4.1 I20 I12
4.2-6.9 30 10
STEP 2
PREPMIHGTHECOUNTERTOP
Countetiop cut-out dimensions ~Back of Counter
II 20’%6 t%6”
53.2* .16cm
28% *X,” (JP380)
73.3cm *.16cm
[
tFront of Counter I
6W min. cut-out to Not less-than 1W6%” min. cut-out !(
wall (16.2 cm) 4,8 cm wall (16.2 cm
Cut out the opening as shown in the diagram.
Measure carefullywhen cutting the counterto ,
f
making sure the sides ofthe opening are para lel
and the front and rear cuts are exactly
perpendicular to the sides.
The front ofthe opening must clear the front
support rail on the cabinet and the rear ofthe
openingmust clearthe rear support ofthe cabinet
Chamferdl exposed edges ofdecorativelaminate
to preventdamagefromchipping.
Radius corners of cutout and fle to insure
smooth edges and prment corner crac~.
Roughedges, insidecorners whichhavenotbeen
rounded and forcedfitcan contributeto cracking
ofthe countertoplaminate.
Countertopmust be supported withinY(7.6 cm)
ofcutout.
STEP 3
PREPMEFORDUWORK
N~: Ductwork MU= be vented outside. DO
NOTvent into awall,ceifing,crawlspace, attic or
any concealed space.
Determine the best route for ductwork; it can be
routed in avariety ofways depending on the @pe
ofinstallation.
Typid duct arrangements.
II
B.2
Tra
){AU (
Upinsidewall to roof or DirSCttyto outside.
overhang.
Peninsula
Peninsulaorisland
m
i“
-.—
!
II (8.2 cmX25,4 cm) elbw
Betweenfloor joists. Thru caMnef toe space.
@tied duct arrangementunder concrete skb.
NOTE PVC sewerpipstypePSM 124W-B
Schedule40 ASTM D1785, Yto6“
6(15 cm) (12.7cmto 15cm)
., dia.90” metaltransition
6“ metalelbw
?/ \6“(15 cm)
dw,metal
(15 cm)dial \
Packtightlywithgravel 6“ (15’cm)dia.
IC eawarpipe PVC sewerpipe
NW orsandcompletely elbw
aroundpipe.
16

STEP 4
Pm THEDU~RUN
1. Make asketch ofthe total system.
Identifythe type ofeach fittingand the length of
straight pipe.
2. Enter your run into the Duct hngth Chart in
this guide. Elbows,wallcaps and other fittings
are shown in the chart with their equivalent
straight duct length. Each fittingvalue must be
added to the amount ofstraight duct length used
to determine the overallstraight duct equivalent
length. Use the followingexamples as aguide.
3. Using good quatityducting material, install
per these instructions. Afewminutes and
pennies spent nowwillpay long term dividends
for the ~ie ofthe cooktop.
I
STEP 5
lMST~LTHEDUCNORK
●Ducting must conform to localcode materials
and “makeup” requirements-300 CFM
minimum.
●IMPORT~ Saveforlocalelectrical
inspector’suse.
.Ductingacooktopis easy but criticalfor
proper performance.
●Afterreading these instructions,planthe
ductrun.
●Use the “Ductbngth Chart” to find the
equivalentlength ofthe run.
●Shiftthe blower to “high range” ifindicated
(doneby snapping the “restrictedring”out ofthe
blower inlet). Be sure blower is not running.
●Installthe duct hardware.
IMPORT~
Toti Mowmce duct system is:
90 with 6round wd mp
80 witi 3~x10 W~ ~p
hw range is up to 60
High me is 61 to 90’
GENEN CONSIDERA~ONS:
1. Use6’ diameterroundor 3WX1Wrectan~h o*.
2. Use aYto Wtransition (or aYround to
3%’xIVrectigular transition)atthe bloweroutiet.
The number ofadditionalelbows or transitionsin
the systemshouldbe hted to three.
3. Use qualitymetal duct ofat least 26gauge
galvanizedor 24gauge aluminum. Inferior
qualitypipe and fittingscan cause up to twicethe
restriction shown and is apoor value. See the
Prepare for Duct Work section ofthis guide for
optionalunder-slab ducting. bcal codes may
require aheavier gauge material or restrict PVC.
4. Distance between adjacentfittings (elbows,
transitions, etc.) should beat least lW. me
further the better. Closer distice promotes
turbulence which reduces airflow.
5. Handmadecrimpsare Web tocauserestrictions.
6. Han alternate wallor roof cap is used, be
certain duct size is not reduced, and that there is
abackdraft damper. It is best to use listed caps to
be certain ofproper performance.
7. Thermal breaks: In areas ofextreme cold
weather, it maybe necessary to provideashort
length ofnonmetallicduct as close to the wallas
possible,topreventconductionalongthe meti dud
8. Highakitudeinitiations It isadvisableto
reduce Nowable ductrun by 2~.
9. Foflowthe ductcakulationinthisguide
=efuMy forbest performanceand satisfaction.
STEP b
SHIFTINGTHEBLOWERFROM“LOWWGE”
TO“HIGHWNGE”
Thiscooktop is equipped with adual range
blower.It is shipped from the factory in low
range for most installations.Ethe Equivalent
Duct bngth exceeds 60feet it must be shifted to
high range. Do not shiftto high range for
shorter lengths. This willcause excessive noise
and loss ofconditioned air.
To shiftto high range
be sure the blower is
stopped. Removethe
.f
o
/-::.,
vent grill.Removethe
filterand intake guard. ~:~-’- ~
Pop the spring loaded ,,
“restrictedring”out of ;,, ,,;’
the blower inlet.Replace ~,’;,;:”’
t~d$l~re guard, grill
(continuednd page)
17

E~ple 1
5“to6Transition
Zof6“ Round
4of6Round
&of 6Round
Dud ~l@ Number Toti
~tient of Fittings ~=
hn@ Fi-
rtow
transition 111
YStraight 12+4+6=12 12
i“Elbow 5 2 10
YWMCap 28 128
Toti 51
Emple 2
5“to 6Transition
2’ of 6Round
#of 6Round
6of6Round
4’ of 6Round
3WX1OWallCap
6to 3~xl OTransition
10 of3fi”xl OStraight
Duct Fltig Number Toti
~tient of Fittings ~nw~oyt
hngth Fittings
rtow
;ransition 11 1
~Straight 12+4+6+4=16 16
;“Elbow 5315
;/,to
~lflxl~
“ransition 11 1
,Vxlw
;traight 110 10
Ilflxlw
VdlCap 20 1 20
Total 63

DUCTLENGTHCKRT
Duct Fitting Number ToM @uivalent
Duct Fitting Equivalent bn@ of Fittings bn@-Fiting
8Diameter90°Elbow r
(1.:2 m)
6Diameter45°Elbow 2.5’
(.76m)
*AFOW Yto6Transition 1.0’
(12.7 cmto 15.24cm) (.30m)
AirFlowthisdirectionnotrecommended,
m
6“to3%”X1O“90°Elbow /
(15.24cmto 8.26cmx25.4cm) (1.~m)
AirFlow
a
3WX1Oto690° Elbow 9’
(8.26cmx25.4cmto 15.24cm) (2.75m)
AirFlow
@F’:524:rn~fi:::~~~; “
(.30m)
a
3X”X1O“to 6Transition 4.5’
(8.26cmx25.4cmto 15.24cm) (1.37m)
,AirFlow
Yto3WX1O“90°Elbow 6’
(12.7cmto 8.26cmx25.4cm) (1.83m)
AirFlowthisdirectionnotrecommended.
@3WX1090° Elbow #
(8.26cmx25.4cm) (1.~m)
-3WX1OFlatElbow 12’
(8.26cmx25.4cm) (3.66m)
Qk6“WallCap 28’
(15.24cm) (8.53m)
m3Z”X1OWallCap 20’
(8.26cmx25.4cm) (6.10m)
&-.Z 10“xlO RoofJack o’
(25.4cmx25.4cm) (Om)
@ThermalBreak 2’
(.61m)
6DiameterStraightDuct–Feet 1’
(Forflexductmultiplyby2.) (.30m)
3WX1WStraightDuct–Feet 1’
(.30m)
System Total
19

QUES~ONS?
USETHIS PROBLEM SOLVER
PROBLEM POSS~LE CAUSE
i.,.,., v,..
@*IS”&6T: “, ,’” .: ‘.:;; ;:<““ “ ,.
+,:-~~ &j;&’,k&i@ titibtitim pmi ofywr kuse mu- bya
m~G~G PRQP~WY. biuw,qhuit &*, aM* c&@tbreaker,thema &seormemb Chuit
-=, -riding onMhmof*~~m supply.Ifacimuiibreaketiis
%vdvx resetit;&tie mntrolWxuses&ses,tie circtitkse (ac&dge-type)
$hwldMctigds B~ ONLYBYSO~O~ FWIAR _
ELWWCAL CRCU~S. H, ~r performing1ofthesepmedws,
dtefuseblowsorcircuitbre&er tripsagain,cdl for sewiw,
NO~: Apartmenttenantsor condominium ownersshouldr~uest their
buildingmanagementto perform thischeck before calling for senice.
●Grillheatingelementcontrols arenotproperlyset.
FOODS S~CK *Heatsettingistoo high.
TO G~L ●Gratesweren’t seasonedpriorto griIIing.
WCESSIVE SMO~ ●Accumulated~ase on grill-rocks or food soils on gratearecausing
FROM G~LW WATS ex=ss smoke.
*Fatsnottrimmedfrom meatspriorto cooking,
Ifyouneedmore help...wII, toll free:
GE Answer Center”
800.626.2000
consumer information service
20
Other manuals for JP380
1
Other GE Grill manuals

GE
GE 106796 User manual

GE
GE Monogram ZGG48N31CSS User guide

GE
GE JGGN24 User manual

GE
GE Professional Outdoor Grills and Cooktop User manual

GE
GE 106621 User manual

GE
GE ZGG542LCPSS User manual

GE
GE ZGG48L31YSS User manual

GE
GE 106668 User manual

GE
GE 36 Ceramic Cooktop User manual

GE
GE ZGG27N21CSS User manual