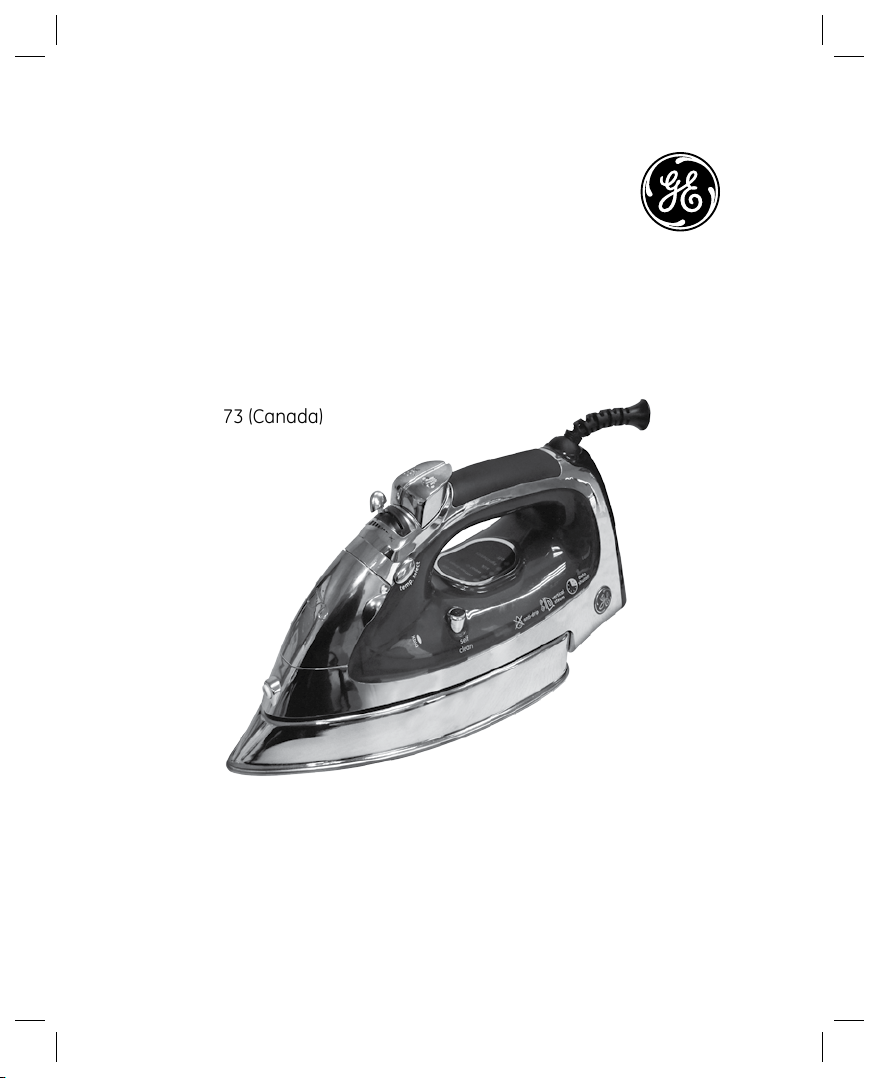
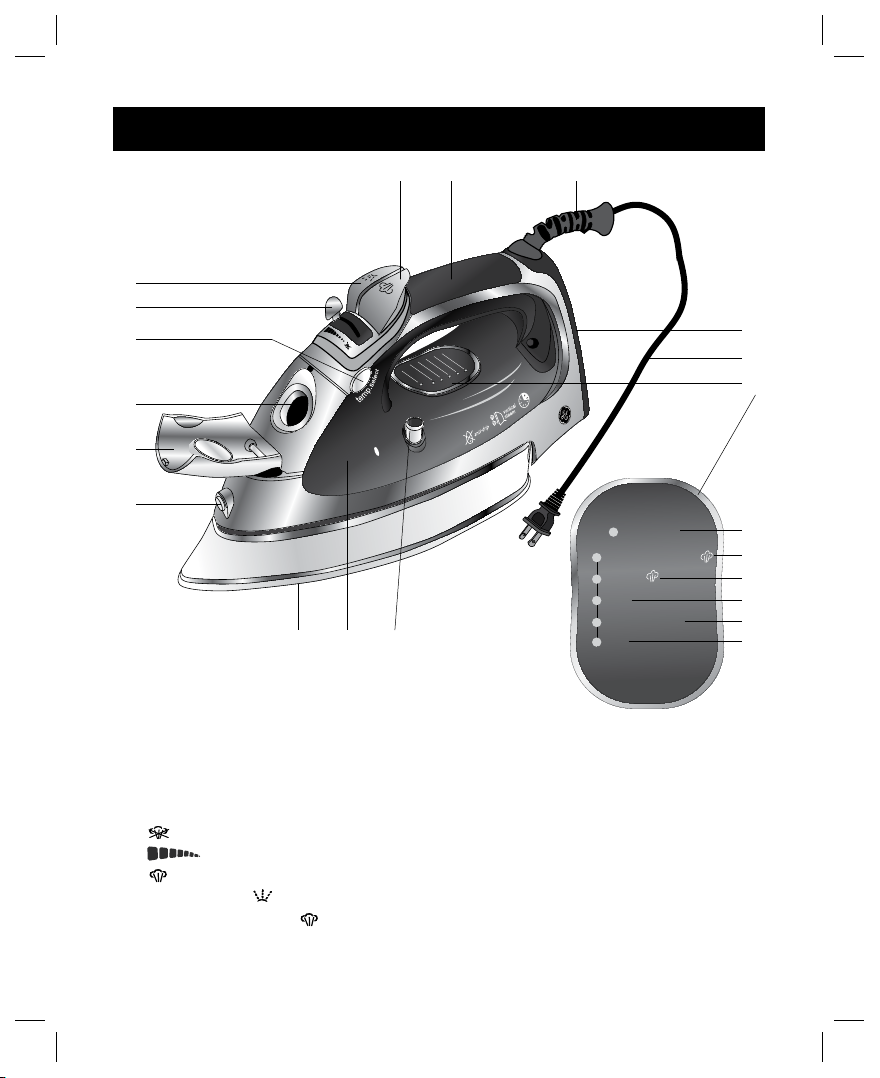
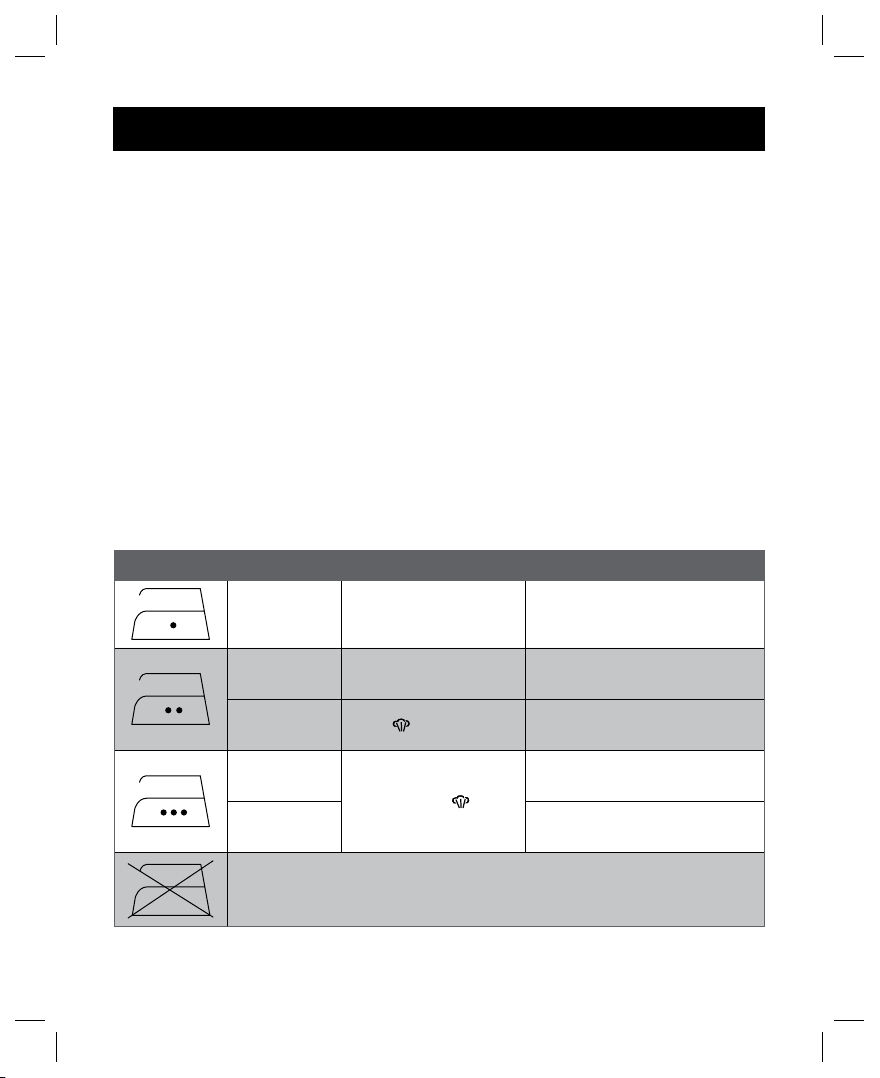
GE 898693 User manual

Professional
Chrome iron
Model Number:
898693
UPC: 605388986931
Customer Assistance
1 877 207 0923 (US)
1 877 556 0973 (Canada)
Thank you for purchasing this GE appliance.
In keeping with the GE ecomagination initiative, please consider the option to recycle
the packaging material and donate any appliance you are no longer using.
To read more about GE's ecomagination commitment, visit:
ge.ecomagination.com
898693-Iron-EN-04.indd 1 2/9/12 4:58 PM

22
IMPORTANT SAFETY INSTRUCTIONS
When using an iron, basic precautions should always be followed, including the
following:
READ ALL INSTRUCTIONS BEFORE USING
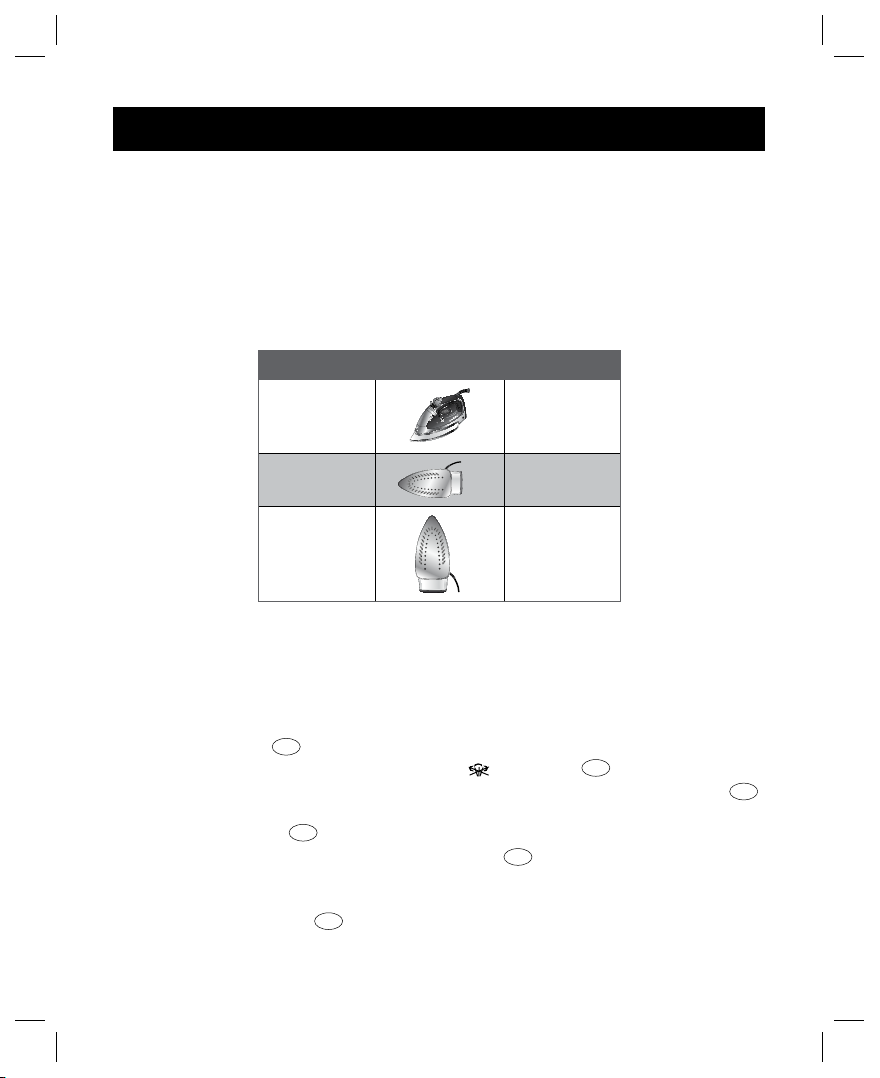
• Only use an iron for its intended use
• To avoid the risk of electric shock, do not immerse the iron in water or other liquids.
• Always turn the iron to OFF before plugging or unplugging the iron from the
electrical outlet. Never pull on the cord to disconnect the iron from the electrical
outlet; instead, grasp the plug and pull on the plug to disconnect the iron.
• Do not let the cord touch hot surfaces. Let the iron cool completely before putting
the iron away. Coil the cord loosely around the iron when storing.
• Alwaysdisconnectthe iron fromthe electrical outletbeforelling the iron with
water, emptying the water from the iron, and when the iron is not in use.
• Do not operate the iron with a damaged cord or in the event the iron has been
dropped or damaged or there are visible signs of damage or it is leaking. To
avoidtheriskofelectricshock,donotdisassembletheiron.Takeittoaqualied
serviceman for examination and repair. Incorrect assembly might result in a risk of
electric shock when the iron is used after reassembly.
• The iron must be used and rested on a stable surface.
• When placing the iron on its heel, ensure that the surface on which the iron is
placed is stable.
• Close supervision is required for any appliance used by or near children. Do not
leave the iron unattended while the iron is connected or on an ironing board.
• Burns can occur from touching hot metal parts, hot water, or steam. Use caution
whenyouturnasteamironupsidedown—theremightbehotwaterinthereservoir.
• To avoid a circuit overload, do not operate an iron on the same circuit with another
high-wattage appliance.
• If an extension cord is absolutely necessary, a cord with an ampere rating equal to
or greater than the maximum rating of the iron shall be used. A cord rated for less
amperagecanresultinariskofreorelectricshockduetooverheating.Careshall
be taken to arrange the cord so that it cannot be pulled or be tripped over.
SAVE THESE INSTRUCTIONS!
898693-Iron-EN-04.indd 2 2/9/12 4:58 PM

3
OTHER CONSUMER SAFETY INFORMATION
This appliance is intended for household use only.
WARNING! Shock Hazard: This appliance has a polarized plug (one wide blade) that
reducestheriskofelectricshock.Theplugtsonlyonewayintoapolarizedoutlet.
Do not defeat the safety purpose of the plug by modifying the plug in any way or by
usinganadapter.Iftheplugdoesnottfullyintotheoutlet,reversetheplug.Ifitstill
doesnott,haveanelectricianreplacetheoutlet.
PLEASE READ BEFORE FIRST USE:
• Duringrstuseoftheiron,itmayappeartosmoke.Thiswillstopanddoesnot
indicate a defect or hazard.
• Manyironsspitorsputterduringtherstfewuseswithtapwater.Thishappensas
the steam chamber becomes conditioned. This will stop after a few uses.
• Steamventsshouldbeclearedbeforerstuse.Prepareironforsteamironing;then
iron over an old cloth for a few minutes while letting iron steam.
898693-Iron-EN-04.indd 3 2/9/12 4:58 PM

44
PARTS
max
self
clean
auto
shutoff
auto o
cotton-linen
wool
silk
synthetics
o
1
7
10
2
3
5
4
6
8 9
11
13
14
15
16
17
18192021
12
1. Spray nozzle
2. Fill inlet cover
3. Fill inlet
4. Temp. button
5. Function control
: dry ironing
: steam output
: steam ironing
6. Spray button
7. Steam burst button
8. Handle
9. Swivel cord guard
10. Heel
11. Power cord with power plug
12. Temperature display panel
13. auto o indicator
14. cotton-linen indicator
15. wool indicator
16. silk indicator
17. synthetics indicator
18. o indicator
19. self clean button
20. Water tank
21. Soleplate with steam nozzles
898693-Iron-EN-04.indd 4 2/9/12 4:58 PM

55
ILLUSTRATIONS
a
max
self
clean
auto
shutoff
b
max
self
clean
auto
shutoff
c
max
self
clean
auto
shutoff
max
self
clean
auto
shutoff
def
g
h
i
max
self
clean
auto
shutoff
max
self
clean
auto
shutoff
j
max
self
clean
auto
shutoff
k
max
self
clean
auto
shutoff
l
898693-Iron-EN-04.indd 5 2/9/12 4:58 PM

66
OPERATION
Before rst use
• Carefully remove all packaging materials and retain for future use.
• Unwind the power cord (11).
• Clean the outside of the iron with a damp cloth and a mild detergent.
• Placetheirononaatandheat-resistantsurface.
NOTES:
• Whenusingtheironforthersttime,werecommendtestingitonasparepieceof
fabric to ensure the soleplate (21) and water tank (20) are completely clean.
• Theironmayproduceanodorandgiveosmokewhenswitchedonfortherst
time, as residues from the production process are eliminated. This is normal and
does not indicate a defect or hazard.
• Theironmayspitorsputterduringtherstfewuseswithtapwater.Thishappens
as the steam chamber becomes conditioned. This will stop after a few uses.
Preparing garments to be ironed
NOTE: Always follow the ironing instructions attached to the garments. Should these be
missing, please refer to the instructions in the table below:
Label Garment Temp. select panel Ironing instructions
Synthetics synthetics Dry iron on reverse side of
garments.
Silk silk Dry iron on reverse side of
garments.
Wool wool Steam iron while damp on
reverse side of garments.
Linen
cotton-linen
Steam iron while damp on
reverse side of garments.
Cotton Steam iron while damp using
steam or spray.
Do not iron
898693-Iron-EN-04.indd 6 2/9/12 4:58 PM

77
OPERATION (CONT.)
• Begin ironing with the garments requiring lower temperature settings. Doing this
shortens the waiting time (the iron heats up faster than it cools) and reduces the
risk of scorching garments.
• Ifthegarmentconsistsofamixtureofbers,settheironaccordingtotheberthat
requires the lowest temperature.
• Ifuncertainaboutthe bercontentofa garment,testingona minorareaof it
before ironing is recommended. In doing this, start with a low temperature. If
wrinklespersist,graduallyincreasethetemperatureto nd the best setting for
the garment.
• To prevent the garments from being stained or damaged, it is best to iron them on
the reverse side.
• When the temperature has been selected, allow 2 minutes for the iron to reach
maximum temperature.
Dry ironing
• Sort the garments to be ironed ( Preparing garments to be ironed).
• Connect the power plug (11) to a suitable electrical outlet.
• Slide the function control (5) to the dry ironing position (ill. g
).
• Press the temp. button (4) on either side of the iron until the respective indicator
ashes(ill. d
).
• Place the iron on its heel (10) and let it heat up (ill. e
).Theindicatorashesuntil
selected temperature has been reached.
• After use, turntheirono,disconnectitfromtheelectricaloutlet,andemptythe
water tank (20) ( Turningironoandemptyingwatertank).
NOTES:
• CAUTION! Burn hazard: During preheating, do not touch the soleplate (21) to
check the temperature (ill. f
).
• During preheating, ironing breaks or after use, always place the iron on its heel
(10) (ill. e
).
• When lowering the temperature setting, please allow several minutes for the iron
to adjust.
898693-Iron-EN-04.indd 7 2/9/12 4:58 PM

88
OPERATION (CONT.)
Filling iron with water
NOTE: This iron has been designed to work with tap water; however, if you live in an
area with hard water, we recommend the use of distilled water. Chemically softened
water (e.g. from household water softeners) is not recommended and may cause the
iron to leak or spit.
• Ensure the iron is unplugged from the electrical outlet.
• Place the iron on its heel (10)onaatandheatresistantsurface.
• Openthellinletcover (2) (ill. a
).
• Fill the water tank (20)throughthellinlet(3) until the max marking on the tank
(20) is reached (ill. b
).
• Close thellinletcover (2) (ill. c
).
Steam ironing
CAUTION! Burn Hazard: Alwaysllthewatertank(20) with water before connecting
the iron to the electrical outlet.
• Fill the iron with water ( Filling iron with water).
• Connect the power plug (11) to a suitable electrical outlet.
• Slide the function control (5) to dry ironing position (ill. g
).
• Press the temp. button (4) on either side of the iron until the cotton-linen indicator
(14)ashes(ill. d
). CAUTION! Burn hazard: Steam ironing should be only used
with cotton-linen or wool mode and when the appliance is fully heated (indicator
on steadily). If not, hot water might drip from the soleplate (21) and cause burns!
• Place the iron on its heel (10) and let it heat up (ill. e
). The cotton-linen indicator
(14)ashesuntiltheselectedtemperaturehasbeenreached.
• After the cotton-linen indicator (14) lights up steadily, press the steam burst button
(7) a few times. Steam will come out of the soleplate nozzles (21) (ill. j
).
• Slide the function control (5) to the desired steam output (between and ).
Slide right/left to increase/decrease the steam output. Steam is kept at a constant
volume and temperature.
• After use,turntheirono,disconnectitfromtheelectricaloutlet,andemptythe
water tank (20) ( Turningironoandemptyingwatertank).
898693-Iron-EN-04.indd 8 2/9/12 4:58 PM

9
OPERATION (CONT.)
Water spray
NOTES:
• This function can be used to help iron heavy fabrics or dicult areas (collars,
pockets, sleeves, creases, etc). It can also be used when ironing delicate fabrics,
which cannot be steam ironed.
• Thisfeatureonlyworkswhenwaterhasbeenlledintothetank(20). If the spray
isbeingusedforthersttime,oriftheironhasbeenidleforsometime,youmay
need to press the spray button (6) a few times to prime the spray pump before
it works correctly.
• Aim the spray nozzle (1) at the garment and then press the spray button (6).
• A spray of water is emitted from the spray nozzle (1) (ill. i
).
Steam burst
NOTE: This function provides an extra amount of steam to remove stubborn creases.
For extra stubborn creases, wait a few seconds before pressing the steam burst
button (7) again. You may need to press the steam burst button (7) a few times to
prime the pump before it works correctly. We recommend pressing it every 5 seconds.
• Press the steam burst button (7).
• A burst of steam is released from the soleplate nozzles (21) (ill. j
).
Vertical steam ironing
CAUTION! Burn Hazard: Do not direct steam toward people or pets. This function
provides an extra amount of steam to remove creases on delicate garments in a
hanging position, hanging curtains or other hanging fabrics. During use, do not let the
soleplate (21) touch delicate fabrics!
• Prepare the iron for steam ironing ( Steam ironing).
• Hold the iron vertically and keep it about 6 inches (15cm) away from the garment
to be ironed.
• Press the steam burst button (7). Now, steam bursts out and penetrates into the
garment to remove creases (ill. k).
898693-Iron-EN-04.indd 9 2/9/12 4:58 PM

10
OPERATION (CONT.)
Anti-drip function
• This feature is designed to prevent water from dripping from the soleplate (21)
when the iron is not heated enough. During use, the iron may emit a clicking sound,
particularly while heating up or cooling down. This is normal and indicates the iron
is functioning normally.
Auto shut-o function
• Iftheironisnotmovedforacertainperiodoftime,itwillshutoautomatically.
Position Illustration Time
On soleplate
max
self
clean
auto
shutoff
30 seconds
On the side 30 seconds
On the heel 15 minutes
• After shuto,theironstopsheatingupandtheauto o indicator (13) lights up.
• Tilt the iron back and forth to resume the work with the last temperature setting.
Turning iron o and emptying water tank
• After use, press the temp. button (4) on either side of the iron until the o indicator
(18) lights up (ill. d
).
• Slide the function control (5) to dry ironing position (ill. g
).
• Disconnect the iron from the electrical outlet and let it cool on its heel (10) (ill. e
).
• Openthellinletcover(2) and hold the iron upside down over a sink to empty the
water tank (20) (ill. l
).
• Store the iron on its heel (10) in a safe place (ill. e
).
CAUTION! Burn Hazard: During the cooling process, do not touch the soleplate (21) to
check the temperature (ill. f
).
898693-Iron-EN-04.indd 10 2/9/12 4:58 PM

11
CLEANING AND MAINTENANCE
Self-cleaning
• This function removes scale and mineral build-up in the steam chamber.
• Fill the iron to half its capacity with water ( Filling iron with water).
• Connect the power plug (11) to a suitable electrical outlet.
• Slide the function control (5) to the dry ironing position (ill. g
).
• Press the temp. button (4) on either side of the iron until the cotton-linen indicator
(14)ashes(ill. d
).
• Place the iron on its heel (10) and let it heat up (ill. e
). The cotton-linen
indicator (14)ashesuntiltheselectedtemperaturehasbeenreached.
• After the cotton-linen indicator (14) lights up steadily, press the temp. button (4)
(ill. d
) until the o indicator (18) lights up. Disconnect the iron from the electrical
outlet.
• Slide the function control (5) to the steam ironing position (ill. h
).
• Hold the iron over a sink with one hand, and press and hold the self clean
button (19) continuously with the other hand. CAUTION: Boiling water with steam
and impurities is ejected from the soleplate nozzles (21).
• Gently move the iron back and forth.
• Release the self clean button (19) when the water tank (20) is completely empty.
Cleaning the iron
• Do not use harsh abrasives, chemical cleaners or solvents to clean the casing of
your iron, as these will damage its surface.
• To clean the occasional build-up of scale on the soleplate (21) and the casing, just
wipe with a soft damp cloth.
• Always store the iron in an upright position on its heel (10) (ill. e
).
Storage
• Before storage, make sure to turn the iron o and empty the water tank (20)
(Turningironoandemptyingwatertank).
• Let the iron cool and dry completely.
• Store the iron in a dry and cool place. To avoid accidents, ensure that both the iron
and its power cord (11) are beyond reach of children or pets.
898693-Iron-EN-04.indd 11 2/9/12 4:58 PM

12
TROUBLESHOOTING
PROBLEM CAUSE SOLUTION
Iron does not
heat up.
• The power plug (11) is not
connected properly to
the electrical outlet or the
circuit breaker is tripped.
• The temperature setting is
set to o.
• Theautoshut-ofunction
has been activated.
• Re-connect the power
plug (11) properly to the
outlet or check the circuit
breaker.
• Press the temp. button
(4) to select the desired
temperature.
• Tilt the iron back and forth
to restart the iron.
Water leaks out
of the iron.
• The water tank (20) is
overlled.
• The set temperature has
not been reached or is too
low.
• Pour out some water.
• Allowsucienttimefor
the iron to preheat or set
higher temperature.
Iron does not
produce steam.
• Water level in the water
tank (20) is too low.
• The set temperature has
not been reached.
• The function control (5)
is not set to the steam
ironing position.
• Anti-drip function shuts
osteamwhenthe
temperature setting is too
low.
• Add water in the water
tank (20).
• Allowsucienttimefor
the iron to heat up.
• Set the function control (5)
to the steam ironing
position.
• Set temperature higher.
AllLEDSash
and unit beeps.
• Iron is defective. • Please contact our
Customer Assistance at
1.877.207.0923 (U.S.) or
1.877.556.0973 (Canada).
898693-Iron-EN-04.indd 12 2/9/12 4:58 PM

13
TROUBLESHOOTING
PROBLEM CAUSE SOLUTION
Iron leaves
spots on
garments.
• Before use, there is water
left in the water tank (20).
Leftover water may
stain garments and the
soleplate (21).
• Scale has built up inside
the water tank (20).
• Always empty the water
tank (20) after each use.
• Rinse the water tank (20)
periodically.
Creases are not
removed.
• The fabric setting is not
suitable.
• The spray function or the
steam burst function is not
used.
• Select the correct
temperature according to
the fabric label.
• Use the spray function or
the steam burst function
instead.
Garments are
scorched.
• The set temperature is too
high.
• Choose a lower
temperature setting.
The soleplate
(21) is scratched
or damaged.
• During use, the iron is
placed on zippers, rivets,
buttons, etc. of garments.
• Avoid ironing on such
accessories of garments;
if necessary, contact our
customer services for help.
If additional assistance is needed, please contact our Customer Assistance at
1.877.207.0923 (U.S.) or 1.877.556.0973 (Canada).
TECHNICAL DATA
Rated voltage: 120 V~, 60Hz
Rated power input: 1500W
898693-Iron-EN-04.indd 13 2/9/12 4:58 PM

CUSTOMER ASSISTANCE
If you have a claim under this warranty, please call our Customer Assistance Number. For faster
service, please have the model number and product name ready for the operator to assist you.
This number can be found on the bottom of your appliance and on the front page of this manual.
Model Number: __________________ Product Name: __________________
Customer Assistance Number 1.877.207.0923 (U.S.) or 1.877.556.0973 (Canada).
Keep these numbers for future reference!
For more information, please visit us at WWW.GEHOUSEWARES.COM
Two-year limited warranty
What does your warranty cover?
• Anydefectinmaterialorworkmanship.
For how long after the original purchase?
• Twoyears.
What will we do?
• Provideyouwithanewone.
• Forthoseitemsstillunderwarrantybut
no longer available, WAL-MART reserves
the right to replace with a similar GE
branded product of equal or greater
value.
How do you make a warranty claim?
• Saveyourreceipt.
• Properlypackyourunit.Werecommend
using the original carton and packing
materials.
• Returntheproducttoyournearest
WAL-MART store or call Customer
Assistance at 1-877-207-0923 (U.S.)
or 1-877-556-0973 (Canada).
What does your warranty not cover?
• Partssubjecttowear,including,without
limitation, glass parts, glass containers,
cutter/strainer, blades, seals, gaskets,
clutches, motor brushes, and/or
agitators, etc.
• Commercialuseoranyotherusenot
found in printed directions.
• Damagefrommisuse,abuse,or
neglect, including failure to clean
product regularly in accordance with
manufacturer's instructions.
How does state law relate to this warranty?
• Thiswarrantygivesyouspeciclegal
rights, and you may also have other
rights which vary from state to state or
province to province.
• Thiswarrantyisinlieuofanyother
warranty or condition, whether express
or implied, written or oral, including,
without limitation, any statutory warranty
orconditionofmerchantabilityortness
for a particular purpose.
• WAL-MART,GEandtheproduct
manufacturer expressly disclaim all
responsibility for special, incidental, and
consequential damages or losses caused
by use of this appliance. Any liability is
expressly limited to an amount equal to
the purchase price paid whether a claim,
however instituted, is based on contract,
indemnity, warranty, tort (including
negligence), strict liability, or otherwise.
Some states or provinces do not allow
this exclusion or limitation of incidental
or consequential losses, so the foregoing
disclaimer may not apply to you.
What if you encounter a problem with this
product while using it outside the country of
purchase?
• Thewarrantyisvalidonlyinthecountry
of purchase and if you follow the
warranty claim procedure as noted.
is a trademark of General Electric
Company and is used under the
license by Wal-Mart Stores Inc.,
Bentonville, AR 72716
Imported by/Importé par
Walmart Canada
1940 Argentia Road
Mississauga, Ontario L5N 1P9
898693-Iron-EN-04.indd 14 2/9/12 4:58 PM

PLANCHA PROFESIONAL
DE CROMO
Número de modelo:
898693
UPC: 605388986931
Asistencia al cliente
1 877 207 0923 (EE.UU.)
1 877 556 0973 (Canadá)
Gracias por comprar un pequeño aparato GE.
En concordancia con la iniciativa GE ecomaginación, por favor considere la opción de
reciclar el material de embalaje y donar el aparato cuando ya no lo use.
Para leer más sobre el compromiso ecomaginación de GE, visite:
ge.ecomagination.com
898693-Iron-ES-01.indd 1 12-2-14 5:51

22
INSTRUCCIONES DE SEGURIDAD
IMPORTANTES
Al usar planchas, deberían seguirse precauciones de seguridad básicas, incluyendo
las siguientes:
LEA TODAS LAS INSTRUCCIONES ANTES
DE SU USO
• Utilice una plancha solo para el propósito para el que se diseñó.
• Para evitar riesgos de descarga eléctrica, no sumerja la plancha en agua u otros líquidos.
• Siempre APAGUE la plancha antes de conectarla o desconectarla del tomacorriente.
Nunca tire el cable para desconectar la plancha del tomacorriente; en lugar de lo
anterior, tome el enchufe y jale de éste.
• Nopermitaqueelcabletoquesuperciescalientes.Dejequelaplanchaseenfríe
completamente antes de guardarla. Al guardar la plancha, enrolle el cable sin
dejarlo tirante.
• Siempre desconecte la plancha del tomacorriente antes de llenarla con agua, vaciar
el agua de la plancha y cuando no esté en uso.
• No use la plancha si el cable está dañado o en caso de que la plancha se haya caído,
dañado o si hay signos visibles de daño o fugas. Para evitar el riesgo de descarga
eléctrica,nodesarmelaplancha.Llévelaauntécnicocalicadoparaquelaexamine
y repare. Un re-ensamblaje incorrecto puede inducir un riesgo de descarga eléctrica
al utilizar la plancha luego de haberla ensamblado.
• Laplanchadebeusarseydejarsesobreunasupercieestable.
• Al poner la plancha sobre su respaldo, asegúrese de que la supercie donde la
dejará es estable.
• Se requiere una supervisión atenta cuando un aparato se usa cerca de niños. No
deje la plancha sola mientras esté conectada o sobre la tabla de planchar.
• Tocar partes metálicas calientes, agua caliente o vapor puede producir quemaduras. Tenga
cuidado al darle la vuelta a una plancha de vapor, podría haber agua caliente en el depósito.
• Para evitar una sobrecarga del circuito, no use la plancha en el mismo circuito que
otro aparato de alto consumo.
• Siesabsolutamentenecesarioelusodeuncabledeextensión,debierautilizarse
unodeigualomayoramperajequelaclasicaciónmáximadelaplancha.Uncable
con menos amperaje puede causar riesgo de incendio o descarga eléctrica por
sobrecalentamiento. Disponga el cable cuidadosamente de forma que no pueda
tropezarse con él o que alguien pueda tirar de él accidentalmente.
¡GUARDE ESTAS INSTRUCCIONES!
898693-Iron-ES-01.indd 2 12-2-14 5:51

3
OTRAS INSTRUCCIONES DE SEGURIDAD
PARA EL CONSUMIDOR
Este aparato es para uso doméstico exclusivamente.
¡ADVERTENCIA! Riesgo de Descarga: Este electrodoméstico tiene un enchufe
polarizado (una clavija es más ancha que la otra) que reduce el riesgo de descarga
eléctrica. El enchufe entra de un solo modo en una toma de corriente polarizada.
No elimine la medida de seguridad del enchufe modicándolo en cualquier modo
o usando un adaptador. Si el enchufe no entra totalmente en la toma de corriente,
invierta su posición. Si todavía no entrase, acuda a un electricista para que sustituya
la toma de corriente.
POR FAVOR LEER ANTES DE USAR POR PRIMERA VEZ:
• Duranteelprimer uso de laplancha,podría parecerque expele humo. Esto se
detendrá y no indica ningún defecto o peligro.
• Muchas planchas escupen o salpican durante las primeras veces que se usan con
agua de la llave. Ésto ocurre porque la cámara de vapor se está acomodando. Ésto
dejará de suceder después de unos pocos usos.
• Las ventilas de vapor debieran limpiarse antes de usar la plancha por primera vez.
Prepare la plancha para utilizarla con vapor; luego planche sobre una tela vieja por
algunos minutos mientras deja que la plancha bote vapor.
898693-Iron-ES-01.indd 3 12-2-14 5:51

44
PARTES
max
self
clean
auto
shutoff
auto o
cotton-linen
wool
silk
synthetics
o
1
7
10
2
3
5
4
6
8 9
11
13
14
15
16
17
18192021
12
1. Boquilla del pulverizador
2. Tapa de la entrada de agua
3. Entrada de agua
4. Botón Temp.
5. Control funcional
: planchado en seco
: salida de vapor
: planchado con vapor
6. Botón rociador
7. Botón de ráfaga de vapor
8. Asa
9. Protección del cable
10. Respaldo
11. Cable de alimentación con enchufe
12. Panel indicador de temperatura
13. indicador de apagado automático
14. indicador de algodón-lino
15. indicador de lana
16. indicador de seda
17. indicador de sintéticos
18. indicador de apagado
19. botón de limpieza automática
20. Depósito de agua
21. Suela con boquillas de vapor
898693-Iron-ES-01.indd 4 12-2-14 5:51

55
ILUSTRACIONES
a
max
self
clean
auto
shutoff
b
max
self
clean
auto
shutoff
c
max
self
clean
auto
shutoff
max
self
clean
auto
shutoff
def
g
h
i
max
self
clean
auto
shutoff
max
self
clean
auto
shutoff
j
max
self
clean
auto
shutoff
k
max
self
clean
auto
shutoff
l
898693-Iron-ES-01.indd 5 12-2-14 5:51

66
USO
Antes del primer uso
• Cuidadosamente retire todos los materiales de empaque y guárdelos.
• Desenrede el cable (11).
• Limpieelexteriordelaplanchaconuntrapohúmedoyundetergentesuave.
• Coloquelaplanchasobreunasupercieplanayresistentealcalor.
NOTAS:
• Al usar la plancha por primera vez, recomendamos probarla sobre un trozo de tela
sobrante para asegurarse de que la suela (21) y el depósito de agua (20) están
completamente limpios.
• Puede que la plancha emita algo de olor y humo cuando se encienda por primera
vez debido a la eliminación de residuos del proceso de producción. Esto es normal
y no indica ningún defecto o peligro.
• Puede que la plancha salpique durante las primeras veces que se usa con agua del
grifo. Ésto ocurre porque la cámara de vapor se está acomodando. Ésto dejará de
suceder después de unos pocos usos.
Preparación de las prendas a planchar
NOTA: Siga siempre las instrucciones de planchado de las prendas. En caso de que no
estuviesen, vea las instrucciones de la tabla que aparece a continuación:
Etiqueta Tela Panel de selec. de temp. Instrucciones de planchado
Sintético Sintéticos Planchar en seco por el
reverso de las telas.
Seda seda Planchar en seco por el
reverso de las telas.
Lana lana Planchar con vapor por el
reverso de las telas.
Lino
algodón-lino
Planchar con vapor por el
reverso de las telas.
Algodón
Planchar con vapor al estar
húmedo utilizando vapor o
rocío.
No planchar
898693-Iron-ES-01.indd 6 12-2-14 5:51
Table of contents
Languages:
Other GE Iron manuals
Popular Iron manuals by other brands

Philips
Philips EasySpeed Plus GC2040 Series user manual

Philips
Philips PerfectCare Expert GC9200 Series manual

DOMENA
DOMENA XL Pro 90 Ecofibres quick start guide

TZS First AUSTRIA
TZS First AUSTRIA FA-5618-6 instruction manual

Concept Smoke Screen
Concept Smoke Screen Sentinel S50 Installation and operation manual

Braun
Braun TexStyle Control SI 18.720 user manual