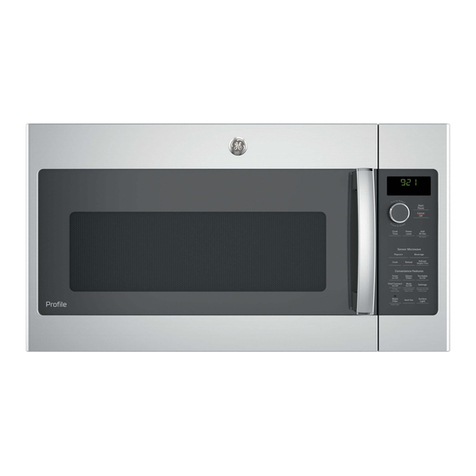
GE JE1540 User manual

GEAppliances
JE1540
@
Part No. 164D3370P017 Pub.No. 49-40076

IMPORTANTSAFETYINFORMATION.
READALLINSTRUCTIONSBEFOREUSING.
Zt WARNING!
For your safety, the information in this manual must be
followed to minimize the risk of fire or explosion, electric
shock, or to prevent property damage, personal injury, or
loss of life.
PRECAUTIONSTOAVOIDPOSSIBLE
EXPOSURETOEXCESSIVE
MICROWAVEENERGY
Do NotAttemptto operate
this (wen _th tile door ()pen
since open-door operation
can resuh in harmful
exposure to microwave
energ T. It is important not
to deteat or tamper with the
saiety interlocks.
Do Not Place any object
between tile oven flont face
and tile door or allow soil
or cleaner residue to
accumulate on sealing
surf_lces.
Do Not Operatetile oven if it
is damaged. II is particularly
important that tile oven
door close properly and that
lhere is no damage to lhe:
doorben,
!i_ hinges and latches
.........................(broken or loosened)
doorsealsandsealing
surf_lces.
TheOven ShouldNot be
adjusted or repaired by
anyone except properly
qualified service personnel.
SAFETYPRECAUTIONS
This microwave oven is not approved or tested for
marine use.
Read and tollow the specitic
precautions in the Precautions
toAvoid Possible Exposure to
Excessive Microwave Energy
section above.
This appliance must be
grounded. Connect only
to a properly grounded
outlet. See tile Grounding
Instructionssection on page 8.
Install or locate this
appliance only in accordance
xdth the provided Installation
Instructions.
Be cerlain to place the tiont
sm-tace of tile door three
inches or more back tiom
the counlertop edge to avoid
accidental tipping of the
appliance in normal usage.

Use this appliance only for its intended purpose as
described in this Owner's Manual
Do not mount this appliance
over a sink.
Do not mount lhe microwave
oven over or near any portion
of a heaung or cooking
appliance.
Do not store anything directly
on u)p of the microwave oven
sm-tace when lhe microwave
oven is in operation.
Do not operate this appliance
flit: has a dmnaged power
cord or plug, if it is not
_xnking properly, or if it has
been damaged or dropped.
Do not cover or block any
openings on the appliance.
Use fl_is appliance only for its
intended use asdescribed in
this manual. Do not use
con-osive chemicals or vapors
in this appliance. This
microwave oven is specifically
designed l*)heal, dUor cook
toed, and is not inmnded tor
laboralol Tor industrial use.
Do not store this appliance
ouldoors. Do not use this
product near water-tor
example, in a wet
basement, near a sx_mming
pool or near a sink.
Keep power cord mvay Dora
heated surtaces.
Do not immerse power cord
or plug in wamr.
Do not let power cord hang
over edge of table or counter.
To reduce the risk of fire in
the oven cavity:
Do not overtook toed.
Careflflly auend appliance
if paper, plastic or other
combustible materials are
placed inside the oven while
cooking.
Remove xdre t_dstAies and
metal handles flom paper
or plasuc containers betore
placing them in lhe oven.
Do not use the oven tor
slorage pml)oses. Do not
leave paper products,
cooking utensils or toed in
the oven when not in use.
If mamrials inside the oven
should ignim, keep rim oven
door closed, mm the oven off
and disconnect the power
cord, or shut offpower at the
tilse or circuit breaker panel.
If lhe door is opened, the fire
may spread.
See door surface cleaning
inslrucfions in the Care and
cleaning of the microwave
oven section of this manual.
This appliance should be
serviced only by qualified
service personnel. Contact
nearest authorized service
thcility tor examination,
repair or adjusmmnt.
As _dth any appliance, close
supervision is necessary
when used by children. 3

IMPORTANTSAFETYINFORMATION.
READALLINSTRUCTIONSBEFOREUSING.
WARNING!
ARCING
If you see arcing, press the CtEAR/OFF pad and correct
the problem.
Arcing is the microwave le_m
tbr sparks in ll_e oven, Arcin Z"is
caused by:
Metal or fbil louching lhe
side of tim oven.
Foil not molded to fi)od
(upturned edges acl like
anlennas).
Melal, such as lwisl-ties,
poulu_7 pins or gold-dnmmd
dishes, in the microwave.
Recycled paper lowels
conlaining small melal pieces
being used in lhe microwave.
FOODS
iiiiiiiiiiiii_iil
iiiiiiiiiiiii_iil
Do nol pop popcorn in your
microwave oven unless in a
special microwave popcorn
accessory or unless )xns use
popcorn labeled fbr use in
microwave ovens.
_mm producls such as
whole eggs and sealed
conlainers_fbr example,
closedjars-_dll explode and
should nol be heamd in llsis
microwave oven. Such use of
lhe microwm-e oven could
resuh in injm T.
Do not boil eggs in a
microwm-e oven. Pressure _dll
build up inside egg yolk and
_dll cause il 1oburst, possibly
resuhing in inju U.
iiiiiiiiiiiii_iil
()peraling tim microwm-e
_dflsno food inside R)r more
lhan a minule or lx_s)may
crosse dmnage us tim oven
and could stmt a fire. It
increases tim heal around tim
magnelron and can shorlen
rise lite of lhe oven.
Foods _dlh unbroken outer
"skin" such as polatoes, hot
dogs, smssages, lomaloes,
apples, chicken livers and
oflmr giblels, and egg >)lks
should be pierced lo allow
sleam lo escape during
cooking.

,SUPERHEATEDWATER
Microwaved water and other
liquids do not always bubble
when they reach the boiling
point. Theycan actually get
superheated and not bubble
at all.
Superheated liquid will bubble
up out of the cup when it is
moved or when something like
a spoon or tea bag is put into it.
Toprevent this from happening
and causing injury, do not heat
any liquid for more than 2
minutes per cup. After heating,
let the cup stand in the
microwave for 30 seconds
before moving it or putting
anything into it.
Avoid heaung baby food in
glassjars, even xdlh the lid
off. Make sure all infant food
is lhoroughly cooked. Stir
tood lo disuibule lhe heal
evenly. Be cmeflfl lo prevenl
scalding when wanning
tonnula. The container m W
teel cooler lhan lhe tbmmla
really is. Always lest lhe
tormula beiore teeding }
lhe baby.
Don'l deflosl flozen
beverages in nano_._mecked
boules (especially
cmbonaled beverages). Even
if lhe conlainer is opened,
pressure can build up. This
can cruise the conlainer lo
burst, possibly resuhing in
injm T.
Sponlaneous boiling:-I Jnder
cerlain special circumslances,
liquids m W slarl 1oboil
during or shorlly atler
removal flom the microwave
oven. To prevent bums flom
splashing liquid, we
recommend lhe fi)lloxdng:
before removing lhe
conlainer flom lhe oven,
allow the conlainer lo sland
• .o
in the oven fox oOto 40
seconds atier lhe oven has
shul ol:l.Do nol boil liquids
in nano,amecked conlainers
such as soft drink boules,
_dne flasks and especially
nano,amecked coffee cups.
Even if tim conlainer is
opened, excessive sleanl can
build up and cause il 1obursl
or ovex-flow.
Hol foods and smam can
cruise bums. Be careflfl when
opening aW conlainers of
hol food, including popcorn
bags, cooking pouches and
boxes. To prevent possible
in,ju U, direcl sleam mvay
flom hands and fh(e.
Do nol (wercook polalx)es.
They could deh),trale and
calvh fire, causing damage 1o
)x)ur oven.
X#3mncooking pork, follow
lhe directions exaclly and
ahvws cook lhe meal lo an
inlemal lemperamre of at
leasl 170°F. This assures lhal,
in lhe remole possibilily lhat
uichina m Wbe presenl in
lhe meal, il xdll be killed and
meal xdll be safe loeal. 5
IMPORTANTSAFETYINFORMATION.
READALLINSTRUCTIONSBEFOREUSING.
WARNING!
MICROWAW-SAFECOOKWARE
Make sure all cookwme used in
your microwave oven is suitable
tor microwaving. Most glass
casseroles, cooking dishes,
measming cups, custard cups,
potm_ 7 or china dinner,rare
which does not have metallic
him or glaze _ith a metallic
sheen can be used. Some
cookware is labeled "suitable
for microwaving."
If you are not sure ifa dish is
microwave-s_e, use this test:
Place in lhe oven bolh the
dish you are tesling and a
glass measming cup filled
_dfl_l cup ofwaler--sel the
measuring cup either in or
next to tim dish. Microwave
1minute at high. If the dish
heats, it should not be used
tor microwaving.
If the dish remains cool and
only the wamr in the cup
heats, then the dish is
microwave-s_e.
If you use a meal
thennomemr while cooking,
make sure it is sat}€t{_ruse
in microwave ovens.
Do not use recycled paper
products. Recycled paper
towels, napkins and waxed
paper can contain melal
flecks which may cause arcing
or ignite. Paper producls
containing nylon or nylon
filaments should be avoided,
as they may also ignite.
Some St}Totbam trays (like
those that meat is packaged
on) have a thin stlip of metal
embedded in the bolloul.
_q_en microwaved, the metal
can burn the floor of lhe
oven or ignite a paper towel.
Do not use lhe ulicrowave to
dUnewspapers.
Not all plastic x_lap is suilable
tor use in microwave ovens.
Check the package tor
proper use.
Paper lowels, waxed paper
and plastic wrap can be used
to cover dishes in order lo
retain moisture and prevent
spattering. Be sure to vent
plastic x_aap st) steam can
escape.
Cookware may become hot
becm_se of heat uanstened
tiom the heated tood. Pot
holders m W be needed to
handle the cookware.

"Boilable"cookingpouches
andtightlyclosedplasticbags
shouldbeslit,piercedor
venledasdirecmdby
package.Iftroyarenot,
plasticcouldburstduringor
immediatelyaftercooking,
possiblyresultingininjuU.
Also, plastic storage
conlainers should be at least
partially uncovered because
they tbnn a tight seal. When
cooking x_th containers
tightly covered xdth plastic
x_lap, remove covering
careftllly and direct smmn
awW from bands and fhce.
Use foil only as direcled in
tiffs guide. TV dinners may
be microwaved in foil uays
less than 3/4" high; remove
the top toil cover and remm
the u W to the box. "_qlen
using tbil in the microwave
oven, keep tile toil at least
1 inch awW ftom tile sides
of the oven.
Plastic cookware-Plastic
cookware designed fbr
microwave cooking is rely
useful, but should be used
careflllly. Even microwave-
s_e plastic may not be as
tolerant of overcooking
conditions as are glass or
ceramic mamfials and may
soften or chin if subjected
to short periods of
overcooking. In longer
exposures to overcooking,
tile tood and cookware could
ignite.
Follow these guidelinem
fllem in strict compliance
with file cool<ware
illanu[hclurer's
recommendations.
Do not permit children
to use plastic cookware
without complete
supervision.

IMPORTANTSAFETYINFORMATION.
READALLINSTRUCTIONSBEFOREUSING.
WARNING#
Improper use of the grounding plug can result in a risk of
electric shock.
GROUNDINGINSTRUCTIONS
This appliance must be grounded. In the event of an elecuical short
circuit, Dounding reduces the iisk of elecuic shock by prtMding an
escape wire tbr the elecuic cunent.
This appliance isequipped with a power cord having a grounding
wire with a grounding plug. The plug must be plugged into an
outlet thai isproperly installed and glounded.
Consuh a qualified electiician or service technician it the
grounding insliuctions are not completely understood, or if doubt
exists as to whether the appliance is properly grounded.
If the outlet is a standard 2-prong _all, outlet it is yore, personal
responsibility and obligation to have it replaced with a properly
grounded 3-prong wall outlet.
Do not under any circumstances cut or remove the third (ground)
prong flom the power cord.
We do not recommend using an exmnsion cord with this appliance.
If the power cord is too short, have a qualified elecuician or serxqce
technician install an outlet nero the appliance. (See WARNING--
EXTENSIONCORDSsection.)
For best operation, plug this appliance into its own electiical outlet
to prevent flickeiing of lights, blowing of tuse or tiipping of circuit
breaker.

ADAPTERPLUGS
Usage situations where appliance's power cord will be disconnected
infrequently.
Because of potential safety
h_ards under certain conditions,
we strongly recommend against the perrnRtedinCanada)
useofanadapterplug.However, it Alignlarge I_ II
you still elect to use an adapter, pr0ngs!sl0ts I II
where local codes permit, a
rEMPO RYCONNECrIONmarbe ,
made to a properly grounded t_x_- Ensureproperground
TEMPORARY and firmconnection
pl-ong wall 1-eceptacle by the use of a METHOD beforeuse,
1;L lisled adapler which is available
al mosl local hmdware stores.
Tile larger slot in file adapter must be alig_md _dfll the larger slot in
the wall receptacle to provide proper polmity in the connecuon of
the power cord.
CAUTION:Attaching theadapterground terminal tothe wall receptacle
cover screw doesnot ground theappliance unlessthe coverscrew is
metal,andnot insulated,and the wall receptacle isgrounded through
the housewiring.
You should have file circuit checked 1)ya qualified elecuician to
make sure the receptacle is properly gTounded.
When disconnecting the power cord tiom tile adaptor, alwws hold
the adaptor xdth one hand. If lhis is not done, tile adapter gTound
terminal is veUlikely to break xdth repeamd use. Should this
happen, DO NOT USEthe appliance undl a proper gTound has again
been established.
Usagesituationswhereappliance'spowercordwill bedisconnected
frequently.
Donotuseanadapterplugin these situations because flequent
disconnection of tile power cord places undue strain on tile adaptor
and leads u) eventual failure of tile adaptor gTound mnninal. You
should have tile t_x_-prong wall receptacle replaced _dth a flnee-
prong (gTounding) receptacle by a qualified elecnician befbre
using the appliance.
9

IMPORTANTSAFETYINFORMATION.
READALLINSTRUCTIONSBEFOREUSING.
WARNING!
EXTENSIONCORDS
A shorl power supply cord is provided to reduce dm _isks resulting
fiom becoming entangled in or t_ipping over a longer cord.
Extension cords m W be used if you are cmef_al in using dram.
If an exmnsion cord is used-
!{{{SThemarked electrical rating of the extension cord should be at
least asgreat as tl_e electrical rating of d_e appliance;
_he extension cord must be a groundingqype 3-wire cord and it
':must be plugged into a 3-slot outlet;
:{_The extension cord should be ananged so thai it _11 not drape
over the counter top or tabletop where it can be pulled on by
children or t_ipped over unintentionally.
If you use an extension cord, tl_e interior light m W flicker and the
blower sound m W va_Twhen d_emicrowave oven is on. Cooking
dines mW be longer, too.

REMEMBER...
Yourcontinued health and safety are important to us.
Please read and follow this Safety Information carefully.
We wantyou to remain a happy and health.ypart of our
GEfamily.
SAVETHESEINSTRUCTIONS
77

Congratulations!
YouAreNow PartoftheGEFamily.
Welcome/o fire GE family.
We're proud of our quality
products and we are
commitmd toproviding
dependable se_Tice. You'll
see it in fl_iseasyqo-use
Owner' s Mmmal and you'll
hem il in tim fl{endly voices
of our customer se_,ice
departmenl.
Best of all, you'll expe_ience
fl_ese values ea(h time you
use your microwave oven.
That's importanl, because
your new microwave oven
_11 be pal of your tamily
for ma W years. And we hope
you will be part of ours for a
long time to come.
Weflmnkyou tbr bwing
GE. Weappreciate your
purchase, and hope you
_ll continue lo rely on us
whenever you need quality
appliances foryour home.
@
Staple salessliporcancelled
checkhere.
Proof of the original purchase date
isneeded to obtain service under
the warranty.
72
Write the modeland serial
numbershere.
#
#
Youcan find them on a labelinside
the oven.

GE& You,
A Service Partnership.
Ask any GEappliance owner and they will
tell you we stand behind our products with
unmatched quality service. However, did
you know that most questions result from
simple problems that you can easily fix
yourseff injust a few minutes? This
Owner's Manual can tellyou how.
ReadthisManual
Inside you _dll find many
helpflll }finis on how 1ouse and
maintain )x)ur microwave oven
properly..lust a liule preventive
cme on your part can save
you a greal deal of time and
money over the life of your
microwave oven.
ReviewtheSectionon
TroubleshootingTips
You'll find many answers 1o
common problems here.
If you review our charl of
Troubleshooting Tips firsl,
you InW nol need 1ocall fbr
sel_ice al all.
If YouNeedService
If you do need sewice, you can
relax knoxdng help isonly a
phone call mvay.A lislof loll-flee
cuslolner service nulnbers is
included in the back section.
()r you can always call lhe
GE Answer Cenler ®at
800.626.2000, 24 hours a day,
7 days a week.
Safety Information
PrecautionstoAvoid
PossibleExposureto
ExcessiveMicrowaveEnergy...2
SafetyPrecautions......... 2.3
Arcing..................... 4
Foods ................. 4.5
Microwave-SafeCookware. .6, 7
GroundingInstructions........ 8
AdapterPlugs .............. 9
ExtensionCords........... 10
OperatingInstructions
Featuresof You,"
MicrowaveOven ........ 14,15
ChangingPowerLevel....... 16
TimeFeatures ......... 17-22
ConvenienceFeatures.... 23-27
OtherFeatures......... 28-30
Microwave Terms........ 31
CareandCleaning....... 32,33
Troubleshooting tips
Before You
CarlForService ........ 34,35
ThingsThatAre Normal With
YourMicrowave Oven....... 35
CustomerService
Warranty . .............. 39
ServiceTelephone
Numbers .......... BackCover
!3

Aboutthe featuresofyour microwave oven.
Throughout this manual, features and appearance may vary from
your model.
1oooV_9_ ?
!
74
Featuresof theOven
_:_ ,,DoorLatches.
} _ Wi.dowwithMetalShield.S,,eenallows,ooking,o1,e
_dewed while keeping microwm,es confined in the oven.
....ConvenienceGuide.
TouchControlPanelDisplay.
Ooortatch Release. Press latch release to open door.
Removable Turntable.Tumlable and support must be
in place when using the oven. The tumlable may be
removed tbr cleaning.
NOTE,:Ratingplate,ovenvent(s)andovenlight arelocated onthe inside
wallsof themicrowave oven.

Youcan microwave by time or with the convenience features.
time Features
Press Enter
MICROCOOK Amountofcookingtime
(Pressonceortwice)
TIMEDEFROST Amountofde%stingtime
EXPRESSCOOK Startsimmediately!
ADD30SEC Startsimmediately!
POWERLEVEL Powerlevel1-10
co.vo.Jo.ro t. o
Press Enter Option
POPCORN Startsimmediately! more/lesstime
BEVERAGE Startsimmediately! 1-3 servings
REHEAT Foodtype1-6 1-3 servings
SNACKS Snacktype1-6 number/weight
COOK Foodtype1-9+weight
AUTODEFROST Foodweight I5

Aboutchanging thepower level
D
[][][]
DD[]
[][][]
D
@
/6
Tile power level may be entered or changed
immediately after en/ering tile feature time fbr MICRO
COOK, TIME DEYROSYor EXPRESS COOKTile power level
may also be changed dining time countdown,
Press MICRO COOKor
•_TIME DEFROST.
Enter (ooking or deflosting time.
_lect desired power level 1-10.
Press START.
Variable power levels add flexibili/y to microwave
cooking. Tile power levels on tim microwave oven can
be compmed to tile sm_tce units on a range. Each
power level gives you microwave ener,w a certain
pe_vent of tile time. Power level 7is microwave ener,w
70% of tile time. Power level 3is ener,w 30% of tile
time. Most cooking will be done on High (power level I0)
which gives you 100% power. Power level 10will cook
f_tster but tbod m Wneed more frequent stining,
rotating or turning over. A lower setting will cook more
evenly and need less stining or rotating of tile tood.
Some f()ods may have beuer flavor, mxture or
appearance if one of file lower settings is used. Use
a lower power level when cooking tbods that have a
tenden( T to boil over, such as scalloped potatoes.
Rest periods (when the microwave ener,w wcles off)
give time tbr tim tbod/o "equalize" or nansier heat to
the inside of the tbod. An example of this is sho,m with
power level 3--/he deflost cycle. If microwave energ Tdid
not wcle tie tile outside of tile tbod would cook betbre
the inside was deflosted.
Hereare someexamplesof usesfor variouspower levels:
HighI0: Fish, bacon, vegetables, boiling liquids.
Med-High 7."Gentle cooking of meat and pouh_v baking
casseroles and reheating.
Medium b Slow cooking and tenderizing for stews and
less tender cuts of meat.
tow2or& Defrosting; simmering; delicate sauces.
Warm1:Keeping tbod warm; softening butler.

Aboutthe time features.
MICRO 1COOK
DDD
DDD
DDD
D
Micro Cook
Micro CookI
Allo_ you to microwave for any thne up to 99 minutes
and 99 seconds.
Powerlevel 10(High)is automatically set but you may
change it tot more flexibility.
:{_Change power level if you don't want full
{:i:{{_,powe£ (Press POWERLEIIEL.Select a desired
power level 1- 10.)
You may open the door dining Micro Cook to check
the food. Close the door and press STARTtoresume
cooking.
Micro Cookfl
Lets you change power levels automatically duing
cooking. Here's how to do it:
:{_Change the power level if you don't want full
{:i:{{_,powe£ (Press POWERLEIIEL.Select a desired
power level 1- 10.)
Press_MICROCOOKagain, .
!_nler the second cook time.
!{{_Change the power level if you don't want full
powe£ (Press POWERLEIIEL.Select a desired
po_er level 1- 10.)
At the end of Micro Cook I, Micro Cook II counts doxm.
77

Aboutthe time features.
I8
Cooking Guide for Micro Cook
NOTE:Use power love/High (10)unless otherwise noted.
amount
Asparagus
(freshspears)
(frozenspears)
Beans
(freshgreen)
(frozengreen) lO_z. package
(frozenlima) 1O-oz.package
Time Comments
lib. 5 to 8rain, In 1X_lt. casserole, place 1/4 cu P
Me&High (7) water.
10-oz. package 4 to 7 rain. In 1.<It.casserole.
1lb. cut in half 10 to 15 rain. In 1X_lt. casserole, place 1/2 cup
wa[eI'.
4 to 8 rain. In 1.<tl.casserole, place
2 tablespoons water.
4 to 8rain. In 1.<it.casserole, place 1/4cup
waler.
1 bunch 16 to 22 rain. In 2.<tLcasserole, place 1/2 cup
wa|eF.
Cabbage
(fresh) 1medium head
(about 2 lbs.)
(wedges)
Carrots
(fresh, sliced) 1lb.
(frozen) lO-oz, package
Cauliflower
(flowerets) 1medium head
(fresh,whole) 1medium head
(frozen) lO-oz, package
5 to 9 rain. In 2-<it.casserole, place 1/2 cup
water.
7 to 11 rain. In 2-<it.casserole, place 1/4 cup
water.
4 to 7 rain. In 1-<It.casserole.
4 to 7 rain. In 1-<It.casserole, place
3 tablespoons wamr.
6 to 10 rain.
5 to 9 rain.
4 to 8 rain.
3 to 7 rain.
7to 11 rain.
7to 15 rain.
3to 7 rain.
In 17_or 2-qt. casserole, place
1/4 cup water.
In 2-or 3-qt. casserole, place
1/4 cup wamr.
In 17__lt.casserole, place 1/4 cup
watei.
In 1-<it.casserole, place
2 tablespoons water.
In 2-<it.casserole, place 1/9 cup
water.
In 2-<it.casserole, place 1/2 cup
water.
In 1-<it.casserole, place
2 tablespoons wamr.
Broccoli
(fresh cuO 1 bunch
(I'A to 1V:,lbs.)
(fresh spears) 1 bunch
(I'A to 1K,lbs.)
(frozen, 10-oz. package
Chopped)
(frozen spears) 10-oz. package

Amount Time Comments
(frozen kernel) 1O-oz.package 2 to 6min. In 1-<It.casserole, place
2 tablespoons water.
Corn on the cob
(fresh) 1 to 5ears 1V4to 4min.
per ear
(frozen) 1ear 3 to 6 min.
2 to 6 ears 1 to 3 rain.
per ear
Mixed
vegetables
1O-oz. package 2 to 6 min.
In 2-<tl.glass baking dish, place
com. If corn is in husk, use no
wamr; if corn has been husked,
add 1/4 cup wamr. Reanange
after half of time.
Place in 2-qt. glass baking dish.
Cover wilh vented plasdc wrap.
Reanange after half of time.
In 1-<it.casserole, place
3 tablespoons water.
(fresh, shelled)
(frozen)
Potatoes
(fresh,cubed,
(fresh,whole,
sweet or white)
2 lbs. unshelled 7 to 10 rain.
1O-oz. package 2 to 6min.
4 potatoes 9 to 12 min.
(6 to 8 oz. each)
1 (6 to 8 oz.) 1 to 4 rain.
In 1-<it.casserole, place 1/4 cup
water.
In 1-<it.casserole, place
2tablespoons water.
Peel and cut into 1-inch cubes.
Place in 2-<it.casserole _fith 1/2
cup wamr. Stir after half of time.
Pierre _fith cooking tork. Place
in center of the oven. Eel stand
5 minutes.
spinach
(fresh) lOto 16oz. 3to 6rain.
(frozen,chopped, 10-oz. package 3 to 6rain.
andleaO
sq.ash
(fresh,summer 1 lb. sllced 2 to 5rain.
andyellow)
(winter,acorn, 1 to 2 squash 5 to 9min.
or butternut) (about 1lb. each)
In 2-<it.casserole, place washed
spinach.
In 1-<it.casserole, place
3tablespoons wamr.
In 1V__lt.casserole, place 1/4
cup water.
Cut in half mad remove fibrous
membranes. In 2-qt. glass baking
dish, place squash cut,side-
down. Turn cu>side-up atier
4 minutes.
/9

Aboutthe time features.
2O
TIME
DEFROST
DDD
DDD
DDD
D
Time Defrost
Allows you to deflost tor a selected length of lirne.
See the Defrosting Guidotor suggested times.
Power level is automatically set at 3, but can be changed.
You can deflosI small items quickly by raising the power
level after entering the time. Power level7 cuts the total
deflosfing time in about half; power level 10cuts the
total time/o approximamly 1/3. However, toed will
need more flequent attention than usual.
A dull thumping noise may be heard during deflosting.
This is normal when oven is not operating at Highpower.
Defrosting Tips
iiiiiiiiiiiii_iil
Foods flozen in paper or plastic can be deflosted in
the package. Closed packages should be slit, pierced
or vented AFTER toed has partially deflosmd. Plastic
storage containers should be partially uncovered.
Family-size, prepackaged Dozen dinners can be
deflosted and microwaved. If the toed is in a toil
container, transter it u) a microwave-sate dish.
Foods that spoil easily should not be allowed to sit;
out fi_rmore than one hour _ler deflosting. Room
temperature promotes the growlh of bare,tiff
bacteria.
iiiiiiiiiiiii_iil
For more even defl-osdng of larger toods, such
as roasts, use Auto Defrost. Be sure large meats
are completely deflosted betore cooking.
When deflosted, tood should be cool but softened
in all areas. If still slightly icy, return to the microwave
ve_5, briefly or let it stand a tew minutes.
Other manuals for JE1540
1
Table of contents
Other GE Microwave Oven manuals

GE
GE PSA2201RSS User manual

GE
GE JES1656 User manual

GE
GE Spacemaker LVM1540 User manual

GE
GE Advantium PSB9100DF User manual

GE
GE Profile JES2251SJ How to use

GE
GE SpacemakerXL 164D2966P212 User manual

GE
GE JE1050GA User manual

GE
GE JES82TW Use and care manual

GE
GE JEB1055 User manual

GE
GE JES639 User manual