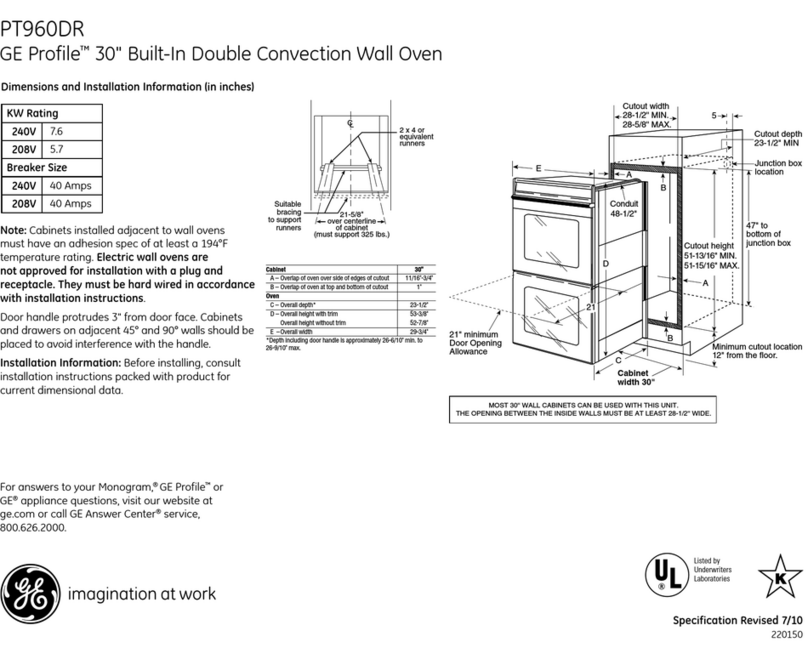
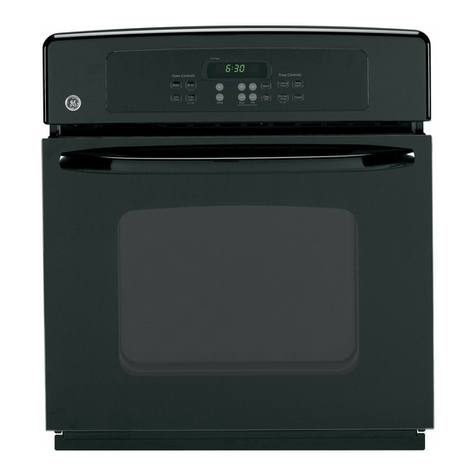
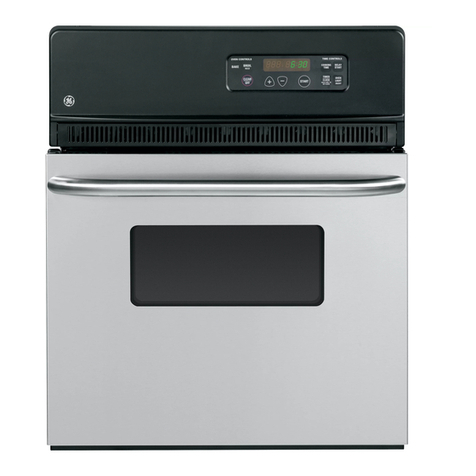
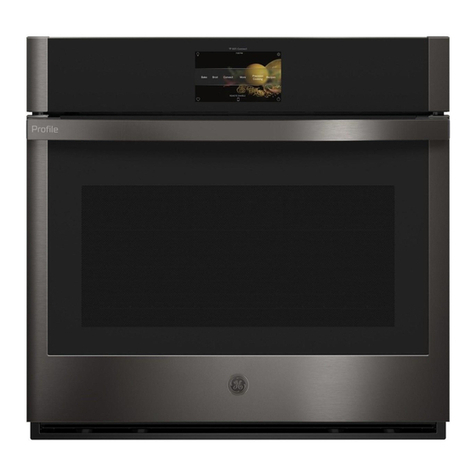
GE Monogram ZEK938 User manual

Owner's
Manual
27" and 30" Convection
Wall Oven
ZEK938 - 27" Single Wall Oven
ZEK958 - 27" Double Wall Oven
ZET938 - 30" Single Wall Oven
ZET958 - 30" Double Wall Oven
Four mural 5.convection
de 69 cm (27 po)
et 76 cm (30 po)
Manuel du propridtaire
ZEK938 -Four mural silnple de 27 po
ZEK958 - Four mural double de 27 po
ZET938 - Four mural simple de 30 po
ZET958 - Four mural double de 30 po
La section franqaise commence it la page 47
ge,com
Horno de convecci6n
de pared de 27"y 30"
Manual del propietario
ZEK938 - Horno de pared simple de 27"
ZEK958- Horno de pared doble de 27"
ZET938 - Homo de pared silnple de 30"
ZET958- Homo de pared doble de 30"
La secci6n en espmiol empieza en la pagina 91
@Monogram:
[49-8o43s1
02-07 JR
Printed in the United States

Consumer Inff)rmation
l:l%l[ Oven
Introduction Yore" new Monogram wall oven makes all eloquent statement of style, convenience and kitchen
i)lanning flexibility. Whether you chose it fl_r its pm'ity of design, assiduous attention to detail--
or fin" both of these reasons--you'll find that wmr Monogram wall oven's superior blend of fin'm
and ftmction will delight you fl)r years to come.
Your Monogram wall oven was designed to provide the flexibility to blend in with your kitchen
cabinetry. Its sleek design can be beautihflly integrated into the kitchen.
The infi)rmation on the following pages will hel I) you operate and maintain yore" wall oven
properly.
Contents Care and Cleaning
Broiler Pan and Grid .................. 37
Control Panel ........................ 39
Lift-Off O',en Door .................... 38
Light Bulb .......................... 40
Oven Door . ......................... 39
Probe .............................. 40
Racks ............................... 37
Stainless Steel and Metal Parts ........... 37
Consumer Services
Befl)re You (;all For Service .......... 41, 42
hnportant Phone Nmnbel_ ............. 45
Model and Serial Numbers ............... 3
Product Registration .............. 3, 43, 44
Sa_btv Instructions ................... 4, 5
_'\_u'ra nty ............................ 46
Oven
Aluminum Foil ................... 4, 9, 29
Baking or Roasting ................... 8, 9
Broiling/Broiling Guide ............. 10-12
Controls ............................. 7
Clock and Timer ................... 13, 14
Convection ....................... 20-25
Features ............................. 6
Probe ................... 17-19, 23, 29, 40
Proofing ............................ 27
Sabbath Feature .................... 34-36
SelfZCleaning Oven ................. 29, 30
Special Features ................... 31-33
Thermostat .......................... 28
Timed Baking & Roasting ............ 15, 16
_%u'ming ............................ 26
protective
shitsOingfibrz
and
p(u:hagir g
t(@e
Carefully grasp a corner (ff the protecti_v shipping
film with your fingers and slowly peel it fl'om the
appliance sm'fime. Do not use any shaq) items to
remove the film. Remove all ot the film befiwe
using the appliance fiw the fil_t time.
To assm'e no damage is done to the finish of
tile product, tile satbst way to remove the adhesive
from packaging tape on new appliances is an
application of a household liquid dish_;Mfing
detergent. Apply with a sott cloth and allow
to soak.
N07_: The adhesive must be removedjhmz all parts.
It cat, not be removad !/it is baked o_z.

Be[bre
using your
wall oven
Read this manual carefully. It is intended to
help you operate and maintain your new wall
()veil l)roperlv.
Keep it handy ti)r answers to your questions.
If you don't understand something or need
more help, there is a list of toll-f]'ee consumer
service nmnbers inchlded in the back section
of this manual.
OR
Visit our Website at: ge.com
-Write
down the
model &
serial
numbers
You'll find them on a label on the side trim
or on the front of the (lower) oxen behind
tile ()*,'ell 0oo12
Fill out and return the (_onsumer Product
P.egistration Card that is packed with this
product. If you cannot find it, })lease send
in the duplicate card printed in the back
of this manual.
Before sending in this card, please write these
mmlbers here:
Model Number
Serial Number
Use these lltlI/lbeI's ill all} correspondellce of
service calls concerning }our *<_11o_en.
{/you
received a
damaged
wall oven
Immediately contact the dealer (or btulder)
that sokl )ou the wall oxen.
Save time
& money
Before )ou request serx4ce, check the Problem
Solver in the back of this manual. It lists causes of minor ol)erating, problems that
}Oil call COlTeCt }ourself.
[.[you
need
service
To obtain service, see the (;onsmner Services
page in the back of this manual.
We're proud of our service and want you to be
pleased. If %r some reason you are not happy
with the service vou receive, here are the steps
to %llow %r further help.
FIRST, contact the people who serviced )our
appliance. Explain *_ll} )on are not pleased.
In most cases, this >All sol'_e the problem.
NEXT, if you are still not pleased, write all the
details--including )our phone number--to:
Managex; Customer Relations
GE Appliances
Appliance Park
Louisville,/<.Y 40225

IMPORTANT SAFETY INSTRUCTIONS
WARNING!
For ",our satety tile infm'mation in this manual must be followed to mininlize tile risk of fire or
explosion, electric shock, or to prexent propert) damage personal ii_jtu T or loss of life.
IMPOR 7ANT SA[FTY NO TICE
" The California Safe Drinking Water and
Toxic Enforcement Act requires tile Governor
of CaliJ_m'nia to publish a list of substances
known to tile state to cause cancer, birth
de_bcts 05" other reproductive harm, and
requires businesses to warll CtlStOl/lers o_
potential exposure to such substances.
" The fiberglass insulation in self-cleaning
ovens gives off a very small amount of carbon
monoxide during the cleaning cycle, Exposm'e
can be minimized by venting with an open
window or using a ventilation lira or hood.
lru-rlD g--_ -i-_ v-p A-_ Trlp
"l[±VJ[r_.Jl[_ J[a_Jk_ ][ : Tile health of
some birds is extremelx sensitixe to the fumes
gixen off dm'ing the sel_Lcleaulng c) cle of an}
oven. Move birds to another well-ventilated
rooll].
CA U770NS
When using your appliance, follow basic safety
precautions, including the following:
" Use this appliance only for its intended use
as described in this manual.
, Be sure your appliance is properly installed
and grotmded b} a qualified technician in
accordance with tile provided installation
instrtlctiosls.
" Be sure the oven is securely installed in a
cabinet that is firmly attached to the house
structure, Never allow anyone to climb, sit,
stasld or hang O51 tile ovesl door.
" Have the installer show you the location of
the circuit breaker or fuse. Mark it for eas}
re_erellce.
,Do not attempt to repair or replace any part
of your wall oven unless it is specifically
recommended in this manual. All other
sesMcing should be re_brred to a qualified
technician.
" Teach children not to play with the controls
05"any other part of the oven.
*Never leave the oven door open when you
are not watching the oven.
, Always keep dish towels, dish cloths, pot
holders and other linens a safe distance from
yoIlr oven.
" For your safety, never use your appliance for
warming or heating the room.
, Always keep wooden and plastic utensils
and canned food a safe distance away from
your oven.
" Keep the oven free from grease buildup.
, Always keep combustible wall coverings, curtains
or drapes a safe distance from your oven.
, DO NOT STORE OR USE COMBUSTIBLE
MATERIALS, GASOLINE OR OTHER
FLAMMABLE VAPORS AND LIQUIDS IN
THE VICINITY OF THIS OR ANY OTHER
APPLIANCE,
, Do not let cooking grease or other flammable
materials accumulate in or near the wall oven.
* Do not use water on grease fires. Smother fire
or flame or use a multi-purpose dry chemical
or loam-type fire extinguisher.
Flame in tile oven can be smothered
completely by closing the oven door
and turning the oven off or by using a
multi-pro'pose dry chemical or fl)am-type
fire extinguisher.
, Do not use aluminum foil to line oven
bottoms, except as suggested in this manual,
hnproper installation of ahllllillt/ul foil ma)
result in a risk of electric shock or fire.
, Cook meat and poultry thoroughly--meat to
at least an INTERNAL temperature of 160°F
and poultry to at least an INTERNAL
temperature of 180°1)'. Cooking to these
temperatures usually protects against
fl)odborne illness.
"Before performing any service, DISCONNECT
THE OVEN POWER SUPPLY AT THE
HOUSEHOLD DISTRIBUTION PANEL BY
REMOVING THE FUSE OR SWITCHING
OFF THE CIR(R)IT BREAKER.
,Do not store flammable materials in the oven.
4

SAP 2TY PRE CA U770NS
Do not leave children alone---dfikh'en should not
be left alone or unattended ill all area where an
appliance is ill use. They should never be allowed
to sit or stand 05*any pal_ of tile appliance.
Do not touch the heating elements or the
interior surface of the oven. These sm'thces
may be hot enough to burn even though they
are dark ill color. Dsu'ing and Mter use, do not
touch, or let clothing or other flammable
materials contact, any interior area of tile
oven; allow sufficient time fin" cooling frst.
Potentially hot smfimes include tile (wen vent
openings and suHimes near tile openings, crevices
around tile oven do(m the edges of tile door
window and metal trim pal_s above the dora:
Remember: Tile inside surihce of tile oven
may be hot when the door is opened.
Never place cooking utensils or any other items
on the oven flora: There is a heating element
beneath tile 55\ell tool: Plating items (sn tile
(5\'ell floor *llay catlse tile ove*l to overheat,
resulting ill damage to tile (wen and risk (ff
damage (55"fire to cabinets.
CAUTION: OVINTEI ;.ST
TO CHILDRI_q SHOULD NOT BE STOREI) IN
CABINETS ABOVE A WALL OVEN_CHILDRE_
(KIMBING ON THE OVE_ TO REACt-I ITEMS
COULD BE SHIlOUSLY INJURED.
Never wear loose-fitting or hanging garments
while using the appliance. Be careful when
reaching fist items stored over the oven.
Flammable material could be ignited if
brought ill contact with oven heating
elements and may cause severe bm'ns.
Do not heat unopened food containers.
Pressm'e coukl buikl up and tile container
could bm_t, causing all is_jm>
, Keep the oven vent unobstructed.
" Place the oven rack in the desired position while the
oven is cool. If rocks must be handled when hoL do
not let pot hokler contact tile heating dements.
"Never leave jars or cams of fat drippings in or
neax yOLW oven.
, Pulling out the rack to the rack stop is a
convenience in lifting heavy foods. It is also
a precaution against burns fl'om touching
hot stu'litces of tile door (55"oven walls.
,When using cooking or roasting bags in the
oven, flsllow tile manufltcturer's directions.
"Do not use your oven to dry newspapers.
If overheated, they can catch (55,fire.
"Do not use oven for a storage area. Items stored
in an oven call ignite.
"Do not leave paper products, cooldng utensils
or food in the oven when not in use.
" Do not allow anyone to climb, stand or hang
on the door. They could damage tile oven 05"
cause severe personal il_jury.
"Use only dry pot holders--moist (55"damp pot
holders on hot surthces may result ill burns
fl'om steam. Do not let pot holders touch oven
heating elements. Do not use a towel
or other bulky cloth.
, After broiling, always take the broiler pan out
of the oven and dean it. Lefto\ er grease ill tile
broiler pan can catch fire tile next time you use
tile pall.
, Stand away from the oven when opening the
oven door. Hot air or steam which escapes call
cause burns to hands, ti_ce and/or eves.
,Large scratches or hnpacts to glass doors can
lead to broken or shattered glass.
SEI_ r -CLI 2ANINGOVEN
Do not clean the door gasket. Tile door gasket
is essential %r a good seal. Care should be
taken not to rub, damage or move the gasket.
Do not use oven cleaners. No COl/llllerrial ovell
cleaner 05"oven lille*" protective coating of any
kind should be used ill or around ally pa*_ of
tile oven. I_.esidue from 55\en cleaners will
damage the inside of tile oven when tile
seliZrlelm cycle is used.
, CleaJa o@ parts listed in tiffs Owner's Manual.
* Before self-demffng the oven, remove tile
broiler pan, grid and other cookware.
" Be sure to wipe up excess spillage before
startling the self-clemffng operation.
" If the sdf-dea_ning mode malftmctions, turn
tile oven off and disconnect tile power supply.
Have it seswiced by a qualified technidan.
SAVE THESE INSTRUCTIONS
Features of Your Wall Oven
I.l_ll! Ove*_
Design
inJbrmation
(NO1 a// fi.al*_r_<s
are o_ all modeL_.
4ppeara_ce may vaU.)
®
®
®
@
®
@
Feature Index Page
1 Oven Racks with Stop-Ix)cks 5, 8, 11, 12,
Two additio_al racks may be o_lered. Pub No. 3-A014 20, 21, 29, 37
2 Broiler Pan and (;rid 5, 9, 10, 18, 21, 29, 37
3 Probe Dependi_g o_ your overt, the probe outlet will be located 17, 18, 19, 23, 29, 40
i_t the ove_ wall or _eiling_
4 ()tt_;et Rack (on some mode£) 20, 21, 23, 37
5 Oven Eight Pad (s) LeI._ you tur_ the overt ligt_t o_t a_td _![_ 34, 40
D_'pe_di_g" on your ove_, the ove_ [_,@t will be located i_ the ove_ wall or ceili_g'.
6 Oven Control, Clock and Timer 7, 13, 14, 31-33
7 Oven _,]]t Grille 5
8Automatic Oven 15ght Switch (on some mode£)
9 Oven Rack Supports Pack position,s ar_ s_g_*_ted i_ the Co_tvection Cooking; 8-12, 20, 21, 37
Bahi_g or Roasti_ N" a)_d B_oiling section,s.
10 Removable ()_en Floor 29
11 IS/1-()ff Oven Door with Broil Slop Position 10, 38
12 Oven Door Gasket 5, 39
13 Convection Fan and Ileating Element @erat(_ duri_g co)r_ectio)_ cooki)g: 20-25
14 Oven Broil Element 10, 39
15 Automatic Oven Door I atch 29, 30
16 Oven _'nt 5

Oven Control, (;lock & Timer
14%II Oven
Doubleovencontrolshown.(Appearancemayvary.)
k atures of
yO_llT 07}C72
control,
clock and
tim
1
2
3
4
5
6
7
8
BAKE. Press to select the bake flmction.
BROIL HIGH/LOW. Press to select the
broil flmction.
CONV BAI_]/MULTI. Press to select baking
with convection oil multiple racks.
CONV BAld]/1 RACK. Press to select
baking with convection on one rack.
CONV ROAST. Press to select roasting with
convection.
WARM/PROOE Press once tk_I"warming or
twice if)r proofing. See the How to Set the
Oven for Wanning section and the How to
Set the Oven for Proofing section.
START. Must be pressed to start any
cooking or cleaning flmction.
DISPLAY. Shows the operations you have
selected, the time of day and the cooking
or cleaning status.
If "F - mad anumber or letter" flash in the
display and the ()veil control signals, this
indicates hmction error code. Press the
CLFAR/OFF pad. Allow oven to cool for
one hour. Put the oven back into ol)eration.
If flmction error code repeats, disconnect
power to the ()veil and call for service.
9 COOKTIME. Use fi)r Timed Bake, Timed
Convection Bake and Timed Convection
Roast operatioils.
10 DELAY START. Use along with the
COOK TIME or SELF CLEAN STD/LOW
pads to set the ()veil to start and stop
autonmticallv at a time you select.
11 SELF CLEAN STD/LOW. Press to select
the sellecleaning flmction. See the Using
the SeltZCleaning Oven section.
PROBE. Press when using the probe to
cook food.
12
13
14
15
16
OVEN LIGHT ON/OFE Press to turn the
()veil lights oil or off.
CLEAR/OFE Press to cancel any ()veil
operation except the clock and timer.
TIMER ON/OFE Press to select the
timer flmction. The timer does not control
()veil operations. The timer can time up to
9 hours and 59 minutes.
NUMBER PADS. Use to set any flmction
requiring nmnbers--fi)r example, the time
of dav on the clock, the timer, the oven
temperature, the internal food temi)erature,
the starting and length of cooking time for
Timed Bake and the starting and length of
cleaning time for Sell:Clean.
17 CLOCK. Press to enter the time of day.
7bnes The control has a series of tones that will sound
at dilterent times. These tones may sound while
you set the control for an ()veil function or at
the end of the oven fimction. They will also
alert vo/i wheil }lil iilcorrect tiille or
teml)erature has been entered or if
there is a l)rol)lem with the ()veil.
When vou press a touch pad, you will hear a
beep. This beep will let you know you have placed
enough pressure oil the pad to activate it.
When vou set an oven temperature, the
()veil autonmticallv starts to heat. When the
temperature inside the oxen reaches xour,
set teml)erature, a tone will sound to let you
know to place the food in the ()veil.
An attention tone will sound if vou set an
invalid flmction or try to set an additional
flmction. The tone can be quickly identified
by watching the display messages.

Baking or Roasting
14%_11Ov_'n
Be/bre you
begin... 7b avoid possible burt_s, place ltze racks in
lhe de,sired posilion b_fi*re)ou lurn lhe oven on,
The racks haxe stop-h)cks, so that when
placed correctly on the sui)ports, they will stop
before coming completely out, and will not tilt.
When placing and remoxing cookware,
pull the rack out to the bran I) on the
rack suI)port.
To remove a rack, pull it toward )ou,
tilt the front end up and pull it out.
To replace, place the end of the rack
(stop-locks) on the sui)port, tilt up the
front and push the rack in.
CAUTION: Never place cooking utensils or
any other items on the oven floor. There is
a heating element beneath the oven floor,
Placing items on the oven floor may cause the
oven to overheat, resulting in damage to the
oven and risk of damage or fire to cabinets.
30" ovens (shown) have 7 rack positions,
27" ovens have 4 rack positions.
®
®
®
®
@
®
®
How to set
the oven jbv
baking or
roasting
1Press the BAKE pad.
2 Press the immber pads to set the desired
tempera ture.
B Press the START pad.
4 Check food for aloneness at minimmn time
on recipe. Cook longer if necessary.
5 Press the CLEAR/OFF pad when cooking
is complete.
NOTE: A _ooli*_g'J(oz m( 9' automatically turn on
and (1_/ to cool inl_,rnal part,s, This is normal, and
the filn mr{;' continue to *_tn even ({tier the oven is
turboed q]]_
Rack Position
Type of Food 27" Oven 30" Oven
Fvoz(,n pi(,s B or C Cov D
(on cookie sheet)
Angel ib_l cake A A or B
Bundt or pound cakes A A or B
Biscuits, muffins, B or C C or D
brownies, cookies,
cupcakes, layer
cakes, pies
Cassev_)les B or C C or D
®
@
®
®

Preheating
and pan
placement
Preheat the oven if the recipe calls fl)r it. To
p_eheat, set the o\ en at the correct temperature.
Preheating is necessary flw good results when
baking cakes, cookies, pastx y and breads.
l_)r ovens without a preheat indicator l_q'ht or tone,
/)reheat 10 mi_utes.
Baking results will be better if baking pans are
centered in the oven as much as possible. Pans
should not touch each other or the wails of the
oven. If you need to use two racks, stagger the
pans so one is not directly abo\ e the other, and
leave approximately 1½" between pans, f/"om
the fi'(mt, back and sides of the wall.
Aluminum
jbil You can use alunfilmm fl)il to line the broiler
pan and broiler grid. However, you must mold
the toil tightly to the grid and cut slits in it just
like the grid.
Ahtmit_um /bil may aL_o be used to _atl h a spillover
Never entirely cover a rack with ahmfilmln fifil.
This will disturb the heat ciI'culation and result
in poor baking.
A slnaller sheet of toil inav be used to catch a
spillover by placing it on a lower rack several
inches below the fi_od.
Cut slits in the foil just like the grid.

Broiling
_,_%_11Oven
How to set
the oven Jbr
broiling
Close the door. Always broil with the door
closed.
1Place the meat or fish on a broiler grid
in a broiler pan.
2Follow suogested,_, rack positions in the
Broiling Guide,
The size, weig'hl, thiHcne,s,%slartint_" lempefatufe and
.Y°ur [)r¢_ie_vncefor (lonenes swill allY,(1,broilin ¢",limes
This guide is ba,s_¢don meal,s at *_fi'_wmtor
#mpe*nlure.
3 Press the BROIL HIGH/LOW pad once
for HI Broil.
To change to LO Broil, press the BROIL
HIGH/LOW pad again.
4 Press the START pad.
5When broiling is finished, press the
CLILO_R/OFF pad.
Closethe door.
Alwaysbroilwiththe doorclosed,
Ifyour oven isconnectedto 208volts,
rare steaksmaybe broiledby preheatin0the broiler
and positionin0the ovenrackoneposition hi0her.
10

Broiling guide
Jot 27" ovens
(071 SOniC
models)
The s;_,, we_<l_t,thid_)_ess,
_iarii.g tem]wmimv and
you_pl@,_,z(,p,do_le,e_s
wig aff,:d bmili_g times.
7hA gvtkh: is basd on meals
ai _j_a'mior iew/,,mim_,.
*TheUS.l),,pa_t,*o_io/
Ag'_#uliu_,sars "l'm_b,ff is
p@u/a_; bul you should
know thal _oohi_/g il to rod)'
14(1°10`m_,mzsso,w fi_od
/,oism_i_g m_mK_m,_ ma)'
_m-viv_,."(,%m*,,: _,, l,'ood
Book. )bur Kitche_ (h&h,.
{SIZI ]{_'v.flt_w 1985.)
Qtu_tity and/ Rack
Food or Thickness Position
Gromld Beef
Well I)one
Beef Steaks
Rare +
Medium
Well I)one
1 lb. (4 patties)
1/2 to 3/4" thick
1" thick
1 to 1_ lbs.
1_" thick
2 to 2_ lbs.
C
C
C
First Side
Time (mln.)
10
6
8
12
Second Side
Time (mln.)
7
5
6
11
Comments
Space cvenl}. [p to S patties take
about the same tilne.
Steaks less thal_ 1" thick cook
thlough beible blowning. Pan
fl3ing is l-eCOllllneHded.
Slash tbt.Ra l-e+ C 10 7-S
Medium C 15 14-16
Well I)one C 25 20-25
C|ficken 1 whole A 35 1(1-15 P,cduce tilne about 5to 10 minutes
2 to 2½ lbs., per side for era-up chicken.
split lengthwise Brash each side with mehed buttel;
Lo BI_fil Pieces A or B 25-35 15-20 Broil skin-_;id e-d_/XVll ti r,,t.
Lo BI_fil Boneless A or B 15-20 1(1-15
Lo|xster Tails 2_ g 18-20 I)o not Cut tlnough back ot shell. Spread
6 to S oz. each turn oxel. open. Blush with mehed butter
Lo Bloil C 18-25 NiA before broiling and after half of
broiling tilne.
Fish Filleks 1/4 to 1/2" thick H tndle and tu Ill very calefl/ll>
tli Broil C 5 5 Brash with lemon bllttel- befine
Lo Bloil I) 5 5 aim during cooking, if desired.
Pwheat broiler to incr(,a-s,/)l-t)wllillg.
Ham Slices 1" thick B S S lnclvase time 5 to 10 lninutes per side
(precooked) fin 1½" thick or home-culcd ham.
Pork Chops 2 (1/2" thick) C 10 10 Slash litt.
Well I)one 2 (l'flfick) about 1 lb. B 13 13
Lamb Chops
Meditun 2 (1" tiff(k) C 10 9 Slash tbt.
Well I)one about 10 to 12 oz. C 12 10
Medium 2 (1½" thick) C 14 12
Well I)one _d)out 1 lb. g 17 12-14
Gm'lic Bl_ad
Lo Broil C 3 N/A
11

Broiling
l,l#_ll Oven
Broiling ,guide
./br 30" ovens
(on so7/tg
models)
'77,_ { S. D@mtm_,ltt o/
po]mlm; but you shouht
know tkal ,)ohk_g it to o_dy
140°1: m_,a.s some jood
poismtktg mgmtisms may
sm_,,iva "(N)mz_c ._aje l.'ood
Book. }'ore Kitchot (,ui([<
{ SI)A l{_J. flzne 1985.)
Quantity and/ Rack
Food or Thickness Position
Grotmd Beef
_\bll Done
Beef S_eaks
Ralct
Medium
_Abll I)olle
Medium
"_\bll Done
1 lb. (4 patties)
1/2 to 3/4" thick
1" thick
1 to 1_ lbs.
1½" thick
2 to 2_ lbs.
EorF
E or F
E
E
E
E
E
E
First Side
Time (ndn.)
10
10
8
1(}
12
I(}
15
25
Second Side
Time (ndn.)
7
9
6
8
10
8
14-16
2O-25
Conlments
Space evenl}; Up to S patties take
about the same time.
Steaks less than 1" thick cook
through 1;,efbl-e1;,rowning. Pan
hTing is l-ecolnlllellded.
Slash fat.
Chicken 1whole C 25 10 I),cduce time about 5 to 10 mimltes
2 to 2½ lbs., per side tOl- cul-up chicken.
',plit lengthwise Brash each side with lnehed bmtm.
Lo Broil Pieces B or C 25-35 15-20 Broil skin-side<li_wn first.
Lo Broil Boneless B or C 15-20 10-15
Lobster Tails 2_i C 18-20 I)o not Cut thlough back of shell. Spread
6 to 8 oz. each tlllll ovel; open. Brash with lnehed bmter
befi)le broiling _/lld after half of
Lo Broil D 18-25 NiA bloiling time.
Fisli Fillets 1/4 to 1/2" thick Handle and tt/l-ll VelV carefully.
Hi gloil E5 5 Brash with lelnon butter belbl-e
Lo Broil F 5 5 and during cooking, if desired.
Preheat broiler to incl-e_L',e blowning.
Ham Slices 1" thick I) 8 8 hlclc_Lse time 5 to 10 lllillt/tes per side
(precooked) fin- 1½" thick or holne-< m-ed ham.
Pork Cliops 2(1/2" tlfick) E 10 10 Slash fht.
"_\bll I)one 2 (1" thick) about 1 lb. I) 15 15
Lamb Chops
Medium 2 (1" thick) E 1(1 9 Slash ftt.
_,\bll I)one abom 10 to 12 oz. E 12 10
Medium 2 (1½" thick) E 14 12
Well [)()lie abom 1 lb. E 17 12-14
Garlic Bx_ad
Lo Broil E 3 NiA
12

Oven Control, Clock & Timer
l,l?_ll Oven
Clock The clock mu,st be set Jbr the automatic oven timing"
J)tmtion,_ to work proper@
The time of day clock cannot be changed
during Delay Start. (It can be changed during
a regular bake or broil operation.)
7b set
the clock 1Press the CLOCK pad.
2 Press the nmnber pads the sanle way you
read them. For example, to set 12:34, press
the nmnber pads 1, 2, 3 and 4 in that order.
If nmnber pads are not pressed within one
minute atter you press the CLOCK pad, the
display reverts to the original setting. If this
hal)pens, press the CLOCK pad and reenter
the time of day.
3 Press the START pad. This enters the time
and starts the clock.
To check the time of day when the display is
showing other information, simply press the
CLOCK pad. The time of day shows tmtil
another pad is pressed.
q)®®®®®®®®®
If a flashing time of day is in the display,
wm have experienced a power thilm'e.
Reset the clock.
To reset the clock, press the CLOCK pad.
Enter the correct time of day by pressing
the ai)propriate nmnber pads. Press the
START pa d.
77met NOTE: Tke timer is in@endent oi all tlw other'
fitnction,s and it do¢,_not control the oven. Tke
CLEAR/OFF pad doe,_ not qffi,_t the tbm,:
You may program the timer to time cooking
or other household activities for up to 9 horn's
and 59 minutes.
The timer c(mnts down in minutes, 1 minute
at a time, tmtil the last 60 seconds are reached.
Then the control will beep one time. The
seconds will not be displayed until the last
minute is reached.
When the timer reaches " :00," the control
will beep 3 times fl)llowed by one beep every
6 seconds tmtil the TIMER ON/OFF pad is
pressed.
The 6-second tone can be canceled by
following the steps in the Special Features
of Yore" Control trader Tones at the End of
a Timed Cycle.
13

Oven Control, Clock & Tinier
I,Ddl Oven
Using
the timer 1 Press tile TIMER ON/OI_T pad.
2Press the nmnber pads to set the time. For
example, to enter 2 hours and 45 minutes,
touch 2, 4 and 5 in that order.
(/you make a reMake, press lt_e TIMER ON/OFF
pad and beg'in again.
3 Press tile START pad.
Atter pressing the START pad, "SET"
disappears; this tells you the time is counting
down, although tile display does not change
until one minute has passed. Seconds will not
be shown in tile display until tile last minute is
counting down.
4 _¥hen time is up, the o',en control signals
tmtil }ou press the TIMER ON/OFF pad.
Displa) then shows the time of din.
NOTE: 77re minute timer is independent q/all ttte
olher fi_n(tion,s and it does not _onlrol the oven.
The CLEAR/OFF pad does not q]f¢cl the timer:
@
®®@®®®®®®®
@
To reset the timer:
If tile display is still shoMng tile time remaining,
you may change it by pressing the TIMER
ON/OFF pad, then press tile number pads until
tile time you want appea_ in tile display.
If tile remaining time is not in tile display (clock,
delay start or cooking time are in tile display),
recall the remaining time by pressing the TIMER
ON/OFF pad and then pressing tile ntli//bei" pads
to enter tile new tiu/e vo/I w[lnt,
To cancel the timer:
Press tile TIMER ON/OFF pad twice.
Control
lochout
Your control will allow w)u to lock out tile
touch pads so thev cannot be actiw_ted when
pressed.
NOTE: On doubh, oven model, s, lhis a_tivates this
,fi,atu*_,fi*r both ovens.
To lock/unlock the controls:
1 Press the 9 and 0 pads at the same time fin" 3
seconds, tmtil the display shows "I,OC ON."
2 To tmlock tile control, press tile 9 and 0pads
(on double oven models, use the upper oven
controls) at tile sau/e time for 3 seconds,
until the display shows "I,OC OFF."
X'_lien this teature is on and tile touch pads are
pressed, the control will beep and tile displa)
will show "I,OC ON."
NOTES:
• 77w conlrol bc/¢oul mogh,@cts all louch pads. 5b
lou(h /)ads will wod_ when lhis f,alut,_ is aHivalal.
The a((/t,',slnu:nt"willbe relain(:d in nun_or)'({fi_ra
pow_,"/hilut;_.
®®
LOCK
14

Timed Baking
Wall Oven
Using the
timed baking
and roasting
./eatures
N07_: l_)o(I.s thai spoil easily, sueh as mill:, <g:g:s,
.fish, stq]jin_s, poldt* 3' and pork, shouh[ not be
alb'wed to sit fbr more than l hour b(f)re o*' ((tier
eookb_g: Room Icmperatui'e p*vmoles the ,¢rowtho/
har*@d baete*'ia. Be sure thai the oven I{g'htis off
beeause heat fi*)m the bulb will sped harn_/)ll baeteria
g_)wth.
On double oven models, you can use timed
baking in one o\ en while using sell:clean in the
other; you can also use timed baking in both
()veils at tile same time.
How to set
an immediate
start and
automatic
stop
The oven will turn on immediately and eooh fi*r a
seh, lted lenKlh o/time. A t the end o/the iookin K lime
the oven will turn (:ffautomatically.
Make sure the oven clock shows the correct
time of day.
1Press the BAKE pad.
2 Using the number pads, enter the desired
temperature.
3 Press the COOK TIME pad.
NOTE: (/your *veipe *,¢quM, s p*vhealing; you ma 3
need lo add additional lime lo lke leng'lk qt lke
eooking" lime.
4 Using the number pads, enter the desired
baking time, The oven temperature and
the cooking time that you entered will be
displayed.
5Press the START pad.
The display shows the oven temperature
that you set and the cooking time countdown.
(The display starts changing once the
temperature reaches 100°K)
N07_: On double oven model, s, wken using" both
oveas at the same tim6 the limes showing" ia the
disph O' will be /br the last ovea set. 7b disJda)' the
time set./or the fi*:d oven set; press the COOK 77ME
pad /br that oven.
The oven will continue to cook fi)r the
programmed alllO/lllt of time, then shut oft
automatically, unless the _%_tRM feature was set.
See the How to set tke ovea fin' rvarmi_:{" section.
6 Press the CLEAR/OFF pad to clear the
display.
@
@@@(9@@@@@@
@
@@@(9@@@@@@
@
15

Timed Baking
I,l_d! Ove*_
How to set
a delayed
start and
automatic
stop
}bu ca_ sel lhe ovet_ conlrol lo delay-slarl lhe oven,
cook fin' a SpeC!fic le_g'lh o/lime at_d lher_ llo't_ (*[]
aulomalically.
Make sure tile oxen clock shows tile correct
time of day.
1Press tile BAKE pad.
2 Using the number pads, enter tile desired
temperature.
3 Press tile COOK TIME pad.
NOTF: (/your r(,ci/)e r(,_7uires l)rehealb_g;, you mar,
r_eed to add addiliot_al lime lo the ler_g'lh(_tlhe
cookb_g" lime.
4 Using tile number pads, enter tile desired
baking time.
5
6
Press tile DELAY START pad.
Using tile number pads, enter tile time of
(la} }o/t 1V_IIIt tile o_en to ttlI'n on and st_lI't
cooking
7 Press tile START pad.
NOTE: Ar_ altet_lior_ torte will ,soured !t you are usir_g
limed bahi_g" at_d do t_ol pr_,,ssltte START Dad ((tier"
et_leri_g" lhe bakb_g" lemperalur_:
If wm would like to check tile times vou have
set, press the DELAY START pad to check the
start time you have set or press tile COOK
TIME pad' to check the length of cooking time
you have set.
When tile oven turns on at tile time of (lay wm
have set, the display will show the changing
temperatm'e (starting at IO0°F) and the
cooking time countdown.
N07_: On double oven model,s, when usir_g"both
ove_zs at the same tinu, lhe linu,,s showir_g" i_z the
disph O' will beJbr the last oven set. 7b disph O' the
time set Jbr the fir, st oven set; press the DELAY
START pad to (h(uk the start time you have set or
Dress the COOK TIME pad to che(k the #r_g'lh o/
_ookir_g"lime you have set.
Tile oven will continue to cook fin" tile
programmed amo/mt of time, then shut ott
automaticall 5 unless tile X4%kRMfeature was set.
See tile How to set the oven /br warmi_g" section.
8 Press tile CL]?_atR/OFF pad to clear tile
displa),
@
®®@®@@®®®@
@
®®@®®@®®®@
@
®®®®®®®®®@
@
16

Using the Probe
I.l?d! Oven
7Emperature
probe For many foods, especially roasts and poultry,
internal food temperature is the best test fi)r
aloneness. The temperature probe takes the
guesswork out of roasting by cooking fi)ods to
the exact aloneness vou want,
Use of probes other than the one provided with
this product ma) result in damage to the probe.
Use the handles of the probe and I)lug, when
inserting and remoxing them from the meat
and outlet.
• To axoid damaging your probe, do not use
ton(*s_,to pull on the cable when remoxing, it.
• To axoid breaking the probe, make sure fl)od
is completely defrosted befi>re inserting.
• To pre',ent possible burns, do not unI)lu,*
the probe from the outlet until the oxen
has cooled.
• Nexer leaxe your probe inside the oxen
durin(*_ a self cleaning c_cle.
• Do not store the probe in the oxen.
_-,_ Cable
Plug 1[ 11
Handles
The temperature probe has askewer-like probe at one end anda
plug atthe other end that goes into the outlet inthe oven.
17

Using the Probe
Wall Oven
I)l'OpgT
placement
of the probe
Alter preparing the meat and placing it on
a trixet or on the broiler pan grid, fi)llow these
directions for proper probe placement.
I,ay the probe on the outside of the ineat
along the top or side and mark with yore"
finger where the edge of the meat comes to
on the probe. The point should rest in the
center of the thickest meaty part of the roast.
2 Insert the probe completel) into the meat,
up to the handle. It should not touch the
bone, fat or gristle.
For roasts with no bone, insert the probe into
the meatiest part of the roast. For bone-in ham
or lamb, insert the probe into the center of the
lowest large muscle or joint.
Insert the probe into the center of dishes such
as meat loaf or casseroles. When cooking fish,
insert the probe fl'om just above the gill into
the meatiest area, parallel to the backbone.
Insert the probe into the meatiest part of the
inner thioh,_ from below and parallel to the leo
of a whole tm'kex.
18

How to set
the oven jot
roasting
when using
the probe
1
2
Insert the probe into the n/eat.
Pluo_ the probe into the outlet in the o_ei1.
Make sure it is pushed all the way in.
Close the oxen door.
3
4
Press tile PROBE pad.
Press the nunlber pads to set the desired
internal fi)od or nleat teinl)erature. The
nlaxinlunl internal teini)erature fl)r tile food
that you can set is 200°F.
5Press the BAKE pad.
6 Press the nunlber pads to set the desired
o_,en teillperat life.
7 Press tile START pad.
77_e display will flash !t #w probe is inserted into
the 0uiM and you have not ,set a probe temperature
and Dressed the START Dad.
When the o_en starts to heat, the word "I,O"
will be in the displa).
AIter the internal teinl)erature of the
n/eat reaches 100°K tile changino internal
teini)erature will be shown in tile display.
8 When tile internal teinl)erature of tile nleat
reaches tile nun/her you have set, tile probe
and tile ()veil turn off and tile ()veil control
signals. To stop tile signal, press tile
CLEAR/OFF pad. Use hot pads to ren/ove
tile probe fl'oin tile ti)od. Do not use tongs
to pull on it--they n/ight dan/age it.
To change tile oven teini)erature during tile
Roast c_cle press the BAKE pad and then the
nunlber pads to set tile new ten/l)erature.
• If tile probe is renloved fl'oin tile fi)od 1)etk)I'e
the final teini)erature is reached, a tone will
sound and tile display will flash until tile
l)I'obe is I'elllOVed ti'Oill tile ()veil.
•You can use tile tinier even thou,*h xou
cannot rise tin/ed oxen ol)erations.
@
®®@®@®®®®@
@
@@@@@(9@@@@
@
@
19

Using the Convection Oven
I,l?ll[ Oven
Convection
.fitn
In a con_,ection o_,en, a tilil circulates hot air ()_,ei;
under and around the food.
This circulating hot air is evenly distributed
throughout tile oven ca\'it_: .&s a result, toods are
evenly cooked and 1)rowned---_)flen in less time
with convection heat.
NOTE: TIw conva:tion fim will O'cleon aml _?/Jwhil_
cookint_"to be,_tdi,_lribule hot air in the oven,
T/w amvection /im shuts (?_/wlu<ntlw oven door i,s
o/wm<d.DO NOT leave tlw door @en f>r lo_N"lw_7o& (>/
tb_w while I¢,sing"a>nvection (ool<bN"or you m(9' shorten
flu:l!fi"(:/the(onve(:tionlu:aling"elemenL
1-Rack
convection
baking
Tile comection tim circulates tile heated air exenlx
oxer and aromM tile fi)od using tile bake and broil
elements.
_4hen conxecfion baking with only 1 rack, use
CONVECTION BAKE 1 IL_CK m{d fi)r best results
place the rack on shelf C or D at the center of the
o_en. Cook times nlav decrease so fi)od shouM be
checked earlier than package directions to make
S/lI'e that it does not oxercook.
Ideal fi)r cooking large casseroles and lasagna with
good results.
Multi-rack
convection
bahing
CAUTION:
Whenyouareusingthe
offsetrack(on27" models)
inthe lowestposition(A),
youwill needto use
cautionwhenpullingthe
rackout.Werecommend
thatyoupullthe rackout
severalinchesandthen,
usingtwopot holders,pull
therackoutbyholdingthe
sidesofit. Theoffsetrack
is lowandyoucouldbe
burnedif you placeyour
handinthe middleofthe
rackandpullalltheway
out.Beverycarefulnotto
burnyourhandonthedoor
whenusingarackinthe
lowestposition(A).
Because heated air is drculated evenly throughout
tile oven, fi)ods can be baked with excellent results
using multiple racks.
Tile aI/IO/Int of [illle required for multi-rack
baking may increase slightly for sonle fl)ods, but
overall time is saved because two to three times as
much fi)od is cooked at once. (',()()!des, muffins,
biscuits, and other quick breads give good results
with multi-rack baking.
27" Ovm)s
When baking on 3 rack% divide tile oven into
thirds by placing tile offset rack in tile third (C)
rack position and tile straight racks in fi_t (A) and
fi)m'th (D) rack positions.
For two-rack baking, place the offset rack in the
bottom (A) rack position. Place the straight rack in
the third (C) rack position.
30" Ovens
When baking on 3 racks, place one rack in tile
second (B) position, one in tile fourth (D)
position and one in tile sixth (F) position.
For two-rack baking, place tile offset rack in tile
second (B) rack position. Place the straight rack in
tile fimrth (D) rack position.
Multi-rack position 27" oven
®
Offsetrack
®
Multi-rack position 30" oven
®
®
®
Adapting
re€ipes
You can use your fi_vorite redpes in tile
convection oven.
When convection baking, reduce baking
temperature by 25°F or activate the Auto Redpe ''_
(_onve_ion fl_atm'e. See tile _/)(:(:igll ]?(':llto'e,ssection.
Use pan size recommended.
Some package instructions fi)r fl'ozen casseroles
or main dishes have been developed using
coi//illercial convection ovens. For best res/llts
in this oven, preheat the oven and use the
temperature on the package.
2(1
Other manuals for Monogram ZEK938
4
This manual suits for next models
3
Table of contents
Languages:
Other GE Oven manuals
Popular Oven manuals by other brands

Panasonic
Panasonic NN-CS596S Operating instruction and cook book

AEG Electrolux
AEG Electrolux D88406 user manual

Hamilton Beach
Hamilton Beach 31173 manual

Indesit
Indesit FV1 GB Instructions for installation and use

KitchenAid
KitchenAid KFID500ESS installation instructions

Hotpoint Ariston
Hotpoint Ariston 7OFK 837J X RU/HA operating instructions