GE 15-Feb User manual

2-9315
We bring good things to life.
Speakerphone
with 12-Number Memory
User’s Guide

IMPORTANT INFORMATION
NOTICE: The Industry Canada label identifies certified equip-
ment. This certification means that the equipment meets certain
telecommunications network protective, operational and safety
requirements. The Industry Canada does not guarantee the
equipment will operate to the user’s satisfaction.
Before installing this equipment, users should ensure that it is
permissible to be connected to the facilities of the local telecom-
munications company. The equipment must also be installed
using an acceptable method of connection. The customer should
be aware that compliance with the above conditions may not
prevent degradation of service in some situations.
Repairs to certified equipment should be made by an authorized
Canadian maintenance facility designated by the supplier. Any
repairs or alterations made by the user to this equipment, or
equipment malfunctions, may give the telecommunications
company cause to request the user to disconnect the equipment.
Users should ensure for their own protection that the electrical
ground connections of the power utility, telephone lines and
internal metallic water pipe systems, if present, are connected
together. This precaution may be particularly important in rural
areas.
CAUTION: Users should not attempt to make such connections
themselves, but should contact the appropriate electric inspection
authority, or electrician, as appropriate.
NOTES: This equipment may not be used on coin service pro-
vided by the telephone company.
Party lines are subject to telephone company tariffs and, there-
fore, you may not be able to use your own telephone equipment if
you are on a party line. Check with your local telephone company.
HEARING AID COMPATIBILITY
This telephone system meets FCC/Industry Canada standards for
Hearing Aid Compatibility.
INDUSTRY CANADA NUMBER IS LOCATED ON THE CABINET BOTTOM
LOAD NUMBER IS LOCATED ON THE CABINET BOTTOM

INTRODUCTION
Your GE speakerphone is designed to give you flexibility in use, and high
quality performance. To get the most from your new telephone, we
suggest that you take a few minutes right now to read through this
instruction manual.
The first section shows you how to install and set up the phone; next, it
discusses speakerphone functions, followed by a section describing all of
the phone features.
If you have any questions or problems, consult the Table of Contents, the
Troubleshooting Guide, or the Index for the solution.
TABLE OFCONTENTS
INTRODUCTION .................................................................................................... 1
TABLE OFCONTENTS....................................................................................... 1
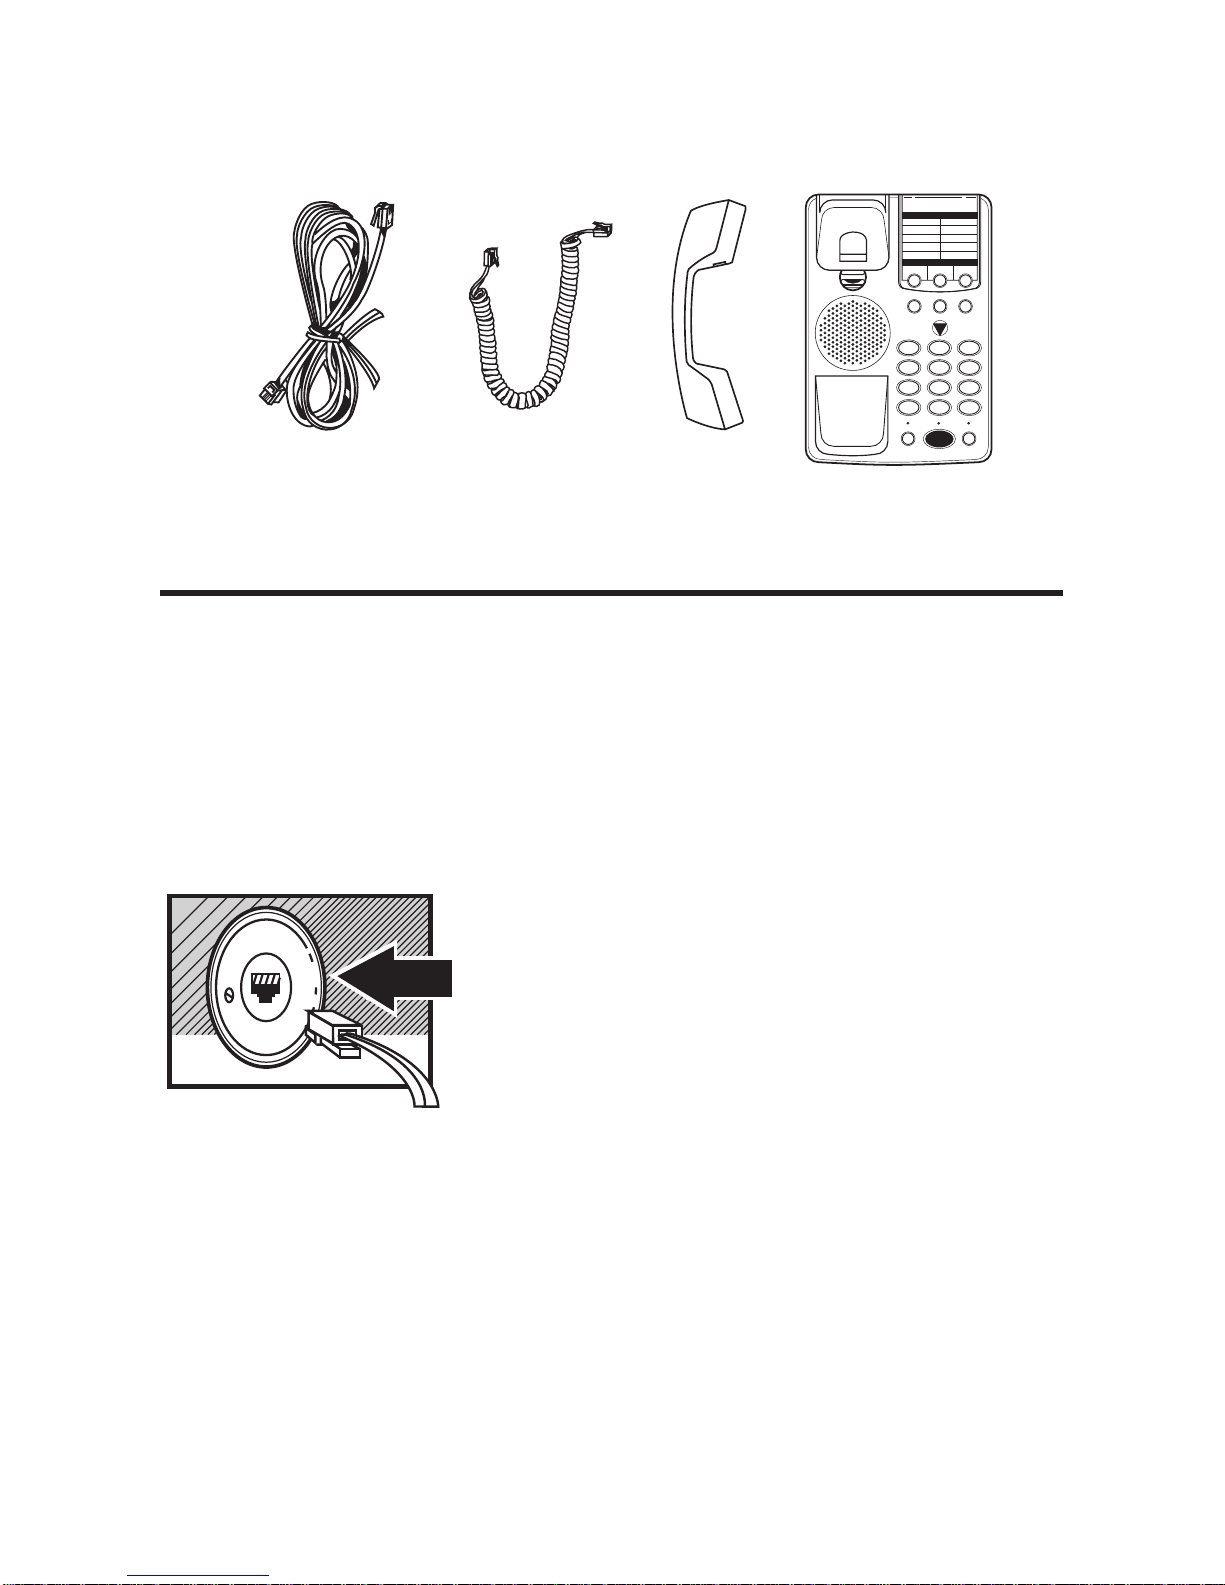
PARTS CHECKLIST ............................................................................................ 2
INSTALLATION AND SET UP................................................................................... 2
BEFORE YOU BEGIN ......................................................................................... 2
REQUIREMENTS ........................................................................................... 2
INSTALLING THE 9V BATTERY ......................................................................... 3
DESK OR TABLETOP INSTALLATION .................................................................. 4
WALL MOUNT INSTALLATION......................................................................... 5
WALL MOUNT INSTALLATION CONTINUED ........................................................ 6
USING THE SPEAKERPHONE ................................................................................... 6
SPEAKERPHONE LOCATION................................................................................. 6
SPEAKERPHONE USE ........................................................................................ 7
MAKING ACALL .......................................................................................... 7
SWITCHING BETWEEN SPEAKER AND HANDSET .................................................. 7
RECEIVING ACALL ....................................................................................... 7
USING THE FEATURES .......................................................................................... 8
VOLUME CONTROLS ......................................................................................... 8
TEMPORARY TONE FEATURE .............................................................................. 8
MUTE BUTTON ............................................................................................. 8
FLASH BUTTON ............................................................................................ 8
MEMORY DIALING ........................................................................................... 9
REDIAL BUTTON ........................................................................................... 9
HOLD BUTTON .............................................................................................. 9
USING HOLD WITH THE HANDSET ................................................................... 9
USING HOLD WITH THE SPEAKERPHONE ........................................................... 9
STORING THE LAST NUMBER DIALED ............................................................ 10
ADDING APAUSE TO THE DIALING SEQUENCE ................................................ 10
CHANGING ASTORED NUMBER.................................................................... 10
CLEARING ASTORED NUMBER ..................................................................... 10
STORING ANUMBER IN MEMORY ................................................................. 10
DIALING ANUMBER FROM MEMORY ............................................................. 11
DIALING THE EMERGENCY QUICK DIAL NUMBERS ........................................... 11
CHAIN DIALING FROM MEMORY ................................................................... 11
TROUBLESHOOTING GUIDE .................................................................................. 12
CARE AND MAINTENANCE ................................................................................... 13
REN NUMBER .................................................................................................. 13
INTERFERERENCE INFORMATION ............................................................................. 14
TELEPHONE NETWORK INFORMATION ..................................................................... 14
INDEX .............................................................................................................. 15
SERVICE ........................................................................................................... 16

2
PARTS CHECKLIST
Your package should contain the following items:
2
ABC
MEM DIAL
FLASH STORE REDIAL
5
JKL
8
TUV
0
OPER
MUTE HOLD
EMERGENCY QUICK DIAL
SPEAKER
12 MEMORY SPEAKERPHONE
1
2
3
4
5
6
7
8
9
AREA CODE PHONE NUMBER
1
4
GHI
7
PRS
*
TONE
3
DEF
6
MNO
9
WXY
#
Phone line cord Handset Base unit
Handset cord
INSTALLATION AND SET UP
Your GE Speakerphone can be placed on a desk or tabletop, or can
be mounted on the wall. After you decide which type of installa-
tion you want, refer to the appropriate installation diagram.
BEFORE YOU BEGIN
REQUIREMENTS
A modular jack USOC: CA11A (RJ11C) or
a CA14A (RJ14C) is required.
Installation of this telephone in locations
with 4-prong jacks or with hard-wired
outlets requires additional converters (not
included). The dealer from whom you
purchased the system, or a telephone
supply store, can advise you regarding
the proper converter.

3
EMERGENCY QUICK DIAL
1
2
3
4
5
6
7
8
9
AREA CODE
12 MEMORY SPEAKERPHONE
Installing the 9V battery
Installation of a 9V battery is optional, however when installed,
the battery provides better performance for the speakerphone.
1Remove the plastic cover over the
telephone memory directory.
3Insert a 9V battery.
2Open the battery compartment
door using the flat edge of a
screwdriver.
EMERGENCY QUICK DIAL
1
2
3
4
5
6
7
8
9
AREA CODE
12 MEMORY SPEAKERPHONE
4Close the battery door.
5Replace the plastic cover
over memory directory.
BATTERY
Battery Safety Precautions
For your safety, please follow these precautions:
• Do not recharge, disassemble, mutilate, wet, or dispose of battery in fire.
• Keep battery out of reach of children.
• Replace only with 9V battery.
• When replacing the battery, be sure to unplug the phone line from the
phone before inserting the battery.

4
DESK OR TABLETOP INSTALLATION
Phone Cord Wrap
You can remove the base plate
and wrap any extra phone cord to
get it out of the way; then replace
the base plate.
Plug the telephone
line cord into a
modular jack
[CALLA (RJ11C or
RJ14C) CA14A] and
into the PHONE
LINE jack on the
back of the unit.
2
ABC
MEM DIAL
FLASH STORE REDIAL
5
JKL
8
TUV
0
OPER
MUTE HOLD
EMERGENCY QUICK DIAL
SPEAKER
12 MEMORY SPEAKERPHONE
1
2
3
4
5
6
7
8
9
AREA CODE PHONE NUMBER
1
4
GHI
7
PRS
*
TONE
3
DEF
6
MNO
9
WXY
#
PULSE TONE
LO VOLUME HI
RECEIVER
LO MED HI OFF LO HI
RINGER
Adjust the
RINGER volume
switch to the
desired setting.
Set the PULSE/TONE switch
to TONE if you use Touch-
Tone service; set it to PULSE if
you have rotary service.
Plug the handset cord into
the handset, and into the
telephone jack on the left
side of the unit.

5
WALL MOUNT INSTALLATION
The Speakerphone can be mounted on a wall phone plate (not
included).
Connect the phone cord to the
modular jack on the wall.
Slip the mounting holes over the wall
plate posts and slide the unit down
firmly into place.
PHONE LINE
BASE PLATE
PUSH TO
RELEASE
PUSH TO
RELEASE
Plug the phone cord into the phone
jack on the back of the unit, wrap the
extra line cord around the brackets on
the bottom of the base, and then thread
it through the bottom of
the base plate.
Reverse the direction of the Base Plate
and replace it by putting the tabs into the
slots on the top of the unit first, and
then snapping the bottom tabs into
place.
PHONE LINE
BASE PLATE
PUSH TO
RELEASE PUSH TO
RELEASE
Remove the Base
Plate from the back
by pressing down on
the snap tabs located
at the top, and then
lifting it off.
THIS END UP FOR DESK USE
THIS END UP FOR WALL USE
BASE PLATE
PUSH TO
RELEASE PUSH TO
RELEASE
Rotate the handset hook.
FLASH STORE REDIAL
EMERGENCY QUICK DIAL
12 MEMORY SPEAKERPHONE
1
2
3
4
5
6
7
8
9
AREA CODE PHONE NUMBER
Wall mount installation continued on next page

6
WALL MOUNT INSTALLATION CONTINUED
PULSE TONE
LO VOLUME HI
RECEIVER
LO MED HI OFF LO HI
RINGER
USING THE SPEAKERPHONE
SPEAKERPHONE LOCATION
For best speakerphone performance, avoid the following:
• Areas with high background noise. (The microphone might pick
up these sounds and prevent the speakerphone from going into
the receiving mode when you finish talking.)
• Surfaces affected by vibration.
• Recessed areas such as in a corner, under a cupboard, or next
to a cabinet, which can generate an echo effect.
Set the PULSE/TONE
switch to TONE if you use
Touch-Tone service; set it to
PULSE if you have rotary
service.
Set the RINGER VOLUME
switch as desired.
Plug the handset cord into the
handset and into the unit, and then
hang up the phone.
2
ABC
MEM DIAL
FLASH STORE REDIAL
5
JKL
8
TUV
0
OPER
MUTE HOLD
EMERGENCY QUICK DIAL
SPEAKER
12 MEMORY SPEAKERPHONE
1
2
3
4
5
6
7
8
9
AREA CODE PHONE NUMBER
1
4
GHI
7
PRS
*
TONE
3
DEF
6
MNO
9
WXY
#

7
SPEAKERPHONE USE
Note the following guidelines when using the speakerphone:
• The speakerphone works similar to a two-way radio in that you
can only listen or talk at one time.
• Stay reasonably close to the phone so that you can be clearly
heard by the person to whom you are talking.
• You can adjust the speaker volume by sliding the VOLUME
control on the right side of the base unit.
• The speakerphone indicator light comes on when the
speakerphone is in use.
MAKING ACALL
1Press the SPEAKER button instead of picking up the handset.
2Adjust volume if needed.
3Make your call.
4Press SPEAKER again to hang up the phone.
SWITCHING BETWEEN SPEAKER AND HANDSET
You can switch between speakerphone and handset while the
phone is dialing a number, or anytime during a conversation.
•Speaker to Handset — Pick up the handset.
•Handset to Speaker —
Press SPEAKER, then hang up handset.
TIP: If you’re using the speakerphone in a noisy environment
and are in listening mode, you can improve the listening perfor-
mance by pressing MUTE. Just be sure to press MUTE again
before you try to speak.
RECEIVING ACALL
Make sure that the RINGER switch is set to HI or LOW or the phone
will not ring.
1Press the SPEAKER button instead of picking up the handset
when the phone rings.
2Adjust volume if needed.
3Press SPEAKER again to hang up the phone.

8
USING THE FEATURES
VOLUME CONTROLS
Control the volume of both the handset and the speakerphone:
• Use the VOLUME control to adjust
speakerphone volume.
• Use the RECEIVER volume control to
adjust the handset volume.
PULSE TONE
LO VOLUME HI
RECEIVER
LO MED HI OFF LO HI
RINGER
TEMPORARY TONE FEATURE
If you have Pulse (rotary) service, and want to access customer
calling services that require Tone dialing, such as getting informa-
tion from a local bank, you can use this feature.
1Press the TONE button ( *) after you have connected to the
service to enable Tone dialing.
2When you hang up, the phone automatically returns to Pulse
dialing mode.
MUTE BUTTON
The MUTE button deactivates the microphone for both the
speakerphone and the handset, so that anything you say cannot
be heard by the caller on the other end of the line.
• Press MUTE to mute the microphone (the indicator light
turns on).
• Press MUTE again to continue the phone conversation
(the indicator light turns off).
FLASH BUTTON
Press the FLASH button instead of using the hook switch to
activate customer calling services such as call waiting or call
transfer, which are provided by your local phone company.

9
REDIAL BUTTON
Redial the last number you called by pressing the REDIAL button
after you get a dial tone.
NOTE: The Redial feature holds in memory the last phone
number you dialed (as many as 32 digits). If you pressed any
numbers after dialing the phone number, (for example, when
accessing a voice-menu system) those numbers also are redialed.
HOLD BUTTON
Use the HOLD button to interrupt a phone conversation without
hanging up, and then pick up the conversation again on the same
phone or any extension.
NOTE: When hold is on, the HOLD indicator light is active.
USING HOLD WITH THE HANDSET
1Press HOLD (the indicator light comes on).
2Hang up (the indicator light blinks).
3Pick up the handset , press SPEAKER, or pick up an extension
phone to release hold (the indicator light turns off).
USING HOLD WITH THE SPEAKERPHONE
1Press HOLD (the speakerphone indicator light turns off, and the
hold indicator light blinks).
2Press SPEAKER, pick up the handset or an extension phone to
release hold.
MEMORY DIALING
Store as many as 12 numbers in memory for easy
dialing. Three can be stored in the Emergency
Quick Dial locations, and nine additional numbers
can be stored in the numbered keys (1-9).
MEM DIAL
FLASH STORE REDIAL
EMERGENCY QUICK DIAL
12 MEMORY SPEAKERPHONE
1
2
3
4
5
6
7
8
9
AREA CODE PHONE NUMBER

10
3
2
6
STORING THE LAST NUMBER DIALED
Store the last number you dialed by pressing REDIAL instead of
dial a phone number (in step 3 of the preceding procedure).
ADDING APAUSE TO THE DIALING SEQUENCE
Use the REDIAL button to insert a delay in the dialing sequence
when storing a number, for example, when you need to dial 9 to
get an outside line.
Press REDIAL at the point in the dialing sequence in which a
pause is required. Each pause counts toward the 16 digit limit.
CHANGING ASTORED NUMBER
Change a stored number by replacing it with a different number.
CLEARING ASTORED NUMBER
1Pick up the handset or press the SPEAKER button.
2Press the STORE button.
3Press the MEM DIAL button; then press an EMERGENCY QUICK
DIAL button or a number key (1-9).
4Hang up.
5
STORING ANUMBER IN MEMORY
1Press SPEAKER
(or pick up the handset).
2Press STORE.
3Dial the number
to be stored (up to 16 digits).
4Press MEM DIAL.
5Press a Memory Location
(1-9 on the keypad), or an
EMERGENCY QUICK DIAL
button.
6Press SPEAKER (or
hang up the handset).
7Record the phone number on
the memory directory (located
under the plastic cover).
4
1
2
ABC
MEM DIAL
STORE
5
JKL
8
TUV
0
OPER
EMERGENCY QUICK DIAL
SPEAKER
1
4
GHI
7
RS
*
TONE
3
DEF
6
MNO
9
YZ
#
PQ WX

11
DIALING ANUMBER FROM MEMORY
You can dial numbers from memory when using the handset
or speakerphone. When you get a dial tone, press the MEM DIAL
button followed by the memory location (1-9) for the number you
want to dial.
CAUTION: If you make test calls to emergency numbers, remain
on the line and explain the reason for the call. Also, make these
calls in off-peak hours, such as early morning or late evening.
DIALING THE EMERGENCY QUICK DIAL NUMBERS
To dial one of these numbers, just press its button after you get a
dial tone.
C
HAIN
D
IALING
FROM
M
EMORY
Use this feature to make calls which require a sequence of num-
bers, for instance if you use a calling card for a frequently called
long distance number. Basically, you dial each part of the se-
quence from memory. The following example shows how you can
use chain dialing to make a call through a long distance service:
The Number For Memory
Location
Long distance access number 7
Authorization code 8
Frequently called long distance number 9
1. Press SPEAKER (or pick up the handset).
2. Press the MEM DIAL button and then press 7.
3. When you hear the access tone, press MEM DIAL and then
press 8.
4. At the next access tone, press MEM DIAL and then 9.

12
TROUBLESHOOTING GUIDE
Problem Solution
No dial tone. • Check hook switch to make
Won't dial out sure it pops up.
• Make sure speakerphone indicator comes
on (if using speakerphone.)
• Make sure TONE/PULSE is set to correct
position.
• Unplug the phone, wait 30 seconds, and
plug the phone back in.
Phone doesn’t ring • Check RINGER VOLUME.
• Could have too many phones on one
line. (The total LN of all phones should
not be greater than the maximum LN
for your calling area, Usually 5.)
Low handset or • Check the volume settings (see p. 8).
speaker volume
Light and tone • This is normal as power is fluctuating
feedback flutter when with phone outpulsing.
dialing in PULSE mode.
Can’t be heard by • Make sure phone cord is securely
other party plugged in
.
• Make sure MUTE indicator is off.
Memory dialing • Make sure you entered numbers
correctly. (See "Memory Dialing.")

13
CARE AND MAINTENANCE
To keep your GE telephone working and looking good, follow
these few simple guidelines:
• Avoid putting the phone near heating appliances and devices
that generate electrical noise. (i.e., motors, fluorescent lamps.)
• Phone should not be exposed to direct sunlight or moisture.
•
Avoid dropping the handset and other rough treatment.
• Clean telephone with a soft cloth. (Remember to first unplug
the phone from the wall outlet.)
• Never use a strong cleaning agent or abrasive powder, as this
will damage the finish.
• Retain the original packaging for future use.
REN NUMBER
On the bottom of this equipment is a label indicating, among
other information, the FCC Registration number and Ringer
Equivalence Number (REN) for the equipment. You must, upon
request, provide this information to your telephone company.
The REN is useful in determining the number of devices you may
connect to your telephone line and still have all of these devices
ring when your telephone number is called. In most (but not all)
areas, the sum of the RENs of all devices connected to one line
should not exceed 5. To be certain of the number of devices you
may connect to your line as determined by the REN, you should
contact your local telephone company.

14
INTERFERERENCE INFORMATION
This Class B digital apparatus meets all requirements of the
Canadian Interference-Causing Equipment Regulations.
This equipment generates and uses radio frequency energy which
may interfere with residential radio and television reception if not
properly installed and used in accordance with instructions
contained in this manual. Reasonable protection against such
interference is ensured, although there is no guarantee this will
not occur in a given installation. If interference is suspected and
verified by switching this equipment on and off, the user is
encouraged to try to correct the interference by one or more of
the following measures: Reorient the radio/television receiver’s
antenna, relocate the equipment with respect to the receiver, plug
the equipment and receiver into separate circuit outlets. The user
may also wish to consult a qualified radio/television technician for
additional suggestions. This equipment has been fully tested and
complies with all limits for Class B computing devices pursuant to
part 15, Sub-part J, FCC Rules and Regulations.
TELEPHONE NETWORK INFORMATION
Should your equipment cause trouble on your line which may
harm the telephone network, the telephone company, where
practicable, may notify you that temporary discontinuance of
service may be required. Where prior notice is not practicable and
the circumstances warrant such action, the telephone company
may temporarily discontinue service immediately.
The telephone company may make changes in its communications
facilities, equipment, operations or procedures where such action
is required in the operation of its business. If these changes are
expected to affect the use or performance of your telephone
equipment, the telephone company will likely give you adequate
notice to allow you to maintain uninterrupted service.
Notice must be given to the telephone company upon termination
of your telephone from your line.

15
INDEX
Symbols
9V battery installation 3
B
Battery Safety Precautions 3
E
Emergency Quick Dial buttons
10
F
FLASH button 8
H
HOLD button 9
I
Installation 4-6
M
Memory Dialing 9
Adding a Pause to the Dialing
Sequence 10
Chain dialing from memory
11
Changing a stored number
10
Clearing a stored number 10
Dialing a number from
memory 11
Emergency Quick Dial
numbers 10, 11
Storing a number 10
Storing the last number
dialed 10
modular jack 2
MUTE button 8
P
Phone Cord Wrap 4
Pulse (rotary) service 8
PULSE/TONE switch 4, 6
R
RECEIVER volume control 8
REDIAL button 9, 10
RINGER VOLUME switch 4, 6
S
SPEAKER button 7
speakerphone performance 6
Speakerphone use 7
switching between speaker-
phone and handset 7
T
Temporary tone feature 8
U
Using HOLD with the Handset
9
Using HOLD with the
Speakerphone 9
V
VOLUME control 8

Model 2-9315
15401970 (Rev. 1 E/F)
98-41
Printed in Philippines
© 1998 Thomson Consumer Electronics, Inc.
Trademark(s) ® Registered
SERVICE
Thomson Consumer Electronics Canada, Inc. warrants to the
purchaser or gift recipient that if any manufacturing defect
becomes apparent in this product within 1 year from the original
date of purchase, it will be replaced free of charge, including
return transportation.
This warranty does not include damage to the product resulting
from accidents, misuse or leaking batteries.
Should your product not perform properly during the warranty
period, either:
1. Return it to the selling dealer with proof of purchase for replacement,
OR
2. Remove the batteries (where applicable), and pack product complete
with accessories in the original carton (or equivalent).
— Mail prepaid (with proof of purchase) and insured to:
Thomson Consumer Electronics Canada, Inc.
Distribution Centre
7400 A Bramalea Road
Mississauga, Ontario L5S 1X1
The provisions of this written warranty are in addition to and not a
modification of or subtraction from the statutory warranties and
other rights and remedies contained in any applicable legislation,
and to the extent that any such provisions purport to disclaim,
exclude or limit any such statutory warranties and other rights
and remedies, such provisions shall be deemed to be amended to
the extent necessary to comply therewith.
If you are unable to find a qualified servicer for out of warranty
service, you may write to:
Thomson Consumer Electronics Canada, Inc.
P.O. Box 0944
Indianapolis, Indiana, U.S.A., 46206-0944
Attach your sales receipt to this booklet for future reference. This
information is required if service is needed during the warranty
period.
PURCHASE DATE ____________________________________________
NAME OF STORE_____________________________________________
This manual suits for next models
1
Table of contents
Other GE Telephone manuals