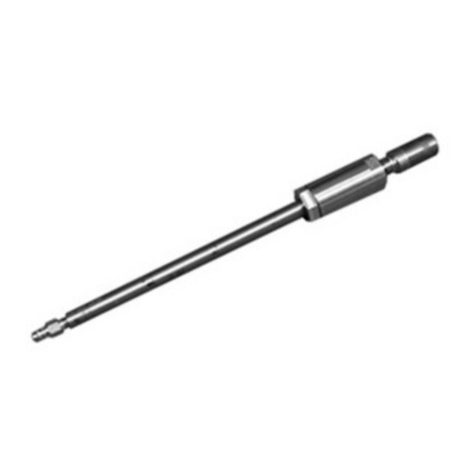
GE Bently Nevada 7200 Series User manual

-~
ARTISAN
®
~I
TECHNOLOGY
GROUP
Your definitive source
for
quality
pre-owned
equipment.
Artisan Technology
Group
Full-service,
independent
repair
center
with
experienced
engineers
and
technicians
on staff.
We
buy
your
excess,
underutilized,
and
idle
equipment
along
with
credit
for
buybacks
and
trade-ins
.
Custom
engineering
so
your
equipment
works
exactly as
you
specify.
•
Critical
and
expedited
services
•
Leasing
/
Rentals/
Demos
• In
stock/
Ready-to-ship
•
!TAR-certified
secure
asset
solutions
Expert
team
ITrust
guarantee
I
100%
satisfaction
All
tr
ademarks,
br
a
nd
names, a
nd
br
a
nd
s a
pp
earing here
in
are
th
e property of
th
e
ir
r
es
pecti
ve
ow
ner
s.
Find the GE / Bently Nevada 81725-02 at our website: Click HERE

Part Number 74756-01
Rev. G (07/07)
Installation Manual
14 mm Proximity Transducer System
7200 Series

14 mm Proximity Transducer System 7200 Series Installation Manual
ii
Copyright © 1986 Bently Nevada LLC
All rights reserved.
The information contained in this document is subject to change without notice.
The following are trademarks of General Electric Company in the United States and other
countries:
Proximitor
Contact Information
The following ways of contacting Bently Nevada are provided for those times when you cannot
contact your local representative:
Mailing Address 1631 Bently Parkway South
Minden, Nevada USA 89423
USA
Telephone 1.775.782.3611
1.800.227.5514
Fax 1.775.215.2873
Internet www.ge-energy.com/bently

iii
Additional Information
Product Disposal Statement
Customers and third parties, who are not member states of the European Union, who are in
control of the product at the end of its life or at the end of its use, are solely responsible for the
proper disposal of the product. No person, firm, corporation, association or agency that is in
control of product shall dispose of it in a manner that is in violation of any applicable federal,
state, local or international law. Bently Nevada LLC is not responsible for the disposal of the
product at the end of its life or at the end of its use.

14 mm Proximity Transducer System 7200 Series Installation Manual
iv
Contents
1. SYSTEM OVERVIEW .................................................................................................................................................... 1
1.1 INTRODUCTION.................................................................................................................................................. 1
1.2 PROXIMITY MEASUREMENTS........................................................................................................................ 2
2. INSTALLATION.............................................................................................................................................................. 4
2.1 INTRODUCTION.................................................................................................................................................. 4
2.2 RECEIVING INSPECTION AND STORAGE.................................................................................................. 4
2.3 INSTALLATION CONSIDERATIONS ............................................................................................................. 4
2.4 PROBE INSTALLATION..................................................................................................................................... 7
2.5 PROXIMITOR INSTALLATION......................................................................................................................... 9
3. MAINTENANCE...........................................................................................................................................................12
3.1 INTRODUCTION................................................................................................................................................12
3.2 CALIBRATION CHECK ....................................................................................................................................12
3.3 RECALIBRATION...............................................................................................................................................14
3.4 TROUBLESHOOTING......................................................................................................................................14
4. APPENDIX A.................................................................................................................................................................16
5. APPENDIX B.................................................................................................................................................................20
6. APPENDIX C.................................................................................................................................................................29

Section 1 - SYSTEM OVERVIEW
1
1. SYSTEM OVERVIEW
1.1 INTRODUCTION
The 7200 Series 14 Millimetre Proximity Transducer System is a noncontacting, shaft vibration and
relative position measurement system. The system includes a probe and Proximitor. Figure 1-1
shows a typical system.
The transducer system measures the gap between the
probe tip and an observed metal surface and converts
this distance to a proportional negative dc voltage.
The system measures both static (fixed) and dynamic
(changing) distances. The output signal is fed to a
monitor to determine such things as radial vibration
and axial thrust position.
Probes are available in different configurations to
accommodate a variety of applications and to aid in
installation. The probe tip is approximately 14 mm
(0.55 inches) in diameter. The system offers a linear
measuring range of 160 mils (4.06 mm) beginning at
20 mils (0.51 mm) from the probe face. Also, the
system scale factor is 100 mV/mil (3.94 V/mm).
Two Proximitor types are available, each calibrated
to a specific cable electrical length. Probe cables are
designed to achieve a system length of 5.0 or 9.0
metres (16.4 or 29.5 feet). All cables are trimmed to an electrical length which can be longer or
shorter than the stated physical length. Cables are available with or without ETFE (fluoropolymer)
armor.
The probes come with the serial number and part number printed on a label. The label is protected
by a piece of clear FEP tubing. During installation, user identification can be placed under another
piece of shrinkable FEP tubing. The tubing is shrunk when heat is applied.
Figure 1-1. 14 mm Proximity Transducer
System

14 mm Proximity Transducer System 7200 Series Installation Manual
2
The probe signal and the input power are transmitted between the Proximitor and a standard Bently
Nevada monitor through a 3-wire shielded signal cable (provided by the user in most cases). The
Proximitor can be up to 1000 feet (305 metres) from a monitor without degradation of performance.
Probes are compatible with most petrochemical environments. Strong acids with a pH of less than 4,
strong bases with a pH greater than 10, and some organic solvents may damage the probes. Contact
the nearest Bently Nevada Corporation office for details about probes that operate in harsh
environments.
Standard versions of the components of this system are shown in Appendix A. Specifications are
listed in Appendix B, and Appendix C shows scale factors and sensitivity curves.
1.2 PROXIMITY MEASUREMENTS
The probe radiates radio frequency energy from the probe tip coil. As a conductive material (such as
a machine shaft) approaches the probe tip, eddy currents are induced into that material. The closer
the conductive material comes to the probe tip, the greater the magnitude of the eddy currents. As
the eddy currents increase, the power energy radiated from the probe tip is absorbed and there is a
corresponding loss in power detected at the Proximitor. If the probe-to-shaft gap remains constant,
the Proximitor output signal remains constant; if the gap changes, the output signal changes
accordingly.
The 14 Millimetre Proximity Transducer System is primarily intended for measuring the axial thrust
motion of large machine rotors. Its relatively large linear measuring range may be required for
thrust position measurements on large machines. Probes mounted to measure thrust position should
be located within 12 inches of the thrust collar. Thrust position probes mounted at the machine end
opposite the thrust collar do not provide adequate protection since they also measure differential
expansion. Typically, two probes are used so that if one is damaged or fails, thrust position can
continue being monitored. See Figure 1-2.

Section 1 - SYSTEM OVERVIEW
3
Figure 1-2. Typical Thrust Position Probe Mounting
This transducer system can also be mounted to measure radial vibration. Typically, two probes are
mounted 90 degrees apart along the radial axis of a shaft. This enables vibration to be analyzed at
all angles along the radial plane. Radial vibration probes should be mounted within 6 inches of the
bearing under surveillance. See Figure 1-3.
Figure 1-3. Typical Radial Vibration Probe Mounting

14 mm Proximity Transducer System 7200 Series Installation Manual
4
2. INSTALLATION
2.1 INTRODUCTION
This section covers inspection, storage, and installation of equipment as well as the actual
installation procedures for the probe and Proximitor.
2.2 RECEIVING INSPECTION AND STORAGE
All equipment should be removed from shipping containers and visually inspected to ensure there is
no shipping damage. If shipping damage is apparent, file a claim with the carrier and submit a copy
to Bently Nevada Corporation. Include part and serial numbers on all correspondence. If no
damage is apparent and the equipment is not going to be used immediately, Bently Nevada
Corporation recommends returning the equipment to the shipping container and resealing. The
equipment should be stored in an environment free from potentially damaging conditions such as
high temperature, excessive humidity, or a corrosive atmosphere. See Appendix B for
environmental specifications.
The equipment is durable; however, reasonable handling care should be exercised during
installation. When cable connectors are part of the equipment, they must be properly protected from
physical abuse or contamination by oil, water, or other substances by wrapping them with FEP tape
or another connection protective device.
CAUTION
Do not use adhesive electrical tape; oil mist will dissolve the adhesive
causing connector contamination.
2.3 INSTALLATION CONSIDERATIONS
Bently Nevada probes and Proximitors are calibrated to AISI E4140 series steel. Most AISI 1000
and AISI 4000 Series steel present a response curve similar to the AISI E4140 Series steel.
However, copper, aluminum, brass, tungsten, or other types of metals present a different response
curve. If the metal to be observed has significantly different magnetic and electrical properties than
AISI E4140 steel, follow the recalibration procedure in Section 3. If it is necessary for the probe to
observe a plated area, contact the nearest Bently Nevada Corporation office for assistance.
Proper installation requires the observed surface to be free of irregularities such as hammer marks,
scratches, holes, or keyways. Any type of plating (including chrome) normally results in a
nonuniform plating thickness. Residual magnetism, surface irregularities, and other conditions in
Section 2 - INSTALLATION
5
the observed surface can cause electrical or mechanical runout which will introduce error in the
Proximitor output.
The various techniques for eliminating electrical and mechanical runout are described in several
papers available from Bently Nevada Corporation, including:
• Dealing with "Glitch". Where does Electronic Vectorial Runout Compensation Fit In?
(Application Note 004)
• "Glitch": Definition of and Methods for Correction, including Shaft Burnishing to Remove
Electrical Runout. (Application Note 011)
The electromagnetic fields of probe tips mounted too closely together will cross-couple, causing a
small amplitude ac signal to be superimposed on the Proximitor outputs. To prevent cross-coupling
mount the probes so that the distance between the tips is at least as large as that shown in the Figure
2-1.
A = 28 mm (1.1 inches) minimum
B = 82 mm (3.2 inches) minimum
C = 64 mm (2.5 inches) minimum
D = 61 mm (2.4 inches) minimum
Figure 2-1. Cross-Coupling
Because the electromagnetic field also extends outward from the side of the probe tip, it is necessary
to remove all conductive material from around the tip as shown in Figure 2-2. If this is not done,

14 mm Proximity Transducer System 7200 Series Installation Manual
6
false information will be generated. Side view can be avoided by proper gapping of the probe or by
removing conductive material by counterboring.
Figure 2-2. Proper Probe Tip Side Clearance
Brackets or other structural members used to mount probes must be rigid. When using a mounting
bracket, it should be field checked for resonant frequency. The resonant frequency should be at least
ten times machine running speed. Brackets must support the probe in a position perpendicular to the
observed surface. The probe axis can vary 15 degrees from perpendicular without affecting the
performance of the transducer system.
Probes may be mounted through existing machine hardware such as the bearing cover of a machine
case. Many times it is advantageous to use an external mounting adapter, allowing the probes to be
removed and replaced, or gapped again without taking the machine apart. For more information on
mounting brackets and adapters, contact your nearest Bently Nevada office for information on
transducer accessories.

Section 2 - INSTALLATION
7
2.4 PROBE INSTALLATION
Perform the following procedure to assure proper probe installation. The observed surface must
remain motionless while gapping the probe. The probe can be gapped mechanically or electrically.
Use either steps a and b or steps a and c.
a. Before installing the probe into its mounting hole, ensure the tapped hole is free of foreign
material. If necessary, use an appropriate tap to clean the threads. Before the probe is threaded,
disconnect the probe integral cable from the Proximitor or make sure it is free to turn to prevent
twisting the lead.
b. The probe can be gapped mechanically. Thread it into the mounting and use a nonmetallic
feeler gauge to set the gap. A nonmetallic feeler gauge must be used to prevent scratching of
the probe tip or the observed surface.
Figure 2-3. Gap Indications During Mounting

14 mm Proximity Transducer System 7200 Series Installation Manual
8
c. The probe can also be gapped electrically by connecting the probe cable to the Proximitor (see
CAUTION below). Apply the proper input voltage (-18 Vdc or -24 Vdc) to the Proximitor.
Connect a digital multimeter to the Proximitor output. Thread the probe into the mounting, and
observe the transducer output voltage. As the probe is threaded, the transducer output voltage
remains low or gives a false reading because it is sensing the surrounding mounting material.
See Figure 2-3. As the probe tip extends through the mounting, the transducer output voltage
will increase to its maximum output and then decrease as it approaches the observed surface.
By cross-referencing this voltage with the probe calibration curve in Appendix C, the proper
gap can be set.
d. When the probe is properly gapped, secure it by tightening the jam nut (locknut). Care should
be taken so the jam nut is not secured so tightly the threads are stripped.
CAUTION
Remember, to prevent twisting, disconnect the probe from the
Proximitor when threading the probe. Reconnect it to take readings.
Axial position probes should be gapped when the machine is not
running so that the rotor can be placed at a known position with
respect to the clearances in the thrust bearing.
After the probe is secured in position, the probe cable must be securely fastened to prevent fatigue
failure caused by oil flow, moving air, or singular stress conditions. A clip or cable holding device
will work as long as it does not exert enough force on the cable to cause the FEP insulation to cold
flow. Cold flow is change in dimension or distortion caused by the sustained application of force.
Sometimes it is necessary to seal around the probe cable. Sealing creates a special problem, because
the cable is insulated with FEP which will cold flow and cannot be subjected to high pressure
exerted by some gland seals. If the pressure differential across the seal area is one atmosphere or
less, a simple seal (such as duct seal putty) can be used. If the differential pressure is greater than
one atmosphere, a special probe must be used. Contact your nearest Bently Nevada office for more
information.
Before the probe is installed, make sure its electrical length is equal to the electrical length required
by the Proximitor.
Before routing the cable, insert an identification label (provided by the user) under the clear FEP
sleeve at the end of the cable, if desired. Secure the label by applying heat to shrink the tubing. The
heat source should not exceed 300° F (149° C).

Section 2 - INSTALLATION
9
The cable should be routed inside conduit connected to the enclosure which contains the Proximitor.
Where the cable is installed in a conduit, care must be taken not to rub or cut the cable on sharp or
rough surfaces. Protect the connector from contamination by covering or taping prior to pushing
through the conduit.
If it is undesirable or not possible to route the cable inside conduit, armored cable should be used.
Use clips or similar devices to secure the armored cable to supporting surfaces. Route the cable
through protected areas to reduce the chance of physical abuse. The armor should be terminated at
the Proximitor enclosure.
If the connector on the cable ever needs replacement, check with Bently Nevada Corporation for
installation procedures, connector part numbers, and the required tools.
2.5 PROXIMITOR INSTALLATION
The Proximitor should be mounted in an enclosure that provides protection from mechanical damage
and contamination. Weatherproof sheet metal or explosion-proof cast-aluminum housings provide
optimum protection from mechanical damage and undesirable climatic conditions. In corrosive or
solvent environments, the enclosure should be purged with clean, dry compressed air or inert gas to
protect the Proximitor. The protective enclosure should be free of material such as loose metal parts
that could short-circuit Proximitor terminals. Excess cable and uninsulated armor must be secured
away from Proximitor terminals. The excess cable, for example, can be secured with clamps to the
enclosure lid or housing wall.
Bently Nevada Corporation recommends placing as many Proximitors as possible in the same
protective enclosure, provided that all can be installed without altering the electrical length of the
probe-to-Proximitor cabling. Enclosing multiple Proximitors decreases installation costs and
simplifies the routing of cables from the Proximitors to the monitors. Check with the nearest Bently
Nevada Corporation office for information on available Proximitor housings.
Before installing power and signal connections, make sure the Proximitor supply voltage is within a
range of -17.5 Vdc to -26 Vdc, referenced to supply common. The exact voltage depends on the
requirements of the monitor being used with the system. When used with a -24 Vdc power source,
the 14 Millimetre Proximity Transducer System offers a linear range of approximately 160 mils
(4.06 mm). As the power source decreases (-18 Vdc for instance) there is a decrease in the linear
range. See Appendix C.
Field wiring from the Proximitor to the monitor is generally provided by the user unless a specific
request is made to have Bently Nevada Corporation do the fabrication. Shielded three-wire cable
should be used.
Proper isolation and shield grounding ensures that a minimum amount of noise will be induced in
the signal conductor. Bently Nevada Corporation recommends electrically isolating all Proximitors.
The Proximitor protective housings manufactured by Bently Nevada Corporation can be ordered to

14 mm Proximity Transducer System 7200 Series Installation Manual
10
include the isolation kits. For retrofit and conversion situations, Bently Nevada Corporation offers a
Proximitor Isolation Kit (BNC P/N 19094-01).
The probe is internally isolated to provide shield isolation at the probe end. The probe cable shield
is physically connected to the Proximitor case which is isolated with FEP insulation. Figure 2-4
shows the field wiring and shield grounding connections made to 7000, 7200, and 9000 Series
monitors.
The shield of each field wiring cable should be earth grounded at only one end; the other end should
not be grounded. All shields of field wiring connected to the monitors in the same rack should
connect to the same earth ground to avoid ground loops. If safety barriers are not used in the field
wiring, each monitor-end shield connects to the COM terminal of the respective rack signal module.
The signal module COM terminals are connected to ground by a user-installed jumper wire
connecting a specific remote reset terminal (common) to the earth ground. If safety barriers are
used, shields are connected to the earth ground bus, and the jumper wire between the remote reset
terminal and earth ground must not be installed.

Section 2 - INSTALLATION
11
Figure 2-4. Field Wiring and Shield Grounding for 7000, 7200, and
9000 Series Monitors

14 mm Proximity Transducer System 7200 Series Installation Manual
12
3. MAINTENANCE
3.1 INTRODUCTION
This section contains calibration and troubleshooting procedures. The recommended maintenance
equipment is given in Table 3-1. If the recommended equipment is not available, equivalent
instruments can be used. Any maintenance performed by the user, other than that which is specified
herein, may void the warranty.
Table 3-1. Recommended Maintenance Equipment
MAINTENANCE EQUIPMENT
RECOMMENDED EQUIPMENT
Digital Multimeter
Test and Calibration Kit
Variable Resistor
Soldering Iron
Power Supply
Hewlett-Packard Model 3465 A/B
Bently Nevada Corporation Model TK3-2E or
TK3-2G
0 to 10k ohms
Weller Model SP23
Hewlett-Packard Model 6215A
3.2 CALIBRATION CHECK
Successful completion of the following procedure assures proper transducer calibration.
a. Connect test equipment as shown in Figure 3-1.
b. Adjust the spindle micrometer on the TK3 test and calibration kit until it indicates 20 mils (0.51
mm).
c. Insert the probe into the TK3 probe holder. Adjust the probe in the holder until the digital
multimeter indicates -2.00 ±0.01 Vdc and tighten the probe in the fixture. Do not contact the
probe tip.

APPENDIX A
13
Figure 3-1. Test Equipment Setup
d. Adjust the micrometer to a 15 mil (0. 38 mm) indication, then back to a 20 mil (0. 51 mm)
indication and record the output voltage. Going to the 15 mil (0. 38 mm) indication first will
eliminate any play in the micrometer before taking the 20 mil reading.
e. Increase the gap in 20 mil increments by adjusting the micrometer. Record the voltage
indication at each increment.
f. Either plot each voltage indication obtained in step e or compare each to the desired calibration
curve in Appendix C.
g. If the transducer is out of tolerance (refer to the specifications), recalibrate.

14 mm Proximity Transducer System 7200 Series Installation Manual
14
3.3 RECALIBRATION
Perform the following procedure to recalibrate the transducer.
a. Remove the protective assembly from the calibration resistor on the Proximitor (use a
screwdriver to pry away the outer barrier). Desolder and remove the calibration resistor (see
Figure 3-1).
b. Attach the variable resistor between the calibration resistor terminals.
c. Perform the calibration check (Page 3-1) and adjust the variable resistor as appropriate until the
desired calibration curve is obtained.
NOTE
Increasing the resistance between the calibration terminals will
decrease the Proximitor output voltage and slope of the calibration
curve; decreasing the resistance will cause the Proximitor output
voltage and slope of the calibration curve to increase.
d. When the desired average scale factor is obtained, remove the variable resistor from the
calibration terminals and use the digital multimeter to measure its resistance. Select a 1%
tolerance resistor (or two in parallel) equal to the measured resistance of the variable resistor.
e. Solder the resistor(s) between the calibration terminals.
CAUTION
To prevent damage to components, do not leave the soldering iron in
contact with the Proximitor terminals too long.
f. Remove the room-temperature vulcanizing compound from the epoxy fiberglass shroud.
g. Install the shroud over the calibration resistor(s) and encapsulate with room-temperature
vulcanizing compound that does not have an acid base.
3.4 TROUBLESHOOTING
The troubleshooting procedure in Table 3-2 helps the user interpret and isolate faults in an installed
transducer system. Before beginning the procedure, ensure the system has been installed correctly
and all connectors have been secured properly in the correct locations.
When a malfunction occurs, locate the fault indication in the left-hand column of Table 3-2. Then,
refer to the center column which lists the probable causes for each fault indication, and the right-
hand column which lists the procedure to isolate and correct the fault. Use a digital multimeter to
perform voltage and resistance measurements.

APPENDIX A
15
Table 3-2. Fault Isolation and Correction
FAULT INDICATION PROBABLE CAUSE ISOLATION AND CORRECTION
Voltage between Prox. COM
and VTterminals not within
range of -17.5 to -26 Vdc.
1. Faulty power source.
2. Faulty wiring between power
source and Proximitor.
Disconnect output wiring from power source. Measure power source output
voltage. If not within range of -17.5 to -26 Vdc, replace the power source.
If power source output voltage is within range of -17.5 to -26 Vdc, fault
exists in wiring between power source and Proximitor or in the Proximitor.
Reconnect wiring at power supply and disconnect at Proximitor. If voltage
at wire terminals which connect to Proximitor is not correct, replace faulty
wiring. If voltage is correct, replace Proximitor.
Voltage between Prox.
OUTPUT and COM
terminals remains at zero
volts.
1. Short circuit in field wiring or
instrument connected to Proximitor
OUTPUT terminal.
2. Faulty Proximitor.
Disconnect wiring from Proximitor OUTPUT terminal. Remeasure voltage
between Proximitor OUTPUT and COM terminals. If a voltage other than
zero is measured, replace field wiring or instrument that was connected to
Proximitor OUTPUT terminal. If voltage is zero, replace Proximitor.
Voltage between Prox.
OUTPUT and COM
terminals remains at more
than zero and less than 1
volt.
1. Short circuit in probe.
2. Short circuit in probe cable.
NOTE: A gap of less than 10 mils
between the probe tip and observed
surface could cause an indication like
a short circuit.
Disconnect cable from Proximitor. Remeasure voltage between Proximitor
OUTPUT and COM terminals. If unchanged, replace Proximitor. If within
a few volts of the voltage between Proximitor COM and VTterminals, a
short circuit exists in probe cable. Clean probe cable connector with solvent
such as Freon. Reconnect probe lead to Proximitor. Remeasure voltage
between Proximitor OUTPUT and COM terminals. If still zero volts,
replace the probe.
Voltage between Prox.
OUTPUT and COM
terminals remains within a
few volts but is not identical
to the voltage between COM
and VTterminals.
1. Faulty Proximitor
2. Open circuit in probe. NOTE: A
gap between the probe tip and
observed surface that is too large for
the transducer to measure could cause
an indication similar to an open probe
circuit.
Disconnect probe cable from the Proximitor. Using a small piece of wire,
short the center pin to the outer shell of the coaxial connector on the
Proximitor and remeasure the output voltage. If the voltage is not 0.6 to 0.8
volts, replace the Proximitor. If the voltage is between 0.6 and 0.8 volts, an
open circuit exists in the probe. Using the DMM set to the resistance
function, measure the outer conductor and the inner conductor of the probe.
Normal resistance of the probe measured center to outer is 3 to 9 ohms.
Replace faulty probe.
Voltage between Prox.
OUTPUT and COM
terminals remains identical
to voltage between COM
and VTterminals.
1. Short circuit in wiring between
Proximitor OUTPUT and VT
terminals.
2. Faulty Proximitor.
Remove wiring from Proximitor OUTPUT terminal. Remeasure voltage
between Proximitor OUTPUT and COM terminals. If voltage is less than
supply, a short circuit exists in wiring between Proximitor OUTPUT and VT
terminals. If voltage is unchanged, replace Proximitor.
Table of contents
Other GE Transducer manuals
Popular Transducer manuals by other brands

K&K Sound
K&K Sound PURE CLASSIC product manual

Garmin
Garmin GT12M-THF installation instructions

S+S Regeltechnik
S+S Regeltechnik RTM-CO2-2S Operating Instructions, Mounting & Installation

S+S Regeltechnik
S+S Regeltechnik THERMSGARD RGTM2 Series Operating Instructions, Mounting & Installation

controlair
controlair 500-BD Installation, operation and maintenance instructions

gtm
gtm KTN-LF Series operating manual