GE 165D4700P385 User manual

Safety Instructions . . . . . . . . . . . . . .2–3
Operating Instructions
Compacting . . . . . . . . . . . . . . . . . . . . . . . . . . . .6
Features . . . . . . . . . . . . . . . . . . . . . . . . . . . . . . . .4
Loading . . . . . . . . . . . . . . . . . . . . . . . . . . . . . . . .5
Removing a Full Trash Bag . . . . . . . . . . . . .6
Trash Bag Installation . . . . . . . . . . . . . . . . . .5
Using the Trash Compactor . . . . . . . . .5–6
Care and Cleaning
Cleaning the Unit . . . . . . . . . . . . . . . . . . . . . . .7
Troubleshooting Tips . . . . . . . . . . . . . 8
Consumer Support
Consumer Support . . . . . . . . . . . . . . . . . . . 12
Product Registration
for Customers in Canada . . . . . . . . . . 9, 10
Warranty . . . . . . . . . . . . . . . . . . . . . . . . . . . . . 11
GEAppliances.com
GCG1500
GCG1580
GCG1700
165D4700P385 49-55061-1 09-09 JR
Write the model and serial
numbers here:
Model # ______________
Serial # ______________
You can find them on the label
on the front of the frame.
Trash Compactors
Owner’s Manual

IMPORTANT SAFETY INFORMATION.
READ ALL INSTRUCTIONS BEFORE USING.
WARNING!
For your safety, the information in this manual must be followed to minimize the risk of fire or
explosion, electric shock, or to prevent property damage, personal injury, or death.
This compactor is for household use only. Use
this appliance only for its intended
purpose as
described in this Owner’s Manual.
Close supervision is necessary when any
appliance is operated near children. Do not
allow the compactor to be used as a toy, or to
run unattended at any time.
CHILD LOCK-OUT INSTRUCTIONS: Turn
the knob to OFF and remove it when not
compacting trash. This will help prevent
anyone from tampering with the compactor
or children from operating it.
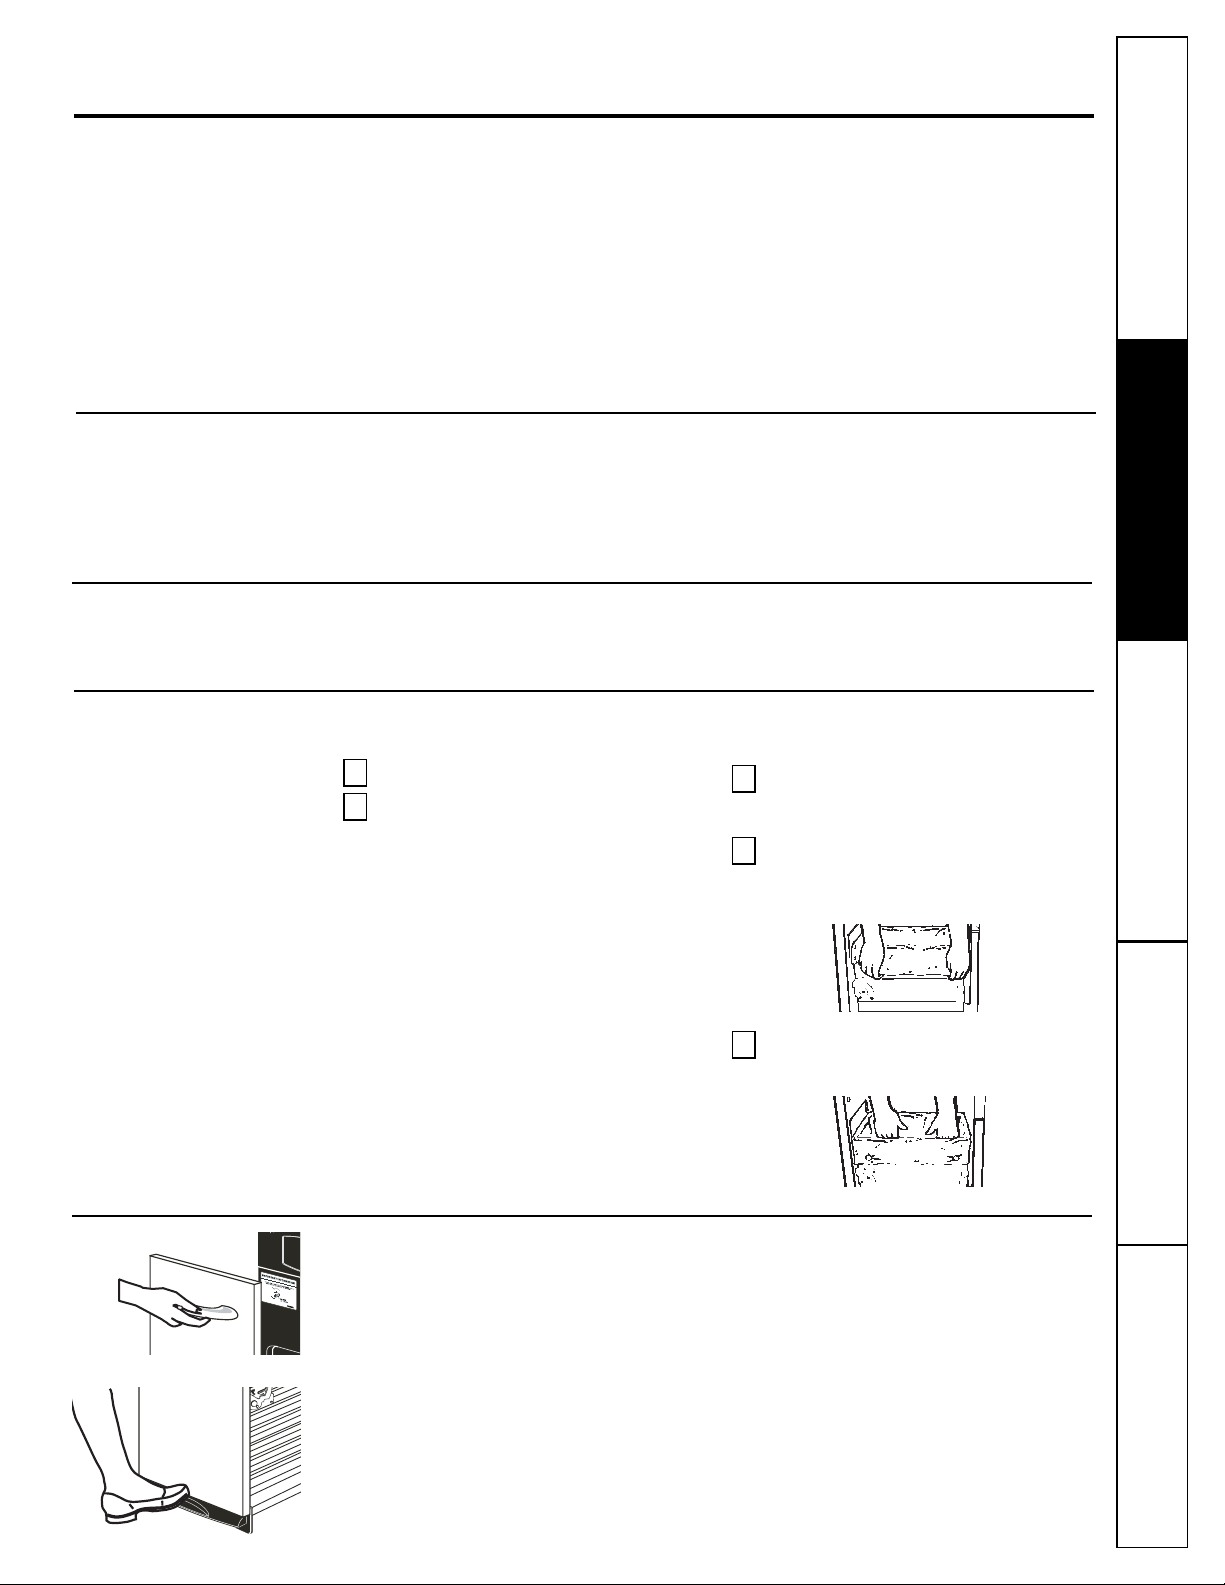
Do not push trash into the drawer with hands
or feet. Trash might contain broken glass,
sharp pieces of metal, or other sharp objects
that might cause injury.
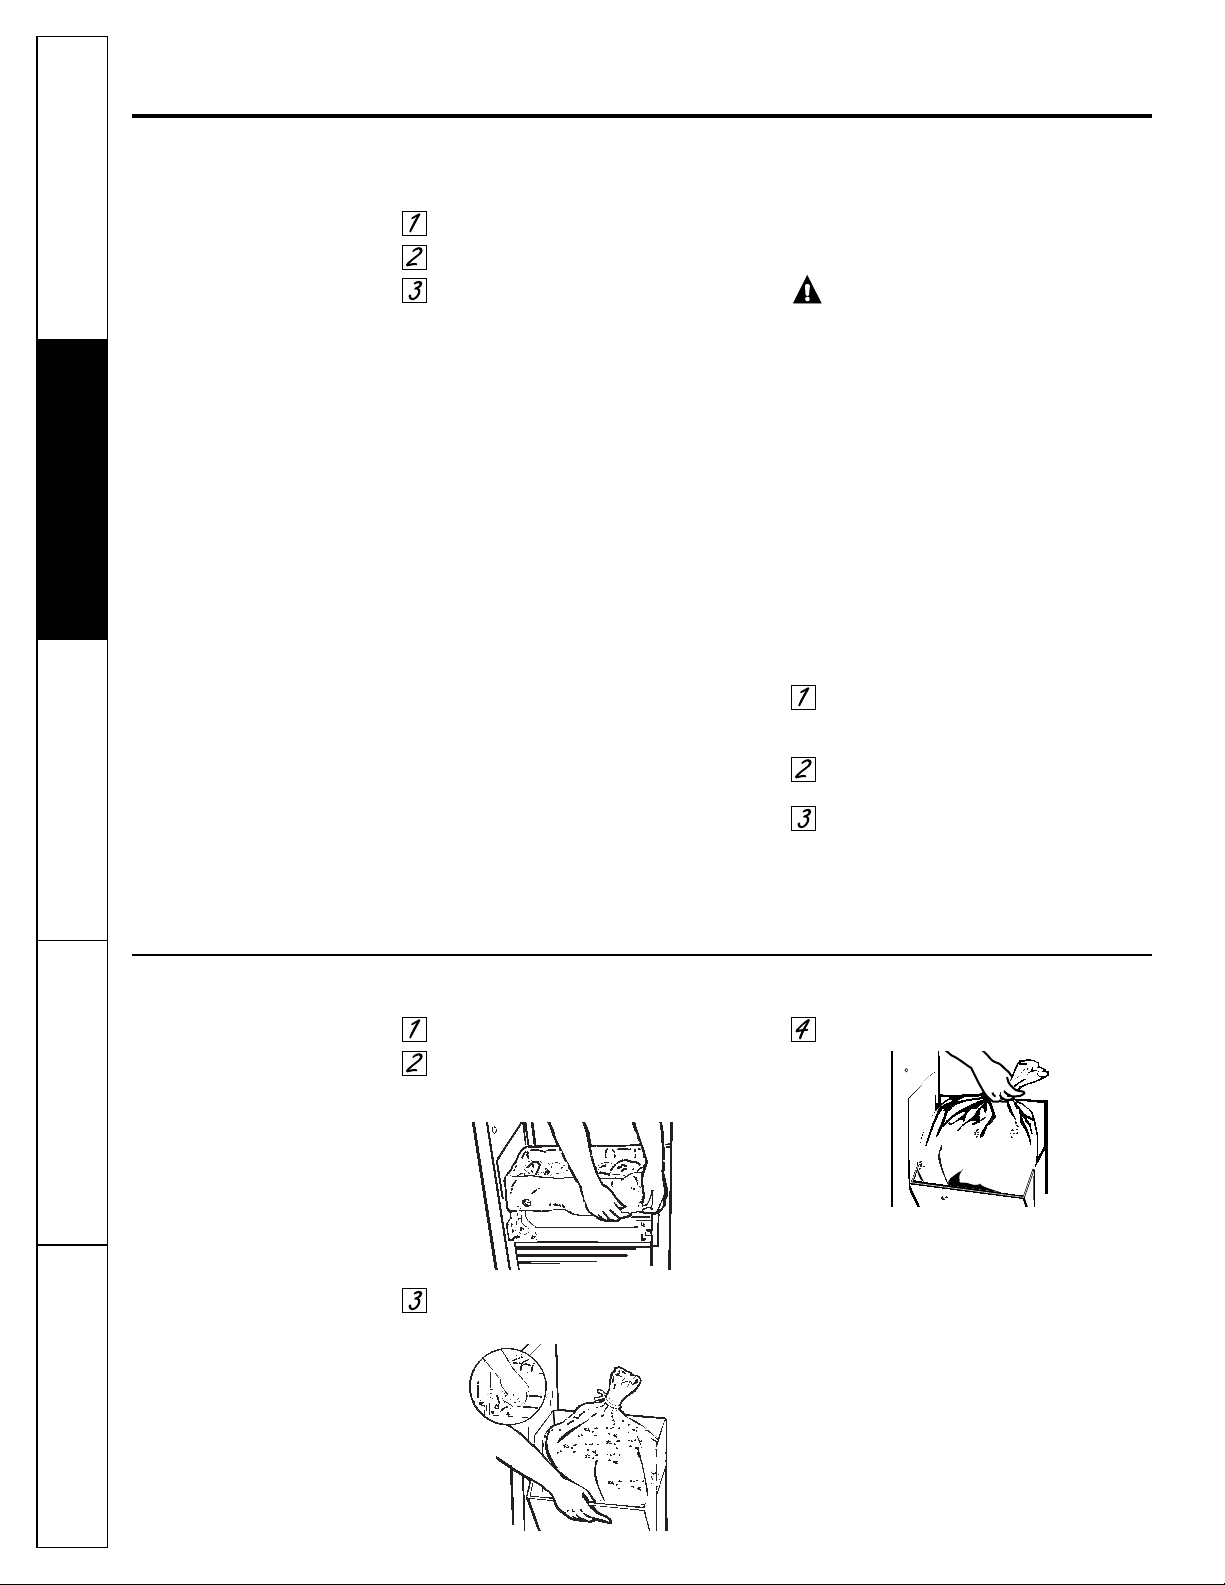
When removing or carrying the trash bag,
keep the bag away from your body. Sharp
objects may have pierced it.
Be careful when cleaning the inside of the
cabinet or trash drawer. Glass fragments may
be stuck to the ram, imbedded in the drawer
surface or lying in the bottom of the cabinet.
Do not install or store compactor where it will
be exposed to outside conditions.
Make sure the compactor is properly installed
and leveled on a floor that can support its
weight.
Do not touch moving parts.
Do not compact food waste such as raw meat
and fish, rinds, personal hygiene items and
disposable diapers. These items create very
strong odors and should not go into the
compactor.
Do not use as a freestanding unit. Use only as
a built-in unit.
PRECAUTIONS AGAINST UNREASONABLE USE
OF YOUR COMPACTOR:
Never compact shotgun shells, cartridges for
firearms, fireworks, etc., which are highly
explosive.
Never compact flammable materials such as
paint, oil- or gasoline-saturated rags, engine
starting fluid cans, paint thinner cans, etc.—
spontaneous combustion or explosive vapor
concentrations could occur.
Never compact containers of toxic chemicals
such as strong insecticides or other poisonous
materials—compaction could release
hazardous fumes.
Never compact aerosol cans containing
explosive or highly toxic chemicals. (If
you are sure the aerosol cans contain
non-hazardous materials such as shaving
cream, cheese spread and whipped cream,
they may be compacted.)
Do not compact lit cigarettes, cigars, or other
hot or burning items.
Do not store or use gasoline or other
flammable vapors and liquids in the vicinity of
this or any other appliance.
Do not overload your appliance.
Handle a loaded trash bag with care. Sharp
objects can pierce the bag and cause injury.
Do not overload trash bag with heavy
material such as glass.
SAFETY PRECAUTIONS
2
Operating Instructions Safety Instructions
Care and Cleaning
Troubleshooting Tips
Consumer Support
When using electrical appliances, basic safety precautions should be followed, including the following:

Consumer SupportOperating Instructions
Safety Instructions Care and Cleaning Troubleshooting Tips
3
GEAppliances.com
When using electrical appliances, basic safety precautions should be followed, including the following:
To prevent hazard of electrical shock,
this compactor must be properly installed and
grounded in accordance with the Installation
Instructions before it is used.
Do not operate with a damaged cord set,
plug, motor, or after damage in any manner.
Have the appliance examined, repaired, or
adjusted by an authorized service technician.
Do not take apart this appliance. Incorrect
reassembly can cause electric shock when
subsequently used.
Unplug the compactor before making any
repairs. NOTE: We strongly recommend that
any servicing be performed by a qualified
person.
Do not use an adapter plug or an extension
cord with this appliance.
Follow National Electric Codes or prevailing
local codes and ordinances. This appliance
must be supplied with 120V, 60Hz and
connected to an individual, properly grounded
branch circuit protected by a 15 or 20 amp
circuit breaker or time delay fuse.
If the electric supply provided does not meet
the above requirements, call a licensed
electrician.
We recommend that a separate circuit
serving only this appliance be provided.
Do not, under any circumstances, cut or
remove the third grounding prong from the
power cord.
This appliance must be grounded. In the event
of a malfunction or breakdown, grounding will
reduce the risk of electric shock by providing
a path of least resistance for electric current.
This appliance is equipped with a cord having
an equipment grounding conductor and a
grounding plug. The plug must be plugged
into an appropriate outlet that is properly
installed and grounded in accordance with
local codes and ordinances.
WARNING: Improper connection of
the equipment grounding conductor can result
in a risk of electric shock. Check with a qualified
electrician if you are in doubt as to whether the
appliance is properly grounded.
Do not modify the plug with this appliance. If
it will not fit the outlet installed, have a proper
outlet installed by a qualified electrician.
ELECTRICAL SAFETY
READ AND FOLLOW THIS SAFETY INFORMATION CAREFULLY.
SAVE THESE INSTRUCTIONS
PROPER INSTALLATION AND MAINTENANCE
This compactor must be properly installed and located in accordance with the Installation Instructions
before it is used. If you did not receive an Installation Instruction Manual, you can receive one by visiting
GEAppliances.com, or by calling 800.GE.CARES (800.432.2737) in the United States. In Canada, visit
www.GEAppliances.ca or call 1.800.561.3344.

About the trash compactor.
Features
DRAWER HANDLE
DOOR PANEL
FOOT PEDAL DRAWER OPENER AND
COMPACTOR ACTIVATION
TOE KICK
ON/OFF KNOB
DRAWER SAFETY SWITCH
MODEL AND SERIAL NUMBER LABEL
BAG RETAINER BUTTONS
MOVEABLE SIDE DOOR LATCH
4
Operating Instructions Safety Instructions
Care and Cleaning
Troubleshooting Tips
Consumer Support

Consumer Support
Care and Cleaning Troubleshooting Tips
Operating Instructions
Safety Instructions
Using the trash compactor. GEAppliances.com
What It Does and How It Works
Your compactor reduces household trash to as little as one-fourth of its original volume.
It compacts most refuse, including paper, cans, bottles, jars, plastic containers, wrappings,
sweepings and some food wastes.
Drop trash into the disposable bag (designed for compactor use) that lines the compactor
trash drawer and close the drawer. When you start the compactor, an electrically-operated
ram moves down into the drawer, compacts trash, moves back up again—and the compactor
shuts off automatically.
NOTE: The trash drawer must be at least 1/2 full before you will notice compaction because
the ram does not travel all the way down into the drawer. By adding trash, compaction is
transferred to the items below until all trash is compacted.
ON/OFF Knob
The removable knob is provided for your
protection as a safety measure. When the
knob switch is in the OFF position, the
compactor will not operate.
Child Lockout Instructions:
Lock the compactor when it is not in use, by
removing the knob. This will keep children
from operating the compactor and prevent
anyone from tampering with it.
Drawer Safety Switch
The compactor has two safety switches to ensure that the drawer is in its fully closed position
for operation. The compactor will not cycle without the drawer being fully closed.
Trash Bag Installation
Before installing a new bag, be sure that:
The drawer side is securely locked.
The container is clean and free of sharp
debris that may puncture the bag.
Reinforced plastic bags came with your
compactor and are ready to be installed.
You must use the specially designed
heavy-duty trash bags included with your
compactor. These bags are available from
your dealer or Factory Service Center. Ask for
catalog number WC60X10005.
To order bags, call toll-free:
National Parts Center 800.626.2002 (U.S.)
800.661.1616 (Canada)
GEAppliances.com (U.S.)
www.GEAppliances.ca (Canada)
To install a new bag:
Place the bag into the drawer. Open
the bag and pull the top edges over
the drawer top.
Lock the bag in place by pulling the
four prepunched holes over the bag
retainer buttons. Holes will expand over
the buttons without harming the bag.
Press inside of bag against the
drawer bottom, sides and corners
for a smooth fit.
3
2
1
2
1
Loading
Slightly lift and pull the compactor door
handle or press the foot pedal and pull
the drawer out.
Remember:
To help keep the ram clean when
compacting messy food waste, place a
couple of folded sheets of newspaper
on top of the load to be compacted.
Items too bulky to go into the drawer can
be folded to fit. If it cannot be folded to fit
into the drawer, do not attempt to force it.
Folded newspaper is also helpful when
compacting a large glass bottle, or several
bottles or jars, or any other items that
might shatter.
Although it is not necessary to compact
until the drawer is full or nearly full, we
suggest that, for maximum compaction,
you start the compactor each time a
significant amount of trash is added.
5

Using the trash compactor.
Compacting
To start the compactor:
Turn the knob to ON.
Make sure the drawer is fully closed.
Lift the foot pedal up to start cycle.
The ram travels downward into the drawer,
compacting the trash. At the bottom of the
stroke, the ram automatically reverses
direction, retracts out of the drawer, returns
to its starting position, and the compactor
shuts off automatically.
The cycle takes less than 30 seconds. As the
trash drawer fills with trash, cycle time gets
progressively shorter.
NOTES:
You will not see compacting of trash the
first few times you load. The compactor
drawer should be about 1/2 full before
the compactor can begin to compress
the load.
Glass bottles can make a loud noise
when they break during compaction. This
is normal. Also, bottles in the trash drawer
will not always break during the first cycle.
Breaking glass and associated noise may
occur several cycles later, depending on
the type and volume of the trash.
When bottles and cans are compacted,
small tears in the bag may occur. This
is normal and in no way affects the
performance of the compactor. Keep
the bag away from your body to prevent
injury from sharp objects that may have
pierced the bag.
CAUTION:
Do not apply too much force when
turning the knob. The knob should always
rotate easily. Forcing may break the knob
and damage the switch.
When emptying waste baskets into the
trash drawer, some items may spill into
the compactor behind the drawer. Items
behind the drawer could prevent it from
closing completely and prevent the
compactor from operating. To remove
such items from behind the drawer, open
the drawer and remove it to clean them
out. See the Care and Cleaning section.
To stop the compactor:
The compactor may be stopped at any time.
Attempting to open the drawer while
the ram is moving will stop the ram.
The safety switch will activate.
Close the drawer completely and the
ram will travel back to the UP position.
Open the drawer fully and turn the knob
to OFF.
6
Operating Instructions Safety Instructions
Care and Cleaning
Troubleshooting Tips
Consumer Support
Removing a Full Trash Bag
Pull the drawer completely open.
Remove the top of the bag from the
bag retainer buttons. Pull up all four
bag cuffs.
Push the side-lock latch down and tilt
the drawer side open.
Lift the bag out.

Consumer SupportTroubleshooting TipsOperating Instructions
Safety Instructions Care and Cleaning
7
Care and cleaning of the compactor. GEAppliances.com
As is true of most appliances, proper care is needed to give you continued satisfaction. Before cleaning the compactor,
turn the knob to the OFF position and remove it. If you will be away for more than a couple of days, remove the
compactor bag. Lock the compactor by removing the knob and store it in a safe place.
Cleaning the Unit
To clean the outside:
Wipe with a clean damp cloth.
Painted panels:
Apply a coat of kitchen/appliance wax when
the compactor is new, and then several times
a year.
Stainless steel panels:
Stainless steel panels can be cleaned with
Cerama Bryte®or a similar product using a
clean, soft cloth.
Cerama Bryte is available from GE Parts by
calling 800.626.2002 (U.S.) or 800.661.1616
(Canada).
To clean the drawer interior:
Remove the bag. See page 6.
Wear protective gloves. There may be
bits of glass in the drawer. Press the
side door latch down.
Hold the side door latch and tilt
the side of the drawer until the latch
clears the drawer front. The drawer side
can be removed by tilting and sliding it
out.
Wash with a damp cloth using warm,
soapy water. Rinse and then dry with
a soft cloth.
If the drawer side was removed, slide it
back into the tilted position.
Press the side door latch down while
pressing the side to the upright position.
Lock the side door latch.
To clean the cabinet interior:
Pull the drawer out until it stops.
Note the tracks in which the drawer
rollers move.
Lift the front to clear the drawer stops.
Grab the drawer on both sides. Pull it out
the rest of the way and set it aside.
Vacuum inside of the cabinet. Liquid
spills or wet trash should be cleaned up
by hand, or use a vacuum designed to
pick up liquid.
Wash, rinse and dry the inside.

8
Operating Instructions Safety Instructions
Care and Cleaning
Troubleshooting Tips
Consumer Support
Before you call for service…
Troubleshooting Tips
Problem Possible Causes What To Do
Compactor won’t Compactor is unplugged •Make sure the cord is plugged securely into a
operate working outlet.
Circuit breaker/fuse is •Check house circuit breakers /fuses. Replace
tripped/blown fuses or reset breaker.
Knob switch may not be •Make sure the switch is in the ON position.
in the ON position
Foot pedal may not be lifted •Lift foot pedal up momentarily until compaction cycle
up long enough to start cycle starts.
Drawer may not be closed •Check to make sure the drawer is firmly closed.
Compactor has an automatic •If you have just compacted repeatedly, this protector
thermal motor reset may have opened the motor circuit. Wait a few
minutes and the motor reset will reclose
automatically.
Drawer is hard Trash may have fallen •Remove any trash.
to close behind the drawer
Drawer will not The ram is not all the •Lift up on the foot pedal and release to allow ram to
open way up complete a cycle.
Little or no apparent Drawer is not full •The drawer must be at least 1/2 full of trash before
compaction enough you will see any amount of compacting. The ram does
not travel all the way to the bottom. Trash in the bottom
of the drawer will be crushed during later cycles.
Trash is stuck between ram •Remove any trash.
and basket

9
OWNERSHIP REGISTRATION
P.O. BOX 1780
MISSISSAUGA, ONTARIO
L4Y 4G1
(FOR CANADIAN CONSUMERS ONLY)
Please place in envelope and mail to:
Veuillez mettre dans une enveloppe et envoyez à :

10

11
Consumer SupportTroubleshooting TipsOperating Instructions
Safety Instructions Care and Cleaning
Trash Compactor Warranty.
All warranty service provided by our Factory Service Centers,
or an authorized Customer Care®technician. To schedule
service on-line, visit us at GEAppliances.com, or call 800.GE.CARES
(800.432.2737) in the United States. In Canada, call
1.800.561.3344. Please have serial number and model
number available when calling for service.
For The Period Of: GE Will Replace:
One Year Any part of the compactor which fails due to a defect in materials or workmanship.
From the date of the During this limited one-year warranty, GE will also provide, free of charge, all labor
original purchase and in-home service to replace the defective part.
Service trips to your home to teach you how to use
the product.
Improper installation, delivery or maintenance.
Failure of the product if it is abused, misused, or used for
other than the intended purpose or used commercially.
Replacement of house fuses or resetting of circuit
breakers.
Damage to the product caused by accident, fire, floods
or acts of God.
Incidental or consequential damage caused by possible
defects with this appliance.
Damage caused after delivery.
Product not accessible to provide required service.
What GE Will Not Cover:
This warranty is extended to the original purchaser and any succeeding owner for products purchased for
home use within the USA or Canada. If the product is located in an area where service by a GE Authorized
Servicer is not available, you may be responsible for a trip charge or you may be required to bring the product
to an Authorized GE Service location for service. In Alaska, the warranty excludes the cost of shipping or
service calls to your home.
Some states do not allow the exclusion or limitation of incidental or consequential damages. This warranty
gives you specific legal rights, and you may also have other rights which vary from state to state. To know
what your legal rights are, consult your local or state consumer affairs office or your state’s Attorney General.
Warrantor (USA): General Electric Company. Louisville, KY 40225
Warrantor (Canada): Mabe Canada Inc., Suite 310, 1 Factory Lane, Moncton, N.B. E1C 9M3
Staple your receipt here.
Proof of the original purchase
date is needed to obtain service
under the warranty.
EXCLUSION OF IMPLIED WARRANTIES—Your sole and exclusive remedy is product repair as provided in
this Limited Warranty. Any implied warranties, including the implied warranties of merchantability or
fitness for a particular purpose, are limited to one year or the shortest period allowed by law.

Printed in China
Consumer Support.
GE Appliances Website In the U.S.A. GEAppliances.com
Have a question or need assistance with your appliance? Try the GE Appliances Website 24 hours a day,
any day of the year! For greater convenience and faster service, you can now download Owner’s Manuals,
order parts or even schedule service on-line. In Canada: www.GEAppliances.ca
Schedule Service In the U.S.A. GEAppliances.com
Expert GE repair service is only one step away from your door. Get on-line and schedule your service at your
convenience any day of the year! Or call 800.GE.CARES (800.432.2737) during normal business hours.
In Canada, call 1.800.561.3344
Real Life Design Studio In the U.S.A. GEAppliances.com
GE supports the Universal Design concept—products, services and environments that can be used by people of all
ages, sizes and capabilities. We recognize the need to design for a wide range of physical and mental abilities and
impairments. For details of GE’s Universal Design applications, including kitchen design ideas for people with disabilities,
check out our Website today. For the hearing impaired, please call 800.TDD.GEAC (800.833.4322).
In Canada, contact: Manager, Consumer Relations, Mabe Canada Inc.
Suite 310, 1 Factory Lane
Moncton, N.B. E1C 9M3
Extended Warranties In the U.S.A. GEAppliances.com
Purchase a GE extended warranty and learn about special discounts that are available while your warranty is still
in effect. You can purchase it on-line anytime, or call 800.626.2224 during normal business hours. GE Consumer Home
Services will still be there after your warranty expires. In Canada, call 1.888.261.2133
Parts and Accessories In the U.S.A. GEAppliances.com
Individuals qualified to service their own appliances can have parts or accessories sent directly to their homes
(VISA, MasterCard and Discover cards are accepted). Order on-line today, 24 hours every day or by phone at
800.626.2002 during normal business hours.
Instructions contained in this manual cover procedures to be performed by any user. Other servicing generally
should be referred to qualified service personnel. Caution must be exercised, since improper servicing may cause
unsafe operation.
Customers in Canada should consult the yellow pages for the nearest Mabe service center, or call 1.800.661.1616.
Contact Us In the U.S.A. GEAppliances.com
If you are not satisfied with the service you receive from GE, contact us on our Website with all the details including
your phone number, or write to: General Manager, Customer Relations
GE Appliances, Appliance Park
Louisville, KY 40225
In Canada: www.GEAppliances.ca, or write to: Director, Consumer Relations, Mabe Canada Inc.
Suite 310, 1 Factory Lane
Moncton, N.B. E1C 9M3
Register Your Appliance In the U.S.A. GEAppliances.com
Register your new appliance on-line—at your convenience! Timely product registration will allow for enhanced
communication and prompt service under the terms of your warranty, should the need arise. You may also mail
in the pre-printed registration card included in the packing material. In Canada: www.GEAppliances.ca
12

Mesures de sécurité . . . . . . . . . . . . .2–3
Foncionnement
Compactage . . . . . . . . . . . . . . . . . . . . . . . . . . .6
Caractéristiques . . . . . . . . . . . . . . . . . . . . . . . .4
Chargement . . . . . . . . . . . . . . . . . . . . . . . . . . . .5
Retrait d’un sac
plein d’ordures ménagères . . . . . . . . . . . . .6
Installation du sac
d’ordures ménagères . . . . . . . . . . . . . . . . . .5
Utilisation du compacteur
pour ordures ménagères . . . . . . . . . . . .5–6
Entretien et nettoyage
Nettoyage de l’appareil . . . . . . . . . . . . . . . .7
Conseils de dépannage . . . . . . . . . . 8
Soutien au consommateur
Soutien au consommateur . . . . . . . . . . . 12
Inscription du propriétaire . . . . . . . . . 9, 10
Garantie . . . . . . . . . . . . . . . . . . . . . . . . . . . . . . 11
www.electromenagersge.ca
GCG1500
GCG1580
GCG1700
165D4700P385 49-55061-1 09-09 JR
Inscrivez ici les numéros
de modèle et de série :
Modèle N° ________________
Série N° __________________
Vous les trouverez sur l’étiquette
apposée sur la partie avant du
cadre de l’appareil.
Compacteurs
Manuel du propriétaire
pour ordures ménagères

MESURES DE SÉCURITÉ IMPORTANTES.
LISEZ D’ABORD TOUTES LES DIRECTIVES.
AVERTISSEMENT !
Pour votre sécurité, vous devez suivre l’information contenue dans ce manuel pour réduire les risques
d’incendie, d’explosion, de choc électrique ou pour éviter tout dommage matériel, des blessures ou
la mort.
Ce compacteur est réservé à l’utilisation
résidentielle. Utilisez cet appareil seulement
pour l’usage auquel il est destiné selon ce
manuel du propriétaire
.
Il faut une supervision étroite lorsque l’appareil
est utilisé par ou près d’enfants. Ne laissez
jamais le compacteur être utilisé comme jouet
ou fonctionner sans supervision.
VERROUILLAGE DES COMMANDES : Mettez
le bouton à la position OFF (arrêt) et retirez-le
lorsque vous ne faites pas de compactage
d’ordures ménagères. Cela empêchera toute
mauvaise utilisation du compacteur et
empêchera les enfants de l’utiliser.
Ne poussez pas les déchets dans le tiroir avec
les mains ou les pieds. Les déchets pourraient
contenir du verre cassé, des pièces de métal
tranchantes ou d’autres objets coupants qui
pourraient provoquer des blessures.
En retirant ou transportant le sac d’ordures
ménagères, gardez le sac loin de votre corps.
Les objets coupants peuvent l’avoir percé.
Attention en nettoyant l’intérieur de
l’armoire ou le tiroir à ordures ménagères.
Les fragments de verre pourraient être collés
au coulisseau, incrustés dans la surface du
tiroir ou au bas de l’armoire.
N’installez pas et ne rangez pas le compacteur
à un endroit où il sera exposé aux conditions
extérieures.
Assurez-vous que le compacteur est bien
installé et à niveau sur un sol qui peut
supporter son poids.
Ne touchez pas aux pièces mobiles.
Ne compactez pas de déchets alimentaires
comme de la viande crue et du poisson, des
couennes, des articles d’hygiène personnelle
et des couches jetables. Ces articles
produisent de très fortes odeurs et ne vont
pas dans le compacteur.
Ne l’utilisez pas comme appareil amovible.
Utilisez seulement comme appareil encastré.
PRÉCAUTIONS CONTRE L’UTILISATION
DÉRAISONNABLE DU COMPACTEUR :
Ne compactez jamais de cartouches à plomb,
de cartouches d’armes à feu, de pièces de feu
d’artifice, etc. qui sont très explosifs.
Ne compactez jamais de matériaux
inflammables comme peinture, chiffons
saturés d’huile ou d’essence, contenants de
liquides de démarrage à moteur, contenants
de diluant de peinture, etc. Il pourrait y
avoir une combustion spontanée ou des
concentrations de vapeurs explosives.
Ne compactez jamais les contenants de
produits chimiques toxiques comme des
insecticides forts ou autres matériaux
toxiques; le compactage pourrait dégager
des vapeurs dangereuses.
Ne compactez jamais d’aérosols contenant
des produits chimiques explosifs ou très
toxiques. (Si vous êtes certains que les
aérosols contiennent des matériaux non
dangereux comme la crème de rasage,
le fromage à tartiner et la crème fouettée,
ils peuvent être compactés.)
Ne compactez pas les cigarettes, les cigares
allumés ou autres articles chauds ou en feu.
Ne rangez et n’utilisez pas d’essence ou
autres vapeurs et liquides inflammables près
de cet appareil ou de tout autre appareil
électroménager.
Ne surchargez pas votre appareil
électroménager.
Manipulez un sac à poubelle plein avec soin.
Les objets pointus peuvent percer le sac et
vous blesser. Ne surchargez pas le sac à
poubelle de matières lourdes comme du verre.
PRÉCAUTIONS DE SÉCURITÉ
2
Fonctionnement Mesures de sécurité
Entretien et nettoyage
Conseils de dépannage
Soutien au
consommateur
En utilisant des appareils électriques, il faut toujours suivre les précautions de base, y compris ce
qui suit :

Soutien au
consommateur
Fonctionnement
Mesures de sécurité Entretien et nettoyage Conseils de dépannage
3
www.electromenagersge.ca
En utilisant des appareils électriques, il faut toujours suivre les précautions de base, y compris ce
qui suit :
Pour éviter tout danger de choc électrique,
ce compacteur doit être bien installé et mis
à la terre conformément aux instructions
d’installation avant de l’utiliser.
Ne faites pas fonctionner avec un cordon, une
fiche ou un moteur endommagés ou après
tout autre dommage. Faites examiner, réparer
ou ajuster l’appareil par un technicien de
service autorisé.
Ne démontez pas cet appareil. Un appareil
mal remonté pourrait provoquer un choc
électrique lors de son utilisation subséquente.
Débranchez le compacteur avant
toutes réparations. REMARQUE : Nous
recommandons fortement que toute
réparation soit exécutée par une personne
qualifiée.
N’utilisez pas une fiche d’adaptation ou
une rallonge électrique avec cet appareil.
Suivez les codes nationaux de l’électricité
ou les codes et ordonnances en vigueur
localement. Cet appareil doit être alimenté
d’un courant de 120 V, 60 Hz et branché à
un circuit exclusif mis à la terre correctement
et protégé par un disjoncteur de 15 ou
20 ampères ou un fusible temporisé.
Si l’alimentation électrique fournie ne répond
pas aux exigences précédentes, appelez
un électricien agréé.
Nous recommandons de prévoir un circuit
distinct pour cet appareil.
Ne coupez et ne retirez dans aucun cas
la troisième broche de mise à la terre du
cordon.
Cet appareil doit être mis à la terre. Dans le
cas de mauvais fonctionnement ou de panne,
la mise à la terre réduira le risque de choc
électrique en fournissant une voie de moindre
résistance pour le courant électrique.
Cet appareil est doté d’un cordon et d’une
fiche avec mise à la terre. La fiche doit être
branchée dans une prise appropriée
correctement installée et mise à la terre
conformément aux codes et règlements
locaux
.
AVERTISSEMENT : Toute
mauvaise connexion du conducteur de mise
à la terre de l’équipement pourrait mener à
un risque de choc électrique. Consultez un
électricien qualifié si vous n’êtes pas certain
que l’appareil soit bien mis à la terre.
Ne modifiez pas la fiche de cet appareil.
Si elle n’entre pas complètement dans
la prise, faites installer une prise appropriée
par un électricien qualifié.
SÉCURITÉ ÉLECTRIQUE
INSTALLATION ET ENTRETIEN APPROPRIÉS
Avant d’utiliser ce compacteur, il faut s’assurer qu’il a été correctement installé, en conformité avec
les directives d’installation fournies. Si vous n’avez pas reçu de directives d’installation, vous pouvez
les obtenir en visitant notre site Web à l’adresse GEAppliances.com ou en composant le 1.800.432.2737
(1.800.GE.CARES) aux États-Unis. Au Canada, visitez notre site Web www.electromenagersGE.ca ou
composez le 1.800.561.3344.
VEUILLEZ LIRE ET SUIVRE ATTENTIVEMENT CES MESURES
DE SÉCURITÉ.
CONSERVEZ CES DIRECTIVES

Le compacteur pour ordures ménagères.
Caractéristiques
POIGNÉE DE TIROIR
PANNEAU DE PORTE
OUVRE TIROIR À PÉDALE ET ACTIVATION
DU COMPACTEUR
PLINTHE
BOUTON ON/OFF (MARCHE/ARRÊT)
INTERRUPTEUR DE SÉCURITÉ DU TIROIR
EMPLACEMENT DES NUMÉROS DE
MODÈLE ET DE SÉRIE
BOUTONS DE RETENUE DU SAC
VERROU DE PORTE LATÉRALE AMOVIBLE
4
Fonctionnement Mesures de sécurité
Entretien et nettoyage
Conseils de dépannage
Soutien au
consommateur

Soutien au
consommateur
Entretien et nettoyage Conseils de dépannage
Fonctionnement
Mesures de sécurité
Utilisation du compacteur
pour ordures ménagères. www.electromenagersge.ca
Ce qu’il fait et comment il fonctionne
Votre compacteur réduit les ordures ménagères jusqu’à un quart de leur volume original.
Il compacte la plupart des déchets, y compris le papier, les cannettes, les bouteilles, les bocaux, les
contenants de plastique, les enveloppes, les restes de balayage et certains déchets alimentaires.
Déposez les déchets dans le sac jetable (conçu pour les compacteurs) à l’intérieur du tiroir d’ordures
ménagères du compacteur et fermez le tiroir. Lorsque vous allumez le compacteur, un coulisseau
électrique se déplace vers le bas dans le tiroir, compacte les ordures ménagères, remonte à
nouveau et le compacteur s’éteint automatiquement.
REMARQUE : Le tiroir à ordures ménagères doit être au moins rempli à moitié avant de noter le
compactage car le coulisseau ne se déplace pas jusqu’au fond du tiroir. En ajoutant des ordures,
la force de compression est transférée aux articles en dessous jusqu’à ce que tout soit compacté.
Bouton ON/OFF (marche/arrêt)
Le bouton amovible est fourni pour votre
protection comme mesure de sécurité. Lorsque
l’interrupteur du bouton est à la position OFF
(arrêt), le compacteur ne peut pas fonctionner.
Verrouillage des commandes :
Verrouillez le compacteur lorsqu’il n’est pas
utilisé en retirant le bouton. Cela empêchera les
enfants d’utiliser le compacteur ainsi que toute
autre utilisation abusive.
Interrupteur de sécurité du tiroir
Le compacteur a deux interrupteurs de sécurité
pour faire en sorte que le tiroir soit
complètement fermé lorsqu’il est en marche.
Le compacteur ne fonctionnera pas si le tiroir
n’est pas complètement fermé.
Installation du sac d’ordures ménagères
Avant d’installer un nouveau sac, assurez-
vous que :
Le côté du tiroir est bien verrouillé.
Le contenant est propre et libre de débris
tranchants qui pourraient percer le sac.
Des sacs de plastique renforcés sont fournis
avec votre compacteur et sont prêts à être
installés.
Vous devez utiliser les sacs d’ordures
ménagères robustes spécialement conçus
pour cet usage et inclus avec le compacteur.
Ces sacs sont disponibles chez votre
concessionnaire ou au centre de service de
l’usine. Demandez le numéro de catalogue
WC60X10005.
Pour commander des sacs, appelez sans frais au :
Centre national de pièces1.800.626.2002 (É.-U.)
1.800.661.1616 (Canada)
GEAppliances.com (É.-U.)
www.electromenagersge.ca (Canada)
Pour installer un nouveau sac :
Placez le sac dans le tiroir. Ouvrez le sac
et tirez les bords supérieurs par dessus
le dessus du tiroir.
Verrouillez le sac en place en accrochant
les quatre trous prépercés sur les boutons
de retenue du sac. Les trous s’élargiront sur
les boutons sans problème pour le sac.
Pressez l’intérieur du sac contre le bas
du tiroir, les côtés et les coins pour un
ajustement facile.
3
2
1
2
1
Chargement
Soulevez un peu et tirez la poignée de la porte
du compacteur ou enfoncez la pédale et sortez
le tiroir.
Rappel :
Pour aider à garder le coulisseau propre
en compactant des ordures ménagères
salissantes, placez quelques feuilles de
journaux pliées sur le dessus de la charge
à compacter.
Les articles trop gros pour entrer dans le tiroir
se replient pour s’ajuster dans le tiroir. Si ce
n’est pas possible, n’essayez pas de les forcer.
Les journaux repliés sont aussi utiles pour
compacter une grosse bouteille de verre ou
plusieurs bouteilles ou bocaux ou autres
articles qui pourraient éclater.
Bien qu’il ne soit pas nécessaire de
compacter jusqu’à ce que le tiroir soit plein
ou presque plein, nous suggérons, pour un
compactage maximum, d’utiliser l’appareil
chaque fois que vous ajoutez une quantité
importante de déchets.
5

Utilisation du compacteur pour ordures ménagères.
Compactage
Pour mettre en marche le compacteur :
Tournez le bouton à ON.
Assurez-vous que le tiroir est bien fermé.
Soulevez la pédale pour lancer le cycle.
Le coulisseau se déplace vers le bas
dans le tiroir, compactant les déchets.
À la fin de la course, le coulisseau change
automatiquement de direction, sort du tiroir,
revient à sa position de départ et le
compacteur s’éteint automatiquement.
Ce cycle prend moins de 30 secondes. Tandis
que le tiroir se remplit de déchets, la durée du
cycle diminue progressivement.
REMARQUES :
Vous ne verrez pas le compactage des
déchets les premières fois que vous
chargez. les premières fois que vous
chargez. Le tiroir du compacteur doit
être au moins rempli à moitié avant que
le compacteur commence à compacter
la charge.
Les bouteilles de verre peuvent faire un
bruit fort en se brisant lors du
compactage. C’est normal. De même, les
bouteilles dans le tiroir à ordures ne se
briseront pas toujours durant le premier
cycle. Le verre qui se brise et le bruit qui y
est associé peuvent se produire plusieurs
cycles plus tard selon le type et le volume
des déchets.
Lorsque les bouteilles et les cannettes
sont compactées, le sac pourrait se
déchirer un peu. Cela est normal et
n’affecte aucunement le rendement de
l’appareil. Gardez le sac loin de votre corps
pour éviter toute blessure d’objets coupants
qui pourraient avoir transpercé le sac.
MISE EN GARDE :
Ne pressez pas trop en tournant le
bouton. Le bouton devrait toujours tourner
facilement. Forcer pourrait briser le bouton
et endommager l’interrupteur.
En vidant les paniers de déchets dans le
tiroir à ordures, certains articles peuvent
tomber derrière le tiroir. Ces articles
pourraient empêcher le tiroir de se fermer
complètement et ainsi empêcher le
compacteur de fonctionner. Pour les retirer
de l’arrière du tiroir, ouvrez le tiroir et
retirez-le pour les enlever. Consultez
la section Entretien et nettoyage.
Pour arrêter le compacteur :
Le compacteur peut être arrêté en tout temps.
Essayer d’ouvrir le tiroir tandis que
le coulisseau se déplace arrêtera le
coulisseau. L’interrupteur de sécurité
s’activera.
Fermez entièrement le tiroir et le
coulisseau reviendra à la position vers
le HAUT.
Ouvrez entièrement le tiroir et tournez
le bouton à OFF (arrêt).
6
Fonctionnement Mesures de sécurité
Entretien et nettoyage
Conseils de dépannage
Soutien au
consommateur
Retrait d’un sac plein d’ordures ménagères
Ouvrez complètement le tiroir.
Retirez le dessus du sac des boutons
de retenue du sac. Poussez les quatre
revers du sac.
Poussez le verrou de côté vers le bas
et penchez le côté du tiroir pour ouvrir.
Sortez le sac avec le chariot du sac.

Soutien au
consommateur
Conseils de dépannageFonctionnement
Mesures de sécurité Entretien et nettoyage
7
Entretien et nettoyage du compacteur. www.electromenagersge.ca
Comme pour la plupart des appareils électroménagers, il faut un bon entretien pour une satisfaction continue. Avant de
nettoyer le compacteur, tournez le bouton à la position OFF (arrêt) et enlevez-le. Si vous prévoyez d’être absent pendant
quelques jours, retirez le sac du compacteur. Verrouillez le compacteur en retirant le bouton et rangez-le en lieu sûr.
Nettoyage de l’appareil
Pour nettoyer l’extérieur :
Essuyez les surfaces à l’aide d’un chiffon
propre et humide.
Panneaux peints :
Appliquez un peu de poli pour
électroménagers lorsque le compacteur est
neuf, et ensuite à plusieurs reprises pendant
l’année.
Panneaux en acier inoxydable :
Vous pouvez nettoyer les panneaux en acier
inoxydable avec le produit nettoyant Cerama
BryteMD ou un produit similaire et un chiffon
doux et propre.
Vous pouvez vous procurer le nettoyant
Cerama Bryte au service des pièces de GE
en composant le 800.626.2002 (É.-U.) ou au
800.661.1616 (Canada).
Pour nettoyer l’intérieur du tiroir :
Retirez le sac. Voir page 6.
Portez des gants protecteurs. Il pourrait
y avoir des morceaux de verre dans
le tiroir. Enfoncez le verrou de porte
latérale.
Tenez le verrou de porte latérale et
penchez le côté du tiroir jusqu’à ce que
le verrou dégage l’avant du tiroir. Le côté
du tiroir se retire en le penchant et le
glissant pour le sortir.
Lavez avec un chiffon humide et de
l’eau tiède savonneuse. Rincez et
asséchez avec un chiffon doux.
Si le côté du tiroir a été retiré, remettez-le
en position penchée.
Enfoncez le verrou de la porte latérale
en pressant le côté à la position
verticale. Verrouillez le verrou de porte
latérale.
Pour nettoyer l’intérieur de l’armoire :
Sortez le tiroir jusqu’à ce qu’il s’arrête.
Notez les rails où se déplacent les
roulettes du tiroir.
Soulevez l’avant pour dégager les
butées du tiroir. Agrippez le tiroir des
deux côtés. Sortez-le jusqu’au bout et
mettez-le de côté.
Passez l’aspirateur à l’intérieur de
l’armoire. Nettoyez à la main les
déversements liquides ou les déchets
humides ou passez un aspirateur conçu
pour ramasser le liquide.
Lavez, rincez et asséchez l’intérieur.

8
Fonctionnement Mesures de sécurité
Entretien et nettoyage
Conseils de dépannage
Soutien au
consommateur
Avant d’appeler un réparateur…
Conseils de dépannage
Problème Cause Possible Quoi faire
Le compacteur ne Le compacteur est bloqué •Assurez-vous que le cordon est bien branché dans
fonctionne pas une prise sous tension.
Le fusible est grillé ou •Vérifiez les fusibles ou les disjoncteurs. Remplacez le fusible
le disjoncteur est déclenché ou réenclenchez le disjoncteur.
Le bouton de l’interrupteur •Assurez-vous que l’interrupteur est à la position ON
pourrait ne pas être à la (marche).
position ON (marche)
La pédale n’a peut-être pas •Soulevez la pédale momentanément jusqu’à ce que
été soulevée pendant assez le cycle de compactage débute.
longtemps pour amorcer le cycle
Le tiroir n’est peut-être pas fermé •Assurez-vous que le tiroir est bien fermé.
Le moteur du compacteur •Si vous avez compacté plusieurs fois en peu temps,
comporte un mécanisme cette protection pourrait avoir fermé le moteur.
de protection thermique Attendez quelques minutes et le moteur se remettra
qui se remet en marche en marche automatiquement.
automatiquement
Le tiroir est difficile Des ordures pourraient être •Retirez toutes les ordures.
à fermer tombées derrière le tiroir
Le tiroir ne s’ouvre pas Le coulisseau n’est pas à •Soulevez la pédale et relâchez-la pour permettre au
la fin de sa course coulisseau de terminer son cycle.
Peu ou aucun Le tiroir n’est pas •Le tiroir doit être au moins à moitié plein de déchets avant
compactage apparent assez rempli que vous puissiez constater un compactage des déchets.
Le coulisseau ne se déplace pas jusqu’au bas. Les ordures
au bas du tiroir seront écrasées durant les cycles
subséquents.
Des ordures sont coincées •Retirez toutes les ordures.
entre le coulisseau et le panier
This manual suits for next models
19
Table of contents
Languages:
Other GE Trash Compactor manuals

GE
GE UCG1600 Series User manual

GE
GE UCG1520NSS User manual

GE
GE GCG1520 Safety guide

GE
GE GCG1500RBB Manual

GE
GE GE PROFILETM GCG1500L Manual

GE
GE GCG1580P User manual

GE
GE GCG1500P User manual

GE
GE UCG1500 Series User manual

GE
GE GCG17 - Profile 1.4 cu. Ft. Compactor Manual

GE
GE GCG1580PSS - ProfileTM 15" Compactor0 Manual