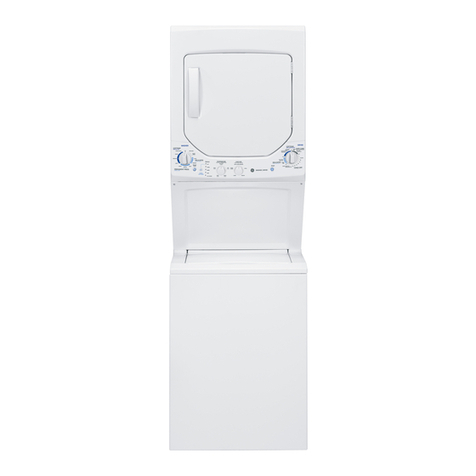
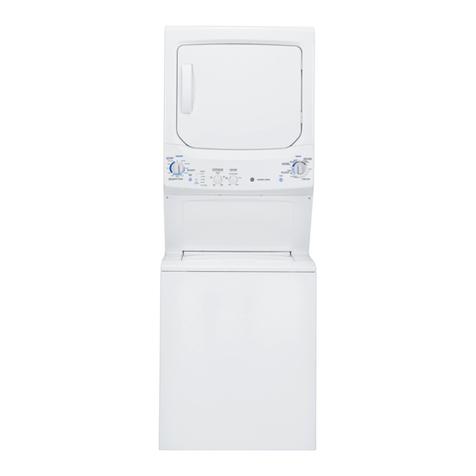
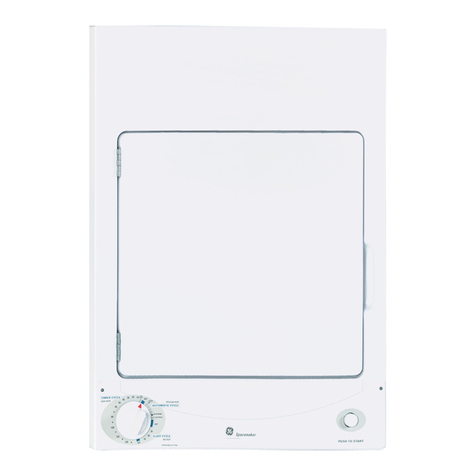
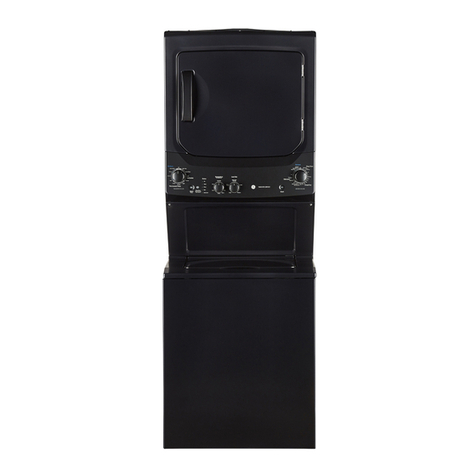
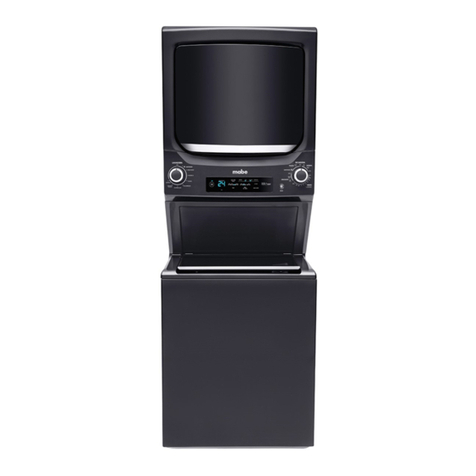
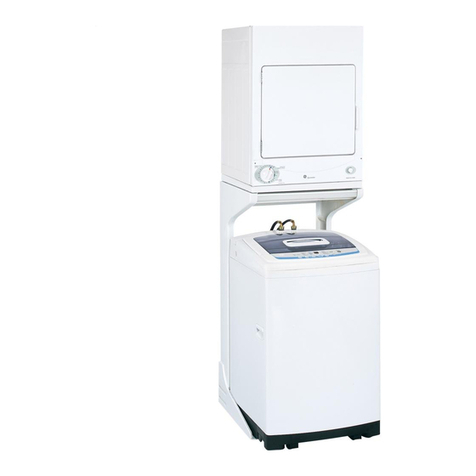
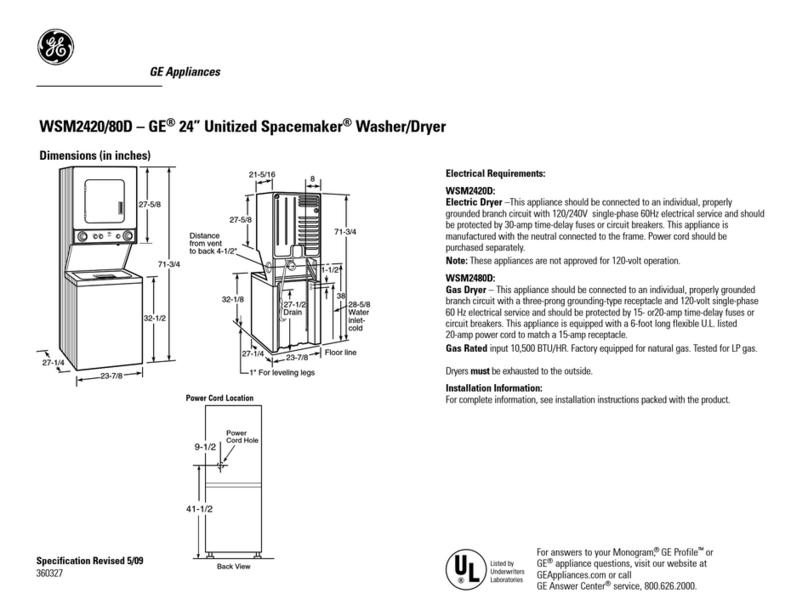
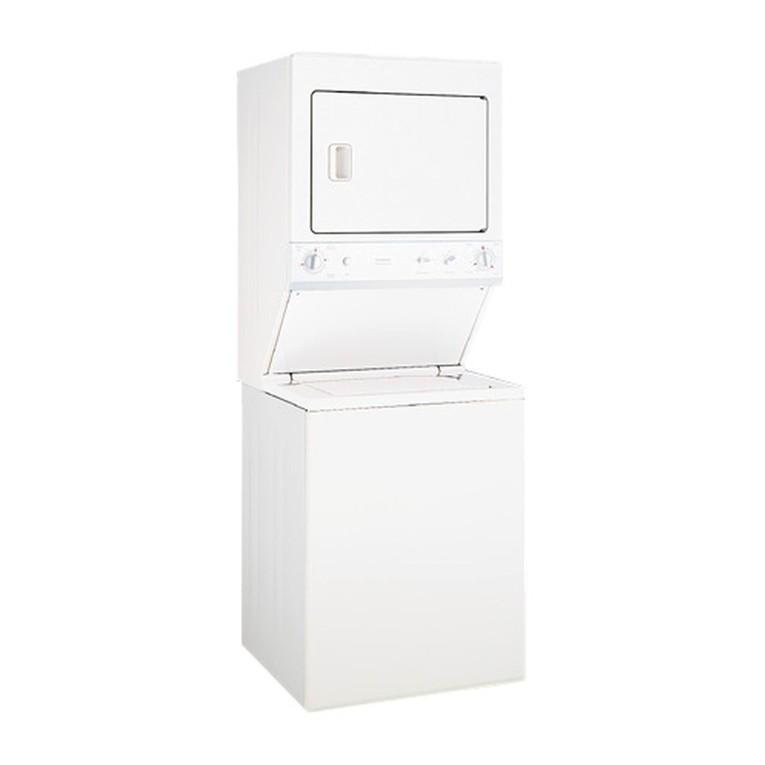
GE Spacemaker GTUP240EMWW User manual

189D7219P002 31-16652 10/29/10 GE
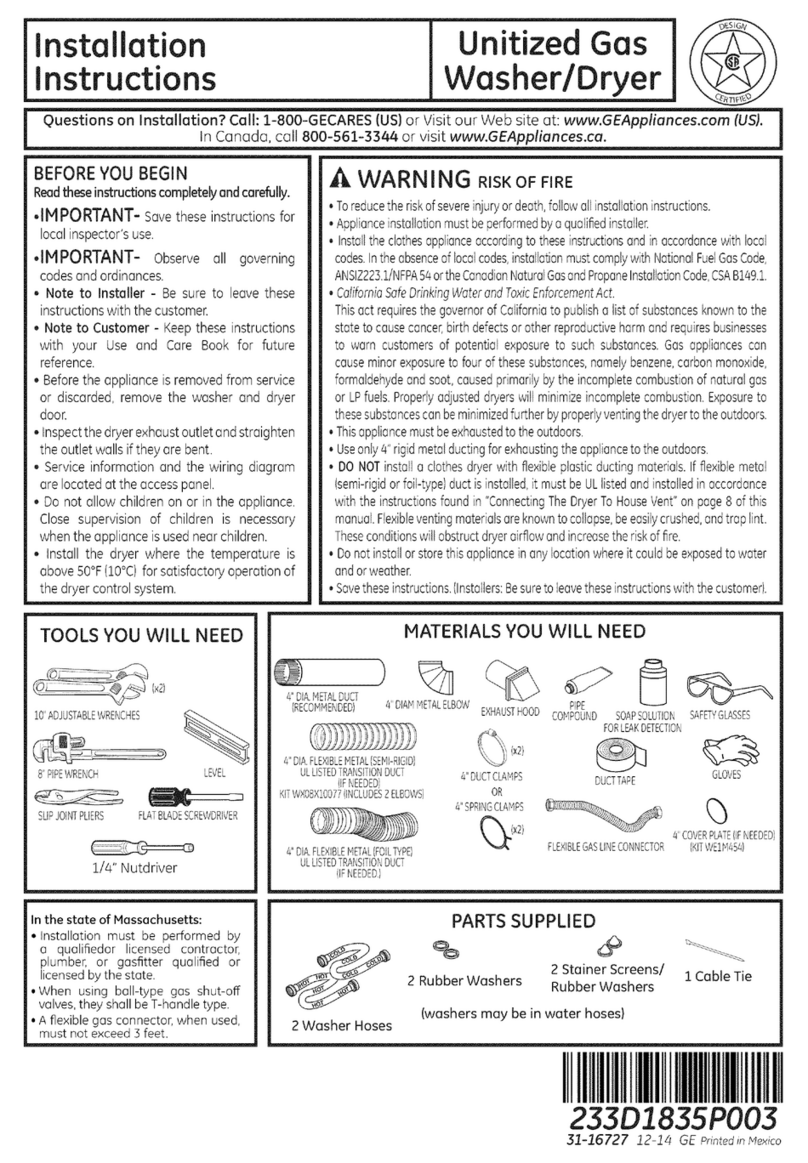
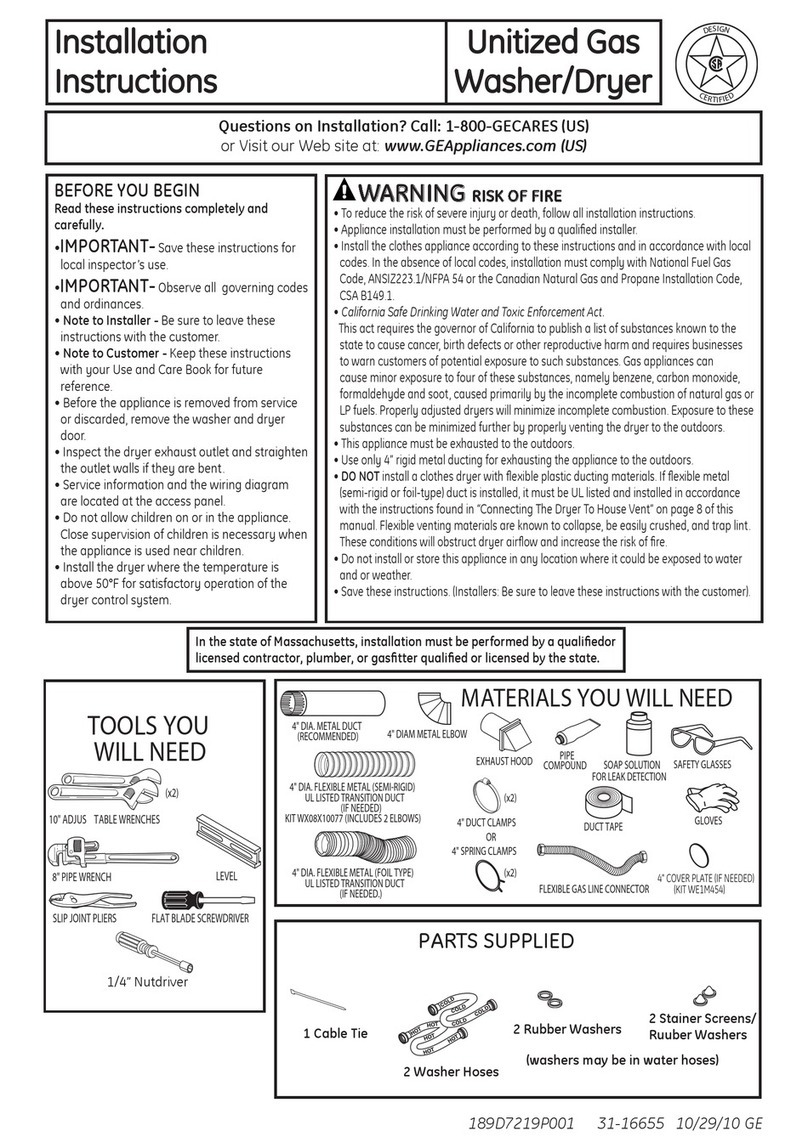
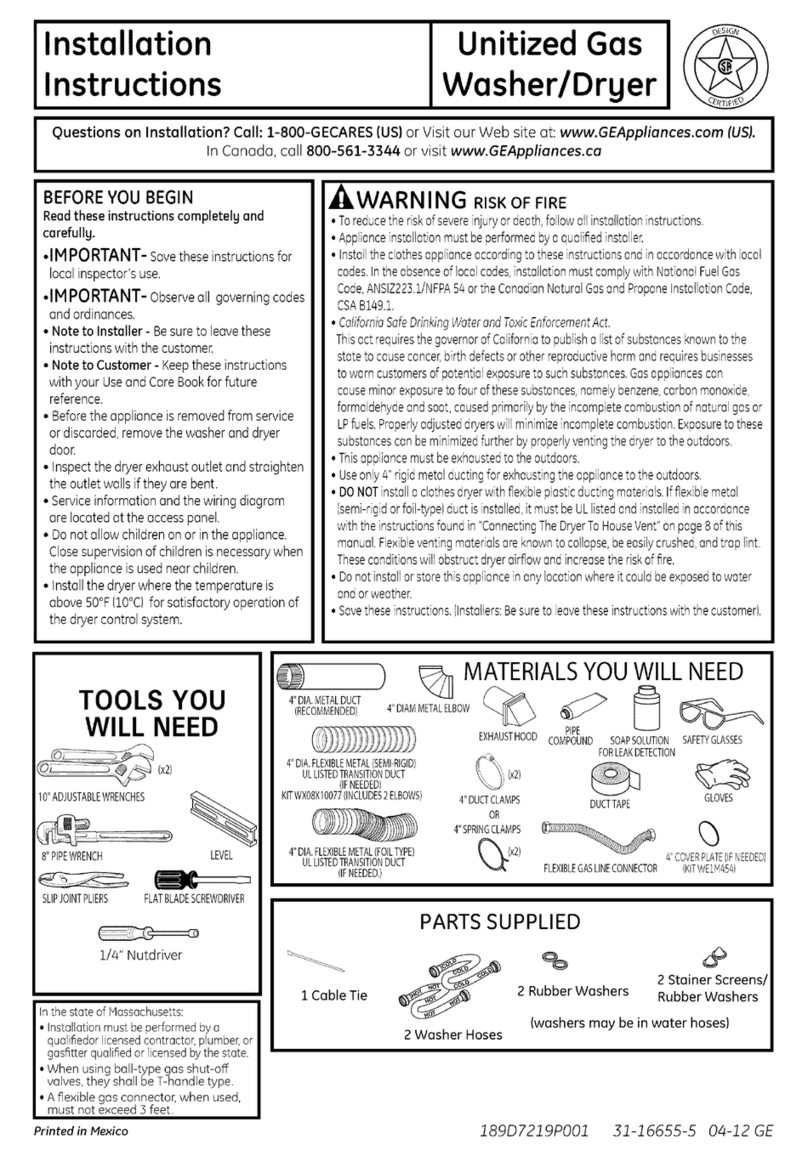
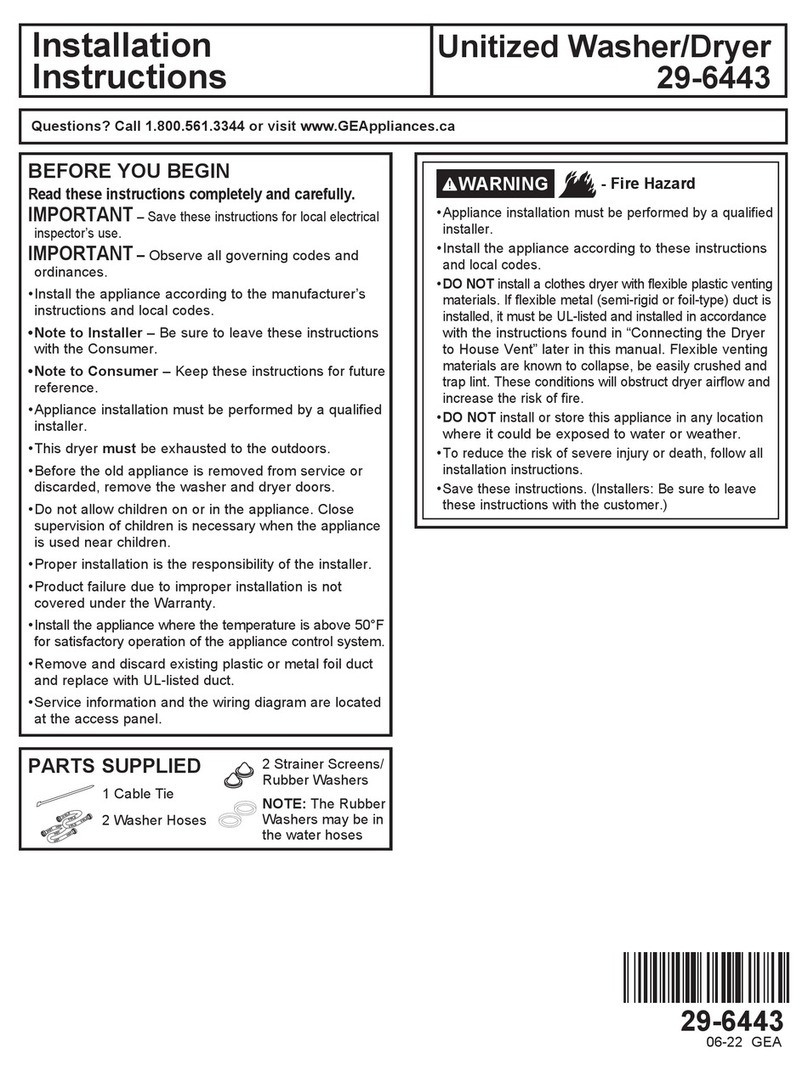
WARNING RISK OF FIRE
• To reduce the risk of severe injury or death, follow all installation
instructions.
• Appliance installation must be performed by a qualied installer.
• Install the appliance according to these instructions and in accordance
with local codes.
• This appliance must be exhausted to the outdoors.
• Use only 4” rigid metal ducting for exhausting the clothes dryer to the
outdoors.
• DO NOT install a clothes dryer with exible plastic ducting materials.
If exible metal (semi-rigid or foil-type) duct is installed, it must be
UL listed and installed in accordance with the instructions found in
“Connecting The Dryer To House Vent” on page 8 of this manual.
Flexible venting materials are known to collapse, be easily crushed,
and trap lint. These conditions will obstruct dryer airow and increase
the risk of re.
• Do not install or store this appliance in any location where it could be
exposed to water and or weather.
• Save these instructions. (Installers: Be sure to leave these instructions
with the customer).
NOTE: Installation and service of this appliance requires basic
mechanical and electrical skills. It is your responsibility to
contact a qualied installer to make the electrical connections.
Installation
Instructions
Unitized Electric
Washer/Dryer
Questions on Installation? Call: 1-800-GECARES (US)
or Visit our Web site at: www.GEAppliances.com (US)
BEFORE YOU BEGIN
Read these instructions completely and carefully.
•IMPORTANT- Save these instructions for
local inspector’s use.
•IMPORTANT- Observe all governing codes
and ordinances.
•Note to Installer - Be sure to leave these
instructions with the customer.
• Note to Customer - Keep these instructions
with your Use and Care Book for future
reference.
• Before the appliance is removed from service
or discarded, remove the washer and dryer
doors.
• Inspect the dryer exhaust outlet and straighten
the outlet walls if they are bent.
• Service information and the wiring diagram
are located at the access panel.
• Do not allow children on or in the appliance.
Close supervision of children is necessary
when the appliance is used near children.
• Install the appliance where the temperature is
above 50°F for satisfactory operation of the
control system.
MATERIALS YOU WILL NEED
GLOVES
SAFETY
GLASSES APPLIANCE POWER
CORD KIT
(NOT PROVIDED)
4" DUCT
CLAMPS (2)
OR
4" SPRING
CLAMPS (2)
EXHAUST
HOOD
3/4" STRAIN
RELIEF
UL RECOGNIZED
4" DIA. METAL
ELBOW
DUCT TAPE
UL RATED
120/240V,30A
WITH 3 OR 4 PRONGS.
IDENTIFY THE PLUG
TYPE AS PER THE
HOUSE RECEPTACLE
BEFORE PURCHASING
LINE CORD.
4" DIA. FLEXIBLE METAL (SEMI-RIGID)
UL LISTED TRANSITION DUCT
(IF NEEDED)
KIT WX08X10077 (INCLUDES 2 ELBOWS)
4" DIA. METAL DUCT
(RECOMMENDED)
4" DIA. FLEXIBLE METAL (FOIL TYPE)
UL LISTED TRANSITION DUCT
(IF NEEDED.) 4" COVER PLATE (IF NEEDED)
(KIT WE1M454)
TOOLS YOU WILL NEED
Slip Pliers
Phillips Screwdriver
Screw Driver I
Flat-blade Screwdriver
1/4” Nutdriver
Level 2
Level PARTS SUPPLIED
2 Rubber Washers 2 Stainer Screens/
Ruuber Washers
(washers may be in water hoses)
2 Washer Hoses
1 Cable Tie

Installation Instructions
2
INSTALLATION REQUIREMENTS LOCATION
This appliance must be installed on rm ooring to
minimize vibration during spin cycle. Concrete ooring is
best, but wood base is sufcient, provided oor support
meets FHA standards. This appliance should not be
installed on rugs or exposed to weather.
PLUMBING
WATER PRESSURE - Must be 20 psi minimum to 120 psi
maximum.
WATER TEMPERATURE - Household water heater should be
set to deliver water at 120° to 150°F (50° to 66°C) IN THE
WASHER when hot wash is selected.
SHUTOFF VALVES - Both hot and cold shutoff valves
(faucets) should be supplied.
DRAIN - Water may be drained into standpipe or set tub.
Discharge height MUST NOT BE LESS THAN 30 INCHES,
and no more than 6 feet above the base of the washer.
Standpipe must be 1-1/2 inches minimum inside diameter
and must be open to atmosphere.
ELECTRICAL REQUIREMENTS
CAUTION: Before plugging in washer, read the follow-
ing electrical requirements.
CAUTION: For personal safety, do not use an
extension cord or adapter plug with this appliance. Do
not, under any circumstances, cut or remove the third
grounding prong from the power cord. Follow national
electrical codes and ordinances. This appliance must be
supplied with the voltage and frequency indicated on the
rating plate (located at the top of the dryer front panel),
and connected to an individual, properly grounded branch
circuit, protected by a 15- or 20-amp circuit breaker or
time-delay fuse. If the electric supply provided does not
meet the above requirements, call a licensed electrician.
Step 1 Prepare the Area and Exhaust for Installation of
Appliance (see section 1).
Step 2 Check and Ensure the Existing External Exhaust is
Clean (see section 1) and Meets Attached Installation
Specications (see section 3).
Step 3 Remove the Foam Shipping Pads (see section 1).
Step 4 Move the Appliance to the Desired Location.
Step 5 Connect the Power Supply (see section 2).
Step 6 Connect the External Exhaust (see section 4).
Step 7 Level Your Appliance (see section 5).
Step 8 Connect to plumbing facilities (see section 8).
Step 9 Check the Operation of the Power Supply
and Venting.
Step 10 Place the Owners Manual and the Installation
Instructions in a Location Where They Will Be Noticed By
the Owner.
For Alcove or Closet Installation, see section 10.
For Bathroom or Bedroom Installation, see section 11.
For Mobile or Manufactured Home see, section 9.
For side or bottom exhaust, see section 6.

Installation Instructions
3
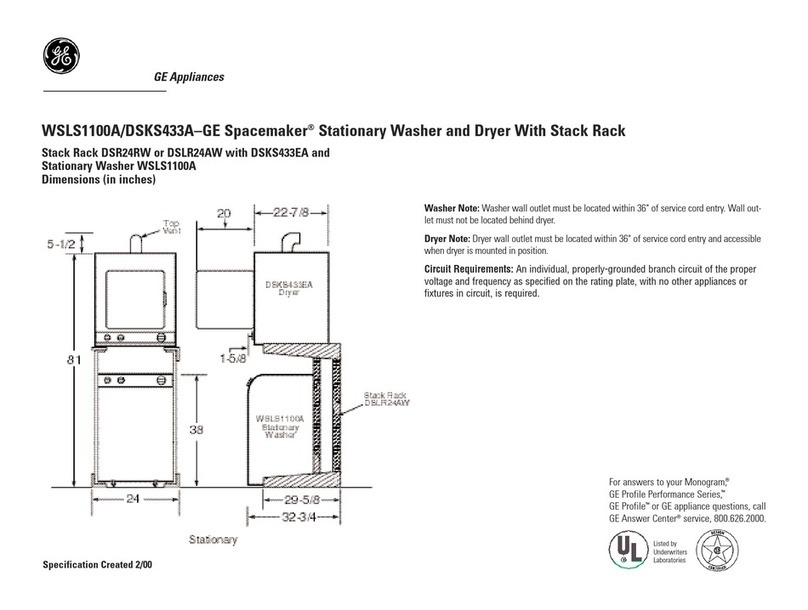
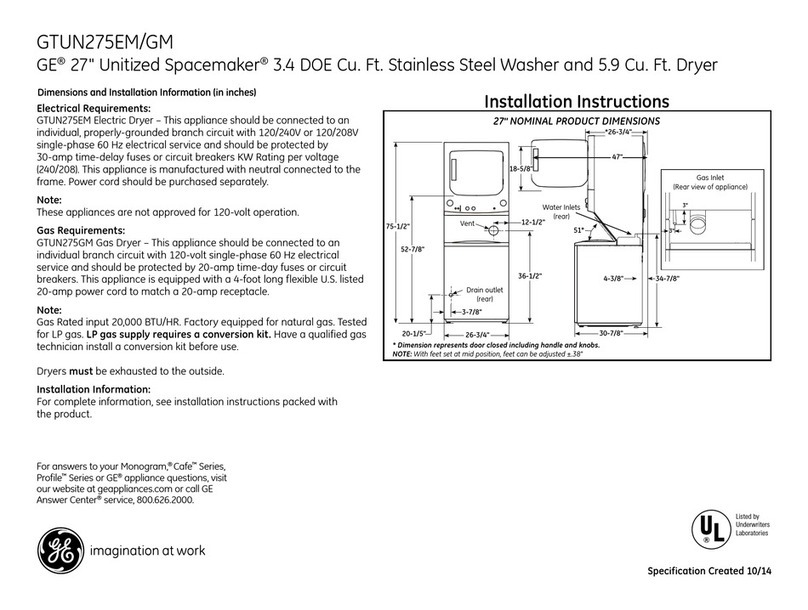
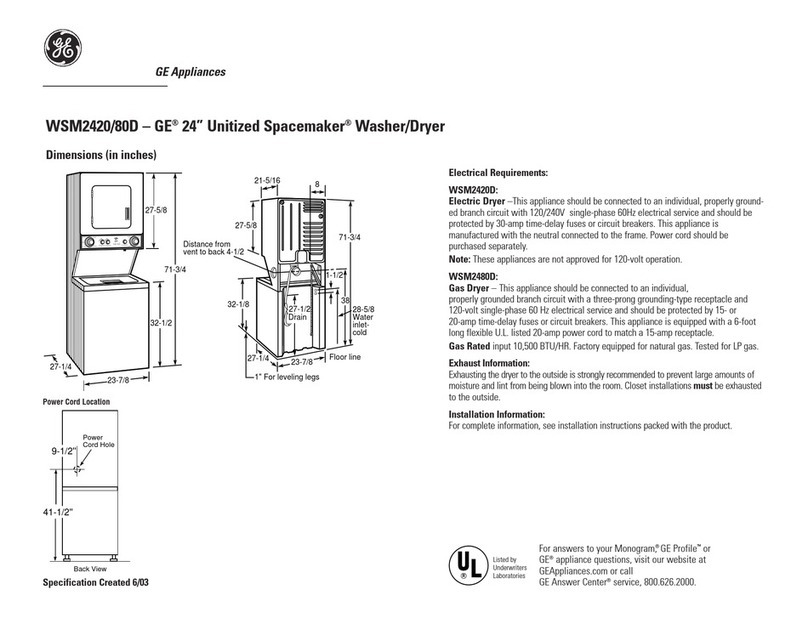
24” NOMINAL PRODUCT DIMENSIONS
74.5”
51”
Vent
Water inlets
(rear)
Drain outlet
(rear)
4.2”
4.1”
23.75”
26”
37”
*23.75”
43”
51°
* Dimension represents door closed including handle and knobs.
NOTE: With feet set at mid position, feet can be adjusted ±.375”.
8.2”
17.9”
32.7”
27.25”
19.1”
27” NOMINAL PRODUCT DIMENSIONS
75.5”
52.9”
Vent
Water inlets
(rear)
Drain outlet
(rear)
3.9”
2.9”
26.8”
27.7”
36.5”
*26.7”
47”
51°
* Dimension represents door closed including handle and knobs.
NOTE: With feet set at mid position, feet can be adjusted ±.375”.
12.5”
18.6”
20.2” 30.85”
4.35”

Installation Instructions
4
Minimum Clearance Other Than Alcove or Closet Installation
Minimum clearance to combustible surfaces and for air opening are: 0 in. clearance both sides and 1 in. rear.
Consideration must be given to provide adequate clearance for installation and service.
1PREPARING FOR INSTALLATION
OF NEW APPLIANCE
REMOVING LINT FROM WALL
EXHAUST OPENING
• Remove and discard existing plastic or metal foil
transition duct and replace with UL listed transition
duct.
2ELECTRICAL CONNECTION
INFORMATION
WARNING - TO REDUCE THE RISK
OF FIRE, ELECTRICAL SHOCK AND PERSONAL
INJURY:
• DO NOT USE AN EXTENSION CORD OR AN
ADAPTER PLUG WITH THIS APPLIANCE.
Appliance must be electrically grounded in accordance
with local codes and ordinances, or in the absence
of local codes, in accordance with the NATIONAL
ELECTRICAL CODE, ANSI/NFPA NO. 70.
INTERNAL DUCT
OPENING CHECK THAT EXHAUST
HOOD DAMPER OPENS
AND CLOSES FREELY.
WALL
ELECTRICAL REQUIREMENTS
This appliance must be connected to an individual
branch circuit, protected by the required time-delay
fuses or circuit breakers. A four or three-wire, single
phase, 120/240V or 120/208V, 60Hz, 30 amp circuit
is required. If the electric supply does not meet the
above specications, then call a licensed electrician.
GROUNDING INSTRUCTIONS
This appliance must be connected to a grounded metal,
permanent wiring system, via the power cord.
TILT THE APPLIANCE
SIDEWAYS AND REMOVE
THE FOAM SHIPPING PADS
BY PULLING AT THE SIDES
AND BREAKING THEM
AWAY FROM THE APPLIANCE
LEGS. BE SURE TO REMOVE
ALL OF THE FOAM PIECES
AROUND THE LEGS.
NEW HOME OR REMODELING FAUCETS/
DRAIN STANDPIPE/ELECTRICAL LOCATION
FLOOR
33”
42”
12”
Locate spigots,
drain standpipe
and electrical plug
in this area
Right side of
Unitized Washer/
Dryer.
Styrofoam Block
Washer hoses
and parts
After the machine is in the
home, remove remaining
packing material/carton
from washer.
DO NOT REMOVE SHIPPING
ROD AT THIS TIME.
Remove styrofoam block.
Remove the bag containing
the
Washer hoses and
parts
parts from tub. Put
styrofoam block back in tub
opening to hold tub in place
during the rest of installation.
Move washer close to nal
position. Make sure there
is at least a 24” clearance
on right side of washer to
remove shipping bar. PULL
SHIPPING BAR OUT USING
YELLOW PLASTIC HANDLE.
Keep bar so it can be
reinstalled if washer is ever
moved again.
Shipping
Bar
Yellow plastic handle

Installation Instructions
5
CONNECTING APPLIANCE USING 4-WIRE
CONNECTION (MUST BE USED FOR
MOBILE HOME INSTALLATION)
NOTES: SInce January 1,1996, the National Electric code
requires that the new constructions utilize a 4-wire
connection to an electric dryer.
WARNING:Only a 4-conductor cord shall be
used when the appliance is installed in a location where
grounding through the neutral conductor is prohibited.
Grounding through the neutral is prohibited for the new
branch-circuit installations, mobile homes, recreational
vehicles, and areas where local codes prohibit
grounding through the neutral conduction.
1. Turn off the circuit breaker (s) (30 amp) or remove the
dryer’s circuit fuse at the electrical box.
2. Be sure the appliance cord is unplugged from the wall
receptacle.
3. Remove the power cord cover located at the lower
back.
4. Remove and discard ground strap. Keep the green
ground screw for step 7.
5. Install 3/4 in. UL recognized strain relief to power cord
entry hole. Bring power cord through strain relief.
6. Connect power cord as follows:
A. Connect the 2 hot lines to the outer screws of
the terminal block (marked L1 and L2).
B. Connect the neutral (white) line to the center of
the terminal block (marked N).
7. Attach ground wire of power cord with the green
ground screw (hole above strain relief bracket). Tighten all
terminal block screws (3) completely.
8. Properly secure power cord to strain relief.
9. Reinstall the cover.
L1
N
L2
RELOCATE GREEN
GROUND SCREW
HERE
STRAIN
RELIEF
BRACKET
GREEN OR
YELLOW WIRE
3/4", UL
RECOGNIZED
STRAIN RELIEF
HOT
WIRE
SCREWS
(3)
HOT
WIRE
COVER
NEUTRAL
(White)
REMOVE GROUND STRAP
AND DISCARD. KEEP GREEN
GROUND SCREW
4 #10 AWG MINIMUM COPPER
CONDUCTORS OR 120/240V 30A POWER
SUPPLY CORD KIT MARKED FOR USE
WITH DRYERS & PROVIDED WITH
CLOSED LOOP OR SPADE TERMINALS
WITH UPTURNED ENDS (NOT SUPPLIED).
CONNECTING DRYER USING 3-WIRE
CONNECTION
1. Turn off the circuit breaker(s) (30 amp) or remove the
dryer’s
circuit fuse at the electrical box.
2. Be sure the dryer cord is unplugged from the wall.
3. Remove the power cord cover located at the lower
back.
4. Install 3/4 in. UL recognized strain relief to power cord
entry hole. Bring power cord through strain relief.
5. Connect power cord as follows:
A. Connect the 2 hot lines to the outer screws of
the terminal block (marked L1 and L2).
B. Connect the neutral (white) line to the center
of the terminal block (marked N).
6. Be sure ground strap is connected to neutral (center)
terminal of block and to green ground screw on cabinet
rear. Tighten all terminal block screws (3) completely.
7. Properly secure power cord to strain relief.
8. Reinstall the cover.
WARNING: NEVER LEAVE THE
COVER OFF OF THE TERMINAL BLOCK.
L1
L2
STRAIN RELIEF
BRACKET
3/4", UL
RECOGNIZED
STRAIN RELIEF
HOT
WIRE
HOT
WIRE
GROUND
STRAP
GREEN
GROUND
SCREW
NEUTRAL
(White)
SCREWS
(3)
COVER
3 #10 AWG MINIMUM COPPER
CONDUCTORS OR 120/240V 30A POWER
SUPPLY CORD KIT MARKED FOR USE
WITH DRYERS & PROVIDED WITH CLOSED
LOOP OR SPADE TERMINALS WITH
UPTURNED ENDS (NOT SUPPLIED).
WARNING: NEVER LEAVE THE
COVER OFF OF THE TERMINAL BLOCK.

Installation Instructions
6
EXHAUST INFORMATION (cont)
EXHAUST SYSTEM CHECK LIST
HOOD OR WALL CAP
• Terminate in a manner to prevent back drafts or entry
of birds or other wildlife.
• Termination should present minimal resistance to
the exhaust air ow and should require little or no
maintenance to prevent clogging.
•Never install a screen in or over the exhaust duct. This
could cause lint build up.
• Wall caps must be installed at least 12 in. above ground
level or any other obstruction with the opening pointed
down.
SEPARATION OF TURNS
For best performance, separate all turns by at least 4 ft.
of straight duct, including distance between last turn and
exhaust hood.
SEALING OF JOINTS
TURNS OTHER THAN 90º
• One turn of 45º or less may be ignored.
• Two 45º turns should be treated as one 90º turn.
• Each turn over 45º should be treated as one 90º turn.
• All joints should be tight to avoid leaks. The male end of
each section of duct must point away from the dryer.
• Do not assemble the ductwork with fasteners that
extend into the duct. They will serve as a collection
point for lint.
• Duct joints can be made air and moisture-tight by
wrapping the overlapped joints with duct tape.
• Horizontal runs should slope down toward the outdoors
½ inch per foot
INSULATION
Duct work that runs through an unheated area or is
near air conditioning should be insulated to reduce
condensation and lint build-up.
3EXHAUST INFORMATION
WARNING - IN CANADA AND IN
THE UNITED STATES, THE REQUIRED EX-
HAUST DUCT DIAMETER IS 4 IN (102mm). DO
NOT USE DUCT LONGER THAN SPECIFIED IN
THE EXHAUST LENGTH TABLE.
Using exhaust longer than specied length will:
• Increase the drying times and the energy cost.
• Reduce the dryer life.
• Accumulate lint, creating a potential re hazard.
The correct exhaust installation is YOUR
RESPONSIBILITY. Problems due to incorrect
installation are not covered by the warranty.
Remove and discard existing plastic or metal foil
transition duct and replace with UL listed transition
duct.
The MAXIMUM ALLOWABLE duct length and number of
bends of the exhaust system depends upon the type of
duct, number of turns, the type of exhaust hood (wall
cap), and all conditions noted below. The maximum
duct length for rigid metal duct is shown in the table
below.
27” DRYER EXHAUST LENGTH
4" DIA.
4"
4" DIA.
4" DIA.
2-1/2"
RECOMMENDED MAXIMUM LENGTH
Exhaust Hood Types
Recommended
No. of 90º
Elbows Rigid
Metal Rigid
Metal
56 Feet
46 Feet
34 Feet
32 Feet
0
1
2
3
42 Feet
36 Feet
28 Feet
18 Feet
Use only for short
run installations
24” DRYER EXHAUST LENGTH
4" DIA.
4"
4" DIA.
4" DIA.
2-1/2"
RECOMMENDED MAXIMUM LENGTH
Exhaust Hood Types
Recommended
No. of 90º
Elbows Rigid
Metal Rigid
Metal
43 Feet
33 Feet
24 Feet
0
1
2
36 Feet
26 Feet
16 Feet
Use only for short
run installations

Installation Instructions
7
LEVEL
SIDE-TO-SIDE.
2 LEVELING LEGS
LEVEL
FRONT-TO-BACK.
DUCT TAPE OR
DUCT CLAMP
DUCT TAPE OR
DUCT CLAMP
4" METAL DUCT CUT
TO PROPER LENGTH
EXTERNAL DUCT
OPENING
For straight line installation, connect
the dryer exhaust to the external
exhaust hood using duct tape or
clamp.
4EXHAUST CONNECTION
THIS DRYER COMES READY FOR REAR
EXHAUSTING. IF SPACE IS LIMITED, USE
THE INSTRUCTIONS IN SECTION 6 TO
EXHAUST DIRECTLY FROM THE SIDES OR
BOTTOM OF THE CABINET.
WARNING - TO REDUCE THE
RISK OF FIRE OR PERSONAL INJURY:
• This appliance must be exhausted to the outdoors.
• Use only 4” rigid metal ducting for the home exhaust
duct.
• Use only 4” rigid metal or UL-listed exible metal
(semi-rigid or foil-type) duct to connect the dryer
to the home exhaust duct. It must be installed
in accordance with the instructions found in
“Connecting The Dryer To House Vent” on page 8 of
this manual.
• Do not terminate exhaust in a chimney, a wall,
a ceiling, gas vent, crawl space, attic, under an
enclosed oor, or in any other concealed space of
a building. The accumulated lint could create a re
hazard.
• Never terminate the exhaust into a common duct
with a kitchen exhaust system. A combination of =
grease and lint creates a potential re hazard.
• Do not use duct longer than specied in the exhaust
length table. Longer ducts can accumulate lint,
creating a potential re hazard.
• Never install a screen in or over the exhaust duct. This
will cause lint to accumulate, creating a potential re
hazard.
• Do not assemble ductwork with any fasteners
that extend into the duct. These fasteners can
accumulate lint, creating a potential re hazard.
• Do not obstruct incoming or exhausted air.
• Provide an access for inspection and cleaning of
the exhaust system, especially at turns and joints.
Exhaust system shall be inspected and cleaned at
least once a year.
5
LEVELING AND STABILIZING YOUR
APPLIANCE
STANDARD REAR EXHAUST
Level and stabilizing your appliance
1. Carefully move the appliance to its nal location.
Gently rock the appliance into position. It is important
not to damage the rubber leveling legs when mov-
ing your appliance to its nal location. Damage legs
can increase appliance vibration. It may be helpful to
spray window cleaner on the oor to help move your
appliance to its nal position.
Note: do not use washer cover to lift the unit.
2. To ensure the appliance is level and solid on all four
legs, tilt the appliance forward so the rear legs are off
the ground. Gently set the appliance back down to
allow the rear legs to self adjust.
3. With the appliance in its nal position, place a level on
top of back part of the washer lid and check it side to
side, then check front to back. Screw the front leveling
legs up or down to ensure the appliance is resting solid
on all four legs (no rocking or the appliance should ex-
ist), turn the lock nuts on each leg up toward the base
of the unit and snug with a wrench.
Note: Keep the leg extension at minimum to prevent
excessive vibration. The farther out legs are extended, the
more the unit will vibrate.
STANDARD REAR EXHAUST
(Vented above oor level)
ELBOW HIGHLY
RECOMMENDED
RECOMMENDED
CONFIGURATION
TO MINIMIZE
EXHAUST BLOCKAGE
NOTE: ELBOWS WILL PREVENT DUCT KINKING AND COLLAPSING
Installation Instructions
8
C
H
C
H
DON’T
DO NOT USE
EXCESSIVE
EXHAUST
LENGTH
DO NOT SIT
APPLIANCE
ON FLEXIBLE
EXHAUST
DO NOT
CRUSH
FLEXIBLE
EXHAUST
AGAINST
WALL
C
H
C
H
C
H
C
H
DO
ELBOW HIGHLY
RECOMMENDED
CONNECTING THE DRYER TO HOUSE VENT
RIGID METAL TRANSITION DUCT
• For best drying performance, a rigid metal transition duct is
recommended.
• Rigid metal transitions ducts reduce the risk of crushing and
kinking.
UL-LISTED FLEXIBLE METAL (SEMI-RIGID) TRANSITION DUCT
• If rigid metal duct cannot be used, then UL-listed exible metal
(semi-rigid) ducting can be used (Kit WX08X10077).
• Never install exible metal duct in walls, ceilings, oors or
other enclosed spaces.
• Total length of exible metal duct should not exceed 8 feet
(2.4m).
• For many applications, installing elbows at both the dryer and
the wall is highly recommended (see illustrations). Elbows
allow the appliance to sit close to the wall without kinking
and or crushing the transition duct, maximizing drying
performance.
• Avoid resting the duct on sharp objects.
UL-LISTED FLEXIBLE METAL (FOIL-TYPE) TRANSITION DUCT
• In special installations, it may be necessary to connect the
dryer to the house vent using a exible metal (foil-type) duct.
A UL-listed exible metal (foil-type)duct may be used ONLY
in installations where rigid metal or exible metal (semi-rigid)
ducting cannot be used AND where a 4” diameter can be
maintained throughout the entire length of the transition
duct.
• In Canada and the United States, only the exible metal(foil-
type) ducts that comply with the “Outline for Clothes Dryer
Transition Duct Subject 2158A” shall be used.
• Never install exible metal duct in walls, ceilings, oors or
other enclosed spaces.
• Total length of exible metal duct should not exceed 8 feet
(2.4m).
• Avoid resting the duct on sharp objects.
• For best drying performance:
1. Slide one end of the duct over the clothes dryer outlet pipe.
2. Secure the duct with a clamp.
3. With the dryer in its permanent position, extend the duct to
its full length. Allow 2” of duct to overlap the exhaust pipe.
Cut off and remove excess duct. Keep the duct as straight
as possible for maximum airow.
4. Secure the duct to the exhaust pipe with the other clamp.

Installation Instructions
9
6DRYER EXHAUST TO RIGHT, LEFT
OR BOTTOM CABINET
WARNING - BEFORE PERFORMING
THIS EXHAUST INSTALLATION, BE SURE TO
DISCONNECT THE APPLIANCE FROM ITS
ELECTRICAL SUPPLY. PROTECT YOUR HANDS
AND ARMS FROM SHARP EDGES WHEN
WORKING INSIDE THE CABINET. BE SURE TO
WEAR GLOVES
• Apply duct tape as shown on the joint between the dryer
internal duct and the straight duct pipe.
CAUTION:
Internal duct joints must be
secured with tape, otherwise
they may separate and cause
a safety hazard.
C
H
FLOOR
REMOVE
DESIRED
KNOCKOUT
(ONLY 1)
For downward venting, rotate elbow
sections so that elbow points downward
ADDING ELBOW AND DUCT FOR
EXHAUST TO LEFT OR RIGHT SIDE OF
CABINET
• For side ducting, remove the knockout (ONLY 1).
Rotate elbow sections so that the points to the side.
Preassemble 4” elbow with 4” duct. Use only 4” UL
approved rigid metal for ducting inside the dryer.
• Insert duct assembly through the side opening and
connect to the internal elbow.
CAUTION:Be sure not to pull or damage the
electrical wires inside the dryer when inserting the
duct.
C
H
4” UL approved rigid metal
C
H
DUCT
TAPE

Installation Instructions
10
PLUMBING INFORMATION
WATER SUPPLY REQUIREMENTS
• HOT AND COLD WATER FAUCETS – Must be within 42” of
the appliance water inlet hose connections. The faucets
must be 3/4” garden hose-type so inlet hoses can be
connected.
•WATER PRESSURE – Must be between 10 and 120
pounds per square inch with a maximum unbalance
pressure, hot vs. cold owing, of 10 pounds per square
inch.
•WATER TEMPERATURE – Water heater should be set to
deliver 140° to 150°F (60° to 66°C) in the washer when
HOT wash is selected.
• SHUT-OFF VALVES – Both hot and cold water shut-off
valves (faucets) should be supplied.
• LOCATION – Do not install appliance in an area where
the temperature will fall below freezing. If appliance
is stored or transported in freezing temperatures, be
sure all water from the ll and drain systems has been
removed.
DRAIN REQUIREMENTS
• DRAIN RATE – The drain or standpipe must be capable
of accepting a discharge at the rate of 16 gallons per
minute.
• DRAIN HEIGHT – The drain height must be 33” minimum
and 96” maximum.
• STANDPIPE DIAMETER – The standpipe diameter must
be 1-1/2” minimum. There MUST be an air gap around
the drain hose in the standpipe. A snug t can cause a
siphoning action.
• SIPHON BREAK KIT – For a drain facility less than 33”
high, the hose, coupling and clamps provided in the
machine must be used and, in addition, a siphon break
MUST be installed on the back of the machine. Use
Siphon Break Kit WH49X228 and follow instructions in
the kit.
7CONNECTING TO PLUMBING
FACILITIES
If not installed, install rubber washer in one end of hot water
hose. Thread hot water hose onto connection labeled H at
top rear of washer. Hand tighten, plus an additional 1/8 turn
with pliers.
If not installed, install rubber washer in one end of cold water
hose. Thread cold water hose onto connection labeled C at
top rear of washer. Hand tighten, plus an additional 1/8 turn
with pliers.
Move appliance as close to nal location as possible, leaving
room for you to make water, drain, electrical and vent
connections to your home.
8
c
H
NOTE: If longer drain hose is
required, order drain hose
extension kit, GE part number
WH49X301. Connect additional
drain hose (contained in kit) to
original hose with hose clamp
(contained in kit).
Insert free end of drain hose
into drain opening of your
home up to drain hose stopper
(do not remove hose stopper
it prevents siphoning). If water
valves and drain are built into
wall, fasten drain hose to one
of water hoses with cable tie
provided (ribbed side on inside).
If your drains is a standpipe,
fasten drain hose to standpipe
with cable tie provided.

Installation Instructions
11
11
BATHROOM OR BEDROOM INSTALLATION
• The appliance MUST be vented to the outdoors. See
EXHAUST INFORMATION section 3 & 4.
• The installation must conform with local codes or, in the
absence of local codes, with the NATIONAL ELECTRICAL
CODE, ANSI/NFPA NO. 70.
9
MOBILE OR MANUFACTURED HOME
INSTALLATION
• Installation MUST conform to the MANUFACTURED
HOME CONSTRUCTION & SAFETY STANDARD,
TITLE 24, PART 32-80 or, when such standard is not
applicable, with AMERICAN NATIONAL STANDARD FOR
MOBILE HOME, ANSI/NFPA NO. 501B.
• The appliance MUST be vented to the outdoors with
the termination securely fastened to the mobile home
structure.
• The vent MUST NOT be terminated beneath a mobile or
manufactured home.
• The vent duct material MUST BE METAL.
• Do not use sheet metal screws or other fastening
devices which extend into the interior of the exhaust
vent.
• See section 2 for electrical connection information.
10 ALCOVE OR CLOSET INSTALLATION
• If your appliance is approved for installation in an
alcove or closet, it will be stated on a label on the
appliance back.
• TO PREVENT LARGE AMOUNTS OF LINT AND MOISTURE
FROM ACCUMULATING AND TO MAINTAIN DRYING
EFFICIENCY, THIS MACHINE MUST BE EXHAUSTED
OUTDOORS.
• Do not install this appliance with less than the minimum
clearances shown above.
CONSIDERATION MUST BE GIVEN TO
PROVIDE ADEQUATE CLEARANCES FOR
INSTALLATION AND SERVICE.
CAUTION: DO NOT INSTALL THIS
APPLIANCE IN A CLOSET WITH A SOLID DOOR.
1” 0” 0”
0”
1”
DOOR VENTILATION OPENING (27”
MODELS)
A minimum of 120 square inches of opening, equally
divided at top and bottom, is required. Air openings are
required to be unobstructed when a door is installed.
A louvered door with equivalent air openings for the
full length of the door is acceptable.
When louvers or registers are placed in door openings, the
free air openings of the louvers or registers must equal 120
square inches.
DOOR VENTILATION OPENING (24”
MODELS)
A minimum of 72 square inches of opening is required. Air
openings are required to be unobstructed when a door is
installed. A louvered door with equivalent air openings for
the full length of the door is acceptable.
When louvers or registers are placed in door openings, the
free air openings of the louvers or registers must equal 72
square inches.
60 Sq. In.
60 Sq. In.
27” Model
48 Sq. In.
24 Sq. In.
24” Model

Installation Instructions
12
12 SERVICING
WARNING- LABEL ALL WIRES PRIOR TO DISCONNECTION WHEN SERVICING
CONTROLS. WIRING ERRORS CAN CAUSE IMPROPER AND DANGEROUS OPERATION
AFTER SERVICING/INSTALLATION.
For replacement parts and other information, refer to
Owner’s Manual for servicing phone numbers.
TO REGISTER YOUR DRYER
CALL TOLL-FREE
1-888-269-1192
Prompt registration conrms your right to protection
under the terms of your warranty.
www.GEAppliances.com (US)
For Questions on Installation, Call: 1-800-GECARES (US)

Instrucciones de Instalación
12
12 SERVICIO TÉCNICO
ADVERTENCIA- ETIQUETE TODOS LOS CABLES ANTES DE LA DESCONEXIÓN
CUANDO SE REALICEN CONTROLES DEL SERVICIO TÉCNICO. CUALQUIER ERROR DE
CABLEADO PUEDE OCASIONAR UN FUNCIONAMIENTO INADECUADO Y PELIGROSO
LUEGO DE LA INSTALACIÓN/ SERVICIO TÉCNICO.
Para el reemplazo de piezas y otras informaciones, consulte los números telefónicos del servicio técnico en el Manual
del Propietario.
PARA REGISTRAR SU SECADORA
LLAME AL NÚMERO GRATUITO
1-888-269-1192
El registro temprano conrma su derecho de
protección de acuerdo con los términos de su
garantía.
www.GEAppliances.com (US)
Para Realizar Consultas sobre la Instalación, Llame al 1-800-GECARES (US)

Instrucciones de Instalación
11
11
INSTALACIÓN EN BAÑO O HABITACIÓN
• Este electrodoméstico DEBERÁ contar con ventilación hacia el
exterior. Consulte INFORMACIÓN DE ESCAPE en las secciones
6 y 7.
• La instalación debe cumplir con los códigos locales o,
en ausencia de códigos locales, con el CÓDIGO NACIONAL
DE ELECTRICIDAD (NATIONAL ELECTRICAL CODE), ANSI/
NFPA NO. 70.
9
INSTALACIÓN EN CASA RODANTE O
PREFABRICADA
• La instalación DEBE ser realizada conforme con el ESTÁNDAR
DE CONSTRUCCIÓN Y SEGURIDAD DE CASAS PREFABRICADAS,
TÍTULO 24, PARTE 32-80 (MANUFACTURED HOME
CONSTRUCTION & SAFETY STANDARD, TITLE 24, PART 32-80)
o, cuando dicho estándar no sea aplicable, con el ESTÁNDAR
NACIONAL ESTADOUNIDENSE DE CASAS RODANTES
(AMERICAN NATIONAL STANDARD FOR MOBILE HOME), ANSI/
NFPA NO. 501B.
• El electrodoméstico DEBE contar con ventilación hacia el
exterior con la terminación ajustada de forma segura a la
estructura de la casa rodante.
• La ventilación NO DEBE terminar en la parte inferior de una
casa rodante o prefabricada.
• El material del conducto de ventilación DEBE SER DE METAL.
• No use tornillos de chapa u otros dispositivos de ajuste que se
extiendan por el interior de la ventilación del escape.
• Para obtener información sobre la conexión eléctrica,
consulte las secciones 2.
10 INSTALACIÓN EN ALCOBA O CLOSET
• Si se aprobó la instalación de su electrodoméstico en alcoba
o clóset, esto gurará en una etiqueta en el reverso del
electrodoméstico.
• La secadora DEBERÁ contar con ventilación hacia el exterior.
Consulte la sección de INFORMACIÓN DEL ESCAPE.
• No instale este electrodoméstico con menos del nivel de
despeje mínimo como se muestra más arriba.
• El clóset debe contar con ventilación hacia el exterior, a n
de evitar la acumulación de gas en caso de una pérdida del
suministro de gas.
• No se deberá instalar ningún otro electrodoméstico
que consuma combustible en el mismo clóset con el
electrodoméstico.
SE DEBERÁ PROVEER EL NIVEL DE DESPEJE
NECESRAIO PARA LA INSTALACIÓN Y EL SERVICIO
TÉCNICO.
PRECAUCIÓN: NO INSTALE ESTE
ELECTRODOMÉSTICO EN UN CLÓSET QUE POSEA UN
PUERTA SÓLIDA.
1” 0” 0”
0”
1”
ABERTURA DE LA PUERTA DE
VENTILACIÓN (MODELOS DE 27”)
Se requiere un mínimo de 120 pulgadas cuadradas de abertura,
equivalentemente divididos en la parte superior e inferior. Se requiere que
las aberturas de aire no estén obstruidas cuando se instale una puerta.
Se acepta el uso de una puerta de celosía con aberturas de aire sobre
toda la longitud de la puerta.
Cuando se colocan celosías o registros en aperturas de puertas, sus
aberturas de aire deben ser equivalentes a 120 pulgadas cuadradas.
ABERTURA DE LA PUERTA DE
VENTILACIÓN (MODELOS DE 24”)
Se requiere un mínimo de 72 pulgadas cuadradas de
abertura. Se requiere que las aberturas de aire no estén
obstruidas cuando se instale una puerta. Se acepta
el uso de una puerta de celosía con aberturas de aire
equivalentes a la longitud completa de la puerta.
Cuando se colocan celosías o registros en aperturas de
puertas, sus aberturas de aire deben ser equivalentes a 72
pulgadas cuadradas.
60 pulgadas cuadradas
Modelo de
27”
48 pulgadas
cuadradas.
24 pulgadas
cuadradas.
Modelo de
24”

Instrucciones de Instalación
10
INFORMACIÓN DE PLOMERÍAREQUISITOS
DE SUMINISTRO DE AGUA
• GRIFOS DE AGUA CALIENTE Y DE AGUA FRÍA – Deben
estar dentro de las 42” de las conexiones de la
manguera de entrada de agua del electrodoméstico.
Los grifos deben ser del tipo para manguera de jardín
de ¾”, de modo que las mangueras de entrada puedan
ser conectadas.
• TEMPERATURA DE AGUA – Debe estar entre 10 y
120 libras por pulgada cuadrada con una presión
desbalanceada máxima, ujo caliente versus frío, de 10
libras por pulgada cuadrada.
PRESIÓN DEL AGUA – El calentador de agua deberá
estar congurado entre 140° y 150°F (60° y 66°C) en la
lavadora cuando se seleccione lavado CALIENTE.
VÁLVULAS DE CIERRE – Tanto la válvula de cierre de
agua caliente como la de agua fría (grifos) deberán ser
suministradas.
• UBICACIÓN – No instale el electrodoméstico en
un área donde la temperatura sea bajo cero. Si el
electrodoméstico es ubicado o transportado en
temperaturas bajo cero, asegúrese de que toda el agua
del sistema de llenado y drenado haya sido removida.
REQUISITOS PARA EL DRENAJE
• REQUISITO DEL DRENAJE – El drenaje o el tubo de
subida deben poder aceptar una descarga a un
promedio de 16 galones por minuto.
• ALTURA DEL DRENAJE – La altura del drenaje debe ser
de un mínimo de 33” y un máximo de 96”.
• DIÁMETRO DEL TUBO DE SUBIDA – El diámetro del tubo
de subida debe ser de un mínimo de 1-1/2”. DEBE haber
un espacio de aire en torno a la manguera de drenaje
en el tubo de subida. Un ajuste sin holgura puede
provocar una acción de sifonaje.
• KIT DE DESVIACIÓN DEL SIFÓN – Para una instalación
de drenaje inferior a las 33” de altura, la manguera,
junto con las abrazaderas provistas en la máquina,
deberán ser usadas y, además, se DEBERÁ instalar una
desviación del sifón en la parte trasera de la máquina.
Use el Kit de Desviación del Sifón WH49X228 y siga las
instrucciones del mismo.
7CONEXIÓN A INSTALACIONES DE
PLOMERÍA
Si no se encuentra instalada, instale la arandela de goma
en un extremo de la manguera de agua caliente. Coloque
la manguera de agua caliente en la conexión con etiqueta
H en la parte superior trasera de la lavadora. Ajuste
manualmente, además de dar un giro adicional de 1/8 con
una pinza.
Si no se encuentra instalada, instale la arandela de goma
en un extremo de la manguera de agua fría. Coloque la
manguera de agua fría en la conexión con etiqueta H en la
parte superior trasera de la lavadora. Ajuste manualmente,
además de dar un giro adicional de 1/8 con una pinza.
Mueva el electrodoméstico tanto como sea posible hasta su
ubicación nal, dejando espacio para que pueda hacer las
conexiones del agua, drenaje, electricidad y ventilación en
su hogar.
8
c
H
NOTA: Si se requiere el uso
de una manguera más larga,
ordene un kit de extensión
de manguera de drenaje;
el número de pieza de GE
es WH49X301. Conecte la
manguera de drenaje adi-
cional (incluida con el kit) a
la manguera original con la
abrazadera para manguera
(incluida con el kit).
Inserte el extremo libre de la
manguera de drenaje en la ab-
ertura del drenaje de su hogar
hasta el tope de la manguera
de drenaje (no retire el tope
de la manguera, ya que éste
evita el sifonaje). Si las válvulas
de agua y el drenaje están
adheridas a la pared, ajuste la
manguera de drenaje a una de
las mangueras de agua con el
enlace para cable provisto (el
lado elástico en el interior). Si el
drenaje es un tubo de subida,
ajuste la manguera de drenaje
al tubo de subida con el enlace
de cable provisto.

Instrucciones de Instalación
9
6SALIDA DE LA SECADORA HACIA EL GABI-
NETE DERECHO, IZQUIERDO O INFERIOR
ADVERTENCIA- ANTES DE REALIZAR
LA INSTALACIÓN DE ESTE ESCAPE, ASEGÚRESE
DE DESCONECTAR EL ELECTRODOMÉSTICO
DE SU SUMINISTRO ELÉCTRICO. PROTEJA SUS
MANOS Y BRAZOS DE EXTREMOS CORTANTES
AL TRABAJAR DENTRO DEL GABINETE.
ASEGÚRESE DE USAR GUANTES.
C
H
Para una ventilación descendente, rote las
secciones del codo de modo que éste apunte
hacia abajo.
ESCAPE HACIA LA IZQUIERDA O DERECHA DEL
GABINETE
• Para que el conducto salga hacia uno de los laterales,
quite el separador (SÓLO 1). Gire las secciones del codo
de modo que apunten hacia el costado. Realice un
ensamble previo del codo de 4” con el conducto de 4”.
Use sólo metal rígido de 4” para conductos aprobados
por UL dentro de la secadora.
• Inserte el ensamble del conducto a través de la
abertura lateral y conecte el mismo al codo interior.
PRECAUCIÓN:Asegúrese de no forzar ni dañar los
cables eléctricos dentro de la secadora al insertar el
conducto.
C
H
Metal rígido de 4” aprobado por UL
• Aplique cinta para conducto como se muestra en la
junta entre el conducto interior de la secadora y la
tubería recta del conducto.
PRECAUCIÓN:
Las juntas del conducto inte-
rior deben estar aseguradas
con cinta; de otro modo, se
podrán separar y ocasionar
riesgos de seguridad.
C
H
CINTA PARA
CONDUCTO

Instrucciones de Instalación
8
CONEXIÓN DE LA SECADORA A LA
VENTILACIÓN DE LA CASA
CONDUCTO DE TRANSICIÓN DE METAL RÍGIDO
• Para un mejor funcionamiento del secado, se recomienda el
uso de un conducto de transición de metal rígido.
• Los conductos de transición de metal rígido reducen el riesgo
de que se puedan aplastar o doblar.
CONDUCTO DE TRANSICIÓN DE METAL FLEXIBLE (SEMI-
RÍGIDO) DE LA LISTA DE UL
• Si no se pudiera usar un conducto de metal rígido, entonces se
podrá usar un conducto de metal exible (semi-rígido) de la lista de
UL (Kit WX08X10077).
• Nunca instale un conducto de metal exible en paredes, cielos
rasos, pisos u otros espacios adjuntos.
• La longitud total del conducto de metal exible no deberá
superar los 8 pies (2.4m).
• Para muchas aplicaciones, se recomienda enfáticamente la
instalación de codos tanto en la secadora como en la pared. Los
codos permiten que la secadora pueda estar junto a la pared sin
que se aplaste ni se doble el conducto de transición, maximizando
el rendimiento del secado.Evite que la tubería se apoye sobre
objetos cortantes. CONDUCTO DE TRANSICIÓN DE METAL FLEXIBLE
(TIPO HOJA DE ALUMINIO) DE LA LISTA DE UL
• Para instalaciones especiales, puede resultar necesaria la
conexión de la secadora a la ventilación de la casa usando un
conducto de metal exible (tipo hoja de aluminio). Un conducto
de metal exible (tipo hoja de aluminio) podrá ser usado SÓLO en
instalaciones donde los conductos de metal rígido o metal exible
(semi-rígido) no puedan ser usados Y donde se pueda mantener un
diámetro de 4” a lo largo de todo el conducto de transición.
• En Canadá y en Estados Unidos, sólo se podrán usar los
conductos de metal exible (tipo hoja de aluminio) que cumplan
con el “Resumen del Tema 2158A de Conductos de Transición para
Secadoras de Ropa” (Outline for Clothes Dryer Transition Duct
Subject 2158A).
• Nunca instale un conducto de metal exible en paredes, cielos
rasos, pisos u otros espacios adjuntos.
• La longitud total del conducto de metal exible no deberá
superar los 8 pies (2.4m).Evite que la tubería se apoye sobre
objetos cortantes.
• Para un mejor funcionamiento:
1. Deslice un extreme del conducto sobre la tubería de salida de la
secadora de ropa.
2. Asegure el conducto con una abrazadera.
3. Con la secadora en su posición permanente, extienda el
conducto hasta su máxima extensión. Permita que 2” del conducto
se superpongan con la tubería de escape. Corte y retire el sobrante
del conducto. Mantenga el conducto lo más recto posible para
lograr el ujo de aire máximo.
4. Asegure el conducto a la tubería de escape con la otra
abrazadera.clamp.
C
H
C
H
C
H
C
H
QUÉ
HACER
CODO ALTAMENTE
RECOMENDADO
C
H
C
H
QUÉ NO HACER
NO USE UNA
LONGITUD
EXCESIVA DEL
CONDUCTO
NO APOYE EL
ELECTRODOMÉSTICO
SOBRE UN ESCAPE
FLEXIBLE
NO
APOYE UN
ESCAPE
FLEXIBLE
CONTRA
LA PARED

Instrucciones de Instalación
7
ADVERTENCIA - PARA REDUCIR
EL RIESGO DE INCENDIO O LESIONES
PERSONALES:
• Este electrodoméstico deberá contar con un escape
hacia el exterior.
• Use sólo un conducto de metal rígido de 4” para el
conducto de salida del hogar.
• Use sólo un conducto de metal rígido de 4” o de
metal exible de la lista de UL (semi-rígido o tipo
hoja de aluminio) para conectar la secadora al
conducto de escape del hogar. Se deberá instalar
de acuerdo con las instrucciones que guran en
“Conexión de la Secadora a la Ventilación del
Hogar” en la página 8 de este manual.
•No termine la salida del escape en una chimenea,
pared, cielo raso, ventilación de gas, sótano, ático,
debajo de un piso adjunto, o en cualquier espacio
oculto de una construcción. La pelusa acumulada
podría crear riesgos de incendio.
• Nunca termine el escape en un conducto común
con un sistema de escape de una cocina. La
combinación de grasa y pelusa crea un posible
riesgo de incendio.
• Evite que el conducto sea más largo que como se
especica en la tabla de longitud del escape. Los
conductos más largos acumulan pelusa, creando un
posible riesgo de incendio.
•Nunca instale una rejilla en o sobre el conducto de
escape. Esto causará la acumulación de pelusa,
creando un posible riesgo de incendio.
• No ensamble la tubería con tensores que se
extiendan sobre el conducto. Estos tensores
acumulan pelusa, creando un posible riesgo de
incendio.
• No obstruya el aire entrante o saliente.
• Provea un acceso para inspección y limpieza del
sistema de escape, especialmente en curvas y
juntas. El sistema de escape se deberá inspeccionar
y limpiar por lo menos una vez al año.
4CONEXIÓN DEL ESCAPE
ESTA SECADORA ESTÁ EQUIPADA CON ESCAPE TRASERO. SI EL
ESPACIO ES LIMITADO, USE LAS INSTRUCCIONES DE LA SECCIÓN
9 PARA QUE EL ESCAPE FUNCIONE DIRECTAMENTE DESDE LOS
COSTADOS O LA PARTE INFERIOR DEL GABINETE.
CINTA DE CONDUCTO
O ABRAZADERA DEL
CONDUCTO
ABERTURA DEL
CONDUCTO
EXTERNO
CORTE DEL CONDUCTO
DE METAL DE 4”
PARA UNA LONGITUD
APROPIADA CINTA DE
CONDUCTO O
ABRAZADERA
DEL
CONDUCTO
CONECTOR DE LA LÍNEA DE GAS
FLEXIBLE NUEVO APROBADO POR
CSA (AGA)
GAS TUBO DE
ENTRADA
Para la instalación en línea recta, conecte
el escape de la secadora a la campana de
escape usando cinta para conducto o una
abrazadera.
CODO ALTAMENTE
RECOMENDADO
CONFIGURACIÓN
RECOMENDADA
PARA MINIMIZAR EL
BLOQUEO DEL ESCAPE
NOTA: EL CODO EVITARÁ LA TORCEDURA Y ROTURA DEL CONDUCTO
ESCAPE TRASERO ESTÁNDAR
(Ventilación por encima del nivel del piso)
5CÓMO NIVELAR Y ESTABILIZAR EL
ELECTRODOMÉSTICO
Cómo nivelar y estabilizar el electrodoméstico
1.Con cuidado mueva el electrodoméstico hasta su ubicación nal.
Suavemente balancee el electrodoméstico en su posición. Es im-
portante no dañar las patas niveladoras de goma al mover el elec-
trodoméstico hasta su ubicación nal. Si las patas se encuentran
dañadas, esto podrá incrementar la vibración del electrodoméstico.
Puede ser de ayuda aplicar espray de limpieza de ventanas en el
piso, a n de mover el electrodoméstico hasta su ubicación nal.
Nota: No use la cubierta de la lavadora para levantar la unidad.
2. Para asegurar que el electrodoméstico esté nivelado y posicionado
de forma sólida sobre sus cuatro patas, incline el electrodoméstico
hacia adelante de modo que las patas traseras queden levantadas
del piso. Suavemente vuelva a apoyar el electrodoméstico para
permitir que las patas traseras encuentren su ajuste.
3. Con el electrodoméstico en su ubicación nal, coloque un niv-
el sobre la parte trasera de la tapa de la lavadora y controle
la misma de un costado a otro y luego de adelante hacia
atrás. Atornille las patas niveladoras del frente de arriba hacia
abajo, para asegurar que el electrodoméstico se apoye con
solidez sobre sus cuatro patas (no debería haber balanceo del
electrodoméstico), gire las tuercas de bloqueo en cada pata
hacia la base de la unidad y ajuste con una llave.
Note: mantenga la extensión de la pata al mínimo para evitar
vibraciones excesivas. Cuando más extendidas se encuentran las
patas, más vibrará la unidad.
NIVELACIÓN DEL
FRENTE HACIA
ATRÁS
NIVELACIÓN
DE UN LADO A
OTRO
2 NIVELACIÓN DE LAS PATAS

Instrucciones de Instalación
6
3INFORMACIÓN SOBRE EL ESCAPE
ADVERTENCIA - EN CANADÁ Y
EN ESTADOS UNIDOS, EL DIÁMETRO DEL CONDUCTO
DE ESCAPE REQUERIDO ES DE 4” (102 mm.). NO USE
CONDUCTOS MÁS LARGOS QUE LOS ESPECIFICADOS EN LA
TABLA DE LONGITUD DEL ESCAPE.
El uso de un escape más largo que el especicado:
• Incrementará los tiempos de secado y el costo de
energía.
• Reducirá la vida útil de la secadora.
• Acumulará pelusa, creando un posible riesgo de
incendio.Es SU RESPONSABILIDAD que el escape esté
instalado correctamente. Cualquier problema debido
a una instalación incorrecta no estará cubierto por
esta garantía.
Retire y elimine plásticos u hojas de aluminio existentes
en el conducto de transición y reemplace por el
conducto de transición que gura en la lista de UL.
La longitud MÁXIMA PERMITIDA del conducto y la
cantidad de torsiones del sistema de escape depende
del tipo de conducto, número de giros, el tipo de
campana de escape (caperuza de pared), y todas
las condiciones indicadas previamente) La longitud
máxima para conductos de metal rígido gura en la
siguiente tabla.
INFORMACIÓN SOBRE EL ESCAPE
LISTA DE CONTROL DEL SISTEMA DE ESCAPE
CAMPANA O CAPERUZA DE PARED
• Terminar de modo que se eviten ráfagas de aire traseras o la
entrada de pájaros u otros animales.
• La terminación debería presentar una resistencia mínima
sobre el ujo del aire del escape y debería requerir poco o
ningún mantenimiento para evitar obstrucciones.
•Nunca instale una rejilla en o sobre el conducto de escape.
Esto podría ocasionar la acumulación de pelusa.
• Las caperuzas de pared se deben instalar por lo menos a 12”
sobre el nivel de suelo o en cualquier otra obstrucción con la
abertura en dirección hacia abajo.
SEPARACIÓN DE CURVAS
Para un mejor funcionamiento, separe todas las curvas a por lo menos
4 pies del conducto recto, incluyendo la distancia entre el último giro y
la campana de escape.
CURVAS QUE NO ESTÁN A 90º
• Una curva de 45º o menos podrá ser ignorada.
• Dos curvas de 45º se deberán tratar como una curva de 90º.
• Cada curva superior a 45º se deberá tratar como una curva de 90º.
SELLADO DE JUNTAS
• Todas las juntas deberán estar ajustadas para evitar goteras. El
extremo macho de cada sección del conducto deberá estar apartado
de la secadora.
• No ensamble la tubería con tensores que se extiendan sobre el
conducto. Estos servirán como puntos de recolección de pelusa.
• Se podrá evitar la entrada de aire y humedad en las juntas del
conducto envolviendo las juntas de forma superpuesta con cinta
para conducto.
• Las partes horizontales deberán tener una caída de ½” por pie hacia
el exterior.
AISLANTE
Cuando el conducto atraviese un área sin calefacción o esté
cerca de un acondicionador de aire, deberá ser aislado a n de
reducir la condensación y la acumulación de pelusa.
0
1
2
3
LONGITUD
DEL ESCAPE
27” LONGITUD MÁXIMA RECOMENDADA
Tipos de Campanas de Escape
Recomendado: Use sólo para
instalaciones cortas
4”
Metal Rígido
Nº de Codos
de 90º Metal Rígido
56 Pies
46 Pies
34 Pies
32 Pies
42 Pies
36 Pies
28 Pies
18 Pies
Diámetro
de 4”
Diámetro
de 4” Diámetro
de 4”
0
1
2
LONGITUD
DEL ESCAPE
24” LONGITUD MÁXIMA RECOMENDADA
Tipos de Campanas de Escape
Recomendado: Use sólo para
instalaciones cortas
4”
Metal Rígido
Nº de Codos
de 90º Metal Rígido
43 Pies
33 Pies
24 Pies
36 Pies
26 Pies
16 Pies
Diámetro
de 4”
Diámetro
de 4” Diámetro
de 4”

Instrucciones de Instalación
5
CONEXIÓN DEL ELECTRODOMÉSTICO
UTILIZANDO UNA CONEXIÓN DE 4 CA-
BLES (SE DEBERÁ USAR PARA LA INSTA-
LACIÓN EN VIVIENDAS MÓVILES).
NOTAS: Desde el 1 de enero de 1996, el Código Nacional
de Electricidad requiere que las construcciones nuevas
utilicen una conexión de 4 cables para una secadora
eléctrica.
ADVERTENCIA: Sólo se usará un cable de 4
conductores cuando el electrodoméstico se instale en
una ubicación donde se prohíba la conexión a tierra a
través del conductor neutral. Se prohíbe la conexión
a tierra a través del conector neutral en vehículos
nuevos y en áreas donde los códigos locales prohíben
la conexión a tierra a través de una conducción neutral.
1. Apague el disyuntor(es) (30 amperios) o retire el fusible
del circuito de la secadora de la caja de electricidad.
2. Asegúrese de que el cable del electrodoméstico esté
desenchufado del receptáculo de la pared.
3. Retire la tapa del cable de corriente ubicada en la parte
inferior trasera.
4. Retire y descarte la cinta de conexión a tierra. Conserve
el tornillo verde de conexión a tierra para el paso 7.
5. Instale el amortiguador con refuerzo de ¾ pulgadas
listado por UL del agujero de entrada del cable de
corriente. Pase el cable de corriente por el amortiguador
con refuerzo.
6. Conecte del cable de corriente del siguiente modo:
A. Conecte los 2 polos de carga a los tornillos
exteriores del bloque terminal (marcados L1 y L2).
B. Conecte el polo neutral (blanco) al centro del
bloque terminal (marcado N).
7. Adjunte el cable a tierra del cable de corriente al tornillo
verde de conexión a tierra (agujero sobre el soporte del
amortiguador con refuerzo). Ajuste todos los tornillos (3)
del bloque terminal completamente.
8. Asegure el cable de corriente al amortiguador con
refuerzo.
9. Vuelva a instalar la tapa.
L1
N
L2
REUBIQUE EL TORNILLO
DE CONEXIÓN A TIERRA
VERDE AQUÍ
SOPORTE DEL
AMORTIGUADOR
CON REFUERZO
CABLE VERDE O
AMARILLO
AMORTIGUADOR CON
REFUERZO DE 3/4”
LISTADO POR UL
CABLE
DE
CARGA
TORNILLOS
(3)
CABLE DE
CARGA
TAPA
NEUTRO
(Blanco)
RETIRE Y DESCARTE LA CINTA DE
CONEXIÓN A TIERRA. CONSERVE EL
TORNILLO VERDE DE CONEXIÓN
A TIERRA.
CABLES ELÉCTRICOS CONDUCTORES
DE COBRE NÚM. 10 AWG DE POR LO MENOS
4 HILOS O KIT DE CABLE DE CORRIENTE DE
120/ 240V 30 A MARCADO PARA USO CON
SECADORAS Y PROVISTO CON TERMINALES
DE BUCLE CERRADO O CON HORQUILLA
CON EXTREMOS HACIA ARRIBA (NO PROVISTO).
CONEXIÓN DE LA SECADORA USANDO
UNA CONEXIÓN DE 3 CABLES
1. Apague el disyuntor(es) (30 amperios) o retire el fusible
del circuito de la secadora de la caja de electricidad.
2. Asegúrese de que el cable de la secadora esté desen-
chufado del receptáculo de la pared.
3. Retire la tapa del cable de corriente ubicada en la
parte inferior trasera.
4. Instale el amortiguador con refuerzo de ¾ pulgadas
listado por UL del agujero de entrada del cable de cor-
riente. Pase el cable de corriente por el amortiguador con
refuerzo.
5. Conecte del cable de corriente del siguiente modo:
A. Conecte los 2 polos de carga a los tornillos
exteriores del bloque terminal (marcados L1 y
L2).
B. Conecte el polo neutral (blanco) al centro del
bloque terminal (marcado N).
6. Asegúrese de que la cinta de conexión a tierra esté
conectada a la terminal del centro neutral del bloque y al
tornillo verde de conexión a tierra en la parte trasera del
gabinete. Ajuste todos los tornillos (3) del bloque terminal
completamente.
7. Asegure el cable de corriente al amortiguador con
refuerzo.
8. Vuelva a instalar la tapa.
L1
L2
SOPORTE DEL
AMORTIGUADOR
CON REFUERZO
AMORTIGUADOR
CON REFUERZO
DE 3/4” LISTADO
POR UL
CABLE DE
CARGA
CABLE DE
CARGA
CINTA DE
CONEXIÓN
A TIERRA
TORNILLO
VERDE DE
CONEXIÓN
A TIERRA
NEUTRO
(Blanco)
TORNILLOS
(3)
TAPA
CABLES ELÉCTRICOS CONDUCTORES DE COBRE
NÚM. 10 AWG DE POR LO MENOS 3 HILOS O KIT
DE CABLE DE CORRIENTE DE 120/ 240V 30A
MARCADO PARA USO CON SECADORAS Y
PROVISTO CON TERMINALES DE BUCLE
CERRADO O CON HORQUILLA CON EXTREMOS
DOBLADOS HACIA ARRIBA (NO PROVISTO).
ADVERTENCIA: NUNCA
DEJE LA TAPA FUERA DEL
BLOQUE TERMINAL.
ADVERTENCIA: NUNCA
DEJE LA TAPA FUERA DEL
BLOQUE TERMINAL.
Other manuals for Spacemaker GTUP240EMWW
3
Table of contents
Other GE Washer Dryer manuals

GE
GE GE Unitized Spacemaker WSM2480T User instructions

GE
GE Spacemaker WSLS1100A User instructions

GE
GE WNCD2050 User manual

GE
GE GTUN275GMWW User manual

GE
GE GTUP240EM5WW User manual

GE
GE Mabe MCL2040PSBB User manual

GE
GE Spacemaker GTUP270EMWW User manual

GE
GE GUD27EE User manual

GE
GE 8557471A User manual

GE
GE Unitized Spacemaker GTUP240EM Service manual
Popular Washer Dryer manuals by other brands

Kenmore
Kenmore 417.93702201 Repair parts list

Whirlpool
Whirlpool WET3300SQ0 parts list

Alliance Laundry Systems
Alliance Laundry Systems SWD444C Installation & operation

Siemens
Siemens WD15G421GB Instruction manual and installation instructions

Beko
Beko BWD7541IG user manual

LG
LG GCW1069CS quick start guide