GE GTWS8650DWS User manual

Write the model and serial
numbers here:
Model # _____________
Serial # ______________
You can find
them under
the lid of the
washer.
GEAppliances.com
Owner’s Manual
Washers
49-90460 10-12 GE
Safety Instructions ..........2,3
Operating Instructions
Appliance Communication....12,13
Care and Cleaning
oftheWasher.................... 13
Features.........................7-9
Loading and Using
theWasher...................... 11
Operating instructions..........4–6
Special Features ..................10
Troubleshooting Tips.....14–16
Consumer Support
Consumer Support................18
Parts and Accessories. . . . . . . . . . .3, 18
Warranty..........................17
G004
As an ENERGY STAR®partner,
GE has determined that this
product meets the ENERGY STAR®
guidelines for energy efficiency.
Printed in the United States

2
This is the safety alert symbol. This symbol alerts you to potential hazards that can kill you or hurt you and others. All safety
messages will follow the safety alert symbol and the word “DANGER”, “WARNING”, or “CAUTION”. These words are defined as:
Indicates a hazardous situation which, if not avoided, will result in death or serious injury.
Indicates a hazardous situation which, if not avoided, could result in death or serious injury.
Indicates a hazardous situation which, if not avoided, could result in minor or moderate injury.
DANGER
WARNING
CAUTION
IMPORTANT SAFETY INFORMATION.
READ ALL INSTRUCTIONS BEFORE USING.
IMPORTANT SAFETY INSTRUCTIONS
To reduce the risk of fire, explosion, electric shock, or injury to persons when using your appliance, follow
basic precautions, including the following:
Read all instructions before using the appliance.
DO NOT wash or dry articles that have been previously cleaned in, washed in, soaked in or spotted with gasoline, dry-
cleaning solvents, or other flammable or explosive substances, as they give off vapors that could ignite or explode.
DO NOT add gasoline, dry-cleaning solvents, or other flammable or explosive substances to the wash water. These
substances give off vapors that could ignite or explode.
Under certain conditions, hydrogen gas may be produced in a hot-water system that has not been used for 2 weeks
or more. HYDROGEN GAS IS EXPLOSIVE. If the hot water system has not been used for such a period, before using a
washing machine, turn on all hot-water faucets and let the water flow from each for several minutes. This will release
any accumulated hydrogen gas. As the gas is flammable, DO NOT smoke or use an open flame during this time.
DO NOT allow children to play on or in this appliance. Close supervision of children is necessary when this appliance is
used near children.
Before the washer is removed from service or discarded, remove the door or lid.
DO NOT reach into the appliance if the tub or agitator is moving. Wait until the machine has completely stopped before
opening the lid.
DO NOT install or store this appliance where it will be exposed to the weather.
DO NOT tamper with controls.
DO NOT repair or replace any part of this appliance or attempt any servicing unless specifically recommended in the
user maintenance instructions or in published user repair instructions that you understand and have the skills to carry
out.
Keep the area around your appliance free of combustible materials such as lint, paper, rags and chemicals.
DO NOT operate this appliance if it is damaged, malfunctioning, partially disassembled, or has missing or broken parts
including a damaged cord or plug.
Unplug the appliance or turn off the circuit breaker before servicing. Pressing the Power or Start/Pause button DOES NOT
disconnect power.
DO NOT mix chlorine bleach with ammonia or acids such as vinegar or rust remover. A toxic gas may be produced.
DO NOT leave the washer door open. An open door could entice children to crawl inside the washer.
The laundry process can reduce the flame retardancy of fabrics. Carefully follow the garment manufacturer’s wash and care
instructions.
See “Electrical Requirements” located in the Installation Instructions for grounding instructions.
SAVE THESE INSTRUCTIONS
WARNING

3
GEAppliances.com
WHEN NOT IN USE
Turn off water faucets to minimize leakage if a break or
rupture should occur. Check the condition of the fill hoses;
GE recommends changing the hoses every 5 years.
Ensure that the hot water hose is connected to the “H”
(internal red screened) valve and the cold water hose is
connected to the “C” (internal blue screened) valve.
Install or store where it will not be exposed to
temperatures below freezing or exposed to the weather,
which could cause permanent damage and invalidate the
warranty.
Properly ground washer to conform with all
governing codes and ordinances. Follow details
in Installation Instructions.
This washer does not include water supply hoses.
GE strongly recommends the use of factory specified
parts. A list of factory hoses available for purchase are
listed below. These hoses are manufactured and tested to
meet GE specifications.
GE strongly recommends the use of new water supply
hoses. Hoses degrade over time and need to be replaced
every 5 years to reduce the risk of hose failures and water
damage.
Parts and Accessories
Order on-line at GEApplianceparts.com today, 24 hours a
day or by phone at 800.626.2002 during normal business
hours.
Part Number Accessory
PM14X10002 4 ft Rubber Water Supply Hoses
Or
PM14X10005 4 ft Braided Water Supply Hoses
WX10X10011 Tide®Washing Machine Cleaner*
WX7X1 Washer Floor Tray
DR07X10002 6’ Cable
DRM2E300V0 ACM, Splitter, two 6’ Cables & a 1’
Cable
PROPER INSTALLATION
This washer must be properly installed and located in accordance with the Installation Instructions before it is used.
If you did not receive an Installation Instructions, you can receive one by visiting GEAppliances.com or by calling
800.GE.CARES (800.432.2737).
* Tide®is a registered trademark of Procter & Gamble
SAVE THESE INSTRUCTIONS
DO NOT allow children to play on or in this appliance. Close supervision of children is necessary
when this appliance is used near children. Failure to follow this instruction may result in death
or injury to persons.
If the lid is opened between cycles (i.e. not pausing and
restarting the current cycle, changing cycles after it
started, etc.) pushing the Start button will cause the
washer to turn on the cold water for 5 seconds followed
by a 10 second delay before locking the lid and starting
the cycle.
If the lid is opened during this 15 second period, the word
PAUSE will start scrolling across its display. You will have
to push the Start button again to restart the cycle.
FUNCTIONALITY CHECK
Confined
Space Hazard
WARNING
¥

Throughout this manual, features and appearance may vary from your model.
4
Operating instructions.
Controls
A
B
TM
Select Cycle and Push Button for stain options
Basket
Stain Removal Guide
B
A
DC
EF
G
H
I
Power
Press to “wake up” the display. If the display is active, press to put the washer into idle mode.
NOTE: Pressing POWER does not disconnect the appliance from the power supply.
Start and Unlock Lid
Press Start to begin the cycle. NOTE: The lid must be closed for the washer to fill and the cycle to start. If the lid is open, “LID” will scroll across
the display. If the lid is closed, the lid will lock, the LID LOCKED light will light, the detergent will be dispensed, and “FILL” will scroll across the
display.
Pressing Unlock Lid will Pause the cycle and the Start indicator light will blink.
To continue the cycle, press Start again. If machine is paused more than 24 hours, the cycle will be cancelled. If water remains in the machine,
select the Drain & Spin cycle to drain tub and spin water out of the washer tub.
Display and Status Lights
Display:
The display shows the approximate time remaining until the end of the cycle.
NOTE: The cycle time is affected by how long it takes the washer to fill. This depends on the water pressure in your home. The “smart” timer
“learns” the amount of time it takes to fill your washer and adjusts the total time accordingly.
In addition, this display will, “scroll” the washer status:
bALANCINgStart of rebalancing cycle to redistribute clothes. Stops after rebalancing is complete.
CyCLE PrEP Sensing dry load size prior to fill (normal).
dELAY When Delay Wash is initiated. Replaced with estimated time when cycle starts.
End End of current cycle.
ES Washer in a delay start (4 hour maximum) awaiting lower energy rates (see the Energy Smart section).
FILL For the first 45 seconds of a fill, the estimated end of cycle time is displayed. For the rest of the fill time, “FILL” is scrolled
until the fill completes.
H2O SUPPLY Can not sense water level (valves possibly turned off).
HEAt Water being heated for Sanitize cycle.
LId Cycle stopped because lid is open. Close the lid.
LOAd SenSE Sensing wet load size (normal).
PAUSE Cycle paused because the Start/Pause button was pressed and the washer was set to Pause. Press Start button again to
restart the cycle.
Cycle status lights:
Shows whether the washer is in the SOAK, WASH, RINSE or SPIN cycle.
Feature status lights indicate (see sections F, Gand Hfor more details):
The My Settings feature is on for this cycle.
The washer is locked - will blink once if you press any button or turn the cycle knob.
The signal is on. See the Variable Signal description.
The Energy Smart feature is selected. See About Appliance Communication section.
C
The lid is locked. See the Control
Lock description.
The eWash feature is selected.
A Delay Wash time is set.
$GGIDEULFVRIWHQHUWRWKHIDEULF
VRIWHQHUGLVSHQVHUVHHSDJH
$GGGHWHUJHQW*(UHFRPPHQGV
WKHXVHRI+LJK(IILFLHQF\
GHWHUJHQWVLQDOO(QHUJ\
6WDUUDWHGZDVKHUV
/RRVHO\DGGLWHPVDURXQGLQIXVRU
™
2YHUORDGLQJPD\QHJDWLYHO\LPSDFW
ZDVKSHUIRUPDQFH6HHSDJHIRU
VXJJHVWHGORDGLQJH[DPSOHV
&ORVHOLG
NOTE: :DVKHUZLOOQRWILOOZLWKOLG
RSHQ
Step 2 Step 3 Step 4
Step 1
6HOHFWZDVKF\FOH
6HOHFWZDVKRSWLRQV
LQFOXGLQJFabric Softener
RSWLRQ
6HOHFWoptions including
Pretreat/Bleach option.
3UHVVStart.

Settings
Individual settings for agitation (Soil), water temperature (Temp), and spin (Spin) can be set from the minimum (lowest in column) to
maximum (highest in column). In general, the higher up the column, the more washer energy will be used.
NOTE: Higher Spin speeds typically reduce dryer time/energy usage (i.e. reduces total energy when using both a washer and a dryer).
GEAppliances.com
Wash Cycles-Cycle Selector Knob
The wash cycle controls the type of washing process. The Cycle Selector knob can be turned in either direction. Turning the knob after
starting a cycle will stop the washer and change the cycle/options to the new selection. Press Start to begin the new cycle selection.
NOTE: When the knob is turned to another cycle, the tub light is turned on to assist in loading.
The chart below will help you match the wash cycle setting with your clothing.
Speedwash
For small loads of lightly soiled items that are needed in a hurry. Provides light wash/rinse and short high speed spin.
Delicates
For lingerie and special-care fabrics with light to normal soil. Provides light
wash and
low speed spin.
Hand Wash
*
For items labeled hand washable with light soils. Provides an extra light wash and medium speed spin.
Jeans
*
For washing medium to lightly soiled jeans.
Provides
normal wash
and medium speed spin. (
For heavily soiled
work jeans, use Whites cycle.)
Dark Colors*For non-colorfast cottons and blends or items that are labeled cold wash. Provides normal wash and medium speed
spin.
Whites
*For heavy to lightly soiled whites, household linens, work and play clothes.
Provides a heavy wash and a high
speed spin.
Normal/
Light Colors
*For heavy to lightly soiled colorfast cottons, household linens, work and play clothes.
This cycle provides the best
overall cleaning and should be used for most everyday items. Provides normal wash and medium speed spin.
Towels/Sheets* Provides periods of agitation and soak tailored for washing towels and sheets. Provides normal wash and a
high speed spin.
Sanitize When selecting sanitize, the washer increases the water temperature to sanitize and remove 99.9% of
bacteria found in home laundry. Provides an extra heavy wash and a medium spin.
Bulky Items/ For large coats, bed spreads, mattress covers, sleeping bags and similar large and bulky items. Large items
Comforters, Pillows such as blankets, comforters, jackets and small rugs. Provides a normal wash and an extra heavy spin.
Quick Rinse
Rinses and spins non-soiled items where a rinse only is desired. Provides an extra light wash and an
extra high speed spin. Fabric Softener and Extra Rinse options are available with this cycle.
Drain & Spin
For draining the tub and spinning water out of the clothes. Provides a normal wash and a medium speed
spin.
BASKETclean Use for cleaning the basket of residue and odor. The washer will fill with hot water. Use this cycle once a
month with liquid chlorine bleach or Tide®Washing Machine Cleaner. NOTE: Never load laundry while using
BASKETclean. The laundry may become damaged or contaminated. See the Care and Cleaning section.
* Cycles available with Steam Assist
D
5
NSF Protocol P172
Sanitization Performance of Residential and
Commercial, Family-Sized Clothes Washers
Steam Assist
Steam Assist adds steam into the washer during Hand Wash, Jeans, Dark Colors,Whites, Normal/Light
Colors and Towels/Sheets cycles.
To use:
1. Turn Power on and select one of the above wash cycles.
2. Press the Steam Assist button to activate.
3. Press the Start button.
Stain Removal Guide
The Stain Removal Guide feature allows you to indicate what stains are on the garments in your load. This
feature can be used with any wash cycle except Sanitize.
To use Stain Removal Guide:
1. Select the wash cycle.
2. Press the Stain Removal Guide button (the button will light up when it is on).
Continue to press to select tomato stain, oily stain, grass stain or dirt stain. The indicator light will show the
selected stain.
To select a different stain, press the Stain Removal Guide button until desired stain to be removed is lit.
To turn off Stain Removal Guide, press until the light on the button turns off.
NOTE: The Soil and Temperature levels will be changed to match each stain type. Turning off Stain Removal
Guide will return the settings to default.
E
Stain Removal Guide
Select Cycle and Push Button for stain options
NOTE: The default Sanitize cycle water
temperature (Hot) can NOT be changed.

6
Operating instructions.
Cycle Options
Soak
This option begins with a brief agitation, soaks for a specified period of time, then moves through the rest of the cycle automatically.
Repeated pressing of the Soak button will add 15, then 30 and then return back to 0 soak minutes.
Extra Rinse
When you use extra detergent or bleach to clean heavily soiled clothes, use the Extra Rinse option to better remove additional residues.
NOTE: This option is not allowed for some cycles.
Fabric Softener
Set this option to provide a deep rinse or when manually adding fabric softener to the rinse cycle. NOTE: This option is not allowed for some
cycles. When allowed, it may change other settings (e.g. Spin may go to a higher setting) to maximize performance.
NOTE: Do not use fabric softener dispensing balls with this washer. They do not work correctly in high efficiency washers.
Pretreat/Bleach
Set this option to add pretreatment -OR- bleach in the next load. Press once to indicate adding pretreatment (light on above button), twice
to specify bleach (light on below button), three times to turn off (no light). Pretreatment or bleach will be added at the optimal time during the
wash cycle (differs for pretreatment or bleach).
NOTE: Do NOT use pretreatment and bleach in the same load. If you forget to dispense (did not press button once or twice), you can flush
out the dispenser by pouring water into the compartment and running a Quick Rinse cycle to remove from the tub.
Delay Wash
When the Delay Wash button is repeatedly pressed, the delay time is set from 1 (01H) to 9 (09H) hours and back to clear (00H) hours. If you
press and hold the Delay Wash button for 3 seconds, it will immediately reset.
Additional Options
My Settings
As the cycle selector knob is turned, the Soil, Temp and Spin settings change to automatic pre-set default settings. If you desire a different
setting, select the desired options or changes to cycle settings. Press and hold the My Settings button for 3 seconds, the washer will save
these settings for that cycle and the status heart and My Settings button will light when active. In the future, when you turn the selector
knob to that cycle, your settings will be automatically recalled. To temporarily (i.e. for this load) return to the pre-set default settings, press the
My Settings button for 1/2 second. The status heart and button lights will turn off and the options will change back to these defaults. To
make these default settings permanent, hold the My Settings button again for 3 seconds to make them your preferred settings (the lights
will turn back on). NOTE: My Settings includes Stain Removal Guide and Steam Assist but not Delay Wash or Variable Signal - or any bulk
dispense options.
Variable Signal
Use the Variable Signal button to change the volume of the end of cycle signal. Press the button until you reach the desired volume (high,
medium, low) or off.
Basket Light
The basket light will turn on when the Basket Light button is pressed, the lid is lifted, or the cycle knob is turned. It will stay on for 5 minutes or until the
Basket Light button or Power button is pressed.
Control Lock
You can lock the controls to prevent any selections from being made. Or you can lock the controls after you have started a cycle. Children
cannot accidentally start the washer by touching buttons with this option selected.
7RORFNWKHZDVKHUFRQWUROV press and hold the Control Lock button for 3 seconds. The control lock icon will light up when it is on.
7RXQORFNWKHZDVKHUFRQWUROV press and hold the Control Lock button for 3 seconds.
NOTE: The Power button can still be used when the machine is locked.
eWash
When the eWash button is pressed, the cycle changes to its most energy efficient settings and all of the eMonitor lights will light to indicate
that the most efficient settings are on. If you change settings, the eWash light will go off and the number of eMonitor lights will decrease (or
increase) to indicate decreased (or increased) energy efficiency settings.
F
G
H
ISmartDispense™
The SmartDispense™ feature allows you to set your liquid HE (High Efficiency) detergent and/or softener dispensing preferences for
your load. This feature can be used with any wash cycle, except for Quick Rinse, Drain & Spin and BASKETclean cycles.
The SmartDispense™ system automatically dispenses liquid HE (High Efficiency) detergent and/or concentrated liquid fabric
softener into each cycle at the optimal times.
To utilize the SmartDispense™ dispensers, they must first be filled. Although any liquid HE (High Efficiency) laundry detergent
and concentrated liquid fabric softener can be used in the SmartDispense™ system, all liquid HE (High Efficiency) detergents and
concentrated liquid fabric softeners are not the same.
CAUTION! Absolutely do not store liquid chlorine bleach, powder detergent, non-concentrated liquid fabric softener or other
laundry additives in any of the tanks. Use only liquid detergent which has been specifically designed for use in High Efficiency washers.

About washer features. GEAppliances.com
7
Automatic Load Sensing
This provides the correct amount of water suited to the size and type of load placed in the unit. The washer will not fill with water during
automatic load sensing if the lid is open. When the lid is closed the machine is able to begin filling with water in order to sense the load
size.
NOTE: This is a high efficiency washing machine with Infusor™ wash action. This system requires less water while providing effective
cleaning action. You may notice that the water level is lower than on your previous washer. This is normal for an Infusor™-equipped
washer.
Pretreatment or Liquid Bleach
To add either liquid pretreatment or liquid bleach to
just the next load, pour only one of them in the right
front compartment and press the Pretreat/Bleach
button either once to light the pretreat light (above
button) or twice to light the bleach light (below
button). The liquid will be added at the optimal time
(pretreatment - early or bleach – late) in the wash
cycle.
Pretreatment option
Check clothing care labels for special
instructions.
2Measure liquid pretreatment carefully, following
instructions on the bottle.
3Before starting the washer, pour measured
amount of pretreatment directly into the
compartment.
Bleach option
The water fill
dilutes liquid
chlorine bleach as
the washer fills for the wash cycle.
Check clothing care labels for special
instructions.
2Measure liquid bleach carefully, following
instructions on the bottle.
Never pour undiluted liquid chlorine bleach
directly onto clothes or into the wash
basket.
Do not pour powdered bleach into bleach
compartment.
3Before starting the washer, pour measured
amount of bleach directly into bleach
compartment. Avoid splashing or over-filling
dispenser. If you prefer to use powdered
bleach, add it into the wash basket with your
detergent.
Do not mix chlorine bleach with ammonia
or acids such as vinegar and/or rust
remover. Mixing can produce a toxic gas
which may cause death.
Pretreatment or Liquid
Bleach Compartment
Dispensers - Laundry Additives
All additives – Detergent and fabric softener can be dispensed through the SmartDispense®system. Single dosages of bleach, pretreatment
(such as OxiClean®) or detergent are added through the dispensers in the front corners. Your option selections will determine when each
additive is automatically dispensed at its optimal time in the wash or rinse cycle.
Average Small Load
Clothes Level
Water Level
Average Medium Load
Clothes Level
Water Level
Clothes Level
Water Level
Average Large Load

8
About washer features.
Bulk Detergent Tank
The bulk detergent tank holds over a gallon (140
ounces or 4100 ml) of liquid bulk detergent. After
filling the tank, press the Detergent Tank On button
to turn on its light and designate bulk (rather than
manual) detergent dispense.
The Tank Levels lights (1-5) indicate how much
detergent is left. An empty tank is shown by a single
red light. A full (or nearly full) tank is shown by 5
lights.
NOTE: If you press Start when the tank is empty, the
Detergent Tank On and the red light will blink.
A beep will also sound if Variable Signal is on.
The Detergent Cup Amount lights indicate if a Low,
Medium, or High amount will be dispensed.
See the Bulk Tank Special Functions Option 1: Set
Concentration Settings on page 10 to understand
how the Low, Medium, and High amounts are
established.
Detergent will be automatically dispensed at the
optimum time at the beginning of each fill cycle.
Bulk Detergent Tank
Single Wash Detergent Dispenser
If you prefer to manually add either powder or liquid
detergent to the next wash cycle, pour it in the left
front opening and make sure the Tank On light is
off (press button if light is on). Most detergent will
immediately enter the tub. The washer will flush
water through this opening just prior to the fill cycle
to add any detergent that did not fall into the tub.
NOTE: Do not put detergent tablets in the single
wash detergent dispenser.
Detergent tablets should be added to the bottom
of the washer basket before clothes are placed
inside.
Single Wash Detergent Dispenser
Set the Bulk Detergent Cup Amount Preference
When the Detergent Tank On light is on, pressing the Detergent Cup Amount button will set the Detergent
Cup Amount lights (1, 2, or 3).
Level 1 will distribute the standard amount minus 25%.
Level 2 will distribute the standard amount.
Level 3 will distribute the standard amount plus 25%.
Examples:
Factory default standard amount is 1.5 oz (44 ml) (Concentration Setting ).
If Detergent Cup Amount shows 3 lights then 1.9 oz (55 ml) will be dispensed.
If Detergent Cup Amount shows 2 lights then 1.5 oz (44 ml) will be dispensed.
If Detergent Cup Amount shows 1 light then 1.1 oz (33 ml) will be dispensed.
NOTE: Each cycle knob position defaults to a different Detergent Cup Amount (including 0 if no
detergent is used). If you change the Soil setting, the Detergent Cup Amount may change. You can
then manually change the Detergent Cup Amount, but your change will not be saved when you leave
this knob position or if you set a My Settings.
1.9 oz.
1.5 oz.
1.1 oz.
Concentration
Setting
3 lights:
2 lights:
1 light:

9
GEAppliances.com
Bulk Softener Tank
The bulk softener tank holds over a gallon (140
ounces or 4100 ml) of liquid non-concentrated bulk
softener. After filling the tank, press the Softener
Tank On button to turn on its light and designate
bulk fabric softener dispense.
The Tank Levels light (1-5) indicate how much
softener is left. An empty tank is shown by a single
red light. A full (or nearly full) tank is shown by 5
lights.
NOTE: If you press Start when the tank is empty,
the Softener Tank On and the red light will blink.
A beep will also sound if Variable Signal is on.
The Softener Cup Amount lights indicate if a Low,
Medium, or High amount will be dispensed.
See the Bulk Tank Special Functions Option 1: Set
Concentration Settings on page 10 to understand
how the Low, Medium, and High amounts are
established.
The spin speed will be increased to the highest
speed and the softener will be dispensed during
the rinse cycle.
Bulk Softener Tank
Single Use Softener
To manually add a specific softener amount to a
single load, press the Fabric Softener and Unlock
Lid buttons and pour the softener into the washer
basket during the rinse cycle (Rinse cycle light is on).
NOTE: Pressing the Fabric Softener button will turn
off the Bulk Softener Tank dispenser.
Pour into the
washer basket
Set the Bulk Softener Cup Amount Preference
When the Softener Tank On light is on, pressing the Softener Cup Amount button will set the Softener Cup
Amount lights (1, 2, or 3).
Level 1 will distribute the standard amount minus 25%.
Level 2 will distribute the standard amount.
Level 3 will distribute the standard amount plus 25%.
Examples:
Factory default standard amount is 1.0 oz (30 ml) (Concentration Setting ).
If Softener Cup Amount shows 3 lights then 1.3 oz (37 ml) will be dispensed.
If Softener Cup Amount shows 2 lights then 1.0 oz (30 ml) will be dispensed.
If Softener Cup Amount shows 1 light then .8 oz (22 ml) will be dispensed.
NOTE: Softener Cup Amount is 0 for non softener knob positions or whatever was set the last time
softener was dispensed. If you manually change the Softener Cup Amount, this will be used for all
further softener cycles. It will not be (uniquely) saved if you set a My Settings.
1.3 oz.
1.0 oz.
0.8 oz.
Concentration
Setting
3 lights:
2 lights:
1 light:

Enter Special Features mode. See To Enter Special
Features section above.
2Remove all articles from the washer basket.
3Press the Extra Rinse button.
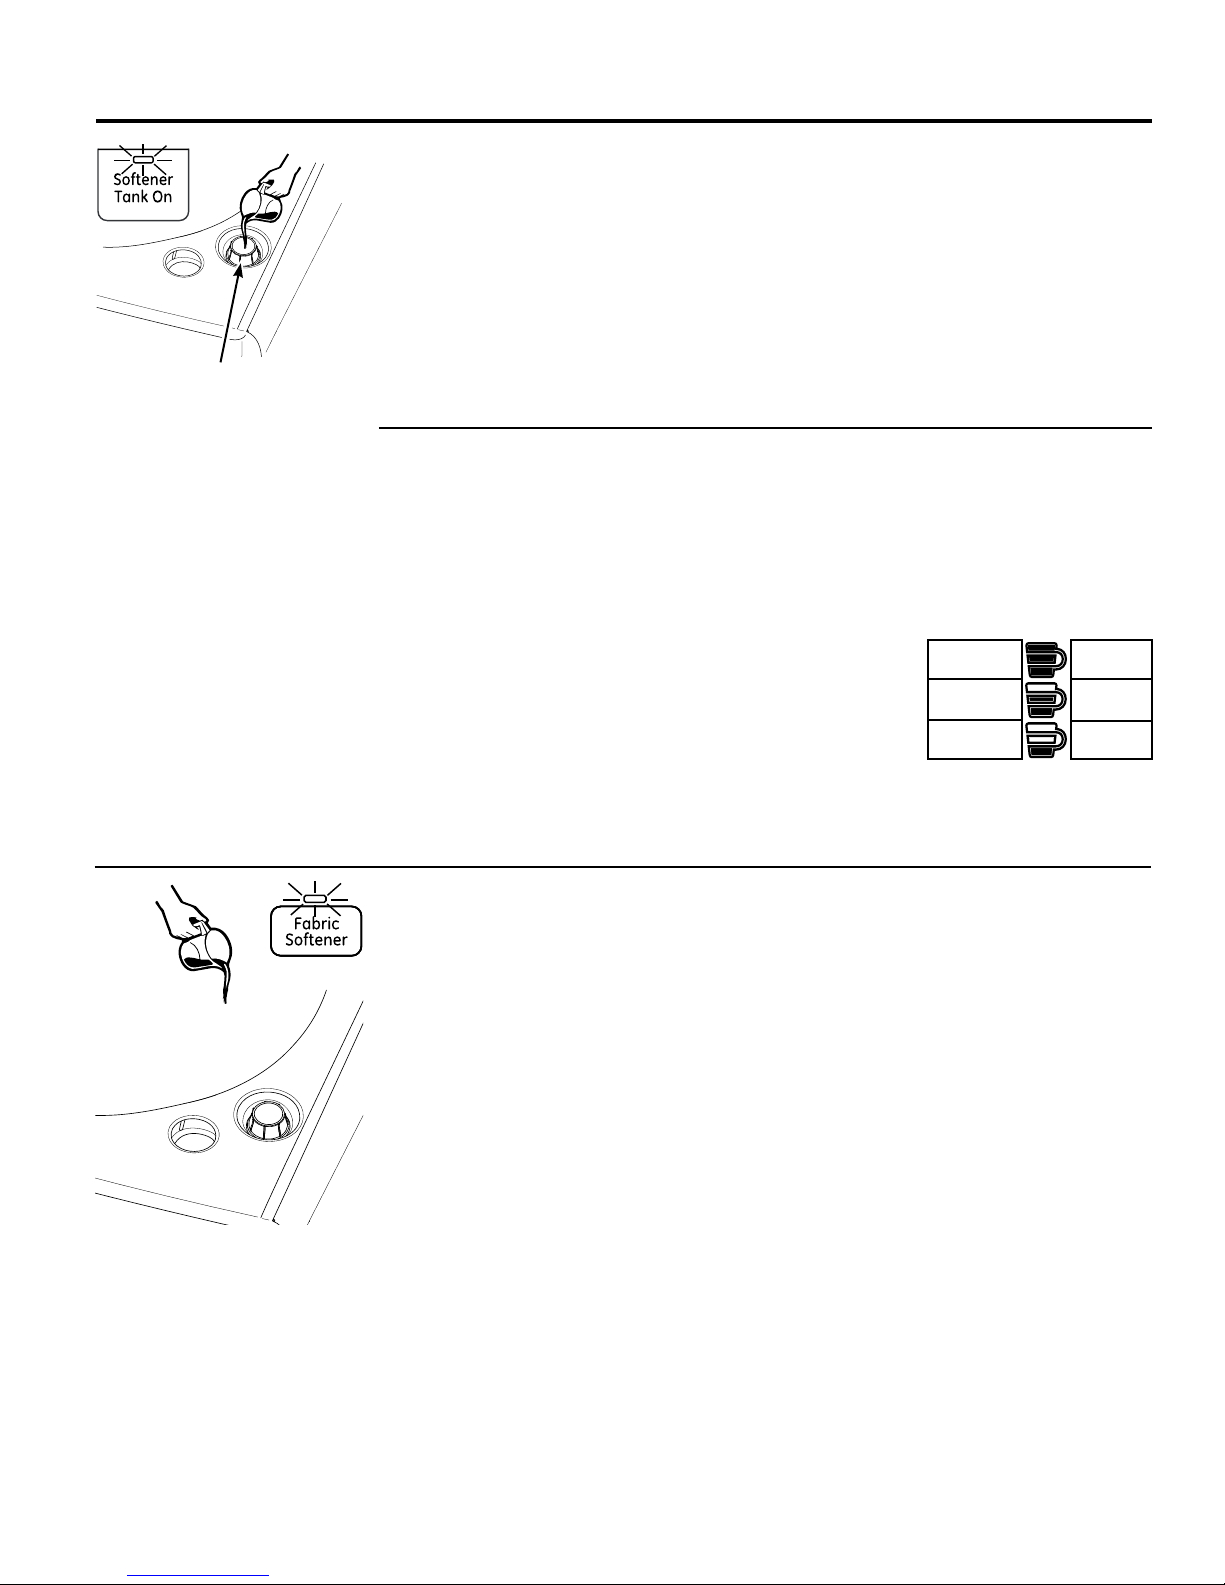
The My Settings and lights will go out. The Start
button light will blink. The corresponding Tank Levels
lights will show the current tank level.
4Press the Start button.
The tank will dispense for the minutes shown in the
display to empty the selected tank. The Tank Levels
lights will cycle 0,1,2,3,4,5,4,3,2,1,0 until the flush is
finished.
Once finished, the Tank Level will indicate an empty tank
(a single blinking red LED light) and the Start button will
be lit. You can (repeatedly) refill the tank with water and
press the Start button to rinse out the tank as needed.
NOTE: If you suspect that the dispenser is plugged, add
lemon juice to make the water slightly acidic.
Press the Power button to exit (when the tank is
empty).
This function will automatically exit if neither button is
pressed for 2 hours.
NOTE: Bulk tank flush is recommended if you:
Change detergent or softener brands
Accidently add softener to the detergent tank or
vice versa
Put powdered detergent in the detergent tank
Put non-concentrated fabric softener in the
softener tank
10
About special features.
To Enter Special Features
To enter the bulk tank Special Features Mode:
Press the Power button.
2Simultaneously press and hold either the
Detergent Tank On and Detergent Cup Amount buttons
for 3 seconds
or
Softener Tank On and Softener Cup Amount buttons for
3 seconds
The My Settings and Extra Rinse lights will flash to
indicate you are in the Special Features Mode.
OR
Option 1: Set Concentration Settings
NOTE: During initial installation, or if the household
water pressure dramatically changes, the bulk
dispenser will change to accommodate your homes’
unique water pressure. Wait a few wash cycles before
changing concentrations.
The factory default concentration settings are 1.5 oz
(44 ml) for detergent and 1.0 oz (30 ml) for softener.
To allow maximum user flexibility either of these can
be changed to between 0.5 and 10 ounces.
Enter Special Features mode. See To Enter Special
Features section above.
2Press the My Settings button.
The My Settings and the chosen (Detergent or Softener)
3 Cup Amount lights will come on and the Extra Rinse
light will go out. The display will show “10
times in ounces”
the current concentration setting (e.g. 15 represents 1.5
ounces). This amount will be
dispensed when 2 (of the 3)
Cup Amount lights are lit.
3Turn the cycle knob clockwise to increase or
counter-clockwise to decrease the setting (within
preset limits). Each click increases or decreases Level
2 (standard amount) by 1/2 ounce. Levels 1 & 3
change proportionally.
4Press the Cup Amount button to save the new
setting.
This function will then exit and the display will reflect
whatever cycle the cycle knob is on.
To exit without changing the setting, press the Power
button. This function will automatically exit (without
saving) if neither button is pressed within 1 minute.
Option 2: SmartDispenseTM Tank Cleaning
The following table shows the approximate amount dispensed (oz) at each Cup Amount setting (1, 2 or 3) for each
Concentration Setting:
Concentration
Setting
5 10 15 20 25 30 35 40 45 50 55 60 65 70 75 80 85 90 95 100
200 100 67 50 40 33 29 25 22 20 18 17 15 14 13 13 12 11 11 10
0.6 1.3 1.9 2.5 3.1 3.8 4.4 5.0 5.6 6.3 6.9 7.5 8.1 8.8 9.4 10.0 10.6 11.3 11.9 12.5
0.5 1.0 1.5 2.0 2.5 3.0 3.5 4.0 4.5 5.0 5.5 6.0 6.5 7.0 7.5 8.0 8.5 9.0 9.5 10.0
0.4 0.8 1.1 1.5 1.9 2.3 2.6 3.0 3.4 3.8 4.1 4.5 4.9 5.3 5.6 6.0 6.4 6.8 7.1 7.5
Number of
Loads*
*For a 100 oz (2957 ml) bottle for normal ( ) setting.

11
GEAppliances.com
Loading and using the washer.
Always follow fabric manufacturer’s care label when laundering.
Sorting Wash Loads
Sort by color (whites, lights, colors), soil level,
fabric type (sturdy cottons, easy care, delicates) and whether the fabric produces lint (terry cloth,
chenille) or collects lint (velveteen, corduroy).
Proper Use of Detergent
Using too little or too much detergent is a common
cause of laundry problems.
Use less detergent if you have soft water, a smaller load
or a lightly soiled load.
For spots, apply pre-treatment to items as recommended
on the product label. Application should be made in
the basket to prevent overspray which may cause the
coloring on the lid or graphics to fade.
GE recommends the use of High Efficiency
detergents in all Energy Star rated washers.
HE detergents are formulated to work with low water
wash and rinse systems. HE detergents reduce
the oversudsing problems commonly associated
with regular detergents.
When using high efficiency or concentrated detergents,
consult the product label to determine amount required
for optimum performance. Excessive detergent will
negatively impact wash performance.
Loading the Washer
JEANS
3 Jeans
5 Work Wear Shirts
4 Work Wear Pants
72:(/66+((76
2 Bath Sheets
5 Bath Towels/
12 Washcloths
6 Hand Towels/
2 Terrycloth Bath Mats
OR
2 Flat Queen-Sized
Sheets
2 Fitted Queen-Sized
Sheets
4 Pillowcases
1250$/
4 Pillowcases
2 Hand Towels
2 Flat Sheets/
2 Fitted Sheets
2 Bath Towels/
4 Washcloths
OR
6 Shirts (Men’s
or Women’s)
4 Pair Pants (Khakis
or Twills)
5 T-shirts
7 Pairs of Boxers
4 Pairs of Shorts
OR
6 T-shirts
4 Pairs of Sweatpants
4 Sweatshirts
2 Hoodies
7 Pairs of Socks
'(/,&$7(6*
7 Bras
7 Pairs of Underwear
3 Slips
2 Camisoles
4 Nightgowns
*Using a nylon mesh
bag for small items is
recommended.
SPEEDWASH
²*$50(176
2 Casual Wear
Work Shirts
1 Pair Casual Wear
Work Pants
OR
3 Soccer Uniforms
Loading Examples*
Load dry items loosely in the washer basket. For best
results, load items evenly and loosely around the
outside of the basket. To add items after washer has
started, press Unlock Lid, lift the lid and submerge
additional items around the outside of the basket. Close
the lid and press Start to resume.
Do not place large items such as sheets, blankets
and towels across the Infusor™. Load them around
the outside of the basket.
Do not put lawn or sofa cushions into the washer as
they are too big to move. Remove outer covers and
ONLY wash them.
DO NOT wash fabrics soiled with flammable liquids or cleaning solvents.
No washer can completely remove oil.
DO NOT dry anything that has ever had any type of oil on it (including cooking oils).
Doing so can result in death, explosion, or fire.
WARNING
Fire Hazard

About Appliance Communication.
12
CleanSpeakTM
This washer can communicate with a compatible
dryer (one whose Owner’s Manual contains a
&OHDQ6SHDNdescription) via a cable between these
appliances. This cable comes with &OHDQ6SHDN
dryer models or may be purchased separately.
At the end of the wash cycle, the washer sends a
signal to the dryer to indicated a preferred dry cycle.
When the dryer becomes idle (“End” display times
out - or- the door is opened) “CYCLE” will scroll
across its cycle time display, its current cycle knob
setting LED will be lit, and (if different) a second
recommended cycle LED will blink. If “CYCLE” times
out, pressing Power will refresh it and the LEDs. If
the dryer cycle knob is turned , the solid LED will
move accordingly. Pressing the dryer Start will
initiate the cycle knob setting (solid LED) and turn off
the recommended (blinking LED) if a different cycle
is started.
Brillion Enabled Communication
This washer (and/or compatible dryer) can
communicate with your Home Computer and/or
iPhone®. By using the GE Nucleus™Home Energy
Manager and Appliance Communication Module
(ACM) you will be able to see the following:
2Q\RXUKRPHFRPSXWHURUL3KRQH®:
:KLFKF\FOHLVUXQQLQJDQGZKDWLWVFXUUHQWF\FOH
segment is (example, “Spinning”).
7KHHVWLPDWHGWLPHUHPDLQLQJRIWKHF\FOHWKDW
has been selected.
:KHQDF\FOHKDVFRPSOHWHG
$OHUWVQRWLI\LQJ\RXLIWKHZDVKHUQHHGV
maintenance or servicing.
What your software allows you to do:
NOTE: Messages are displayed in English. See
www.gebrillion.com or call 1-800-220-6899 for
possible language options.
&\FOHGLVSOD\ZLOOSURYLGHWKHFXUUHQWVWDWXVRIWKH
ZDVKF\FOH
6RDN0DLQ:DVK5LQVH6SLQRUFRPSOHWH
$OHUWVZLOOQRWLI\\RXRISUREOHPVSomeH[DPSOHV
/RQJILOOWLPH
1RWUHDFKLQJZDWHUWHPSHUDWXUHWDUJHW
/LGORFNSUREOHP
3UHVVXUHVZLWFKHUURU
%XONGLVSHQVHUHUURU
:KDW\RXZLOOQHHGIRUWZRZD\FRPPXQLFDWLRQ
1XFOHXVKRPHHQHUJ\PDQDJHUPRGHO
$SSOLDQFH&RPPXQLFDWLRQ0RGXOHPRGHO
%URDGEDQGFRQQHFWLRQZLWKURXWHU:L)LIRU
iPhone®connection)
&RPSXWHU0DF®or PC) and/or Internet capable
iPhone®
NOTE: If you also have a compatible Energy Smart
dryer, see Installation Instructions for additional
parts.
,QVWDOODWLRQ
6WHS Install your Nucleus Home Energy Manger/
Cable - near your internet router.
Refer to the Quick Start Guide/Installation
Instructions included with this device for
information needed to download software to a
desktop and/or iPhone®.
6WHS Install your Appliance Communication
Module (ACM) in your Laundry area. Determine
the most convenient location for your ACM. Install
the ACM according to the Quick Start/Installation
Instructions included with the device.
6WHS Connect your ACM to your washer or dryer-
washer.
The ACM comes with a splitter, two 6’ cables, and
a 1’ cable (see Parts and Accessories). If you also
have an Energy Smart dryer, use the splitter to
connect both appliances. NOTE: If the dryer did
not
come with a 6 foot cable, you may need to purchase
a second 6 foot cable (see Parts and Accessories).
For more information or questions, please visit:
www.gebrillion.com or call 1-800-220-6899.
Dryer
Washer
Washer
ACM
Dryer
Washer
Spliter
ACM
- OR -

Energy SmartTM
Energy Smart enables your washer to reduce
energy consumption during periods of high energy
costs. If you live in an area where your power
provider charges different rates at various times of
the day, your washer can inform you when you are
paying the highest rate. The Energy Smart icon will
illuminate on the washer control panel, the cycle
time will display “ES”, and the operation will be in
a delay mode. The washer will delay start (up to 4
hours) until the rate goes down. You can override
this feature by holding the 'HOD\:DVK button for
3 seconds to cancel and run it at your convenience
(immediately or delayed 1-9 hours).
:KDW\RXZLOOQHHG
6PDUW0HWHUWRFRPPXQLFDWHZLWK\RXUZDVKHU
(call your power provider)
$QEnergy Smart washer (like this one)
$Q$SSOLDQFH&RPPXQLFDWLRQ0RGXOHACM)
,QVWDOODWLRQ
Step 1: Power provider installs a Smart Meter
Steps 2 & 3: Install an ACM. See the Brillion Enabled
Communication section.
About Appliance Communication. GEAppliances.com
Care and cleaning of the washer.
Wash Basket: Leave the lid open after washing to allow
moisture to evaporate. If you want to clean the basket,
use a clean, soft cloth dampened with liquid detergent;
then rinse. (Do not use harsh or gritty cleaners.)
Use the BASKETclean cycle:
Using the washing machine in a humid space for a long
period of time may lead to a buildup of black mold and
germs in the air inside the washer basket and affect your
health. If you clean the washer tub regularly on a monthly
basis using BASKETclean it will keep the washer basket
clean for hygienic use.
Add tub cleaner or lime scale remover directly into the
washer basket.
Detergent may remain in the washer tub after
cleaning.
When you use liquid chlorine bleach, load it into the
liquid chlorine bleach compartment.
When you use a powdered cleaner, add it into the
single wash detergent dispenser. See the Single
Wash Detergent Dispenser section.
When you use cleaning tablets, place them directly
into the washer tub. (Do not add tablet cleaner to
the single wash detergent dispenser.) See the Single
Wash Detergent Dispenser section.
2Press the Power button.
3Turn the selector knob to BASKETclean.
4Press the Start button.
NOTES:
Never load laundry while using BASKETclean. The laundry
may become damaged or become contaminated. Make
sure to clean the washer basket when it is empty.
It is recommended to leave the lid open after finishing the
laundry to keep the tub clean.
It is recommended that BASKETclean should be repeated
monthly.
If mildew or musty smell already exists, run a BASKETclean
cycle, once a week, for 3 consecutive weeks.
Glass Lid (on some models): Use a clean, soft cloth
dampened with a vinegar and water solution.
Fill Hoses: GE recommends changing the hoses every
5 years.
Exterior: Immediately wipe off any spills. Wipe with damp
cloth. Try not to hit surface with sharp objects.
Interior: The occasional use of a cycle that contains
bleach will keep the inside of the washer clean.
Moving and Storage: Ask the service technician to remove
water from drain pump and hoses. See the Installation
Instructions packed with product for information on how
to reinstall the shipping rod to keep the tub stationary
when moving the washer. For more information, visit
GEAppliances.com or call 800.GE.CARES (800.432.2737).
Do not store the washer where it will be exposed to weather.
Long Vacations: Be sure water supply is shut off at
faucets. Drain all water from hoses if weather will be
below freezing.
13

WATER Possible Causes What To Do
Short spray and delay /LGZDVRSHQHGDQGFORVHG 7KLVLVQRUPDO6HHFUNCTIONALITY CHECK in the Safety
after pushing the Start EHWZHHQF\FOHVHOHFWLRQDQG Instructions section.
button VWDUW
Water level seems low 7KLVLVQRUPDO :DWHUPD\QRWFRYHUWKHWRSOHYHORIWKHFORWKHV
This is normal for this high efficiency washer.
Banging sound during 'UDLQVWDQGSLSHLVWRRORZ 7KHGUDLQKRVHPXVWH[FHHGµKHLJKWDWVRPHSRLQWEHWZHHQ
drain the washer back and the drain pipe.
Too many suds 6RIWZDWHU 7U\OHVVGHWHUJHQW
7RRPXFKGHWHUJHQW 0HDVXUH\RXUGHWHUJHQWFDUHIXOO\8VHOHVVVRDSLI\RXKDYH
soft water, a smaller load or a lightly soiled load.
7\SHRIGHWHUJHQW 6ZLWFKWR+( detergent.
Water leaks 7\SHRIGHWHUJHQW 6ZLWFKWR+( detergent.
8VLQJWRRPXFKGHWHUJHQW 8VHOHVVGHWHUJHQW8VHOHVVVRDSLI\RXKDYHVRIWZDWHU
LQZDVKHU a smaller load or a lightly soiled load.
)LOOKRVHVRUGUDLQKRVHLV 0DNHVXUHKRVHFRQQHFWLRQVDUHWLJKWDWIDXFHWVDQG
LPSURSHUO\FRQQHFWHG rubber washers are installed. Make sure end of drain hose
is correctly inserted in and secured to drain facility.
+RXVHKROGGUDLQPD\ &KHFNKRXVHKROGSOXPELQJ<RXPD\QHHGWRFDOO
EHFORJJHG a plumber.
'UDLQKRVHUXEVRQZDOO 0DNHVXUHGUDLQKRVHGRHVQRWPDNHFRQWDFWZLWKWKHZDOO
May cause excessive wear on the hose.
&RQVWDQWZDWHUSUHVVXUH 7LJKWHQKRVHVDWWKHIDXFHWVDQGWXUQWKHZDWHURIIDIWHUHDFKXVH
WRWKHILOOKRVHVDWWKH &KHFNFRQGLWLRQRIWKHILOOKRVHVWKH\VKRXOGEHUHSODFHG
ZDWHUVRXUFH every 5 years.
Water temperature &RROHUZDWHUWHPSHUDWXUHV 1HZODXQGU\GHWHUJHQWVKDYHEHHQIRUPXODWHGWRZRUN
seems incorrect SURYLGHLPSURYHGHQHUJ\ with cooler water temperatures without affecting wash
HIILFLHQF\ performance.
:DWHUVXSSO\LVWXUQHGRII 7XUQERWKKRWDQGFROGIDXFHWVIXOO\RQDQGPDNHVXUHKRVHV
RULPSURSHUO\FRQQHFWHG are connected to correct faucets. NOTE: Water valves are marked
“H” and “C” and internal valve screens are color coded.
:DWHUYDOYHVFUHHQVDUH 7XUQRIIWKHZDWHUVRXUFHDQGUHPRYHWKHZDWHUFRQQHFWLRQ
VWRSSHGXS hoses from the upper back of the washer. Use a brush or
toothpick to clean the screens in the machine. Reconnect
the hoses and turn the water back on.
&RRO&ROG:DWHUZKHQ 7KLVLVQRUPDO3HUIHF7HPSVHQVHVZDWHUWHPSHUDWXUHDQG
VHOHFWLQJ+RW optimizes for best results. Cold water is added periodically
when hot is selected.
+RXVHZDWHUKHDWHULV 0DNHVXUHKRXVHZDWHUKHDWHULVGHOLYHULQJZDWHUDW
QRWVHWSURSHUO\ 120°F–140°F (48°C–60°C).
Water pumped out before /LGOLIWHGRUF\FOHZDVSXWLQ 5HVHWF\FOH
cycle is complete SDXVHIRURYHUKRXUV
Water won’t drain 'UDLQKRVHLVNLQNHGRU 6WUDLJKWHQGUDLQKRVHDQGPDNHVXUHZDVKHULVQRWVLWWLQJRQLW
LPSURSHUO\FRQQHFWHG 7RSRIGUDLQRXWOHWVKRXOGEHOHVVWKDQIWP
above floor.
Washer pauses at the 7KLVLVQRUPDO 7KHZDVKHULVVHQVLQJWKHORDG
beginning of cycles
Washer pauses during 7KH$XWR6RDN2SWLRQ 7KLVLVQRUPDO7KHZDVKHUDOWHUQDWHVEHWZHHQDJLWDWHDQG
wash cycle ZDVFKRVHQ soak during these cycles to get your clothes cleaner with
less wear.
Washer pauses during 7KLVLVQRUPDO 7KHZDVKHUPD\SDXVHGXULQJWKHVSLQF\FOHWRUHPRYH
spin cycle soapy water more efficiently.
Troubleshooting Tips
Save time and money! Review the charts on the following pages, or visit
GEAppliances.com. You may not need to call for service.
Before you call for service…
14

OPERATION Possible Causes What To Do
Washer does not fill 7KLVLVQRUPDO 7KHOLGPXVWEHFORVHGIRUZDVKHUWRILOORURSHUDWH
when lid is open
Washer won’t operate :DVKHULVXQSOXJJHG 0DNHVXUHFRUGLVSOXJJHGVHFXUHO\LQWRDZRUNLQJRXWOHW
:DWHUVXSSO\LVWXUQHGRII 7XUQERWKKRWDQGFROGIDXFHWVIXOO\RQ
&RQWUROVDUHQRWVHWSURSHUO\ &KHFNFRQWUROV
/LGLVRSHQ³VDIHW\IHDWXUH &ORVHOLGDQGSUHVVStart.
SUHYHQWVDJLWDWLRQDQG
VSLQQLQJZKHQOLGLVXS
&LUFXLWEUHDNHUIXVHLV &KHFNKRXVHFLUFXLWEUHDNHUVIXVHV5HSODFHIXVHVRU
WULSSHGEORZQ reset breaker. Washer should have a separate outlet.
(OHFWURQLFVQHHGWREHUHVHW 8QSOXJZDVKHUZDLWPLQXWHVSOXJEDFNLQDQGSUHVVStart.
6WDUWZDVQRWSUHVVHG 3UHVVStart.
/LGPDJQHWPLVVLQJ &DOOIRUVHUYLFH
Unexplained time and/or &KDQJLQJRSWLRQV 7KLVLVQRUPDO6HYHUDORSWLRQVZLOOFKDQJHRWKHURSWLRQVWR
settings changes maximize washer performance. Detergent Cup Amount changes
are not saved.
Movement inside machine6
KLIWLQJPHFKDQLVPLV:
KHQWKHPDFKLQHLVPDQXDOO\WXUQHGRIIWKHVKLIWHUZLOO
when shut offG
LVHQJDJLQJWKHPRWRU disengage the motor before completely shutting down.
I
f lid is raised before the motor is disengaged, it will resume
w
hen lid is closed.
Basket seems loose%
DVNHWPRYHVRUURWDWHVIUHHO\:
DVKHUEDVNHWGRHVQRWKDYHDWUDGLWLRQDOEUDNH%DVNHWZLOO
m
ove freely. This is normal.
PERFORMANCE Possible Causes What To Do
Clothes too wet ,QFRUUHFWF\FOHVHOHFWHG 0DNHVXUHWKHF\FOHVHOHFWHGPDWFKHVWKHORDG\RXDUH
washing. Some fabrics will feel wetter when rinsed with cold water.
:DVKORDGRXWRIEDODQFH
Redistribute load in washer and run through Drain & Spin cycle.
Colored spots ,QFRUUHFWXVHRIIDEULF &KHFNIDEULFVRIWHQHUSDFNDJHIRULQVWUXFWLRQVDQGIROORZ
VRIWHQHU directions for using dispenser.
0DNHVXUH\RXKDYHVHOHFWHGWKH)DEULF6RIWHQHURSWLRQ
3UHWUHDWVWDLQDQGUHZDVKXVLQJQuick Rinse cycle before drying.
'\HWUDQVIHU 6RUWZKLWHVRUOLJKWO\FRORUHGLWHPVIURPGDUNFRORUV
Grayed or yellowed 'HWHUJHQWDPRXQW %HVXUHWRIROORZGHWHUJHQWPDQXIDFWXUHU·VGLUHFWLRQV
FORWKHV+
DUGZDWHU8
VHDZDWHUFRQGLWLRQHUOLNH&DOJRQEUDQGRULQVWDOO
a
water softener.
:DWHULVQRWKRWHQRXJK 0DNHVXUHZDWHUKHDWHULVGHOLYHULQJZDWHUDW
120°F–140°F (48°C–60°C).
Washer is overloaded /RRVHO\ORDGFORWKHVQRKLJKHUWKDQWKHWRSURZRIKROHVLQWKH
washer basket. For best results, load items around the outside
of the basket.
'\HWUDQVIHU 6RUWFORWKHVE\FRORU,IIDEULFODEHOVWDWHVZDVKVHSDUDWHO\
unstable dyes may be indicated.
Lint or residue on &ORWKHVDUHDLURUOLQHGULHG ,I\RXGRQRWGU\\RXUFORWKHVZLWKDFORWKHVGU\HU\RXU
clothes clothes may retain more lint.
,QFRUUHFWVRUWLQJ 6HSDUDWHOLQWSURGXFHUVIURPOLQWFROOHFWRUV
:DVKLQJWRRORQJ :DVKVPDOOORDGVIRUDVKRUWHUWLPHWKDQODUJHUORDGV
'HWHUJHQWQRWGLVVROYLQJ 5HZDVKXVLQJQuick Rinse cycle with Extra Rinse option.
7U\DOLTXLGGHWHUJHQW
8VHZDUPHUZDWHUWHPSHUDWXUH
2YHUORDGLQJ /RRVHO\ORDGFORWKHVLQWKHZDVKHUEDVNHW)RUEHVWUHVXOWVORDG
items around the outside of the basket.
,QFRUUHFWXVHRIIDEULF &KHFNIDEULFVRIWHQHUSDFNDJHIRULQVWUXFWLRQV
VRIWHQHU and follow directions for using dispenser.
0DNHVXUH\RXKDYHVHOHFWHGWKH)DEULF6RIWHQHURSWLRQ
GEAppliances.com
15

Before you call for service…
PERFORMANCE (cont.) Possible Causes What To Do
Pilling 5HVXOWRIQRUPDOZHDURQSRO\ :KLOHWKLVLVQRWFDXVHGE\WKHZDVKHU\RXFDQVORZWKH
FRWWRQEOHQGVDQGIX]]\IDEULFV pilling process by washing garments inside out.
Snags, holes, tears, rips 3LQVVQDSVKRRNVVKDUS )DVWHQVQDSVKRRNVEXWWRQVDQG]LSSHUV
or excessive wear EXWWRQVEHOWEXFNOHV 5HPRYHORRVHLWHPVOLNHSLQVREMHFWVLQSRFNHWVDQG
]LSSHUV DQGVKDUSREMHFWV sharp buttons.
OHIWLQSRFNHWV 7XUQNQLWVZKLFKVQDJHDVLO\LQVLGHRXW
8QGLOXWHGFKORULQHEOHDFK &KHFNEOHDFKSDFNDJHLQVWUXFWLRQVIRUSURSHUDPRXQW
1HYHUDGGXQGLOXWHGEOHDFKWRZDVKRUDOORZFORWKHVWR
come in contact with undiluted bleach.
&KHPLFDOVOLNHKDLUEOHDFKRU 5LQVHLWHPVWKDWPD\KDYHFKHPLFDOVRQWKHPEHIRUH
G\HSHUPDQHQWZDYHVROXWLRQ washing. Use Quick Rinse cycle with Extra Rinse option.
Wrinkling ,QFRUUHFWZDVKDQG 0DWFK&\FOHVHOHFWLRQWRWKHW\SHRIIDEULF\RXDUHZDVKLQJ
GU\F\FOHV (especially for easy care loads).
,PSURSHUVRUWLQJ $YRLGPL[LQJKHDY\LWHPVOLNHZRUNFORWKHVZLWKOLJKWLWHPV
(like blouses).
7U\DIDEULFVRIWHQHU
2YHUORDGLQJRULQFRUUHFWLoosely load clothes in the washer basket.
ZDWHUOHYHO
5HSHDWHGZDVKLQJLQ :DVKLQZDUPRUFROGZDWHU
ZDWHUWKDWLVWRRKRW
Bleach left in dispenser 'LGQ·WVWDUWRUILQLVKF\FOH 5XQHLWKHUDBASKETclean or a Quick Rinse cycle (with Bleach
DIWHUDGGLQJEOHDFK option) to clean out the dispenser. In the future, make sure to
select Bleach option when adding bleach.
SOUNDS Possible Causes Reason
Washer seems 7KLVLVQRUPDO 7KHZDVKHULVYHU\TXLHWGXULQJSRUWLRQVRIWKHZDVKF\FOH
too quiet
“Metallic clicking” 6KLIWHUPHFKDQLVPLV 7KHGULYHV\VWHPZLOOHQJDJHDWWKHVWDUWRIDJLWDWHDQG
HQJDJLQJRUGLVHQJDJLQJ disengage when agitate is complete. This occurs multiple
times during the wash.
Back and forth “swoosh” (OHFWULFPRWRUUHYHUVLQJ 7KLVPDFKLQHKDVDGULYHV\VWHPWKDWGRHVQ·WXVHJHDUV
or light “clicking” sound GLUHFWLRQ This sound is the motor rotating back and forth to clean
during agitate your laundry.
Quick short agitation &ORWKLQJUHGLVWULEXWLRQ $WWKHHQGRIDJLWDWHWKHPRWRUPDNHVVKRUWDJLWDWLRQVWURNHV
sounds at end of agitate to redistribute the load.
“Click” when water 5HOD\VZLWFK 7KHUHOD\PDNHVDFOLFNVRXQGZKHQDFWLYDWHG7KHZDWHU
stops filling level activates the relay and stops filling.
“Clicking” behind Control $XWRPDWLF7HPSHUDWXUH 7ZRYDOYHVPL[FROGDQGKRWZDWHU7KH´FOLFNLQJµLVZKHQHLWKHU
Panel during fill &RQWURO9DOYH valve turns on or off to raise or lower the fill water temperature.
Water flow changes $XWRPDWLF7HPSHUDWXUH 7ZRYDOYHVPL[FROGDQGKRWZDWHU7KHIORZFKDQJHVZKHQHLWKHU
during fill &RQWURO9DOYH valve turns on or off to raise or lower the fill water temperature.
Motor “whining up” or 0RWRUUDPSLQJXSGRZQ 7KHPRWRUZLOOVSHHGXSLQFUHPHQWDOO\GXULQJWKHVSLQF\FOH
“coasting down” in spin GXULQJVSLQF\FOH When spin is complete, it will coast until it stops.
“Humming” :DWHUGUDLQSXPS 7KHGUDLQSXPSZLOOPDNHDKXPPLQJVRXQGZKHQSXPSLQJ
out water after agitation stops and continue until spin is complete.
“Gurgling” :DWHUGUDLQSXPS :KHQWKHSXPSVWDUWVGUDZLQJLQDLU,WVWDUWVWRJXUJOH
The washer should then begin spinning and the sound will
continue until it is done spinning.
Water “swishing” 7KLVLVQRUPDO
7KLVZDVKHUXVHVD,QIXVRUZDVKDFWLRQ:DWHUVZLVKLQJZKLOH
the unit is agitating is normal, especially with smaller loads.
Washer is noisy :DVKHULVXQHYHQ 7ROHYHOWKHZDVKHUDGMXVWWKHOHYHOLQJOHJVE\URWDWLQJWKH
individual leg in the proper direction for up or down.
16
Troubleshooting Tips

17
All warranty service provided by our Factory Service Centers,
or an authorized Customer Care®technician. To schedule service,
on-line, visit us at GEAppliances.com, or call 800.GE.CARES
(800.432.2737). Please have serial number and model number
available when calling for service.
For The Period Of: We Will Replace:
One Year Any factory specified part of the washer which fails due to a defect in materials or workmanship.
From the date of the During this limited one-year warranty, we will also provide, free of charge, all labor and related
original purchase service to replace the defective part.
This warranty is extended to the original purchaser and any succeeding owner for products purchased for home use within
the USA. If the product is located in an area where service by a GE Authorized Servicer is not available, you may be responsible
for a trip charge or you may be required to bring the product to an Authorized GE Service location. In Alaska, the warranty excludes the
cost of shipping or service calls to your home.
If you need to order replacement parts, we recommend that you only use GE factory specified parts. These parts are designed to work
with your appliance and are manufactured and tested to meet GE specifications.
Some states do not allow the exclusion or limitation of incidental or consequential damages. This warranty gives you specific legal
rights, and you may also have other rights which vary from state to state. To know what your legal rights are, consult your local or
state consumer affairs office or your state’s Attorney General.
Warrantor: General Electric Company. Louisville, KY 40225
6HUYLFHWULSVWR\RXUKRPHWRWHDFK\RXKRZWRXVH
WKHSURGXFW
,PSURSHULQVWDOODWLRQGHOLYHU\RUPDLQWHQDQFH
)DLOXUHRIWKHSURGXFWLILWLVDEXVHGPLVXVHGRU
XVHGIRURWKHUWKDQWKHLQWHQGHGSXUSRVHRUXVHG
FRPPHUFLDOO\
5HSODFHPHQWRIKRXVHIXVHVRUUHVHWWLQJRIFLUFXLWEUHDNHUV
3URGXFWVZKLFKDUHQRWGHIHFWLYHRUEURNHQRUZKLFKDUH
ZRUNLQJDVGHVFULEHGLQWKH2ZQHU·V0DQXDO
'DPDJHWRWKHSURGXFWFDXVHGE\DFFLGHQWILUHIORRGV
RUDFWVRI*RG
,QFLGHQWDORUFRQVHTXHQWLDOGDPDJHFDXVHGE\SRVVLEOH
GHIHFWVZLWKWKLVDSSOLDQFH
'HIHFWVRUGDPDJHGXHWRRSHUDWLRQLQIUHH]LQJ
WHPSHUDWXUHV
'DPDJHFDXVHGDIWHUGHOLYHU\
3URGXFWQRWDFFHVVLEOHWRSURYLGHUHTXLUHGVHUYLFH
What Is Not Covered:
Staple your receipt here.
Proof of the original purchase
date is needed to obtain service
under the warranty.
GE Washer Warranty.
(;&/86,212),03/,(':$55$17,(6³<RXUVROHDQGH[FOXVLYHUHPHG\LVSURGXFWUHSDLUDVSURYLGHGLQWKLV/LPLWHG
Warranty. Any implied warranties, including the implied warranties of merchantability or fitness for a particular purpose,
are limited to one year or the shortest period allowed by law.

Consumer Support.
Parts and Accessories GEApplianceparts.com
Individuals qualified to service their own appliances can have parts or accessories sent directly to their homes
(VISA, MasterCard and Discover cards are accepted). Order on-line today, 24 hours every day or by phone
at 800.626.2002 during normal business hours.
If you need to order replacement parts, we recommend that you only use GE factory specified parts. These
parts are designed to work with your appliance and are manufactured and tested to meet GE specifications.
Instructions contained in this manual cover procedures to be performed by any user. Other servicing
generally should be referred to qualified service personnel. Caution must be exercised, since improper
servicing may cause unsafe operation.
GE Appliances Website GEAppliances.com
Have a question or need assistance with your appliance? Try the GE Appliances Website 24 hours a day,
any day of the year! For greater convenience and faster service, you can now download Owner’s Manuals,
order parts or even schedule service on-line.
Schedule Service GEAppliances.com
Expert GE repair service is only one step away from your door. Get on-line and schedule your service at
your convenience any day of the year! Or call 800.GE.CARES (800.432.2737) during normal business hours.
Real Life Design Studio GEAppliances.com
*(VXSSRUWVWKH8QLYHUVDO'HVLJQFRQFHSW³SURGXFWVVHUYLFHVDQGHQYLURQPHQWVWKDWFDQEHXVHGE\
people of all ages, sizes and capabilities. We recognize the need to design for a wide range of physical and
mental abilities and impairments. For details of GE’s Universal Design applications, including kitchen design
ideas for people with disabilities, check out our Website today. For the hearing impaired, please call 800.TDD.
GEAC (800.833.4322).
Extended Warranties GEAppliances.com
Purchase a GE extended warranty and learn about special discounts that are available while your warranty
is still in effect. You can purchase it on-line anytime, or call 800.626.2224 during normal business hours.
GE Consumer Home Services will still be there after your warranty expires.
Contact Us GEAppliances.com
If you are not satisfied with the service you receive from GE, contact us on our Website with all the details
including your phone number, or write to: General Manager, Customer Relations
GE Appliances, Appliance Park
Louisville, KY 40225
Register Your Appliance GEAppliances.com
5HJLVWHU\RXUQHZDSSOLDQFHRQOLQH³DW\RXUFRQYHQLHQFHTimely product registration will allow for
enhanced communication and prompt service under the terms of your warranty, should the need arise.
You may also mail in the pre-printed registration card included in the packing material.
18

GEAppliances.com
Manual del
propietario
Lavadoras
49-90460 10-12 GE
Instrucciones
de seguridad..................2,3
Instrucciones de operación
Comunicación del
Electrodoméstico ..........12,13
Característicasespeciales ........10
Cómo cargar y usar
lalavadora....................... 11
Cuidado y limpieza
de la lavadora. . . . . . . . . . . . . . . . . . . . 13
Funciones........................7-9
Instrucciones de uso............4-7
Consejos para la solución
de problemas..............14–16
Soporte al consumidor
Garantía ..........................17
Piezas y accesorios........... 3,18
Soportealconsumidor............18
Escriba el número de modelo
y de serie aquí:
No. de modelo _____________
No. de serie _______________
Puede encontrarlos
bajo la puerta
de la lavadora.
G004
Como socio de Energy Star®, GE
ha confirmado que este producto
cumple las directrices de Energy
Star®relativas al rendimiento
energético.
Impreso en los Estados Unidos

2
INFORMACIÓN DE SEGURIDAD IMPORTANTE.
LEA TODAS LAS INSTRUCCIONES ANTES DE USAR.
INSTRUCCIONES IMPORTANTES DE SEGURIDAD
Para reducir el riesgo de incendio, explosión, descargas eléctricas o lesiones sobre las personas al usar su
electrodoméstico, siga las precauciones básicas, incluyendo lo siguiente
Lea todas las instrucciones antes de usar este electrodoméstico.
NO lave ni seque prendas que en forma previa hayan sido secadas, lavadas, mojadas o manchadas con gasolina, solventes
de limpieza en seco, u otras sustancias inflamables o explosivas, ya que despiden vapores que se podrían encender o explotar.
NO agregue gasolina, solventes de limpieza en seco, u otras sustancias inflamables o explosivas al agua de lavado. Estas
sustancias despiden vapores que se podrían prender fuego o explotar
.
Bajo ciertas condiciones, se podrá producir gas de hidrógeno en un sistema de agua caliente que no fue usado por 2
semanas o más. EL GAS DE HIDRÓGENO ES UN EXPLOSIVO. Si el sistema de agua caliente no fue usado por dicho período,
antes de usar una lavadora, abra todos los grifos de agua caliente y deje que corra agua de cada uno durante varios minutos.
Esto liberará cualquier gas de hidrógeno acumulado. Debido a que el gas es inflamable, NO fume ni use una llama abierta
durante este proceso
.
NO permita que los niños jueguen sobre o dentro de este electrodoméstico. Cuando el electrodoméstico se use cerca de
niños, será necesario supervisarlos de cerca
.
Antes de dejar la lavadora fuera de servicio o de deshacerse de ésta, quite la puerta o la tapa
.
NO introduzca las manos en el electrodoméstico si el tambor o agitador se encuentra en movimiento. Espere hasta que el
motor se haya detenido completamente antes de abrir la tapa
.
NO instale ni guarde este electrodoméstico donde quede expuesto a los factores climáticos
.
NO manipule indebidamente los controles
.
No intente reparar ni reemplazar cualquier parte del electrodoméstico o realizar cualquier otro trabajo técnico, a menos
que esto sea específicamente recomendado en las instrucciones de mantenimiento del usuario o en instrucciones
publicadas sobre reparaciones del usuario, que entienda y para las cuales posea las destrezas necesarias.
Mantenga el área alrededor del electrodoméstico libre de materiales combustibles tales como pelusa, papel, trapos y
químicos.
NO intente usar este electrodoméstico si se encuentra dañado, funcionando mal, parcialmente desensamblado, o si tiene
partes faltantes o rotas, incluyendo un cable o enchufe dañado
.
Desenchufe el electrodoméstico o apague el disyuntor antes de realizar el servicio técnico. Presionar el botón Power
(Encendido) o Start/Pause (Inicio/Pausa) NO desconecta el encendido.
No mezcle blanqueador con cloro junto con amoníaco o ácidos tales como vinagre y/o removedor de óxido. Se podrá producir
un gas tóxico.
NO deje la puerta de la lavadora abierta. Una puerta abierta podrá atraer a los niños a trepar dentro de la lavadora.
El proceso de lavado puede reducir el tiempo previo a la inflamación de los tejidos. Siga con atención las instrucciones de
lavado y cuidado del fabricante de la prenda.
Para acceder a las instrucciones de conexión a tierra, lea los “Requisitos Eléctricos” ubicados en las Instrucciones de Instalación
.
GUARDE ESTAS INSTRUCCIONES
ADVERTENCIA
Éste es el símbolo de alerta de seguridad. El mismo alerta sobre potenciales riesgos que le pueden producir la muerte o lesiones
tanto a usted como a otras personas. Todos los mensajes de seguridad estarán a continuación del símbolo de alerta de seguridad
y con la palabra “PELIGRO”, “ADVERTENCIA” o “PRECAUCIÓN”. Estas palabras se definen como:
Indica una situación de riesgo que, si no se evita, producirá la muerte o lesiones graves.
Indica una situación de riesgo que, si no se evita, podría producir la muerte o lesiones graves.
Indica una situación de riesgo que, si no se evita, podría resultar en lesiones menores o moderadas.
PELIGRO
ADVERTENCIA
PRECAUCIÓN
Other manuals for GTWS8650DWS
4
This manual suits for next models
1
Table of contents
Languages:
Other GE Washer manuals

GE
GE WA7070G Installation instructions

GE
GE G151 User manual

GE
GE VKXR4100T User manual

GE
GE GFWN1100H Manual

GE
GE Spacemaker WSXH208 Original instructions

GE
GE PFW950 Original instructions

GE
GE GHDRES26 User manual

GE
GE GTW750CPLDG How to use

GE
GE Zoneline 2200 User manual

GE
GE Profile PFWS4600LWW Original instructions