manuals.online logo
Brands
  1. Home
  2. •
  3. Brands
  4. •
  5. GE
  6. •
  7. Washer
  8. •
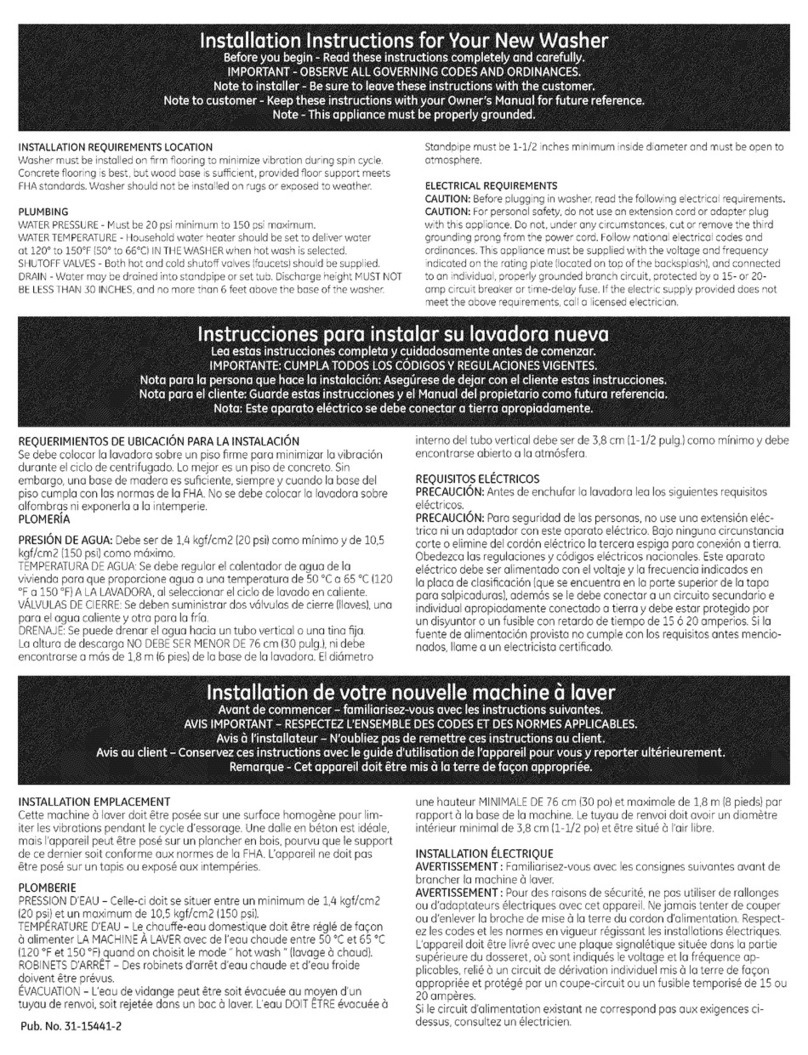
  9. GE WLW3810S Installation instructions

GE WLW3810S Installation instructions

This manual suits for next models

3

Other GE Washer manuals

GE GFW450SSM User manual

GE

GE GFW450SSM User manual

GE Appliances WSKP2060 User manual

GE

GE Appliances WSKP2060 User manual

GE Profile WPGT9350 How to use

GE

GE Profile WPGT9350 How to use

GE GFWN1000 Original instructions

GE

GE GFWN1000 Original instructions

GE WWA8480BAL User manual

GE

GE WWA8480BAL User manual

GE Profile Harmony WPGT9360 How to use

GE

GE Profile Harmony WPGT9360 How to use

GE GE Energy Star WCRE6270K Manual

GE

GE GE Energy Star WCRE6270K Manual

GE LAVEUSES WBVH5200 Original instructions

GE

GE LAVEUSES WBVH5200 Original instructions

GE GTWP1000MWW Assembly instructions

GE

GE GTWP1000MWW Assembly instructions

GE WSXH208A Series How to use

GE

GE WSXH208A Series How to use

GE GTWS8450DWS Assembly instructions

GE

GE GTWS8450DWS Assembly instructions

GE WCVH6400J User manual

GE

GE WCVH6400J User manual

GE GTWP2000MWW Assembly instructions

GE

GE GTWP2000MWW Assembly instructions

GE EWA4600G0 How to use

GE

GE EWA4600G0 How to use

GE GTW480 Original instructions

GE

GE GTW480 Original instructions

GE GFWS1700H How to use

GE

GE GFWS1700H How to use

GE Profile WPRB8050 User manual

GE

GE Profile WPRB8050 User manual

GE WISR106 User manual

GE

GE WISR106 User manual

GE WDSR2120J Manual

GE

GE WDSR2120J Manual

GE WPXQ3090T User manual

GE

GE WPXQ3090T User manual

GE WJSR2080T User manual

GE

GE WJSR2080T User manual

GE Profile ENERGY STAR WPDH8800J How to use

GE

GE Profile ENERGY STAR WPDH8800J How to use

GE G188 User manual

GE

GE G188 User manual

GE WCVH4815K Original instructions

GE

GE WCVH4815K Original instructions

Popular Washer manuals by other brands

Zanussi ZWF 14080 W user manual

Zanussi

Zanussi ZWF 14080 W user manual

Zanussi FV 825 N Instruction booklet

Zanussi

Zanussi FV 825 N Instruction booklet

LG WM8000HVA Specifications

LG

LG WM8000HVA Specifications

Whirlpool 3RGSC9400 Use and care guide

Whirlpool

Whirlpool 3RGSC9400 Use and care guide

Zanussi TJ 1284 H instruction manual

Zanussi

Zanussi TJ 1284 H instruction manual

AEG KO-LAVAMAT 74740 User information

AEG

AEG KO-LAVAMAT 74740 User information

Beko WSRE7512PRA user manual

Beko

Beko WSRE7512PRA user manual

Whirlpool LA5OOOXP Use and care guide

Whirlpool

Whirlpool LA5OOOXP Use and care guide

Miele PW 6207 operating instructions

Miele

Miele PW 6207 operating instructions

Bush WMNB712EB instruction manual

Bush

Bush WMNB712EB instruction manual

ALLIANCE UW60AV Information manual

ALLIANCE

ALLIANCE UW60AV Information manual

Bosch WAN280H3 User manual and installation instructions

Bosch

Bosch WAN280H3 User manual and installation instructions

Maytag MAT15MNAW installation instructions

Maytag

Maytag MAT15MNAW installation instructions

LG T2109VSAL owner's manual

LG

LG T2109VSAL owner's manual

Indesit IWC 61481 Instructions for use

Indesit

Indesit IWC 61481 Instructions for use

Electrolux EWF12843 user manual

Electrolux

Electrolux EWF12843 user manual

Indesit WIN 70 Instructions for use

Indesit

Indesit WIN 70 Instructions for use

Whirlpool Cabrio WTW6400SW2 quick start guide

Whirlpool

Whirlpool Cabrio WTW6400SW2 quick start guide

manuals.online logo
manuals.online logoBrands
  • About & Mission
  • Contact us
  • Privacy Policy
  • Terms and Conditions

Copyright 2025 Manuals.Online. All Rights Reserved.

Yourbwbhm
Contents
Agitator
20
Appliance Registration
2
Bleach Dispenser
9
Care and Cleaning
20
Consumer Services
23
Controls Setting
7
Cycle Descriptions
5
Cycle Times
8
Detergents and Additives
10–14
Energy-Saving Tips
9
Fabric and Cycle Settings
8
Fabric Softener Dispenser
9
Hard Water
12
Important Phone Numbers 23
Loading the Washer
7, 11
Model
and Serial Numbers
2
Operating Instructions
5-1o
Problem Solver
16–20
Safety Instructions
3,4
Soak Cycle
9
Sorting Clothes
7, 11
Stains
14
Stain Removal Guide
15
Storage and Vacation Tips 20
User Maintenance Instructions 20
Warranty
Back Cover
GE Answer Center”
800.626.2000
se and
Care
of
models
~W3810S
WW3800S
WW3600S
mw3400s
HELP US HELP YOU...
Read this book carefully.
It is intended to help you
operate and maintain your
new washer properly.
Keep it handy for answers to
your questions.
If you don’t understand something
or need more help, write (include
your phone number)
Consumer Affairs
Hotpoint
Appliance Park
Louisville, KY 40225
Save time and money.
Before you request service . . .
check the Problem Solver
section. It lists causes of minor
operating problems that you can
correct yourself.
If you received a
damaged washer...
Immediately contact the dealer (or
builder) that sold you the washer.
Write down the model
and serial numbers.
You’ll find them on a label on
the lower left side near the front
These numbers are also on the
Consumer Product Ownership
Registration Card that came with
your washer. Before sending in
this card, please write these
numbers here:
Model Number
Serial Number
Use these numbers in any
correspondence or service
calls concerning your washer.
WARMNG:
For
your
safety
the
information in this manual must
be
followed to minimize
the
risk of fire
or
explosion or to prevent property damage, personal injury or
loss
of life.
—Do
not store or use gasoline or other
●
Immediately call your gas supplier from a
flammable
vapors
and liquids
in
the neighbor’s phone. Follow the gas
supplier’s
vicinity
of
this or any
other
appliance.
instructions.
—WHAT
TO
DO
IF YOU
SMELL
GAS
●
If you cannot reach your gas
supplier)
●
Do not try to
Hght
any
appliance.
call
the
fire
department.
●
Do
not
touch any
electri~
switch;
—Installation and service
must
be performed
do
not
use any phone in your building. by a qualified installer, service agency or
*
Clear
the
room, building or area of
aH
the gas supplier.
occupants.
All washing instruction terms in this book conform to the Care
Labeling Rule established by the Federal Trade Commission, January 1984.
If You Need Service
To obtain service, see the
Consumer Services page
in the back of this book.
We’re proud of our service and
want you to be pleased. If for some
reason you are not happy with the
service you receive, here are three
steps to follow for further help.
First, contact the people who
FINALLY, if your problem
serviced your appliance. Explain
is still not resolved, write:
why you are not pleased. In most Major Appliance Consumer
cases, this will solve the problem.
Action Panel
NEXT, if you are still not pleased, 20 North
Wacker
Drive
write all the details—including Chicago, IL 60606
your phone number—to:
Manager, Consumer Relations
Hotpoint
Appliance Park
Louisville, KY 40225
IMPORTANT SAFETY INSTRUCTIONS
Read all instructions
before
using your appliance.
A
WARNING—TO
reduce
the
risk
A’\
h
●
Do not wash or dry articles that
of
fire,
electric shock,
or
injury to
\
)
have been cleaned in, washed in,
persons when using your appliance, soaked in, or spotted with
follow
basic precautions, including
the
following:
combustible or explosive substances
●
Use this appliance only for its intended purpose
(such
as wax, paint, gasoline,
degreasers,
dry-
as described in this Use
and
Care Book.
cleaning solvents, kerosene, etc.) which may
ignite or explode. Do not add these substances
to the wash water. Do not use these substances
o
●
This washer must be properly
,4,.
around your washer and/or dryer during
Q.,”;
$
*
~
*>.
installed and located in accordance operation.
=-.
-=,
with
the
Installation Instructions
before it is used.
If
you
did
not receive
an
A
WARNING—HYDROGEN GAS
Installation Instructions sheet with your is
produced by the chemical action
washer, you can obtain one by
qalling,
toll
within your water heater and the gas
free, the
GE
Answer
Center?
800.626.2000.
can accumulate in the
water
heater and/or water
pipes if hot water has not been used for a period
—Properly
ground
to conform with all
of two weeks or longer. HYDROGEN GAS
governing codes and ordinances. Follow
CAN
BE EXPLOSIVE UNDER THESE
details in Installation Instructions. CIRCUMSTANCES.
So
to prevent the
—Install or store where it will not be exposed possibility of damage or injury, if you have not
to temperatures below freezing or exposed used hot water for two weeks or more, or move
to the weather.
into
a
residence in which the hot water
system
<onnect
to
a properly rated, protected
and
sized
may not have been used for
some
time,
turn on
power supply circuit to avoid electrical overload.
all
hot water faucets and allow them
to
run
for
<onnect
to adequate plumbing and drain
several minutes before
using
any electrical
facilities as described in the Installation
appliance which is connected to
the
hot water
Instructions.
system. This will allow any hydrogen gas to
escape. Since the gas is
Rammable,
do not
smoke or use an open flame or appliance
*
Turn off water faucets when the washer is not in
during this process.
use to relieve pressure on hoses and valves, and
to minimize leakage if a hose or valve should
break or rupture.
●
Never reach into washer while it is
moving. Before loading, unloading
M
●
When disconnecting this appliance
or adding clothes, push in the Cycle
~
pull
by
the
plug rather than
the
cord to
Selector knob to OFF position, then
<
avoid damage to the cord or junction of
wait until the machine has completely stopped
cord and plug. Make sure that the cord
before opening the lid.
is located so that it
will
not
be
stepped on, tripped
over or otherwise subjected to darn-age or
striss.
*Close
supervision is necessary if
●
Do not repair or replace any part this appliance is used by or near
of
the appliance or attempt any children. Do not allow children
servicing unless specifically to play inside, on, or with this
recommended in this Use and Care
Book
or
appiianc~
or any discarded
in published user-repair instructions that you appliance. Dispose
of
discarded appliances and
understand and have the skills to carry out. shipping or packing materials properly. Before
discarding a washer, or removing from service,
To minimize the possibility of injury:
remove the washer lid.
&
(continued next page)
●
Do
not mix chlorine
bleach
with
ammonia
or
acids such as vinegar
andor
rust remover.
Mixing
can produce a
hum
toxic gas which may cause
death.
3
WORTANT
SAFEH
mSTRUCTIONS
m
*
Keep all laundry aids
(such
as
●
Do
not operate this appliance if it is damaged,
t
detergents, bleaches, fabric softeners, malfunctioning, partially disassembled, or has
[
etc.)
out
of
the
reach of children,
m
missing or broken parts, including a damaged
preferably in a locked cabinet. cord
or
plug.
Observe all warnings
on
container
labels to avoid personal injury.
●
Never climb on or stand on the washer top.
●
Do not wash fiberglass
tiicles
in your washer.
a
Q
Keep the area around and underneath Skin irritation could result from the remaining
your appliances free from the
accumulation of combustible materials, particles that may
be
picked up by clothing
during subsequent washer use.
such as lint, paper, rags, chemicals, etc.
●
me
laundry process can reduce
* Keep the floor around your appliances clean and
~
‘\ the flame
retmdancy
of fabrics.
dry to reduce the possibility of slipping.
A
~
~
TO
avoid
such
aresult,
the garment
●
To minimize the possibility of electric
a
manufacturer’s care instructions
shock, unplug this appliance from the should be followed very carefully.
power supply before attempting any
maintenance or cleaning (except the
removal and cleaning of the lint filter).
For
wmher
operation
*
NOTE:
Turning the Cycle Selector
●
Do
not
leave washer lid up during
cycle,
/
~
knob to an
O~position
does
NOT
This will stop the wash and spin action and
/-
disconnect the appliance from the prevent completion of the cycle.
power supply.
●
Do
not
tamper
with controls.
SAVE
T=SE
~STRUCTIONS
4
T~S
TO
~LP
YOU SELECT
SETT~GS
Cycle names and features may vary from model to model
(on
models
so equipped)
Regular
Cycles—
Permanent Press
Cycles—
For most cottons, linens, work and play clothes. For loads of synthetics, blends and/or delicate fabrics.
Longer wash times plus deep rinse, spray rinse A cold water cool down helps prevent set-in wrinkles
and spin provide thorough washing and detergent in permanent press shirts, blouses, dresses and similar
removal. apparel with normal soil.
Rapid Wash
Cycle—
Spotscrubber
System—
Saves time
and
energy when washing small loads The
Spotscrubber
cycle uses a special wash cycle and
of lightly soiled clothes.
a highly concentrated detergent solution in a
small
amount of water in the Mini-Basket tub.
Rinse water carries away soils and detergent suds and
automatic extra rinse assures complete removal of
detergent.
Optional Extra Rinse
Cycle—
PreWash
Cycle—
The option of an extra rinse in the Regular Cycle For use when clothes are excessively soiled.
helps assure complete detergent removal when extra Provides an agitated soak, and a soak without
detergent was used or where unusual skin sensitivity agitation, followed by agitation and spin. Washer
to detergent is a concern. must be reset for desired wash cycle.
Knits
Cycle— Supercycle—
A shorter cycle specially-designed for today’s knits.
For modern fabrics with heavy or oily soil. Agitation
An early and long spray rinse cools down fabrics for a long time loosens stubborn soils.
before the washer reaches maximum spin speed to
help
prevent wrinkle setting.
Soak
Cycle—
Auto Soak
Cycle—
Clothes activate in a soaking agent for a short time, This will add additional wash time on cycles to allow
then the water spins out. Washer turns off at end of the detergent to break down excessive soils. After the
Soak Cycle—must be reset for desired wash cycle. Auto Soak is complete, it will automatically move
through the selected cycle.
Delicate
Cycle—
Washable Woolens
Cycle—
For lingerie and fabrics requiring special care, this This cycle helps to reduce the need to wash these
cycle has a gentle wash and a
S1OW
spin.
fabrics by hand.
Washable Silks
Cycle—
Mini-Basket
System—
For fine washable silks. Check manufacturers’ care Uses the Mini-Basket feature. Provides a complete
labels for special instructions. wash, rinse and spin cycle.
5
HOW TO OPERATE YOUR
CLOTmS
WASHER
Features and appearances may vary slightly
WARNINGTO reduce the risk of
fire,
electric shock, or injury to persons when using your
appliance, read the IMPORTANT SAFETY INSTRUCTIONS before operating this appliance.
WLW381
OS
~w
10 cycle
hea~
duty extra large
m~ity
2
sped
washer
~m
S
cycle
hea~
duty extra large
capcity
4
s-
washer
.
WLW3600S
1
I
I
WLW3400S
6
Setting the Controls —
Controls and features will vary from model to model
Use the Suggested Fabric and Cycle Settings guide
Q
to help you make the proper selections.
6
@
Select Wash Spin Speed.
~
Select Water Level.
SMALL: Washer is less than
1/3
ful
MEDIUM: Between
1/3
and 1/2 full.
LARGE: Between 1/2 and 2/3 full.
EXTRA LARGE: Over 2/3 full.
If
vou
wish to increase the water
lev
e
of clothes.
:1
after you’ve
,
made a selection, turn knob to RESET and
s~lect
new
level.
Select
Was~inse
Temperature.
Push Cycle Selector knob
in and turn clockwise to
your selected wash setting.
Pull Cycle Selector knob
~
START ,
out to start the washer.
If
9
*
\
$
you wish to change setting
after washer has started, push
STOP
@
Cycle Selector knob into stop
the washer and reset to the new
position. Setting can be changed at any time.
Sorting and Loading
● Sort clothes carefully by fabric type, weight, color
●
See Bleach and Fabric Softener Dispenser sections
and amount of soil, according to instructions in How
for instructions in their uses (on models so equipped).
to Sort Clothes section.
●
For information on how to use bleaches and fabric
● Add measured amount of detergent. See Detergents
softeners, see Other Laundry Products section.
section for information on detergents and other
laundry additives.
● Close the lid. Washer will fill but not agitate or spin
with the lid open.
● Load clothes into wash basket, being careful not
to overload. See How to Load Your Washer section.
Cycle Times — Total Cycle Times (Approximate Minutes)
NOTES:
● Total time includes pauses between each phase of the cycle.
● Total time does rzot include water fill times. Fill times vary
depending on household water pressure and your selected water level.
perm press, Knits &
Delicates Rapid Wash Supercycle
Heavy, Medium & Light
Soil
I
WLW381OS
29
18
48* 36
Perm
Press & Knits
Supercycle
Heavy,
Medium &Light soil
WLW3800S
30
47* 36
Perm
Press
Supercycle
Heavy, Medium & Light Soil
I
WLW3600S
30
47* 36
Perm
Press & Knits
Heavy, Medium & Light Soil Soak
[
WLW3400S
25 37
12
*
Total Cycle Minutes do not include the auto soak cycle you have chosen.
7
SUGGESTED
FABWC
AND CYCLE SETTINGS
Cycle Suggested
Permanent Press & Knits
Delicates
Regular
Extra Cleaning & Auto Soak
Special Instructions
*Down-filled
garments
**Pillows
***Blankets
For Clothes
Loa~abrics
such as:
● Synthetics
● Permanent press, treated cottons,
blends with cottons
● Down-filled garments, if machine
washing is recommended*
● Pillows**
Q
Baby clothes (delicate)
s
Lingerie
● Cottons and
linens
● Denims
● Blankets***
● Baby clothes (sturdy)
“
Work clothes with heavy soil
WasMSpin
Speed
Normal/Slow
Gentle/Slow
Gentle/Slow
Normal/Fast
Normal/Fast
Wash frequently to fluff up the down and retain the garment’s warmth.
WASH SEPARATELY. Wet down gives off an odor which maybe absorbed
by other garments. Odor disappears when garment is dry. Treat heavily soiled
areas with liquid detergent or a paste made of water and powdered detergent.
Close zippers. Wash 2 or 3 garments at a time or add towels to balance.
GARMENT MUST BE TUMBLE DRIED.
Pillows are made of different
materials–dacron,
foam, polyester, natural feather, —
and down. MANUFACTURER’S CARE LABELS MUST BE FOLLOWED
CAREFULLY. If washing is recommended, check pillows for weak seams or
holes and mend, to prevent escape of the filling. Fill washer, add detergent
and agitate for several minutes. Add two pillows at a time to balance load.
Use largest water level.
Fill washer with water; add detergent and allow to dissolve. Add blanket.
WASH ONLY ONE BLANKET AT A TIME. On electric blanket, sew a strong
piece of cloth over plug to protect blanket and washer from damage. Pre-treat
heavily soiled spots with
liquid
detergent. —
8
OPERAT~G
~STRUCTIONs
(continued)
How to Use the Bleach Dispenser
(on models so equipped)
Use this dispenser with liquid bleach only. If you
● Pour measured amount of liquid bleach directly into
prefer to use powdered bleach, pour it into the
/
bleach dispenser.
wash basket along with your detergent. Do not
%%
● Do not ovefllll or allow dispenser to oveflow. Avoid
pour powdered bleach into the bleach dispenser. splashing. Undiluted bleach can cause fabric damage.
● Measure bleach carefully. See manufacturer’s
instructions.
“
Never pour undiluted liquid bleach directly
onto clothes or into the wash basket.
How to Use the Fabric Softener Dispenser
(on models so equipped)
● Position the Fabric Softener ● The fabric softener will automatically be dispensed
Dispenser on the agitator.
M
at the proper time.
Q
● Pour manufacturer’s recommended ● Do not stop the washer during the first spin.
amount of fabric softener into a This will cause the dispenser to empty too soon.
one cup (240 ml) measuring cup.
c
Do not use the Fabric Softener Dispenser with
● Add enough water to fill the cup 1/2 full. the Soak or Prewash Cycle.
● Pour the diluted softener into the dispenser. ● If the dispenser gets clogged, soak it in a solution of
one cup (240 ml) water and one cup (240 ml) alcohol.
H
OW
to Use the Soak Cycles
(on models so equipped)
●
Soak: Turn the cycle selector to soak. Start the
● NOTE: For an extended soak, allow the washer
washer. Add
pre-measured
detergent or soak product;
to fill and agitate for a few minutes to dissolve the
add clothes.
soaking agent. Then push in the Cycle Selector knob
to stop the washer (keep lid closed) and allow to soak
for as long as desired. After desired soak period, pull
out the Cycle Selector knob to complete the cycle.
H
OW
to Use the Auto Soak Cycle
(on models so equipped)
In the Auto Soak cycle the washer fills, agitates and ● Extra Cleaning with Auto Soak: Set the Cycle
it soaks for the time you selected. It automatically Selector knob for soak time desired in Extra Cleaning
advances into the next cycle. cycle. Start the washer. The washer will agitate, soak
c
PreWash
with Auto Soak: Set the cycle selector
and automatically advance into Extra Cleaning.
for soak time desired in the
PreWash
cycle. Start the
washer. The washer will agitate, soak and automatically
advance into
PreWash.
ENERGY-SA~G
T~S
If your clothes and household items don’t look clean and
fresh after washing, you will probably rewash them.. and
that means you’ll waste energy. Remember to sort your
clothes carefully, and load them properly, select correct
cycles, use enough detergent and
choose a
water
temperature warm enough to release and get rid of soil.
● Try to wash less often. Save articles of the
same type of fabric until you have a full load.
● If you must wash smaller loads, adjust the amount
of water. Small loads should have lower water levels.
● Always rinse in cold water. The temperature of
the rinse does not affect cleaning.
●
Wash in off-peak utility hours. Your local utility
can tell you which are the off-peak hours.
c
Use your washer’s Normal Spin. This will remove
more water during spin, which will shorten drying
cycle to save more energy.
9
HOW TO SORT CLOTHES
Sort by Surface Texture
Separate
1
m
m
me
Lint a
~
Lint 0
%~Producers
from ‘%Collectors
LJ LJ
LINT PRODUCERS—such as terry toweling and
chenille—give up lint.
LINT COLLECTORS—such as man-made fibers and
napped fabrics like velveteen and corduroy—attract
lint. These must be washed separately.
For more information on lint control, see The
Problem Solver section.
Sort by Fabric
Separate
In addition to sorting to
reduce lint collection,
it is recommended
that fabrics of similar
construction be
washed together
whenever possible.
Sort by Soil
Sort by Color
For instructions
on different fabrics
and loads, see the
Suggested Fabric and
Cycle Settings guide.
It pays to check and prepare
clothes for washing.
“
Empty pockets, brush out cuffs,
zip zippers, and fasten snaps,
hooks and buttons.
● Do any necessary mending—rips,
hems, tears.
● Check all items for areas of heavy
soil or stain.
● Remove stains. See Stain
Removal Guide.
● Turn
poly
knits inside-out to
minimize fabric surface damage.
EXTM
CLEANING
(See
Tips to Help You Select
Settings section for instructions.)
See Stain Removal Guide.
See Suggested Fabric
and Cycle Settings guide.
See The Problem Solver section.
Soaking and Pretreating-a good
way to loosen deep soils and stains.
A thorough soaking with detergent
or special soaking agent is another
way to remove heavy soils,
embedded dirt and even some stains.
10