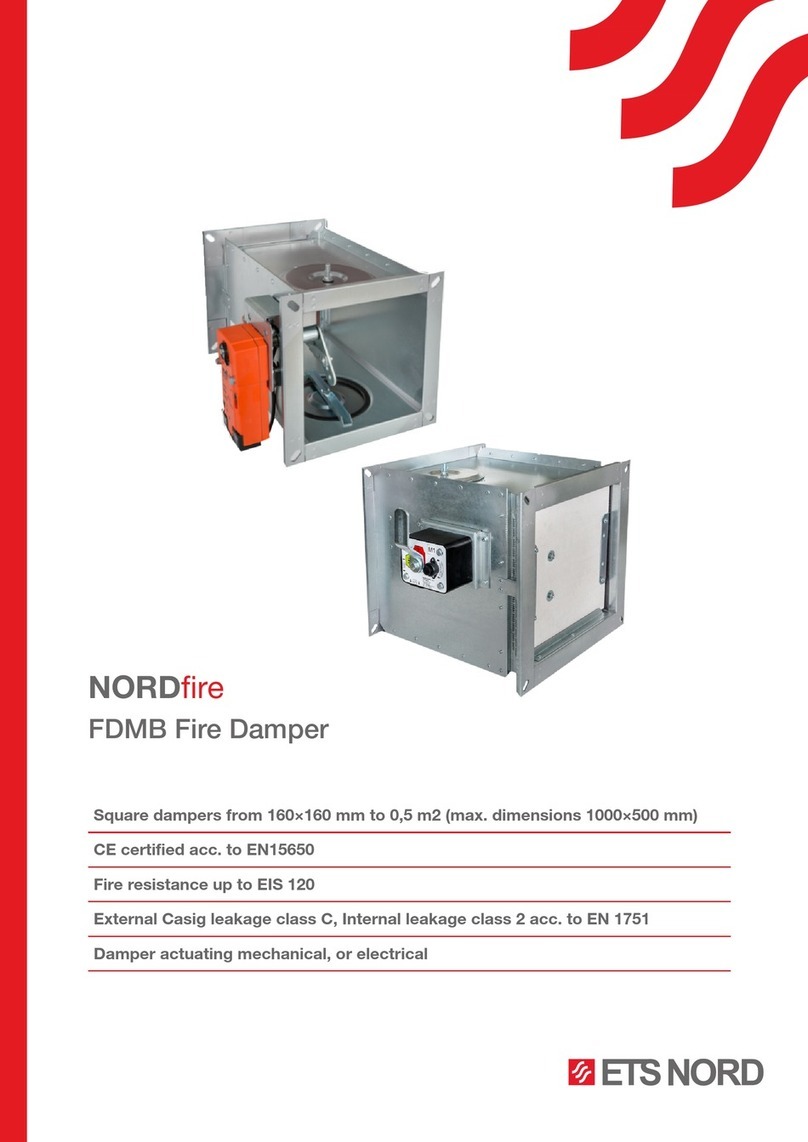
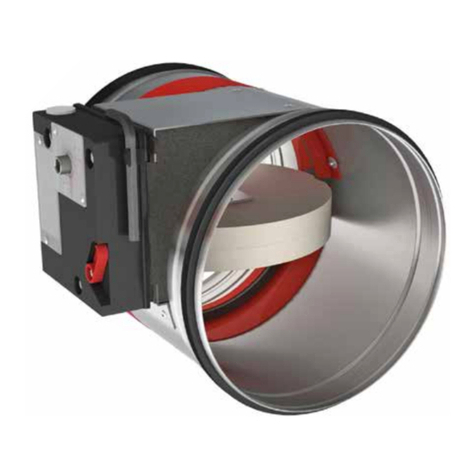
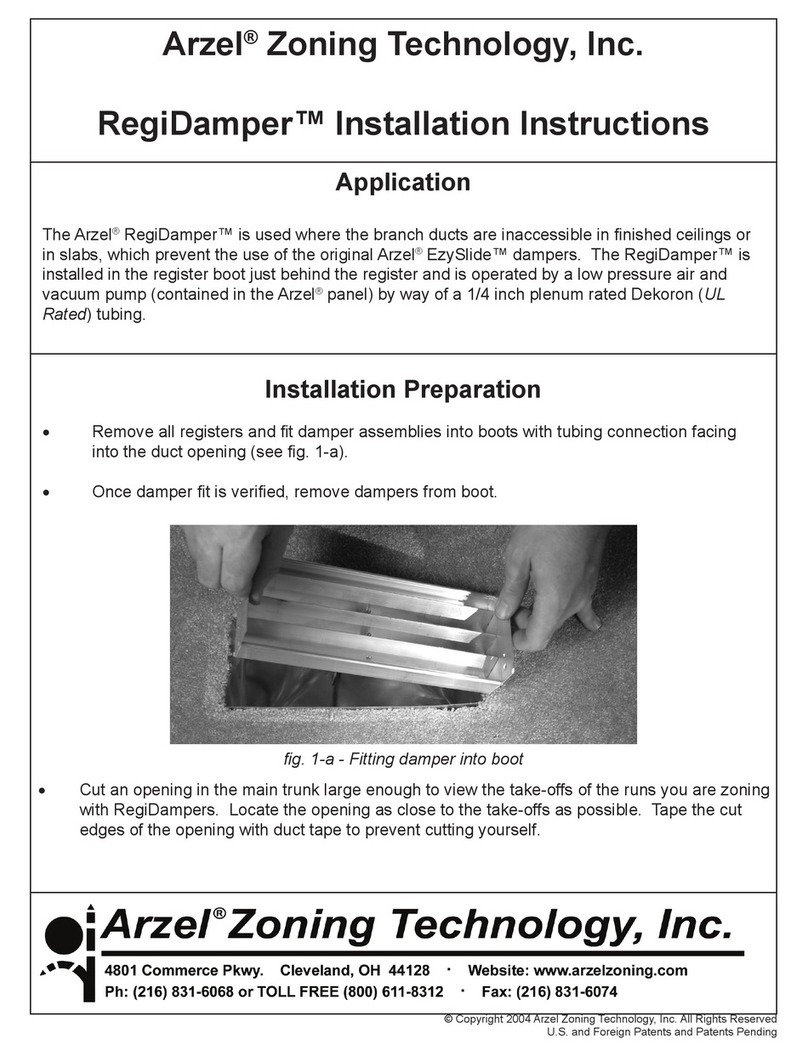
Geba WFK Series User manual

Assembly and Operating Instructions
Version: 06/2023
Tested according to EN 1366, Part 2
geba Fire Damper WFK
according to EN 15650
With open cross-section for use in air handling systems of
buildings

2
assembly and operating instructions geba re damper WFK
Table of contents
Table of contents
General instructions ...........................................................................................................3
Safety and intended use........................................................................................................4
Transportation and Storage .....................................................................................................5
Product Description ...........................................................................................................5
General Installation Information .................................................................................................6
1. Removal of transport lock.............................................................................................6
2. Checking the release tab .............................................................................................6
3. Distance to load-bearing components ...................................................................................7
4. Important information................................................................................................7
Distances - Installation in Ceilings and Walls ......................................................................................8
Installation - Solid Ceiling ......................................................................................................9
Installation - Solid Wall .......................................................................................................10
Installation - Lightweight Wall with Metal Stud Framework .........................................................................11
Installation - Sliding Ceiling Connection .........................................................................................12
Installation - Shaft Wall with Metal Stud Framework ..............................................................................14
Distances - Installation in Wooden Ceilings and Walls..............................................................................15
Installation - Wooden Ceilings .................................................................................................16
Installation into a Wooden Ceiling Structure......................................................................................17
Installation - Würth I-Block....................................................................................................18
Installation - Modular Ceiling, System Cadolto ....................................................................................19
Installation - Board Stack / Plywood Wall ........................................................................................20
Installation - Lightweight Wall with Wooden Stud Framework .......................................................................21
Installation - Insert Element WFK-ES ............................................................................................22
Installation - Soft Firestop.....................................................................................................23
Function Test, Commissioning, Maintenance, Decommissioning, Removal und Disposal...................................................24

3
assembly and operating instructions geba re damper WFK
1322
DIN EN 15650:2010
re damper
WFK
18
1322-CPR-086678/01
Bartholomäus GmbH
Bachstraße 10
89607 Emerkingen
Nominal activation/sensitivity conditions
fullled
- Load capacity of the temperature-
sensitive sensor
- Response temperature of the
temperature-sensitive sensor
fullled
Response delay (response time):
- Closing time
50 cycles
Operational safety:
- cyclic testing
Fire resistance:
- Retention of the cross section
- Compartmentation E
- Thermal insulation I
- Smoke leakage S
- Mechanical strength (regarding E)
- cross section (regarding E)
EI XX
(ve/ho, i <--> o)
S
Durability of response delay:
- Response of the temperature-sensitive
sensor to temperature and load fullled
Durability of operational safety:
- Testing of opening and closing cycles - not applicable -
CE Marking and Labeling:
CE marking
Producer data
Year of marking
EG Certicate of Conformity
European standard
Product description
Type/Model
Information about applicable characteristics
See page 4
fullled
fullled
fullled
General Instructions
This assembly and operating manual describes the re protection damper of the WFK variant. To ensure the proper functioning of the re protection
damper, it is absolutely essential to read the supplied assembly and operating manual before any use and to observe the instructions listed therein.
Upon facility handover, the manual is to be handed over to the facility operator. The facility operator is required to include the manual in the
system documentation. Malfunctions or damages resulting from failure to follow this manual or non-compliance with legal regulations do not lead
to liability claims against the manufacturer. This assembly and operating manual is intended for planners, developers, and operators of systems in
which re protection dampers are to be integrated.
Furthermore, this manual is intended for individuals performing the following tasks:
• Transport and storage
• Installation
• Commissioning, operation, and maintenance
• Decommissioning, dismantling, and disposal
In addition to this assembly and operating manual, the applicable standards and technical regulations must be followed.
Guidelines for cleaning and connecting ventilation elements according to VDI 6022 Sheet 1 Table 2 b):
"According to DIN EN 12097: maximum screw length 13 mm or resulting protrusion of screws and rivets of a maximum of 12 mm. To prevent
injuries to maintenance personnel, a distance of one meter from inspection and cleaning openings should be maintained. Under no circumstances
should cleaning and maintenance work be obstructed."
General Instructions

4
assembly and operating instructions geba re damper WFK
Safety and Intended Use
The described tasks on the re protection damper may only be carried out by qualied personnel. The following regulations and guidelines must be
observed for all tasks related to the re protection damper:
Equipment and Product Safety Act
Operating Safety Ordinance
Building Code Regulations
Accident Prevention Regulations (BGV A1, BGV A3)
The re protection damper WFK is a safety component specially developed for re protection.
Certications and Standards
EI 120 (hoi <--> o) S
EI 90 (vei <--> o) S
EI 60 (vei <--> o) S
EI 90 (vei <--> o) S
EI 90 (hoi <--> o) S
EI 90 (vei <--> o) S
EI 60 (vei <--> o) S
EI 90 (vei <--> o) S
Fire protection damper according to EN 15650:2010
Performance Declaration Certificate 1322-CPR-086678/01
Declaration of Performance DoP/WFK/DE/2023/006
Classification according to DIN EN 13501-3:2009
Solid ceiling wet installation (mortar) d* ≥150 mm:
Installation Würth - I-Block wet installation
Modular ceiling system Cadolto, wet installation
Solid wall (mortar) d* ≥100 mm:
Solid wall dry installation (insert element) d* ≥100 mm:
Lightweight wall with metal stud framework wet installation (mortar) d* ≥100 mm:
Lightweight wall with metal stud framework dry installation (insert element) d* ≥100 mm:
Sliding ceiling connection GDA, lightweight wall d ≥100 mm
Board stack / plywood ceiling paneled wet installation (mortar) d* ≥112.5 mm:
Board stack / plywood ceiling wet installation (mortar) d* ≥140 mm:
Timber beam ceiling wet installation (mortar) d* ≥174.5 mm:
Shaft wall wet installation (mortar) d* ≥90 mm:
Shaft wall dry installation (insert element) d* ≥90 mm:
Wood stud wall paneled on both sides wet installation (mortar) d* ≥130 mm:
Wood stud wall paneled on both sides dry installation (insert element) d* ≥130 mm: Board
stack / plywood wall wet installation (mortar) d* ≥100 mm:
Board stack / plywood wall dry installation (insert element) d* ≥100 mm:
Tested according to DIN EN 1366-2
Damper leakage according to EN 1366-2
All other relevant norms and regulations for fire protection must be observed.
*d: wall/ceiling thickness
Intended Use
The re protection damper is used as a thermal barrier device to prevent the spread of re and smoke through the air duct. The re protection
damper can be used in supply and exhaust air systems, with or without heat recovery. Intended installation locations include solid walls, solid
ceilings, lightweight partitions, shaft walls, wooden ceilings, board stack walls, plywood walls, and wood stud walls. Installation can be done
vertically and horizontally with any airow direction. Connections can be made to air ducts made of combustible or non-combustible materials,
including single-sided connections with grille cover. In accordance with European standards, use without dual pipe connections is possible unless
there are national requirements to the contrary. Under the conditions of intended installation and operation, the Type WFK re protection damper
achieves the performance class DIN EN 13501-3:2007 + A1:2009. Furthermore, the general maintenance guidelines DIN 31051 and EN 13306 apply.
Prohibited Uses
The re protection damper must not be used under the following conditions
Use as a smoke extraction damper
Use in hazardous areas (Ex zones)
Use outdoors without adequate protection against weather inuences
Use in exhaust systems of commercial kitchens
Use in ventilation systems where function is hindered by heavy contamination, extreme humidity, or chemical contamination.
Use in installation situations where internal inspection, such as camera inspection, reection, and cleaning of the re protection damper in its
installed state, is not possible.
Modications to the re protection damper and the use of spare parts not approved by Bartholomäus GmbH are not allowed.
Residual hazards
geba-Fire protection dampers undergo rigorous quality controls during manufacturing. Additionally, a functional test is conducted prior to delivery.
Damages during transportation or installation can lead to a compromised function. The proper and undamaged condition of the re protection
damper must be checked before installation and during commissioning
Safety and Intended Use

5
assembly and operating instructions geba re damper WFK
Transportation and Storage
Inspection of the delivery
Inspect the delivery for any damage and completeness immediately
upon receipt. In case of any transport damage or incomplete delivery,
notify the carrier and your supplier promptly. The complete delivery
includes
re protection damper
if applicable,. attachments/accessories
assembly and operating instructions
Transport to the building site
Transport the re protection damper in its shipping packaging as close
as possible to the installation location
Transport and Storage - Product Description
Dimensions
Product Description
Fire protection dampers of the WFK series are used as safety components within the ventilation system.
The re protection damper is intended to prevent the spread of re and smoke through the air duct. During operation at normal temperature, the re
protection damper is open to ensure the airow in the ventilation system.
Caution!
Risk of injury from edges and sheet metal parts.
Wear protective gloves during transport and installation.
Functional description (Fig. 2)
The re protection damper contains two thermal
release devices that trigger at a temperature above
70°C. This causes the preloaded closure aps to
pivot from the 'open' to the 'closed' position.
Maintenance-free stainless steel double torsion
springs serve as the driving mechanism
Triggering device
Stainless steel double
torsion springs
Sealing cap
Fig. 2
Nominal size
DN in mm 100 125 160 200 250
D98 123 158 198 248
D1 145 177 211 251 300
D2 130 155 190 230 280
L1 168 168 168 178 188
L2 32 41 60 76 101
L3 110 110 110 120 130
LG 245 255 270 300 335
Weight in kg 1.2 1.7 2.2 3.3 4.9
D
D
D1
75
40
L3
L1 L2
LG
40
D2 Fig. 3
Storage
When storing re protection dampers, please consider the following
points:
Protect the re protection damper from dust and debris.
Shield from moisture and direct sunlight.
Do not expose the re protection damper (even when packaged)
directly to the weather.
Store the re protection damper at temperatures between -40°C and
50°C.
Packaging
Dispose of packaging materials properly after unpacking.

6
assembly and operating instructions geba re damper WFK
11
2
General Installation Information
1. Removal of transport lock
Position of the release tabs must be checked before installing the ap.
The release tabs must be straight and sit inside the bracket as shown in
Fig. 8.
Important! Both pins of the release tabs must be positioned inside the
designated cutouts of the brackets.
Caution!
Flap blades are tensioned.
Danger of injury!
General Installation Information
2. Checking the release tab
Safety bracket
Security plate
1
2
Bend both safety brackets
upwards.
Press safety brackets with
locking plate downwards
(through WFK).
Remove locking plate and
safety bracket completely
from the housing.
Fig. 4
Fig. 8
Fig. 5
Fig. 6 Fig. 7
Pin

7
assembly and operating instructions geba re damper WFK
3. Distance to load-bearing components
Caution!
Malfunction of the re protection damper due to contamination or damage.
Clean the re protection damper from any debris before installation.
Protect the re protection damper from contamination and damage during installation.
Caution!
Risk of injury from edges and sheet metal parts.
Wear protective gloves during transport and installation.
Connection of ventilation ducts
Installation is possible vertically and horizontally with any airow direction. Suitable for installation in solid and wooden ceilings, as well as in solid
walls, shaft walls, and lightweight walls with metal and wooden studs, and wooden walls. For stud construction, use elastic connectors to absorb
thrust forces and allow for expansion compensation. Connection of air ducts made of combustible or non-combustible materials, also possible with
single-sided grille. European standards allow for use without dual-pipe connection unless national regulations state otherwise.
4. Important Information
Y1* Y2**
Ceiling ≥10 mm ≥20 mm
Wall ≥10 mm ≥20 mm
*Housing cover from load bearing components
**Clearance area D2 from supporting components
Exception: „Installation - Soft Firestop“ on page 23
General Installation Instructions
Load-bearing structures
according DIN EN 1363-1:2012 section 7.2.2
Solid construction with high bulk density: masonry or solid concrete
with a total density of ≥850 kg/m³ according to section 7.2.2.1.
Solid construction with low bulk density: aerated concrete with a
total density of (650 ± 200) kg/m³ according to section 7.2.2.2.
Lightweight construction: Lightweight wall with metal studs and
plasterboard paneling, according to section 7.2.2.4.
Load-bearing structures according to DIN EN
1363-1:2012 section 7.2.2
Shaft walls single-sided paneled: in accordance with EN 1363, Part
1, Section 7.2.3 and EN 1366, Part 2, Section 7.2.
Board stack / plywood ceilings d ≥112.5 mm; paneled with GKF
board (12.5 mm)
Board stack/ plywood ceilings d ≥140 mm
Timber beam ceiling d ≥174.5 mm; triple-paneled with GKF boards
(3 x 12.5 mm)
Wood stud wall d ≥130 mm on both sides, double-paneled with GKF
boards (each 2 x 12.5 mm)
Board stack / plywood walls d ≥100 mm
Fig. 9
Approved mortar for wet installation
The voids between the re protection damper and the wall/ceiling must
be completely lled with mortar across the entire wall/ceiling thickness.
Air pockets must be prevented. Approved mortar:
DIN 1053: Group II, IIa, III, IIIa, or re protection mortar Group II, III
EN 998-2: Class M 2.5 to M20 or re protection mortar Class M 2.5
to M20
Alternatively, equivalent mortars to the above-mentioned standards,
gypsum mortar.
Mounting brackets
Attach the supplied mounting or
stop brackets on both sides of the
housing cover using wing nuts.
The brackets are fastened with the
shorter side against the cover and
aligned according to Fig. 10.
75
Fig.10
Ceiling/
Wall
Y1
Y2
D2

8
assembly and operating instructions geba re damper WFK
Distances - Installation in Ceilings & Walls
Distances - Installation in ceilings and walls
X2 Solid ceiling
Wooden ceiling
Lightweight wall**, solid wall
wooden stud wall Shaft wall
Interaxis distance ≥DN + 70 mm ≥DN + 70 mm ≥DN + 240 mm
DN 100 170 mm 170 mm 340 mm
DN 125 195 mm 195 mm 365 mm
DN 160 230 mm 230 mm 400 mm
DN 200 270 mm 270 mm 440 mm
DN 250 320 mm 320 mm 490 mm
X1 Solid ceiling
Wooden ceiling
Lightweight wall**, solid wall
wooden stud wall Shaft wall
WFK-WFK (innen) ≥20 mm ≥20 mm ≥190 mm
**Lightweight wall with metal stud:
Lightweight walls with metal studs and double-sided paneling, classied according to EN 13501-2 or comparable national classication.
Lightweight walls with metal studs and double-sided paneling made of gypsum berboards or gypsum- or cement-bound panel materials (wall
thickness ≥100 mm, spacing of metal studs ≤625 mm).
Connection of air duct with elastic connector.
Shaft wall with metal stud framework, single-sided paneled with 2 x 20 GKF (brous gypsum board) panels.
Ceiling installation: Mount the mounting brackets (shown in red) ush with the top edge of the ceiling when installing on the ceiling, and ush with
the bottom edge of the ceiling when installing under the ceiling.
Wall installation: Mount the mounting brackets (shown in red) ush with the wall when installing on the wall.
Installation on or under ceiling
Abb.11
Installation situation Gap S* Distance to load-
bearing components
Solid ceiling ≤150 mm ≥20 mm
Solid wall ≤150 mm ≥20 mm
Lightweight wall with
metal stud**/with
wooden stud
≤150 mm ≥20 mm
D2 + 2 x S
DN
S
*Gap S (150)
S≤150 mm
circumferential gap
Fig. 12
Eintauchtiefe
50 mm
Befestigungswinkel
als Montagehilfe
Mörtelverguss S
Massivdecke
≥150 mm
X1
X2
D2
D2

9
assembly and operating instructions geba re damper WFK
Installation - Solid Ceiling
Wet installation
DN Pipe diameter
S Gap S ≤150 mm round/rectangular
d Ceiling thickness d ≥150 mm
1 Fire damper WFK
2 Solid ceiling (wet installation)
3 Mounting bracket (use screws if necessary)
4 Mortar
Basics/Data
Performance class El 120 (hoi ↔o) S
Solid ceilings with a minimum thickness of 150 mm, e. g. made of concrete or aerated concrete
Distance between two re protection dampers is ≥25 mm (page 8)
Distance to supporting components ≥20 mm from dimension D2 (Fig. 9, page 7; red spacing surface)
Installation during ceiling construction
The re protection damper can be directly embedded into the solid ceiling during its construction. The surrounding gap S can be omitted here.
1. Remove the transportation safeguard from the re protection damper (page 6).
2. Verify the correct position of the release tabs (page 6).
3. Attach the mounting brackets to the housing using wing nuts (Fig.12, page 8).
4. Position the re protection damper with the mounting brackets ush with the upper edge of the ceiling when installing on top of the oor
ceiling, or ush with the lower edge of the ceiling when installing below the oor ceiling (Fig. 11, page 8). use screws if necessary.
5. Protect the interior of the re protection damper from mortar and debris.
6. Pour the re protection damper in place.
Installation after ceiling completion (core drilling, penetration)
If installation takes place after the ceiling has been completed, the following steps must be carried out:
1. Remove the transportation protection from the re protection damper (page 6).
2. Verify the correct positioning of the release tabs (page 6).
3. Attach the mounting brackets to the housing using wing nuts (Fig. 10, page 7).
Create the installation opening through core drilling or penetration (Fig. 11, page 8):
- For a single re protection damper, we recommend an installation opening of at least Ø D2 + 2 x 20 mm;
- For two re protection dampers, we recommend an installation opening of at least 2 x Ø D2 + 40 mm + 2 x 20 mm;
- Maintain a distance of ≥ 25 mm between two re protection dampers.
4. Position the re protection damper with the mounting brackets ush with the upper edge of the ceiling when installing on top of the oor
ceiling, or ush with the lower edge of the ceiling when installing below the oor ceiling (Fig. 11, page 8). Use screws if necessary. The wall/
ceiling-ush leg can be shortened if space is limited.
5. Install formwork.
6. Fill the re protection damper with a surrounding mortar bed in the thickness of the ceiling.
Note: Protect the interior of the re protection damper from mortar and debris.
Installation - Solid Ceiling
1 2
3
3
4
4
1
1
2
2
4
3
d
D2
DN
SS
D2
DN
S
S
1 2
3
3
4
4
1
1
2
2
4
3
d
D2
DN
SS
D2
DN
S
S
Fig.13

10
assembly and operating instructions geba re damper WFK
1S4
Basics/data
Performance class El 90 (vei ↔o) S
Solid walls with a minimum thickness of 100 mm, made of materials such as concrete or aerated concrete.
Distance between two re protection dampers is ≥25 mm (page 8).
Distance to load-bearing components ≥20 mm from dimension D2 (Fig. 9, page 7, red clearance area).
Installation during wall construction
The re protection damper can be directly embedded into the solid wall during its construction.
1. Remove the transportation safeguard from the re protection damper (page 6).
2. Verify the correct positioning of the release tabs (Page 6).
3. Attach the mounting brackets to the housing using wing nuts (Figure 10, Page 7).
4. Position the re protection damper in the designated installation position on a mortar bed during wall assembly. Mounting brackets must align
vertically and ush (Fig.11; Fig.14, 2) with the wall, use screws if necessary.
5. Protect the interior of the re protection damper from mortar and debris.
6. Embed the re protection damper into the wall with a surrounding mortar bed.
Installation after wall completion (core drilling, penetration)
If installation takes place after wall completion, the following steps must be carried out:
1. Remove the transportation safeguard from the re protection damper (page 6).
2. Verify the correct positioning of the release tabs (page 6).
3. Attach the mounting brackets to the housing using wing nuts (Fig. 10, page 7).
Create the installation opening (round/rectangular) through core drilling or penetration (page 8):
- For a single re protection damper, we recommend an installation opening of at least Ø D2 + 2 x 20 mm;
- For two re protection dampers, we recommend an installation opening of at least 2 x Ø D2 + 40 mm + 2 x 20 mm;
- Maintain a distance of ≥ 25 mm between two re protection dampers.
4. Slide and position the re protection damper into the installation opening.
Mounting brackets must align vertically and ush (Fig.11; Fig.14, 2 ) with the wall, use screws if necessary. The wall/ceiling-ush leg kan be
shortened if space is limited.
5. Protect the interior of the re protection damper from mortar and debris.
6. Seal the surrounding gap with approved mortar (page 7) to the full wall thickness.
Installation - Solid wall
Installation - Solid Wall
Wet Installation
DN Pipe diameter
S Gap S ≤150 mm, round/ rectangular
d Wall thickness d ≥100 mm
1 Fire protection damper WFK
2 The installation position is determined by vertical mounting
brackets (corresp. to the horizontal axis orientation of the closure aps)
3 Solid wall (wet installation)
4 Mounting brackets
5 Screw mounting brackets (use screws if necessary)
Fig.14
DN
3S1
2
D2
S
d
1 5
S
DN

11
assembly and operating instructions geba re damper WFK
Installation - Lightweight Wall with Metal Stud Framing
Abb.15
D2
D
S2
1 5 76
d
8
S2
DN
D2 S3
S3
1 5
d
76
E
89
DN
A Installation - lightweight wall w/ metal stud
framing
B Installation under the oor ceiling
C Installation on load-bearing components (here:
ceiling and wall)
D Wall cross-section, installation of WFK w/o reveals
E Wall cross-section, installation of WFK w/o
reveals, paneled
F Wall cross-section, installation of WFK round
opening
G Installation position using vertical mounting
brackets predened (corresponds to the horizontal axis
position of the shut-off aps)
S1 Distance to load-bearing components S1 ≥20 mm
S2 Gap without reveal paneling S2 ≤150 mm
S3 Gap with reveal paneling S3 ≤150 mm
S4 Gap S4 ≤75 mm
d Wall thickness d ≥100 mm
1 Fire protection damper WFK
2 Metal prole
3 Load-bearing component (here: wall or. ceiling)
4 Double-sided paneling, dual-layered with GKF
panel (2 x 12,5 mm)
5 Mounting brackets
6 Insolation
7 CW prole 50 mm
8 Mortar, acc. to DIN 1053: group II, IIa, III, IIIa or
re protection mortar group II, III; EN 998-2: class
M 2.5 to M20 or re protection mortar class M 2.5
to M 20
9 Reveal, w/o, single or double paneling
Basics/Data
Performance class EI 90 (vei ↔o) S
Lightweight walls with metal studs and double-sided paneling according to European classication (EN 13501-2) or comparable national
classication.
Double-sided paneling made of cement or gypsum-based panel materials, gypsum berboards, or re protection boards made of calcium silicate,
wall thickness d ≥100 mm.
Distance between metal studs ≤625 mm.
Installation in round openings without replacement gap S4 ≤75mm.
Installation in rectangular openings with a bracing prole or with replacements and bars.
Reveals must always be screwed to the stud framework.
Distance to load-bearing components (ceiling, wall) S1 ≥20 mm.
Installation - wet installation
Construct lightweight wall with metal stud framing according to manufacturer's specications:
1. Create installation opening, alternatively with doubling.
Perimeter gap S2/S3 ≤150 mm; we recommend the mortar gap not be smaller than 20 mm.
- Before wall paneling: create installation opening in metal stud framing with replacement and bars.
- After wall paneling: create rectangular installation opening and reinforce with perimeter metal prole.
2. Remove transport safeguard from the re protection damper.
3. Check trigger plates for correct positioning.
4. Attach mounting brackets to the housing using wing nuts.
5. Place and secure re protection damper in the installation opening. Mounting brackets must be installed vertically and ush ( G) with the
wall, use screws if necessary. The wall- / ceiling-ush leg can be shortened if space is limited.
6. Protect the interior of re protection dampers from mortar and debris.
7. Completely seal the circumferential gap S with mortar over the entire wall thickness d.
F
S4
1 5 6
d
8
S4
DN
D2
2
4
3
S1
S1
625 mm
G
A
B C GF GG
Installation - Lightweight Wall with Metal Stud Framework
Wet installation

12
assembly and operating instructions geba re damper WFK
Installation - Leightweight Wall with Metal Stud Framing
Installation - Lightweight Wall with Metal Stud Framework
Sliding Ceiling Connection
WFK-GDA W 100
CW = 50 mm
WFK-GDA W 125
CW = 75 mm
WFK-GDA W 150
CW = 100 mm
ØB B1 H H1 H2 L L1 B2 L L1 B2 L L1 B2
DN 100 98 250 190 250 215 93 113 135
49
101 148
74
115 160
99
DN 125 123 275 215 275 240 105 113 145 101 158 115 170
DN 160 158 310 250 310 275 123 113 163 101 176 115 188
DN 200 198 350 290 350 315 143 122 182 110 195 120 208
DN 250 248 400 340 400 365 165 133 205 120 218 120 232
Basics/data
Performance class EI 90 (vei ↔o) S
Lightweight walls with metal studs and double-sided paneling according to European classication (EN 13501-2) or comparable national
classication.
Double-sided paneling made of cement or gypsum-based panel materials, gypsum berboards, or re protection boards made of calcium silicate,
wall thicknesses d = 100 mm, d = 125 mm, d = 150 mm.
Distance between metal studs ≤625 mm.
Installation in rectangular openings with a bracing prole or with replacements and bars.
B1
B
H
H1
H2
B2
2x12,5
2x12,5
ø
ø
L L1
CW
The manufacturer's specications for metal stud walls (Knauf, Rigips, etc.) must be observed when dealing with suspended ceiling connections involving sliding.
[mm]
WFK-GDA LW
max. LH
DN 100 255 300
DN 125 280 325
DN 160 315 360
DN 200 355 400
DN 250 405 450
LW
LH
4x12,5 mm
GKF
max. 2,5 max. 2,5
625
beidseitige Beplankung
2x12,5 mm GKF
WFK-GDA LW
max. LH
DN 100 505 300
DN 125 555 325
DN 160 625 360
DN 200 705 400
DN 250 805 450
625 625
LW
LH
4x12,5 mm
GKF
max. 2,5 max. 2,5
0
beidseitige Beplankung
2x12,5 mm GKF

13
assembly and operating instructions geba re damper WFK
Installation of Sliding Ceiling Connection
Construct lightweight wall with metal stud framing according to manufacturer's specications for sliding ceilings:
1. Create installation opening as specied, see left.
2. Adhere a 10 mm thick stone wool board with a melting point > 1000 °C, 1
1
3. Place 1
2and install 1
3 the re protection damper in the installation opeing.
4. Align the re protection damper 1
4.
5. Paneling of metal stud wall with 20 mm clearance at the bottom 1
5.
6. Panel the gap between the clearance 1
6.
2
1
+
2
4x
Installation - Leightweight Wall with Metal Stud Framing
6
8 x
2x12,5 mm GKF
beidseitig der Wand
Beton : Ø 10 mm
Porenbeton: Ø 8 mm
Ziegel: Ø 8 mm
Steinwollplatte, Dicke 10 mm
Schmelzpunkt > 1000 °C
1
3
1
21
4
1. Lage, 12,5 mm GKF
20 mm
5
2. Lage, 12,5 mm GKF
20 mm

14
assembly and operating instructions geba re damper WFK
Installation - Shaft Wall with Metal Stud Framework
Wet installation
Basics/data
Performance class EI 90 (vei ↔o) S
Shaft walls with metal studs and one-sided paneling according to European classication (EN 13501-2) or comparable national classication.
One-sided paneling made of cement-bound or gypsum-bound panel materials, gypsum berboards, or re protection boards made of calcium
silicate, wall thickness d ≥90 mm, with or without insulation.
Distance between metal studs ≤625 mm.
Installation in rectangular installation openings allowed.
Stiffening of the installation opening with a bracing prole or with replacements and bars.
Reveals are always to be screwed to the stud frame.
Distance to supporting components (ceiling, wall) S1 ≥20 mm.
Installation - wet installation
Erect the shaft wall according to manufacturer specications.
1. Create the installation opening, alternatively with additional framing.
2. Circumferential gap S2/S3 ≤150 mm; we recommend not making the mortar gap less than 20 mm.
- Before wall paneling: create the installation opening in the metal stud framework using replacements and bars.
- After wall paneling: create a rectangular installation opening and reinforce it with a surrounding metal prole.
3. Remove the transport safeguard from the re protection damper.
4. Check the positioning of the release tabs.
5. Place and secure the re protection damper in the installation opening.
Mounting brackets must be vertically aligned and ush ( F ) with the wall, use screws if necessary. The wall- / ceiling ush-leg can be
shortened if space is limited.
6. Protect the interior of re protection dampers from mortar and debris.
7. Completely seal the circumferential gap S with mortar over the entire casting depth (here: d1 and d2).
A Installation in shaft wall
B Installation under the oor ceiling
C Installation on load-bearing components (here: wall and ceiling)
D Wall cross-section, installation of WFK without reveals
E Wall cross-section, installation of WFK with reveals paneled
F Installation position predetermined by vertical mounting brackets
(corresponds to the horizontal axis position of the closure aps).
S1 Distance to load-bearing components S1 ≥20 mm
S2 Gap without reveal paneling S2 ≤150 mm
S3 Gap with reveal paneling S3 ≤150 mm
d1 Pouring thickness without reveal paneling d1 ≥90 mm
d2 Pouring thickness with reveal paneling d2 ≥100 mm
1 Fire protection damper WFK
2 Metal prole
3 Load-bearing component (here: wall or ceiling)
4 Double-sided paneling, dual-layered with GKF panel (2 x 20 mm),
one-sided with metal stud framing
5 CW prole 50 mm
6 Reveal, without, single or double paneling
7 Mortar, DIN 1053: group II, IIa, III, IIIa or re protection mortar
group II, III
EN 998-2: class M 2.5 to M20 or re protection mortar
class M 2.5 to M 20
8 Mounting bracket, must be vertically aligned (as indicated by the
installation position of the re protection damper).
Abb.16
2
4
3
S1
S1
625 mm
F
F
A
B C F1 8
4
5
7
S2
d1
1 8
4
6
7
S3
d2
D E
Installation - Shaft Wall with Metal Stud Framework

15
assembly and operating instructions geba re damper WFK
Z1
S
S
60
Z2
Eintauchtiefe
50 mm
Installation examples, on or under the ceiling
Z1 (mm) Z2 (mm) S* in relation to D2 (mm)
Board stack / plywood ceiling (REI90)
Thickness: 100 mm + paneling underneath
12.5 mm (GKF board)
≥ 25 ≥ DN + 70 ≤150
Board stack / plywood ceiling (REI90)
Thickness: 140 mm
without paneling
≥ 25 ≥ DN + 70 ≤150
Board stack ceiling (REI90)
thickness: 137 mm + paneling underneath
3 x 12.5 mm (GKF boards)
≥25 ≥ DN + 70 ≤150
Installation wooden ceiling: Secure reinforcing prole in 60 mm depth all around the ceiling penetration.
Clearance area D2: Describes the area where the gap (S) connects (page 7, Fig. 9).
Distances - Installation in Wooden Ceilings and Walls
Clearances - Installaton in Wooden Ceilings and Walls
clearance area D2
D2
D2
Fig.16
Abb.17 Abb.18
reinforcingprole
S
Reinforcing prole
(40 x 40 x 3 mm)
circumferential in immersion depth
of
60 mm in wooden ceiling
*Gap S (150)
S≤150 mm
circumferential gap with structural
reinforcment
(reinforcing profile)

16
assembly and operating instructions geba re damper WFK
31
2.2 4
A
3 2.1 41
A
Wooden ceiling structures
Installation - Wooden Ceilings
Installaton options, wet installation
A Wooden structure; for possible congurations see A.1, A.2, A.3
1 Fire protection damper WFK
2.1 Mounting bracket, ush wit oor ceiling
2.2 Mounting bracket ush under the oor ceiling
3 Casting mortar all around to the entire oor ceiling height (gap S
≤150 mm).
4 Reinforcing prole, surrounding in a depth of 60 mm (page 15)
A.1 Board stack / plywood ceiling REI 90 A.2 Board stack / plywood ceiling REI 90
A.3 Board stack ceiling REI 90 A.1 Board stack / plywood ceiling (REI 90)
total ceiling thickness ≥112.5 mm
consisting of board plywood element ≥100 mm
with GKF board 1 x 12.5 mm
A.2 Board stack / plywood ceiling (REI 90)
total ceiling thickness ≥140 mm without paneling
A.3 Timber beam ceiling (REI 90)
total ceiling thickness ≥174.5 mm
consisting of timber beam element ≥137 mm
with GKF boards 3 x 12.5 mm
1 Fire protection damper WFK
2 Mortar circumferential ≤150 mm
3 Reinforcing prole, circumferential in 60 mm depth (page 15)
4 Timber beam 100 x 100 mm with replacement
5 OSB board
6.1 1 x 12.5 mm Gypsum board re protection panel (GKF)
6.2 3 x 12.5 mm Gypsum board re protection panel (GKF)
7 Mineral wool ≥1000°C
on the oor ceiling under the oor ceiling
Installation - Wooden Ceiling Structures
Detail X Detail Y
Detail Z
Fig. 21 Fig. 22
Fig. 23
2
444444
A.1 1
≥112,5
3
6.1
2
A.2 1
≥140
3
≥174,5
2
5 7
444444
A.3 1
6.2
4
3
YX
Z
Fig.19 Fig. 20

17
assembly and operating instructions geba re damper WFK
Installation into a Wooden Ceiling Structure
Basics/data
Performance class up to EI 90 (hoi ↔o) S
Wooden ceiling constructions with re protection paneling (tested congurations on page 16)
Distance of re protection damper to bearing components ≥20 mm
Distance between two re protection dampers Z1 ≥25 mm (details, page 15).
Installation - wooden ceilings
After completion of the ceiling, the following steps are to be carried out:
1. Remove the transport safeguard from the re protection damper (page 6).
2. Check the positioning of the release tabs (page 6).
3. Secure mounting brackets to the housing with wing nuts (Fig.10, page 7). Create an opening or replacement:
- For individual re protection dampers, we recommend an installation opening of at least Ø D2 + 2 x 20 mm (page 15); maximum is Ø D2 + 300
mm with reinforcement possible.
- For multiple re protection dampers, we recommend an installation opening of at least 2 x Ø D2 + 40 mm + 2 x 20 mm (page 15).;
- Maintain a distance ≥ 25 mm between two re protection dampers.
4. Reinforcement: install angle proles (40 x 40 x 3 mm) all around in a depth of 60 mm in the wooden ceiling.
5. Apply formwork.
6. Position the re protection damper with the mounting bracket ush with the upper edge of the ceiling during installation on the oor ceiling;
when installing below the oor ceiling, position the mounting bracket ush with the lower edge of the ceiling (Fig..20 2.1 , Fig..21 2.2 ), use
screws if necessary. The wall- / ceiling-ush leg can be shortened if space is limited.
7. Pour the re protection damper into the ceiling with a surrounding mortar bed.
Note: Protect the interior of the re protection dampers from mortar and debris.
Installation - Wooden Ceiling Structure

18
assembly and operating instructions geba re damper WFK
Installation Würth - I-Block, Wet Installation
DN Pipe Diameter
d Ceiling thickness d ≥150 mm
1 Fire protection damper WFK
2 Solid ceiling
3 Mounting bracket (screwing if necessary)
4 Filling of remaining gap with gypsum-sand mixture
5 I-Block, Test Report No. 232000337-01 MPA NRW
6 Filling of remaining gap with MG IIIz
Basics/data
Performance class El 120 (hoi ↔o) S
Solid ceilings with a minimum thickness of 150 mm, e.g., made of concrete or aerated concrete
The distance between two re protection dampers is ≥100 mm
Installation in the ceiling
1. Remove the transport safeguard from the re protection damper (page 6).
2. Check the positioning of the release tabs (page 6).
3. Secure mounting brackets to the housing with wing nuts (Fig.12, page 8).
4. Position the re protection damper with the mounting bracket ush with the upper edge of the I-block during installation on the oor ceiling
When installing below the oor ceiling, position the mounting bracket ush with the lower edge of the I-block. Use screws if necessary.
5. Protect the interior of re protection dampers from mortar and debris.
6. Cast the re protection damper.
Please refer to the installation details in test report No. 232000337-01, MPA NRW, and the assembly instructions of Adolf Würth GmbH & Co. KG.
Installation - Würth I-Block
1
23
4
5
6

19
assembly and operating instructions geba re damper WFK
Basics/data
Performance class El 120 (hoi ↔o) S
Solid ceilings with a minimum thickness of 150 mm, e.g., made of concrete or aerated concrete
The distance between two re protection dampers is ≥100 mm
Installation in the ceiling
1. Remove the transport safeguard from the re protection damper (page 6).
2. Check the positioning of the release tabs (page 6).
3. Secure mounting brackets to the housing with wing nuts (Fig.12, page 8).
4. Position the re protection damper with the mounting bracket ush with the upper edge of the I-block during installation on the oor ceiling
When installing below the oor ceiling, position the mounting bracket ush with the lower edge of the I-block. Use screws if necessary.
5. Protect the interior of re protection dampers from mortar and debris.
6. Cast the re protection damper.
Please refer to the installation details in test report No. 232000337-01, MPA NRW, and the assembly instructions of Adolf Würth GmbH & Co. KG.
DN Pipe diameter
1 Fire damper WFK
2 Modular ceiling, System Cadolto
Execution acc. to manufacturer's instructions or proof of usability
3 Concrete plinth ≥150 mm all around with reinforcement, height ≥
125 mm.
4. Mounting bracket
Basics/data
Performance class El 120 (hoi ↔o) S
Installation WFK
The re protection damper can be cast directly during the construction of the solid ceiling. The surrounding gap S can be omitted in this case.
1. Remove the transport safeguard from the re protection damper (page 6).
2. Check the positioning of the release tabs (page 6).
3. Secure mounting brackets to the housing with wing nuts (Fig.12, page 8).
4. Position the re protection damper with the mounting brackets of the concrete plinth ush with the upper edge.
5. Protect the interior of re protection dampers from mortar and debris.
6. Cast the re protection damper.
Note: Protect the interior of re protection dampers from mortar and debris.
The stability and re resistance of the structure must be veried by the construction side.
Mineral wool, melting point
≥1000 °C e. g. Rockwool 800
Perimeter gap closure with re-resistant
expanding material in case of re, e.g.,
Conlit Kit (Z-19.11-1104)
1
2
45
Installation in Modular Ceiling, System Cadolto
3

20
assembly and operating instructions geba re damper WFK
1S4
Installation - Board Stack / Plywood Wall
Wet installation
DN Pipe diameter
S Gap S ≤150 mm, round/ rectangular
d Wall thickness d ≥100 mm
1 Fire protection damper WFK
2 Installation position determined by vertical mounting brackets
(corresponds to horizontal axis position of the closure dampers).
3 Board stack / plywood wall
4 Mounting brackets
5 Screw mounting brackets (use screws if necessary)
Basics/data
Performance class El 90 (vei ↔o) S
Board stack / plywood wall d ≥100 mm
Gap S ≤150 mm
Round installation opening and rectangular installation opening possible
Distance between two re protection dampers is ≥25 mm (page 15)
Distance to supporting components ≥20 mm to dimension D2 (page 7; red clearance area)
Installation instructions for wet installation
The re protection damper can be installed in the board stack wall and plywood wall while adhering to the required clearance rules, either in wet
installation or with an insert element.
1. Remove the transport safeguard from the re protection damper (page 6).
2. Check the positioning of the release tabs (page 6).
3. Secure mounting brackets to the housing with wing nuts (Fig.10, page 7).
4. Create the installation opening (round/rectangular) through core drilling or breakthrough (page 15).
- For individual re protection dampers, we recommend an installation opening of at least Ø D2 + 2 x 20 mm;
the maximum allowed is D2 + 2 x gap S ≤150 mm.
- For two re protection dampers, we recommend an installation opening of at least 2 x Ø D2 + 40 mm + 2 x 20 mm
- Maintain a distance ≥ 25 mm between two re protection dampers.
Position the re protection damper in the designated installation position on the shaft wall with the mounting brackets.
Mounting brack ets must be vertically aligned and ush (Fig.25, 2 ) with the wall, use screws if necessary. The wall- / ceiling-ush leg can be
shortened if space is limited.
5. Carry out formwork and ll the existing gap with approved mortar (page 7) to the full wall thickness.
Installation - Solid Wood Panel Wall/Board plywoodWall
DN
3S1
2
D2 S
S
1 5
d
DN
Fig.24
Table of contents