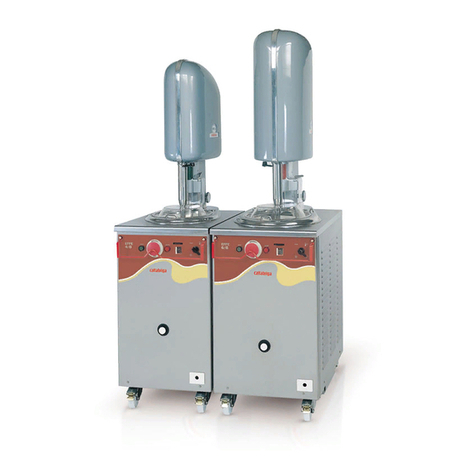
GEL MATIC GIOTTO 11 GR Quick start guide

GIOTTO 11 GR
Rev.04 - 08.2021
211555.04
INSTALLATION, USE AND MAINTENANCE
ORIGINAL INSTRUCTIONS

2
Giotto 11 GR
ACKNOWLEDGEMENTS
Dear Customer,
Thanks for choosing Gel Matic Italia.
We are confident that the product you purchased will fully meet your expectations, just like all the other machines designed by
Gel Matic Italia. The product that you are about to use is the outcome of in-depth research and tests to guarantee utmost levels
of functionality, safety and satisfaction, both in terms of design and efficiency.
This user instructions manual, which outlines the correct use and maintenance, will help you to make the most of your machine.
We trust you will find our explanations clear and we may continue, in the future, to count you among our esteemed customers.
Gel Matic Italia S.r.l.
Head Office Showroom Production Site
Via Zanica, 6C I - 24050 Grassobbio (BG)
Legal Head Office Production Site
Via G. Galilei, 10 I - 24050 Orio al Serio (BG)

3
Giotto 11 GR
SUMMARY
Acknowledgements .............................................................................................................................................................................................................................
1Documentation notes ......................................................................................................................................................................................................................
1.1 Use ........................................................................................................................................................................................................................................
1.2 Graphic conventions .................................................................................................................................................................................................
1.2.1 Symbols .....................................................................................................................................................................................................
1.2.2 Text representation ............................................................................................................................................................................
2Safety rules and directions .........................................................................................................................................................................................................
2.1 Danger levels ................................................................................................................................................................................................................
2.2 Structure of safety directions .............................................................................................................................................................................
2.3 Essential safety directions ...................................................................................................................................................................................
2.3.1 Qualification and role of personnel ..........................................................................................................................................
2.3.2 Operator’s and store manager’s obligation of accuracy .............................................................................................
2.3.3 Safety rules on installation and maintenance ...................................................................................................................
2.3.4 Safety rules for use ...........................................................................................................................................................................
3Description of the machine .........................................................................................................................................................................................................
3.1 Intended uses ...............................................................................................................................................................................................................
3.2 Technical data ..............................................................................................................................................................................................................
3.2.1 Size ..............................................................................................................................................................................................................
3.2.2 Noise ..........................................................................................................................................................................................................
3.2.3 Radio frequency emission ............................................................................................................................................................
3.2.4 Refrigerant .............................................................................................................................................................................................
3.3 Working limits ..............................................................................................................................................................................................................
4To the installer.....................................................................................................................................................................................................................................
Delivery, transportation and installation ................................................................................................................................................................................
4.1 Delivery ............................................................................................................................................................................................................................
4.2 Transportation to the installation area ..........................................................................................................................................................
4.3 Unpacking ......................................................................................................................................................................................................................
4.4 Package content check ..........................................................................................................................................................................................
4.5 Preliminary operations ..........................................................................................................................................................................................
4.6 Positioning ....................................................................................................................................................................................................................
4.6.1 Introduction on the installation place .....................................................................................................................................
4.6.2 Moving and positioning the machine .....................................................................................................................................
4.7 Electrical connection ................................................................................................................................................................................................
5 First start-up ........................................................................................................................................................................................................................................
6User interface quickstart ..............................................................................................................................................................................................................
6.1 Home page .....................................................................................................................................................................................................................
6.2 Selecting the operation mode ............................................................................................................................................................................
6.3 Machine menu ............................................................................................................................................................................................................
6.4 Pop-Up ............................................................................................................................................................................................................................
7Part names and functions ............................................................................................................................................................................................................
7.1 Machine layout .............................................................................................................................................................................................................
7.2 Dispensing door ..........................................................................................................................................................................................................
7.3 Beater ...............................................................................................................................................................................................................................
7.4 Feed tube ........................................................................................................................................................................................................................
7.5 Cleaning tools ..............................................................................................................................................................................................................
8Operating procedures ....................................................................................................................................................................................................................
Introduction ...............................................................................................................................................................................................................................................
8.1 Assembly ........................................................................................................................................................................................................................
2
6
6
6
6
6
7
7
7
7
7
7
8
8
9
9
9
9
9
9
9
10
10
10
10
11
11
11
11
11
11
11
11
12
13
13
14
14
14
15
15
16
17
17
18
19
19
19

4
Giotto 11 GR
8.1.1 Assembly of the beater .....................................................................................................................................................................
8.1.2 Assembly of the dispensing door ..............................................................................................................................................
8.1.3 Assembly of the feed tube ..............................................................................................................................................................
8.1.4 Assembly of the hopper agitator ................................................................................................................................................
8.1.5 Assembly of the drip-tray ...............................................................................................................................................................
8.1.6 Sanitizing .................................................................................................................................................................................................
8.2 Priming ............................................................................................................................................................................................................................
8.3 Daily closing procedures .......................................................................................................................................................................................
8.4 Daily opening procedures ....................................................................................................................................................................................
8.5 Cleaning ..........................................................................................................................................................................................................................
8.5.1 Remove the ice cream from the machine .............................................................................................................................
8.5.2 Rinse .........................................................................................................................................................................................................
8.5.3 Hopper cleaning .................................................................................................................................................................................
8.5.4 Disassembly of components ......................................................................................................................................................
8.5.5 Cleaning and sanitization of components ...........................................................................................................................
8.6 Product settings ........................................................................................................................................................................................................
8.6.1 Adjusting the ice cream viscosity and selecting the product type .........................................................................
8.6.2 Adjusting the overrun ......................................................................................................................................................................
9Machine menu ....................................................................................................................................................................................................................................
9.1 Password access modes ........................................................................................................................................................................................
9.2 Functions .......................................................................................................................................................................................................................
9.2.1 HT cicle ......................................................................................................................................................................................................
9.2.1.1 Presentation of the main screen ...........................................................................................................................
9.2.1.2 HT cycle manual start-up ........................................................................................................................................
9.2.1.3 How to schedule the HT cycle auto-start ......................................................................................................
9.2.1.4 Symbols on the home page ...................................................................................................................................
9.2.1.5 Pop-Up messages ........................................................................................................................................................
9.2.1.6 Notifications ....................................................................................................................................................................
9.2.2 Cleaning ...................................................................................................................................................................................................
9.2.3 GTECH Self-Service ...........................................................................................................................................................................
9.2.3.1 How to select the view type ...................................................................................................................................
9.2.3.2 How to activate Self-Service mode ...................................................................................................................
9.2.3.3 How to quit Self-Service mode ...........................................................................................................................
9.2.3.4 How to select and upload multimedia files ..................................................................................................
9.3 Settings ...........................................................................................................................................................................................................................
9.3.1 Viscosity and selection of the product type ........................................................................................................................
9.3.2 Autoswitch ..............................................................................................................................................................................................
9.3.2.1 Presentation of the main menu ...........................................................................................................................
9.3.3 System settings ..................................................................................................................................................................................
9.3.4 Parameters .............................................................................................................................................................................................
9.3.4.1 How to change parameters ....................................................................................................................................
9.3.4.2 How to save a set of parameters .......................................................................................................................
9.3.4.3 How to retrieve a set of parameters ................................................................................................................
9.3.4.4 How to restore factory-set parameters .........................................................................................................
9.3.5 Mix temperature calibration .........................................................................................................................................................
9.4 Utilities .............................................................................................................................................................................................................................
9.4.1 Log ...............................................................................................................................................................................................................
9.4.2 GTECH Healthy ....................................................................................................................................................................................
9.4.2.1 Presentation of the main screen .........................................................................................................................
9.4.2.2 How to activate GTECH Healthy .........................................................................................................................
9.4.2.3 Notifications ....................................................................................................................................................................
9.4.3 Serving counter ...................................................................................................................................................................................
9.4.3.1 How to reset the counter .........................................................................................................................................
9.4.4 Software ..................................................................................................................................................................................................
9.4.5 Connection .............................................................................................................................................................................................
9.4.5.1 How to connect to the machine remotely ....................................................................................................
9.4.6 GCARE Maintencance ......................................................................................................................................................................
19
20
21
21
21
22
22
23
26
26
26
27
28
29
30
32
32
32
33
33
33
33
34
35
35
35
36
36
36
36
36
37
37
37
37
38
38
38
38
38
38
39
39
39
40
40
40
41
41
41
41
41
42
42
42
43
44

5
Giotto 11 GR
9.4.6.1 Maintencance levels ...................................................................................................................................................
9.4.6.2 How to record maintenance operations ........................................................................................................
9.4.6.3 Notifications ...................................................................................................................................................................
9.4.7 vCard ..........................................................................................................................................................................................................
9.4.8 GCARE Notifications ..........................................................................................................................................................................
9.4.8.1 How to set up notifications .....................................................................................................................................
9.4.9 GLEARN Tutorial ..................................................................................................................................................................................
44
44
45
45
45
46
46

6
Giotto 11 GR
1. DOCUMENTATION NOTES
1.1 USE
This document contains essential information about installation for Technical Personnel and necessary directions for daily use
and maintenance for the Operator and the Store Manager.
IMPORTANT
Keep the instructions for use in a safe and handy place.
IMPORTANT
In case of transfer, attach the present instructions for use and maintenance to the machine.
1.2 GRAPHIC CONVENTIONS
1.2.1 SYMBOLS
GENERIC HAZARD
This symbol, placed on your machine or in this manual, indicates a potential danger of personal injuries
and damage to objects. Follow recommended precautions in this manual and safe operating practices
RISK OF ELECTROCUTION
This symbol indicates that the described operation can present the risk of electrocution, if it is not carried
out in compliance with safety prescriptions.
RISK OF BURNS
This symbol indicates that the described operation can present the risk of burns, if it is not carried out in
compliance with safety prescriptions.
EARTHING
The machine shall be properly earthed. Inobservance of these instructions can cause serious personal
injury, due to electrocution.
IMPORTANT
This symbol indicates that the information is very important for the concerned personnel
1.2.2 TEXT REPRESENTATION
REPRESENTATION MEANING
Important Important tip for using the machine; it is not a warning.
Tier 1
Tier 2

7
Giotto 11 GR
2. SAFETY RULES AND DIRECTIONS
Do not attempt to operate the soft serve machine until you read and understand all safety messages and the instructions in
this manual.
2.1 DANGER LEVELS
The danger level is part of the safety direction and it is characterized by a keyword. The possible consequences differ according
to the chosen keyword.
DANGER Imminent danger: causes serious personal injuries or death.
WARNING Potentially dangerous situation: can cause serious personal injuries or death.
CAUTION Potentially dangerous situation: can cause minor personal injuries.
NOTICE Potentially harmful situation: can cause damage to the product or other objects.
2.2 STRUCTURE OF SAFETY DIRECTIONS
CAUTION
Danger type and source
Explanation of type and source of danger
●Precautionary measures against danger
●Any additional precautionary measures against danger
2.3 ESSENTIAL SAFETY DIRECTIONS
Safety directions are represented by a warning symbol and a keyword.
2.3.1 QUALIFICATION AND ROLE OF PERSONNEL
According to their level of education and responsibility, the personnel in charge of the machine can be:
OPERATOR Trained person in charge of operating the machine, able to perform simple tasks, such as start-up
and shutdown of the machine, delivery and operations of product loading and unloading, cleaning
operations, including disassembly of the components and sanitization. The Operator has no specific
technical skills.
The Operator must not maintain or service this machine.
The Operator must not operate the machine until all service and access covers are secured with
screws.
STORE MANAGER Owner or supervisor of the machine or the store, obliged to train the Operators on proper procedures
and to make sure they do not perform machine operations outside their level of knowledge or
responsibility.
The Store Manager makes sure safe operation conditions are constantly provided.
He/she is able to enter advanced functions and settings, protected by password (see paragraph 9.1
Password access model)
TECHNICIAN A person who has been trained by a factory representative, or an experienced and qualified service
person, to perform more complicated operations such as machine installation, maintenance repairs,
component replacement, is aware of hazards associated with electricity, moving parts, and takes ne-
cessary steps to protect against injury to themselves and other people.
The trained Technician responsible for installing the machine shall instruct the Store Manager and the
Operator appropriately on the safety measures to be adopted.
2.3.2 OPERATOR’S AND STORE MANAGER’S OBLIGATION OF ACCURACY
The machine complies with cutting-edge technical standards and generally recognized safety technical rules. This ensures the
highest safety levels.
In everyday reality, such safety can be achieved solely and exclusively by respecting allrequirements (see paragraphs 2.3.3“Safety
rules on installation and maintenance” and 2.3.4 “Safety rules for use”. The task of designing and controlling those requirements
falls under the Shop Manager’s obligation of accuracy.

8
Giotto 11 GR
2.3.3 SAFETY RULES ON INSTALLATION AND MAINTENANCE
●Before installing the equipment and doing maintenance, read this booklet carefully and keep it handy for future reference
by the personnel.
●All extraordinary operations of installation, assembly and maintenance must be carried out solely and exclusively by qualified
personnel authorized by Gel Matic, according to the standards in force in the country of use and complying with the rules
on systems and workplace safety.
●Before performing any installation or maintenance work, disconnect the machine from the power supply.
●Before installing the machine, make sure the systems comply with the standards in force in the country of use and with the
information stated on the data plate.
●Any intervention, tampering or modification which is not expressly authorized and does not comply with the contents of this
manual voids the warranty.
●Any installation or maintenance operation other than the ones indicated in this manual can cause damage, injury or fatal
accidents.
●At the first start-up, after an extraordinary maintenance operation or repair, it is necessary to clean and sanitize the machine
before restarting it and produce ice cream.
●People not in charge of installation are not allowed to transit or stay near the working area during the installation process.
●The machine must be installed on a flat and stable, non-mobile surface.
●Do not place the machine on a site directly exposed to the sun. If outdoors, protect it with a sunshade or something else.
●Do not clean the machine with water jets. Do not install machine next to a water jet where splash of the machine can occur.
●The packaging material is potentially dangerous and must be kept out of reach of children or animals and properly disposed
of according to local regulations.
●The machine data plate provides important technical information: it is essential in the event of maintenance or repair of the
equipment. Therefore it is recommended not to remove, damage or modify the label.
●In case of maintenance and fault repairs, use only original spare parts.
●Failure to comply with these directions can cause damage and fatal injuries, voids the warranty and relieves Gel Matic from
any liability.
2.3.4 SAFETY RULES FOR USE
WARNING
Risk of burns and injuries
During the HT cycle (see paragraph 9.2.1 “HT Cycle” ), pay attention to the following measure.
●Do not open the hopper cover or the dispensing handle, because the temperature of the mix
stored inside the machine is very high (above 65°C/149°F).
●Before using the equipment and doing ordinary maintenance, read this manual carefully and keep it handy for future
reference by the personnel.
●Any use or cleaning procedure other than the ones indicated in this manual are considered misuse and can cause damage,
injury or fatal accidents. They void the warranty and relieve Gel Matic from any liability.
●Children should not be allowed to play around this equipment. Cleaning and ordinary maintenance must not be carried out
by children.
●This machine is intended for professional use only to produce ice cream. Any other use does not comply with the intended
use and is therefore dangerous.
●Specifically, the machine can be used -with specific mix and appropriate machine settings- to produce:
○Frozen Beverage
○Soft Ice
○Gelato
○Hard Ice Cream
●This machine is to be operated by trained persons. The dispense feature, if used by public in self-serve applications, shall be
monitored by trained persons able to assist people with physical, sensory or mental impaired capabilities.
●Do not place the machine on a site directly exposed to the sun. If outdoors, protect it with a sunshade or something else.
●Do not clean the machine with water jets.
●The machine shall be used with no defects. All protection devices and covering panels shall be fitted.
●If the machine does not work or you notice functional or structural alterations, disconnect it from the power supply and
contact a Technician authorized by Gel Matic without attempting to repair it yourself.
●Stick to the scheduled ordinary maintenance (see GCARE Maintenance section).
●In case of maintenance, use only original spare parts.

9
Giotto 11 GR
●The warning labels must remain legible for the life of the machine. Check labels periodically to be sure they can be recognized
as warning labels.
●Failure to comply with these directions can cause damage and fatal injuries and voids the warranty.
3. DESCRIPTION OF THE MACHINE
3.1 INTENDED USES
This is a professional machine, designed to produce frozen beverage, soft ice cream, gelato and hard ice cream with a temperature
range of -2° to -9°C (28,4° to 15,8°F). Use of this machine to make other products is considered misuse.
3.2 TECHNICAL DATA
See the machine data plate for specific technical data.
Technical details
No of flavours 1
Control system In.Co.Di.S.
Production system Gravity
Heat Treatment ■
Weight 85 kg
Hopper capacity 6,5 l
Cylinder capacity 1,5 l
Production capacity
Kg/h 18
Power supply
Phase 1
Volt 110-230
Hertz 50; 60
Power 1,2 kW
Refrigeration system
Condensation Air ■
Water Upon request
3.2.2 NOISE
The noise level (A-weighted equivalent continuous sound pressure level) in the workplace is less than 70dB (A).
3.2.3 RADIO FREQUENCY EMISSION
Gel Matic Radio spectrum: this machine includes a radio-electric equipment which intentionally emits radio waves.
Frequency band: from 2402 to 2480 MHz
Maximum RF power transmitted: -2.55 dBm (nominal: max +7.5 dBm)
3.2.4 REFRIGERANT
As for protection of the environment, Gel Matic is proud to use only environmentally friendly HFC refrigerants.The HFC refrigerant
used in this machine is generally considered non toxic and non flammable. Nevertheless, all gases are potential hazards and
must be handled with care. If the refrigerant comes into contact with the skin, can cause severe damage.
Protect your eyes and skin.In case of burns, rinse immediately with cold water. Ifthe burns are severe, contact a doctorimmediately.
The gas charge is indicated on the machine data plate.
3.2.1 SIZE

10
Giotto 11 GR
3.3 WORKING LIMITS
DO NOT use the machine with inconstant power supplies or +/- 10% beyond the value indicated on the plate or with the power
cable damaged;
DO NOT use the machine in explosive atmospheres;
DO NOT operate or store the machine in locations where high-pressure water jets or harmful substances are used;
DO NOT use the machine at an ambient temperature of more than +40°C (104°F) or with humidity higher than 90%.
COMPLY with the temperature limits imposed even when the machine is not being operated.
DO NOT use the machine at an altitude higher than 1,500 m above sea level.
USE only appropriate and recognized mixtures for express blending machines.
Usage not expressly indicated in this manual is to be considered improper and therefore must be strictly avoided.
The manufacturer will not be held liable for direct or indirect harm to persons or animals or damage to objects caused by
improper use of the machine.
4. TO THE INSTALLER
DANGER
Impact and crushing
To avoid damage or accidents during transportation, follow the recommendations below.
●Transport operations can only be carried out by qualified personnel, complying with the safety
suggestions.
●Comply with the safety suggestions printed on the packaging.
●Carry out transportation with care.
CAUTION
Choking hazard
The packaging material is potentially dangerous.
●Keep it out of reach of children or animals and properly dispose of it according to local regulations.
DELIVERY, TRANSPORTATION AND INSTALLATION
●Before installing the machine, read carefully chapter 2 Safety rules and directions on page 6.
●Installation must be carried out solely and exclusively by qualified personnel.
4.1 DELIVERY
Carry out the following operations immediately upon delivery by the forwarder.
●Check the consignment for completeness. Make sure the goods delivered by the forwarder correspond to the content of
the delivery note and to the order placed. In case of missing items, promptly inform the forwarder and Gel Matic or its local
representative.
●Make sure the packing has no visible damage. In case of suspected transport damage, make a written complaint immediately
against the forwarder and Gel Matic or its local representative. Enclose a picture of damaged items to your complaint.
IMPORTANT
Failure to report damage or missing elements upon delivery invalidates the right of recourse.
WARNING
If the machine is damaged, DO NOT operate it.

11
Giotto 11 GR
4.2 TRANSPORTATION TO THE INSTALLATION AREA
Use only original packaging to transport the machine. Use mechanical means, such as transpallets or forklifts.
4.3 UNPACKING
●Cut the straps which secure the package.
●Lift the protective cardboard.
●Remove the protective cellophane.
Gel Matic has been following Gel Matic WAY philosophy for years, increasing the
environmental compatibility of its products and committing itself to reducing energy
consumption and waste. Gel Matic wants to protect the environment and invites you
to dispose of the material in the appropriate containers for separate collection.
4.4 PACKAGE CONTENT CHECK
Make sure the packaging contains:
1) Giotto 11 GR ice cream machine
2) Assembly kit
3) Emergency kit
4) Cleaning kit
5) User manual
Check the power cord integrity and make sure it has not been damaged during transportation.
In case of missing or damaged parts, make a written complaint immediately against Gel Matic or its local representative. Enclose
a picture of damaged items to your complaint.
4.5 PRELIMINARY OPERATIONS
●Remove the protective film.
●Do not use blades or other tools which may spoil surfaces.
4.6 POSITIONING
4.6.1 INTRODUCTION ON THE INSTALLATION PLACE
●Install the machine in rooms with adequate air exchange and protected from atmospheric agents.
●Make sure that the support base is horizontal and supports the weight of the machine.
●It is recommended NOT to place the machine on a support base higher than 90 cm.
●Position the machine, keeping a minimum clearance of approximately 4 cm from each sides.
●To be used only indoors: this unit is designed to work indoors at ambient temperature between 10°C and 40°C (50°F-104°F). .
●Do not place the machine on a site directly exposed to the sun.
●Position the machine away from sources of heat.
4.6.2 MOVING AND POSITIONING THE MACHINE
●Level the machine on the horizontal supporting surface. If, for any reason, the machine must be moved, use extreme care.
●To safely move the machine, several people are required. Failure to observe this warning may cause personal injury or
damage to the machine.
4.7 ELECTRICAL CONNECTION
DANGER
Electrical mains and connection systems
●Connection to the electrical mains and connection systems must comply with the standards in
force in the country of installation. They must be carried out by qualified personnel authorized
by Gel Matic. Failure to comply with these directions can cause damage and injuries, voids the
warranty and relieves Gel Matic from any liability.

12
Giotto 11 GR
●Before connecting the machine to the electrical mains, make sure the mains voltage and frequency correspond to the ones
stated on the machine data plate, placed on the rear panel.
●The plug at the end of the power cord and the corresponding socket shall be the same type and comply with the regulations
in force on electrical systems.
●The plug shall be accessible after installation.
WARNING
Never pull the cable to remove the plug.
●Do not use adapters or taps as they could cause overheating, burns or power the machine incorrectly thus leading to its
breakage.
WARNING
In case of damage to the power cord, replacement shall be carried out by an authorized Gel Matic
Service Centre or by a qualified technician. This aims at avoiding any risk.
WARNING
Some components are live even when the power switch is off (OFF position). Before carrying out
maintenance or repairing the machine, unplug the power supply or turn the wall switch off.
●If the machine is not equipped with plug but only with power cord: fit an omnipolar shut-off device on the machine power
supply line, with overvoltage category III, located in an easily accessible position.
5. FIRST START-UP
The first start-up includes the following operations:
1) Use the assembly kit provided with the machine and assemble the missing parts of the beater and the dispensing door. See
paragraphs 8.1.1 Assembly of the beater and 8.1.2 Assembly of the dispensing door for further details.
2) Make sure the machine is electrically connected and turn it on by means of the ON/OFF switch.
3) At the first start-up, configure the machine basic settings listed below.
√Language
√Privacy
√Connection to a WiFi network
√Date and time
√Unit of measure
√HT cycle schedule
√GTECH Healthy protocol
4) Before priming the machine and starting production, it is essential to clean and sanitize the machine (see paragraph 8.1.6).
NOTICE
Warranty is considered activated as soon as the configuration referred to at point 3 above is completed.

13
Giotto 11 GR
6. USER INTERFACE QUICKSTART
The advanced In.Co.Di.S. system (Interactive Control & Diagnosis System) allows you to easily communicate with the machine at
any operating step.
IMPORTANT
The In.Co.Di.S. system is equipped with touch screen technology. It is necessary to follow the
instructions below for its proper use.
6.1 HOME PAGE
The home page shows essential information about the machine operation state.
PRODUCTION MODE
DATE AND TIME
USER REMOTELY
CONNECTED
CLEANING
COUNTDOWN
HYGIENE INFORMATION*
DISPENSING
IN PROGRESS
CONNECTION
MIX LEVEL OK
REMAINING SERVINGS
MIX OUT
STAND-BY MODE
STOP MODE
CONNECTION
ACTIVATED
CONNECTION
UNAVAILABLE
CONNECTION
DISABLED
CLEANING FUNCTION
HT CYCLE FUNCTION
OPERATION STATE
HOPPER TEMPERATURE & LEVEL MIX
GCARE MAINTENANCE
NOTIFICATIONS
*if GCARE HEALTHY is enabled

14
Giotto 11 GR
6.2 SELECTING THE OPERATION MODE
●Several operation modes are available. Swipe down and select the desired one:
PRODUCTION: Select this mode at the beginning of your work shift during which ice cream will be
dispensed. The machine automatically prepares the product and allows delivery.
STAND-BY: Select this mode at the end of your work shift, when ice cream dispensing is no longer
required. The machine does not produce ice cream and does not allow dispensing it. It keeps the mix
refrigerated, thus saving a considerable amount of energy. The mix storage temperature is displayed
on the touch screen monitor placed on the front panel.
CAUTION: The storage function can NOTbe used to replace the procedures of cleaning and sanitizing.
STOP: Select this mode when you wish to stop the machine completely.All functions are deactivated,
the mixture is not kept refrigerated.
CAUTION: During assembly and disassembly procedures (paragraphs 8.1 and 8.6.2), it is essential to
turn off the machine completely by means of the ON/OFF switch.
6.3 MACHINE MENU
●Swipe up to view the available menus: Functions, Settings and Utility.
6.4 POP-UP
A notification system informs the user about malfunctions or gives simple suggestions
on how to improve the machine management. Notifications are shown on the screen
via pop-up messages, whose colour represents a specific category.
SUCCESS
Green-bordered pop-up
represents a successful
event, a simple notification
with a read request.
INFO
Blue-bordered pop-up
represents an information.
It may contain some
controls or questions the
user can answer.
WARNING
Yellow-bordered pop-up
represents a warning. The
user is invited to perform
an action described in the
pop-up message to return
to production.
ALARM
Alarm-bordered pop-
up represents an alarm
condition of the machine.
Alarms are notified with a
message and a description
of the solution to be
adopted. Each alarm is
recorded in the machine log.

15
Giotto 11 GR
7. PART NAMES AND FUNCTIONS
7.1 MACHINE LAYOUT
1
12
13
10
14
11
6
9
8
7
5
3
2
4
No Name Function
1Cylinder Produces the product to be dispensed and keep some ready.
2Hopper Stores the liquid mix at 2/4°C.
3Beater Rotates in the freezing cylinder, blending air and mix and ejecting product.
4Dispensing door Closes the cylinder and provides product dispensing.
5Photocell Detects the presence of a cone or cup and sets up the machine for dispensing.
6Hopper agitator Keeps the mix stirred inside the hopper for homogeneous temperature and structure.
7Feed tube Feeds the cylinder with mix and air and allows the overrun adjustment.
8Hopper cover Closes the hopper to avoid mix contamination.
9Control panel Allows to activate the various operation modes, view their status and change settings.
10 ON/OFF switch Switches on and off the machine. During assembly and disassembly procedures, the
switches must be OFF.
11 Air filter Filters impurities from the air sucted by the cooling circuit.
12 Drip-tray Collects product drops getting out of the dispensing door.
13 Drain tube Drains product leaking from the cylinder in case the beater seal is damaged.
14 Carter Front, side and rear panels. Thay can be removed only by a qualified technician.

16
Giotto 11 GR
7.2 DISPENSING DOOR
1
3
9
10
4
6
8
7
5
2
No Name Function
1Dispensing door Closes the cylinder and provides product dispensing.
2Dispensing door seal Prevents the product from leaking out of the dispensing door
3Dispensing handle It starts and stops the product dispensing.
4Piston Opens and closes the product opening, thus letting the product flow.
5Spring Closes the piston automatically when the user releases the handle.
6Piston o-ring Prevents the product from leaking out of the piston housing. Must be lubricated.
7Shaped nozzle Gives the dispensed product a specific shape.
8Fastening knob Secures the dispensing door to the cylinder.
9Prime tube Lets the excess of air out of the cylinder during the priming phase.
10 Prime tube o-ring Seals the prime tube in the dispensing door. Must be lubricated.

17
Giotto 11 GR
7.3 BEATER
7.4 FEED TUBE
1
2
3
4
12
No Name Function
1Beater body Rotates in the freezing cylinder, blending air and mix and ejecting product.
2Beater scraper blade Scrapes the frozen product from the freezing cylinder wall.
3Beater seal Prevents the product from leaking out of the bottom of the cylinder. Must be lubricated
carefully and replaced regularly.
4Beater o-ring Safety O-ring preventing the product from leaking out of the bottom of the cylinder.
Must be lubricated carefully and replaced regularly.
No Name Function
1Feed tube body Feeds the cylinder with mix and air and allows the overrun adjustment.
2Overrun carburetor Regulates overrun (quantity of air incorporated by the mix).

18
Giotto 11 GR
7.5 CLEANING TOOLS
CLEANER &
SANITIZER
12
34
5
6
No Name Function
1Hopper and cylinder cleaning &
sanitizing brush
Brush for cleaning and sanitizing the hopper and the cylinder.
2Dispensing door and feed tube cleaning
& sanitizing brush
Brush for cleaning and sanitizing the dispensing door and the feed tube.
3Inlet hole cleaning & sanitizing brush Brush for cleaning and sanitizing the mix inlet hole.
4Drain pipe cleaning & sanitizing brush Brush for cleaning and sanitizing the product drain pipe.
5Cleaner & sanitizer Product for the preparation of a cleaning & sanitizing solution.
6Tool for O-ring removal Allows to remove O-rings without damaging them.

19
Giotto 11 GR
8. OPERATING PROCEDURES
CAUTION
The user is responsible for complying with current national or federal health regulations.
INTRODUCTION
The following instructions refer to a situation where the various components are removed and dry, after cleaning. The following
procedures show how to assemble the machine components, do the sanitization, prime the machine with fresh mixture and
dispense the first ice cream serving.
If, instead, you have to disassemble the machine for the first time and to the cleaning, see paragraph “Disassembly of the various
components” and “Cleaning”.
8.1 ASSEMBLY
Correct assembly of the machine is important to prevent leakage of the product and damage to the machine.
Make sure all parts of the assemblies have been washed and sanitized before assembling.
CAUTION
Lubricate the parts mentioned by using a suitable lubricant for contact with food (e.g. Lubrifilm).
WARNING
Make sure the machine is disconnected. ON/OFF switch must be off (OFF). Failure to do so may
cause serious personal injury due to moving parts.
8.1.1 ASSEMBLY OF THE BEATER
Assemble the beater, lubricate its seal and insert it into the cylinder.
IMPORTANT
If the seal or the scraper blade has signs of wear, cracks or cuts, replace it.
Lubricant
2
4
1
Lubricant
3
Install the 2 O-rings in their seats on the beater and lubricate them.
Lubricate and install the beater seal.

20
Giotto 11 GR
8.1.2 ASSEMBLY OF THE DISPENSING DOOR
Insert the piston with the spring into the lubricated housing of the dispensing door, attach the handle, fit the shaped nozzle and
the prime tube. Mount the dispensing door on the machine and secure it with the fastening knobs.
6
10 mm
!
9
7
1
5
8
3
4
5
6
!
7
89
11
Lubricant
2
Install the 2 O-rings in their seats on the piston and lubricate them.
Place the spring on the piston,install the piston in its seat on the dispensing
door and match it with the handle pin.
Install the shaped nozzle. Install the 2 O-rings on the prime tube, lubricate and install it in its seat on the dispensing door.
Mount the scraper on the beater body.
Insert the assembled beater in the freezing cylinder.
Lubricant
10
Table of contents
Other GEL MATIC Ice Cream Maker manuals
Popular Ice Cream Maker manuals by other brands

Ovation
Ovation OV8088 instruction manual

ARIETE
ARIETE Gran Gelato metal 693 manual

Rival
Rival Gourmet Creamery GC8155 owner's guide

Kambrook
Kambrook Little Chefs Soft Scoops KLCIA4 Instruction booklet

Frigomat
Frigomat Taylor C119 06 Series Operating instructions and maintenance

Unold
Unold Gourmet 48856 Instructions for use