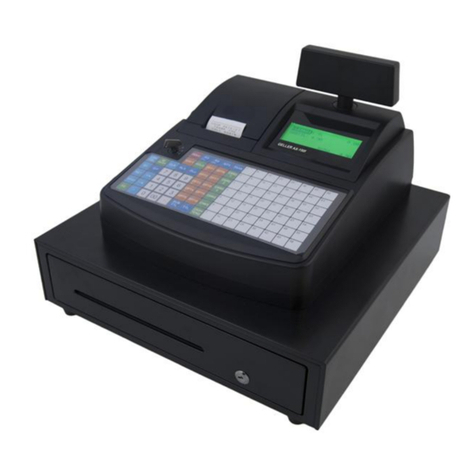
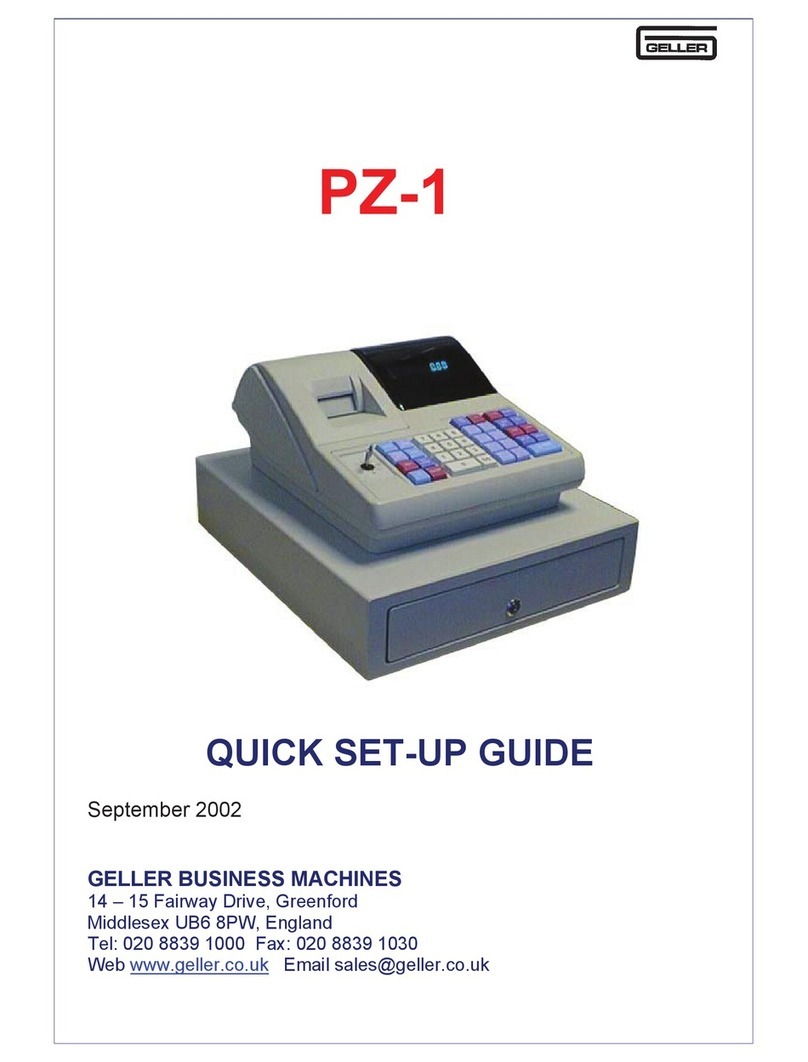
Geller TL-550 User manual

OPERATING MANUAL
TL-550
Nov. 2003


NOTICE
The information and specifications in this manual are subject to change without notice.
While every precaution has been taken to make this manual accurate, the Manufacturer
shall not be liable for any errors or omissions, nor for any damages resulting from the use
of the information herein.
This manual may not be copied or transmitted by any means, in whole or in part, without
prior written consent from the Manufacturer.
FEDERAL COMMUNICATIONS COMMISSION NOTICE
This equipment has been tested and found to comply with the limits for a Class A digital
device, pursuant to section J in Part 15 of the FCC Rules. These limits are designed to
provide reasonable protection against harmful interference when the equipment is
operated in a commercial environment.
This equipment generates, uses, and can radiate radio frequency energy and, if not
installed and used in accordance with the instructions, may cause disruptive interference
of radio communications. Operation of this equipment in a residential area is likely to
cause interference, in which case the user will be required to correct the problem at his
own expense.

Introduction
We very much appreciate your purchase of this cash register. This cash register is
equipped with function keys which allow you to program and use various functions and
with numeric keys for entering numbers.
This manual explains the methods for programming and entering transactions with this
cash register and it describes precautions and accessory items necessary to use it. This
manual also shows examples of the receipts that will be printed out for each case
described.
Before using the cash register, please read this manual so that you understand its
operation.

NOTICE
FEDERAL COMMUNICATIONS COMMISSION NOTICE
Introduction
Contents
Overview of Steps Required to Use This Cash Register
1. Before Starting Operations ......................................................................................... 1
1. 1 General Specifications ................................................................................................... 1
1. 2 Precautions....................................................................................................................... 1
1. 3 Part names and Functions ............................................................................................ 2
An External View .............................................................................................................. 2
Control Lock..................................................................................................................... 3
Printer .............................................................................................................................. 3
Keyboard.......................................................................................................................... 4
Customer Display............................................................................................................. 6
Examples of status symbols............................................................................................. 6
Operator Display .............................................................................................................. 7
2. Setting Up................................................................................................................................ 8
2. 1 Installing the Cash Register.......................................................................................... 8
2. 2 Initializing Your Cash Register..................................................................................... 8
2. 3 Installing and Removing a Paper Roll ........................................................................ 9
Installing a Paper Roll........................................................................................................... 9
Removing a Paper Roll .........................................................................................................10
3. Programming Layout.........................................................................................................12
3. 1 Keyboard ...........................................................................................................................12
3. 2 Character Table................................................................................................................14
3. 3 Explanation on character input ............................................................................................15
3.3.1. Programming names and messages............................................................................15
3.3.2. How to input letters .....................................................................................................15
4. P1 programming ..................................................................................................................16
4. 1 Setting DATE/TIME/NUMBER........................................................................................16
4. 2 DEPARTMENT Programming........................................................................................17
4. 3 Setting PLU .......................................................................................................................19
4. 4 Setting TAX .......................................................................................................................20
4. 5 Setting Tax Table .............................................................................................................21
Contents

4. 6 Setting DISCOUNT ( - ) ...................................................................................................22
4. 7 Setting +% .........................................................................................................................23
4. 8 Setting -% ..........................................................................................................................23
4. 9 Setting CLERK NAME.....................................................................................................24
4.10 Setting AGE TABLE ........................................................................................................25
4.11 Setting FOREIGN CURRENCY......................................................................................25
4.12 Setting PRINT MESSAGE...............................................................................................25
4.13 Setting LOGO MESSAGE...............................................................................................25
4.14 Setting FOOD STAMP.....................................................................................................26
4.15 Setting GUEST TABLE ...................................................................................................26
5. P2 programming ..................................................................................................................27
5. 1 Setting SYSTEM FLAG ...................................................................................................27
5. 2 Setting PASSWORD ........................................................................................................40
5. 3 Setting TRANSACTION NAME......................................................................................41
5. 4 Setting REPORT PARAMETER.....................................................................................43
5. 5 Setting STARTUP NUMBER ..........................................................................................43
5. 6 Setting TIMER AND ALARM ..........................................................................................44
5. 7 COM1/2 SETUP.................................................................................................................44
5. 8 Setting KEY LAYOUT......................................................................................................45
5. 9 ROUNDING METHOD FOR FINALIZING AMOUNT ...................................................47
5.10 JOURNAL MODE..............................................................................................................47
5.11 VERSION............................................................................................................................47
6. Cash Register Operation ................................................................................................48
6. 1 Before Operating Your Cash Register........................................................................48
6. 2 Basic Operation ..............................................................................................................48
6. 3 Receipt On or Off Mode..................................................................................................50
6. 4 Check and Charge ..........................................................................................................51
6. 5 Change Calculations.......................................................................................................52
6. 6 Tendered Amount Entries ............................................................................................52
6. 7 Discounting with the [-] Key ........................................................................................52
6. 8 Using the [+%] Key and [-%] Key.................................................................................53
6. 9 Tax Calculations .............................................................................................................54
6.10 Receiving a Returned Item ...........................................................................................55
6.11 Received on Account and Paid Out ............................................................................55
6.12 Exchanging Money and Opening the Drawer ...........................................................56
6.13 Calculation of change after the transaction finalized ............................................56
7. Making Corrections............................................................................................................57
Contents
7. 1 Correcting Numbers That Have Been Entered .........................................................57
7. 2 Voiding the Last Entry....................................................................................................57
7. 3 Voiding Earlier Entries ...................................................................................................57
7. 4 Voiding a Sales After the Transaction Has Been Finalized...................................58
7. 5 Voiding a Sales at V Control Lock Key Position......................................................58
8. Hold Operation......................................................................................................................59
9. EURO Operation...................................................................................................................60
9. 1 Tendered amount and total amount are in LC..........................................................60
9. 2 Tendered amount and total amount are in Euro. .....................................................60
9. 3 In case the finalization by CASH, CHECK, CHARGE (CARD) is possible by the
flag selection: ...................................................................................................................60
9. 4 Operation of RA(=received on account) and PO(=paid-out) in Euro...................61
10. Special Functions.............................................................................................................62
10.1 Training Mode...................................................................................................................62
10.2 Age Verification................................................................................................................63
10.3 Unit Price Display ............................................................................................................63
10.4 Guest Table .......................................................................................................................64
11.Checking and Resetting Sales Information..........................................................67
11.1 Overview of Checking and Resetting Sales Information .......................................67
11.2 Structure & Explanation of Reports ............................................................................68
11.3 Sample Reports................................................................................................................70
11.4 JOUNAL SEARCH............................................................................................................72
11.5 Declaring Amount of Cash in Drawer .........................................................................73
11.6 RS232C Interface .............................................................................................................74
12. Maintenance.........................................................................................................................75
12.1 Cleaning Your Cash Register .......................................................................................75
12.2 Opening the Drawer Manually ......................................................................................75
12.3 In Case of a Paper Jam...................................................................................................75
12.4 Head Cleaning Procedure and Precautions ..............................................................75
12.5 LIST OF ERROR MESSAGES........................................................................................77
12.6 Troubleshooting...............................................................................................................78
Contents

Overview of Steps Required to Use This Cash Register
1. Understand your cash register.
Before using your cash register, check the specifications and part names, and
confirm the precautions for using it.
See Chapter 1, “Before Starting Operations.”
2. Install your cash register.
Place the cash register in a location near a wall outlet and plug the power cord into
the outlet.
See section 2.1 “Installing the Cash Register.”
3. Initialize the cash register.
Initialize the cash register’s memory, before programming the cash register.
See section 2.2 “Initializing Your Cash Register.”
4. Install the paper roll.
Install paper rolls for the receipt and journal correctly.
See section 2.3 “Installing and Removing a Paper Roll.”
5. Program your cash register.
Program certain items for your store into the memory of the cash register, for
example, the price of an item, the taxes levied on the item, the functions of the
keys and so on.
See Chapter 3 “Programming Layout.”
6. Operate the cash register.
Perform the sales transaction according to your programming.
See “Chapter 4 P1 programming,” “Chapter 5 P2 programming,”
“Chapter 6 Cash Register Operation,” “Chapter 7 Making Corrections,”
“Chapter 8 Hold Operation,” “Chapter9 EURO Operation” and “Chapter
10 Special Functions.”
7. Check and reset the sales information.
Review and reset the daily sales information. You can also check the information
from a certain period of time, such as a week and a month. After resetting the
information, you can enter the new information from the next day.
See Chapter 11 “Checking and Resetting the Sales Information.”

1.1 General Specifications
Item Description
Power source AC 100V - 240V
Power consumption 30W
Ambient operating temperature 32˚F to 104˚F (0˚C to 40˚C)
Memory C-MOS RAM
Memory back-up time Approx. 20 days by rechargeable battery (Ni-H)
Printer 1 station line thermal printer
Printing speed Approx. 10 lines per sec.
Paper roll Width 57.5 mm (2.25 inches)
Max diameter 70 mm (2.74 inches)
External dimensions 350mm (W) x 408mm (D) x 321mm (H)
(13.7” (W) x16.0” (D) x12.6” (H))
Weight 10 kg (22 lb) (No.26 Drawer)
1.2 Precautions
Please note the following items before using the cash register.
Avoid using the cash register in the following conditions:
Exposed to direct sunlight or water
Hot or humid environments
Near equipment that generates strong electromagnetic fields
Anywhere there may be sudden changes in temperature
Do not touch the cash register if your hands are wet.
If the register malfunctions, do not attempt to repair the cash register by yourself.
Plug your cash register into any standard wall outlet. Other electrical devices on the
same circuit may damage the cash register.
The main outlet for this cash register must be located near the unit and easily accessible.
1
1. Before Starting Operations
1
2
3
4
5
6
7
8
9
10
11
12

1
2
3
4
5
6
7
8
9
10
11
12
1.3 Part names and Functions
This section shows part names and describes the function of each part of the cash register.
An External View
Part names Functions
1. Printer cover This cover protects the printer.
2. Receipt dispenser This is where the receipt comes out.
3. Drawer This drawer is used to store cash, checks, coupons, etc.
There is a lock on it. Lock or unlock with the drawer key which came
with this cash register.
4. Display (Customer’s side) This display shows the customer the price, total, change due, and
various types of symbols during sales transaction.
5. Display (Operator’s side) This display shows the operator the price, total, change due,
department codes, PLU codes and various types of symbols during
sales transaction.
This display also indicates steps of programming, taking reports etc.
6. Control lock The control lock allows you to change cash register modes.
7. Keyboard The keyboard is for operating the cash register.
2
1 Before Starting Operations
1
2
3
4
7
6
5
TL112.qxd 03.6.18 6:56 PM ページ2

1
2
3
4
5
6
7
8
9
10
11
12
Control Lock
The control lock allows you to change the cash register mode.
Your register is equipped with seven modes. The cash register is
always in one of these nine modes for any operation. Keys are a
set of three kinds such as marked as “OW,” “MA” and “OP”
respectively.
OW:Key for Owner can access all key positions.
MA : Key for Manager can access “L,” “R,” “V,”
“X,” “Z” and “P1” positions.
OP : Key for Operator can access “L” and “R” positions.
The following table shows the modes the cash register is equipped with.
Mark Mode Name Functions
P2 Program 2 Used to program “SYSTEM FLAG,” “PASSWORD,” “TRANSACTION
NAME” etc.
LLock mode Used to turn off the cash register. This mode disables all operations.
RRegister mode Used for normal checkout operations.
VVoid Used to correct the registration.
XRead Report Used to read and print the Sales Reports.
ZReset Report Used to read, reset and print the Sales Reports.
P1 Program 1 Used to program “DATE/NAME/NUMBER,” “DEPARTMENT,”
“PLU” etc.
Printer
The figure shows the printer
when the cover is removed
Receipt location
Paper entrance (under the roller)
Thermal head
MA
L
P1
R
V
X
Z
P2
OP
OW
3
1 Before Starting Operations
Head up lever

4
1 Before Starting Operations
1
2
3
4
5
6
7
8
9
10
11
12
Keyboard
The figures below show the standard keyboards for this cash register.
Name Abbreviation Functions
1. Price look up Key PLU Used for registering a PLU item. A PLU number is used as a code for a
pre-programming merchandise price, to maintain a tally of cost and
quantity of the merchandise sold.
Max. 6,000 PLUs.
1'.1 to 40 Used to register a PLU item directly.
2.Triple function. Used to register multiple items, to display the current
time, and to display the clerk number.
X
TIME
Multiplication/Time
Key/Clerk Number
Direct PLU Key (Flat
keyboard)
Flat Keyboard

Name Abbreviation Functions
3. Hold (Interrupt) HOLD Used for interrupt in the registration temporarily. To release from
this function, ID key is used.
4. Department shift Key DEPT/SHFT Changes the code used by the Department Keys. For example, it is
pressed to use the 1 key for department 11 (Raised), 7 (Flat).
5.RA 1) Used to move the cursor upward in sales registration.
2) Used to register cash, card or check amount received on account.
3) Used not to display the number by pressing before numeral keys
(not in sales registration) for password, ID etc.
6. Paid-out Key PO 1) Used to move the cursor downward in sales registration.
2) Used to register cash, card or check amount paid out of the cash
drawer that are not in transaction; i.e., petty cash.
7. Discount Key [
-
%] Used to give a discount as a percentage of the price of an item.
8. Plus Percentage Key [
+
%] Used to add a percentage rate such as a service charge or gratuity to
an individual item.
9./FC Used as Euro or foreign currency key.
10. Card Keys CARD1, CARD2 Used to receive the payment by a card.
11. Charge Key CHRG Used to sell on credit.
12. Check Key CHKS Used when receiving a check for a sale.
13. Total Key TOTL Used to display a subtotal including tax.
14.#/ST Used to print a non-add code and to display a subtotal during
operations.
15. Cash Key Used to register the amount of cash tendered by the customer,
complete the sales transaction and display the amount of change due.
This key is also used to fix entered numbers to issue a report.
16. Cancel Key CANCEL Used for cancellation of the current transaction.
17.ENT RLS Used for entering the price of PLU items and temporary release of the
programmed price and the maximum entry lock-out function.
18. Minus Key Used to discount a certain amount or subtract an amount of an item
when you receive a coupon. Known as a mark-down key.
19. Return Key RET Used to register the price of returned items.
20. Void Key VOID Used to void an amount you have entered and stored.
21. Clear Key CLEAR Used to clear an error or an amount you entered by mistake.
22. Clerk ID Key ID Used for entering individual clerk ID code. This key is also used to
control printing of receipts. Used to release from HOLD function as
well.
23. Error correction Key EC Used for voiding an incorrectly entered item immediately after
entering it.
24. Numeric Keys 1 to 00 Used for entering numbers.
25. Department Keys Used to classify the source of an item from up to 10 departments
(Raised) and 6 departments (Flat). One of these keys needs to be
pressed when an item assigned to a department key is sold.
26. Point Key •This key is used to enter decimal values.
27. Feed Key FEED Used to advance the receipt/journal paper.
1 to 6
1 to 10
PLU price entry
and release key
CASH
CASH/TEND
Non-add/Subtotal
Key
Euro (Foreign
Currency) Key
Received on
account Key
5
1 Before Starting Operations
1
2
3
4
5
6
7
8
9
10
11
12

6
1 Before Starting Operations
1
2
3
4
5
6
7
8
9
10
11
12
Customer Display
The cash register has a pop-up, seven-segment customer display on the back.
It displays prices, subtotals, change due, and so on. The display can show up to nine
digits.
Examples of status symbols
Your register has eight types of status symbols for the customer display: , , , , ,
, ., ,
Each symbol is displayed as shown below:
Appears when an error, such as an overflow,
occurs.
Appears when discounting.
Appears when registering non-sales amount.
For example, entering money received on
account and entering petty cash removed from
the drawer (paid-out).
Appears when the amount received from a
customer is more than the sales total.
Appears when the cash register calculates the
subtotal after pressing the #/ST Key or when
the amount received from a customer is less
than the sales amount.
Amount

1
2
3
4
5
6
7
8
9
10
11
12
7
1 Before Starting Operations
Appears when voiding and entering returned
item from a customer.
Displays when the CASH/TEND Key is
operated.
Displays when the CHKS Key is operated.
Displays when the CHRG Key is operated.
Operator Display
The operator display can be raised, and brightness of the display can be adjusted by the
small black dial.
In R mode, process and result of the transaction are displayed according to your entry.
In V mode, “VOID MODE” is displayed instead of “REG MODE.”
In P1, P2, X and Z mode, by moving the cursor and pressing , you can easily select
the needed item.
ENTER

8
2. Setting Up
1
2
3
4
5
6
7
8
9
10
11
12
This chapter explains what steps are required before programming the cash register.
2.1 Installing the Cash Register
To install the cash register:
1. Place the cash register in a location near a wall outlet.
Be sure not to locate the cash register in any of the conditions described in
section 1.2, “Precautions”.
2. Insert the owner’s key (marked with “OW”) into the control
lock and turn it to the “P2” position.
3. Plug the power cord into the outlet.
4. Make sure that the register display reads “HALF RESET.”
5. Turn the owner’s key to the “L” position to turn off the display.
2.2 Initializing Your Cash Register
Before programming the cash register, you must initialize the cash register’s memory.
Do not perform the following steps during programming or normal operation. These steps will
clear all of the settings you have programmed and erase all sales information in the register.
If you select French, Dutch, Swedish or Portuguese instead of English for display and print, please
read CLEAR key in the step 4 to the following key according to the selected language and your ECR
model:
These keys (PLU 2-5 or HOLD) refer to default positions at R mode.
To initialize the cash register:
1Turn the owner’s key to the “L” position.
2. Remove the power cord from the outlet.
3. Turn the owner’s key to the “P2” position.
4. Plug the power code while pressing the CLR key and hold
the key down for at least two seconds. “SYSTEM CLEAR”
will appear in the display. At this point, the register has been initialized.
5. Turn the owner’s key to the “L” position to turn off the display.
・
・
・・
・
・
・
X
V
R
Z
P2
P1
L
CAUTION
・
・
・・
・
・
・
X
V
R
Z
P2
P1
L
CAUTION
PLU4
HOLD
PLU5
DEPT5
PLU3
DEPT4
PLU2
DEPT3

1
2
3
4
5
6
7
8
9
10
11
12
9
2. Setting Up
2.3 Installing and Removing a Paper Roll
This section describes how to install and remove a paper roll. When you install two ply
paper rolls in your cash register. One is for receipts and the other is for your records
(journal).
Before installing a paper roll, be sure to do the
following to avoid causing a paper jam:
Orient the paper roll so that it rotates in a
counterclockwise direction, as shown in Fig.1.
The end of the paper which will be inserted into
the printer must look like the one shown in Fig.2.
Do not insert a paper end that looks like the
ones shown in Fig.3.
Load paper with thermal head in the down
position.
If the paper skews, place the thermal head in the
up position (head up lever) and reset the paper.
If the thermal head has been in the down
position for a long time, it will be impossible to
insert because the head is in contact with the
platen. In this case, place the head in the up
position once and insert the paper again.
Installing a Paper Roll
To install a paper roll for receipts:
1. Make sure the control lock is in the “R” position.
2. From the front of the cash register, grab the rear of the
printer cover and lift it up (See Fig.4.).
Fig.2
Fig.3
To the Printer
Fig.1
Fig.4

1
2
3
4
5
6
7
8
9
10
11
12
10
2. Setting Up
3. Set the roll paper gently into the paper location which
has two spindles and slip the center hubs of the
roll.(See Fig.5)
4. Insert the end of the paper into the paper entrance.
5. Press and hold the FEED key until about 30 cm of the
paper comes out from the printer.(See Fig.6.).
6. (1) Journal
Insert the end of the paper into the slot in the take-
up reel and wind two or three turns of paper
around the reel.(See Fig.7).
(2) Receipt
Insert the end of the paper into the paper exit of
the print cover, and make sure of the paper end to
have come out of the cover.
Then close the printer cover.(See Fig.8).
When you have finished installing the paper roll, close
the printer cover.
Removing a Paper Roll
When the paper begins to have a red area on it, replace
the paper roll.
To remove the paper roll.
1. Turn the control lock to the “R” position.
2. Open the printer cover.
Fig.7
Fig.8
Fig.9
Fig.5
Fig.6

3. Feed the paper about ten lines forward with the FEED
key. (See Fig.9)
4. Remove the take-up reel from the support.
5. Cut the paper after the end of printing. (See Fig.10).
6.Remove the stopper from the take-up reel.
7. Remove the paper record from the take-up reel.(See
Fig.11).
8. Remove the remaining paper roll by pressing FEED
key.
When you have finished removing the paper, install a
new one and close the printer cover. See “Installing a
Paper Roll.”
11
2. Setting Up
1
2
3
4
5
6
7
8
9
10
11
12
Fig.10
Fig.11

12
1
2
3
4
5
6
7
8
9
10
11
12
3. Programming Layout
3.1 Keyboard
These keyboards are used at P1, P2, X and Z control lock key positions.
Raised Keyboard Layourt
Flat Keyboard Layourt
Table of contents
Other Geller Cash Register manuals