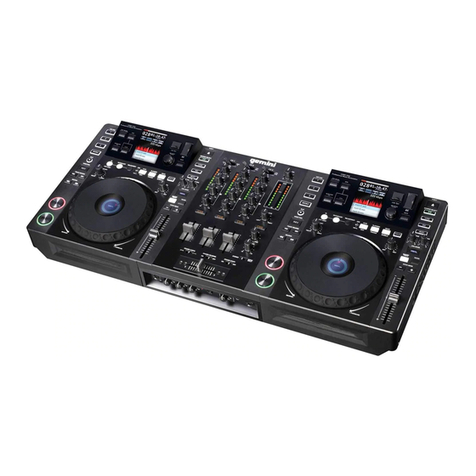
Gemini MDJ-500 User manual

MDJ-500
PERFORMANCE PACK
PROFESSIONAL DJ SYSTEM
USER MANUAL
At Gemini, our highest priority is making your experience unforgetable.
Need help with setting up, troubleshooting, or looking for some tips?
We’re here for you, Monday trough Friday 9-5PM EST.
Be sure to check our website for MDJ software updates.

MDJ-500 PERFORMANCE PACK
PROFESSIONAL DJ SYSTEM
2
INDEX
PREPARING FOR FIRST USE
INTRODUCTION
SAFETY INFORMATION
CLEANING THE UNIT
OPERATING CONDITIONS
PLAYABLE FORMATS
USING MIDI CONTROL AND AUDIO
CONNECTING TO A COMPUTER
CONNECTING EVERYTHING
GETTING STARTED
TO LEARN MORE
WE WANT YOU LISTENING FOR A LIFETIME
CAUTION
PRECAUTIONS
WARRANTY AND REPAIR
LIMITED WARRANTY
RETURN/REPAIR
2
3
3
4
4
4
4
4
5
6
8
10
11
11
12
12
12
PREPARING FOR FIRST USE
Please ensure that you find all the below
items included with your MDJ-500
Performance Pack:
(2) MDJ-500
(1) MXR-01
(3) Power cords
(2) RCA cables
(1) Operating instructions
(1) Wired Microphone
(1) Stereo headphones

MDJ-500 PERFORMANCE PACK
PROFESSIONAL DJ SYSTEM 3
INTRODUCTION
Thank you for purchasing the MDJ-500
Performance Pack. We are confident that
the Gemini family of products will not only
make your life easier through the use of
the latest technological advancements in
cross-platform connectivity and sound
reproduction but will raise the bar for DJ and
pro audio products. With the proper care
& maintenance, your unit will likely provide
years of reliable, uninterrupted service. All
Gemini products are backed by a 1-year
limited warranty*
SAFETY INFORMATION
1- Do not use the MDJ-500 Performance Pack
at temperatures below 41°F/5°C or higher
than 95°F/35°C.
2– These devices should not be exposed to
dripping or splashing, and no objects filled
with liquid (such as drinks) should be placed
on or near them.
3- Place the units in a clean and dry location.
4- Do not place the units in an unstable
location.
5- When disconnecting the power cord from
the AC outlet, always grasp by the plug.
Never pull the power cord.
6- To prevent electric shock, do not remove
the cover or the bottom screws.
7- There are NO USER SERVICEABLE PARTS
INSIDE. Please refer to a qualified technician.
8- Do not use chemical solvents to clean the
units.
9- Keep this manual in a safe place for future
reference.
Note: In the USA- if you experience problems
with this unit call Gemini customer service at
1 (732) 346-0061. Do not attempt to return
this equipment to your dealer.

MDJ-500 PERFORMANCE PACK
PROFESSIONAL DJ SYSTEM
4
CLEANING THE UNIT
To clean the MDJ-500, the MXR-01 and
the headphones use only a dry soft cloth
and/or compressed air. If the unit is soiled
with stubborn dirt, we suggest using a 2:1
solution of distilled water and 30% isopropyl
alcohol. Avoid using harsh cleaning chemicals
such as benzene, paint thinner, bleach, or
hydrochloric acid, which will damage the unit.
OPERATING CONDITIONS
For optimum performance, the temperature
of the operating environment should be
between +41º F - +95º F (+5º C to +35º C).
Failure to maintain proper operating
temperature may result in diculty reading
the display, thermal overload, or systemwide
instability. Avoid exposing the unit to direct
sunlight.
When placing the unit in an installation, make
sure that it is placed on a stable surface, as
far away from vibrations as possible. Even
though the unit is impervious to vibration,
the storage devices (specifically hard drive
based ones) that are designed to be used in
conjunction with it are typically not.
Also, be sure not to place or use the player on
heat generating sources, such as amplifiers or
near spotlights.
PLAYABLE FORMATS
The MDJ-500 plays music files on USB
storage devices. All of the following file
formats are supported:
• WAV (16-bit PCM, sample rates of 8 kHz,
11.025 kHz, 12 kHz, 16 kHz, 22.50 kHz, 24 kHz,
32 kHz, 44.1 kHz, 48 kHz)
• MP3 (16 bit, 44.1 kHz, MPEG-I, Layer III)
• AAC (16 bit, 44.1 kHz, stereo, AAC Core,
AAC Plus, AAC Plus v2)
• AIFF (16 bit, 44.1 kHz, stereo)
Supported file systems on USB Storage
Devices include:
• FAT • HFS+
• FAT32 • NTFS
USING MIDI CONTROL AND AUDIO
When placed in MIDI mode, the MDJ-500 can
send MIDI data from the buttons and dials to
a computer to control the parameters and
playback controls of DJ software. The audio
playback from the computer can also be
output from the MDJ-500 and mixed using
the included MXR-01 mixer.
Before using the MDJ-500 as an audio device,
connect the MDJ-500 to your computer
using the supplied USB cable and allow your
computer to detect it. Open your DJ software
and select the MDJ-500’s output device in
the DJ software’s settings. For instructions
on how to do this, see your DJ software’s
operating instructions.
CONNECTING TO A COMPUTER
The MDJ-500 is a plug and play device that
requires no software installation. The MDJ-
500’s audio and MIDI drivers are compatible
with Windows and OSX.
• To use the MDJ-500 with a computer using
Windows, connect the MDJ-500 to your PC
after starting up the computer. The MDJ-500
will configure standard WDM drivers.
Select the MDJ-500 as your device to use it
as your audio device. ASIO drivers can also
be configured for use with the MDJ-500 and
are available at geminisound.com
• To use the MDJ-500 with a computer using
the OS X operating system, connect the MDJ-
500 to your computer after starting up. Use
the system’s standard Core Audio drivers and
select the MDJ-500 as the device.

MDJ-500 PERFORMANCE PACK
PROFESSIONAL DJ SYSTEM 5
CONNECTING EVERYTHING
1- Connect RCA cable to MDJ-500 Deck 1
output following red/white color coding.
2- Connect other end of MDJ-500 Deck 1
RCA cable to MXR-01 Line 1 input.
3- Connect RCA cable to MDJ-500 Deck 2
output following red/white color coding.
4- Connect other end of MDJ-500 Deck2
RCA cable to MXR-01 Line 2 input.
5- Connect supplied headphones to
Headphone jack on the front of the mixer.
6- Connect MXR-01 Mixer to external speakers
using either the balanced or unbalanced
Master Outputs.
7- Connect microphone to MXR-01 Mixer
using Mic Input jack and supplied cable.
CONECTANDO TODO
1- Conecte el cable RCA a la salida de la
platina MDJ-500 1 según la codificación de
color rojo/blanco.
2- Conecte el otro extremo del cable RCA de
la platina MDJ-500 a la entrada de la línea 1
del MXR-01.
3- Conecte el cable RCA a la salida de la
platina MDJ-500 2 siguiendo la codificación
de color rojo/blanco.
4- Conecte el otro extremo del cable RCA
MDJ-500 Deck2 a la entrada MXR-01 Line 2.
5- Conecte los auriculares suministrados a la
toma de auriculares situada en la parte frontal
del mezclador.
6- Conecte el mezclador MXR-01 a los
altavoces externos utilizando las salidas
maestras balanceadas o no balanceadas.
7- Conecte un micrófono al Mezclador MXR-
01 usando la toma de entrada de micrófono y
el cable suministrado.
CONNECTER TOUT
1- Connectez le câble RCA à la sortie MDJ-500
Deck 1 en suivant le code couleur rouge/blanc.
2- Connectez l’autre extrémité du câble RCA
MDJ-500 Deck 1 à l’entrée MXR-01 Line 1.
3- Connectez le câble RCA à la sortie MDJ-500
Deck 2 en suivant le code couleur rouge/blanc.
4- Connectez l’autre extrémité du câble MDJ-
500 Deck2 RCA à l’entrée MXR-01 Line 2.
5- Connectez le casque fourni à la prise
casque à l’avant de la console.
6- Connectez le MXR-01 Mixer aux enceintes
externes en utilisant les sorties Master
symétriques ou asymétriques.
7- Connectez un microphone au MXR-01 Mixer
en utilisant la prise Mic Input et le câble fourni.
ALLES VERBINDEN
1- Schließen Sie das Cinch-Kabel an den
Ausgang MDJ-500-Deck 1 nach der roten/
weißen Farbcodierung an.
2- Schließen Sie das andere Ende des MDJ-
500-Deck 1-Cinch-Kabels an den Eingang
MXR-01 Line 1 an.
3- Schließen Sie das Cinch-Kabel an den
Ausgang MDJ-500 Deck 2 an und folgen Sie
der roten/weißen Farbcodierung.
4- Schließen Sie das andere Ende des MDJ-
500 Deck2-Cinch-Kabels an den Eingang
MXR-01 Line 2 an.
5- Schließen Sie den mitgelieferten Kopfhörer
an die Kopfhörerbuchse an der Vorderseite
des Mischpults an.
6- Schließen Sie den MXR-01 Mixer über
die symmetrischen oder unsymmetrischen
Master-Ausgänge an externe Lautsprecher an.
7- Schließen Sie ein Mikrofon an den MXR-01
Mixer über die Mic-Eingangsbuchse und das
mitgelieferte Kabel an.
MXR-01
HEADPHONES
POWER SUPP LY
AC 100-240V, 60/50Hz
POWER CONSUMPTION: 10 WATTS
POWER
AC IN
USB
L
R
AUDIO OU T
DESIGNED & ENGINEERED IN THE U SA BY GEMINI. PRODUCED IN CHINA .
POWER SUPP LY
AC 100-240V, 60/50Hz
POWER CONSUMPTION: 10 WATTS
POWER
AC IN
USB
L
R
AUDIO OU T
DESIGNED & ENGINEERED IN THE U SA BY GEMINI. PRODUCED IN CHINA .
POWER
AC IN
100VAC-240VAC
OFF ON
BALANCED MASTER
OUTPUT
CH 1
LN 1 PH 1LN 2 PH 2
MASTER BOOTH
CH 2M IC
INPUT
MXR-01
1 3
2 4
7
6
5

MDJ-500 PERFORMANCE PACK
PROFESSIONAL DJ SYSTEM
6
GETTING STARTED
Using a USB Drive
The main way to play music with the MDJ-
500 is to have your tracks available on a USB
portable drive. Please make sure that your
music files and the USB drive are compatible
with the MDJ-500. If you’re not sure how to
check, or what is compatible, you can use
Gemini’s free software – VCase – to prepare
your drive for you. VCase is available on the
MDJ-500 product page on our website, and
works with both Windows and OS X.
To begin using the units in USB mode, insert
a USB drive with music and press the USB
button in the SOURCE section of the MDJ-500.
Using MIDI
You can also use the MDJ-500 as a controller
in the Virtual DJ software by Atomix. The
MDJ-500 will be recognized as both a MIDI
controller and audio interface in Virtual DJ.
Please note that the MXR-01 will still operate
as an analog mixer – even if your MDJ-500s
are in MIDI mode. This is completely normal.
To begin using the units in MIDI mode,
connect your MDJ-500s to your computer
using the supplied USB cables, then run the
VDJ software.
Uso de una unidad USB
La forma principal de reproducir música con
el MDJ-500 es tener sus pistas disponibles
en una unidad portátil USB. Asegúrese de
que sus archivos de música y la unidad USB
son compatibles con el MDJ-500. Si no
está seguro de cómo comprobar, o lo que
es compatible, puede utilizar el software
gratuito de Gemini - VCase - para preparar su
unidad para usted. VCase está disponible en
la página del producto MDJ-500 en nuestro
sitio web, y funciona en Windows y OS X.
Para comenzar a usar las unidades en el
modo USB, inserte una unidad USB con
música y presione el botón USB en la sección
SOURCE del MDJ-500.
Uso de MIDI
También puede utilizar el MDJ-500 como
controlador en el software Virtual DJ de
Atomix. El MDJ-500 será reconocido tanto
como controlador MIDI como interfaz de audio
en Virtual DJ. Tenga en cuenta que el MXR-01
seguirá funcionando como un mezclador
analógico, incluso si su MDJ-500 está en
modo MIDI. Esto es completamente normal.
Para comenzar a usar las unidades en modo
MIDI, conecte los MDJ-500 a su computadora
usando los cables USB suministrados, luego
ejecute el software VDJ.
EJECT
SETTINGS
USB
MIDI
Utilisation d’un lecteur USB
La manière principale de jouer de la musique
avec le MDJ-500 est d’avoir vos pistes
disponibles sur un lecteur portable USB.
Assurez-vous que vos fichiers musicaux et le
lecteur USB sont compatibles avec le MDJ-
500. Si vous ne savez pas comment vérifier,
ou ce qui est compatible, vous pouvez utiliser
le logiciel gratuit de Gemini - VCase - pour
préparer votre lecteur pour vous. VCase est
disponible sur la page du produit MDJ-500
sur notre site Web et fonctionne à la fois
dans Windows et OS X.
Pour commencer à utiliser les unités en mode
USB, insérez une clé USB avec de la musique
et appuyez sur le bouton USB dans la section
SOURCE du MDJ-500.
Utilisation de MIDI
Vous pouvez également utiliser le MDJ-500
comme contrôleur dans le logiciel Virtual
DJ par Atomix. Le MDJ-500 sera reconnu à
la fois comme contrôleur MIDI et interface
audio dans Virtual DJ. Notez que le MXR-01
fonctionnera toujours comme un mélangeur
analogique - même si vos MDJ-500 sont en
mode MIDI. C’est tout à fait normal.
Pour commencer à utiliser les unités en mode
MIDI, connectez votre MDJ-500 à votre
ordinateur à l’aide des câbles USB fournis,
puis exécutez le logiciel VDJ.
Verwenden eines USB-Laufwerks
Die wichtigste Möglichkeit, Musik mit
dem MDJ-500 abzuspielen, besteht darin,
dass Ihre Tracks auf einem USB-Laufwerk
verfügbar sind. Bitte stellen Sie sicher, dass
Ihre Musikdateien und das USB-Laufwerk
mit dem MDJ-500 kompatibel sind. Wenn
Sie sich nicht sicher sind, wie Sie überprüfen
können oder was kompatibel ist, können Sie
die kostenlose Software von Gemini - VCase
- verwenden, um Ihre Festplatte für Sie
vorzubereiten. VCase ist auf der MDJ-500-
Produktseite auf unserer Website verfügbar
und funktioniert sowohl unter
Windows als auch unter OS X.
Um die Einheiten im USB-
Modus zu verwenden, legen Sie
ein USB-Laufwerk mit Musik
ein und drücken Sie die USB-
Taste im Abschnitt SOURCE
des MDJ-500.
MIDI verwenden
Sie können den MDJ-500 auch
als Controller in der Virtual
DJ-Software von Atomix
verwenden. Der MDJ-500 wird
sowohl als MIDI-Controller
als auch als Audio-Interface
in Virtual DJ erkannt. Bitte
beachten Sie, dass der MXR-01

MDJ-500 PERFORMANCE PACK
PROFESSIONAL DJ SYSTEM 7
SEARCH
TRACKSEARCH
DIRECTION
BROWSE/SELECT
BACK
USB
JOG MODE
BPM TAP
AUTO
MANUAL
14
IN OUT/ADJUST
SHIFT SLIP
HOT CUE
/2 x2
PITCH BEND
+FWD
-REV
KEY/LOCK
SEARCH
WAVE
DELETE DELETE DELETE DELETE
TIMETEXT
BEAT OFFSET
AUTO CUE
RANGEBPM MODE
RELOOP/EXIT
QUANTIZE
LOOP ROLL
BEAT GRID
LOCK
MDJ-500
PROFESSIONAL MEDIA PLAYER
EJECT
SETTINGS
USB
MIDI
1
2
3
4
5
immer noch als analoger Mixer arbeitet -
selbst wenn sich Ihr MDJ-500 im MIDI-Modus
befindet. Das ist völlig normal.
Um die Geräte im MIDI-Modus zu verwenden,
schließen Sie Ihre MDJ-500s über die
mitgelieferten USB-Kabel an Ihren Computer
an und starten Sie dann die VDJ-Software.
Loading And Playing A Track
1- First select your USB drive
2- Next, turn the BROWSE knob to scroll
through the songs on your USB drive. When
you find the song you want to play, push
down on the BROWSE knob to load the
selected track.
3- Use the touch platter to set the starting
position for your track. You will be able to
see the track waveform and play position on
the screen.
4- Move the deck pitch to the desired setting.
5- Press the CUE button to set the MASTER
CUE position. You can use this to return to
the set position at any time by pressing the
CUE button again.
When you’re ready to play the track, press
the PLAY button.
Cargando y Jugando una Pista
1- Primero seleccione su unidad USB
2- A continuación, gire el mando BROWSE
para desplazarse por las canciones de su
unidad USB. Cuando encuentre la canción
que desea reproducir, presione el botón
BROWSE para cargar la pista seleccionada.
3- Utilice el plato táctil para establecer la
posición inicial de su pista. Podrá ver la
forma de onda de la pista y la posición de
reproducción en la pantalla.
4- Mueva el paso de la cubierta al ajuste
deseado.
5- Pulse el botón CUE para establecer la
posición MASTER CUE. Puede utilizarlo para
volver a la posición establecida en cualquier
momento pulsando de nuevo el botón CUE.
Cuando esté listo para reproducir la pista,
presione el botón PLAY.
Chargement et Jouer une Piste
1- Sélectionnez d’abord votre lecteur USB
2- Ensuite, tournez le bouton BROWSE pour
faire défiler les morceaux sur votre lecteur
USB. Lorsque vous trouvez la chanson que
vous voulez jouer, appuyez sur le bouton
BROWSE pour charger la piste sélectionnée.
3- Utilisez le plateau tactile pour régler la
position de départ de votre piste. Vous
pourrez voir la forme d’onde de la piste et la
position de lecture sur l’écran.
4- Déplacez le pas de plat vers le réglage désiré.
5- Appuyez sur la touche CUE pour régler
la position MASTER CUE. Vous pouvez
l’utiliser pour revenir à la position définie à
tout moment en appuyant à nouveau sur le
bouton CUE.
Lorsque vous êtes prêt à lire la piste, appuyez
sur le bouton PLAY.
Ein Track Laden und Spielen
1- Wählen Sie zunächst Ihr USB-Laufwerk aus
2- Drehen Sie anschließend den BROWSE-
Knopf, um durch die Songs auf Ihrem
USB-Laufwerk zu blättern. Wenn Sie
den gewünschten Titel gefunden haben,
drücken Sie den BROWSE-Knopf, um den
ausgewählten Titel zu laden.
3- Verwenden Sie den Touch-Platter, um
die Startposition für Ihre Spur einzustellen.
Sie können die Spurkurve und die
Wiedergabeposition auf dem Bildschirm
sehen.
4- Bewegen Sie die Deck-Tonhöhe auf die
gewünschte Einstellung.
5- Drücken Sie die CUE-Taste, um die
MASTER CUE-Position einzustellen. Sie
können damit jederzeit zur gewünschten
Position zurückkehren, indem Sie erneut die
CUE-Taste drücken.
Wenn Sie bereit sind, den Titel abzuspielen,
drücken Sie die PLAY-Taste.

MDJ-500 PERFORMANCE PACK
PROFESSIONAL DJ SYSTEM
8
TO LEARN MORE
There’s a lot of functionality packed into
these products, and it would take a book
to outline all of it. This guide is meant to
get you started, but if you want to learn
everything your gear can do, we have you
covered. Not only do we oer full manuals
for the MDJ-500 and MXR-01, we also have
many videos available to walk you through
the various functions of these products.
You can get it all by going to
www.geminisound.com. From there you can
visit the product pages for the MDJ-500 and
MXR-01, where you’ll find everything from
product manuals to the latest software and
links to great videos.
APRENDER MÁS
Hay una gran cantidad de funcionalidad
empaquetada en estos productos, y se
necesitaría un libro para esbozar todo. Esta
guía está pensada para que empiece, pero
si quiere aprender todo lo que su equipo
puede hacer, lo tenemos cubierto. No solo
ofrecemos manuales completos para el MDJ-
500 y MXR-01, también tenemos muchos
videos disponibles para guiarle a través de las
diversas funciones de estos productos.
Puede obtenerlo todo visitando
www.geminisound.com. Desde allí puedes
visitar las páginas de producto para el MDJ-
500 y el MXR-01, donde encontrarás todo,
desde manuales de producto hasta el último
software y enlaces a excelentes videos.
POUR APPRENDRE PLUS
Il y a beaucoup de fonctionnalités dans ces
produits, et il faudrait un livre pour décrire
tout cela. Ce guide est destiné à vous aider
à démarrer, mais si vous voulez apprendre
tout ce que votre équipement peut faire,
nous vous avons couvert. Non seulement
nous orons des manuels complets pour le
MDJ-500 et le MXR-01, mais nous disposons
également de nombreuses vidéos pour vous
guider dans les diérentes fonctions de ces
produits.
Vous pouvez tout obtenir en allant sur
www.geminisound.com. De là, vous pouvez
visiter les pages de produits pour le MDJ-
500 et MXR-01, où vous trouverez tout, des
manuels de produits aux logiciels les plus
récents et des liens vers d’excellentes vidéos.
UM MEHR ZU LERNEN
In diesen Produkten steckt eine Menge
Funktionalität, und es würde ein Buch erfordern,
das alles zu skizzieren. Dieser Leitfaden soll
Ihnen den Einstieg erleichtern, aber wenn Sie
alles lernen wollen, was Ihre Ausrüstung kann,
haben wir Sie abgedeckt. Wir bieten nicht nur
komplette Handbücher für den MDJ-500 und
MXR-01, sondern auch zahlreiche Videos, die
Sie durch die verschiedenen Funktionen dieser
Produkte führen.
Sie können alles bekommen, indem Sie auf
www.geminisound.com gehen. Von dort aus
können Sie die Produktseiten für den MDJ-500
und MXR-01 besuchen, wo Sie alles finden, von
Produkthandbüchern bis zur neuesten Software
und Links zu tollen Videos.

MDJ-500 PERFORMANCE PACK
PROFESSIONAL DJ SYSTEM 9

MDJ-500 PERFORMANCE PACK
PROFESSIONAL DJ SYSTEM
10
WE WANT YOU LISTENING
FOR A LIFETIME
Selecting fine audio equipment such as the
unit you’ve just purchased is only the start
of your musical enjoyment. Now it’s time
to consider how you can maximize the fun
and excitement your equipment oers. This
manufacturer and the Electronic Industries
Association’s Consumer Electronics Group
want you to get the most out of your
equipment by playing it at a safe level. One
that lets the sound come through loud and
clear without annoying blaring or distortion—
and, most importantly, without aecting
your hearing. Sound can be deceiving. Over
time your hearing “comfort level” adapts to
higher volumes of sound. So what sounds
“normal” can actually be loud and harmful to
your hearing. Guard against this by setting
your equipment at a safe level BEFORE your
hearing adapts.
To establish a safe level, start your volume
control at a low setting. Slowly increase the
sound until you can hear it comfortably and
clearly, and without distortion. Once you have
established a comfortable sound level. Set the
dial and leave it there.
Taking a minute to do this now will help to
prevent hearing damage or loss in the future.
After all, we want you listening for a lifetime.
Used wisely, your new sound equipment
will provide a lifetime of fun and enjoyment.
Since hearing damage from loud noise is
often undetectable until it is too late, this
manufacturer and the Electronic Industries
Association’s Consumer Electronics Group
recommend you avoid prolonged exposure to
excessive noise.
This list of sound levels is included for your
protection.
DECIBEL LEVEL EXAMPLE
30 - Quiet library, soft whispers
40 - Living room, refrigerator, bedroom away
from trac
50 - Light trac, normal conversation, quiet
oce
60 - Air conditioner at 20 feet, sewing
machine
70 - Vacuum cleaner, hair dryer, noisy
restaurant
80 - Average city trac, alarm clock at two feet.
THESE NOISES CAN BE DANGEROUS
UNDER CONSTANT EXPOSURE
90 - Subway, motorcycle, truck trac, lawn
mower
100 - Garbage truck, chain saw, pneumatic
drill
120 - Rock band concert in front of speakers,
thunderclap
140 - Gunshot blast, jet plane
180 - Rocket launching pad
Information courtesy of the Deafness
Research Foundation.

MDJ-500 PERFORMANCE PACK
PROFESSIONAL DJ SYSTEM 11
CAUTION
• All operating instructions should be read
before using this equipment.
• To reduce the risk of electrical shock, do not
open the unit. There are no user replaceable
parts inside. Please refer servicing to a
qualified Gemini service technician. Do not
attempt to return this equipment to your
dealer.
• Do not expose this unit to direct sunlight or
to a heat source such as a radiator or stove.
• Do not attempt to clean the unit with
chemical solvents as this might damage the
finishing. This unit should be cleaned only
with a damp cloth.
• When moving this equipment, it should be
placed in its original carton and packaging.
This will reduce the risk of damage during
transit.
• Do not expose this unit to water or heat.
• Do not use cleaning products or lubricants
on the controls or switches.
PRECAUTIONS
Please read carefully before proceeding
Always follow the basic precautions listed
below to avoid the possibility of serious injury
or even death from electrical shock, short-
circuiting, damages, fire, or other hazards.
• Read Instructions: All the safety and
operating instructions should be read before
the product is operated.
• Retain Instructions: The safety and
operating instructions should be retained for
future reference.
• Heed Warnings: All warnings on the product
and in the operating instructions should be
adhered to.
• Follow Instructions: All operating and use
instructions should be followed.
• Cleaning: The product should be cleaned
only with a polishing cloth or a soft dry cloth.
Never clean with furniture wax, benzene,
insecticides or other volatile liquids since they
may corrode the cabinet.
• Water and Moisture: Do not use this
product near water, for example, near a
bathtub, wash bowl, kitchen sink, or laundry
tub; in a wet basement; or near a swimming
pool; and the like.
• Do Not Open: Do not open the device or
attempt to disassemble the internal parts
or modify them in any way. The device
contains no user serviceable parts. If it should
appear to be malfuntioning, discontinue
use immediately and have it inspected by
qualified Gemini service personnel.
• Replacement Parts: When replacement
parts are required, be sure the service
technician has used replacement parts
specified by the manufacturer or have the
same characteristics as the original part.
Unauthorized substitutions may result in fire,
electric shock, or other hazards.
• Location: To avoid toppling the device or
causing damage to the internal components,
be sure to adhere to the following:
– When transporting the device, always use
the original carton.
– Before moving the unit, remove all plugged
cables.
– Do not expose the device to excessive dust
or vibrations, or extreme cold or heat (such
as in direct sunlight, near a heater) to prevent
the possibility of panel disfiguration or
damage to the internal components.
– Do not place the device in an unstable
position where it may accidentally fall over.

MDJ-500 PERFORMANCE PACK
PROFESSIONAL DJ SYSTEM
12
Register your product Online at
WWW.GEMINISOUND.COM
to be eligible for great prize giveaways!
WARRANTY AND REPAIR:
All Gemini products are designed and man-
ufactured to the highest standards in the
industry. With proper care and maintenance,
your product will provide years of reliable
service.
LIMITED WARRANTY
A. Gemini guarantees its products to be free
from defects in materials and workmanship
for one (1) year from the original purchase
date. Exceptions: Laser assemblies on CD
Players, cartridges, and crossfaders are cov-
ered for 90 days.
B. This limited warranty does not cover
damage or failure caused by abuse, misuse,
abnormal use, faulty installation, improper
maintenance or any repairs other than those
provided by an authorized Gemini Service
Center.
C. There are no obligations of liability on the
part of Gemini for consequential damages
arising out of or in connection with the use or
performance of the product or other indirect
damages with respect to loss of property,
revenues, of profit, or costs of removal, instal-
lation, or reinstallation. All implied warranties
for Gemini, including implied warranties for
fitness, are limited in duration to one (1) year
from the original date of purchase, unless
otherwise mandated by local statutes.
RETURN/REPAIR
A. In the U.S.A., please call our helpful Cus-
tomer Service Representatives at (732)
346-0061, and they will be happy to give you
a Return Authorization Number (RA#) and
the address of an authorized service center
closest to you.
B. After receiving an RA#, include a copy
of the original sales receipt, with defective
product and a description of the defect. Send
by insured freight to: Gemini and use the
address provided by your customer service
representative. Your RA# must be written on
the outside of the package, or processing will
be delayed indefinitely!
C. Service covered under warranty will be
paid for by Gemini and returned to you. For
non-warrantied products, Gemini will repair
your unit after payment is received. Repair
charges do not include return freight. Freight
charges will be added to the repair charges.
D. On warranty service, you pay for shipping
to Gemini, we pay for return shipping within
the continental United States. Alaska, Hawaii,
Puerto Rico, Canada, Bahamas, and the Virgin
Islands will be charged for freight.
E. Please allow 2-3 weeks for return of your
product.
Under normal circumstances your product
will spend no more than 10 working days at
Gemini. We are not responsible for shipping
times.
IN THE USA:
if you experience problems with this unit, Call
732-346-0061 for Gemini customer service.
Do not attempt to return this equipment to
your dealer.
Parts of the design of this product may be
protected by worldwide patents. Information
in this manual is subject to change without
notice and does not represent a commitment
on the part of the vendor. Gemini shall not
be liable for any loss or damage whatsoever
arising from the use of information or any
error contained in this manual. No part of
this manual may be reproduced, stored in a
retrieval system or transmitted, in any form or
by any means, electronic, electrical, mechani-
cal, optical, chemical, including photocopying
and recording, for any purpose without the
express written permission of Gemini It is rec-
ommended that all maintenance and service
on this product is performed by Gemini or
its authorized agents. Gemini will not accept
liability for loss or damage caused by main-
tenance or repair performed by unauthorized
personnel.
Gemini Worldwide Headquarters
107 Trumbull Street, Building F8 • Elizabeth,
NJ 07206 • USA • Tel: (732)346-0061 • Fax:
(732)346-0065
© Innovative Concepts and Design LLC, All
Rights Reserved.
Other manuals for MDJ-500
1
Table of contents
Other Gemini Dj Equipment manuals

Gemini
Gemini Firstmix i/o User manual

Gemini
Gemini Slate User manual

Gemini
Gemini CDMP-1300 Manual

Gemini
Gemini G4V User manual

Gemini
Gemini Dual CD Mixing Console 36 User manual

Gemini
Gemini CTRL-SIX User manual

Gemini
Gemini RENEGADE User manual

Gemini
Gemini GSYS-4000 User manual

Gemini
Gemini PMX-20 User manual

Gemini
Gemini CNTRL-7 User manual

Gemini
Gemini CDMP-7000 User manual

Gemini
Gemini CTRL-ONE User manual

Gemini
Gemini G4V User manual

Gemini
Gemini MOBILE PAK201 User manual

Gemini
Gemini GMX User manual

Gemini
Gemini DISC-O-MIX 4.0 User manual

Gemini
Gemini MM-04 User manual

Gemini
Gemini MM-03 User manual

Gemini
Gemini CDM-3610 User manual

Gemini
Gemini ICFX-20 User manual