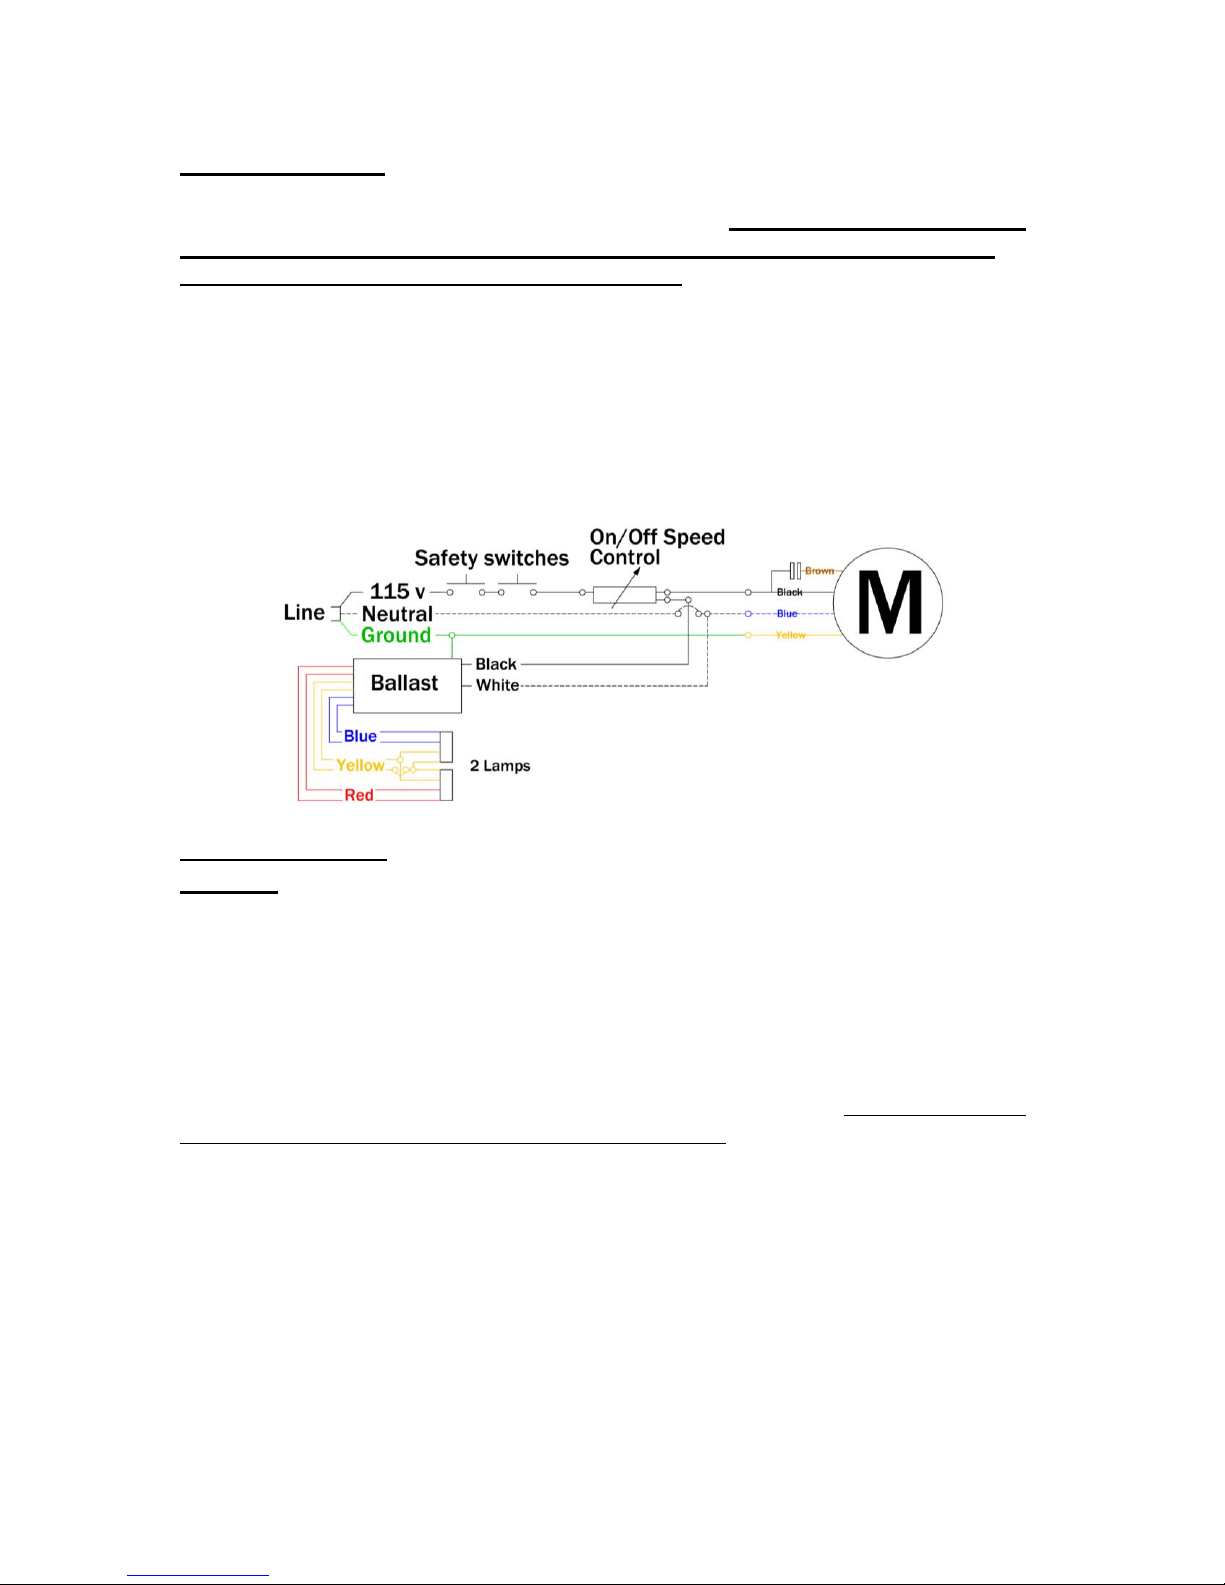
If the clear plug does not emit any glow, the problem may be in the ballast or
wiring. Call your Genesis Air Representative for assistance.
REMOVAL
Power the Genesis Air unit down using the kill switch or breaker to
unit.
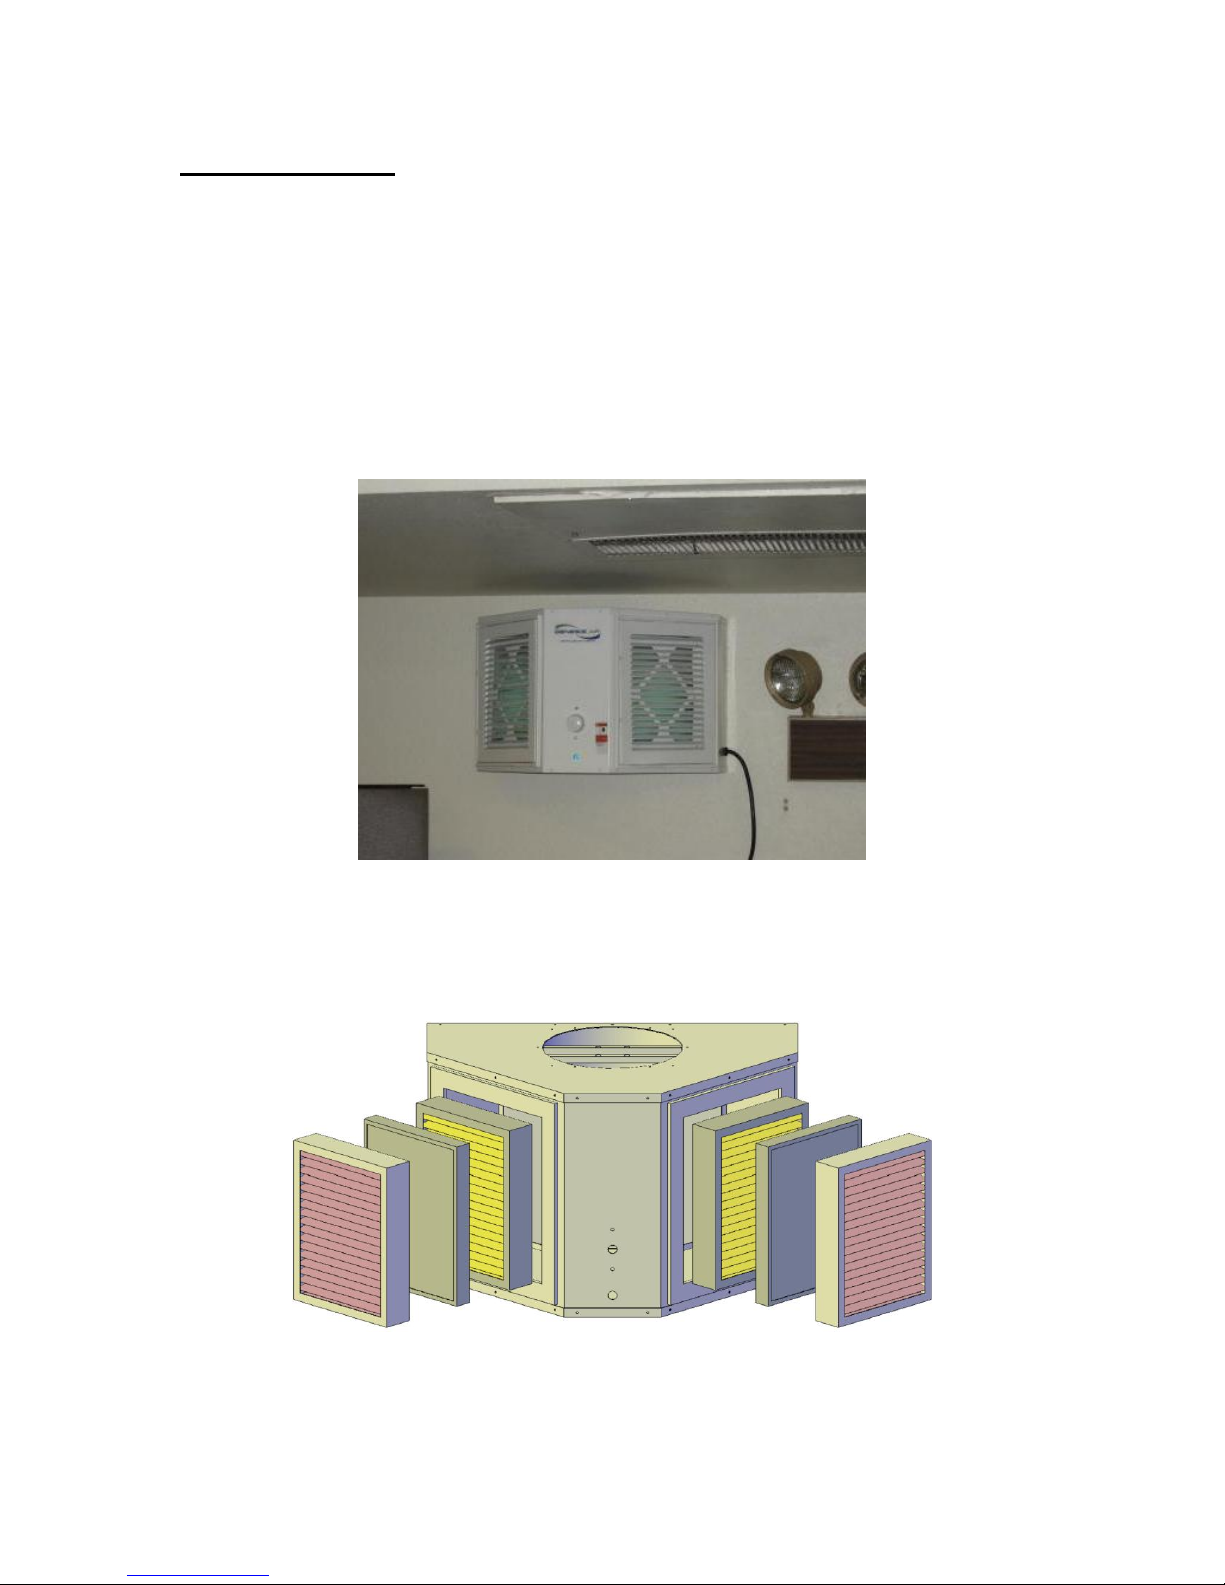
Open the front grille and remove the air filter and UV shield/catalyst assembly.
Grasp the lamp and rock back and forth gently while pulling steadily upwards.
BE SURE NOT TO USE FORCE! The lamp may burst if it collides with the
fan.
DISPOSAL
In most states and provinces, UVGI lamps may be disposed of in the same
manner as fluorescent lamps. While UVGI lamps contain a trace amount of
mercury, the quantity is so minute that disposal is not regulated by federal
standards (established by the EPA). Individual states and provinces may have
established disposal standards. Please adhere to your local regulations.
INSTALLATION
Installation is the reverse of removal.
CATALYST
ALL UNITS MUST BE POWERED DOWN BEFORE SERVICING.
ALL MAINTENANCE PERSONNEL MUST WEAR UV PROTECTIVE
SAFETY GLASSES. ALL EXPOSED SKIN MUST BE PROTECTED BY UV
RESISTANT CLOTHING.
GENERAL
Genesis Air recommends catalyst replacement every fifteen years to provide an efficient
system. As debris and contaminants accumulate on the catalyst, the effectiveness of the
catalyst is decreased. The catalyst must be inspected periodically for build up of
particulate.
INSPECTION
Turn off power to the 2006D&L unit. Unplug unit from service.
Open the front grille and remove the air filter and UV shield/catalyst assembly.
If the catalyst appears clean and free of particulate, congratulations! Otherwise,
proceed to removal.
REMOVAL
If the catalyst will be cleaned and reused, keep track of orientation so
they will be returned from the order they were removed. This will
prevent installation problems.
Turn off power to the 2006D&L unit. Unplug unit from service.
Open the front grille and remove the air filter and UV shield/catalyst assembly.
CLEANING
If the catalyst needs cleaning, remove catalyst panel. Proceed to a wash bay, mop
sink or other washing area.
Shake or brush heavy particulate from the catalyst.
Spray catalyst liberally using Nu-Calgon CalClean, Special HD or other suitable
coil cleaner on catalyst only. Allow to sit 15 minutes, and then wash off with
water.