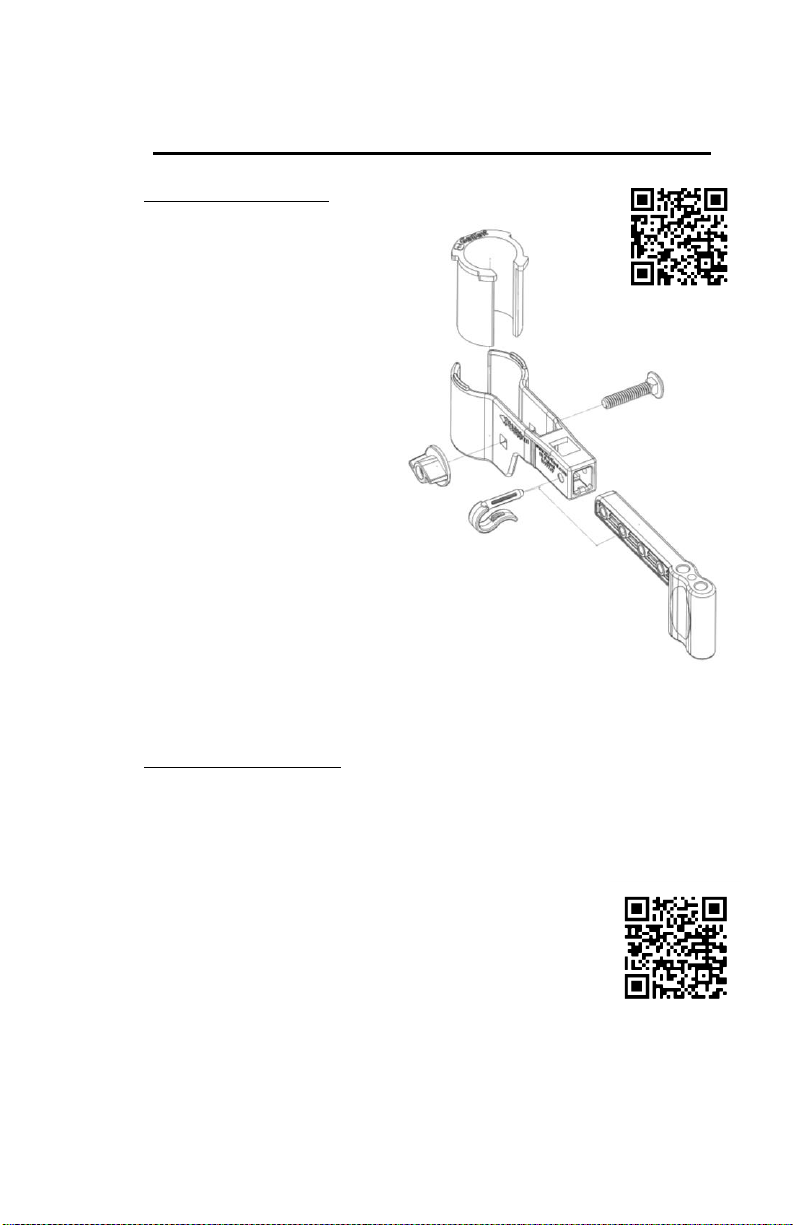
Page: 3 of 20
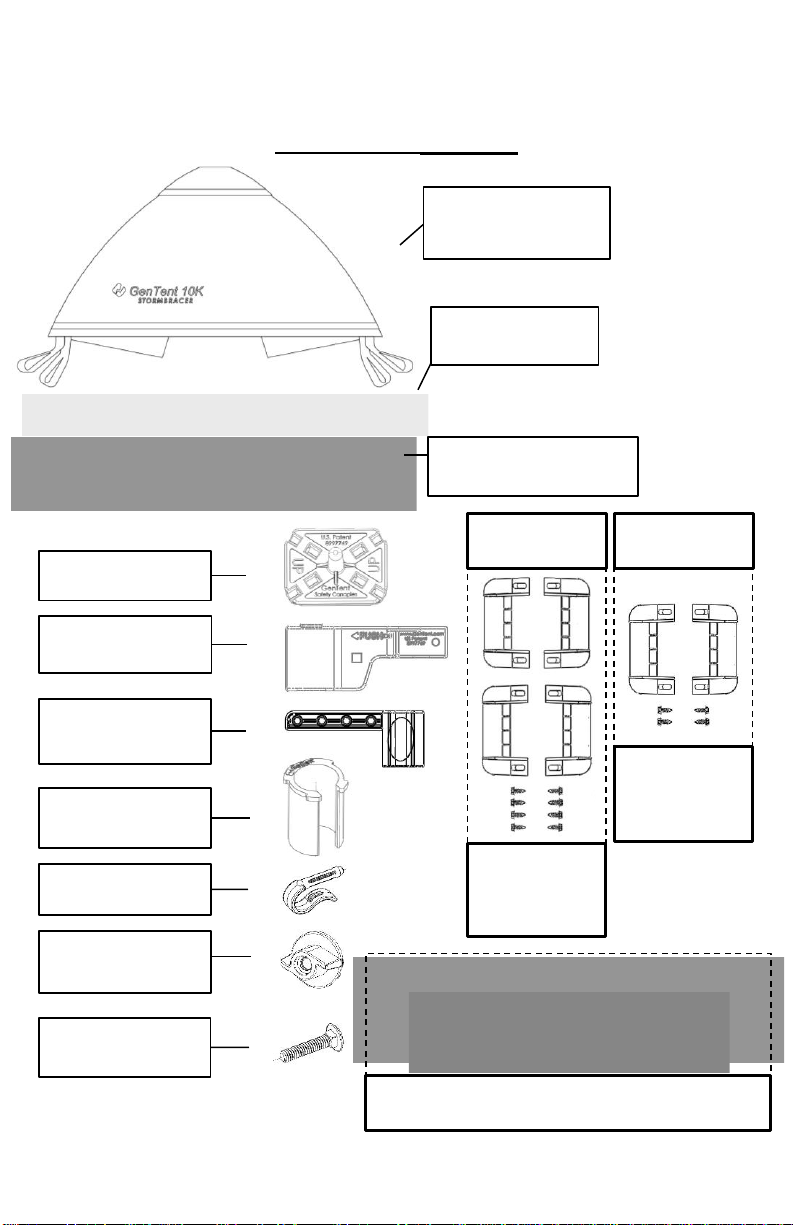
Copyright © 2020 GenTent® Safety Canopies, LLC. Illustrations by Robert Ross, Fine Products, Inc. All Rights Reserved V01012020
IMPORTANT PRODUCT SAFETY
Please review these important safety warnings:
WARNING:
NEVER block or cover the generator exhaust muffler in any way. If the exhaust blows
directly on the GenTent canopy, it is installed incorrectly.
WARNING:
NEVER use the GenTent on a generator whose muffler is openly exposed at the top of
the generator. These generators are disqualified and VOID the WARRANTY of the
GenTent.
WARNING:
NEVER use the GenTent on a generator on a moving vehicle or trailer.
WARNING:
ALWAYS shut generator off before any fueling or maintenance procedures.
WARNING:
NEVER position the GenTent refueling door on the same side of the generator as the
exhaust muffler. Spilled gasoline can result in fire. Always use a funnel while refueling.
CAUTION:
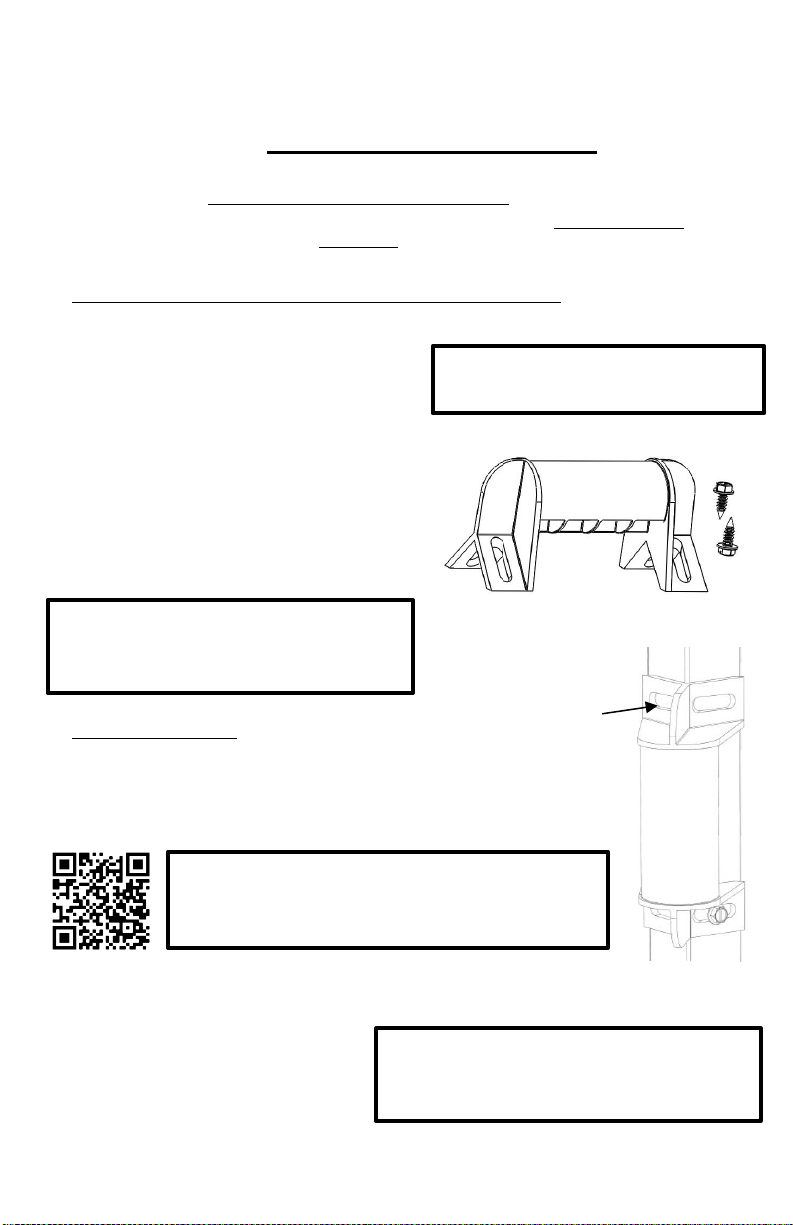
DO NOT pull on the GenTent top cap open corners.
CAUTION:
ALWAYS grasp frame rods firmly during installation to avoid the whipping motion that
can occur if a bent frame rod is mistakenly released.
CAUTION:
AVOID using your portable generator in forecast winds above 70mph.
IMPORTANT OPERATING NOTES
Please review these important operating notes:
NOTE:
Should the GenTent cover block pull starter, release the elastic straps on the pull starter
side and temporarily lift GenTent canopy out of the way.
NOTE:
When using GenTent during snowstorms, periodically brush away any accumulation that
blocks the top vent or surrounds the generator.
NOTE:
The bottom trim of the canopy should align at or slightly below where the fuel tank
connects to the frame. This will prevent pooling water on the fuel tank and potential
drippage toward the outlets. The electrical apron will cover down to the top of the
clamp which should be positioned below the lowest electrical outlet.
NOTE:
Should generator handle cause significant stretching of the elastic straps when
extended, release the elastics straps on the handle side of the generator before
deploying generator handles. Once the generator is in the desired position, lower the
handle, and refasten the elastic straps.