Geomagic Sensable Phantom Omni Application guide

Omni
Device Guide

Copyright Notice
©1993-2013. Geomagic, Inc. All rights reserved. Produced in the USA.
Except as permitted by license, no part of this publication may be reproduced, stored in a retrieval system, or
transmitted, in any form or by any means electronic, mechanical, recording, or otherwise, without prior written consent
of Geomagic, Inc.
Trademarks
Geomagic, OpenHaptics, Phantom, Phantom Desktop, Phantom Omni, Sensable, and Sensable Technologies, Inc. are
trademarks or registered trademarks of Geomagic, Inc. Other brand and product names are trademarks of their
respective holders.
For the most up-to-date trademark information, visit www.geomagic.com.
Warranties and Disclaimers
Geomagic does not warrant that this publication is error free. This publication could include technical or typographical
errors or other inaccuracies. Geomagic may make changes to the product described in this publication or to this
publication at any time, without notice.
Hardware usage guidelines are provided to assist the user in protecting the effectiveness and life of the device. They
are not intended as recommendations for the prevention of repetitive stress injury, carpal tunnel syndrome or any other
conditions, injuries or disorders; users should consult their own physicians. By using the Phantom device, the user
acknowledges and agrees that Geomagic shall have no liability for any disorder, condition or injury arising from any
use of the device.
Warning Do NOT open the Phantom device. Attempting to open or repair the device by anyone other than a
certified authorized service center voids the manufacturer warranty and hardware maintenance contract.
Questions or Comments
If you have any questions for our technical support staff, please contact us at SensableSupport@geomagic.com. You
can also phone 1-888-736-7225 (U.S.A. only) or 1-781-939-7444 (International).
If you have any questions or comments about the documentation, please contact us at
SensableDocumentati[email protected].
P/N - 02495 R10: 2/25/13
Geomagic, Inc
430 Davis Drive, Suite 300
Morrisville, NC 27560
www.geomagic.com

Omni Device Guide
Contents
Preface.............................................................................................. i
About this Guide .................................................................................................................i
Typographical Conventions ................................................................................................i
Chapter 1 Getting Started............................................................................. 1-1
Contents of the Shipping Box ........................................................................................ 1-1
The Phantom Omni Haptic Device ................................................................................ 1-2
System Requirements ..................................................................................................... 1-2
Proper Handling and Positioning of the Phantom Omni Device ................................... 1-3
Chapter 2 Installing the Phantom Omni Device .......................................... 2-1
Installing the Phantom Device Drivers .......................................................................... 2-1
Connecting the Phantom Omni Device .......................................................................... 2-1
Run Phantom Test to Verify Setup ................................................................................ 2-4
Chapter 3 Using the Phantom Omni Device ............................................... 3-1
Working in 3D Space ..................................................................................................... 3-1
Physical Limits of the Device ........................................................................................ 3-1
Appendix A: Troubleshooting .......................................................................... A-1
Appendix B: Customer Support .......................................................................B-1
Appendix C: Regulatory Notices ...................................................................... C-1
Appendix D: Configuring Multiple Devices ..................................................... D-1
Appendix E: Phantom Omni Re-Packaging Instructions ............................... E-1
Appendix F: Device Specifications .................................................................. F-1

Omni Device Guide

Omni Device Guide
PREFACE
Preface
About this Guide
The Phantom Omni® Device Guide describes the process of installing the required device
drivers for your new Phantom Omni haptic device and connecting the hardware device to
your computer. You will also find information on how to use the device and other
information about the device.
For the most current device information please visit our website at www.geomagic.com.
We've worked extensively to ensure that the Phantom Omni device and device drivers
install and work smoothly. If you experience any problems in the installation or use of
your device, please contact Customer Support (see inside cover for contact information).
Please note, if you are installing your device on a supported non-Microsoft® Windows
OS, you will find additional information in a separate document that shipped with your
software product.
Typographical Conventions
This guide uses the following typographical conventions:
Convention Description Example
Italics First use of a new term; reference
to another document or file.
A Vo x e l is...; see the User
Manual.
Bold Keywords, actual user input, or
examples.
Click Ok.
Greater Than (>) Indicates a menu pick, as in
“select Options from the Tools
menu”.
Tools>Options

ii Omni Device Guide
PREFACE

Omni Device Guide 1-1
1
Getting Started
This guide covers the currently shipping Phantom Omni haptic device. The information
contained in this manual was current at the time of publication. Visit www.geomagic.com
for the latest information.
This chapter describes the following:
• The contents of the shipping box
• The Phantom Omni haptice device
• System Requirements
• The proper handling of the Phantom Omni haptic device
Contents of the Shipping Box
If you are purchasing a Phantom Omni device for the first time, in your shipping box you
should find the following:
•The Phantom Omni haptice device and detachable stylus: The Phantom device
uses high-fidelity force feedback to make it possible to touch and manipulate virtual
objects.
•The Phantom Omni Device Guide: Describes the process of connecting the haptic
device as well as how to work with the device including proper handling,
troubleshooting, and device specifications.
•The Phantom Device Driver Installation Guide: Describes the process of installing
the device drivers.
• FireWire® Cable: This IEEE-1394a compliant six pin to six pin FireWire cable is
used to connect the Phantom Omni device to the IEEE-1394a compliant six pin
FireWire port on your computer.
•Universal Power Supply: The power supply can be used on any standard circuit,
using the supplied power cord.
•Power Cord: The power cord connects the Universal Power Supply to the wall outlet.
If any items are missing, please call Customer Support at 1-888-736-7225.

1-2 Omni Device Guide
GETTING STARTED
The Phantom Omni Haptic Device
The Phantom Omni enhances productivity and efficiency by enabling the most intuitive
human/computer interaction possible, the ability to solve problems by touch.
The Phantom Omni model is the most cost-effective haptic device available. The Phantom
Omni system’s high fidelity force feedback senses motion in 6 degrees of freedom
providing the best, most realistic 3D Touch sensation for any application. You can feel the
point of the stylus in all axes, and track its orientation (pitch, roll and yaw). The Phantom
Omni’s portable design, compact footprint, and IEEE-1394a FireWire port interface
ensure quick installation and ease-of-use.
Features
• Dexterous Serial manipulator design
• Six degree-of-freedom positional sensing
• Three degree-of-freedom force feedback
• Portable design and compact footprint for workplace flexibility
• Compact workspace for ease-of-use
• Comfortable stylus with textured paint for long term use and secure grip
• Removable stylus for end-user customization
• Two integrated momentary switches on the stylus for ease of use and end-user
customization
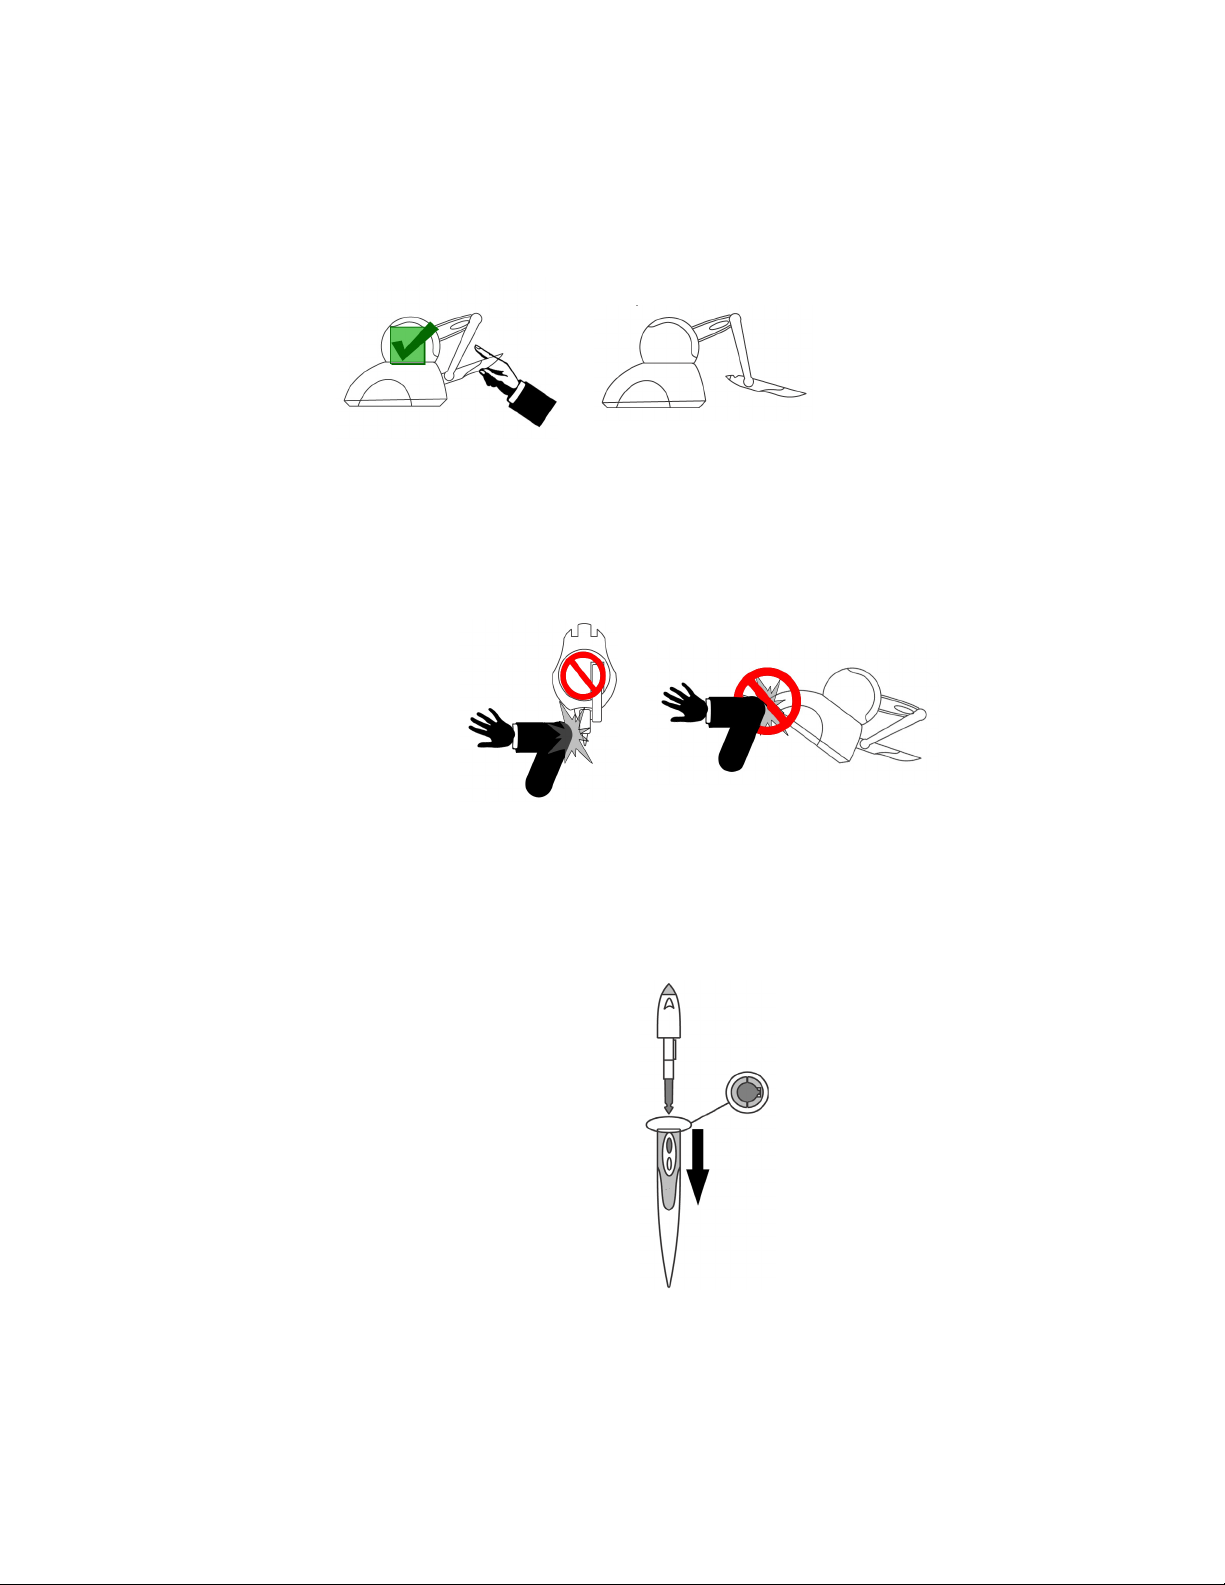
• Stylus-docking inkwell for automatic workspace calibration
• Constructed of metal components and injection-molded plastics
• FCC, CE and RoHS Certified
System Requirements
The Phantom Omni requires certain hardware and software components to be able to
function properly as a real-time streaming device. This section describes the requirements
for operating the Phantom Omni haptic device.
Note Visit www.geomagic.com to get the latest and most complete system
requirements information.
• An Intel® processor based personal computer (A minimum of Pentium® V class
processor is recommended) or select personal computer.
• IEEE-1394a-2000 compliant FireWire® port.
• Windows XP, Windows 7, or Windows 8.
• A hard drive with 512 MB of disk space.
• There are no specific memory requirements to run the haptic device; however, a
minimum of 1 GB RAM is recommended for overall system performance. Any haptic
application that uses the Omni device will have additional memory requirements.

Omni Device Guide 1-3
GETTING STARTED
Proper Handling and Positioning of the Phantom Omni Device
• The most current version of the Phantom Device driver (PDD). See the Phantom
Device Drivers Installation Guide for specific PDD requirements.
• Supplied 6-6 pin FireWire cable. Laptop Users please note that we recommend using
a 6-6 pin cable and add-in card instead of 6-4 pin cable. See www.geomagic.com for
the latest information.
Proper Handling and Positioning of the Phantom Omni Device
Warning Gripping and lifting the Phantom Omni device improperly may
damage it. To reduce the risk of damage, please follow the instructions below.
Handling the Phantom
Omni Device
Calibrating the device: The Phantom Omni may need to be recalibrated from time to
time, particularly if it has lost power. To calibrate the device, place the stylus in the
inkwell and start your haptically enabled application. The indicator light in the inkwell of
the Phantom Omni device will be lit a steady blue when the device is properly calibrated.
Alternatively, you can use the Phantom Test application (Start>All Programs>Sensable.)
Lifting the device To properly lift the device grasp the base of the Phantom Omni unit on
both sides and lift as shown in the image below. DO NOT lift by grasping the stylus or
arm. The stylus is detachable by design. Lifting the unit by the stylus or arm could result
in severe damage to the device.
Position hands to securely fit the device.
Lifting the stylus out of the inkwell Grasp the end of the stylus and lift UP, to
disengage, and then OUT as show below in the image on the left. Do NOT attempt to pull
the stylus straight out as shown on the right.
Be sure to lift the stylus in a two step motion.

1-4 Omni Device Guide
GETTING STARTED
Proper Handling and Positioning of the Phantom Omni Device
Storing the stylus After the device is calibrated, the stylus may be kept in the inkwell or
left resting on the desk. Keep in mind that storing the stylus in the inkwell increases the
risk that the device will be knocked over or that the stylus will be damaged.
Stylus does not need to be stored in the inkwell.
Protecting the device from damage It is best to place the unit firmly on the desktop and
away from edges to reduce the risk of damage to the device from a direct, unintentional
elbow hit. The stylus is particularly vulnerable to sustaining damage when it is in the
inkwell.
To reduce the risk of damage, keep the device out of harms way. Pay extra attention if the
stylus is stored in the inkwell.
Reassembling the detachable stylus The stylus is detachable by design. Reassemble it
by aligning the blade on the shaft with the slot in the stylus and inserting it till it snaps in
place as shown in the image below.
Align the blade and shaft to reassmeble the stylus.

Omni Device Guide 1-5
GETTING STARTED
Proper Handling and Positioning of the Phantom Omni Device
Positioning the
Phantom Omni Device
The correct placement of the device will vary from one user to another. You may want to
experiment to find a placement that feels right for you.
• The device should be positioned so that you are comfortable when working with it.
• You should not feel any strain on your wrist or forearm when working with the
device.
• If you are left-handed, you may find it easier to work with the Omni placed to the left
of the keyboard.
• Remember to take breaks often to stretch your hands, wrists, and elbows.

1-6 Omni Device Guide
GETTING STARTED
Proper Handling and Positioning of the Phantom Omni Device

Omni Device Guide 2-1
2
Installing the Phantom Omni
Device
This chapter will describe, step by step, how to install the Phantom Omni haptic device.
The installation is done in two steps.
• Install the software, the Phantom Device Driver, that allows your computer to
communicate with the Phantom Omni device.
• Connect the hardware, the Phantom Omni device, to your computer and power
source.
Installing the Phantom Device Drivers
The Phantom Omni device communicates with the computer through the FireWire port.
To enable this, you must install a software driver, called the Phantom Device Drivers
(PDD), to control the communication.
Specific instructions for installing the PDD on Windows XP, Windows 7, and Windows 8
systems can be found in the Phantom Device Driver Installation Guide. For installation
instructions for other operating systems, see the additional documentation shipped with
your device or software product, or contact customer support
Note As with most other software packages, you must have administrator
privileges on the machine in order to install the system. If you are unfamiliar with
installing software or do not have administrator privileges, please have your
System Administrator execute these steps for you.
Connecting the Phantom Omni Device
In this section you will setup the Phantom Omni device and plug in all of the cables.
Note Exact appearance of your equipment may vary from that shown in the
figures.
1Restart your computer after installing the PDD if you have not already done so.
2Position the Phantom Omni device in your workspace, using both hands to grasp the
base of the device. See Proper Handling and Positioning of the Phantom Omni Device
for instructions on how to handle the device to reduce the risk of damage.

2-2 Omni Device Guide
INSTALLING THE PHANTOM OMNI DEVICE
Connecting the Phantom Omni Device
3Connect the FireWire cable.
4Connect the power supply as follows:
aInsert the round pin from the Sensable-supplied power supply into the back of the
Phantom Omni device, as shown in the image below.
Insert the FireWire cable plug correctly into the Phantom Omni device.

Omni Device Guide 2-3
INSTALLING THE PHANTOM OMNI DEVICE
Connecting the Phantom Omni Device
bPlug the power supply into an available AC outlet. (For 110 V the AC outlet must
be rated for at least 2 Amps; for 220 V AC, at least 1 Amp).
The power cables connected to the back of the Omni device.
cConnect the supplied FireWire cable into either of the two 6-pin FireWire ports
on the back of the Phantom Omni device.
dConnect the other end of the FireWire cable to the FireWire port on your
computer.
Warning Make sure the connector is facing in the correct orientation as shown
in the image above.
IMPORTANT
Sensable Technologies uses only FireWire components that meet or
exceed the IEEE 1394 implementation recommendations. Sensable
is not responsible for any damage that may result from using 3rd
party cables.

2-4 Omni Device Guide
INSTALLING THE PHANTOM OMNI DEVICE
Run Phantom Test to Verify Setup
5 For Windows® XP Users- After you have connected the Phantom Omni device to
your computer, the Microsoft “Found New Hardware Wizard” dialog will appear.
(This may take a few moments).
Continue as appropriate for your operating system:
6Select Install the software automatically (recommended) and click Next.
7When the Completing the Found New Hardware Wizard window opens, click
Finish to complete the install process.
Run Phantom Test to Verify Setup
In this section you will run the Phantom Test application to confirm that the device is
properly connected and installed.
1Select Start>All Programs>Sensable>Phantom Test.
2If the device is properly connected and installed, the Phantom Test application will
open and you will be in select mode. Gently move the Phantom arm and the Phantom
test application will synchronously display the movement in the display window.
If the device is not properly connected, you will receive the following:
“The Phantom device named ‘Default Phantom’
could not initialize properly.”
If you encounter this error message first check to see that the Omni is the selected
device in the Phantom Configuration tool. If you still encounter problems,
reconnect the device and try again.

Omni Device Guide 3-1
3
Using the Phantom Omni Device
This chapter will introduce you to working with the Phantom Omni haptic device and the
physical limits of the device’s range of motion. It is important to understand these physical
limitations so that you do not inadvertently damage the device by forcing it past its
designed limits.
Working in 3D Space
We have become so accustomed to using a mouse to move around a computer monitor that
we don’t think twice as we move our hand around a desk to move the cursor on the
computer screen. But there was a time not long ago when this seemingly simple task was
not second nature; some even found it challenging and were often frustrated as they
learned. If you are new to working in 3D digital space and haptics, working with the
Phantom Omni device may take a little getting used to. Understanding where objects are
in 3D space may take some practice before you are able to move and manipulate objects
with ease and certainty. Be patient with yourself.
Physical Limits of the Device
The Phantom Omni device has six degrees of motion provided by six axis points. All the
degrees of motion have physical limits. When you reach one of these limits you will feel a
sudden stop; this is the mechanical stop designed into the device. Forcing the device past
any of these stops risks damaging the device.
Take some time to become more familiar with the location of the mechanical stops of the
Phantom Omni before using the device by moving the device through its full range of
motion at each axis point.
1First make sure the device is not active; the inkwell should not be lit. If the inkwell is
lit, close any haptic applications you have open.
2Grasp the stylus as you would a pen, with the free end of the stylus (the eraser end of
a pencil) pointing toward you and the point of the stylus (the end connected to the
arm) pointing toward the unit. Using the following illustration as a guide, gently move
the stylus in all directions to feel each mechanical stop.

3-2 Omni Device Guide
USING THE PHANTOM OMNI DEVICE
Physical Limits of the Device
3Now, you will perform macro movements. That is, you will move the device at the
"body", "shoulder", and "elbow" of the Phantom Omni device.
Macro movements. Showing movement of the Phantom Omni arm and the body.
aStart with large-but gentle movements. See the Figure above. Beginning at the
top, move the arm of the device left/right. The body, sometimes referred to as the
turret, of the Phantom Omni device will pivot until is reaches a physical limit.
Again, do not try to force the device past any of the mechanical stops.
bNext, move the stylus up/down. The primary movement will happen in the
shoulder of the Phantom Omni device.
cNext move it in/out with the primary movement happening in the elbow. When
you reach a physical limit, you'll feel one of the device's mechanical stops. Don't
force the device past any of these stops.
Left/Right
Up/Down
In/Out

Omni Device Guide 3-3
USING THE PHANTOM OMNI DEVICE
Physical Limits of the Device
4Next you perform micro movements further down the haptic device, moving the
device at the stylus, as in the image above.
aHolding the stylus with one hand rotate left/right at the top of the yoke.
bNext pivot it up/down at the bottom of the yoke where it joins the stylus.
cFinally gently twist the stylus back/forth.
Micro movements.
Now you should have an understanding of the range of motion of the Phantom Omni
device at each axis point and where its limits are.
Warning ALWAYS work with the connected end of the stylus pointing away
from you. NEVER rotate the stylus with the point facing you.
Left/Right
Up/Down
Back/Forth

3-4 Omni Device Guide
USING THE PHANTOM OMNI DEVICE
Physical Limits of the Device
Table of contents
Popular Accessories manuals by other brands

Baumer
Baumer OM70-11216514 quick start guide

Cornelius
Cornelius Energize 1 HC Series Operator's manual

Panduit
Panduit Synapsense ThermaNode EZ installation manual

TrickleStar
TrickleStar SENSORCLICK 188LV-TFS-3F quick start guide

Booth
Booth BAR3 product manual

Tecnar
Tecnar accuraspray CS quick start guide