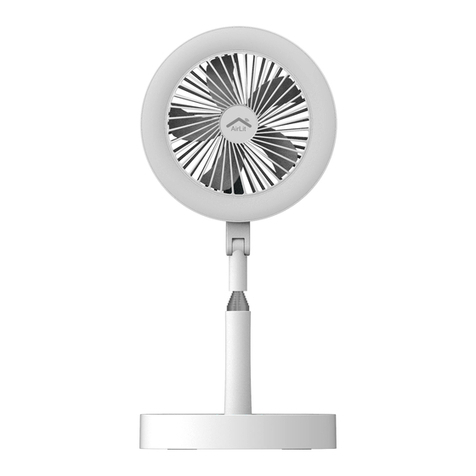
GeoSmartPro AirGo User manual

AirGo Smart Fan
User Manual
Carefully read this instruction manual before
switching on your AirGo Smart Fan for your
utmost safety.

CONTENTS
2
10. Four screws, four bolts, four washers.
9. Pedestal bar
6. Blade cap
3. Back grille
8. Base ring/ cap
5. Blade
2. Front grille
7. Base
4. Plastic grille nut
What’s in the box
1. Motor with control panel
Page 3-4 - Warnings and Cautions
Page 5-6 - AirGo Smart Fan Assembly
Page 7-8 - Operating Instructions
Page 9 - Cleaning, Maintenance and
Specifications
Page 10 Cleaning, Maintenance and
Storage
Page 11 - Warranty
Page 12-13 - Connect to the GeoSmartPro App

3
WARNINGS
AND
CAUTIONS
WARNINGS
- This appliance can be used by children aged from 8 years and above and persons
with reduced physical, sensory or mental capabilities or lack of experience and knowl-
edge if they have been given supervision or instruction concerning use of theappliance
in a safe way and understand the hazards involved.
- Ensure that the fan is switched off from the supply mains before removing the guard.
If the supply cord is damaged, it must be replaced by the manufacturer, its service
agent or similarly qualified persons in order to avoid a hazard.
- Never place the fan near any gas appliances, fire or flammable liquids.
- Never hit or shake the fan to prevent damage.
- Never cover or obstruct the air inlet or outlet to prevent overheating.
- Never spray water or place the fan near water to prevent electric shock.
- Make sure to have a professional technician, manufacturer or a service agent to re-
place a damaged power cord.
- Never share the power outlet with other appliances.
- Never connect or disconnect the power plug with wet hands to avoid electricshocks.
- Never put rods or objects into the opening of the unit.
- Never use an extension cord.

4
WARNINGS
AND
CAUTIONS
CAUTIONS
- Be sure the fan is placed on a stable surface when operating to avoidoverturning.
- The fan must not be used if the guards are not fastened according toinstructions.
- The appliance is for indoor use only.
- Do not plug into the power socket before installation is complete.
- Never insert fingers, pencils, or any other object through the guard when fanis
running.
- Power plug must be removed from power socket before cleaning, servicing,
maintenance and move from one location to another.
- The fan should not be placed in a damp place or where humidity is high (such asa
bathroom).
- Keep the unit at least 1 metre away from electric appliances such as TV’s andradios,
to avoid electromagnetic interference.
- Do not expose the unit under direct sunlight to avoid surface colour fading.
- Do not tilt the unit for more than 35 degrees or upside down while transporting.
- Place the unit on a flat surface with less than 5 degree inclination.
- Do not use chemical solvents (i.e. Benzene, alcohol-grazer) to clean the unitsurface
to avoid scratching and damaging the surface.
- Do not use your appliance with an extension cord unless it has been checkedand
tested by a qualified electrician or electrical supplier.
- Children should be supervised to ensure that they do not play with the appliance.

5
AIRGO
SMART FAN
ASSEMBLY
1. Assemble the tube on
the base by tightening
the four screws and
inserting the base ring
down over the round
base.
2. The height of the fan
can be adjusted by
loosening the height
adjustment ring.
Raise or lower the
fan and carefully
tighten the screw.
3. Insert the fan body
in the main tube
and tighten the
screw to secure the
connection tube.

6
AIRGO
SMART FAN
ASSEMBLY
4. Loosen the nut (5) of the motor
(8). Firmly mount the rear grille
(6) on the motor by matching
3 mounting pads. Tighten the
nut (5) on the back grid so as to
block the grille against the
motor.
Mount the fan blades (4) on the
axis (7). Firmly secure them
with the reversed nut (3). Atthis
point, the blades should turn
freely without touching the nut of
the rear grille.
Loosen the locking strapping clip
(2a) Put the front grille on the
rear grille and tighten the locking
screw.

7
OPERATING
INSTRUCTIONS
Warning: Make sure the fan is fully assembled (and
the grilles are in place and locked) before switching
on.
1. Place your fan on a level and dry surface.
2. Plug the fan into a mains socket of suitable
voltage and frequency (see Technical Specifications
for details)
3. Touch ON/OFF button to turn on the fan.
4. Choose the desired SPEED and MODE using
the Control Panel or Remote Control buttons.
5. Use the TIMER button to set thedesired
turn-off time from 1-8 hours
6. Use the SWING button to start or stop
oscillation.
7. Tilt Adjustment: To adjust the tile, hold the
Main Body with on hand, push the Motor Housingto
desired vertical position with the other hand.
Caution: The fan should be always be switched off
when making this adjustment.

8
OPERATING
INSTRUCTIONS
Swing:
Press the Swing button to turn on oscillation. The swing
indicator turns on. Press again to turn off oscillation.
Speed:
Press the Speed button to change fan speed. There are 3
possible speeds: Low/Medium/High. The corresponding
indicator turns on.
Mode:
NORM mode: The fan operates in the constant speed set
using the Speed button.
SMRT mode: The unit simulates a natural breeze.
NGHT mode: The unit simulates a gentle breeze suitable
for night-time use.
Timer:
Press this button to set the turn-off delay for the unit.
The turn-off delay can be set in two hour increments from
2 to 8 hours. There are 4 indicators 2H,4H,6H and 8H.

9
CLEANING,
MAINTENANCE AND
Model No. -- AGF01UK
Power supply -- 220-240V~50-60Hz
Power -- 55W
Net weight -- 5.6kg
Gross weight -- 6.5kg
Gross dimension --(W x H x D) 480*200*420 mm
Warranty -- 2 years
SPECIFICATIONS
Warning : Always unplug the appliance before cleaning.
1. Always disconnect the appliance from the mains by switching itoff
and removing the plug from the power outlet before cleaning.
2. To clean the outer surface of the appliance, use a lightly damp
cloth. Then, dry it thoroughly with a soft, dry cloth before usingagain.
3. Do not allow water to penetrate the motor during cleaning.
4. Do not reconnect the unit until it is completely dry.
Product Specifications

10
CLEANING,
MAINTENANCE AND
STORAGE
Warning : Always unplug the appliance before cleaning.
Idea
Your AirGo Smart
Fan can also be used
during the cold winter
season to circulate
warm air throughout
your home.
Fan Blade Cleaning
1. To access the fan blade, remove the front grill and blade cap.
2. Clean the fan blade, front and rear grills with a soft moist cloth.
3. Place the fan blade back in its place, tighten the blade cap and securely fasten the
front grill (see Assembly Instructions to ensure the fan blade, front and rear grills are
assembled properly).
Fan Head, Base and Pole Cleaning
Using a soft, moist cloth with or without a mild soap solution carefully clean the fan
base, pole and head. Please use caution around the motor housing area.
Important: Do not allow the motor or other electrical components to be
exposed to water.
Fan Storage
Your AirGo Smart Fan can be stored in the off season, either partially disassembled or
assembled. It is important to keep it in a safe and dry location.
•If stored disassembled, we recommend using the original (or appropriately sized)box.
•If stored assembled or partially assembled, remember to protect the fan headfrom
dust and to unplug it while not in use.

11
WARRANTY
Please keep your receipt as this will be required for any claims under this warranty.
AirGo Smart Fan’s warranty is for 2 years from the date of purchase as described
in this document.
During this warranty period, if in the unlikely event the AirGo Smart Fan no longer
functions due to a design or manufacturing fault, please take it back to the place of
purchase, with your till receipt and a copy of this warranty.
The rights and benefits under this warranty are additional to your statutory rights, which
are not affected by this warranty. Only GeoSmartPro Ltd. (“GeoSmartPro”) has the right
to change these terms.
GeoSmartPro undertakes within the warranty period to repair or replace the appliance,
or any part of appliance found to be not working properly free of charge provided that:
•you promptly notify the place of purchase or GeoSmartPro Ltd. of the problem;and
•the appliance has not been altered in any way or subjected to damage, misuse, abuse,
repair or alteration by a person other than a person authorised by GeoSmartPro Ltd.
Faults that occur through; improper use, damage, abuse, use with incorrect voltage,acts
of nature, events beyond the control of GeoSmartPro, repair or alteration by a person
other than a person authorised by GeoSmartPro or failure to follow instructions for use
are not covered by this warranty. Additionally, normal wear and tear, including, but not
limited to, minor discoloration and scratches are not covered by this warranty.
The rights under this warranty shall only apply to the original purchaser and shall not
extend to commercial or communal use. If your appliance includes a country-specific
warranty insert please refer to the terms and conditions of such warranty or contact your
local authorised dealer for more information.
Waste electrical products should not be disposed of with Household waste.
Please recycle where facilities exist.

12
CONNECT TO THE
GEOSMARTPRO
APP
1. Download the
GeoSmartPro app
from the App Store
or Google Play.
Registration:
Enter the register/login interface,
input the phone number to
receive a verification code to
register by inputting your email
address.
2.

13
CONNECT TO THE
GEOSMARTPRO
APP
3. Connection:
1. Preparation: Connect your AirGo fan to
your electricity outlet, press the “on/off “
button and then the “mode” button for 5
seconds until the indicator rapidly blinks,
then click on the confirm button.
2. You will then need to enter your wifi
password to connect your phone the the
wifi router and connect to the internet.
3. Once you’ve entered all the details,
you should see a
‘Connecting’ page, where your phone
will try to link up to your
AirGo smart fan through the wifi network.
4. Wait until your configuration is
successful, then tap ”Complete” &
Enjoy your AirGo Smart Fan!

Manuel de l'utilisateur du
ventilateur intelligent AirGo
Lisez attentivement ce manuel d’instruction avant d’allumer votre
ventilateur intelligent AirGo pour une sécurité maximale.

CONTENTS
2
Page 3-4 - Avertissements et précautions
Page 5-6 - Ensemble ventilateur AirGo Smart
Page 7-8 - Manuel d'utilisation
Page 9 - Nettoyage, maintenance et
spécifications
Page 10 - Nettoyage, maintenance et
stockage
Page 11 - Garantie
Page 12-13 - Connexion à l'application
GeoSmartPro
Qu'y a-t-il dans la boite
1. Moteur avec tableau de commande 6. Lame Tasse
2. Grille Avant 7. Base
3. Grille arrière 8. Anneau de base / casquette
4. Plastic grille nut 9. Barre de piédestal
5. Lame 10. Quatre vis, quatre boulons,
quatre rondelles.

3
AVERTISSEMENTS
ET Pr
é
cautions
AVERTISSEMENTS
- Cet appareil peut être utilisé par des enfants âgés de 8 ans et plus et des personnes
ayant des capacités physiques, sensorielles ou mentales réduites ou qui manquent
d'expérience et de connaissances si elles ont reçu une surveillance ou des instructions
concernant l'utilisation de l'appareil de manière sûre et comprendre les risques
encourus.
- Assurez-vous que le ventilateur est débranché du secteur avant de retirer la protection.
Si le cordon d'alimentation est endommagé, il doit être remplacé par le fabricant, son
agent de service ou des personnes de qualification similaire pour éviter tout risque.
- Ne placez jamais le ventilateur à proximité d'appareils à gaz, de flammes ou de liquides
inflammables.
- Ne jamais frapper ou secouer le ventilateur pour éviter des dommages.
- Ne jamais couvrir ni obstruer l'entrée ou la sortie d'air pour éviter une surchauffe.
- Ne vaporisez jamais d'eau et ne placez pas le ventilateur près de l'eau pour éviter tout
choc électrique.
- Assurez-vous de faire appel à un technicien professionnel, à un fabricant ou à un agent
de service pour remplacer un cordon d'alimentation endommagé.
- Ne partagez jamais la prise de courant avec d'autres appareils.
- Ne jamais brancher ou débrancher le cordon d'alimentation avec les mains mouillées
pour éviter les chocs électriques.
- Ne placez jamais de tiges ou d'objets dans l'ouverture de l'appareil.
- - N'utilisez jamais de rallonge.

4
AVERTISSEMENTS
ET Pr
é
cautions
Précautions
- Assurez-vous que le ventilateur est placé sur une surface stable lors de son utilisation
pour éviter tout renversement.
- Le ventilateur ne doit pas être utilisé si les protections ne sont pas fixées conformément
aux instructions.
- Cet appareil est destiné à une utilisation en intérieur uniquement.
- Ne branchez pas le cordon d'alimentation avant la fin de l'installation.
- N'insérez jamais les doigts, les crayons ou tout autre objet à travers le protecteur
lorsque le ventilateur fonctionne.
- La prise d'alimentation doit être débranchée de la prise de courant avant le nettoyage, la
maintenance, l'entretien et le déplacement d'un site à un autre.
- Le ventilateur ne doit pas être placé dans un endroit humide ou dans des endroits très
humides (comme une salle de bain).
- Maintenez l’appareil à au moins 1 mètre des appareils électriques tels que les
téléviseurs et les radios pour éviter les interférences électromagnétiques.
- N'exposez pas l'appareil à la lumière directe du soleil pour éviter toute décoloration de la
surface.
- N'inclinez pas l'appareil à plus de 35 degrés ou à l'envers pendant le transport.
- Placez l'appareil sur une surface plane avec une inclinaison inférieure à 5 degrés.
- N'utilisez pas de solvants chimiques (benzène, alcool pour alcool) pour nettoyer la
surface de l'appareil afin d'éviter de rayer et d'endommager la surface.
- N'utilisez pas votre appareil avec une rallonge à moins qu'il n'ait été vérifié et testé par
un électricien qualifié ou un fournisseur d'électricité.
- - Les enfants doivent être surveillés pour s'assurer qu'ils ne jouent pas avec l'appareil.

5
AIRGO
SMART FAN
ASSEMBLAGE
Assemblez le tube
sur la base en
serrant
les quatre vis et
l'insertion de la
bague de base
vers le bas sur la
base ronde.
La hauteur du
ventilateur peut être
ajustée par
desserrer la bague de
réglage en hauteur.
Soulevez ou abaissez
le ventilateur et serrez
soigneusement la vis.
Insérer le corps du
ventilateur dans le tube
principal
et serrez la vis pour fixer
le tube de
raccordement.
1
2
3

6
AIRGO
SMART FAN
ASSEMBLAGE
Desserrer l'écrou (5) du moteur
(8). Fixez fermement la grille arrière
(6) sur le moteur en faisant
correspondre 3 patins de fixation.
Serrer le
écrou (5) sur la grille arrière pour
bloquer la grille contre le moteur.
Montez les pales du ventilateur (4)
sur l'axe (7). Fixez-les fermement
avec l'écrou inversé (3). À ce
stade, les pales doivent tourner
librement sans toucher l'écrou de la
grille arrière.
Desserrez le clip de verrouillage (2a).
Placez la grille avant sur la grille
arrière et serrez la vis de verrouillage.
Table of contents
Languages:
Other GeoSmartPro Fan manuals
Popular Fan manuals by other brands

Mellerware
Mellerware 3 5 8 3 05 0 W instructions

Greentek
Greentek LCH-4E Installation, operation and maintenance manual

Lincat
Lincat SV1212 User and installation instructions

Ortech
Ortech Premium Series instruction manual

Vent-Axia
Vent-Axia SOLO Plus Installation and wiring instructions

CSL
CSL 303355/20180830HK014 user manual