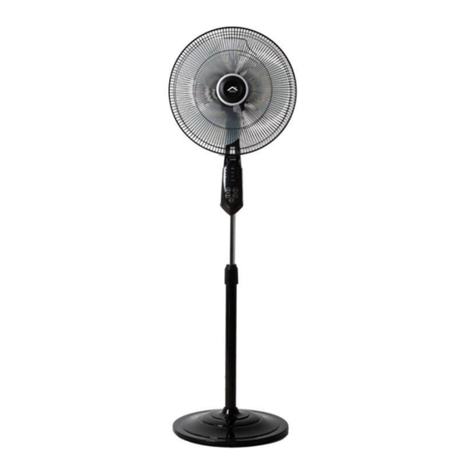
GeoSmartPro AirLit User manual

AirLit
User Manual
Carefully read this instruction manual before
switching on your AirLit for your utmost
safety.

CONTENTS
2
Warnings and Cautions …Page 4-6
AirLit Assembly ...Page 7-10
Operating Instructions ...Page 11-15
Cleaning, Maintenance and
Specifications ...Page 16-17
Warranty …Page 18
App setup ...Page 19-20
Troubleshoot ...Page 21-23

CONTENTS
3
What’s in the box
AirLit
Mirror
Phone holder
Manual
Charging cable

4
WARNINGS
AND
CAUTIONS
WARNINGS
- This appliance can only be used by children aged from 9 years and above and
persons with reduced physical, sensory or mental capabilities or lack of experience
and knowledge if they have been given supervision or instruction concerning use of
the appliance in a safe way and understand the hazards involved.
- Ensure that the fan is switched off unplugged and detached from base unit
before removing the guard.
- Do not look into the light from less than 40cm distance. This may cause eye damage.
- Never leave AirLit unattended or cover it while plugged in or in use.
- Only operate with USB plug 5V/2A and ensure the voltage is consistent before use.
- Never place the unit near any gas appliances, fire, or flammable liquids.
- Fire may cause the battery to explode.
- Never hit or shake the unit to prevent damage.
- Never cover or obstruct the air inlet or outlet to prevent overheating.
- Never spray water or place the unit near water to prevent electric shock.
- Make sure to have a professional technician, manufacturer, or a service agent
to re- place a damaged power cord.
- Never share the power outlet with other appliances.
- Never connect or disconnect the power plug with wet hands to avoid electric shocks.
- Never put rods or objects into the opening of the unit.
- Never insert any object or block the power inlet/outlet

5
WARNINGS
AND
CAUTIONS
CAUTIONS
- Be sure the unit is placed on a stable surface when operating to avoid overturning.
- The unit must not be used if the guards are not fastened according to instructions.
- The appliance is for indoor use only.
- Do not plug into the power socket before installation is complete.
- Avoid sudden and rapid unplugging.
- Never insert fingers, pencils, or any other object through the guard when
fan is running.
- Power plug must be removed from power socket before cleaning,
servicing, maintenance and when moving from one location to another.
- The unit should not be placed in a damp place or where humidity is high (such
as a bathroom).
- Keep the unit at least 1 metre away from electric appliances such as TV’s and
radios, to avoid electromagnetic interference.
- Do not expose the unit under direct sunlight to avoid surface colour fading.
- Handle with care while transporting and moving from one location to another.
- Place the unit on a flat surface with less than 5-degree inclination.
- Do not use chemical solvents (i.e. Benzene, alcohol-grazer) to clean the unit
surface to avoid scratching and damaging the surface.
- Do not use your appliance with an extension cord unless it has been checked
and tested by a qualified electrician or electrical supplier.
- Do not dismantle or disassemble the product yourself for repair or use against
its original intended purpose. This voids the warranty and removes
manufacturer from liability for damage.

6
WARNINGS
AND
CAUTIONS
- Ensure that the phone attachment is clean and securely attached to avoid any
damages to your phone
- Do not attach an object to the mobile holder over 300 grams/10.6 Oz.
- Allow the product to cool off after use.
- It is advised to keep the product clean and regularly maintain it.
- Keep away from reach of children or keep children under supervision to
ensure that children do not play with the appliance.
- For the purposes of recharging the battery, only use the detachable supply
unit provided with this appliance
- Cleaning and user maintenance shall not be made by children without
supervision
- This appliance contains batteries that are only replaceable by skilled persons.
- The battery must be removed from the appliance before it is scrapped.
- The appliance must be disconnected from the supply mains when removing
the battery.
- The battery is to be disposed of safely.

7
AIRLIT
ASSEMBLY
Ring light
Fan grille
Left and right rotation
Top and bottom joint
Telescopic pole
Operational button
Anti-slip silicon pads
Charging indicator
On/Off
USB Output
Type-C
charging
port
Telescopic pole lock
WIFI On/Off/Reset

8
AIRLIT
ASSEMBLY
28mm
38mm
440mm
200mm
145.5mm
200mm
22mm
1000mm

9
AIRLIT
ASSEMBLY
2. Rotate 22° and ensure the unlock
icon is in line with the lock symbol at
the base.
1. Insert unit into the base ensuring
the unlock icon is in line with the
unlock icon of the base.

10
AIRLIT
ASSEMBLY
1. Attach the mirror by
aligning it on to the centre of
your AirLit. Ensure the fan is
switched off when attaching
the magic mirror.
2. Loosen the bolt by rotating
anticlockwise and then press down
the two ends of the clip to attach
your phone holder onto the
telescopic pole of your AirLit.
Ensure that you rotate the bolt
clockwise.

11
OPERATING
INSTRUCTIONS
270º Left
and Right
180º Up
and Down

12
OPERATING
INSTRUCTIONS
120 min timer
Fan control
Light
control
30 min timer
Charging indicator
Power switch
On/Off
USB Output
5V1A
Type-C
Charging
port
2.0A
60 min timer
WIFI On/Off/Reset
2
5
6
3
1
4
7

13
OPERATING
INSTRUCTIONS
Wi-Fi pairing: Soft touch sensor
• Long press and hold the icon for 5 seconds to activate the Wi-Fi pairing. The flashing light of
the indicates that your AirLit is now ready to pair. The flashing light of your will change to
still once successfully paired.
Power switch: Button mode
• Click once to turn on your AirLit, the light on will indicate that your AirLit is now ready to use.
• Click once to turn off your AirLit, the light off on will indicate that your AirLit is now switched off
but connected to the Wi-Fi.
• Click the power button twice to turn off the device and disconnect it from the Wi-Fi.
Light controls only – Soft touch sensor
• Turn on your device following the steps in and press the icon once to turn on the light.
• Quick press the icon twice to switch between white light, cool light and warm light.
• Press and hold the icon for stepless dimming of all light modes. This will increase or decrease
the brightness to suit your needs.
• Press to switch off the light.
1
2
1

14
OPERATING
INSTRUCTIONS
Fan controls only – Soft touch sensor
• Turn on your device following the steps in and press the icon once to turn on the fan at
speed level 1.
• Pressing the icon 2nd time will increase the speed to level 2.
• Pressing the icon 3rd time will increase the speed to level 3.
• Pressing the icon 4th time will set the fan to Nature mode.
• Pressing the icon 5th time will turn it off.
Timing function – Soft touch sensor
• Timing function can be set for your AirLit while using it as a fan or light.
• To set the timing function, you must first turn on your desired function of Light/Fan.
• Press the icon to activate the 30min timer, while the light/fan is on; double tap the icon to
cancel the 30 min timer.
• Press the icon to activate the 60min timer, while the light/fan is on; double tap the icon to
cancel the 60 min timer.
• Press the icon to activate the 120min timer, while the light/fan is on; double tap the icon to
cancel the 120 min timer.
3
1
4
5
6

15
OPERATING
INSTRUCTIONS
Battery light indicator
• Low Battery: Red blinking
• Charging: Green blinking
• Fully Charged: Steady green (When unplugged, indicator turns into steady red)
• Discharging (in use/not connected to power): Steady red
7

16
CLEANING,
USES AND
SPECIFICATIONS
Technical Specification
Product name: AirLit
Product model: ALF01GB
Lamp bead chip: 2835 LED indicator
Brightness range: 10% -100% stepless dimming
Rated power: 6W (40 * 0.15W / LED module)
Colour rendering index: Ra90
Colour temperature range: 3000-5000K natural colour
Lighting level: no video flash / blue light reduction
Illumination: ≥350LM (centre illuminance 30MM distance test value)
Light power: 6W
Fan power: 4W
Wind speed: 1.8-4 m/s
Wind noise: 30-65db
Power input: Type-C 5V2A
USB charging output: 5V1A
Lithium polymer battery: 3.7V 10,000mah
Executive standard: GB 4706.27-2008

17
CLEANING,
USES AND
SPECIFICATIONS
Warning: Always unplug the appliance before cleaning.
1. Always disconnect the appliance from the mains by switching it off and
removing the plug from the power outlet before cleaning.
2. To clean the outer surface of the appliance, use a lightly damp cloth. Then,
dry it thoroughly with a soft, dry cloth before using again.
3. Rotate the front grille clockwise to release the lock to remove the front grille
for cleaning. Remember to attach it back and lock it by rotating it anti-clockwise
prior to using your AirLit.
4. Do not allow water to penetrate the motor during cleaning.
5. Do not reconnect the unit until it is completely dry.
Rotate the front
grille clockwise to
unlock and remove
for cleaning.
Rotate the front
grille anti-
clockwise to lock
and secure before
use.

18
WARRANTY
Please keep your receipt as this is mandatory for any claims under this warranty. AirLit has a warranty
for 12 months from the date of purchase as described in this document. (24 months where
applicable by law)
During this warranty period, if in the unlikely event the AirLit no longer functions due to a
manufacturing fault, please contact us at [email protected] with your proof of purchase
and details of the GeoSmartPro product and the faults. The rights and benefits under this
warranty are additional to your statutory rights, which are not affected by this warranty. Only
GeoSmartPro Ltd. (“GeoSmartPro”) has the right to change these terms. GeoSmartPro
undertakes within the warranty period to repair or - replace the appliance at its discretion with
same or a similar functionality GeoSmartPro product, or any part of appliance found to have a
manufacturing fault free of charge provided that:
• you promptly notify GeoSmartPro Ltd. of the problem with proof of purchase; and
• the appliance is within the warranty period and has not been altered in any way or subjected to
damage, misuse, abuse, repair or alteration by a person other than a person authorised by
GeoSmartPro Ltd. Faults that occur through; improper use, accidental damage, abuse, use with
incorrect voltage, acts of nature, events beyond the control of GeoSmartPro, repair or alteration by a
person other than a person authorised by GeoSmartPro or failure to follow instructions for use are not
covered by this warranty. Additionally, normal wear and tear, including, but not limited to, minor
discoloration and scratches are not covered by this warranty.
The rights under this warranty shall only apply to the original purchaser and shall not extend to
commercial or communal use.
Waste electrical products should not be disposed of with Household waste. Please recycle where
facilities exist.

19
CONNECT TO THE
GEOSMARTPRO
APP
Download the GeoSmartPro
app from the App Store or
Google Play.
Registration:
Enter your email address on the
registration interface to receive a
verification code. Enter the code and
follow the instructions displayed.
2.
It is highly advised to ensure
your router is set to 2.4Ghz and the
5Ghz is temporarily turned off to
pair your AirLit.
1.

CONNECT TO THE
GEOSMARTPRO
APP
20
Connection:
1. Preparation: Plug your AirLit to charge and turn it
on by pressing the “On/Off ”button. Now press and
hold the “ ” button for 5 seconds until the “ ”
rapidly blinks. Click “ ” located on the top right-
hand corner of GeoSmartPro’s app homepage.
2. The option to add AirLit will automatically appear. If not,
click on the AirLit icon to connect. When prompted, enter
your Wi-Fi details and click next. Confirm the “ ” is
rapidly blinking.
3. Once you’ve entered all the details, the app will
now scan to add your AirLit and connect it through
your Wi-Fi network for remote access.
4. Wait until your configuration is successful, then
tap ”Complete” & Enjoy your AirLit!
Remember to turn on and
give permission of your location,
Bluetooth and Wi-Fi settings to the
GeoSmartPro app.
3.
Table of contents
Languages:
Other GeoSmartPro Fan manuals
Popular Fan manuals by other brands

Mellerware
Mellerware 3 5 8 3 05 0 W instructions

Greentek
Greentek LCH-4E Installation, operation and maintenance manual

Lincat
Lincat SV1212 User and installation instructions

Ortech
Ortech Premium Series instruction manual

Vent-Axia
Vent-Axia SOLO Plus Installation and wiring instructions

CSL
CSL 303355/20180830HK014 user manual