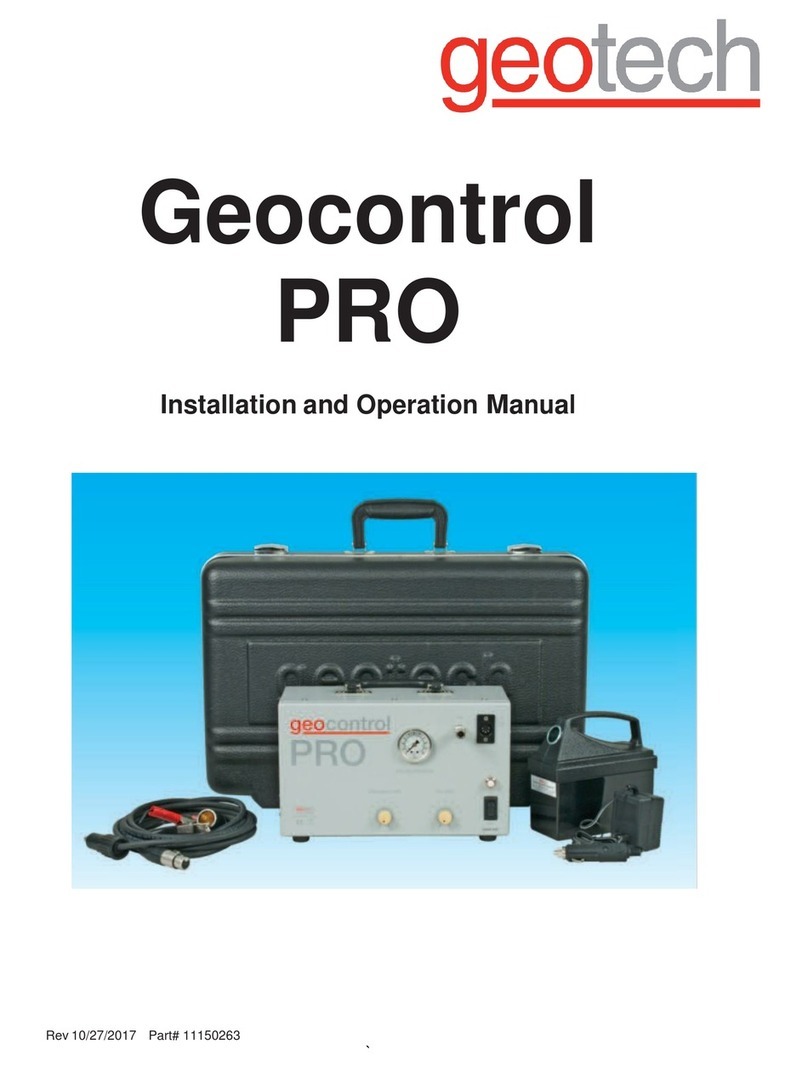
Geotech Geocontrol PRO User manual

Rev. 1 03/18/04 Part # 11150263
Geocontrol
PRO
INSTALLATION AND OPERATION MANUAL

1
TABLE OF CONTENTS
Chapter 1: System Description ................................................................ p. 05
Function and Theory............................................................................. p. 05
Chapter 2: System Installation................................................................. p. 06
Chapter 3: System Operation .................................................................. p. 07
Chapter 4: System Maintenance ............................................................. p. 08
Chapter 5: System Troubleshooting ........................................................ p. 09
Chapter 6: System Specifications............................................................ p. 10
Chapter 7: System Schematic ................................................................. p. 11
Chapter 8: Replacement Parts List.......................................................... p. 12
Warranty and Repair ................................................................................ p. 16

2
NOTE
DOCUMENTATION CONVENTIONS
This manual uses the following conventions to present information:
An exclamation point icon indicates a WARNING
of a situation or condition that could lead to
personal injury or death. You should not proceed
until you read and thoroughly understand the
WARNING message.
A raised hand icon indicates CAUTION information
that relates to a situation or condition that could
lead to equipment malfunction or damage. You
should not proceed until you read and thoroughly
understand the CAUTION message.
A note icon indicates NOTE information. Notes
provide additional or supplementary information
about an activity or concept.
WARNING
CAUTION

3
In order to ensure that your Controller has a long service life and
operates properly, adhere to the cautions below and read this manual
before use.
•Controller power input source must not exceed maximum ratings.
•Controller must be wired to a negative ground system.
•Controller may not operate properly with excess wiring not
supplied by manufacturer.
•Avoid spraying fluid directly at controller.
•Never submerge controller.
•Avoid pulling on wires to unplug controller wiring.
•Avoid using controller with obvious physical damage.
•To prevent controller damage, avoid dropping controller.

4
GEOCONTROL PRO
Figure 1

5
Chapter 1: System Description
Function and Theory
The Geocontrol Pro is a unique controller for operating down well bladder
sampling pumps. When an external 12 VDC power source is connected to
the controller, the internal compressor is capable of producing 100 psi. This
pressure allows the user to take samples from a depth of 200ft.
The controller offers a variable cycle timer for controlling the portable
compressor’s on time and off time. While the compressor is on, air is pushed
down well to the bladder pump compressing the internal bladder and
evacuating the liquid in the pump. When the compressor shuts off, the air
pressure in the pump exhausts out of the system, via the fill rate valve,
allowing liquids to enter the pump. The fill rate valve allows the user to
restrict the air exhaust from around the bladder.
NOTE: The fill rate valve is important for achieving a
desired filling rate of the down well bladder.

6
Chapter 2: System Installation
To operate the Geocontrol Pro, make sure the power switch is in the off
position and plug the power input cord into a 12V lighter receptacle on a
negatively grounded system. If the controller is to be wired directly to a 12V
battery, make sure to connect the positive (red) alligator clip to the positive
(red) battery terminal and connect the negative (black) alligator clip to the
negative (black) battery terminal. Continue by plugging the pump’s air line
into the air out port on the controller’s face. Plumb the pump’s discharge line
into a suitable container. Check all wiring and plumbing for correctness.
Figure 2 – Installation Diagram

7
Chapter 3: System Operation
Discharge Time The time it takes to squeeze the bladder and push the
water out of the pump. The deeper the pump and the
larger the bladder volume, the longer the discharge
time will have to be.
Fill Time The time allowed for the bladder to refill. Larger
bladder volumes and slower fill rates will require
longer fill times.
Fill Rate The rate at which the bladder pump is allowed to refill
under hydrostatic pressure. NOTE: The slower the
fill rate, the longer the fill time should be set at.
By setting the controller fill timer to zero, continuous pumping is possible.
Although the compressor is rated for continuous use, excess heat will begin
to build up. Never exceed the recommended duty cycles for the
Geocontrol Pro.
Adjust the Geocontrol Pro’s “Fill” and “Discharge” timer knobs to the desired
cycle times. Adjust the “Fill Rate” knob to somewhere near the middle of the
scale. NOTE: The more constricted the flow rate out of the pump, the
longer the fill time will need to be. Turn the controller power switch on.
The pump unit should begin pumping fluid. If the discharge from the pump
falls off before the discharge cycle is complete, the fill time is set too low
relative to the fill rate or the discharge time is set too high and the pump is
empty. This can be supported watching the air line pressure gauge for
runaway pressures.
If the discharge cycle ends before the pump is finished discharging, the
discharge time can be increased to maximize yield from the pump.
Slowly adjust the “Fill Rate” knob to get the desired flow rate into the pump.
NOTE: The air line pressure gauge can be utilized to maximize
efficiency. This gauge will indicate a pressure (during the discharge
cycle) that is directly proportionate to the depth to the pump (2.3 feet =
1 psi). When the bladder in the pump is empty of liquids and the
Geocontrol Pro is still on the discharge cycle, the pressure will increase
much faster. If a quick pressure increase is noticed, turn down the
discharge time, once each cycle, until the compressor turns off at the
moment of runaway pressure.

8
Chapter 4: System Maintenance
Unit must be returned to Geotech for any service.
In order to provide long service life, keep the Geocontrol Pro clean. Clean
controller by wiping off with a mild detergent. Apply cleaning solution to a
soft cloth and wipe off the controller. Avoid soaking or directly spraying
liquids on the Geocontrol Pro.

9
Chapter 5: System Troubleshooting
The Geocontrol Pro has been designed and manufactured to provide a long
service life and trouble free operation in the field.
If the compressor, during charge cycles, becomes sluggish, check supply
voltage. If the supply voltage falls below 12 VDC, the compressor’s
performance will be directly affected. A fully charged battery will produce the
best results.
Other sources of low pump output may be the 12V lighter receptacles or
plugs. Make certain these connections are fully plugged in. Once fully
plugged in, rotating the connection can help if there is a dead spot in the
connector. Also, normal wear and tear on cables, receptacles and plugs
could cause undesired operations. Check for fatigue, cracks, rust etc.

10
Chapter 6: System Specifications
Power usage 90-105 W
Voltage 12-14 VDC
Over current protection 15 Amps
Fill timer range 0-60 seconds
Discharge timer range 0-60 seconds
Maximum pump depth 200 FT
Maximum compressor pressure 100 PSI
Duty cycle 40% on, 60% off
Operational temp 50°F-104°F (10°C-40°C)
FEATURES
Variable pump fill control.
Variable pump discharge time control.
Variable pump fill time control.
Internal compressor is thermally protected.
Interchangeable pump connection configurations.
1. For use with negative (-) ground systems only.
2. Exceeding the recommended duty cycle will cause over heating.
3. Damage will result if the supply voltage exceeds 14 VDC.

11
Chapter 7: System Schematic

12
Chapter 8: Replacement Parts List
Geocontrol Pro PN 81150012
Cigarette Cable Adapter Set PN 57500008
12VDC Battery and Charger PN 77250000
Pressure Gauge PN 11150254
Cycle Module PN 51150044
Compressor PN 11150258
Knob PN 11150244

13
Notes

14
Notes

15
Notes

16
The Warranty
For a period of one (1) year from date of first sale, product is warranted to be free
from defects in materials and workmanship. Geotech agrees to repair or replace,
at Geotech’s option, the portion proving defective, or at our option to refund the
purchase price thereof. Geotech will have no warranty obligation if the product is
subjected to abnormal operating conditions, accident, abuse, misuse,
unauthorized modification, alteration, repair, or replacement of wear parts. User
assumes all other risk, if any, including the risk of injury, loss, or damage, direct
or consequential, arising out of the use, misuse, or inability to use this product.
User agrees to use, maintain and install product in accordance with
recommendations and instructions. User is responsible for transportation
charges connected to the repair or replacement of product under this warranty.
Equipment Return Policy
A Return Material Authorization number (RMA #) is required prior to return of any
equipment to our facilities, please call 800 number for appropriate location. An
RMA # will be issued upon receipt of your request to return equipment, which
should include reasons for the return. Your return shipment to us must have this
RMA # clearly marked on the outside of the package. Proof of date of purchase
is required for processing of all warranty requests.
This policy applies to both equipment sales and repair orders.
FOR A RETURN MATERIAL AUTHORIZATION, PLEASE CALL OUR
SERVICE DEPARTMENT AT 1-800-833-7958 OR 1-800-275-5325.
Model Number: ________________
Serial Number: ________________
Date: ________________
Equipment Decontamination
Prior to return, all equipment must be thoroughly cleaned and decontaminated.
Please make note on RMA form, the use of equipment, contaminants equipment
was exposed to, and decontamination solutions/methods used.
Geotech reserves the right to refuse any equipment not properly
decontaminated. Geotech may also choose to decontaminate equipment for a
fee, which will be applied to the repair order invoice.

Geotech Environmental Equipment, Inc
8035 East 40th Avenue Denver, Colorado 80207
(303) 320-4764 ●(800) 833-7958 ●FAX (303) 322-7242
Other manuals for Geocontrol PRO
3
Table of contents
Other Geotech Controllers manuals
Popular Controllers manuals by other brands

HomeMatic
HomeMatic HM-LC-Sw4-SM-2 Installation and operating manual

Lenze
Lenze L-force 8400 Series Software manual

NEXCOBOT
NEXCOBOT RCB600 Quick reference guide

Behringer
Behringer Eurolight BLM420 Technical specifications

IntesisHome
IntesisHome IS-ACX-WIFI-1 Quick install guide

esera automation
esera automation 11325 user guide