HOW TO WORK THE DEVICE
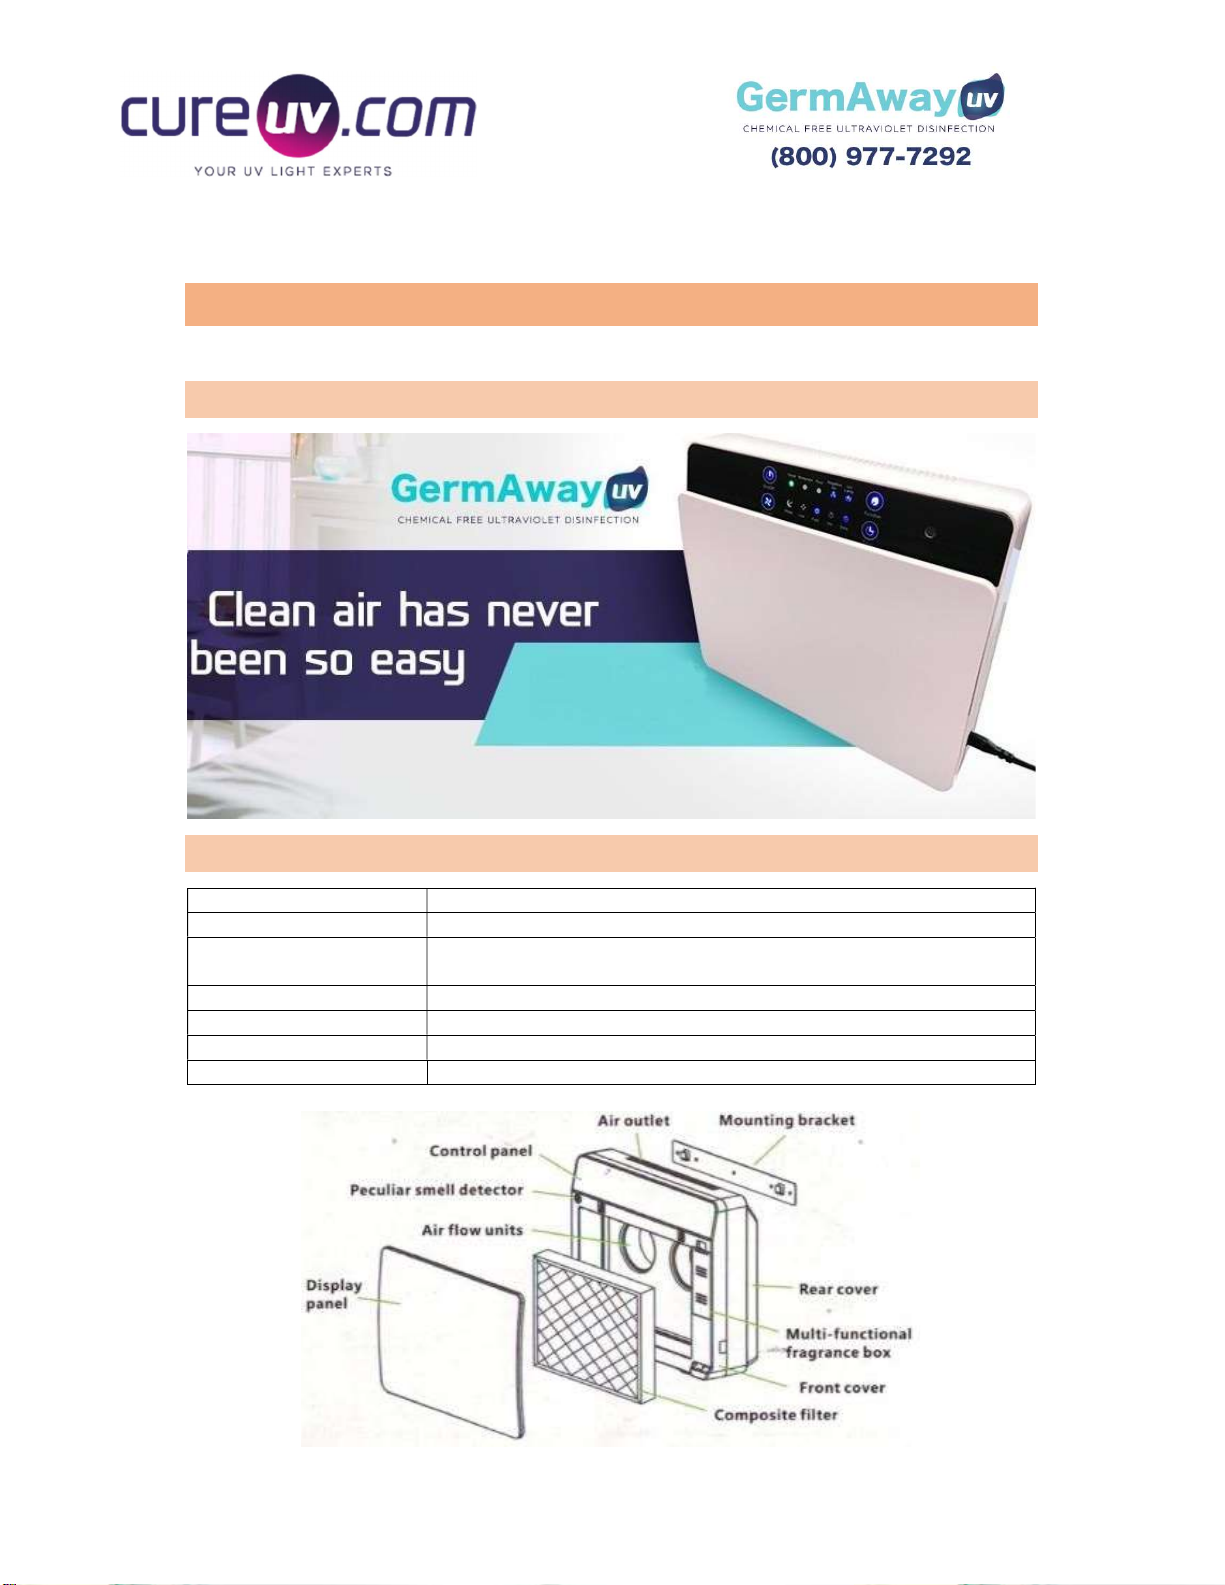
DISPLAY PANEL
This display is touch sensitive, so it only requires a light touch.
As can be seen for the image above the setting that is selecting is illuminated.
Start Up
After connecting the power cord to the device and plugging into outlet, lightly press the On/Off
button on the top left of the panel, to start the purifier
To control air speed
Use the speed function button on the bottom left of the panel.
There are three modes of air speed 1) “sleep” 2) “low” 3) “fast”
We recommend using fast speed when using the device at irregular intervals. If you regularly
use the device low speed is suitable while sleep function is suitable for night time or out of
office hours.
Timing Function
You can either run this machine for 1 hour or 3 hours before the device goes to sleep
The timer button is on the bottom right of the panel.
UV Sterilization and Negative Ion
NOTE: the device is set to negative ion as a default. Therefore, when you start the machine
the negative ion function will be on. The device emits negative ions for 20 minutes at a time
with 5 minute intervals in between.
Automatic Air quality detection
There are three air quality detection indicators labelled “poor”, “moderate”, and “good”.
The device has a built-in sensor that the level of air quality. When the air quality is bad, the
device will automatically switch to the fast speed mode.
It takes about 3 minutes for the sensor to warm up and acclimatise to the room once the
device is turned on.
Filter replacement Warning*
After 1500 hours of operating the filters will require replacement.
The three air quality indicators “poor”, “moderate”, “good” will flash at the same time.
There will also be an alarm that sounds.
Once you have replaced the filter to stop the alarms press the timer and speed buttons
together for 5 seconds, this will reset the system.
*see removal of filter instructions below