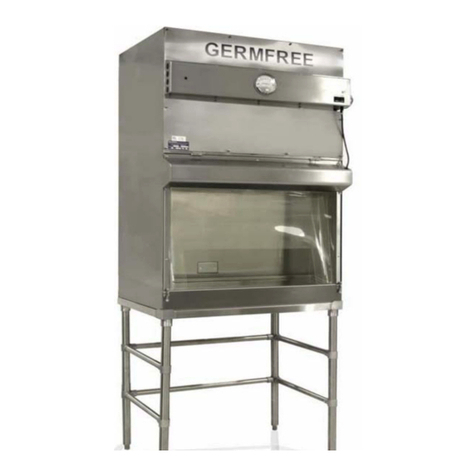
Germfree BBF 2 User manual

Germfree - Class II, Type A2 Biosafety Cabinet User Manual - v2.1 - 09SEP2021 - RMH
Class II, Type A2 Biosafety Cabinet
User Manual

Class II, Type A2 Biosafety Cabinet
User Manual
2
Contents
Introduction ........................................................... 3
Installation ............................................................ 4
Electrical Services ...................................................... 5
Control of Airflow ...................................................... 6
Airflow Diagram........................................................ 7
Filters ................................................................. 8
Certification and Repair........................................... 8
Contoured Viewing Panel ............................................... 9
Cleaning the Viewing Panel ....................................... 9
Stainless Steel Work Deck............................................... 10
Motor Blower .......................................................... 11
Lights ................................................................. 12
Performance Testing.................................................... 13
Use of the Biosafety Cabinet ............................................ 14
Advance Planning: ............................................... 14
Good Technique:................................................. 14
Biological Safety Cabinet Operation “Don’ts”....................... 15
Troubleshooting ....................................................... 16
Dimensions............................................................ 18
Parts List .............................................................. 19
Quality Statement ..................................................... 23
Our Company ......................................................... 23
Germfree’s Mission .................................................... 23
Appendix A - Line Drawings
Appendix B - Wiring Diagrams
Appendix C - Sensocon User Manual

Class II, Type A2 Biosafety Cabinet
User Manual
3
Introduction
The Class II, Type A2 Biosafety Cabinet is a minimal turbulence, unidirectional, vertical down flow re-circulating
laminar flow cabinet, providing a safe work area for handling particles and aerosols down to the sub-micron size
range. This chamber eliminates cross-contamination and accidental release of pathogenic microorganisms or
carcinogenic aerosols to the outside atmosphere. The unit can be used wherever sterile air is required. Other
applications include handling materials such as pollen, powders, allergens, dust, pathogen-free animals and
plants—actually in any situation where both clean air and containment are required. All of the air that bathes the
work area and all the air that is exhausted is passed through High Efficiency Particulate Air (HEPA) filters that are
parallel to each other and to the work surface. These filters remove particulates 0.3 micron in size with 99.99%
efficiency, and they even more efficient for both larger and smaller particulates.
Perhaps the most valuable parameter of the Class II, Type A2 Biosafety Cabinet is containment without the
necessity of working through gloves. This is accomplished by discharging approximately 30% of the total filtered
air each cycle through the exhaust HEPA filter in the top of the unit.
An equal amount of make-up air is pulled into the chamber through the boom of the window under negative
pressure from the blower and positive pressure from the air curtain. The viewing panel has a unique, recessed,
contoured shape, which creates an aerodynamic flow paern. It is this combination that produces the protective
barrier for the operator by containing hazardous materials within the chamber.
Biomedical engineering and technology have introduced safeguards into the design of laboratory equipment,
but these safeguards do not prevent human error. Danger to personnel from carelessness or improperly used
equipment cannot be overemphasized. There is no substitute for safe, proper technique.
Contact Germfree Customer Service
+1 386.265.4300

Class II, Type A2 Biosafety Cabinet
User Manual
4
Installation
The Class II, Type A2 Biosafety Cabinet is ordinarily transported and moved in the upright position. The 3’, 4’ and
6’ units will fit through any opening 32” wide and 58” high. If narrower doors are encountered, the light housing
can be taken off by removing four screws. Alternatively, the viewing panel with the aached light housing can
be completely removed by sliding the split hinges to the right. Removing this panel will reduce the depth of the
biosafety cabinet to 28¾”.
2’ units will fit through any standard doorway.

Class II, Type A2 Biosafety Cabinet
User Manual
5
Electrical Services
The Class II, Type A2 Biosafety Cabinet operates on an 115v, 1-phase, 60 Hertz, 10 Amp electrical system. During
shipment, the power cord is coiled within the control panel. The plug of the power cord is a NEMA 5-15P
3-pronged hospital grade and should be connected to the appropriate 3-prong 115v receptacle. For convenience
of operations and service, all circuitry is located within the control panel.
Standard services include the Motor ON/OFF switch, light switch, a Sensocon or Magnehelic (see front cover
image) gauge at the front of the unit and a speed control located in the control panel behind a plastic cap.
Optional duplex electric outlets may be located in the rear of the work area and optional data ports and/or
stopcocks may be placed at either side at the front of the unit, according to your specifications.

Class II, Type A2 Biosafety Cabinet
User Manual
6
Control of Airflow
To be sure your unit is functioning properly, the air velocity should be measured directly by a qualified third party
certification professional. Readings of air velocity, measured in feet per minute, can be made with a velometer
or thermoanemometer to determine if the unit is within specification and when the filters should be changed.
This certification should be performed at least annually, and many regulatory bodies recommend semi-annually.
The unit must also be recertified any time that it is relocated. The following chart represents the acceptable
range of air velocities that are measured in your unit.
Unit Inflow (fpm) Downflow (fpm) Volume (cfm) Exhaust Flow (fpm)
BBF 2 87-102 65-80 114-134 154-181
BBF 3 102-112 67-82 147-161 123-134
BBF 4 102-112 67-82 215-236 130-142
BBF 6 102-112 70-85 353-388 106-117
Eventually, the HEPA filters will be loaded with particulates to a point where the blower can no longer overcome
the resistance to provide the proper air velocities. At this point new HEPA filters must be installed. Replacement
HEPA filters can be ordered ahead of time so that they are available in advance of changing. Because viable
particles may be trapped and survive for a period of time in the filters, the Class II, Type A2 Biosafety Cabinet
must be decontaminated, if any biological agents have been manipulated within the cabinet, before any HEPA
filters are changed.
A low flow alarm will indicate when the inflow has fallen below acceptable levels. This can indicate that
maintenance needs to be performed on the cabinet.

Class II, Type A2 Biosafety Cabinet
User Manual
7
Airflow Diagram

Class II, Type A2 Biosafety Cabinet
User Manual
8
Filters
All biosafety cabinets are provided with both a supply HEPA filter over the work area and an exhaust HEPA filter
in the top of the unit. All filters were subjected to a particle challenge leak test at the time of manufacturing and
again immediately before shipment and are certified to be 99.99% effective on a .3 Micron particle, the hardest
to capture. Loading time for the filters will depend primarily on the number of particles in the ambient air and
ordinarily, to a lesser extent, on particles generated within the chamber. Under most conditions the life of the
filters will be three to five years; rarely do they become obstructed in three years or less. The biosafety cabinet
may be le on continuously or turned off and on as needed with a ten-minute start up and cool down period
prior to and aer use.
An independent certification agency or a qualified technician specializing in the repair and testing of this type
of equipment must perform all maintenance to the Class II, Type A2 Biosafety Cabinet, especially the filters. The
Germfree service department can assist with or perform most repairs.
Certification and Repair
All models of Class II, Type A2 Biosafety Cabinets have a large supply and a smaller, exhaust HEPA filter. These
are sized to provide the entire work area with ultra clean air and to filter particulate maer. Approximately 30%
of the circulated air is exhausted during each cycle. HEPA filters are placed and sealed within the cabinet to
prevent any bypass of air. Filters are certified to be 99.99 % effective against 0. 3 micron sized particles and free
of any leaks discernible by this method. In the majority of instances, filters received from the manufacturer are
free of leaks. Those that are not are repaired and retested. Testing also includes making sure that the junctions
of the filter medium and framework must be completely free of leaks. This testing also includes checking the
seal around the filter itself. Should damage occur to the filters or if aer replacement, defects are found in new
filters, these defects can be repaired. This requires sealing with RTV (Room Temperature Vulcanizing) silicone.
Commercial organizations with proper equipment and personnel are available in most areas of the world
for testing and servicing. If, you need us to refer you to one of these agencies please contact Germfree (cs@
germfree.com).

Class II, Type A2 Biosafety Cabinet
User Manual
9
Contoured Viewing Panel
The shape of the viewing panel was designed to put the operator above the work with a glare free view of all
parts of the work area.
The viewing panels are hinged and can be raised to more than a 90-degree angle to provide easy access for
larger items (shocks or chains are provided to support the window in the open position). To remove the panel, it
is recommended that two people work together, one at each end. Before removal, unplug the light housing cord
from the electrical outlet located at top right corner and remove the small snap ring from the right-most hinge.
If the unit has shocks, they must be detached prior to removal. Next, raise the viewing panel until it is parallel
to the floor and slide the panel toward the right side, completely separating the split hinges. Be sure to replace
snap ring aer use.
Cleaning the Viewing Panel
• The standard viewing panel is acrylic and can be cleaned with a so cloth.
• Do not use abrasive cleansers or organic solvents on this viewing panel.
• The acrylic should not be cleaned with anything stronger than 50% Ethyl or 70% isopropyl alcohol solution.
• Do not use glass cleaner with ammonia.

Class II, Type A2 Biosafety Cabinet
User Manual
10
Stainless Steel Work Deck
With the viewing panel removed (or raised and supported by the shocks / liing chains), the work platform and
its support can be easily separated and removed. If the Class II, Type A2 Biosafety Cabinet has been used with
potential pathogens, the cabinet should first be decontaminated before disassembling.
During routine cleaning of the work platform, its perforated support and the rear and side walls can be
decontaminated by using a sponge or squeeze bole containing a biocide specific to the organisms being
worked with. Spilled material within the chamber should be made safe by the addition of an appropriate
germicide, followed by the appropriate cleaning procedures. For initial cleaning and daily maintenance, the
interior of the chamber should be completely wiped with 70% alcohol, using a so cloth. Aer cleaning, surfaces
should be wiped down with sterile water to prevent chemicals from damaging the surfaces. The outside of the
all stainless steel units may be similarly maintained.

Class II, Type A2 Biosafety Cabinet
User Manual
11
Motor Blower
The motors and blowers were selected because they have the following characteristics: low noise levels, low
vibration levels, compatibility with the variable speed control, and most important: efficiency in delivering air
through clean HEPA filters as well as those loaded with a considerable amount of particulate material. Motors
are 1/3 or 1/2 h.p., 115 V single phase and 60 Hertz.
Before servicing the motor, the power cord must be disconnected. In the Class II, Type A2 Biosafety Cabinet
access to the motor-blower is through the front of the unit. If potentially hazardous material has been handled,
the biosafety cabinet should first be decontaminated. If the unit is used to contain non-biological chemical
hazards, the workers and surrounding area should be isolated and protected. The motor is located in the center
of the blower and can be disconnected by removing three motor mounting screws.

Class II, Type A2 Biosafety Cabinet
User Manual
12
Lights
Two fluorescent lights are provided in their own housing along the top of the viewing panel and exterior to the
work area. This location gives the best glare free view to the operator and also prevents heat build up within the
cabinet. The lamps are wired independent of the motor blower and provide good visibility within the work area
at all times.

Class II, Type A2 Biosafety Cabinet
User Manual
13
Performance Testing
Your Class II, Type A2 Biosafety Cabinet features a one piece welded construction. No access panels are required
and it has no jointed segments that might loosen during shipment. This is a distinct advantage because many
potential sources of the leaks through gaskets are avoided.
Your Class II, Type A2 Biosafety Cabinet has been thoroughly tested at the factory. To insure that the supply
and exhaust HEPA filters were free of defects; Poly Alpha Olefin (PAO) or an equivalent was aerosolized into
the unit on the upstream side of the HEPA filters. Integrity of the HEPA filters was determined by scanning
with a photometer to detect PAO or equivalent aerosol particles on the downstream side of the HEPA filters. If
there was any penetration greater than .01% through the filter medium or perimeter filter seal, the leaks were
located and repaired. Air velocity was measured with a thermoanemometer to insure that it was uniform and
unidirectional. Other tests for noise level, vibration level and light intensity were performed; the Class II, Type
A2 Biosafety Cabinet meets or exceeds recommended standards. A simple test of the air balance which you can
perform aer the unit is set up is carried out with a smoke generator. The smoke source is held near the access
port of the work area. If the unit is working properly and is unobstructed, the air curtain will direct the smoke
downward. No smoke should enter the work area or flow over the work platform, all air should flow downward
within the unit and no air should exit the interior.

Class II, Type A2 Biosafety Cabinet
User Manual
14
Advance Planning:
To achieve maximum safety and utilization of your Class II, Type A2 Biosafety Cabinet you must take into account
the equipment and materials necessary for the proposed operation and must outline the procedural details of
your particular operation or experiment. The best way to accomplish this is through the use of a checklist and/or
protocol that would include the equipment, apparatus, media, supplies, and any other items necessary for the
anticipated procedure. The procedural checklist should include the order of events and other details necessary
for the successful completion of the proposed operation or experiment.
Your advance planning could include a layout for the arrangement of items in the work area. This should be
planned so that contaminated items and clean items are segregated and the movement of contaminated items
over clean items is minimized. Arrive at a logical progression for a particular operation and arrange your layout
accordingly. In a complex situation, an ideal arrangement of equipment may not be achieved easily so it may be
necessary to compromise.
Good Technique:
When the planning phase is completed, the start up procedure can begin. Turn on the unit and the fluorescent
lights. Clean the entire stainless steel surface in the work area thoroughly using a so, lint free cloth and 70%
alcohol. Using your checklist, collect all items for the procedure, which are to be placed in the chamber. Clean
all of these items thoroughly before introducing large items of equipment. Do not overload the work area. It
is important, however, that everything needed for the complete procedure be placed in the chamber before
starting so nothing passes in or out through the air curtain until the procedure is completed. Items should be
positioned within the work area so they do not block the air intake or the return air openings. Perform work far
enough away from the access opening, i.e., over the work tray, to insure good containment.
Wait approximately ten minutes aer starting the unit before initiating procedures. This allows sufficient time for
the ultra clean air circulating within the chamber to remove any airborne contamination from the work area and
any particulate maer from the newly introduced items. Many facilities will choose to leave the cabinets running
at all times.
The operator is a critical factor in the successful and safe operation of any biological safety cabinet. It is
dangerous to have the idea that the chamber is going to do all of the work. A properly balanced and properly
utilized Class II, Type A2 Biosafety Cabinet will do an excellent job of controlling airborne contamination. Before
starting to work in the chamber, the hands and arms of the operator should be washed thoroughly with a
germicidal soap. It is also recommended that technicians working in the Class II, Type A2 Biosafety Cabinet wear
long sleeved gowns with knit cuffs and rubber gloves. This minimizes the shedding of skin flora into the work
area and protects the hands and arms from contamination with viable agents. Conventional laboratory coats
Use of the Biosafety
Cabinet
The successful use of the Class II, Type A2 Biosafety
Cabinet as a safety tool depends upon two factors:
advance planning and good technique. Even the
most sophisticated and elaborate systems would be
useless if proper technique were not employed. It is
therefore the responsibility of the senior investigator
or the head of a particular facility to train the
personnel who will use the unit and to see that good
technique is maintained. If this is not done, a false
Start-Up Procedure:
1. Turn on unit
2. Wipe down all interior surfaces
3. Allow 10 minutes for particles to wash into HEPA
4. Begin use
Shutdown Procedure:
5. Wipe down all interior surfaces
6. Allow 10 minutes for particles to wash into HEPA
7. Turn off unit

Class II, Type A2 Biosafety Cabinet
User Manual
15
with open cuffs allow the entrapment of contaminated air around the technician’s arms inside the sleeves. The
hands and arms should be inserted into and withdrawn from the work area slowly to prevent “dragging” of
contaminants from the room into the work area or from the work area into the room. Abrupt movements of the
arms and hands should be avoided. Excessive activity in the room may also create disruptive air currents. This
should be held to a minimum or eliminated when work is being performed in the unit. The viewing panel should
never be opened while work is in progress. When the work has been completed, cover the tray for the discarded
supplies with a towel or paper towels soaked in an appropriate germicide. The outside of the tray and other
equipment (glassware, etc.) can be wiped or sprayed with the appropriate solution. Wait approximately five
minutes before removing any item from the chamber.
Biological Safety Cabinet Operation “Don’ts”
1. DON’T ever cover the air intake area in front of the chamber with papers, notebooks, equipment, etc.
Movement of air into the negative pressure section must not be impeded!
2. DON’T ever cover the exhaust filter.
3. DON’T ever attempt any maintenance of the motor or any component outside the work area without
decontaminating the unit.
4. DON’T overload the work area.
5. DON’T carry out procedures in front of the work tray, e.g., too near the air curtain.
6. DON’T place items in a position that would interrupt the laminar flow pattern.
7. DON’T introduce or remove your hands rapidly from the unit.
8. DON’T allow spilled viable material to remain in your BBF.
9. DON’T move contaminated items over clean items.
10. DON’T work with open cuffs or other loose garments that might entrap viable agents.
11. DON’T allow trash to get under the work tray.

Class II, Type A2 Biosafety Cabinet
User Manual
16
Troubleshooting
This section is to be used as a general guideline. An independent certification agency or a qualified technician
specializing in repairs and testing of this type of equipment must do any maintenance or repairs that need to be
made.
Trouble Possible Causes Remedy
Air supply inoperative Main switch off
Check main switch
See that plug is in the electrical
outlet
Green light switch should be on
No air circulation
Blower off Check motor blower control
Blown circuit breaker Check circuit breaker on control
panel
Break in electrical wiring Use electrical diagram and check
wiring connections
Excessive blower vibration Foreign matter in blower squirrel
cage Remove paper, paper clip, etc.
Exhaust air imbalance
Obstruction over exhaust filter Remove obstruction
Improper adjustment of blower
motor control
Adjust to proper reading on
Magnehelic gauge
Obstruction of plenum Remove obstruction
Leak between blower and
plenum
Repair leak – Contact
certification company
Filter loaded Replace Filters – Contact
certification company

Class II, Type A2 Biosafety Cabinet
User Manual
17
Trouble Possible Causes Remedy
Low velocity air
Low voltage on house current Measure voltage – contact
certification company
Filter loaded Replace filters – contact
certification company
Improper adjustment of blower
motor
Adjust to proper reading on
Magnehelic gauge – contact
certification company
Obstruction in plenum Remove obstruction
Leak between blower and
plenum
Repair leak – contact certification
company
High velocity air
Exhaust filter rupture Replace Filters – Contact
certification company
Supply filter rupture Repair – contact certification
company
Supply filter gasket leak Find and repair leak – contact
certification company
Exhaust air outlet obstruction Remove obstruction
Improper adjustment of blower
motor speed control
Adjust to proper reading on
Magnehelic gauge
Non-laminar airflow
Large object obstructing airflow Remove item
Large leak in supply filter Replace Filters – Contact
certification company

Class II, Type A2 Biosafety Cabinet
User Manual
18
Dimensions
Overall Dimensions
Width Depth Height
BBF-2SSCH 24 ⅛” 23 ½” 46 ⅜”
BBF-2SSRX 24 ⅛” 23 ½” 54 ⅛”
BBF-3SSRX 36 ⅛” 27” 57”
BBF-4SSRX 48 ⅛” 27” 57”
BBF-6SSRX 72 ⅛” 27” 57”
*Light housing and control panel adds an additional 4” to depth. Depth dimensions include light housing.
Work Area Dimensions
Width Depth Height
BBF-2SSCH 23 ¾” 17 ½” 21 ⅛”
BBF-2SSRX 23 ¾” 17 ½” 30”
BBF-3SSRX 35 ¾” 22” 28 ⅛”
BBF-4SSRX 47 ¾” 22” 29 ¼”
BBF-6SSRX 71 ¾” 22” 29 ⅜”

Class II, Type A2 Biosafety Cabinet
User Manual
19
Parts List
The following list contains reorder information for parts included on the base model. For information on
optional features, or electrical components of the 220V model, please contact Germfree customer service at cs@
germfree.com
Germfree part numbers are in red
HEPA Filters
Supply Exhaust
BBF-2SSCH / BBF-2SSRX 20” x 20” x 3”
375-1001-00
18” x 8” x 6”
375-1002-00
BBF-3SSRX 20” x 34” x 6”
375-1004-00
18” x 12” x 6”
375-1003-00
BBF-4SSRX 20” x 46” x 6”
375-1006-00
18” x 16” x 6
375-1005-00
BBF-6SSRX 20” x 70” x 6”
375-1007-00
2 @ 18” x 16” x 6”
375-1005-00
Blowers
All models
Direct Drive, forward curved
LAU Industries # DD97 AT
003-1400-00
Viewing Panel
BBF-2SSCH BBF-2VPC Acrylic plastic
625-0006-00
BBF-2SSRX BBF-2VP Acrylic plastic
625-0007-00
BBF-3SSRX BBF-3VP Acrylic plastic
625-0008-00
BBF-4SSRX BBF-4VP Acrylic plastic
625-0009-00
BBF-6SSRX BBF-6VP Acrylic plastic
625-0010-00

Class II, Type A2 Biosafety Cabinet
User Manual
20
Motor
BBF-2SSCH / BBF-2SSRX / BBF-3SSRX / BBF-4SSRX
1/3 hp, 1625 rpm, 5.7 amps
Fasco # 7124-1126-1/2
182-0010-00
BBF-6SSRX 183-0043-00
Diffusors
BBF-2SSCH / BBF-2SSRX 009-1100-02
BBF-3SSRX 009-1100-03
BBF-4SSRX 009-1100-04
BBF-6SSRX 009-1100-06
IV Bars
Bar - All Models 003-6001-00
Bracket - All Models 003-1000-10
This manual suits for next models
7
Table of contents
Other Germfree Laboratory Equipment manuals