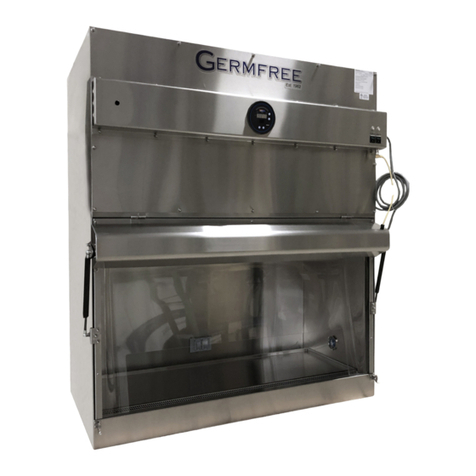
Germfree BBF Series User manual

Benchtop Bioflow Chamber (BBF) User Manual
(Class II, Type A/A2)

Germfree Laboratories
4 Sunshine Blvd • Ormond Beach, FL 32174
Phone 386.265.4300 • Fax 386.677.0442
www.germfree.com

Table of Contents
Introduction 3
Installation 5
Services 5
Control of Airflow 6
Airflow Diagram 8
Filters 9
Contoured Viewing Panel 9
Work Platform 10
Motor-blower 10
Lights 11
Performance Testing 13
Use of Bioflow Chamber 14
Some Biological Safety
Cabinet “Don’ts” 17
Troubleshooting 18
APPENDIX A
Paraformaldehyde Decontamination20
APPENDIX B
Filters 24
LINE DRAWINGS
BBF 2 23
BBF 3 24
BBF 4 25
BBF 6 26
Wiring Diagram 30
PARTS LIST
Standard 31
BBF Series 220v 33

4

5
Introduction
The field of microbiology has recently moved into its second century. Many of the principles
originated by Pasteur, Koch, Lister and others are still valid and in use today. In the past century the
investigator, clinician, and/or technologist performed work without assessing the hazards to the
experimenter, to the experiment or to the public. Only in the past half century have routine
laboratory procedures been analyzed from the standpoint of safety. Surveys of laboratory infections
under the auspices of the American Public Health Association revealed that the majority of
laboratory infections were a result of overt acts. Microbiological safety became a science under the
guidance of Dr. Arnold G. Wedum and associates. Routine laboratory procedures (inoculating,
centrifuging, pipetting, etc.) were a quantitatively analyzed and the amount of aerosol created was
determined with air samplers. The first protective cabinets were crude by today’s standards, but their
use was a step in the right direction. In recent years there have been many innovations and
refinements in hood design. One important advance in this field was the introduction of the
BENCHTOP BIOFLOW CHAMBER.
Today the BENCHTOP BIOFLOW CHAMBER is primarily used for the safe handling of
chemotherapy agents and other toxic or carcinogenic pharmaceutical agents in Pharmacies and
Oncology clinics. The liquid aerosols and fine powders created in these environments behave much
the same the biological pathogens originally manipulated in this type of equipment. Therefore
working in the BENCHTOP BIOFLOW CHAMBER provides state of the art protection from
your particular operation.
The BENCHTOP BIOFLOW CHAMBER is a minimal turbulence, unidirectional, vertical down
flow re-circulating laminar flow cabinet, which provides a safe work area for handling particles and
aerosols down to the sub-micron size range. This chamber eliminates cross-contamination and
accidental release of pathogenic microorganisms or carcinogenic aerosols to the outside atmosphere.
The unit can be used wherever sterile air is required. Other applications include handling materials
such as pollen, powders, allergens, dust, pathogen-free animals and plants—actually in any situation
where both clean air and containment are required. All the air that bathes the work area and all the
air that is exhausted is passed through High Efficiency Particulate Air (HEPA) filters that are parallel
to each other and to the work surface. These filters remove particulates (organisms, aerosols, etc.)
0.3 micron in size with 99.99% efficiency, and they even more efficient for both larger and smaller
particulates. The laminar flow principle consists of moving individual streams of unidirectional ultra
clean air along parallel lines with minimal turbulence. Perhaps the most valuable parameter of the
BENCHTOP BIOFLOW CHAMBER is containment without the necessity of working through

6
gloves. This is accomplished by discharging approximately 30% of the total filtered air each cycle
through the exhaust HEPA filter in the top of the unit.
An equal amount of make-up air is pulled into the chamber through the bottom of the window
under negative pressure from the blower and positive pressure from the air curtain. The viewing
panel has a unique, recessed, contoured shape, which creates an aerodynamic flow pattern. It is this
combination that produces the protective barrier for the operator by containing hazardous materials
within the chamber.
The BENCHTOP BIOFLOW CHAMBER exceeds the requirements for a class 100 chamber
described in Federal Standard No. 209. This standard outlines air cleanliness classes and certain
other environmental air conditions required for achieving and maintaining the levels of
environmental cleanliness. Class 100, according to Federal Standards, is the class where particles 0.5
micron or larger must not exceed a total count of 100 particles per cubic foot. Biomedical
engineering and technology have introduced safeguards into the design of laboratory equipment, but
these safeguards do not prevent human error. Danger to personnel from carelessness or improperly
used equipment cannot be overemphasized. There is no substitute for safe, proper technique.

7
Installation
The BENCHTOP BIOFLOW CHAMBER is ordinarily transported and moved in the upright
position. The exhaust filter of the BENCHTOP BIOFLOW CHAMBER is located within the unit
and the dimensions are such that it will fit through any opening 32” wide and 58” high. If narrower
doors are encountered, the light housing can be taken off by removing four screws or the viewing
panel with the attached light housing can be completely removed by sliding the split hinges to the
right. This will reduce the width of the BIOFLOW CHAMBER to 28”. An additional 3/4”
clearance is required for the two clamps located level with the bottom of the viewing panel.
Services
The BENCHTOP BIOFLOW CHAMBER operates on an 115v, 1-phase, 60 Hertz, 10 Amp
electrical system. During shipment, the power cord is coiled within the control panel. The plug of
the power cord is a 3-pronged safety type and should be put into the appropriate 3-prong 115v
receptacle. For convenience of operations and service, all circuitry is located within the control
panel.
Standard services include the Motor ON/OFF switch, light switch, a magnehelic gauge at the front
of the unit and a speed control located in the control panel behind a plastic cap. Optional duplex
electric outlets may be located in the rear of the work area and optional stopcocks may be placed at
either side at the front of the unit, according to your specifications.

8
Control of Airflow
A qualitative indication of airflow can be monitored with the Magnehelic gauge. It is a good
practice to indicate the original reading, or the reading immediately following certification, on the
gauge with a marker or grease pencil. This will indicate the pressure that relates to airflows within
the acceptable range to provide containment and product protection. Since the change of flow is
related to the increased particulate load on the HEPA filters, which will be apparent by an
increased pressure reading on the Magnehelic gauge, the flow can be monitored. Since the
particulate loading of a HEPA filters happens slowly, except in dusty unconditioned environments,
a large change in the gauge reading in a short period of time will indicate cause for concern. Any
time a concern about the cabinet airflow is present you should call the GERMFREE’s customer
service department or your local certifier for advice prior to resuming operation in the unit. The
exact reading of the Magnehelic gauge on each unit may vary depends on several factors unique to
the individual unit such as resistance of a particular set of HEPA filters, electrical supply voltage,
motor-blower characteristics, etc.
As the filters become “loaded” with particulate matter, the motor blower will overcome a
considerable increase in resistance while maintaining a constant airflow. This automatic
compensation by the blower will cause only minimal changes in the reading of the Magnehelic
gauge. Eventually the resistance across the filters will increase to the point where, at a given setting
of the variable speed control the reading of the Magnehelic gauge increases. At this point it is
necessary to turn the speed control counter-clockwise to increase the motor speed to reset the
airflows (This operation should only be performed by a licensed certifier). This will again change the initial
reading of the gauge and change the location of the “mark” for qualitative airflow monitoring.
Depending on the cleanliness of the air of the room in which the BENCHTOP BIOFLOW
CHAMBER is located, the initial change may not occur for a year or considerably longer. Thus,
with new filters it is only necessary to examine the Magnehelic gauge approximately once a month.
Over time as the HEPA filters continue to load with particulates, mostly from the ambient air,
changes of the variable speed control will be required at increasingly shorter intervals to provide an
adequate airflow. To be sure your unit is functioning properly the velocity should be measured
directly by a qualified, third party, certification professional. Readings of air velocity, measured in
feet per minute, can be made with a velometer or thermoanemometer to determine if the unit is
within specification and when the filters should be changed. This certification should be

9
performed at least annually, and many regulatory bodies recommend semi-annually. The following
chart represents the acceptable range of air velocities that are measured in your unit.
UNIT INFLOW DOWNFLOW VOLUME EXHAUST
FLOW
(fpm) (fpm) (cfm) (fpm)
BBF 2 87-102 65-80 106-125 174-204
BBF 3 102-112 67-82 116-146 132-145
BBF 4 102-112 67-82 173-211 136-150
BBF 6 102-112 70-85 292-344 108-118
Eventually the HEPA filters will be loaded with particulates to a point where the blower can no
longer overcome the resistance to provide the proper air velocities. At this point New HEPA
filters must be installed. Replacement HEPA filters can be ordered ahead of time so that they are
available in advance of changing. Because viable particles may be trapped and survive for a period
of time in the filters, the BENCHTOP BIOFLOW CHAMBER must be decontaminated, if any
biological agents have been manipulated within the cabinet, before any HEPA filters are changed.
Appendix A describes in detail how to accomplish this safety measure and Appendix B describes
the method of changing filters. Please call the factory if you need assistance, or a combined service
may be available from your certification company for decontamination, filter change and
recertification for a standard fee.

10
Air Flow Diagram

11
Filters
All BIOFLOW CHAMBERS are provided with both a supply HEPA filter over the work area and
an exhaust HEPA filter in the top of the unit. All filters were subjected to a particle challenge leak
test at the time of manufacturing and again immediately before shipment and are certified to be
99.99% effective on a .3 Micron particle, the hardest to capture. Loading time for the filters will
depend primarily on the number of particles in the ambient air and ordinarily, to a lesser extent, on
particles generated within the chamber. Under most laboratory conditions the life of the filters will
be three to five years; rarely do they become obstructed in three years or less. The BIOFLOW
CHAMBER may be left on continuously or turned off and on as needed with a twenty-minute start
up and cool down period prior to and after use.
Start-Up Procedure:
1) Turn on unit.
2) Wipe down all interior surfaces.
3) Allow 10 minutes for particles to wash into HEPA.
4) Begin use.
Shutdown Procedure:
1) Wipe down all interior surfaces.
2) Allow 10 minutes for particles to wash into HEPA.
3) Turn off unit.
Contoured Viewing Panel
The shape of the viewing panel was designed to put the operator above the work with a glare-free
view of all parts of the work area. Mechanically, this allows for a one-piece straight up and down
construction with the filters parallel to each other and to the work surface. The standard viewing
panel is acrylic and can be cleaned with a soft cloth and a mild detergent. Do not use abrasive
cleansers or organic solvents on this viewing panel! The acrylic should not be cleaned with
anything stronger than 50% Ethyl or 70% isopropyl alcohol solution. Do not use glass cleaner with
ammonia. The viewing panels are hinged and can be raised to more than a 90-degree angle to
provide easy access for larger items (chains are provided to support the window in the open
position. If the panel is removed, we recommend that two people do this, one at each end. Before
removal, unplug the light housing cord from the electrical outlet located at top right corner and
remove the small snap ring from the right-most hinge. Then raise the viewing panel until it is parallel

12
to the floor and slide the panel toward the right side, completely separating the split hinges. Be sure
to replace snap ring after use.
Work Platform
With the viewing panel removed (or raised and supported by the lifting chains), the work platform
and its support can be easily and separated and removed. If the BENCHTOP BIOFLOW
CHAMBER has been used with potential pathogens, the cabinet should first be decontaminated
with paraformaldehyde before disassembling. During routine operation on the work platform, its
perforated support and the rear and side walls can be decontaminated by using a sponge or squeeze
bottle containing a biocide specific to the organisms being worked with. Spilled material within the
chamber should be made safe by the addition of an appropriate germicide. For initial cleaning and
daily maintenance the interior of the chamber should be completely wiped with 70% alcohol, using a
soft cloth. The outside of the all stainless steel units may be similarly maintained.
Motor Blower
The motors and blowers were selected because they have the following characteristics: low noise
levels, low vibration levels, compatibility with the variable speed control and most important,
efficiency in delivering air through clean HEPA filters as well as those loaded with a considerable
amount of particulate material. Motors are 1/3 or 1/2 h.p., 115 V single-phase and 60 Hertz.
Before servicing the motor, the power cord must be disconnected. In the BENCHTOP BIOFLOW
CHAMBER access to the motor-blower is through the top of the unit. If potentially contagious
material has been handled, the BIOFLOW CHAMBER should first be decontaminated. If the unit
is used to contain non-biological chemical hazards, the workers and surrounding area should be
isolated and protected. The motor is located in the center of the blower and can be disconnected by
removing three motor mounting screws.
Lights
Two fluorescent lights are provided in their own housing along the top of the viewing panel and
exterior to the work area. This location gives the best glare-free view to the operator and also

13
prevents heat build-up within the cabinet. The lamps are wired independent of the motor-blower
and provide good visibility within the work area at all times.
Ultraviolet lights are provided in the work area only if ordered. Most authorities do not recommend
use of UV light in this type of safety cabinet for a number of reasons:
1) A considerable volume of HEPA filtered air passes through the work area so that the unit
tends to be self-cleansing.
2) The tubes and electric components could affect the laminar airflow pattern.
3) There is a danger to personnel, since approximately 12% of the UV light penetrates the
viewing panel. More importantly, the ultraviolet rays will be reflected off the stainless
steel work area. Thus, damage may occur to the retina of unsuspecting persons.
4) The tops of the UV tubes will be kept clean by the laminar flow air; however, the bottoms
of the tubes will have to be wiped with a cloth soaked in alcohol as a light coating of
dust will interfere with their effectiveness. This, of course, will have to be performed
at less frequent intervals inside the cabinet than in the ordinary room.
5) If left on for long periods of time, such as overnight or over the weekend, the UV will
crack and/or yellow the viewing panel unless it is shielded.
6) The UV tubes may have lost their germicidal potential, even though they glow with a blue
light. They must be tested periodically for effectiveness.
7) In the proper utilization it may be necessary to rotate or turn over objects in the work area
so that all surfaces are exposed to the direct or reflected ultraviolet rays, since there is
no bactericidal effect in the shadows.
Traditional use of UV would ordinarily be limited to initial sterilizing of the work area and
decontaminating of material spilled within it. For initial sterilization we would recommend that the
decontamination of surfaces within the work area would be one indication for the use of UV;
however, we would recommend flooding a spill with the appropriate germicide. For serious
accidents, complete decontamination of the entire BENCHTOP BIOFLOW CHAMBER with
paraformaldehyde should be considered, see Appendix B.
Units that have UV lights are wired with a safety switch, which automatically shuts off these lights
when the fluorescent lights are turned on. Since most bacteria for which UV is effective are killed in
seconds and spores in minutes it is recommended that the ultraviolet light be used for a

14
predetermined interval, e.g., 10 to 20 minutes. Preferably, the user should set an alarm type clock
and stay out of the immediate vicinity of the chamber when the UV lights are operative. Standard
precautions must be taken, of course, to protect personnel whenever ultraviolet lights are utilized.
Performance Testing
Your BENCHTOP BIOFLOW CHAMBER features a one-piece welded construction. No access
panels are required and it has no jointed segments that might loosen during shipment. This is a
distinct advantage because many potential sources of the leaks through gaskets are avoided. Your
BENCHTOP BIOFLOW CHAMBER has been thoroughly tested at the factory. To insure that the
supply and exhaust HEPA filters were free of defects; dioctylphthalate (DOP) or an equivalent was
aerosolized into the unit on the upstream side of the HEPA filters. Integrity of the HEPA filters was
determined by scanning with a photometer to detect DOP or equivalent aerosol particles on the
downstream side of the HEPA filters. If there was any penetration greater than .01% through the
filter medium or perimeter filter seal, the leaks were located and repaired. Air velocity was measured
with a thermoanemometer to insure that it was uniform and unidirectional. The probe was placed
six inches away from the interior walls and readings were taken at 6"-spaced intervals in both axes at
window height. Other tests for temperature rise, noise level, vibration level and light intensity were
performed; the BENCHTOP BIOFLOW CHAMBER meets or exceeds recommended standards.
A simple test of the air balance which you can perform after the unit is set up is carried out with
cigarette smoke or a chemical smoke, i.e., titanium tetroxide. The smoke source is held near the
access port of the work area. If the unit is working properly and is unobstructed, the air curtain will
direct the smoke downward. No smoke should enter the work area or flow over the work platform,
all air should flow downward within the unit and no air should exit the interior.
The BENCHTOP BIOFLOW CHAMBER has also been tested from a microbiological standpoint.
This testing was two-fold. Challenges were designed to prove the integrity of the unit in containing
potentially hazardous materials and to demonstrate that work within the chamber would be
protected from outside contamination.
Use of the BioFlow Chamber
The successful use of the BENCHTOP BIOFLOW CHAMBER as a safety tool depends upon two
factors: advance planning and good technique. Even the most sophisticated and elaborate systems
would be useless if proper technique were not employed. It is therefore the responsibility of the

15
senior investigator or the head of a particular facility to train the personnel who will use the unit and
to see that good technique is maintained. If this is not done, a false sense of security may prevail.
Advance Planning:
To achieve maximum safety and utilization of your BENCHTOP BIOFLOW CHAMBER you
must take into account the equipment and materials necessary for the proposed operation and must
outline the procedural details of your particular operation or experiment. The best way to
accomplish this is through the use of a checklist and/or protocol that would include the equipment,
apparatus, media, supplies, biological samples, specimens and any other items necessary for the
anticipated procedure. The procedural checklist should include the order of events and other details
necessary for the successful completion of the proposed operation or experiment.
Your advance planning could include a layout for the arrangement of items in the work area. This
should be planned so that contaminated items and clean items are segregated and the movement of
contaminated items over clean items is minimized. Arrive at a logical progression for a particular
operation and arrange your layout accordingly. In a complex situation, an ideal arrangement of
equipment may not be achieved easily so it may be necessary to compromise.
Good Technique:
When the planning phase is completed, the start-up procedure can begin. Turn on the fluorescent
lights. Clean the entire stainless steel surface in the work area thoroughly using a soft, lint-free cloth
and 70% alcohol. Using your checklist, collect all items for the procedure, which are to be placed in
the chamber. Clean all of these items thoroughly before introducing large items of equipment. Do
not overload the work area. It is important, however, that everything needed for the complete
procedure be placed in the chamber before starting so nothing passes in or out through the air
curtain until the procedure is completed. Items should be positioned within the work area so they do
not block the air intake or the return air openings. Perform work far enough away from the access
opening, i.e., over the work tray, to insure good containment.
Now that all the items on the checklist have been arranged in the work area, turn the switch to ON.
Many operators choose to leave the unit on constantly. Wait approximately five minutes before
starting test procedures. This allows sufficient time for the ultra clean air circulating within the
chamber to remove any airborne contamination from the work area and any particulate matter from
the newly introduced items.
The operator is a critical factor in the successful and safe operation of any biological safety cabinet.
It is dangerous to have the idea that the chamber is going to do all of the work. A properly balanced
and properly utilized BENCHTOP BIOFLOW CHAMBER will do an excellent job of controlling
airborne contamination. Before starting to work in the chamber, the hands and arms of the operator

16
should be washed thoroughly with a germicidal soap. It is also recommended that technicians
working in the BENCHTOP BIOFLOW CHAMBER wear long-sleeved gowns with knit cuffs and
rubber gloves. This minimizes the shedding of skin flora into the work area and protects the hands
and arms from contamination with viable agents. Conventional laboratory coats with open cuffs
allow the entrapment of contaminated air around the technician’s arms inside the sleeves. The hands
and arms should be inserted into and withdrawn from the work area slowly to prevent “dragging” of
contaminants from the room into the work area or from the work area into the room. Abrupt
movements of the arms and hands should be avoided. Excessive activity in the room may also create
disruptive air currents. This should be held to a minimum or eliminated when work is being
performed in the unit. The viewing panel should never be opened while work is in progress. When
the work has been completed, cover the tray for the discarded supplies with a towel or paper towels
soaked in an appropriate germicide. The outside of the tray and other equipment (glassware, etc.)
can be wiped or sprayed with the appropriate solution. Wait approximately five minutes before
removing any item from the chamber.
For loop sterilizing, a LP (liquid petroleum) burner is recommended because it does not block the
laminar flow pattern. If a flame is necessary, a micro burner with a pilot light can be utilized. The
burner should be placed toward the back of the work area. Do not use a flame of such magnitude
that it will damage the filter. Make sure that the flame is extinguished and the gas turned off at the
stopcock when not needed. An electric element type of loop sterilizer may also be used.
Exposure to airborne micro-organisms is one of the most common sources of laboratory infections.
Through biomedical engineering and advance technology, we have provided the BENCHTOP
BIOFLOW CHAMBER as one of the key elements to safe handling of viable biological materials
and other materials that must be contained. By utilizing good sterile technique and following the
outlined procedures you can protect yourself, the environment and the integrity of your research.
YOU ARE THE KEY.
Biological Safety Cabinet Operation “Don’ts”
1) DON’T ever cover the air intake area in front of the Chamber with papers,
notebooks, equipment, etc. Movement of air into the negative pressure
section must not be impeded!
2) DON’T “turn up the air” under the impression that the faster the air flow the
better the unit is operating. A flow of about 80 linear feet a minute is the
recommended velocity for most conditions (at this speed smoke introduced
into the chamber should gently and evenly float down without breaking up

17
into turbulent patterns). Also do not reduce the airflow rate below safe
levels.
3) DON’T ever cover the exhaust filter.
4) DON’T ever attempt any maintenance of the motor or any component
outside the work area without decontaminating the unit as described in
Appendix B.
5) DON’T overload the work area.
6) DON’T carry out procedures in front of the work tray, e.g., too near the air
curtain.
7) DON’T place items in a position that would interrupt the laminar flow
pattern.
8) DON’T introduce or remove your hands rapidly from the unit.
9) DON’T allow spilled viable material to remain in your BBF.
10) DON’T move contaminated items over clean items.
11) DON’T work with open cuffs or other loose garments that might
entrap viable agents.
Troubleshooting
This section is to be used as a general guideline. An independent certification agency or a qualified
technician specializing in repairs and testing of this type of equipment must do any maintenance or
repairs that need to be made.
Trouble Possible Causes Remedy
Air supply inoperative
Main switch off Check main switch.
See that plug is in the electrical
outlet.
Green light switch should be
on.
No air circulation Blower off Check motor blower control.
Blown circuit breaker Check circuit breaker on
control panel.

18
Break in electrical wiring Use electrical diagram and
check wiring connections.
Excessive blower vibration Foreign matter in blower
squirrel cage
Remove paper, paper clip, etc.
Exhaust air imbalance Obstruction over exhaust filter Remove obstruction.
Improper adjustment of
blower motor control
Adjust to proper reading on
Magnehelic gauge.
Obstruction of plenum Remove obstruction.
Leak between blower and
plenum
Repair leak – Contact
certification company.
Filter loaded Replace Filters – Contact
certification company.
Low velocity air Low voltage on house current Measure voltage – contact
certification company.
Filter loaded Replace filters – contact
certification company.
Improper adjustment of
blower motor
Adjust to proper reading on
Magnehelic gauge – contact
certification company.
Obstruction in plenum Remove obstruction.
Leak between blower and
plenum
Repair leak – contact
certification company.
High velocity air Exhaust filter rupture Replace Filters – Contact
certification company.
Supply filter rupture Repair (App. B) – contact
certification company.
Supply filter gasket leak Find and repair leak – contact
certification company.
Exhaust air outlet obstruction Remove obstruction.
Improper adjustment of
blower motor speed control
Adjust to proper reading on
Magnehelic gauge.
Non-laminar airflow Large object obstructing
airflow
Remove item.
Large leak in supply filter Replace Filters – Contact
certification company.

19
Appendix A
PARAFORMALDEHYDE DECONTAMINATION
Successful decontamination with paraformaldehyde consists of exposing all internal parts of the
chamber to the generated formaldehyde gas under the proper conditions, which will kill all
microorganisms that are harbored anywhere within the cabinet. Although the details are for the
BENCHTOP BIOFLOW CHAMBER, the general method will apply to other types of biological
safety cabinets. Specifically, it is necessary to (a) close off the cabinet and any extension (ductwork),
(b) volatilize and disseminate the proper amount of paraformaldehyde, (c) assure proper conditions
of temperature and humidity, (d) contain the gas for an adequate period of time and (e) terminally
remove the gas from the cabinet.
Details for the procedure are numbered more or less in the order in which they should be
performed:
1) If the unit is ducted, this duct must be sealed at some appropriate point. This may be
at the termination of the duct or closer to the unit if a damper or similar mechanism
is utilized. If the exposed duct is long, additional paraformaldehyde may be needed
to compensate for the increased volume.
2) If the unit is not ducted, tape a plastic cover over the exhaust filter on top of the
BENCHTOP BIOFLOW CHAMBER. This cover should be fabricated with a
sleeve on the top and flexible hose taped to the sleeve. (We find that permanent
taping of the flexible hose to the plastic cover is advantageous because it can be used
with other BENCHTOP BIOFLOW CHAMBERS that have to be decontaminated
without having to tape a flexible hose in place each time). The flexible hose is placed
in a window to exhaust fumes to the outside. (However, this hose can be placed or
taped into the room exhaust system providing it does not connect to other areas in
the building).
3) In a situation where the formaldehyde gas can’t be exhausted through a duct or
window it can be passed into a charcoal or appropriate chemical filter.
4) The temperature ranges found in laboratories where the BENCHTOP BIOFLOW
CHAMBER would be employed are quite satisfactory for using formaldehyde.
Relative humidity is more critical; it is desirable to have a relative humidity of 60% or
higher (short of saturation) for optimum decontamination. Experience has shown,

20
however, that decontamination with paraformaldehyde will occur at a relative
humidity as low as 50% and a temperature as high as 30C. If the relative humidity is
too low it can be increased by boiling water on a hot plate within the work area.
5) A commercially available electric frying pan, containing a specified amount of
paraformaldehyde (see table) is placed on the work tray. The thermostat of the frying
pan is set at 450 F. and the paraformaldehyde spread evenly over the surface of the
pan. The electric cord should hang free from the cabinet.
6) Cover the viewing panel with a plastic film and tape the top, sides and bottom so
there are no leaks. To insure that disseminated formaldehyde gas will not escape into
the room, use one of the following methods around the electric cords:
a) Tape the cord(s) resting on the edge of the unit using sufficient tape,
or...
b) Make a small slit in the plastic film. Insert the cord(s) through the
film and tape. (We find method (a) to be the better of the two, for
the slit has to be made large enough for the plug to pass through.
Since there is a tendency for the film to tear when the tape is
removed the plastic film can only be used a few times).
7) Plug the frying pan cord into the electrical outlet on the control panel.
8) After one-fourth of the paraformaldehyde has depolymerized turn on the
blower-motor for 10-15 seconds. Repeat when one-half, three-fourths, and the total
amount of the paraformaldehyde has depolmerized.
9) Disconnect electrical cord(s).
10) Let the unit stand for at least one hour.
11) Evacuate gas from hood.
12) Remove plastic film from the front of cabinet and from over the exhaust filter and
then turn on the blower.
13) Addendum:
a) Experience from established laboratories has shown that the amount
of paraformaldehyde can range from as low as 0.15 grams per cubic
foot of cabinet volume to 0.3grams/ft3. This concentration may be
used for most work with safety; however, the investigator should
consider what organisms have been used in the BENCHTOP
BIOFLOW CHAMBER. One can employ a lower concentration to
decontaminate the cabinet after using S. marcescens than after using
Mycobacterium tuberculosis or some other highly resistant organism.
b) In a series of experiments using M tuberculosis and the saprophytic
phase of Histoplasma capsulatum we found that 0.25 grams/ft3
paraformaldehyde polymerized into the cabinet killed all
This manual suits for next models
5
Table of contents
Other Germfree Laboratory Equipment manuals
Popular Laboratory Equipment manuals by other brands

Roth
Roth Rotilabo M 3 instruction manual

Piuro
Piuro 900410 operating instructions

Buchi
Buchi NIRMaster Supplement Installation Manual

VPixx Technologies
VPixx Technologies VPX-ACC-8060 user manual

Argos Technologies
Argos Technologies Flexifuge C1000 Operator's manual

Steinberg Systems
Steinberg Systems SBS-LI-18 user manual