MANUAL DE INSTRUCCIONES T-200
Instruction Manual
1. AVISOS DE SEGURIDAD Y PRECAUCIONES 1. SAFETY WARNINGS AND PRECAUTIONS
1. Asegúrese de entender y seguir todas las instrucciones
antes de usar este aparato.
1. Ensure that you understand and follow all instructions
before operating this kit.
2. Cuando trabaje con el carro transportador-elevador lleve
siempre el equipo de seguridad apropiado (zapatos, gafas,
guantes, etc.)
2. Always wear suitable security kits (shoes, glasses, gloves,
etc.) when you use the transporter-elevator trolley.
3. Asegúrese que el peso del bidón a levantar es adecuado a
las especificaciones del equipo. No sobrecargue el equipo.
3. Do not overload this kit. Know the weight of the drum being
lifted.
4. Use el equipo únicamente para levantar o transportar los
bidones. No use este equipo como un soporte o para
cualquier otro propósito.
4. Use the kit for lifting only. Do not use this kit for any other
purpose. Do not use it as a stand.
5. Para utilizar el transportador-elevador de bidones con
seguridad colóquelo en una superficie que sea estable, sin
excesivas pendientes, limpia y capaz de sostener la carga.
5. Place the transporter-elevator trolley correctly. Only use this
kit on a surface that is stable, level, clean and dry and capable
of sustaining the load.
6. Estabilizar la carga. Asegúrense que la carga permanece
estable en todo momento. No mover la carga a menos que el
bidón esté seguro.
6. Stabilize load. Ensure that the load remains stable at all
times. Do not move load unless the drum is secured. Lift dead
loads only.
7. Centrar la carga. Centrar la carga antes de asegurarla y
alzarla. Las cargas descentradas pueden dañar los cierres,
causando un fallo del soporte.
NOTA: Cuando se mueva el transportador de bidones,
aseguraros de mantener una distancia de seguridad para
evitar heridas, atropamientos, enganches o pellizcos.
7. Center Load. Center the load before securing and lifting. Off
center loads can damage the seals, causing support failure.
NOTE: When moving the transporter-elevator trolley, be sure
to maintain a safe distance to avoid injury, be careful not to
pinch fingers.
8. Evitar mover el transportador de bidones alrededor de
espectadores. Si el soporte falla, puede ocasionar daños a las
personas que estén alrededor.
8. Avoid moving the transporter-elevator trolley around
spectators. If the support fails, the load of the drum could
injury a person's feet.
9. No realizar ninguna alteración en el soporte. Se deben usar
todos los acoplamientos suministrados por el fabricante.
9. No alterations shall be made to the support. Only
attachments supplied by the manufacturer shall be used.
10. Si no se tienen en cuenta estas anotaciones puede ocurrir
un daño personal o un perjuicio a la propiedad.
10. Failure to heed these markings may result in personal
injury and/or property damage.
AVISO: Los avisos, advertencias e instrucciones comentadas
en este manual de instrucciones no pueden cubrir todas las
posibles condiciones y situaciones que puedan ocurrir. Se
debe entender por el operador que el sentido común y la
prudencia son factores que no pueden ser incluidos en este
producto, pero deben ser suministrados por el operador.
WARNING: The warnings, cautions and instructions discussed
in this instruction manual cannot cover all possible conditions
and situations that may occur. It must be understood by the
operator that common sense and caution are factors which
cannot be built into this product, but must be supplied by the
operator.
2. USO Y CARACTERÍSTICAS 2. INTENDED USE AND FEATURE
Diseñado para levantar y transportar bidones de hasta 300 kg. Designed to lift and transport drums of up to 300 kg.
- El diseño de la esclusa elevadora sostiene el bidón en una posición
elevada para un fácil transporte.
- Lift lock design holds drum in raised position for easy transport.
- El ariete hidráulico resistente con pedal de pie asegura un funcionamiento
rápido.
- Heavy-duty hydraulic ram with foot pedal for quick operation.
- Rueda orientable trasera giratoria y ruedas frontales grandes para ayudar
a una fácil maniobra.
- Rear swivel caster wheel and big front wheels for easy maneuvering.
3. ESPECIFICACIONES 3. SPECIFICATIONS
Peso máximo del bidón: 300 kg Capacity: 300 kg
Altura del bidón: 863 mm (mínimo) – 920 mm (máximo) Drum height: 863 mm (min.) – 920 mm (max.)
Tara del equipo: 36,5 kg Kit tare: 36.5 kg
4. DESEMBALAJE 4. UNPACKING
Cuando se desembale, asegúrense que todas las piezas están incluidas.
Refiéranse al despiece y a su lista al principio de este manual. Si alguna de
las piezas falta o está rota, por favor póngase en contacto con su
distribuidor tan pronto como sea posible
When unpacking, check to make sure that all the parts are included. Refer
to the Parts Diagram and Parts listing at the beginning of this manual. If any
parts are missing or broken, please connect the distributor as soon as
possible.
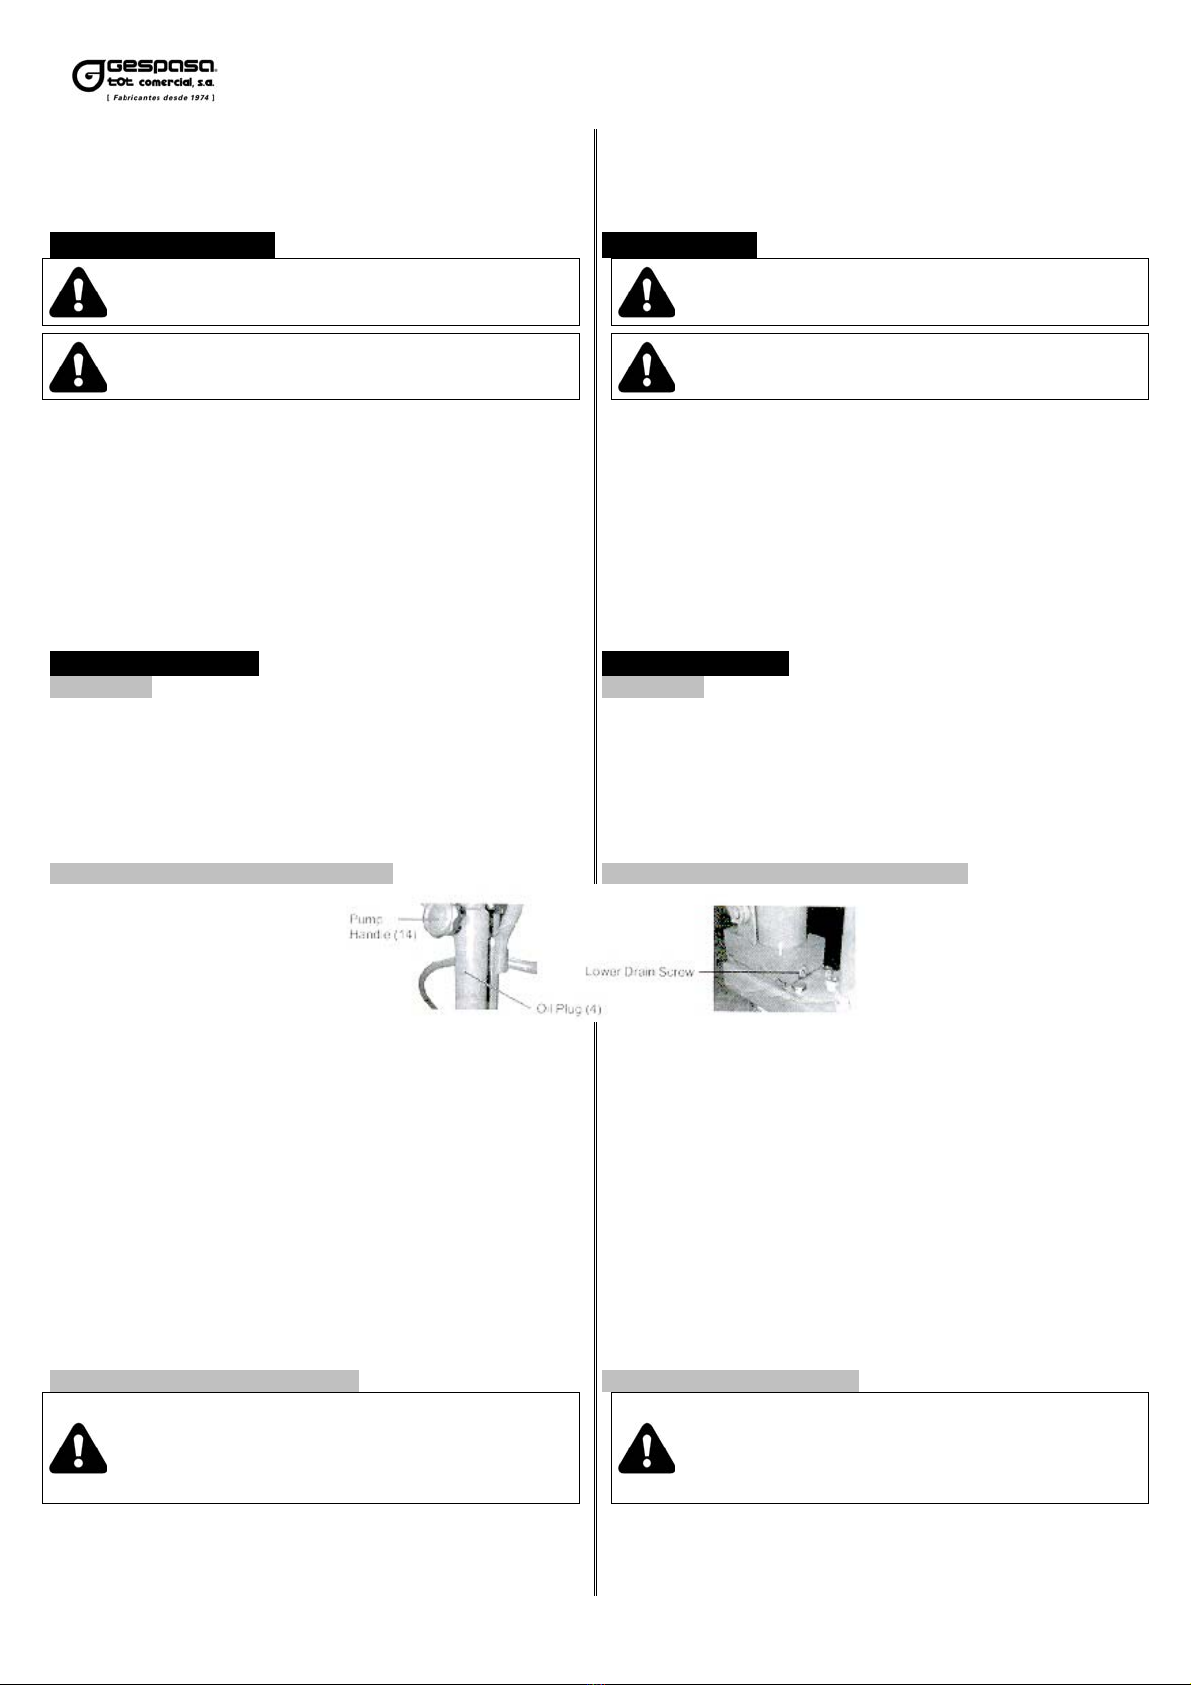
5. MONTAJE 5. ASSEMBLY
Durante el montaje, consulten el Despiece y la lista situado al principio de
este manual. Apretar bien las tuercas y los tornillos.
During assembly, refer to the Assembly Drawing and Parts List located at
the beginning of this manual. Securely tighten all nuts and bolts.
5.1. Acoplar el montaje de la ruedecilla (44) a la estructura (76) usando los
tornillos (45).
5.1. Attach the Caster Assembly (44) to the Frame (76) using Bolts (45).
5.2. Acoplar la rueda frontal (51) a cada abrazadera de la rueda de la
estructura (76) usando el tornillo (49), el casquillo (50), la arandela (53) y la
tuerca (54).
5.2. Attach the front Wheel (51) to each wheel bracket of the Frame (76)
using Bolt (49), Bushing (50), Washer (53) and Nut (54).
5.3. Montar el montaje de la palanca (37) al brazo guía (75) usando los
tornillos (68).
5.3. Mount the Handle Assembly (37) to the Guide Arm (75) using Bolts
(68).
5.4. Insertar la parte superior del soporte (59) en el brazo guía (75). 5.4. Insert the top of Stand (59) into the Guide Arm (75).
5.5. Montar el soporte (59) a la base (1) usando los tornillos (48). 5.5. Mount the Stand (59) to the Base (1) using Bolts (48).
5.6. Poner la tuerca (67) en la parte superior del soporte (59) y apretar por
encima de las roscas del soporte.
5.6. Place Nut (67) on top of Stand (59) and tighten over Stand threads.
5.7. Acoplar la Base hidráulica de montaje (1) a la estructura trasera de la
sección (76) usando los tornillos (48).
5.7. Attach the hydraulic assembly Base (1) to rear section Frame (76)
using Bolts (48).