manuals.online logo
Brands
  1. Home
  2. •
  3. Brands
  4. •
  5. Gessi
  6. •
  7. Plumbing Product
  8. •
  9. Gessi RETTANGOLO 23403 User manual

Gessi RETTANGOLO 23403 User manual

RETTANGOLO
Art. 23403
Art. 23404
PROGRAMMA TERMOSTATICO
THERMOSTATIC PROGRAM
PROGRAMME THERMOSTATIQUE
THERMOSTATISCHES PROGRAMM
PROGRAMA TERMOSTÁTICO
ПРОГРАММА ТЕРМОСТАТИЧЕСКИХ СМЕСИТЕЛЕЙ
Gessi SpA - Parco Gessi
13037 Serravalle Sesia (Vercelli) - Italy
Phone +39 0163 454111 - Facsimile +39 0163 459273
www.gessi.com - [email protected]
2
35x35
140
1180
80
60
~512
~404
216
150±20
1056
1206
~644
2100
2172
Ø63
Ø63
A terra - To the floor
Altezza consigliata - Suggested height
A terra - To the floor
FREDDA - COLD
G1/2"
CALDA - HOT
G1/2"
Fig. 1
PRELIMINARI - PRE-INSTALLATION INFORMATION - PRÉALABLES -
VORBEREITUNG - PRELIMINARES - ПРЕДВАРИТЕЛЬНАЯ ПОДГОТОВКА
Dimensioni in mm - Measures in mm - Dimensions en mm - Maß im mm - Medidas en milímetros - Размеры выражены в мм
Art. 23403
3
Fig. 1
PRELIMINARI - PRE-INSTALLATION INFORMATION - PRÉALABLES -
VORBEREITUNG - PRELIMINARES - ПРЕДВАРИТЕЛЬНАЯ ПОДГОТОВКА
Dimensioni in mm - Measures in mm - Dimensions en mm - Maß im mm - Medidas en milímetros - Размеры выражены в мм
Art. 23404
4
Prima dell’installazione e messa in funzione
Attenzione! I tubi d’alimentazione devono essere sciacquati con cura prima dell’installazione del disposi-
tivo, in modo che non rimangano trucioli, residui di saldatura o canapa, o altre impurità all’interno dei tubi.
Attraverso tubazioni non sciacquate a fondo o attraverso la rete idrica generale, nel dispositivo possono
entrare corpi estranei in grado di danneggiare guarnizioni/o-ring.
Si raccomanda pertanto di dotare anche l’impianto generale di ltri.
E’ consigliabile installare il nuovo articolo osservando bene lo schema di installazione ideale proposto
in fig. 1
Before installation and setting to work
Attention! The feeding pipes have to be rinsed carefully before the installation of the device so that there
won’t remain shavings, sealing or hemp residues, or other impurities inside the pipes. Through pipes not
thoroughly rinsed or through the general water network, in the device foreign bodies can enter that could
damage gaskets /o-ring.
So lters should be installed also on the general system.
We recommend installing the new item in compliance with the installation layout as in fig. 1
Avant l’installation et la mise en fonction.
Attention! Les tuyaux d’alimentation doivent être rincés avec soin avant l’installation du dispositif, de
sorte que ils ne restent pas de copeaux, des restes de soudage ou de chanvre, ou d’autres impuretés à
l’intérieur des tuyaux. A travers les conduites non rincées à fond ou à travers le réseau hydrique général,
dans le dispositif peuvent entrer des corps étrangers à même de détériorer les gaines/o-ring. On recom-
mande ainsi d’installer des ltres également sur le système général.
Pour installer un nouvel article, il est conseillé d’observer attentivement le schéma d’installation idéal
proposé dans la fig. 1
Vor der Installation und Inbetriebnahme
Achtung! Bevor die Vorrichtung zu installieren, bitte spülen Sie die Zuleitungsröhre sorgfältig aus, um
alle Spannen, Schweiß- und. Hanfrückstände bzw. alle Verunreinigungen vom Inneren der Röhre zu
entfernen. Durch nicht sorgfältig gespülte Rohrleitungen bzw. durch das allgemeine Wassernetz können
Fremdkörper in den Korpen eintreten, die die Dichtungen bzw. die O-Ringe beschädigen können. Es ist
dann empfehlenswert, die allgemeine Anlage mit Filtern auszustatten.
Bei der Installation des neuen Artikels ist es empfehlenswert, den im Abb. 1 gezeigten Anweisungen zur
idealen Installation zu folgen.
Antes de la instalación y la puesta en función
¡Cuidado! Los tubos de alimentación tienen que ser enjuagados escrupulosamente antes de instalar el
dispositivo de manera que no haya virutas, residuos de soldadura o cáñamo u otras impurezas al interior
de los tubos. A través de los tubos no perfectamente enjuagados o de la red hídrica general pueden
entrar en el dispositivo unos cuerpos extraños que pueden dañar guarniciones, o-rings y/o. Les reco-
mendamos por lo tanto que instalen los ltros en la planta general también.
Les aconsejamos que instalen el nuevo artículo observando bien el esquema de instalación ideal pro-
porcionado en la fig. 1

Перед установкой устройства необходимо тщательно промыть водопроводные трубы,
чтобы в них не оставались стружка, шлак от сварки, лен или другие посторонние тела. Через
плохо промытые водопроводные трубы или через общую водопроводную сеть в устройство могут
попасть посторонние тела, способные повредить уплотнения и уплотнительные кольца.
Поэтому, рекомендуется оснастить фильтрами также и общую систему.
Рекомендуется устанавливать новый артикул, тщательно соблюдая идеальную схему установки,
предложенную на рис. 1.
PRELIMINARI - PRE-INSTALLATION INFORMATION - PRÉALABLES -
VORBEREITUNG - PRELIMINARES - ПРЕДВАРИТЕЛЬНАЯ ПОДГОТОВКА
5
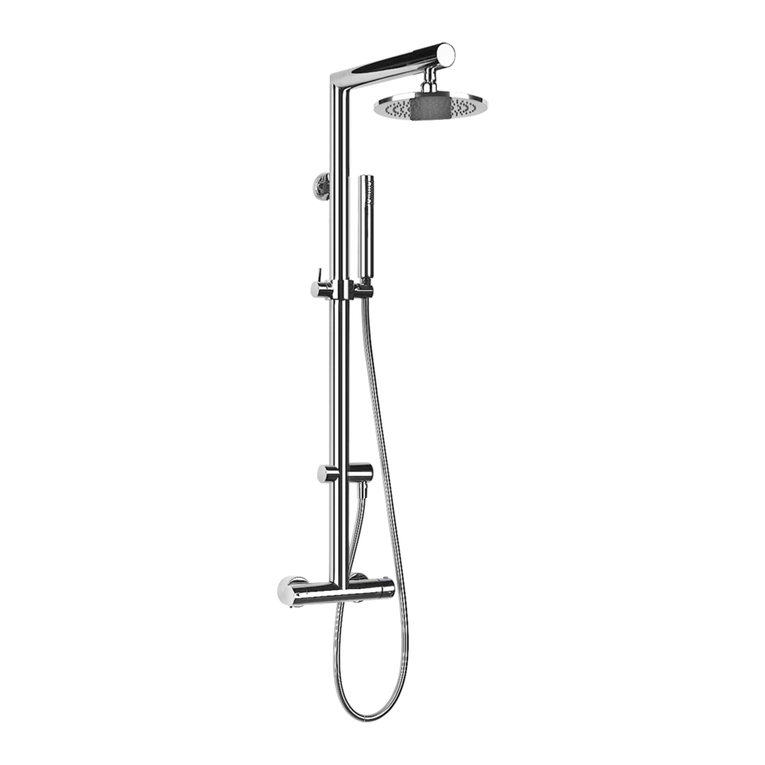
Contenuto della confezione:
1 - Soffione
2 - Supporto soffione
3 - Fissaggio a parete
4 - Maschera di foratura
5 - Corpo miscelatore
6 - Eccentrici
Package content:
1 - Shower head
2 - Shower head support
3 - Wall fastening
4 - Piercing jig
5 - Mixer body
6 - Eccentrics
Contenu de l’emballage:
1 - Pomme
2 - Support pomme
3 - Fixation murale
4 - Gabarit de perçage
5 - Corps mélangeur
6 - Excentriques
Inhalt der Verpackung:
1 - Brausekopf
2 - Stütze für den Brausekopf
3 - Wandbefestigung
4 - Bohrschablone
5 - Mischerkörper
6 - Exzenterscheiben
Contenido del embalaje:
1 - Rociador
2 - Soporte rociador
3 - Fijación a la pared
4 - Plantilla de horadación
5 - Cuerpo mezclador
6 - Excéntricos

1 - Душевая лейка
2 - Суппорт душевой лейки
3 - Крепление к стене
4 - Кондуктор для сверления
5 - Корпус смесителя
6 - Эксцентрики
1
Fig. 2
2
3
4
5
6
PRELIMINARI - PRE-INSTALLATION INFORMATION - PRÉALABLES -
VORBEREITUNG - PRELIMINARES - ПРЕДВАРИТЕЛЬНАЯ ПОДГОТОВКА
6
Ø8
Fig. 3
- Utensili necessari per l’installazione
- Tools for installation
- Outils nécessaires pour l’installation
- Für die Installation notwendige Werkzeuge
- Herramienta necesaria para la instalación
- Инструмент, необходимый для установки
3 mm
Ch. 14 mm
Ch. 30 mm
PRELIMINARI - PRE-INSTALLATION INFORMATION - PRÉALABLES -
VORBEREITUNG - PRELIMINARES - ПРЕДВАРИТЕЛЬНАЯ ПОДГОТОВКА
7
CALDA
HOT
Parete finita - Tiled wall
FREDDA
COLD
150±20
0÷12
G 1/2"
G 1/2"
Fig. 4
Fig. 7
Fig. 6
Ch. 14 mm
Ch. 30 mm
Ch. 30 mm
Fig. 5
INSTALLAZIONE - INSTALLATION - INSTALLATION - INSTALLATION - INSTALACIÓN - УСТАНОВКА
Dimensioni in mm - Measures in mm - Dimensions en mm - Maß im mm - Medidas en milímetros - Размеры выражены в мм
8
INSTALLAZIONE DEL CORPO MISCELATORE
Prima di iniziare assicurarsi che l’acqua della rete idrica sia chiusa.
Verificare che la posizione delle tubazioni rientri nei parametri indicati in figura, quindi avvitare gli eccen-
trici ai tubi di alimentazione utilizzando della canapa o teflon per garantire la tenuta sui filetti (l’interasse
finale tra i due eccentrici dovrà essere di circa 150mm). L’errata connessione delle utenze d’ingresso
pregiudica il corretto funzionamento della cartuccia regolatrice di temperatura. Avvitare i dadi esagonali
agli eccentrici a muro, interponendo la guarnizione di tenuta. Scorrere i rosoni sulle guide no a raggiun-
gere la parete nita.
Attenzione! Vericare con l’ausilio di una livella che il corpo miscelatore sia stato posizionato perfetta-
mente in verticale ed inoltre assicurarsi che i rosoni, una volta posizionati contro la parete, consentano
le operazioni di pulizia dei ltri (vedi paragrafo “pulizia e/o sostituzione dei ltri” nella sezione dedicata
alla manutenzione).
MIXER BODY INSTALLATION
Before starting make sure the water network is off.
Check that the position of pipes is within the parameters in the figure, then screw the eccentrics on supply
pipes using hemp or Teflon to guarantee tightness on threads (the final center distance between the two
eccentrics shall be of around 150mm). The wrong connection of inlet devices disrupts proper operation of
temperature adjustment cartridge. Screw hexagonal nuts on wall eccentrics, laying the tightness gasket
in between. Let round anges slide on rails down to the nished wall.
Warning! Check with a level that the mixer body is perfectly positioned vertically and also make sure that
round anges, once positioned against the wall, allow lters cleaning operations (see paragraph “lters
cleaning and/or replacing” in the maintenance section).
INSTALLATION DU CORPS MÉLANGEUR
Avant de commencer s’assurer que l’alimentation du réseau de distribution est coupée.
Vérifier que la position des tuyauteries est conforme aux paramètres indiqués sur la figure, puis visser les
excentriques sur les tubes d’alimentation en utilisant du chanvre ou du téflon pour garantir l’étanchéité
sur les filets (la distance finale entre les axes des deux excentriques devra être d’environ 150mm). Un
branchement erroné des alimentations d’entrée compromet le fonctionnement correct de la cartouche
régulatrice de température. Visser les écrous hexagonaux sur les excentriques au mur, en interposant le
joint d’étanchéité ; glisser les rosaces sur les guides jusqu’à leur contact avec la paroi nie.
Attention! Vérier avec l’aide d’un niveau que le corps mélangeur a été positionné parfaitement vertical
et s’assurer en outre que les rosaces, une fois positionnées contre la paroi, permettent les opérations
de nettoyage des ltres (voir paragraphe “nettoyage et/ou substitution des ltres” dans la section dédiée
à l’entretien).
INSTALLATION DES MISCHERKÖRPERS
Bevor zu starten, ist es sicherzustellen, dass die Wasserleitungen gesperrt sind.
Überprüfen Sie, dass die Position der Leitungen den im Bild angegebenen Parametern folgt, dann
schrauben Sie die Exzenterscheiben an die Versorgungsleitungen mittels Hanf oder Teflon an, um die
Dichtheit der Gewinden zu gewährleisten (am Ende soll der Achsabstand zwischen den zwei Exzenter-
scheiben etwa 150 mm. lang sein). Die falsche Verbindung der Wasser-Einleitungen kann die korrekte
Funktionierung der Kartusche zur Temperaturregelegung beeinträchtigen. Die Sechskantmutter an die
wandinstallierten Exzenterscheiben anschrauben, und den Dichtungsring einfügen. Die Rosetten auf die
Führungsschienen bis zur Fertigwand laufen lassen.
Achtung! Stellen Sie mittels einer Libelle sicher, dass sich der Mischerkörper in vertikaler Position be-
ndet, und dass die Rosetten die Reinigung der Filter ermöglichen, nachdem sie an die Wand installiert
worden sind (siehe “Reinigung und/oder Wechsel der Filter” in dem Paragraph über die Instandhal-
tung).
INSTALACIÓN CUERPO MEZCLADOR
Antes de empezar asegúrense que el agua procedente de la red hídrica esté cerrada.
Verifiquen que la posición de las tuberías corresponda a los parámetros indicados en la figura, sucesi-
INSTALLAZIONE - INSTALLATION - INSTALLATION - INSTALLATION - INSTALACIÓN - УСТАНОВКА
9
vamente atornillen los excéntricos a los tubos de alimentación utilizando cáñamo o teflón para asegurar
la hermeticidad de las roscas (la distancia final entre los dos excéntricos tendrá que ser de aproximada-
mente 150 mm). La conexión incorrecta de las líneas de entrada perjudica el correcto funcionamiento
del cartucho de regulación de la temperatura. Atornillen las tuercas hexagonales a los excéntricos en
la pared, interponiendo la junta de cierre. Hagan deslizar los orones sobre las guías hasta alcanzar la
pared acabada.
¡Cuidado! Veriquen con la ayuda de un nivel que el cuerpo del mezclador se encuentre perfectamente
posicionado en vertical y, además, asegúrense que los orones, tras haber sido posicionados contra la
pared, no perjudiquen las operaciones de limpieza de los ltros (vean párrafo “Limpieza y/o sustitución
de los ltros” en la sección dedicada al mantenimiento).

Перед началом убедитесь, что вода из водопроводной сети перекрыта.
Убедитесь, что положение труб соответствует размерам, указанным на рисунке, после чего
навинтите эксцентрики на водопроводные трубы, используя лен или тефлон для обеспечения
герметичности резьбы (межосевое расстояние между двумя эксцентриками должно быть около
150 мм). Неправильное подключение труб на входе отрицательно сказывается на исправности
работы регулировочного картриджа температуры. Привинтите шестигранные гайки к настенным
эксцентрикам, устанавливая уплотнительную прокладку. Сдвиньте розетки по направляющим
вплоть до отделанной стены.
 Проверьте по уровню, что корпус смесителя правильно установлен по вертикали, кроме
того, убедитесь, что розетки, после того, как они были приложены к стене, позволяют прочищать
фильтры (см. параграф “чистка и/или замена фильтров” в разделе, посвященном обслуживанию).
INSTALLAZIONE - INSTALLATION - INSTALLATION - INSTALLATION - INSTALACIÓN - УСТАНОВКА

10
50
Ø8
Fig. 8
Fig. 9 Fig. 10
INSTALLAZIONE - INSTALLATION - INSTALLATION - INSTALLATION - INSTALACIÓN - УСТАНОВКА
Dimensioni in mm - Measures in mm - Dimensions en mm - Maß im mm - Medidas en milímetros - Размеры выражены в мм
11
FORATURE PER FISSAGGIO A PARETE
Utilizzare la maschera di foratura come mostrato in gura per individuare i punti in cui effettuare i fori per
il ssaggio a parete. Per fare questo è importante che i rosoni del corpo dell’articolo siano ben appoggiati
alla parete in modo tale da permettere alla maschera di foratura di essere il più precisa possibile.
Togliere la maschera di foratura e realizzare i fori profondi minimo 50mm con una punta Ø8mm per inse-
rirvi i tasselli in dotazione.
WALL INSTALLATION HOLES
Use the drilling jig as shown in the picture to individuate the points where to make the drills for the wall
mounting. To do this, it is important that the covering rings of the body of the item are well laid against the
wall, in order to obtain maximum accuracy from the drilling jig.
Remove the piercing jig and make holes deep at least 50mm with a drill Ø8mm to insert the plugs sup-
plied.
PERÇAGES POUR FIXATION À PAROI
Utiliser le gabarit de forage comme il est montré dans la figure pour déterminer les points ou il faut
effectuer les trous pour le fixage à la paroi. Pour faire cela il est important que les roses du corps
de l’article sont bien appuyés à la paroi pour permettre au gabarit de forage pour être la plus précise
possible.
Retirer le gabarit de perçage et pratiquer des trous profonds au minimum de 50mm avec une pointe
Ø8mm pour y insérer les chevilles fournies en dotation.
BOHRUNGEN ZUR WANDINSTALLATION
Wie gezeigt, verwenden Sie die Bohrschablone, um die für die Wandbefestigung notwendigen Bohrung-
spunkte zu lokalisieren. Zu diesem Zweck, sollen die Scheiben des Teilkörpers an der Wand befestigt
sein, so dass die höchste Genauigkeit der Bohrschablone gewährleistet wird.
Die Bohrschablone ausziehen und die Löcher mit einer mindesten Tiefe von 50mm durch einen Bohrer
von Ø8mm anbohren, um die serienmäβigen Dübel einzufügen.
HORADACIÓN PARA LA FIJACIÓN A LA PARED
Utilicen la plantilla de horadación, como indicado en la figura, para individuar los puntos en los cuales
hay que realizar los huecos para la fijación a la pared. Para hacer esto es importante que los florones del
cuerpo del artículo queden bien apoyados a la pared para que la plantilla de horadación pueda utilizarse
de la manera más precisa posible.
Quiten la plantilla de horadación y realicen los huecos profundos, como mínimo 50mm, con una broca de
Ø8mm para introducir los tacos incluidos en el suministro.

Используйте кондуктор для сверления, как показано на рисунке, чтобы определить точки для
крепления к стене. Для этого необходимо, чтобы розетки корпуса изделия хорошо прилегали к
стене, чтобы кондуктор сверления был как можно более точным.
Снимите кондуктор для сверления и просверлите отверстия глубиной минимум 50 мм сверлом Ø8
мм, чтобы вставить туда входящие в комплект дюбели.
INSTALLAZIONE - INSTALLATION - INSTALLATION - INSTALLATION - INSTALACIÓN - УСТАНОВКА
12
Fig. 11 Fig. 12
Fig. 14
Fig. 13
Fig. 15 Fig. 16
3 mm
3 mm
3 mm
INSTALLAZIONE - INSTALLATION - INSTALLATION - INSTALLATION - INSTALACIÓN - УСТАНОВКА

13
INSTALLAZIONE SUPPORTO SOFFIONE
Individuare tutti i componenti del ssaggio, quindi applicare la placchetta alla parete facendo coincidere i fori
con quelli dei tasselli. Fissare con le apposite viti in dotazione. Pre-montare sul supporto sofone i componenti
restanti del ssaggio a parete.
Attenzione! Per evitare di danneggiare la supercie della colonna doccia bloccare temporaneamente il ssag-
gio avvitando LEGGERMENTE la vite al supporto della prolunga.
Assicurarsi che la maniglia per l’erogazione sia chiusa e togliere la protezione in plastica dal corpo miscelatore.
Inserire il supporto sofone nel corpo no a battuta e avvicinarlo alla placchetta a muro andando ad avvitare
LEGGERMENTE le viti di ssaggio a parete.
SHOWER HEAD SUPPORT INSTALLATION
Find all the components for the fastening and apply the plate to the wall with holes coinciding with those of the
plugs. Fasten with the special screws supplied. Pre-install on shower head support the remaining components
of wall fastening.
Warning! To avoid damaging the surface of the shower column temporarily block the fastening SLIGHTLY
tightening the screw on the support of the extension.
Make sure the supply handle is off and remove plastic protection from mixer body. Insert the shower head sup-
port in the body down to the stop and approach it to the wall plate SLIGHTLY tightening the fastening screws to
the wall.
INSTALLATION DU SUPPORT DE LA POMME
Identier tous les composants de la xation, puis appliquer la plaquette à la paroi en faisant coïncider les trous
avec ceux des chevilles. Fixer avec les vis spéciales fournies. Pré-monter sur le support de la pomme les com-
posants restants de la xation à paroi.
Attention! Pour éviter d’endommager la supercie de la colonne douche bloquer temporairement la xation en
serrant LÉGÈREMENT la vis sur le support de la rallonge.
S’assurer que le levier de commande de l’ouverture est fermé et retirer la protection plastique du corps mélan-
geur. Insérer le support de la pomme dans le corps jusqu’ à la butée et la rapprocher de la plaquette au mur en
serrant LÉGÈREMENT les vis di xation à la paroi.
INSTALLATION DER STÜTZE FÜR DEN BRAUSEKOPF
Alle zur Befestigung notwendigen Bestandteile bestimmen, dann das Plättchen an die Wand befestigen und
dafür sorgen, dass seine Löcher mit denen der Dübel zusammenfallen. Mit den serienmäβigen Schrauben befe-
stigen. Die Restbestandteile der Wandbefestigung auf das untere Ansatzrohr vormontieren.
Achtung! Um die Beschädigung der Duschsäulenoberäche zu vermeiden, ist die Befestigung vorläug zu
blockieren, indem die Schraube zur Stütze des Ansatzrohrs LEICHT eingeschraubt wird.
Sicherstellen, dass der Handgriff zur Wasserversorgung zu ist, und den Plastikschutz aus dem Mischerkörper
herausnehmen. Die Stütze des Brauskopfs in den Körper bis Anschlag einfügen und sie ans Wandplättchen
annähren, indem die Schrauben zur Wandbefestigung LEICHT eingeschraubt werden.
INSTALACIÓN SOPORTE FLORÓN
Individúen todos los componentes de jación, sucesivamente apliquen la placa a la pared haciendo coincidir sus
huecos con aquellos de los tacos. Fijen con los tornillos correspondientes incluidos en el suministro. Efectúen
el premontaje sobre el soporte de los demás componentes para la jación a la pared.
¡Cuidado! Para no dañar la supercie de la columna ducha bloqueen temporáneamente la jación atornillando
LIGERAMENTE el tornillo al soporte de la alargadera.
Asegúrense que la maneta para la erogación Este cerrada y quiten la protección de plástico del cuerpo mezcla-
dor. Introduzcan el soporte del orón en el cuerpo hasta el tope y acérquenlo a la placa a la pared atornillando
LIGERAMENTE los tornillos de jación a la pared.

Найдите все компоненты крепления, после чего приложите к стене накладку, совмещая ее отверстия
с отверстиями дюбелей. Закрепите входящими в комплект винтами. Установите на суппорт душевой
лейки остальные компоненты крепления к стене.
Внимание! Чтобы не повредить поверхность душевой колонны, временно затяните крепление, СЛЕГКА
завинчивая крепежный винт удлинителя.
Убедитесь, что ручка подачи воды закрыта, и снимите пластиковую защиту с корпуса смесителя.
Вставьте суппорт душевой лейки в корпус до упора и подведите его к настенной накладке, слегка
завинчивая винты крепления к стене.
INSTALLAZIONE - INSTALLATION - INSTALLATION - INSTALLATION - INSTALACIÓN - УСТАНОВКА

14
Fig. 17 Fig. 18
REGISTRAZIONE DEL FISSAGGIO A PARETE
Il ssaggio a parete è stato ideato in modo tale da consentire all’installatore la possibilità di compensare
la distanza tra la parete nita e la colonna doccia. Per effettuare la registrazione del ssaggio inserire
la vite in uno dei tre fori posti sul supporto della prolunga ed avvitarla leggermente. L’asola posta sul
raccordo a parete permette poi di scorrere il tutto no a raggiungere la distanza desiderata. Se al primo
tentativo non si raggiungesse la condizione ottimale svitare la vite e inserirla nel foro precedente e/o
successivo e procedere come prima descritto.
WALL FASTENING ADJUSTMENT
Wall fastening was conceived so to allow the installer to compensate the distance between the nished
wall and the shower column. To adjust the fastening insert the screw in one of the three holes on the
support of the extension and slightly tighten it. The buttonhole on the wall connection allows the sliding of
all until reaching the required distance. If at rst attempt the optimal condition is not achieved loosen the
screw and insert it in the previous and/or successive hole and follow the above description.
RÉGLAGE DE LA FIXATION À PAROI
La xation à paroi è été conçue de façon à donner à l’installateur la possibilité de compenser la distance
entre la paroi nie et la colonne douche. Pour effectuer le réglage de la xation insérer la vis dans l’un
des trois trous disposés sur le support de la rallonge et la visser légèrement. La fente placée sur le rac-
cord à paroi permet ensuite de faire glisser le tout jusqu’à atteindre la distance désirée. Si l’on n’obtient
pas à la première tentative la condition optimale, desserrer la vis et l’insérer dans le trou précédent et/ou
successif et procéder comme décrit ci-dessus.
EINSTELLUNG DER WANDBEFESTIGUNG
Die Wandbefestigung ist so gedacht worden, dass der Rohrleger die Möglichkeit hat, den Abstand
zwischen Fertigwand und Duschsäule auszugleichen. Um die Befestigung einzustellen soll die Schraube
in eins der drei Löcher an der Stütze des Ansatzrohrs eingefügt und leicht eingeschraubt werden. Die
Öse auf dem Wand-Verbindungsstück ermöglicht dann den Schub bis zum gewünschten Abstand. Soll
der beste Zustand nicht mit dem ersten Versuch erreicht werden, schrauben Sie die Schraube ab und
fügen Sie sie in das vorhergehende/nachstehende Loch, bevor die Operation wie oben beschrieben zu
erledigen.
3 mm
INSTALLAZIONE - INSTALLATION - INSTALLATION - INSTALLATION - INSTALACIÓN - УСТАНОВКА

15
AJUSTE DE LA FIJACIÓN A LA PARED
La jación a la pared ha sido concebida de manera que el instalador pueda compensar la distancia entre
la pared acabada y la columna ducha. Para efectuar el ajuste de la jación introduzcan el tornillo en uno
de los tres huecos realizados sobre el soporte de la alargadera y atorníllenlo ligeramente. El ojal alojado
sobre el racor de pared permite el deslizamiento del conjunto hasta alcanzar la distancia deseada. Si
después de la primera tentativa todavía no se ha alcanzado la condición optima, destornillen el tornillo,
introdúzcanlo en el agujero precedente y/o sucesivo y sigan como indicado anteriormente.

Крепление к стене было разработано таким образом, чтобы предоставить установщику возможность
компенсировать расстояние между готовой стеной и душевой колонной. Для регулировки крепления
вставьте винт в одно из трех отверстий на суппорте удлинителя и слегка завинтите винт. Прорезь на
настенном соединении позволяет сместить все вплоть до достижения необходимого расстояния.
Если с первой попытки не будет достигнуто оптимальное условие, отвинтите винт и вставьте его в
предыдущее и/или следующее отверстие, после чего действуйте как описано выше.
INSTALLAZIONE - INSTALLATION - INSTALLATION - INSTALLATION - INSTALACIÓN - УСТАНОВКА
16
Fig. 19 Fig. 20
Fig. 21 Fig. 22
3 mm
3 mm
INSTALLAZIONE - INSTALLATION - INSTALLATION - INSTALLATION - INSTALACIÓN - УСТАНОВКА
17
INSTALLAZIONE SUPPORTO SOFFIONE
Vericare mediante una livella il perfetto allineamento della colonna doccia (vedi il paragrafo “Registra-
zione del ssaggio a parete” nella sezione dedicata all’installazione) e stringere la vite per bloccarne
la posizione.
Identicare poi la posizione perfettamente verticale del supporto sofone aiutandosi con la livella e
stringere con forza le viti di ssaggio.
SHOWER HEAD SUPPORT INSTALLATION
Check with a level shower column’s perfect alignment (see paragraph “Wall fastening adjustment” in
the maintenance section) and tighten the screw to stop its position.
Then nd the perfectly vertical position of the shower head support with the help of the level and tighten
strongly the fastening screws.
INSTALLATION DU SUPPORT DE LA POMME
Vérier au moyen d’un niveau l’alignement parfait de la colonne douche (voir le paragraphe “Réglage
de la xation à paroi” dans la section dédiée à l’installation) et serrer la vis pour bloquer sa position.
Dénir ensuite la position parfaitement verticale du support de la pomme en s’aidant du niveau et serrer
avec force les vis de xation.
INSTALLATION DER STÜTZE FÜR DEN BRAUSEKOPF
Stellen Sie mittels einer Libelle sicher, dass die Duschsäule perfekt aufgereiht ist (siehe “Einstellung
der Wandbefestigung” im Paragraph über die Installation) und klemmen Sie die Schraube fest, um sie
in ihrer Position zu blockieren.
Die perfekt vertikale Position des Stütze für den Brausekopf mittels einer Libelle bestimmen, und die
Befestigungsschrauben festschrauben.
INSTALACIÓN SOPORTE FLORÓN
Veriquen con la ayuda de un nivel la perfecta alineación de la columna ducha (vean párrafo “Ajuste
de la jación a la pared” en la sección dedicada a la instalación) y cierren el tornillo para bloquear su
posición.
Identiquen con la ayuda de un nivel que el soporte del orón se encuentre perfectamente posicionado
en vertical y cierren con fuerza los tornillos de jación.

Проверьте по уровню правильное выравнивание душевой колонны (см. параграф “Регулировка
крепления к стене” в разделе, посвященном установке) и затяните винт, чтобы заблокировать
его положение.
Затем найдите строго вертикальное положение суппорта душевой лейки, помогая себе в этом
уровнем, после чего затяните с усилием крепежные винты.
INSTALLAZIONE - INSTALLATION - INSTALLATION - INSTALLATION - INSTALACIÓN - УСТАНОВКА
18
Fig. 23 Fig. 24
INSTALLAZIONE SUPPORTO SOFFIONE
Importante! Vericare che la maniglia per l’erogazione ruoti in maniera uida. Nel caso risultasse troppo dura
ripetere le operazioni di allineamento descritte nell’installazione del supporto sofone.
Inne scorre il rosone n contro la parete.
SHOWER HEAD SUPPORT INSTALLATION
Important! Check that supply handle turns uidly. If it is too hard repeat the alignment operations described in
the installation of the shower head support.
Then let round ange slide down to the wall.
INSTALLATION DU SUPPORT DE LA POMME
Important! Vérier que le levier de contrôle du débit tourne avec douceur. Au cas où il serait trop dur répéter les
opérations d’alignement décrites dans l’installation du support de la pomme.
Enn pousser la rosace contre la paroi.
INSTALLATION DER STÜTZE FÜR DEN BRAUSEKOPF
Wichtig! Stellen Sie sicher, dass der Handgriff zur Kontrolle der Temperatur leicht drehen kann. Falls er zu fest
ist, wiederholen Sie die zur Installation des unteren Ansatzrohrs beschriebenen Operationen zur Aufreihung.
Die Rosette bis zur Wand laufen lassen.
INSTALACIÓN SOPORTE FLORÓN
¡Importante! Veriquen que la maneta para la erogación gire de manera uida. En el caso de que fuera dema-
siado dura repitan las operaciones de alineación descritas en la instalación de la alargadera inferior.
Finalmente hagan deslizar el orón contra la pared.

Важно! Убедитесь, что ручка для подачи воды свободно вращается. Если она вращается слишком туго,
то повторите операции выравнивания, описанные в установке суппорта душевой лейки.
Наконец, сместите розетку до стены.
INSTALLAZIONE - INSTALLATION - INSTALLATION - INSTALLATION - INSTALACIÓN - УСТАНОВКА
19
Fig. 25 Fig. 26
INSTALLAZIONE SOFFIONE
Togliere la striscia adesiva che protegge la guarnizione inserita all’interno del raccordo superiore del
sofone ed assicurare lo stesso al proprio supporto avvitando con forza la ghiera (aiutarsi in questa ope-
razione con una chiave da 22mm).
INSTALLATION OF SHOWER HEAD
Remove adhesive strip that protects the gasket inserted in the upper connection of the shower head and
fasten it to its support screwing strongly the ring nut (in this operation a 22mm wrench can be useful).
INSTALLATION POMME
Retirer la bande adhésive qui protège le joint inséré à l’intérieur du raccord supérieur de la pomme et xer
celle-ci sur son propre support en vissant avec force la bague (on peut s’aider pour cette opération avec
une clef de 22mm).
INSTALLATION VON BRAUSKOPF
Den aufklebenden Band zum Schützen der Dichtung beim oberen Ansatzrohr des Brausekopfs herausne-
hmen und den Ring festschrauben (zu diesem Zweck kann ein Schlüssel von 22mm angewandt werden),
um den Brauskopf auf seiner Stütze zu befestigen.
INSTALACIÓN POMO DE DUCHA
Quiten la tira adhesiva que protege la junta introducida al interior del racor superior del orón y fíjenlo a su
soporte atornillando con fuerza la virola (es posible, durante esta operación, utilizar una llave de 22mm).

Снимите липкую ленту, защищающую уплотнение, вставленное в верхнее соединение душевой
лейки, и прикрепите лейку к суппорту, туго завинтив круглую гайку (используйте в этой операции
ключ на 22 мм).
INSTALLAZIONE - INSTALLATION - INSTALLATION - INSTALLATION - INSTALACIÓN - УСТАНОВКА
20
Fig. 27 Fig. 28
Fig. 29
Fig. 30
38° C
38° C <
38° C >
PUSH
USO
- Ruotare la maniglia di 90° verso destra per abilitare l’erogazione a piena portata.
- Se la maniglia è in posizione di riposo l’acqua viene erogata a 38° C (vedi taratura della cartuccia
termostatica). Per diminuire la temperatura ruotare la maniglia verso destra. Per aumentare la tempe-
ratura oltre i 38° C ruotare la maniglia verso sinistra premendo il pulsante di sicurezza.
USE
- Turning the handle 90° degrees to the right to allow the distributions working at full ow.
- If the handle is in standing position, the water is distributed at 38°C (see “thermostatic cartridge
adjustment”). To decrease the temperature, just turn right the handle. To increase the temperature
over 38°C just turn left the handle while pushing the safety-button.
USAGE
- Tournez la poignée de 90° à droite an de mettre en marche la distribution de l’eau à plein débit.
- Si la poignée se trouve dans sa position de repos, l’eau est distribuée à la température de 38°C (voir
le tarage de la cartouche thermostatique). Tournez la poignée à droite pour diminuer la température.
Pour augmenter la température au dessus de 38°C, tournez la poignée à gauche et appuyez sur
l’interrupteur de sécurité.
GEBRAUCH
- Den Handgriff um 90° nach rechts drehen, um die Wasserversorgung mit voller Leistung zu betäti-
gen.
- Wenn sich der Handgriff in der Ruheposition bendet, wird das Wasser mit 38° C versorgt (siehe
die Kalibrierung der thermostatischen Kartusche). Um die Temperatur zu senken, drehen Sie den
Handgriff nach rechts. Um die Temperatur auf über 38° C zu erhöhen, drehen Sie den Handgriff nach
links und drücken Sie den Sicherheitsknopf.
USO - USE - USAGE - GEBRAUCH - USO - ИСПОЛЬЗОВАНИЕ

This manual suits for next models

1

Other Gessi Plumbing Product manuals

Gessi 32982 User manual

Gessi

Gessi 32982 User manual

Gessi MIMI 31232 User manual

Gessi

Gessi MIMI 31232 User manual

Gessi iSpa 41161 Troubleshooting guide

Gessi

Gessi iSpa 41161 Troubleshooting guide

Gessi RETTANGOLO T 20485 User manual

Gessi

Gessi RETTANGOLO T 20485 User manual

Gessi RETTANGOLO XL 26106 User manual

Gessi

Gessi RETTANGOLO XL 26106 User manual

Gessi 54018 User manual

Gessi

Gessi 54018 User manual

Gessi cono 45003 Troubleshooting guide

Gessi

Gessi cono 45003 Troubleshooting guide

Gessi 32850 User manual

Gessi

Gessi 32850 User manual

Gessi LE TERRE 39107 User manual

Gessi

Gessi LE TERRE 39107 User manual

Gessi iSpa 41405 Troubleshooting guide

Gessi

Gessi iSpa 41405 Troubleshooting guide

Gessi OXYGENE HI-TECH 920 User manual

Gessi

Gessi OXYGENE HI-TECH 920 User manual

Gessi INCISO 58204 Troubleshooting guide

Gessi

Gessi INCISO 58204 Troubleshooting guide

Gessi GOCCIA 33973 User manual

Gessi

Gessi GOCCIA 33973 User manual

Gessi RETTANGOLO 20120 Troubleshooting guide

Gessi

Gessi RETTANGOLO 20120 Troubleshooting guide

Gessi OVALE 21513 Troubleshooting guide

Gessi

Gessi OVALE 21513 Troubleshooting guide

Gessi Rilievo 59089 User manual

Gessi

Gessi Rilievo 59089 User manual

Gessi RILIEVO 59028 User manual

Gessi

Gessi RILIEVO 59028 User manual

Gessi 39581 User manual

Gessi

Gessi 39581 User manual

Gessi VIA MANZONI 44898 User manual

Gessi

Gessi VIA MANZONI 44898 User manual

Gessi 40457 User manual

Gessi

Gessi 40457 User manual

Gessi iSpa 41037 User manual

Gessi

Gessi iSpa 41037 User manual

Gessi Goccia Series User manual

Gessi

Gessi Goccia Series User manual

Gessi RILIEVO 59023 Troubleshooting guide

Gessi

Gessi RILIEVO 59023 Troubleshooting guide

Gessi QUADRO User manual

Gessi

Gessi QUADRO User manual

Popular Plumbing Product manuals by other brands

Viega Multiplex Trio F manual

Viega

Viega Multiplex Trio F manual

Axor Uno 14850 Series Assembly instructions

Axor

Axor Uno 14850 Series Assembly instructions

Zanussi 132455 Specifications

Zanussi

Zanussi 132455 Specifications

Hans Grohe Metris 31480 Series Instructions for use/assembly instructions

Hans Grohe

Hans Grohe Metris 31480 Series Instructions for use/assembly instructions

Kohler Purist K-T14428 installation guide

Kohler

Kohler Purist K-T14428 installation guide

CRISTINA TABULA CRITA220 installation instructions

CRISTINA

CRISTINA TABULA CRITA220 installation instructions

Signature Hardware OCALA 948533 manual

Signature Hardware

Signature Hardware OCALA 948533 manual

Perrin & Rowe 4799 Installation & user guide

Perrin & Rowe

Perrin & Rowe 4799 Installation & user guide

Honeywell NK295 Installation instruction

Honeywell

Honeywell NK295 Installation instruction

Omnires Y SYS MONTREAL Installation and Maintenance

Omnires

Omnires Y SYS MONTREAL Installation and Maintenance

Elkay LK 7124 quick start guide

Elkay

Elkay LK 7124 quick start guide

Hans Grohe Raindance E 300 1jet Showerpipe 350 ST... Instructions for use and assembly instructions

Hans Grohe

Hans Grohe Raindance E 300 1jet Showerpipe 350 ST... Instructions for use and assembly instructions

Moen 26000 Series installation guide

Moen

Moen 26000 Series installation guide

Bristan Quadrant Riser Rail kit Fitting instructions

Bristan

Bristan Quadrant Riser Rail kit Fitting instructions

Brizo Tresa T67336 quick start guide

Brizo

Brizo Tresa T67336 quick start guide

Graff 9960 installation instructions

Graff

Graff 9960 installation instructions

Riobel PB66C-EM installation guide

Riobel

Riobel PB66C-EM installation guide

Moen Solace S4711BN Replacement parts list

Moen

Moen Solace S4711BN Replacement parts list

manuals.online logo
manuals.online logoBrands
  • About & Mission
  • Contact us
  • Privacy Policy
  • Terms and Conditions

Copyright 2025 Manuals.Online. All Rights Reserved.