54
3. General Description of Use
Tool Changing
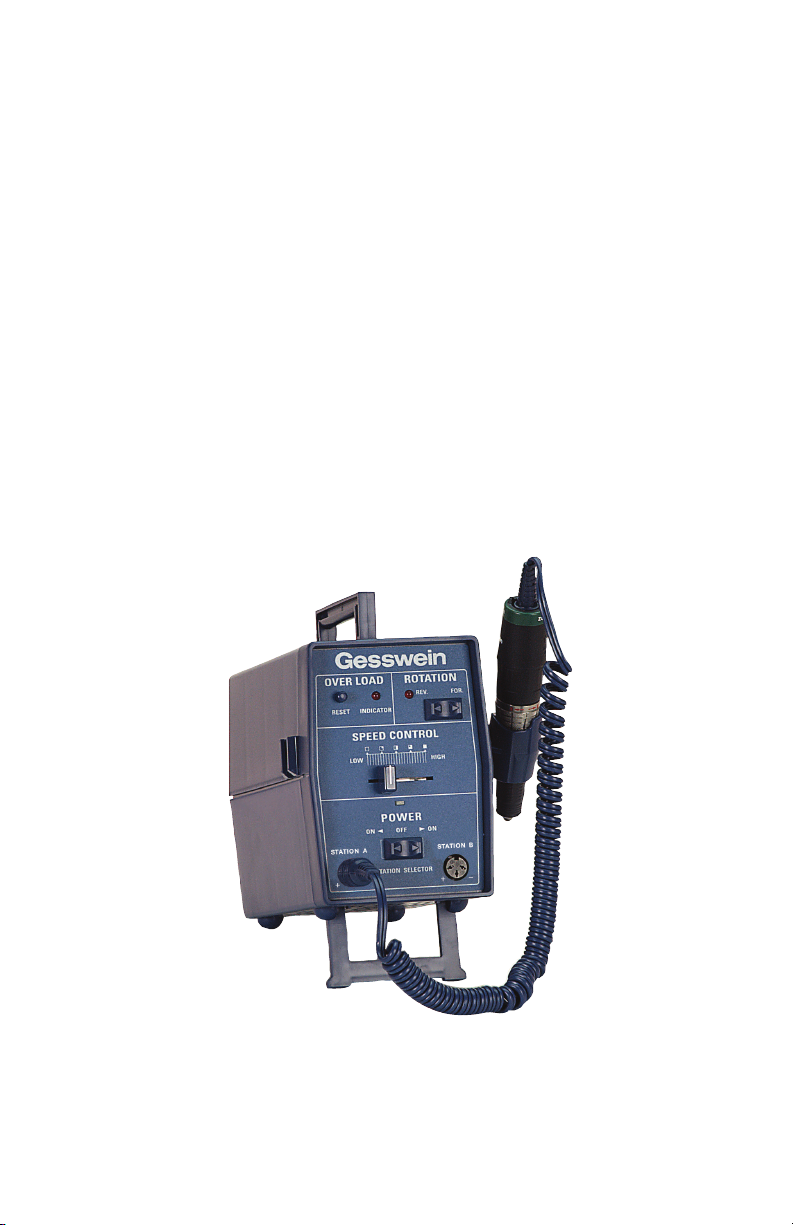
The Gesswein Power Hand 2X Rotary Handpiece
uses a quick-tool-release mechanism that allows
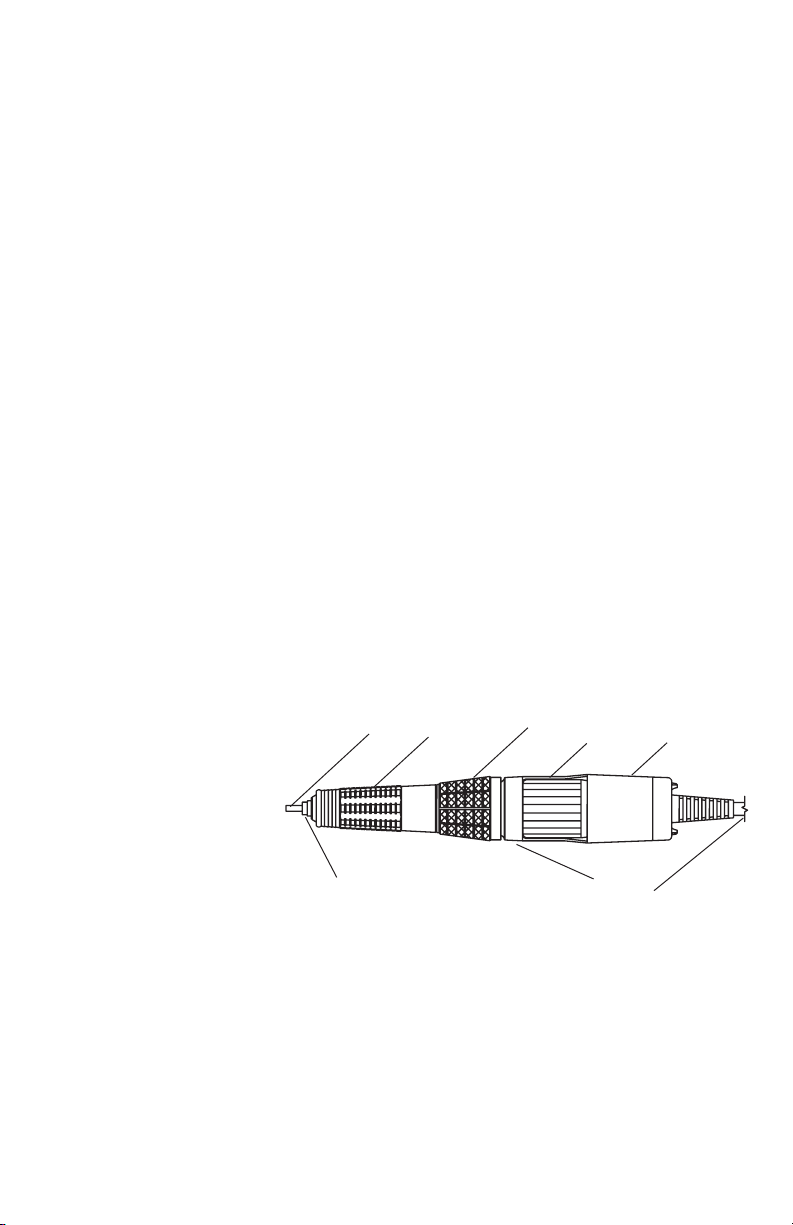
for rapid tool changes. To operate, turn the Collet
Release Ring toward the arrow pointing to the
“R” or release position (see fig. 2). When in full
“R” position, the Collet Release Ring will make
a click sound; the collet is then fully open and
ready to accept a tool.
To secure the tool, rotate the Collet Release
Ring toward the “S” or secure position. Again, a
click sound will be heard, indicating the collet is
fully closed and the tool is secure.
When changing tools, be sure that the hand-
piece motor is not running. If you attempt a tool
change under this condition, the motor will be
stalled and damage will occur.
Collet Removal
The Gesswein Power Hand 2X Rotary
Handpiece can be fitted with three different size
collets. Standard sizes are 3⁄32" (2.35mm) and 1⁄8"
(3.2mm). Bright Cutting Package supplied with a
3.0mm collet.
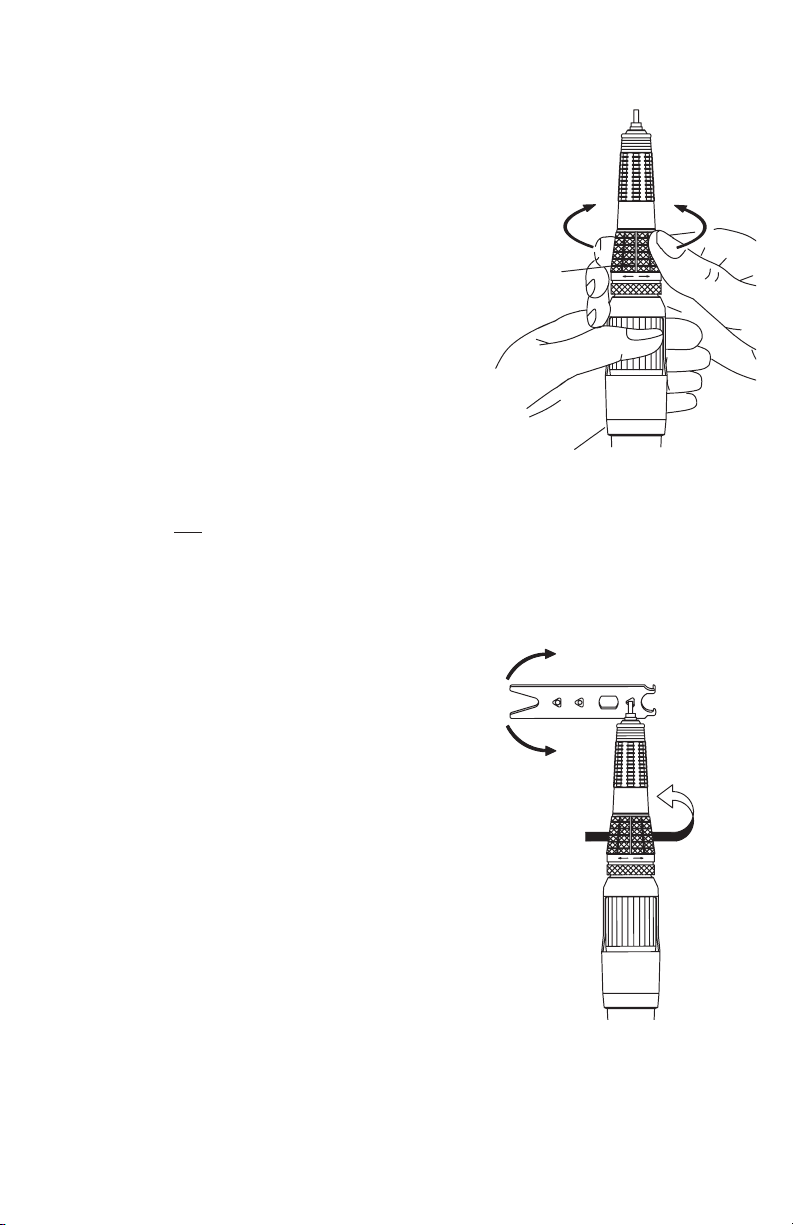
To change collets, rotate the Collet Release Ring
to the full “R” position and remove the tool in the
collet. Hold the collet between thumb and fore-
finger and turn in a counterclockwise direction
until the collet is removed. Insert the new collet
and reverse the procedure. It is best to tighten
a replaced collet by hand with the collet wrench
(#510-0180), securing until just tight.
R S
Collet
Wrench
Tighten
R
Loosen
Fig. 3
Collet
Release
Ring
SR
RS
Fig. 2
Blank Bar
R
Collet
Wrench
Collet
Release
Ring
Fig. 3a
If the collet cannot be loosened by hand using
the Collet Wrench, additional torque may be
required. To use the Collet Wrench, place the tri-
angular cutout in the wrench over the collet (see
fig. 3), and turn counterclockwise to loosen and
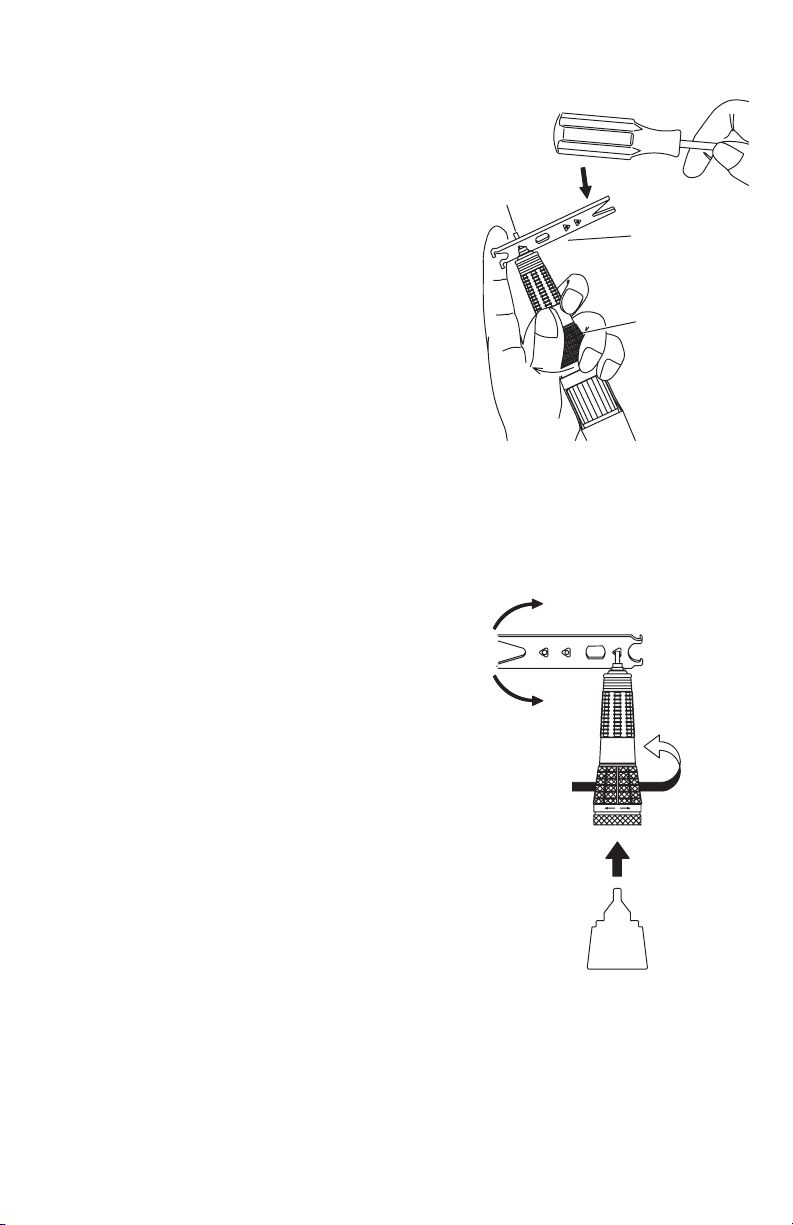
clockwise to tighten the collet. If more torque
is required, hold the handpiece with the Collet
Wrench secure on the collet, and tap the wrench
with a solid tool (see fig. 3a) in a counterclock-
wise direction. This procedure will loosen the
collet, which can then be removed by hand.
If the handpiece collet is so tight that the above
procedure will not loosen it, then remove the
Head Assembly from the Motor Assembly. This
can be done by grasping the Motor Connecting
Ring (see fig. 1) and pulling upward. Insert the
Chuck Joint Wrench (see Fig. 3b) into the Nylon
Coupler (#510-0151), hold the Head Assembly
and Chuck Joint Wrench securely in one hand,
and with the Collet Wrench in place on the collet,
loosen in a counterclockwise direction (for parts
drawing, refer to page 7.)
After a collet is replaced, be sure that the Collet
Release Ring is rotated to its full “S” position
and that the collet rotates freely when turned by
hand. If the collet does not rotate freely, it is not
fully seated in the Head Assembly, and you must
repeat the removal-replacement procedure.
RS
Chuck
Joint
Wrench
Collet
Wrench
R
Tighten
Loosen
Fig. 3b